Home Blog Page 26

Best Canned Beer for Hikers: Bringing Alcohol on Your Hike

0

If you love being outdoors, but also like a little bit of alcohol from time to time, then you will want to enjoy some of the best canned beer while you are out hiking and enjoying the outdoors. While safety can be a concern at times, there is nothing wrong with kicking back and enjoying a brew or two while you get in a great hike with friends or family.

Is there really anything better than a beautiful view and some great tasting beer? What a fine way to enhance your experience in nature, than with a can of beer. Using cans is a great option as it is safer to travel within your pack. You will not have to worry about breaking bottles or having sharp items break the can. Canned beer is definitely the way to go when hiking.

Blood Orange Gose and the Anderson Valley in the background

You might find yourself overwhelmed at the amount of beer brands that are on the market. Where do you start? First, you have to think about how much beer you will take because you might be limited on space with your other gear. Remember to only take what is necessary. Canned beer is more light weight, because the aluminum can weigh virtually nothing compared to beer bottles, that can also break.

picture of a canned beer and a beautiful landscape in the background

In this article, we will discuss the features you should look out for as far as canned beer, and give you some options of the best canned beers on the market right now, so you can find your next 6 pack and head out on your next hike. Remember to stay safe while you are hiking and drinking. Never allow yourself to get dehydrated, and remember to bring water for yourself, too. Now let us discuss some of the best canned beers for your next hike!

Features to Consider

Below are some of the features you should think about before buying just any beer before a hike. Do not be afraid to venture out and try a new beer, ale or lager! With all of the new and beloved ones on the market, you should give them a try!

Flavor

Consider the many flavors available on the market that beer comes in. The possibilities are nearly endless. Many people enjoy apple flavored, citrus flavored or even pumpkin flavored. Take a look at your selection and choose one that sounds good to you!

sierra-nevada canned beer

Size

Beer cans come in various sizes, from 12 ounces to 25 ounces, and other sizes. Consider how much beer you will need, and how much space you have before throwing a load of beer in with your gear. You never want to take too much with you as that adds unneeded weight to your load.

picture of oskarblues canned beer

Percentage of Alcohol

Always check the percentage of alcohol by volume in the beer you are inspecting. Some only have 4 percent alcohol, while others have 10 percent. Either way, consider the amount of alcohol per can so you know what you are getting for your purchase. The average range for alcohol, by volume for beer, is between 4 percent and 12 percent.

Photo of the Best-Canned-Beers

Type of Brew

There is a difference between beer, lager, and ale, which we will explain. Ales and lagers are nearly the same as far as fermentation, but they do so at different temperatures. Beer needs more fermentation time than the previous two. Basically the type of brew you are getting depends on the fermentation process.

Picture of a Beer-Glass

Reviewing the Best Canned Beers for Hikers

One thing that people wonder is how they can keep their beer cold while they are hiking. Check out some ideas below.

  • Freeze an ice pack or some water bottles. You will need the water to stay hydrated anyway. Put these in a small pack or small cooler that you will take with you. If you keep the frozen items near the beer, your beer will stay cold. You can also wrap your beer together and put the bottles or ice packs on top and on the bottom of the beers to keep them cold. You just need to consider weight and storage here.
  • When you are hiking and take a break near a river or stream, put the beer in the water and the flowing water will cool the beer, making it cold enough to drink. This does take time, but you do need to take breaks while hiking so you do not get overwhelmed with heat and moving a lot.
  • Take a small insulated cooler and bring along some dry ice. It is colder than regular ice from home, so it will definitely last longer while you are hiking. This is great because dry ice is also lighter than regular ice, so you do not have to worry about adding a ton of weight to carry.
  • Once you are taking a break in the shade, take a wet towel and wrap it around your beer. This also works great if it is a windy day. Evaporation from the towel will occur and that is how the beer gets cooled.
  • You can purchase a Cooler Tube before your hike. It is a long rectangular pouch that can fit several beers. The Cooler Tube includes a strap to go over your shoulder. It is also insulated, so your beers will stay cool! It easily stores 6 beers in cans, and it can be strapped to your backpack if you cannot wear it over your shoulder. Not only that, but the Cooler Tube is water proof, leak proof and is easy to clean! It zips shut and the strap is adjustable.

Is that a yoga mat on your back Nope, It’s the Mountainsmith Cooler Tube

Best Ones for Hiking

Now we will go over some of the best canned beer for hikers to enjoy out in nature. Some of these will have different flavors and other things that make them stand out. Check out the 10 best canned beers that you can enjoy on your next hike!

Ten Fidy

Manufacturer: Oskar Blues  Ten Fidy

Location: Longmont, Colorado

Description: Oskar Blues was the first to can its beer and has locations in each state of the United States. This beer contains 10 percent alcohol by volume, this beer is bold, tasty, and thick. Made with chocolate and caramel flavors, you notice a sweet taste.

It also comes in a Barrel Ages version, which also packs quite the punch! The Barrel Aged version tastes of coffee and cocoa, and has hints of caramel and vanilla, which will make the taste even more delicious!

Perfect Day IPA

Manufacturer: Asheville Brewing Perfect Day IPA berr

Location: Asheville, North Carolina

Description: North Carolina is known for having some great places to hike. The Asheville Brewing company is right smack dab in the Great Smoky Mountain National Park, and they make the Perfect Day IPA that has 6.5 percent alcohol by volume.

This brew contains El Dorado hops and Citra, and smells fruity! You can also taste the white grapes in the mix, and a little bit of Rye malt to top it all off!

Sierra Nevada Pale Ale

Manufacturer: Sierra Nevada Sierra Nevada Pale Ale

Location: Chico, California

Description: The Sierra Nevada brewing company was founded in 1979, and is known for its environmental efforts. Made with Cascade hops, you will be able to taste the spicy bite it has and smell the beautiful aroma it gives off.

Overall, your classic pale ale, it tastes light and has hints of citrus, which make it taste a little juicy as well.

Athena

Manufacturer: Creature Comforts Athena

Location: Athens, Georgia

Description: This wheat beer is crisp and will quench your thirst for beer, and includes 4.5 percent alcohol by volume. You will find that it includes sauvignon blanc and grapefruit, which make it taste tart.

With the sour taste and the cream taste of the wheat, you will enjoy drinking this beer that also includes hints of lemon.

Brooklyn Lager

Manufacturer: Brooklyn Brewery Brooklyn Lager

Location: Brooklyn, New York

Description: You will find that Brooklyn Lager has a light taste that will refresh you while you are hiking.

The aroma is of malt and hops, but also has a smell of yeast and caramel. The Brooklyn Lager company was founded in 1997 and loves to give to charities all over.

The company is operated with all wind generated electricity, too! They are a very forward thinking, environmentally friendly company that makes great tasting lagers!

Dayblazer Easygoing Ale

Manufacturer: New Belgium Brewing Dayblazer Easygoing Ale

Location: Fort Collins, Colorado

Description: Starting in 1991, the New Belgium Brewing company has been a forward thinking business that is eco friendly and good to their employees. Made with 4.8 percent alcohol by volume, this brand comes in a 24 ounce can, if you prefer.

The Dayblazer Easygoing Ale came on the market in 2017, and is made to be pitted against bigger beer companies. Not much is known about it, other than it is craft brewed and will be sold at comparable prices to Budweiser and Coors.

2×4 DIPA

Manufacturer: Melvin Brewing Melvin Brewing 2x4 DIPA

Location: Alpine, Wyoming

Description: Known for making great veer with a “wild west” touch, this brand of beer is 10 percent alcohol by volume and has won several medals for it taste and other credits. It won the Alpha King Championship two years in a row!

Made with a ton of hops, this is considered one of the best DIPAs in the world. You will taste the citrus flavor and clean taste of the hops and it also has a floral aroma to enjoy. Reviews say you will love this beer!

Gear Up IPA

Manufacturer: Hopworks Urban Brewery Gear Up IPA

Location: Portland, Oregon

Description: Hopworks Urban Brewery is a company that loves the outdoors like you do! You can tell from the art that is on the beer can of Gear Up IPA, that includes mountains, outdoor gear, and other items that show you the best of nature.

This brand is 6.6 percent alcohol by volume, and gives you an aroma of peaches and green pines that are in the IPA. You will also taste the lemon included with the clean taste, flavored with allium hops. Included in this IPA are passion fruit, mango and pineapple that tastes great and can be found only in 6 pack cans of 12 ounces each currently.

Long Trail Ale

Manufacturer: Long Trail Brewery Long Trail Ale

Location: Bridgewater Corners, Vermont

Description: Long Trail Ale came out in 1989 and is the biggest seller in the state of Vermont and has won several medals from the Great American Beer Festival.

This amber colored ale smells of flowers because of the hops and has a peachy taste, making it a little acidic. It contains 5 percent alcohol by volume and pairs great with most foods. The crisp taste makes this tasty beer perfect for hiking with its hints of herbs and earthy feel.

Trail Head Pale Ale

Manufacturer: Fat Head’s Brewery Trail Head Pale Ale

Location: Middleburg Heights, Ohio

Description: Fat Head’s Brewery is known for some interesting beers and the Trail Head Pale Ale is no different. Made with four types of hops (Citra, Simcoe, Amarillo, and Mosaic) you will want this tasty beer when you are outdoors having a great hike with friends.

It is also made with 4 different types of malts (Pale, Munich, CaraPils, and Crystal) and has a slightly lower alcohol by volume content for an IPA, at 6.3 percent. You will first smell the aroma of passion fruit, mango and grapefruit before you sip it.

Then you will taste the caramel from the four malts and all of the hops. Reviewers say to not pass this pale ale up!

What Do Other Hikers Think of These Beers?

As always, what people think about beer, ale, and lagers is always a personal preference. However, the majority of people gave the above beers ales and lagers high scores due to flavor, price, and how they enjoyed it.

Many people enjoy regular beer, though some ales can have a crisper taste. Again, it is all about personal preference. If you like beers with a lot of hops, you can find it. If you like lagers with a citrus or overall fruity taste, you can find it. How about a crisp pale ale? You got it.

Picture of Creature-Comforts canned bear

Some people claim that certain lesser known beers are harder to find and sometimes cost more than your average 6 pack of a well known beer brand. You will have to take that into account when you are searching for a great canned beer for your next hike.

Many drinkers love the refreshing taste of beers with citrus or fruity flavors. While many also love the chocolate and caramel taste, some do not like that when it comes to their alcohol. Moreover people enjoy drinking outdoors, so its always refreshing to take a break from hiking and knock back a cold one!

Pros and Cons

As with all alcohols, you are going to either love it or hate it. As with anything else, there are going to be good and bad things about alcohol, like beers and ales, but it all boils down to taste and alcohol content.

Pros

  • A lot of these beers come in bigger versions, so you can pack what you need and not have your backpack feel bulky.
  • These beers are comparable in price, but vary by location.
  • Many beers, lagers and ales come in various flavors, or include a litany of flavors that make for a great drinking experience!
  • Many beers have a higher alcohol volume per can, so you do not have to take as many beers with you, and instead can feel great after just a couple of beers.

Cons

  • Some people think specialty beers, or lesser known beers, can be more expensive.
  • Some people do not enjoy all of the fruity flavors that beer, ales and lagers can have.
  • Many people do not like lagers because they are darker beers an they are made different than regular beer.
  • Some beer brands are so uncommon that you have to look far and wide to find certain brands.

Concluding Thoughts on This Topic

What is exciting about these beers is that you might find a new brand and flavor that you love that you have never tried before! The great thing is that some of these contain higher alcohol contents and therefore you do not have to take several beers along with you to get a buzz going on.

While you have to find a beer, ale, or lager that suits you, once you do, you will only find that it enhances your hike with your friends and family! Always be safe while drinking and hiking. You can get injured, so never hike while drinking alone. Keep water on you in order to stay hydrated, and keep your cell phone on you in case of emergency. Otherwise, enjoy your new favorite beer safely!

picture of two bear glaases on the table

Backpacking Lunch Ideas: Tips for Meal Planning

0
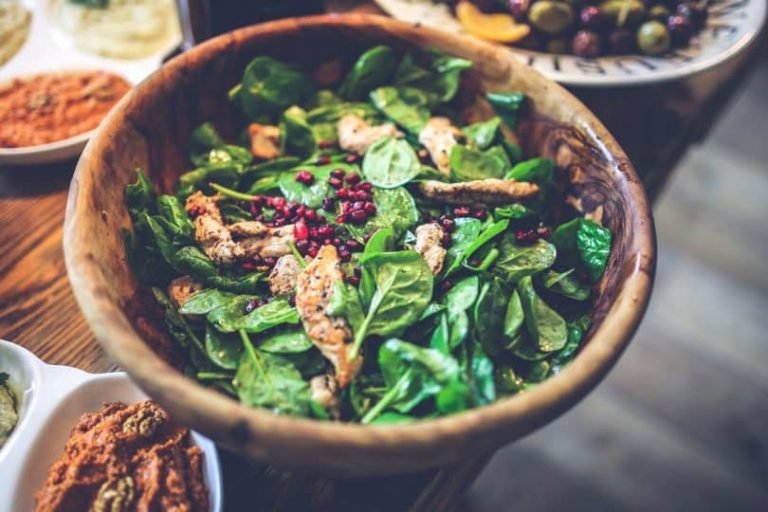
Salad pomegranate, chicken, spinach

After having an exhaustive morning of backpacking and hiking in the wilderness, all you need at midday is a nutrient-rich lunch that will replenish the lost nutrients that were burnt in your strenuous exercises.

Lunch is more advanced than the breakfast, and thus you need more food for that, unless you took enough energy boosters during your backpacking journey, then lunch wouldn’t be that demanding.

A lunch in the wilderness is more challenging than a lunch at home because of the choice of food in your back country gear. We will provide you the backpacking lunch ideas in this article to help you brainstorm your options.

Sliced Tuna With Green Leaf Vegetables

In our back country lunch ideas, we will help you pack the right food from home, tell you which food you should purchase, how to cook it, and share the recipes. The importance of eating certain nutrients will also be discussed.

How much food should you pack?

How much we pack often dictates our lunch choices. If you’re used to perishable food, for example, you have to amend the hobby when coming to the wilderness. Perishable foods may be ideal for short days of backpacking.

The aim is to bring food types that will last you as long as possible, yet light weight that they will not cause muscle fatigues in your body. The popular choice of many people is the tin-stuff food, but the more you pack is the more bulky and heavy they become.

To start with, the amount of food to pack is dependent upon the extent of your backpacking or hiking adventure. If you are going to have a weekend outing, it’s needless to over-pack your gear. Perishable food such as cheese, chicken, and bacon can be ideal for that. But a whole week of getaway demands perishable food that could be kept cool for that long.

breakfast-meat-roll-lettuce

Well, taking the refrigerator with you will certainly be impractical. Even if you can purchase the alternative gadgets to keep food cool, they have a certain limit. The ice packs too, have a limited period to keep your food cold. So, what should you bring then?

Ideal food for hiking lunch ideas

The ideal foods for your backpacking adventure include fresh food, dry food, freeze-dried, spices, canned foods, and snacks.

Fresh food

These are dependent on the number of days to spend in the wilderness. Bananas, apples, pears and other fruits can start decomposing the longer you keep them unconsumed. Carrots often last longer so you are safe with them. If you are going out in winter, you will still be safe.

Orange Carrots on Table

Freeze-dried food (dehydrated)

These ones are also ideal to pack for your lunch, even though they can be expensive. But it’s worth an investment because they can last long.

Dry food

These may include macaroni, oats, pasta, and rice. They can last you long, too, in the wilderness. They are also light in weight in your backpack gear.

Close up picture of oats leaning on table

Spices

Spices are essential to make your foods more appealing and appetizing, especially to your kids. You can bring cinnamon, salt, cayenne pepper, pepper, lemon pepper, garlic powder or cumin. There are plenty of spices that you can bring your delicious food. A good choice is to bring whatever you already have in your kitchen.

Canned food

Tin fish, tuna, baked beans, canned salads, and more, are ideal foods to bring to your backpacking. The cans can be heavy too, so, it’ advisable to empty the contents in light and separate containers and then seal them to retain their freshness. Sometimes it’s better if you prepare them at home, but then you will need to keep the cool for longer days. Otherwise, bring the canned foods to your wilderness excursions.

picture of a canned salad on table

Beverages

Usually at home, after consuming your lunch, you would go to the fridge to grab a flavored drink. It shouldn’t be different with camping. Powdered drinks can be ideal because of the absence of the refrigerator in the wilderness. Water supply could be in your vicinity.

Important Food Facts

Heading to the wilderness doesn’t mean we have to alter the nutritional formula altogether that you have kept at home. Nutritious food will be more vital more than ever when you are backpacking or hiking. Be mindful of the steep trails you traverse on and the long miles you trek on.

All you need is a well-balanced and healthy body. That being said, whenever packing your lunch food at home, you should take cognizance of the nutritional information. Priority should be given to complex carbohydrates, fiber and proteins.

Carbohydrates

Fresh vegetables and fruits, whole grains, are ideal choices for the provision of complex carbohydrates. Such kinds of food, usually release energy slowly because after eating them during lunch, you won’t feel hunger prematurely, before dinner/supper comes. Try to limit sugary food.

Our choices here will be the fruits such as pears, plums, apples, oranges, and bananas. The vegetables could be the broccoli, carrots, cabbage and spinach. These are highly nutritious and can boost your body health to survive hundreds of miles in the back country.

a picture of a yellow bananas beside oranges

Proteins

To have ample fiber and proteins, food such as tuna with cheese and whole grain crackers are suitable. Meat and boiled eggs should also be ideal food to consider providing you the needed nutrients. Because most of these foods are perishable, freezing them and wrapping them with the aluminum foil for later consumption is the best option.

They should be stored in an insulated container. Your lunch after consuming proteins will be remarkably great and you will have more energy to even go extra miles.

Other campers at times have that feeling of tiredness after they had lunch and therefore see no need to continue with their backpacking activities. This could be attributed to the bad choice of nutritious food.

close up picture of grain crackers

We therefore encourage you to even consult the dietitian regarding the choice of food in the wilderness. But our tips are sufficient to help you narrow the search. The other drawback of lunch food is the complexity of preparing them.

Other considerations for back country lunch ideas

Costs

Your budget will limit some of the best choices, but some purchases are worth the investment. Energy-rich foods and freeze-dried foods, in particular, can be quite expensive. However, they are indispensable if you need enough energy for your body to withstand climbing the highest summits. If you are bound to lift heavy weights, the body needs to be revitalized and energized.

Water abundance

You have to circumnavigate your back country in search for available water sources because that will help you in the selection of foods. Some foods need lots of water to cook them, and if you’re backpacking far from water sources, that could be bad news for you. You should therefore take this into account before packing your gear.

2 Men's Watching Water Falls during Daytime

Stove fuel or campfire convenience

If you plan to cook on a campfire, you must make sure that you have adequate woods or coals to cook your food. The ones that take longer to cook, may not be ideal for the limited supply of campfire resources. The same applies to the stove fuel; make sure you have enough to cook your lunch foods. This should also be a guide for you to choose carefully.

Black Non Stick Pan on Black Metal Charcoal Griller With Steak on Outdoor Forest With Two Persons Seating on Hammock

The wilderness conditions may be unpredictable. So, you’re urged to bring more of the pre-made lunch meals if, for just-in-case, it rains heavily to an extent that you can’t make a campfire or in the event that your fuel gets depleted before your backpacking day’s end.

Backpacking lunch meals ideas

We have given you some tips already that what kinds of foods should you consider and what are the guidelines or factors to consider when choosing these meals. Below we will give you specific meals you can consider. Our main aim is to save you time of having to unpack, prepare and clean up after having lunch every midday.

There is a plethora of meal ideas for your lunch time and the popular choices of other outdoor hobbyists include the energy bars, oats, nuts, fig bars and dried fruits. Fatty foods are also recommended such as cheese and nuts (Walnuts and Almonds). The main aim is to pack fats that burn slowly when ingested.

Meat options

Tuna, beef jerky, and salami, are the suitable meat options that need not the refrigerator to keep them cool. So better have them for your trail lunch preparations. They are furthermore nutrient-rich wherein you can get enough sodium and proteins.

Teriyaki Beef Jerky

Tortillas

Tortillas can be the best choice too for your trail lunch. They are lightweight and pack easily and also easy to prepare. You can also bring along the bread for a quick lunch, even though many loaves of bread can be bulky and heavy.

Cheese

From cheese, you can consume fat and lots of calories. And, you can boost the flavor of your bread, tortillas or meat with cheese to make your backpacking adventure more memorable. Note that there are a variety of cheese products out there.

Close-up picture of Cheese

Crackers

Crackers are high in sodium and carbs. They are also delicious and ease to make.

Peanut Butter Energy Bars

To make these energy bars, you need a cup of peanut butter, 3 cups of instant oatmeal and ¾ cup of honey. Mix the honey and the peanut butter in a saucepan and then warm them. Continue stirring them until mixed completely. Then take them off the stove//campfire and add them to the oatmeal.  You can then cut them into energy bars and serve.

a picture of low-fructose, gluten-free chocolate peanut butter bars

Better prepare this at home and then store them in a plastic bag or wrap in an aluminum foil. Consider adding optional items such as the coconut, seeds, nuts and the dried fruits to the recipe just to boost deliciousness.

Lemon Ginger Granola

You need ¼ cup of wheat germ, ½ cup of chopped walnuts, 2 cups of oats, ¼ cup of honey, 2 spoons of brown sugar, a teaspoon of veg oil, ¼ cup of raisins, juice and lemon, ¼ cup of chopped candied ginger and a teaspoon of grated ginger. Then preheat the oven at 250 degree Fahrenheit at home. Take a large bowl to mix the oats, nuts, brown sugar, wheat germ, then mix the honey, grated ginger, lemon juice and zest in another bowl.

get this granola into your oven

Eventually mix both mixtures in the bowls. Then spread it out onto a cooking sheet. Subsequently bake in the pre-heated oven and stir after every 15 minutes until you’re satisfied with the taste. You can then store the meal in an insulated container to serve as lunch in the wilderness.

Hummus

Hummus needs two teaspoons of olive oil, 2.5 ounces of chickpeas, 4 minced garlic cloves, and 6 teaspoons of sesame tahini and lemon juice. To successfully make this, add olive oil, lemon juice and tahini to the mashed chickpeas. This melon juice should preferably be from 3 lemons.

Then add garlic to the mixture and continuously mix until it smoothens. If you are satisfied with the preparation, store the contents in a zip lock bag or airtight container. And you can serve with pita bread slices.

a picture of Homemade Hummus

Six people can be served with the hummus. It’s in fact a great energy food and snack for your backpacking lunch because of the nutrients it has. Moreover, it is lightweight and can last long. We recommend packing dry hummus as an alternative solution, which you can mix with water in the wilderness to serve

Logan bread

To make the Logan bread, you need 7 cups of whole wheat flour, half teaspoon of salt, ¾ cup of brown sugar, ½ cup of milk powder, cinnamon, a teaspoon of baking powder, ½ cup of chopped nuts, a teaspoon of nutmeg, a cup of raisins or any other dried fruit, ¾ cup of honey, ¾ cup of margarine or butter, 2 cups of water and ¾ cup of molasses.

To prepare the Logan bread, mix the ingredients together and add water, molasses, margarine and the honey to make dough. Prepare a saucepan and then pour the dough in it and bake in a preheated oven at 300 degrees Fahrenheit.

Brown Loft Bread in White Textile on Beige Table

Gradually reduce the heat to about 180 degrees Fahrenheit. It can take about an hour to break the bread. Test it and see if it’s done. Then take it off the oven and wrap in an aluminum foil and pack in your gear to prepare for the backpacking gear.

Latte Bars

Latte bars ingredients include the 3 eggs, 2 teaspoons of vanilla, ¼ cup of melted butter, a cup of sugar, half spoon of salt, 2 cups of flour, ¼ cup of instant coffee, ¼ cup of milk/cream, ½ cup of choc chips and a cup of chopped pecans.

And to prepare the Latte bars, preheat the oven to 300 F and apply grease to the saucepan. Prepare a bowl and scramble the eggs in it. Then add vanilla, butter and sugar to the egg mixture. Later mix with salt and flour. Separately mix batter with coffee crystals and milk/cream and then prepare in the prepared saucepan.

Another batter should be prepared separately so you can add the choc chips to it. Then sprinkle the pecans over the batter mixed with coffee and the pure batter. Mix the contents and bake for about 25 minutes. After baking, prepare the plastic wrap for later consumption in the wilderness.

a picture of Homemade Latte Bars

Equally important are the drink recipes for your backpacking lunch to aid in digestion or to provide your body with more energy. Below are a few drink recipes you can take into account:

Hot chocolate

Hot chocolate is ideal for winter backpacking or hiking. During the hot middays it could be unnecessary. However, taking into account the nutrients, you might go against the odds and drink it after your lunch break. To make this hot chocolate, you need ¾ cups of sugar, ½ cup of Hershey’s cocoa, 2 cups of milk powder and ½ a cup of powdered creamer.

Pour and mix these ingredients in a zip lock bag. You can make many servings of hot chocolate. For a single serving, mix ¾ of boiling water with the ¼ cup of the hot choc mixture.

Caramel Apple Cider

This could be an ideal drink recipe after your backpacking lunch. You need a 0.74 ounce packet of apple cider mix and the 2-ounce container of caramel of apple dip. To serve, add boiling water to your cup and mix with the contents, which are the caramel dip and the cider mix.

Hot caramel apple cider

Cocoa mix

½ cup of milk powder, ½ teaspoon of cinnamon, ¼ teaspoon of nutmeg, 2 teaspoons of creamer, 3 teaspoons of sugar, 3 teaspoons of cocoa powder are the ingredients for this cocoa mix. Combine everything and pour in a zip lock bag. To serve, add about 2 teaspoons of the mixture into a cup.

Wrapping It Up!

There are a variety of drinks such as energy drinks to consume after your lunch. But then the problem is that most of the beverages need refrigerators, and that’s impractical in the wilderness. Even our food choices may not be appealing to others. These were, however, our best ideas.

If you have different ideas we reckon you follow our guidelines when choosing any type of foods. It’s not about being full, but about nutritious foods as well as the amount to pack for a certain period of backpacking or hiking.

Garlic Beside Ginger and Pepper on Brown Wooden Table

Backpacking Food Tips: Preparing Backpacking Foods

0

When you are out in the outdoors, putting in whole days of activity, you need food that will sustain you, fortify you, energize you and taste great. This content will help you get your food ready with the essential backpacking food tips.

Getting your food ready is an imperative stride in planning for a backpacking adventure. You want to ensure that you pack out meals that can withstand the situations of outdoor trip, require less planning, furnish you with sufficient nutrition, and taste great.

Oatmeal Packet Cookies

You likewise would prefer not to overlook some important things, like your morning espresso. You also would prefer not to pack more or less. In this article, we are going to take you through some vital tips to remember when packing food for your backpacking trip

Tips to Keep You Eating Well on Your Backpacking Trip

The fact that you are far from home, doesn’t imply that you have to trade off your great dietary patterns. When backpacking, it is quite easy for an already prepared meal to spoil rapidly and it is very challenging to get access to healthy meals. This leads you to fall back on eating undesirable food.

A man holding in his hand Original Beef Jerky

Obviously, you would prefer not to convey so much food that it burdens you, so you may consider bringing along junk foods instead. Eating good food as a backpacker is not required to be an overwhelming experience. Here are essential tips, that will improve your backpacking eating, regimen and cooking.

Reflective insulation cooking

When you’re out in the forested areas and still wish to prepare your food utilizing less fuel, a reflective insulation cooking pot and lid can provide the solution. You can prepare more food from the warmth inside the foils. The reflective insulation is conservative and flexible as well as impervious to tears and cracks prone to happen in the forested areas.

This cooking strategy does not constrain the measure of meal you cook, which means that you can likewise eat well while hiking. Take note of this next time you are embarking on your backpacking trip.

Lightweight reflective insulation or backpacking stove windscreens

Be aware of your local plants

Did you realize that local plants could save lives? Before embarking on your trip, examine which plants are eatable and which are harmful. You will be stunned at the level at which wild organic products, mushrooms, and roots can prove to be useful. These products of the soil give you vitamins. It is a smart thought to have a good manual on eatable plants, it will enable you to distinguish the good ones from the bad ones.

Carry Instant meal

An amazing hack for a hiker is instant meal. They are an absolute necessity pack when you are planning for a backpacking trip. Potatoes are an incredible instant meal staple and instant noodles and rice supplement any food. These food kinds, have great carbohydrate supplements which give vitality. Instant meals enable you to save some time on searching for food when you have settled down for the day.

Closeup Photo of Potatoes

Carry sun tea with you

To get access to the most sumptuous sun tea in the forested areas, gather herbal tea sacks in your food list. Put the sack in a container of water and place it in the outer pocket of your rucksack for a couple of hours. Peppermint, chamomile, ginger, Rosehip tea and lemon balm are some examples of what you can take along.

picure of healthy healing herbs

Sun tea, keeps you consistently hydrated as well, it is an incredible contrasting option to just water. It’s likewise a fundamental cure just in case you get cold during the adventure or if that you have a stomach pain or upset.

Carry handy energy bars

Energy bars are lightweight and they are highly nutritious. Select the ones with a good amount of caloric density for your trip and try to maintain a strategic distance from ones which has high sugar proportion. They are incredible for when you require an energy increment and have some hours to go before the time to eat your food.

Close up picture of two energy bars

Prepared dried vegetables and fruits before the adventure

You can never turn out badly with dried vegetables and fruits. Before setting off, get ready dried vegetables and fruits. The fruits are good for your snack time and breakfast recipes. The dietary value that dried leafy foods are sufficiently high to keep you going. If you add nuts to the fruit, then you have snack time sorted out.

Always hydrate

The main hydrator is water; you require a lot of water as a hiker. On account of nature, you don’t have to carry lot of water along in the event that you convey water filters. Natural springwater source, is the cleanest and purest. You just filter to flush out the possible dirt brought on by aggravation in the water.

Do not take water from stale lakes as there is a danger that the water is sullied past filtration. In case you are uncertain about the water then it is best to boil and filter it so as to pulverize microorganisms in the water.

Picture of a beautiful natural spring water

Good packaging

As a hiker, you are probably going to travel long distances, which means that you require your meal to remain fresh. To shield your food from destroying, you could utilize hacks, for example, vacuum sealing the meal.

To prevent your bread from getting stale, load it in a concealed bottle in order for it not to be exposed to air. It additionally prevents it from crushing. It may go stale, but it should still be eatable if you want it.

As a hiker, you need to keep up the level of your calories, and the ideal approach in doing that is to eat food that is nutrient rich and healthy. Backpacking is great and there is no preferred fun over that with great meals!

Qualities of Good Backpacking Foods

Toward the day’s end, you simply need to expend enough fuel to allow you to move from one distance to another, without getting sick and without losing much energy. However, there is a lot more to backpacking meals than that. If possible, backpacking food should likewise be:

Tasty

This can frequently get put into the base of the heap for lightweight hikers hoping to keep their backpacks very light. However, aside from the transitory pleasure one gets as a result of tucking into tasty meals, the foresight of an extraordinary tasting food to anticipate toward the end of a hard day of hiking can likewise boost morale. It can be immensely motivational and a merited reward.

A close up photo of flautas

Filling

You may want to complete every backpacking food feeling full and fulfilled. There is nothing more terrible than viewing your empty plate of food with a couple of hours until breakfast and a sounding stomach. You should go and sleep with a full tummy so as to prevent you from awakening hungry in the middle of the night. It will likewise keep you warm during the night in the event that you are enjoying the great outdoors in a cool atmosphere.

Lightweight

For those backpacking for a couple of days or weeks without the opportunity to load backpacking food stuffs, having food that is greatly lightweight is important. It likewise should be genuinely conservative in order for it to not fill your entire backpack. How light? Most hikers will feel good conveying around 700g of food every day.

High calorie

The higher the level of calories, the less you will have to eat. Furthermore, the less you have to eat, the less you will need to carry. How high? In the event that you can go for around 125 calories for every Oz (30g), then 3000 calories for each day ought to be sufficient if you are climbing moderate distances. Of course, this is extremely subject to your particular needs and levels of effort and so forth, and it is likewise very hard to accomplish unless you try to pick calorie filled food.

a picture of no cook backpacking food

Easy to cook

You won’t want to spend hours over preparing a truly intricate meal after an exhausting day on the trail. You likewise won’t have adequate pans for anything perplexing. So keep the cooking as easy as possible. This is particularly imperative in the event that you are backpacking in awful or frosty conditions. Everything turns out to be more troublesome in gloved hands.

Quick to cook

The faster you can cook your hiking food the better. Time duration of cooking, will likewise greatly affect the amount of fuel you should take along, which will just add more to the heaviness of your backpack. Snappy and straightforward is critical.

Nutritious

It is very essential to make sure your food has the appropriate nutrient that you require. Your immune system will take a battering when backpacking for a considerable length of time on below normal rest and it is not the ideal time to pass up a great opportunity for key vitamins. Backpacking activity is an intense exercise and it consumes much of calories and supplements. It’s imperative for the meal to be thick in supplements and calories so as to refuel your body system.

A picture of dried jerky meat

Finding Backpacking Foods

Buy easy to discover staples from food stores

Some prepackaged meals that make perfect outdoors foods, for example, cereal, instant milk powder, trail mix, tortilla, snack bars, couscous, noodles/pasta and instant rice can be obtained directly from food stores.

Difficult to find items, for example, dried vegetables and beans, powdered eggs, fruit and vegetable powders, powder-eggs, instant lentils, instant quinoa and solid, high-calorie foods made with whole organic and food ingredients, for example, non-dairy milk powder, and instant brown rice can be discovered online and various food stores.

a picture of dried fruits at the market

Read the cooking guidelines in advance

Check out for any extra ingredients that are necessary to set up the dish before buying it. Replacement can be done for some basic ingredients, for example, olive oil for spread, and dehydrated vegetables for fresh.

Peruse the nutrition label

Check out the nutritional panel for every item ahead of time to figure out whether it will contain adequate calories. Calorie requirement is contingent upon the territory and personal needs. A proper requirement is to search for foods containing no less than 100 calories for each ounce.

Search for fast cook foods

Avoid packaged meals that take more than 10mins to simmer. Search for cook periods of 10mins or less, particularly for longer adventures when you will have to apportion fuel. Quick or instant cooking doesn’t mean you need to purchase the greatly prepared, purge nutrition foods found in many packaged meals.

Most wholesome meals – except for unhulled cereals, uncooked beans, uncooked or parboiled rice, and thick expelled pasta – can be prepared utilizing the boil and soak technique.

a picture of a camping chicken

Best Backpacking Food Ideas

Here is a rundown of the best food ideas for backpacking composed by recommended meal:

For Breakfast

Breakfasts for backpacking can range from quick and essential such as an energy bar to a plushy spread such as eggs, meats, pancakes and espresso. A hot supper can give you an additional boost, genuine, yet a light snack implies no cleanup and a snappier beginning. Here are the popular choices for backpacking breakfast:

Oatmeal Packets: This is a backpacking meal staple. The best thing to know about these oatmeal packets is that they fill in as a bowl. Simply add high temp water to warm the oats inside. Buy the assortment pack.

Corn Meal: You don’t need to be Southern to enjoy corn meal. As simple as oats and can be a good expansion to stir up your food plan.

Dried Fruits: Fresh fruit is typically too heavy and fragile. Dried fruit gives thick sugar, which can definitely be a healthier option than candy.

Seeds and Nuts: Nuts are a top notch approach to pack in thick calories, healthy fats and oils and protein. There are incalculable assortments of nuts also – peanuts, sunflower seeds, cashews, almonds, pistachios, pecans, walnuts and pumpkin seeds to give some examples.

Powder Meals: There is a huge amount of powder choices out there. From whole meal substitutions to weight lifting nutrients. Plan to keep it negligibly processed, give nutrition and taste great.

A picture of healty breakfast

For Launch

As opposed to taking a delayed break for a midday food, a snappier technique is to consume on various modest vitality boosting snacks for the duration of the day. Here are the popular choices for backpacking lunch:

Meats: Hamburger jerky, tuna and salami are examples of non-cook meats for a backpacking trip. None of them need to be refrigerated. Every one of them are delicious and high in sodium and protein. Awesome for a fast lunch.

Cheese: This can be a heavy meal for some ultralight hikers. However, it can give a great deal of calories and fat. Also, it can truly upgrade the meat season. Go for harder cheeses, for they are greatly shelf stable.

Tortillas: Bread can be excessively fluffy and bulky for hiking. Tortillas are conservative and withstand a beating. Awesome for wraps -Meat and Cheese, Peanut Butter and M&Ms, Hummus and Peppers.

Green-belly meal: This is the best backpacking food. Ultralight, ready-made and stacked with a standard 33 percent of your DV of Calories, Fats, Fiber, Protein, Sodium and Carbs. Every single natural ingredient.

Bagels: If tortillas are extremely flat, bagels can help give that good “lighten” surface of bread. They are a less fragile and a more packable choice.

Crackers: This is High in sodium and carbohydrates. Place them on the outward part of your backpack with a bandanna on the off chance that you think they will get crushed inside.

close up photo of bagles

For Dinner

This is your reward after completing your backpacking day. Boondocks gourmets wouldn’t fret with the challenge of making generous dinners out at the colossal view. Most tired hikers, however, prefer the include-boiling- water comfort of prepackaged dehydrated or freeze-dried foods, or simple dishes, for example, pasta.  Here are the popular choices for backpacking dinner:

Instant noodles: Get instant noodles rather than pasta. Instant noodles generally needn’t bother with a great deal of cleanup unlike creamy pastas which is able to leave your cup or bowl a sticky chaos. They likewise have a good measure of carbohydrates.

Instant rice: An amazing base for a hiking dinner feast. There are likewise innumerable rice assortments with various seasonings and veggie ingredients at the grocery store.

Couscous: Prepare in five minutes – considerably faster compared to rice or noodles. The light surface can be a pleasant dinner help. Great in fiber.

Instant potatoes: This is another hiking staple and amazing dinner base. Ultralight backpacking meal with sodium and carbs. Include meat, oil or flavors, to enjoy it.

Dried veggies: It is difficult to eat good meals on the trail. Dried veggies are a special case. You can join them with any of the food items recorded above, and have a pleasant backpacking feast.

Lentils: In the family of legume, Lentils are an antiquated superfood, rich in protein, fiber, calories and Iron. Takes a couple of extra minutes to prepare.

Freeze dried foods: Include hot water, mix, seal and after that hold up a couple of minutes. A lot of options of recipes, flavors and brands to pick from for dinner.

Healthy salad with couscous

Concluding thoughts on this topic

Most backpackers would prefer to save weight by taking along one less meal and taking off. But, bringing somewhat additional is ideal, particularly if things do not end up going as planned. With the underlying assumption that every backpacker has his or her own specific manner of getting things done, we know these tips may not work well for every backpacker.

food cooked on camping fire

Best Water Enhancers: Adding Some Flavor to Water

0

If you are looking to be healthier, one of the easiest things that you can do is swap drinking sodas and juices for drinking water.  Studies have shown that even drinking diet sodas versus plain water can cause more weight gain than just drinking water.

The downside that some people bring up is that water doesn’t have any flavor to it, so it can be a bit dull to drink.

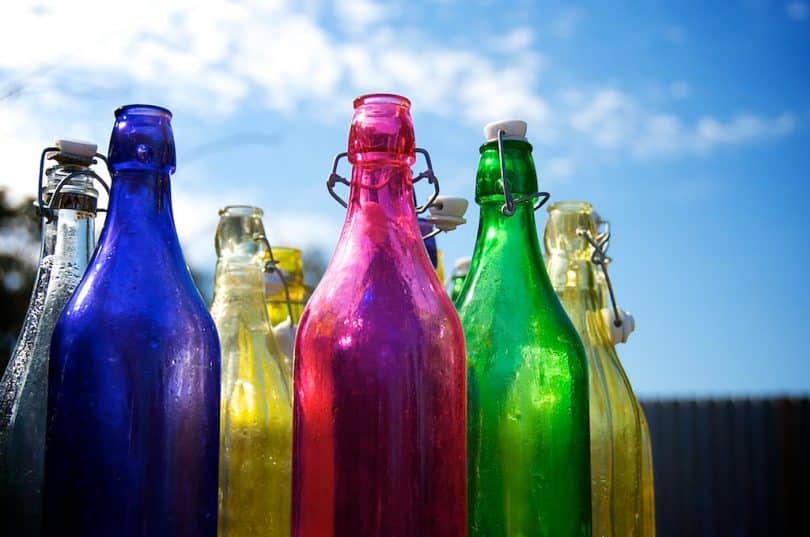
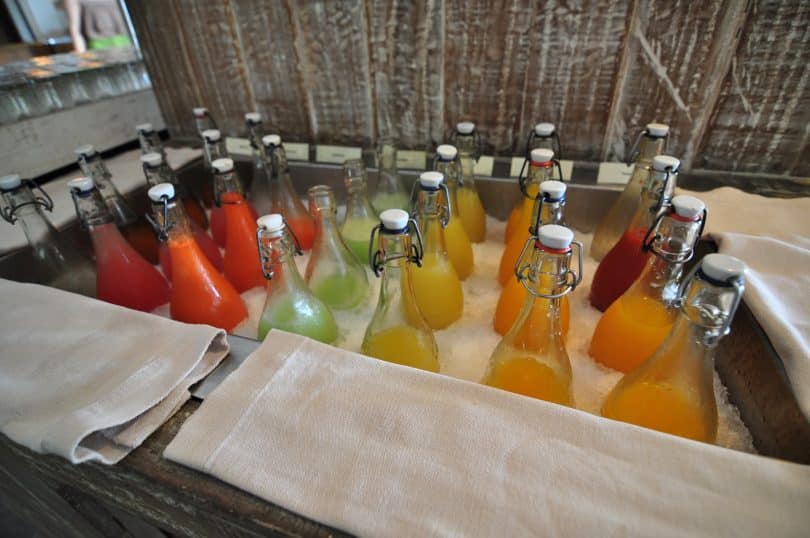
Beautiful coloured bottles

In the past few years, though companies have put out new products to add a touch of flavor to the water, to get you drinking more water.  But what should you look for in your search for the best water enhancers?  We’ll need to go through what you need to know to pick the right choice for you.

What are water enhancers?

These are little bottles filled with a liquid that you squeeze into a container of water.  They are formed from a mixture of ingredients that will differ from company to company.  Some will just add flavor in, others will add in various vitamins or ingredients like taurine to help keep you alert.  Since they are sold in easy to carry small sizes, you can take them with you on a hike or to the office.

liquid-water-enhancers

Also, you are in control of how much you put into your water bottle.  This will be affected by how big of a bottle you are using and also how strong you want the flavor to be.

One of the main selling points of these little bottles of flavoring is that they are shelf stable.  Where you may need to keep a bottle of juice refrigerated, especially after you open it, these can easily be tossed in a bag or a pocket and toted all over town.  There is no need to refrigerate the water after you add some unless you really would like it chilled.

Though for your own safety it might be a wise idea to not leave an unfinished bottle just sit out on the counter for a number of days.  You might wonder what about calories since you are adding in substances to your water.  For that, we need to take a dive into what is used to make these enhancers.

What are water enhancers made of?

If you are trying to be healthier, you have probably already learned how important it is to look at the ingredients on the foods that you buy.  The problem is that sometimes it is hard to tell what is good for you and what is more on the chemical side of the equation.

For example, in water enhancers, you will often find things like citric acid, propylene glycol, and sucralose, among other things.  Are these natural ingredients or man-made ones?  Let’s take a look.

The healthy, functional beverage market is overflowing with opportunities.

First, consider citric acid, it is a naturally occurring acid.  This one is found in citrus fruits and can be beneficial to your body.   But as we move on, things get a little bit muddier.  As we take a look at propylene glycol, there are some interesting things to consider.  It is used to prevent food discoloration when food is stored over periods of time.

Some people will tell you that it is the primary ingredient in anti-freeze, which it normally is, but it can also be found in shaving creams, toothpaste, brake fluid and e-cigarettes.  While studies have shown that this can be problematic and even be damaging to some of your organs if used in high amounts, the FDA does recognize this substance as generally safe.

Is this an ingredient that you should run in fear from?  Probably not, though it may not be the worst thing to consider how many food items it is in that you use.

Then we have the case of sucralose, this is what is sold under the brand name of Splenda.  This substance is apparently made from sugar and so it is supposed to taste like sugar.  However, adding this in instead of sugar means that the product can be labeled sugar-free. Since it is several hundred times sweeter than the ordinary sugar, you can buy companies can put a lot less of this into you a product and make it just as sweet.

This has also been approved by the FDA after they ran tests and found no threat to humans if it is used in the proper amounts.  There are some people that will say that it isn’t great for people much like aspartame.  All in all, this is not a product that you should be overly worried about.

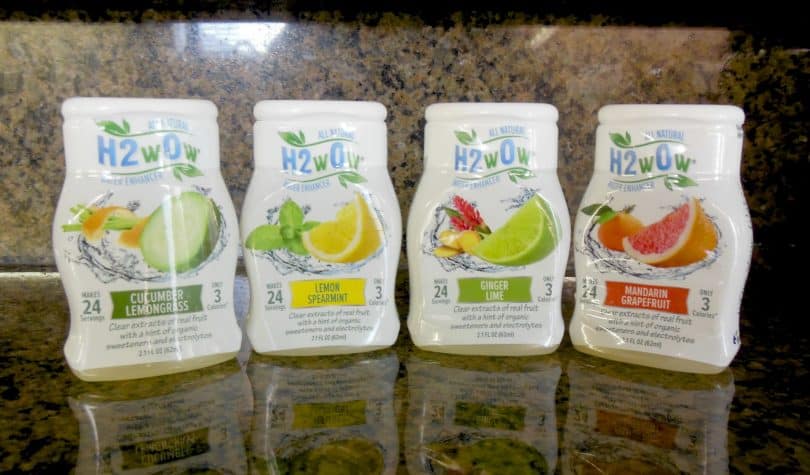
H2O All Natural Liquid Water Enhancer

In addition to these, some will have various other extracts like taurine, ginseng or guarana.  Also, some add in vitamins like B vitamins to perk you up a bit more.  At the end of the day, you have to make the call if you are ok with these ingredients, but they have all been approved by the FDA, showing that they are safe for use.

How much should I use?

Here is where the real push happens.  You have to exhibit some level of portion control to get the most out of these products. All of them will have a suggested serving size printed on their packaging.  This is a good place to start.

You will want to remember that there are still artificial sweeteners in these products while depending on which study you would like to believe they are better for you or perhaps no worse for you than regular sugar, you don’t still don’t want to take in great gobs of them.

Man Pouring Water Bottle on His Mouth

Many will also have some level of caffeine in them.  In a number of cases, adding in a single serving is like drinking a six-ounce cup of coffee.You might want to up the dosage somewhat if you would like a stronger flavor in your water.  There are some people that have taken it to what could be considered unhealthy levels, though.

If you search on YouTube you will find videos of people pouring the entire bottle into a shot glass and knocking it back all at once. While this is clearly the extreme end of the spectrum you will have to determine how much is enough for you.  At some point, after adding water flavoring to your water bottle the product that you are drinking would be more correctly considered a juice or flavored drink instead of the water.

What does the evidence say?

When you go through the studies and the fact that these are approved by the FDA, it is fairly safe to say that these water enhancers aren’t harmful to you if used according to the serving size.  Like nearly anything that you eat, if you disregard the serving size and go hog wild, they might not be the best thing for your body.

On the other side, though, even with using them according to the serving suggestions, there is no evidence to suggest that they are necessarily healthy for you.  The biggest benefit is most likely being able to get people to swap from drinking soda and sugary juices to drinking more water.  If nothing else, this will keep you well hydrated.

a bottle of water overturned

Which to Choose

Any number of companies are putting out water enhancers.  Are they all equal?  Well, no, not at all really.  There are a wide variety of options and choices and a lot will have to do with your personal preferences.  One of the first things to consider is the reason why you are looking for a water enhancer in the first place.

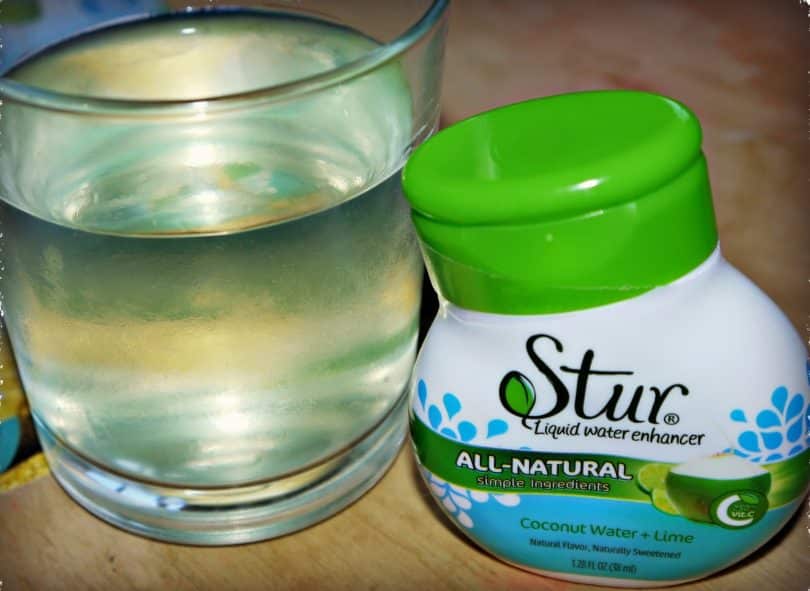
If you are going about it to get healthy and kick your soda habit you might want to take down some of the offerings from Stur or Skinnygirl Water Enhancement.  These are also good choices if you don’t feel comfortable with propylene glycol.

stur-liquid-water-enhancer

If you are looking for more of something that is easy to carry with you to add a bit of flavor to a bottled water you plan to pick up on your travels, the search is a bit wider.  With so many companies giving you offerings you can narrow it to what style flavoring you want.

If you are looking for a simple fruit flavor there is a range from Dasani or Mio.  If you would like a bit of iced tea on the go Crystal Light has a good selection, even a few lemonade options as well.  If you want to have a connection back to your youth or looking for something your child might enjoy there are several Hawaiian Punch and Kool-Aid offerings that are sure to please.

How about some other options?

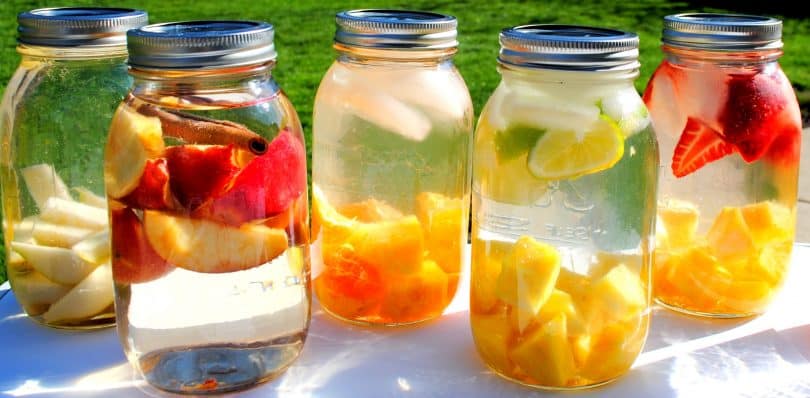
There are other choices than just buying a bottle of stuff to squeeze into your water to add a splash of flavor.  You could always just pour some juice into the bottom of your bottle and then fill the rest with water.  This will dilute the juice and give you a hint of flavor while still giving you, the health benefits of drinking mostly water.  Then there is infusion water.  This is normally accomplished by adding some fruit or vegetable to your water.

One of the most popular is to add a wedge of lemon or lime (or even both) into your bottle.  This gives you a crisp bit of flavor to your water.  Of course, it works best when you have a bottle with an opening big enough to add the fruit in.  There are a few bottles on the market now that have a separate compartment to hold the fruit with a screen, or even a juicer, that will let the water flow through but keep the seeds and most of the pulp at bay.

water enhancers

You can also buy a number of seltzers or carbonated waters.  These can come with any number of flavorings added to them.  This may be a choice if you love that fizz of soda, but are looking for an option that is a bit better for your waistline.

Or if you like your water ice cold, why not add some flavors to the ice itself.  You can toss a berry of your choice into each opening of your ice cube tray and then add your berry ice to the water.  As an added bonus the freezing process will burst a number of the cells inside the berry, letting its juice flow out more readily.

Or if you need a bit of a caffeine boost, why fill an ice cube tray up with coffee and let that freeze.  This can add a bit of a coffee bust with your hydration.  If you get creative you can come up with a number of ways to craft your own water enhancers.

Water enhancement on the trail

One place that these little bottles can truly shine is on the trail.  If you are going out on a backpacking trip, there is no way that you’ll be carrying juices or drinks that require refrigeration.

However, with these enhancers, you can add a splash of flavor to your drink as you roll down the trail or stop for a meal.  The ability to switch from just water all day long could be a saving grace or that special treat when it comes to having a glass of juice with your meal.

While there is any number of amazing filter pumps to get great tasting water out of streams and other water sources, not everyone goes that way.  There are some people that purify their drinking water with iodine tablets while out on the trail.  Other times you might stop by a campsite for a night or two only to find that their water is delivered via old rusty pipes, giving it that hint of iron taste.

In either of these scenarios or any number of others that might come up on the trail, a little flavor enhancement when it comes to your water might be a welcomed change of pace.

adding flavours into water bottle

One thing you will want to consider is if you feel comfortable adding these flavorings into your water bottles. Some back country hikers will tell you that if you add any flavoring, or even use soap, in a water bottle, then it has to go into the bear bag overnight and definitely can’t be taken into your tent.  These people might only want to add this to water in their mess kit cups to feel safe.

Others may choose to mark certain water bottles that they feel comfortable adding flavors to and leaving others for straight water. Then there will be some laid-back types that have no trouble adding these to water they happen to be drinking from.  You might want to experiment with your gear to see if adding certain levels of flavoring might leave a residual flavor in your chosen water bottles before using it in too many of them.

Wrapping Up Water Enhancements

As you may have come to see water enhancements can be a bit of a murky topic.  There is no doubt that they are big business, the first-year Mio was out it brought in over $100 million dollars.  As a new product goes that can’t be ignored.  Those kinds of numbers are the reason that so many companies are now making their own offerings.

One thing that you will have to remember is that just because a company makes money with a product doesn’t mean that it is for you.

Helping people to drink more water is a great idea, as water is a very healthy beverage.  Some people drink it all day without a thought of adding anything more than a slice of lemon to it.  Other people can only drink so much before they are looking for something with some flavor to it.

two adults drinking-water-filter

These bottles can help to add to that flavor and if that is enough to get people to swap sugary sodas and juices for more water, we have no doubt that doctors will be happy about the change.

As for the ingredients, you have to make a call on that one on your own.  On one side of the argument, all the options that are sold in the US have the Food and Drug Administration’s approval that they are safe and use ingredients that are considered safe.

From the government’s point of view if you use them in accord with the serving suggestions there is no problem.  On the other side of the debate, people are arguing that anti-freeze and fake sugar substitutes are not good for the human body.  If those are things you are concerned with there are still a few options on the market for you.

Finally, we would love to hear what you have to say and find out what your favorites are.  In the comment section below to let us know what your top choices are and why you chose them.  Also, how much do you add in a standard bottle of water?

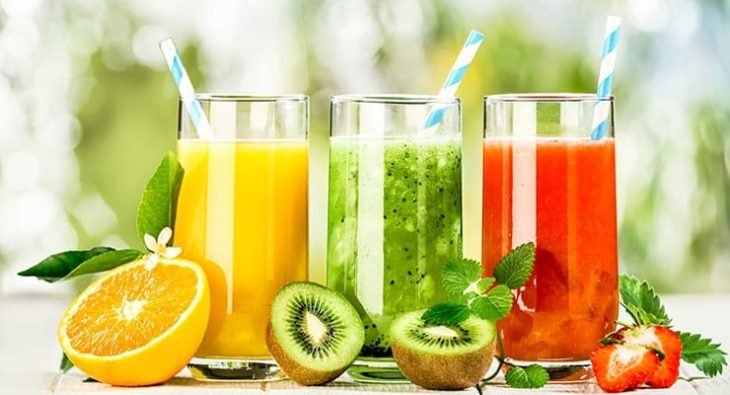
fresh healthy drinks

Best Camping Meals: The Most Delicious Foods for Outdoor Pleasure

0

It is that time of the year in summer whereby thousands flock to their preferred outdoor camping destinations. Quite frankly, many of them are clueless about the best camping meals to treat themselves with on the camping site. You may probably be one of them. But in reality, it can be confusing to select the best meals that will last for the entire outdoor excursion when taking into account that most foods are perishable. Some foods like meat, need refrigerators to last more than two days.

That is a setback to many enthusiastic campers. But freezing it and wrapping it in an aluminum foil can preserve it. Almost all foods that are likely to decay prematurely can be frozen to preserve them. Which foods should you include in your camping gear? The answer to this question is dependent upon one’s preferences and tastes as well as the number of people traveling with. When you are traveling alone, for example, it will be much better to decide which best delicious foods to purchase to your liking.

It will also be equally much better when you are traveling with your family because you probably know their preferred meals. In this article, we have done our best to bring you the most delicious foods for your outdoor pleasure.

Outdoor cooking meals

The criteria used in selecting these camping meals took into account the meals that are easy to prepare, delicious, healthy and long lasting. Taking perishable foods needs you to travel with a refrigerator of which it is practically impossible if you are camping in the wild mountainous regions where there is no electricity.

Having such perishable foods could shorten your camping days to avoid an intolerable wilderness hunger if you have no alternative. To stay safe, we have collected delicious foods with the best camping recipes that could last as long as you want them to.

These meals are categorized into breakfast, lunch, and dinner. The ultimate decision rests with the camper that which meal is best suited for whichever time. Before we delve into these meals, let’s help you prepare for your outdoor camping journey.

How to Prepare for Outdoor Camping to Make Cooking A Breeze?

It can be daunting at the first time, and an inexperienced camper can be confused with which meals and cooking tools to take along on the trip. Experienced solo campers, too, may have the confusion when traveling with families.

Nonetheless, the best preparation is a solution to all the confusions. Firstly, you have to acknowledge that camping menu varies from the home’s normal menu. In the wilderness, you have to compromise your normal menu and adhere to the most convenient and temporary one.

Prepare your camping ingredients

In order to simplify cooking, some of the camping meals have to be prepared beforehand. If you are into veggies and some spices you probably have to leverage on your household table or other gadgets you wouldn’t travel with due to their size. Prepare your camping ingredients before you leave to eliminate the hassle at the camping site.

For instance, if you want to cut your spinach or prepare a live chicken, do so while you are still at home. By the time you get to the camping site, you will only need a few minutes to prepare meals for cooking. Poor preparation may lead to stress-bound camping days.

If you plan to have scones, for example, you must then bake them before you embark on your journey. Traveling with dough or raw flour to the camping site is time-consuming. That may need you to also bring other ingredients and as thus you will be piling up your camping gear needlessly.

The snacks as well need to be prepared in advance. The pleasure of supplementing your camping meals with snacks cannot be overlooked. Children, in particular, are in fond of snacks. So watch out if you are traveling with kids.

Also noteworthy are the cooking utensils such as knives, pans, pots, grill, cooking racks, and bowels. When selecting the utensils you need to take into account the fact that you will be cooking on a campfire, not an electric stove. With that being said, you must have stainless steel tools that can withstand the intense heat.

Making camping meals

The proper materials needed to start the campfire are also important because it may not be a guarantee that you will find them ahead. Avoid the possibility of purchasing from other stores at higher prices because the shops in the vicinity of camping sites are usually expensive.

The Best Breakfast Meals for Campers

The meals for breakfast are often simple without the need to cook them for longer compared to lunch and dinner meals. There is notably a plenty of options to choose from to fulfill your breakfast needs. However, you should strive to prioritize your body health.

Meals such as eggs and bacon, donuts, cereals, oats, sandwiches, omelets, pancakes, buns and bread smeared with butter or cheese are popular among campers to eat early in the morning. They are relatively convenient and easy to prepare.

Egg Sandwiches

Below are the breakfast meals that you can choose to treat yourself with in order to make your mornings very pleasing.

  • Pancakes: these are delicious breakfast meals you can treat yourself or your family with. For cost-cutting purposes, you can simply make your own pancakes instead of buying them.
    When making your own at home, you got to have a Ziploc bag for better storage in a cooler after preparing the ingredients. Purchase Sprouted grain, eggs, flour, baking powder, olive oil, honey and milk to make this delicious breakfast meal.
    Alternatively, you can purchase a ready-mix pancake package that you can simply add water on it and then heat it up before serving at the camping site. Do not forget to take a syrup with you that you can serve the pancakes with.
  • Burgers: burgers are also among the favorite delicious and easy to make breakfast meals convenient for camping. But they can also be eaten at lunch or dinner time. Many people have varying preferences of ingredients needed to make a homemade burger.
    Some stores have ready-made mixtures which require only water to warm them.
  • Egg Sandwiches: Aluminum foil will be of benefit in this case because you need to prepare these sandwiches at home and then freeze them. While at the camping site, the campfire will be useful to warm the egg sandwiches for your breakfast.
    You can warm them directly on the campfire or on a grill if you brought one. To make these sandwiches you may have sausages, cheese, veggies, bacon and biscuits.
  • Hot dogs: these can be well served with bacon, cheese, onion or other sauces when flavoring your breakfast. Other than these supplements, the hot dogs can be served plain to make your stomach full until the next lunch meal. It’s your call to make.
  • Gravy and bread or biscuits: this meal can also spice up your breakfast. It needs simple recipes to make your own biscuits or bread to serve with gravy. To prepare a gravy you can peel tomatoes and onions and mix them with favorite delicious spices.
    You will be minimizing the time needed to prepare them at the campsite. Gravy and biscuits or break are quicker to prepare.
  • Omelets: the ziplock bag is needed to prepare this breakfast meal. Scramble eggs and put them in that bag. The number of eggs depends on how many people are you preparing the breakfast for. Meat, onions, mushrooms, bread, jam or peppers could be your choice list.

The Lunch Meals for Campers

Now the real food preparation process kicks in. Lunch meals often take relatively longer to prepare than the breakfast ones. But most of the breakfast meals can be consumed at lunch as well. For example, sandwiches or scrambled eggs can be consumed.

Quesadillas meals

Below are the lunch meals that are popularly regarded as the best for any enthusiastic camper.

  • Chicken enchilada: combined with lettuce, tortilla chips, lime drops, and barbecue sauce, chicken enchilada can be delightful for your lunch. If you are a novice cooker, you need to hone your cooking skills to make the best meals.
  • Pizza: by now you know that pizza comes in different flavors and ingredients. We recommend sausage, fontina, and onions that are flavored with caramel. This meal can best be prepared at home or at the camping site.
    A big stainless steel frying pan is recommended for the preparing of this meal. No one can say no to a delightful and well-cooked pizza. That being said, you need to bring enough ingredients to treat your companions.
  • Sandwiches: these can be suitable for lunch as well. This time you can consider an apricot or peach jam and butter for your sandwich. You need a loaf bread to achieve this.
    At least that will be enough for members of the camp or for you only as long as you are going to stay outdoor. Some potato chips or favorite veggies can make a good combination with your lunch sandwiches. Some campers prepare sandwiches at home and wrap them with an aluminum foil to warm them at their campsite.
    There are plenty of ingredients to consider when making sandwiches.
  • Grilled or toasted cheese: this meal can be combined with any of your preferred  For example, you can slice a bread and put your grilled cheese on the slices. Alternatively, you can serve a grilled cheese with vegetables or meat.
    To prepare this meal, you will need an aluminum foil that can be used in cooking on the campfire. Depending on the strength of the fire, it approximately takes 15 minutes for this cheese meal to be ready.
  • Mediterranean meals: if you opt for a Mediterranean style of food you can see yourself preparing cucumber, feta cheese, tomato, hummus sandwich, potato chips, and olive.
    This will also be a delightful and delicious tasty meal for your lunch at the camping site.
  • Quesadillas meals: a shredded cheese and vegetables with salsa or guacamole will make you this meal. To enhance its taste, add corn, roasted peppers or tomatoes. All these can be prepared at home before you head to your journey. Remember the zip lock bag we reminded you not to forget.

The Dinner Meals for Campers

Now prepare yourself for mouth-watering meals just before you doze off. A serious cooking process is predominantly done to prepare foods for dinner. With dinner meals, families get to enjoy the time together after a long day of traveling or working.

Camping Easy paella

Even those members that have skipped lunch may want their portions come dinner time. The last thing to do is to disappoint them with non-delicious foods or shortage of meals. Let’s help you choose the best meals for dinner while camping.

  • Curly hot dogs: with these curly hot dogs it is the time that you surprise the family with a new item on the camping menu. Take enough hot dogs as well as crescent rolls that you will use to make curly dogs.
    If you brought enough cooking tools to the camping site you can achieve that or otherwise prepare everything at home. Simply slice the crescent roll and wrap it around the hot dog.
    The next step is to wrap them in an aluminum foil to cook them on your campfire until the dough is well-cooked. The time it takes for the meal to be prepared depends on the strength of your fire. Just make sure you do not burn them.
  • Pizza log: this delightful pizza log can be well-cooked using the campfire. The dough can be prepared while you are still at home to avoid consuming more time in the wilderness. All you need is a frying pan, mozzarella cheese, tomato sauce, veggies and some toppings.
    The next step is to roll out the pizza dough so that you can add the ingredients. Half a cup of tomato sauce, toppings of your preference and the mozzarella cheese approximately 8 ounces should be used.
    After adding these ingredients, roll the pizza dough again to make a delightful pizza log. Use aluminum foil to cook it when you prepare for your dinner. After cooking you can then cut it into pieces for everyone at the camp.
  • Potatoes, Green Beans, and a Grilled Sausage: To make this meal you need potatoes, onions, green beans, sausage, salt, pepper, butter for the topping, fish or olive oil, aluminum foil and a grill. Put the grill on the campfire to preheat it.
    Use the foil to put the potatoes, green beans, sausage, and onions. Add salt and pepper to the meal, then pour oil. Enhance its deliciousness with butter toppings.
    Fold all these ingredients with the aluminum foil and then add water through a small opening to cook the meal on the grill. It can take about 30 minutes for the meal to be prepared depending on how hot the grill is.
  • Campfire foil packs: surprise your family with foil packs made with veggies and meat. The ingredients of choice can be pre-made at home and then refrigerated and then wrapped in an aluminum foil.
    At the campsite, you can use the foil to cook the meal. Make sure you add olive oil. Do not cook under strong flames to avoid burning your meal. It is such an easy way to prepare such a meal for your dinner.
  • Easy paella: now try Spanish popular meals at your camping site. To prepare this type of meal you need to preheat the frying pan and add oil to it. Then add onions in the oil for 5 minutes.
    Add rice, paprika, and thyme in the pan and stir them for a minute and sprinkle wine. Put tomatoes and stock thereafter and cook them uncovered for approximately 15 minutes.
    Thereafter put seafood in the frying pan with the prepared food and cover them. Leave them for 5 minutes until all are well-cooked. You can then squeeze the lemon juice into the pan and then serve the dinner meal.
  • Roasted meat or vegetables: prepare your vegetables by cutting them on your cutting board at home before embarking on your journey. These can be carrots, zucchini, peppers, cabbage, potatoes, onions, garlic, squash and cauliflower.
    Bring meat or fish as well as salt and herbs. Wrap everything in an aluminum foil for the convenience of cooking later on at the camping site. While at the camping site, preheat the grill and put the meal on it and constantly turn until well-cooked.

Important Pro Tips

We understand you might be having different taste of the ingredients than what we have just mentioned. Just make sure you do not take perishable ingredients without refrigerating them before leaving your home.

It is important to buy enough plastic or aluminum foil before heading for your outdoor camping adventure. Also take enough foods depending on the number of days and number of family members you are traveling with.

To make sure that you do not forget anything behind, make a checklist of everything you will need from spices to kitchen utensils for minor preparations at the camping site.

Camping Food Checklist

Purchase enough and affordable outdoor cookware. These include frying pan and a grill among others. The camping meals we mentioned above are not all-inclusive, but we are confident that we have chosen the best delightful meals. When traveling with your family, we recommend that you make a checklist with them to check what they need. It will be an advantage if you are traveling, because then you do not need anyone’s approval regarding the kinds of camping meals and their recipes.

How to Dehydrate Food: A Beginner’s Guide to Dehydrating Food

0
How to Dehydrate Food

Dehydrating fresh fruits and vegetables is one of the oldest and simplest methods for preserving food. According to historical data, people have discovered how to dehydrate food a long time ago in the prehistoric times. Fruits that were kept at the sunny side were not so juicy, but they were sweeter and lasted longer. Soon after that, the dehydrating method was used for preserving food.

The tradition continued until today, of course with more or fewer changes. Among the first dehydrated foods are grapes, pears, apples, and cherries. Nowadays, people dehydrate food because it is the only method of preservation that is letting the vitamins and minerals stay on the fruit. A nice example of this is the quantity of iron and calcium in dried fruit is greater than in the fresh ones.

This makes it an ideal child nutrition candidate. Dried fruits and vegetables are rich in dietary fibers, thus providing better digestion. Mushrooms, on the other hand, depending on their kind, are rich in proteins, antioxidants, vitamins and iron.

Make dehydratyed fruit

Thanks to the thermal procedure of removing water from fruits and vegetables, bacteria and fungus can’t develop and cause food spoiling.

How to Dehydrate Fruits

Start by choosing the fruits.

Choose fresh and truly ripe fruits. Unripe fruits have less intensive taste and color. Overly ripe fruits can be too firm or too soft. Wash them well in order to remove all the impurities.

Choose only healthy fruits that have no signs of rotting. Omissions of this kind may spoil your other fruits too. Before starting the dehydration process, start by softening the shell of the fruit.

This is done in order to speed up the water evaporation process. You can start by dipping the fruit in warm water for 30-60 seconds. After that, dip it in extremely cold water.

Destroy the bacteria with vitamin C

Researchers have proven that if you do a pre-treatment on the fruits with an acid solution, you can destroy the potentially harmful bacteria during the dehydration process.

This procedure has shown as effective against Escherichia coli, Salmonella and Listeria monocytogenes.

Mix two and a half big spoons (34 grams) of pure ascorbic acid (vitamin C) powder with one liter of cold water. One liter of this solution is enough for 10 kilograms of ripe fruit.

Lemon acid or lemon juice can also serve the same purpose of preparing the fruits for dehydration. If you prefer using lemon acid, mix 1 liter of cold water with 1 spoon of lemon acid. For lemon juice, you need to mix equal amounts of water and lemon juice.

Fruit Dehydration process

You can choose to dry the fruits in the sun, in the oven or in the dehydrator. In this article, we will focus on dehydrating food with a dehydrator. Prepare the fruits on a fruit platter by ordering them in only one layer with their “face” up.

Fruit Dehydration process

Little pieces of fruits will dehydrate faster that the bigger ones. Around 6 hours are required for dehydrating thin pieces of apple.

Peaches have more moisture, so they will require around 36 hours. If possible, turn them around every 3 or 4 hours during the dehydration.

At the end of the dehydration, food should be checked more frequently because food dries faster when there is less water in it.

How to Dehydrate Vegetables

When you choose carefully which vegetable you will dehydrate, keep in mind that vegetables release different enzymes after harvesting. They cause changes in the fruit that affect the color, texture, flavor, sugar content and its nutritional value.

This is the reason why vegetables should be prepared right after harvest. Pick the vegetables with the highest quality. The exceptions to the rule are corn and peas. Pick them before they are truly ripened so that they can keep their sweet flavor.

Preparation of the vegetables

Wash the vegetables well in order to remove all the remains of pesticides and carefully dry it.

After that dip the vegetables in the same solution as described before in the fruit preparation process. This is how you prevent the development of microorganisms that can spoil your food faster.

Vegetables dehydration process

Arrange the vegetables in a drying platter in one layer with 1 cm thickness. If you have not yet decided on the dehydration equipment you can choose between electrical dehydrator and oven dehydrator.

Electrical dehydrator offers complete control over the process of temperature regulation. They are economical and suitable for dehydrating small or big quantities, and they are simple to use.

Use them in a well-ventilated area, and closed space with low relative humidity. Drying in an oven dehydrator requires constant observing of the process so that the food doesn’t burn out.

Turn around the vegetables every 30 minutes so that it dries out evenly. After the dehydration is done, leave it alone for another hour.

How to Dehydrate Mushrooms

Start by choosing and preparing the mushrooms. You shouldn’t be reminded of the importance of the process of selecting mushrooms; some might say vital importance.

After that, cleaning of the mushrooms is in order. With the purpose to remove the impurities, a soft brush or a paper towel should be used. Whatever you do, remember that mushrooms are not to be washed with water because of this way, there is a great possibility that fungus and bacteria already present will spread and develop.

For larger impurities, you can use a wet towel. After that, make sure to clean them with a dry towel and detail remove the excess moisture.

After cleaning them well, cut them into thin pieces wide around 0, 3 cm. Such pieces won’t lose their characteristic flavor and they will be a perfect addition to every meal. You can also choose to dehydrate mushroom as a whole, without being cut, but cutting them will save you some time.

Drying the mushrooms

Arrange mushrooms in one layer. Make sure there is plenty of space for each piece so that you avoid them merging together during the dehydration process. The platter should not be oiled because then, the mushrooms will take on a different flavor and the dehydration time will increase.

Let them be in the dehydrator at 65 degrees. Only when the temperature is this high you should put the mushrooms in the oven. Remove them after one hour. Turn them around so as for them to dry evenly.

Drying the mushrooms

At the same time, with a paper napkin or a towel, remove the excess moisture on the surface. Put them back in the dehydrator and let them dry out for another hour. After that, remove them and check for moisture signs. If there is any left, repeat the same procedure and put them back in the dehydrator until they are completely dry.

You should be able to tell when they are dry just by looking at them, but just in a case break one mushroom in pieces. If they are completely dry, they should break like a cracker.

After finishing the dehydration process, let them cool down and put them in hermetically closed jars. This is very important part of the whole process. If you put them in jars while they are still hot, a condensation process will occur and water steam will destroy your previous work.

Drying on The Sun

A lot of fruits and vegetables can be dried in the sun, which is the simplest and economically most effective way of dehydration. Selecting and cleaning the fruits and vegetables goes as described previously in this article.

If possible, cut them on a wooden cutting board with a stainless steel knife so that they wouldn’t change their color. There are two methods for drying fruits and vegetables in the sun.

Drying on The Sun

Both methods are keeping their natural aroma, flavor, and color.

  • You can attach them to a string that you can put out in the open and put a net around it so that you protect your harvest from insects.
  • The another method is arranging them on a wooden surface. You should also put a net around, to prevent your snacks becoming insect food.

Always place the fruits and vegetables on the southern side. If the sun is too strong, turn them around a few times a day so that they dry evenly.

For ideal results, let them dry in the sun for three days and after that, place them in a well-ventilated room to sit for another day. This should go without saying: Always protect the fruits and vegetables from moisture and rain.

Certain experts suggest that the fruit dried in the sun should also be dried in an oven dehydrator for a few minutes. For vegetables, 10 minutes is enough and for fruits, 15 minutes. If you don’t have this option, place them in hermetically closed jars and enjoy them the whole year!

Storing Your Dried Ingredients

For preserving the nutritional advantages in your dried fruits and vegetables, store them on dark and closed spaces. If you don’t use them in a year, it is safer that you throw them away.

DIY Food Dehydrator

When building a homemade food dehydrator, you should make plans for acquiring all the parts and understand how a dehydrator works. You can make the dehydrator by any dimensions you like, depending on your needs.

The most important part of a homemade food dehydrator is the ventilation. Think of it as the engine of the dehydrator. For optimal use of it, you should place the ventilation on the bottom.

This way it will allow for the dry air to pass through the ingredients and dry them out before exiting at the top. It applies the same principles as an essential oil distillatory. The only difference is that the dehydrator uses dry air to make its final product and the distillatory, steam.

Another important matter is the racks you would use for your dehydrator. They might be from an old refrigerator or an old stove. You can even order them or buy them. However, it is necessary that they are made from metal. The main reason for this is because wood sucks moisture in, and you won’t be able to dry anything if you use wooden racks.

The next problem to solve is the spacing. Spacing should be close enough so that rational space usage is ensured, but apart enough so that everything gets dried out evenly. The ideal spacing would be two to three inches.

The next step is covering the walls inside with the reflective aluminum material. Aluminum is kind of a metal thermal conductor. It is frequently used for projects like this because its cools off quicker than any other element.

This is the main reason why it is used in isolation; it radiates the heat away. In a way, it is conducting the heat in the right direction. As a front “door”, use Plexiglas cover.

If you want to improve the efficiency of your homemade food dehydrator, a fan on the top would be a nice addition. Since the hot air moves up and the cold air stays down, by adding a fan near the top you would make control conditions inside the hydrator.

The thermometer would also contribute to more controlled conditions. It should be placed near the top. This way, if you want to change the temperature inside the hydrator, instead of turning the button as in electrical ovens, the only thing you have to do is turn the dehydrator against the sun or away from it.

Now, vent holes are a must. They should be made on the sides. If possible you can change the vent holes with screened louvre vents. This is usually done if you want to dehydrate meat for instance.

Meat requires a longer time to dry out and wasps and insects tend to interfere in this process. Screened louvre vents will take care of this problem for you. You can relax and leave the dehydrator without your supervision for a couple of hours.

  1. Now that you have all the required elements and get the whole idea of the project, you can assemble the parts. Before adding the rack supports, cover all the sides with aluminum material.
  2. After that, attach the top of the dehydrator and the bottom part. They should also be covered with aluminum material.
  3. Finally, after assembling all the sides, place all the racks in and put the Plexiglas on the front.

What Have We Learned?

A food dehydrator is an ideal tool for the kitchen used for preserving the ingredients in a healthy way, without unhealthy additions one of them being excessive thermal heat.

Some people believe that the best way to consume food is by warming it or dehydrating it to the sun. And that should be the maximal temperature applied to any raw food. Cooking and warming the food on high temperatures causes losing the nutritional value of the food and losing some of the enzymes as well.

Whatever your beliefs are, you would agree that a homemade dehydrator is a perfect way to provide tasty and healthy meals for your family without cutting on your budget too much. Dehydration is a process where 95% of the ingredient’s moisture is removed. It improves the shelf life of the food and prevents it from spoiling.

Dehydrate your food

Although many of you are probably using the dehydration process due to its nutritive advantages. Comparing to conservation or food freezing, dehydrated food has the best nutritive value. In a study of the Ministry of Agriculture Department, it is proved that 40% to 60% of the nutritive values are lost while freezing the food and conserved food looses 60-80% of its nutritive value; while the dehydration process loses only 3 to 5%.

The best thing is that by dipping the dehydrated ingredients in the water you can bring back almost the original texture and flavor. Keep in mind that when you are dehydrating food, the amount that you produce is significantly smaller that the amount put in the dehydrator. This is why dehydrated food is the number one food for outdoor activities and nature trips.


Hiking Food Guide: Keeping Your Stomach Full on the Trail

0
Hiking food guideEating on the trail is both similar and different from eating at home. While you are hiking and backpacking your body is burning a lot of calories. In order to remain healthy and active throughout your trip, your food will have to replace the calories that you are losing. The best hiking food guides suggest eating foods that are high in good fats and proteins. Make sure and consider this when packing your gear. Eating enough calories will help you avoid headaches and lethargy.

Studies also show that sufficient eating allows us to focus and concentrate better as well. You do not want to adhere to a strict diet while on the trail.

How Much?

Some experienced hikers suggest packing enough food to allow for 2,500-4,500 calories per day per person.

These estimates are, of course, going to vary according to your weight and individual needs. As you gain more experience yourself, you will become more familiar with how much food you will need for summer hikes, winter hikes and anything in between.

How Much to bring

The most important thing to be aware of is to make sure you will not run out of food. It is always better to have a little more weight in your pack than to run out of food before you get home. So in the beginning, always pack more than you believe you will need.

Good Types of Food

When deciding what kind of food to take with you on your hike, you need to consider a few things before throwing it in your pack.

  • Durability: How well will this food do when being shaken around in a backpack for days on end? Bananas are a great snack, however, they bruise and ruin easily. Unless you only pack one or two for the first day, chances are they will not do any good.
    Peanut butter, on the other hand, is not affected by temperature or being shaken and tossed around. This makes it a perfect candidate for hiking food.
  • Prep time: How long will it take to get this food ready to eat? We will be discussing cooking on the trail in a little while, and a hot meal is always welcome when you are working hard, but everything should not have to be cooked.
    For breakfast, lunch, and snacks, you should choose a food that is quick and always ready. You do not want to have to spend 30 minutes cooking every time you get hungry. You simply need food to replace the calories that you are burning so your body remains healthy.
  • Trash: What is the trash that comes along with this food? Remember, you are in the woods, on the trail, far away from a proper trash can, you must choose a food that does not produce a lot of trash that you will have to keep with you for a week.
  • Weight: Basically, you need to consider the calorie to weight ratio. If your food for breakfast each morning adds 1 lbs for each day, but you only receive half of the calories you need, it is probably not a wise choice for food.
    Again, peanut butter is a good choice. An entire jar may weigh a pound or two, but it is packed with protein and calories that are extremely beneficial.
  • Taste: Do you like the food? Do yourself a favor: Don’t try a plethora of new foods that you are not sure you will like while on the trail. You have two choices; Try the foods before you leave OR Only pack one or two foods to try while you are out. If you force yourself to eat foods that you discover that you hate for a week in a row, you will be miserable. Don’t do that to yourself.

There are a ton of choices and combinations for great hiking foods, what you enjoy and what is best suited for your type of hiking will determine which choices you will make. Most experienced hikers tend to agree on the best types of food to take along on your trip.

Peanut Butter

The versatility and durability of this food make it perfect for the trail. Having 94 calories, 3 carbohydrates, and 4 grams of protein per tablespoon makes it extremely beneficial. Some places offer peanut butter in a squeeze tube that makes it even easier to carry along.

Peanut Butter for hiking

If you are unable to find those convenient packs, don’t fear. A small jar of peanut butter will serve you just as well while you are hiking.

For a variety of snacks try smearing the peanut butter on crackers, apple slices, celery and other foods to mix it up. Each of these, are healthy and fairly easy to take along the trail. If you really need a quick pick-me-up, eat a tablespoon or two straight out of the jar.

Tuna

Tuna is not for everyone. Personally, I do not touch it with a ten-foot pole, however, it is a great food to take on your trip. At only 179 calories per 154 g of tuna, it is not a high-calorie food. What it brings to the table is the amount of protein it carries.

There are 39 grams of protein in that 154 grams of tuna. These proteins are essential in keeping your muscles functioning properly. In case you did not know, muscles are the only thing keeping you alive. Your heart, lungs, and other organs are muscles. The proteins will allow them to work at their full potential.

Tuna for hiking

There are several suggestions when making tuna on a mountain. The favorite can of tuna is one that is small and has a pop top. When you choose the can that has a pop top, it eliminates the need for a can opener.

Most hikers simply put the tuna on crackers or bread as a snack. Some even bring individual packages of mayonnaise to add a little flavor. Again, experiment with different combinations before you go. See which options are the tastiest and the easiest to whip up.

Energy/Granola Bars

Energy bars are packed with calories and are as simple as you get. For example, Cliff Peanut Butter bars have 240 calories and 11 grams of protein. This is a perfect replacement for the calories that are burned while climbing the trail.

Energy Granola Bars

These bars are not meant to entirely replace meals or other foods while hiking. However, they are a very light, easy and efficient snack to keep you moving forward and to keep you healthy.

Dried Fruit/Jerky

Dried fruit and jerky are also great options for the trail. They are sturdy enough to withstand the abuse of the backpack and can stand the heat on summer trips. Calories are included in each and they make a great snack.

There is one issue with packing dried meat and fruit. Make sure and take in plenty of water while snacking on them. Dried fruit and meat will absorb water from your body while it is being digested, if you do not take in extra fluids you can easily become dehydrated.

Dried Fruit Jerky for hiking

Jerky does not provide enough calories to truly replace burnt calories, but it does make for a nice treat when the there is a lull in the trail. Many hikers prefer to dry their own fruits and meats to avoid any added chemicals that companies may place in their products. There are tons of simple recipes to get you started online and a dehydrator can be purchased for a reasonable price from most super or outdoor stores.

Fresh Fruit

On the flip side of dried snacks, there are fresh fruit options. We have discussed that bananas may be appropriate for day trips and possibly two days on the trail, but will not withstand the abuse that the trail offers on longer trips. Apples, oranges, and pears are all decent options for a healthy snack while hiking.

While they are not exactly the most efficient snack because of the lack of calories for their weight, they do have the ability to replace water in your body naturally. Several seasoned hikers suggest apple slices, hard cheese and crackers for an afternoon snack in the mountains.

Cooking on The Trail

Snacks and easy meals will most likely contribute to the majority of your diet while hiking for several days. However, after eating several meals for calories and not necessarily enjoyment, you may crave a nice hot meal to finish off your day.

Packing cooking utensils for a weeklong backpacking trip can be daunting and take up a lot of space. Thanks to many helpful hikers before you, there are tons of tips and suggestions to help guide you along the way.

Cooking on The Trail

There are basically three different types of cooking that you can manage on the trail.

  • Real cooking-involves actually cooking raw materials
  • Cold meals- prepackaged meals that require no heating or cooking
  • Rehydration- using dehydrated food and hot water to “remake” the food

Now, while these options are all completely feasible while hiking, there are major opinions of each of them.

Real cooking is usually not a good option due to the number of supplies needed to make it happen. You would need to bring all of the raw ingredients, with no refrigeration, in order to make the meals. After packing each ingredient, you must add in pots/pans and a stove.

Finally, after you are able to stuff all the materials in your bag, you will need to allow extra time for cooking.

Cold meals are a great option. They are quick and satisfying and do not need any preparation. The food is ready to go whenever you want. If you are on a short trip these are the perfect solutions. However, if you are on the trail for several days, it will begin to get very monotonous.

Cooking outdoor

Rehydration seems to be the favorite for most backpackers. Some hikers even dehydrate and prepare their own meals before leaving and simply rehydrate it on the trail. These recipes and meals can be as simple as macaroni, or noodles and as complex as a rehydrating cake for dessert. It is amazing how versatile this method can be.

When deciding to rehydrate food you will need very basic materials. Most hikers prefer “one pot meals” which means that only one pot is used for cooking the meal. This eliminates having to scrub or clean several pots or pans.

When preparing your own meals to rehydrate there are two options. You may dehydrate the food yourself or buy already dehydrated ingredients. After gathering all the ingredients for the recipes that you choose, it is best to combine them all into a single bag for less trash while hiking. Be sure to include a note on each bag detailing which meal it is and how much water is needed to rehydrate it.

Utensils

Cooking on the trail can be overwhelming and depending on the type of cooking you decide to use, it can be very bulky and heavy. Real cooking will require a few more pots or knives or utensils, but using this basic list will get you started.

Utensils for hiking

You may come to find that you can manage real cooking with very few materials as well. Rehydration can be very minimalistic and often you will only use one pot.

You will also need to consider a heat source, of course. Stoves are the most popular choice as open fires are sometimes prohibited and stoves are quick and easy.

Stoves

There are benefits and downfalls of each type of stove. Most hikers have different preferences based upon what type of hiking they will be doing.

  • Canister stoves are great and double as a pot and a stove. They are simple to use, reliable and because some are a mix of propane and butane, they are fairly stable and able to be carried in lightweight containers.
    There are drawbacks to using a canister stove as well. The added propane allows the stove to work at colder temperatures, but it is possible for the propane to burn off quickly and leave you with butane that will not function at cold temperatures, rendering it completely useless.
    There is also the fact that while the containers are lightweight they are also very small. One container has been suggested to be able to last for 2 people on a trail for 2-3 days.
    You will need to pack extra containers of fuel and also carry around the empty containers as well.
  • Alcohol stoves are also a popular choice among hikers. They can be homemade and are very simple. You can also transport the fuel in any plastic bottle or other containers.
    There is the possibility of having extreme problems with this type of stove if you are not familiar with them. If these stoves get tipped over while burning, the fuel will spill out and can cause a bigger fire. It is recommended to use extreme caution when using these stoves.
  • Multi-fuel or white gas stoves are also a great choice. These are probably what most novice hikers will be the most familiar with. These stoves are exactly what the name implies, multi-fuel.
    Hikers can use white gas, propane, gasoline, kerosene or diesel fuel. This is extremely convenient if hiking for long periods of time. You can fill up your fuel at any trail stop along the way.
  • Solid fuel stoves are an extremely popular choice among single hikers. These tablets are easy to store, carry and relatively inexpensive. Most tablets burn for about 10-12 minutes which would be long enough to heat water for rehydration meals.
    This would probably not be a good choice for real cooking. The time that it would take to prepare the meal would be too long for the tablet to last. However, if you see that you are done cooking before the tablet is gone, you may extinguish the tablet and save it for later. This will help you to never use more than you truly need.

Each of these options has been proven effective on the trail. Again, stoves are recommended to take on the trail due to the fact that open air fires are prohibited in some areas, especially during dry spells. Keep in mind when and where you will be going hiking.

Canister stoves for hiking

Cold temperatures and lack of refilling options often will be able to help you determine which stove will best suit your needs.

Eat Up!

Using these tips from the experienced hikers is a great way to get started. Always remember to pack enough food for your trip and to hydrate as much as possible when eating dried fruits and meats. There is no reason to compromise great snacks and great meals just because you are roughing it on the trail!

Best Hydration Drink: Searching for the Ultimate Hydration Product

0

Being active is becoming a part of the every-day life for almost everyone. Running, biking, swimming, hiking, or any combination of those activities are, literally, working their way into thousands of homes.

For people who are this active, they need the best hydration drink by their side to help them reach their full potential. They need to fuel their body with good food and beverage choices in order to perform to their highest levels.

Water is such a key nutrient that cleans, flushes, and hydrates our bodies but even water needs help to keep up with the demands we ask of our bodies. That’s where the best drink for hydration comes in.

They come in many brands, flavors, and uses, some specific to one sport and some more versatile, but they all have the same goal: hydrate the body under the toughest of conditions. The best hydration drink will aid you when you are running low on fuel. Between sets at the gym or on mile 18 of your marathon, it should be quick and easy to get a hold of and should pack enough punch for you to keep chugging along.

This is also a key issue in our everyday lives as well. It’s been proven that as a whole people are not drinking nearly enough water. We are drawn to sugar or caffeine in order to stay alert and awake when water would work the same way if it has a little boost of flavor and vitamins.

Healthy hydration drinks

Finding ways to stay hydrated the healthy way shouldn’t be this hard. There are plenty of options to choose from but first, you must evaluate the purpose that you are asking of this hydration supplement. Are you going on a strenuous hike or just walking to the store?

Will you be taking this for the last leg of your ultra-marathon or just to keep up with the kids at the park? Each scenario is absolutely a reason to stay hydrated but there are stronger hydration drinks than others and the price tag often correlates with that intensity.

Under The Lid: Qualities of The Best Hydration Drink

Sugars & Carbs

Too many people lose their minds when you talk to them about sugars and carbohydrates (carbs). This is such an important aspect because it is often misunderstood. Sugars and carbs both work together to give you energy.

Too much of either can be a bad thing and that’s why we evaluate this as a point because not everyone needs the same amount of either group. Marathoners or triathletes need more sugars and carbs to get them through their races, while the babysitter staying up late to watch kids might need the energy but without the lasting sugar and carbohydrate effects.

Under The Lid

Evaluation your own goals and needs will help you decide what kinds and what amount of carbs and sugars you will need in order to stay alert and hydrated. If you are hydrating and trying gain muscle a higher carb content hydration mix is a good choice. Distance runners who run for leisure may need the sugars during their runs but should eat carbs before the run and don’t necessarily need carbs during the run itself.

Main Ingredients

The ingredients list is also very important. Did you know that the order in which items are listed on the ingredients list is the measure of how much of those ingredients are in that mix? The first ingredient is always the highest that is found in the recipe.

That being said, making sure that the ingredients are good for you and are not cover-ups of “filler” items that won’t actually do you any good. A good rule to go by is that if you cannot read and understand the ingredients on the list, then being cautious is a good idea.

Bonk hydration drink ingredients

You should be able to identify, or at least look up, what that ingredient is to make sure it really is good for you. There is a lot of science that goes into these formulas and each ingredient should be put there to enhance the drink as a whole.

Multi-Health Attributes

This is something that is becoming more and more important for this day and age. With the many allergies and additional needs of many athletes worldwide it has been necessary for a business to respond and change with the needs of the consumer and the environment.

Gluten free products have had a huge growth spurt in the last 10-15 years due to more research showing the intolerance to gluten, often found in grains and bread. Dairy-free is another group that people have given huge importance to.

Vegan formulas are specialized for people who do not consume animal parts of any sort. Non-GMO is a group which emphasizes that the creation of their products are not made with Genetically Modified Organisms (GMO) during the process. The more people-friendly and health-friendly you can make your product the more people will accept and appreciate their needs being met.

Calories

Calories are an important part of every human’s life. We need them to keep ourselves sustained and with energy. Calories are not a bad thing! The thing to remember is that often topics that are demonized are only bad when used in excess. We need calories to survive.

Amara hydration drink calories

Taking calories into consideration when choosing a hydration drink that is right for you is important simply because each of us has different goals. Olympic weightlifters need more calories during their workout to continue to feed their body during exertion.

Some people are using the hydration beverage to stop drinking things like pop or other sugary drinks and need to watch the caloric intake in order to lose weight. For the different goals of many consumers, there has to be a variance of calories per scoop of each hydration drink.

Flavors

Flavor is an important factor only in the sense of personal preference. The point of using favors as a defining factor is whether the company is reaching for multiple flavors to bring in more consumers. You are much more willing to try that hydration drink again, even if you didn’t like the flavor you first chose because it has ten other flavors.

If you try it once and dislike it and it’s the only flavor produced then there is no way they are getting any more of your money. 

Edible Insects: How to Know Which You Can Eat

0
Edible insect guide

Since the beginning of time, our ancestors have been utilizing the earth and all that it has to offer. Eating insects is something that hunter gatherers were doing ten thousand years ago. In the majority of the world, people enjoy edible insects to this day.

If you think eating insects is gross; you are probably a part of the minority that does not use them as a staple in their diets. It may not seem so, but it is way more prevalent than you may think. So if the practice freaks you out, it might be worth it to learn a little more about it.

Everyone has their own taste, but it never hurts to try new things. When done right, eating insects can be super nutritional and even a tasty addition to your diet in many ways. Whether they are boiled, fried, roasted, sautéed, or toasted, they are ideal for replacing less healthy foods.

Eating insects

Figuring out where to start when it comes to edible insects can be a little nerve wracking. You are not going to want to eat something that is not good for you. Many insects are poisonous and randomly choosing something will not be safe.

You will also not want to eat just any insect that is crawling around. When not raised in a clean environment, they will not be safe to eat. If you are in a survival situation, it is still good to know which bugs will be okay for you to survive on, regardless of where you may be.

Taboo

In the United States and Europe, eating insects is still largely viewed as taboo. Since livestock became a significant investment, bugs have become obsolete. They are seen as destroyers of crops and not as a source of food.

Culture has a great influence on what people choose to eat. In some cultures, foods such as pork, shellfish, and oysters are seen as dirty. This conditioning has everything to do with said culture and how it shapes our opinions and thoughts. Trying new food is always a subject that can be quite touchy.

edible insects at the market

Agrarian society helped to wipe out the use of insects in diets. In the process, it became costlier and more demanding to raise livestock. Since the livestock requires medical care and man power to maintain them, it is much more efficient to use insects as a primary source of protein.

By using pesticides on crops, people are destroying the planet. Instead, they can use an environmentally friendly method and harvest them for food. One hundred pounds of feed produces 10 pounds of beef and 45 pounds of cricket. What else is there to argue for them not only being good for us but good for the environment in their efficiency?

Nutrition

The protein contained in hamburger is approximately 18 percent protein and 18 percent fat. In contrast, cooked grasshoppers contain 60 percent protein with 6 percent fat. Not only are they higher in protein and low in fat, but they also tend to contain healthier unsaturated fatty acids.

cooked grasshoppers for dinner

Insects can also be high in other nutrients like vitamin B and others. They are not only good for you but good for the planet. Breaking the cycle of pesticides and other methods to get rid of bugs will be beneficial for sure.

Things to Avoid

  • Do not just pick up any insect laying around and eat it. It could have bacteria or other harmful environmental properties that are not good for you. Namely, you do not want to be ingesting pesticides from urban areas and even countryside areas.
  • Brightly colored bugs and those with spines and other defensive properties are a no no when it comes to survival situations. Alternatively, any situation, really. If you are unsure, you can always cook up a little bit of it and try a piece. Wait for an hour, and if nothing happens, you are probably good to go. This is especially for those in survival situations when all you have to rely on is instinct.

Edible Insects

So, now that you know a little bit about the practice itself let us look at common insects that are consumed in some regions of the world. Before this, however, keep in mind that any kind of new addition to your diet can cause a reaction. Try only one at a time to ease yourself into it.

edible ant

If you are resorting to eating bugs in a survival situation, you are going to want to cook them if you can. If not, you are probably okay, but it will be a little harder on your stomach. Just make sure to stay away from anything that does not look like it should be eaten.

That will be covered later.

  • Grasshoppers and Crickets: these insects are incredibly protein-rich, and you can find them just about anywhere. The best times to catch them are in the early morning when they’ve just woken up and move the slowest. You can find grasshoppers and in tall grasses, and crickets in dark and damp places, such as underneath logs. They’re easy to catch by hand, but if you don’t have the time or the energy, you can devise an easier way to catch them that you can leave behind. Simply cut off the top of a plastic bottle, bury it in the ground so that the top is level with the ground, and add a piece of fruit. The next day, you should have plenty of grasshoppers and crickets hopping around. Add some dirt and a few leaves, and they’ll choose to burrow under them instead of trying to get out.
    To prepare them, grab their heads and pull; the entrails should come right out with them. These are edible, but removing them eliminates the risk of parasite transmission.
  • Ants: ants are just about everywhere, so they’re not that hard to find. The problem is telling the difference between one that will serve as a good meal and one that will taste terrible. Once you find one ant, it’s pretty easy to find a large number of them, as they tend to travel in straight lines. If you find an ant hill, that’s an added bonus. Simply agitate the entrance of the ant hill with a stick and insert it in the opening. As the ants try to attack it, dunk the stick into a source of water and they should float. Do this a few times until you have several hundred ants to make a good meal.
    To prepare them, boil them for about 6 minutes; this should neutralize the acid that is in their bodies and make them more delectable. If you can’t boil them, at least make sure that they are dead; you don’t want your meal to start biting back.
    As a word of warning, avoid trying to eat any ants that are red; they’ll be extremely bitter.
  • Termites: considered to be a hazard to homeowners, these little bugs are rich in protein, and they’re easy to find in you’re camping in a wooded area. Simply look for downed trees or rotting logs; you’re bound to find some termites inside, munching away. Because they spend most of their lives living in wood, there is less likelihood that they’ve contracted parasites from other insects. To find them, break open a log and shake it hard and fast into a container. They’re light sensitive, so they’ll try to bury deeper into the wood once exposed.
    To prepare termites, roast them in a dry pan for a few minutes. They’ll have a bit of a woody taste to them, but the overall taste is not unpleasant.
  • Grubs: you may have seen survival experts on television chowing down on these fat insects, and you may have to do just the same in order to survive. The great thing about them is that they’re easy to find and collect, since they don’t move very fast. The downside is the sheer size and creepiness factor of a grub bursting in your mouth. The best place to find them is in rotting logs, and under rocks.
    To prepare, you can eat them raw, but if you prefer, you can cook them. Simply skewer them on a long stick and roast them over an open flame until the skin is crispy.
  • Wood lice: also called potato or pill bugs, wood lice actually aren’t bugs at all. Instead, they are a form of land crustacean, which makes them related to crab and shrimp. Many outdoorsmen even say that it has a shrimpy taste to it. The best way to collect them is to overturn rocks and leaves, as well as rotting tree logs. You can easily get a few handfuls.
    To prepare, drop them into a pot of boiling water and cook them for a while. It’s not recommended that you eat them raw, as they can carry nematodes. When they’re done, strain out the water and eat.
  • Earthworms: even little kids know how to find earthworms, so this is another insect that’s easy to catch. Dig around in some damp soil, turn over some rocks, or look under some rotting leaves for these wriggling creatures. You don’t have to worry about them trying to get away from you too quickly.
    To prepare, they can be eaten raw or cooked; the latter is recommended to eliminate the chances of parasite transmission.
  • Stinkbugs: from a name like stinkbug, you wouldn’t think that it would be on a list of insects to eat. However, they’re quite common, so you won’t have to worry about searching for them for a long time. They traverse the ground very openly during the warm summer months, and can be found under rocks and logs when it gets a bit colder.
    Some people have been known to eat them raw, but there are better ways to get over the initial stink. Soak them in water for 5 to 10 minutes, then roast them in a dry pan. Be wary that some of them may still be alive after cooking, but you can still eat them anyway. They’re said to have a hint of iodine flavour.
  • Scorpions: they’re mostly found in hot and dry locations, so you may not find any at all, depending on where you’re camping. Finding them will take a bit of skill, so they could be a last resort if you can’t find anything else. You’ll first have to find their dens, which will be low to the ground and underneath hanging rocks or logs. Dig a hole at the entrance large enough to bury a jar or a cup; when the scorpion comes out at night, it will fall right in. Simply kill it and cut off the stinger.
    To prepare, skewer it with a stick and roast over an open flame until it’s brown. It is said to taste somewhat like crab.
  • Snails and slugs: you can easily find these feasting on rotting vegetation, and even though they’re quite slow, caution should be exercised. They can east poisonous vegetation and mushrooms that make their flesh toxic. To avoid this, you can keep them in a container for a few days in order for the toxins to dissipate, as well as feed them plants that you know aren’t toxic. Then, prepare them throughly in any way you like.

While this is not a comprehensive list, it is still a great start on knowing what kind of insects that you can eat. Once you get over the overall squeamishness about eating insects in general, it is not hard to begin your adventure. It will certainly be an exciting experience to have.

snails and slugs for survival meal

When it comes to edible insects, you are going to want to take it slow. As with any new addition to your diet, ease into it and eat only what is known to be easy on the stomach, at least at first. Once your body is used to it, feel free to dig in and experience whatever you can. It can be an exciting thing, so do make the best of it.

If you have to eat insects in a survival situation, it may be much easier to handle since you have no choice. However, knowing which kinds of bugs that you can eat just might save your life. Regardless of your reasoning behind your interest in edible insects, you will be able to take advantage of the nutritional value and find something new to bring into your diet.

Grand Trunk Skeeter Beeter Pro Hammock: Like Sleeping on a Cloud

0
Grand Trunk Ultralight hammock and tree strapsIn the times when diseases came into a certain area, people slept on hammocks because they reduced the possibility of transmitting contagious diseases. Nowadays, when speaking of hammocks, it is meant of a hammock tent. They are usually covered with a mosquito net, which adds up to the safety features of the hammock itself.

The Grand Trunk Skeeter hammock is the most useful thing on the market. It is a product invented for adventurers who love the nature. It is the perfect choice for people who don’t feel too safe in a tent. Nevertheless, in order to have a positive hammock experience you have to choose the right one for you. So, sit back and weigh up the advantages and disadvantages of the hammock and decide yourself if this is something you wish or need.

The only thing between you and the outside is a mosquito net which is protecting you from bugs. The problem is, it is not very suitable for cold weather conditions for the very same reason. Even though, manufacturers are putting a great effort in improving the breathability in the tents, the hammock has a natural breathability system.

This means that it is not at all closed and you are free to breathe the outside air while sleeping. This said, the hammock is perfect for warmer climates and higher temperatures, but the tents still have no competition when the temperatures drop.

Another important difference is the ground surface, or the lack of one. When sleeping in a tent, even though it is warm outside, you should still have isolation since the ground temperature is always cold. With the hammock this problem is naturally solved. The only thing underneath you is the air, which means that you won’t need to wear an isolation pad.

If you are a camper, there is a great chance that you are an adventurer who is ready to “risk” it and head out into the nature without your “safer” option and consider trying a new way of camping. Some even say the innovative way of camping. In this buying guide, we will explain the differences in the two ways of camping and explain all there is about hammocks. We will even offer a hammock which is the best deal out on the market.

Packaging

The weight of the hammock with the net, straps and all its components is 1.8 pounds and it sizes up to 8 x 5 x 5 inches. As for the weight it supports, it is tested with 300lbs and it does hold up. The label stated capacity is 400 pounds. The packaging is small and durable, and weighs in at 2.6 pounds when shipped. It will come in a box that is 8 x 8 x 8 inches. Out of the box, you will notice the hammock is made of nylon material, which is strong.

Durability and Design

The size is for one adult person or two kids. It could also fit one adult and one small child, but it would feel a bit tight. It is pretty spacious, and it has enough place for a person to read a book without the claustrophobic feeling which is common for the hammocks. It is even spacious enough for tall people, which is very rare feature in a hammock.

There are also zippers on both sides, so you would have the possibility of opening the one side and leaving the other closed. The net is not detachable, so in case you want to use the hammock without the net, you could unzip the zippers and flip over the net so that it lies at the bottom of the hammock. The downside of this hammock is that it doesn’t come with a rain fly, so if it starts to rain you would have to find another cover.

Adults sitting in Grand Trunk Hammocks on the beach

Otherwise, users love this hammock because it is strong, allows the big and tall people to use it with ease, and it packs down so easily that it can fit right into your backpack. Do not forget, you can choose which color you want as well! Take your pick between Olive Green and Khaki, Navy and Forest, or Woodland Camo!

Ease of Use and Assembly

Not only is this hammock simple to use, but it assembles in just minutes! The package comes with all of the items you need to hang your hammock between 2 trees that are 12 to 15 feet apart. Once you get the suspension together, you can use the ropes and carabiners to attach the hammock and simply get in and enjoy! If you want to close the mosquito netting, simply zip the flap closed!
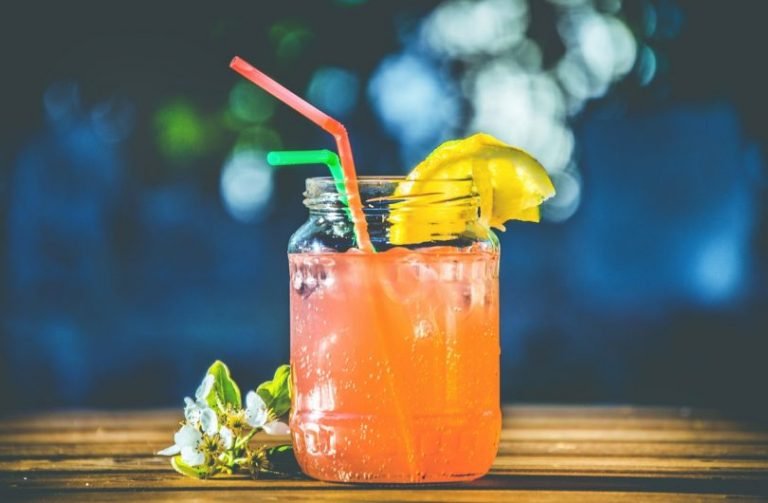
Three hammocks Grand Trunk hanging in the forest

Getting inside is a cinch, as long as you have the hammock at chair height so you can simply sit down and slide in.

Mosquito Proofing

This specific hammock provides protection from bugs like mosquitoes that can attack you and cause the Zika virus and much more as they carry viruses within them. During nice days, where there are no bugs or pests present, you can leave the mosquito net flap open and enjoy the sun.

Man fishing in the lake next to a Grand Trunk Skeeter Beeter Pro Mosquito Hammock

Most people who are campers don’t have the fear of bugs. However, there are many that do not. For this reason, the hammock provides you the perfect shelter from bugs. The fact is, most bugs come from the ground. If you avoid the touch with the ground, you have avoided most of the chances to encounter them. If you are afraid of the bugs, this would probably be the most important feature in a hammock.

Manufacturer Recommendation

The cleaning of the hammock is an important process which should be considered before buying it. With this hammock, you should first remove the carabiners and then wash it by hand with detergent. Keep in mind that this hammock is not recommended for it to be machine washed or machine dried.

A couple enojoying the day in Grand Trunk Skeeter Beeter Pro Mosquito Hammock

Another thing is, you need to be sure there are no sharp objects in your hammock with you, as this can puncture not only the nylon, but the mosquito netting, causing it to rip apart. While the materials made for this hammock are quite durable, you do have to be careful with sharper objects around the area of the hammock.

Value for the Money

While there are many hammocks on the market, some cheaper than others, this hammock comes in at a moderate price for such great quality. Many users say that it has already been worth the money spent as it is strong, lasts a long time, and is problem free!

Close-up of Grand Trunk Double Trunktech Hammock pocket

Amazon users have given this hammock 4.5 out of 5 stars because of the great value it has for the price, among other fantastic features. You can surely get a lot of use out of this hammock when the weather is lovely!