Home Blog Page 27

Eagles Nest Outfitters DoubleNest Hammock: Make Your Outdoor Adventures More Fun

0
Woman relaxing in a ENO Eagles Nest Outfitters - DoubleNest Hammock

Hammock camping is an excellent way to explore the great outdoors. These products make the camping process more exciting; it’s quite affordable, refreshing, and you can use it to camp anywhere (over boulders, rock fields, even above water). When it comes to hammock camping, people are usually concerned about their personal safety as regards to attacks by wild animals: “What if a bear attacks me?”

We want to get things straight. Camping with the hammocks is not in any way different from camping in tents. The hammocks are probably safer compared to tents because these products enable more visibility of your surroundings. The tent won’t slow the bear if it wants to attack, but the hammock will let you see the bear approach so you can formulate an escape plan ahead of time.

The rule of thumb when it comes to animal attacks is to prepare meals away from the campsite to prevent the animals from checking the camp area. Nevertheless, if you want to be safer, place all your food and snacks away from the campground.

This is the main reason why it’s advisable to camp in hammocks. These products ensure you remain elevated and far away from the ground as possible. If you want, you can even set up your hammock close to the tree tops and enjoy the company of squirrels. It’s so much fun, but hammock camping isn’t for the faint hearted or people who walk in their sleep.If you have utilized these items in the past, then you are probably aware that hammocks are rated based on their level of comfort, ease of setup, and the type of portability these items present. More particularly, the ENO Eagles Nest Outfitters hammock provides all these three essential features at a remarkably low price, giving excellent value for your money when you purchase one. If you are an outdoor enthusiast who loves to explore and enjoy Mother Nature, then this hammock is something worth having.

Hammocks are not new in the world of the outdoors, and the market is already filled with different products of this type, available in varying designs, sizes, and prices. Among these products, one of the most common names that are consistently mentioned when talking about the Eagles Nest Outfitters is the Eagles Nest Outfitters DoubleNest Hammock. This product has received outstanding reviews from various verified buyers owing to its excellent combination of price and quality.

Packaging

What we love most about the packaging is that you receive your hammock in a standard 4.5 x 6.3 x 9.2 inch package. The shipping weight is about 1.45 pounds, which is ideal when it comes to transportation However, the suspension straps are sold separately and will cost you approx. $30. They are easy to set up and work well with the hammock.

Design & Durability

This product is suitable for the enthusiast hiker or camper, or a large-sized individual looking for some extra space that can accommodate them comfortably. The ENO double nest hammock is tiny and light enough to be put into the rucksack, yet provides incredible durability in all kinds of weather conditions. Nonetheless, it is advisable not to utilize this product in snowy conditions as this can make cleaning its fabrics quite overwhelming.

Otherwise, the double hammock is easy to clean when you use warm water and soap, without having to use any strong chemical detergents. Once it has been cleaned and properly dried, the used product will appear as good as new. The ENO double nest hammock can be found in different colors in online retail shops including Amazon.

A man sitting in a Woman relaxing in a ENO Eagles Nest Outfitters - DoubleNest Hammock and watching the Ocean

Therefore, acquiring one for use in your outdoor expedition should not be a problem. When it comes to outdoor relaxation, you will be astonished at how much durability, comfort, and convenience this hammock can provide.

The hammock is designed to support up to 400 pounds and can easily fit two people. Made with a lightweight synthetic material, the eagles nest hammock is water resistant, and can be compressed easily. It’s designed to hold even during those windy days and has an attached stuff pack that you can store beer or other items that you need within an arm’s reach as you lie down.

Weight

This Eagles Nest Outfitters Hammock  is so compact and lightweight that it can even put a soft toy to shame. Its material is rolled up into a smaller factor, making it possible for you to slide it into your backpack.

Eagle Nest Outfitters pack

The best part of it is that the bag is sewn into an actual hammock, getting rid of the need to maintain an additional item. While this piece is only 2 pounds heavy, other components such as the marine grade cords, and the carabiners add some weight.

Comfort

The DoubleNest Hammock  is one of the most comfortable products to have on your outdoor tour. This item has been crafted using the 70D breathable nylon which is further supported using a triple interlocking stitch that gives the product the ability to withstand and support a body weight of up to 400 pounds.

The nylon taffeta material is smooth to the touch and offers the best comfort without compromising bare essentials of user’s requirements. The DoubleNest Hammock has a generous size since it’s designed to accommodate two individuals, and there is sufficient fabric to engulf a single user completely.

A couple relaxing in a ENO Eagles Nest Outfitters - DoubleNest Hammock and watching the Ocean

In addition to that, the double nest product offers breathability which prevents the users from soaking in their sweat. Nonetheless, you may need to be cautious when resting outside during cooler nights since the cold will cool you down, even when you are using a sleeping bag.

Therefore, it’s understandable that these items are much suited for use in the summers and in areas where there’s a lot of sunlight such as the beach. Apart from using the hammock in the wilderness, you can still use it in your backyard.

Versatility

The Eagles Nest Outfitters offers one of the best hammocks when it comes to versatility. This product provides portability as a result of its lightweight aspect. Also, the double nest hammock is large enough to accommodate two individuals and still manages to pack easily into your stuff sack.

The final compact form is of a size that is no larger than a grapefruit, making it easier for you to store it in your backpack. The extra components such as the aluminum market carabiners and the nautical grade line with snaps make it possible for you safely attach the product to boat masts, trees, and poles.

Couple relaxing in Eagles Nest Outfitters DoubleNest hammock and looking at the mountain

Irrespective of the versatile nature of the double nest hammock, it is best if don’t use the product as a sleeping pad overnight. However, casual activities such as reading a book or sitting by two are perfect. This 400lbs capacity hammock is a safe place for kids to bounce and jump in their playtime, but this has to be done with adult supervision.

Highly durable, compact, and versatile, this Eagles Nest Outfitter is excellent for hiking, traveling, back-yarding, camping, or simply relaxing during the weekends. Although the price of the double nest is a bit on the higher side, it’s still worth the value due to the features it presents.

Ease of Set-Up

The Eagle Nest Outfitters includes suspension or straps with any of their products. If you are looking to integrate your setup, you might not notice the difference. There are numerous methods and options to try; however, it can’t be installed “out of the box.”

Man looking at his camera in Eagles Nest Double Hammock

This is one of the shortest products, so finding poles or trees far enough apart should not be an issue. You will find that setting up this hammock is an easier process since it consumes less energy and time.

Unique Features

It has a high-strength, safely supports which are designed to support a maximum of 400 pounds. Additionally, the hammock is made of 70D high tenacity breathable nylon taffeta, and triple interlocking stitching that also goes a long way in enabling the support function.

The product is lightweight and easily portable which makes it big enough for two and spacious for one. With the DoubleNest, you can still manage to stuff easily into its attached compression stuff sack, compacting the hammock down to the backpack friendly size of a grapefruit.

3 adults sitting in Eagles Nest Outfitters DoubleNest hammock outside in the wild

Its quick and easy setup. This includes Aluminum Wiregate Carabiners and nautical grade line that allows you to quickly and safely secure the SingleNest to trees, poles, boat masts, or even the wall. The best part? The hammock is ideal for multiple uses, it is versatile, durable, compact, making it ideal for hiking, camping, boating, traveling, backyarding, or just relaxing.

Value for Money & Guarantee

Wondering if the hammock price is a good bargain? Well, the purchase will only set you back approx. $70 which is a good price given its cool design and versatility. There is no guarantee or warranty given with the product and therefore you can contact the manufacturers if you are considering to buy one.

Grand Trunk Nano Hammock: The Ultimate Travel Companion

0
A person relaxing in the Grand Trunk Nano Hammock

We’ve all been there, 8 hours of hiking and finally you touch base for the night. However, there is one more obstacle; setting up camp for the night! This can be a gruelling task, pitching the tent – after finding a suitable spot – and all you want to do is rest. With the Grand Trunk Nano Hammock, you no longer need to worry about carting a tent up to the summit or assembling said tent. This ultra-light hammock stuffs into a compact sack and fits in any backpack.

The Grand Trunk Nano 7 is designed to make your journey easier. It is one of the lightest and most durable hammocks on the market weighing only 7 ounces and supporting up to 300lbs. It is priced at approximately $70.This hammock isn’t the only sleep/shelter system on the market so let’s see how it compares to others on the market. This review is going to help you determine which hammock sleeping system is best for you and your budget.

PACKAGING

When you receive your Grand Trunk Nano 7, you should expect the following to come in the box:

  • The Grand Trunk Nano Hammock
  • Carry bag
  • A pair of ultra-light Mad Rock carabiners

The hammock doesn’t come with straps so you need to purchase these separately.

DESIGN AND DURABILITY

The Nano Hammock is designed from 100% Ripstop Nylon, this is an extra strong material to prevent ripping, triple stitching is also used to increase the strength of the hammock. The hammock has a recommended capacity of 300lbs, the dimensions are 9’ x 4’ and the weight is 7.3oz. An extremely lightweight and highly durable product.

The Nano 7 comes in black or gray. The quality of this hammock is top-notch; the Ripstop Nylon is the highest quality fabric and the triple stitching is of a very high standard. The Nano 7 handled stress tests very well. Furthermore, the carabiners, are excellent – very strong.

Grand Trunk Nano 7 pack on the ground

Many users of this sleep system have been overwhelmed at its continued durability, hike after a hike, mile after mile this product passes every test and doesn’t seem like faltering. It seems that only the sewn-on storage pocket begins to unravel over time. But, let’s face it you aren’t going to sleep on that! At only 9’ x 4’ this hammock is shorter and slimmer than almost all other hammocks on the market.

COMFORT

The Grand Trunk Nano 7 Hammock is rated as being extremely comfortable, not only is the material super lightweight it is also super comfy. You can easily spend 3 nights of comfortable resting in this hammock during temperatures ranging from 50 to 80 degrees Fahrenheit.

Due to the hammock being shorter than most it can be difficult for the taller person to get comfortable. The shorter dimensions, can make it difficult for some people to find an ideal comfortable sleeping position. Furthermore, because of the smaller dimensions, there is less slack in the hammock when stretched to the max for taller sleepers therefore you will have the feeling of being right on the edge, however, if you get used to that feeling you will find comfort at the end of the day.

A man in Grand Trunk Nano 7 Hammock near a river

Whether you are camping, hiking, hanging out at the lake or reading in the garden you can find relaxation using this hammock. Many users of this hammock of all heights and weight comment on the comfort of this product.

WEIGHT

Ripstop Nylon is used to make this hammock and for good reason, it’s very durable and it’s extremely lightweight, weighing in at just 7.3oz. You will not even notice this sleeping station as you hike to your favorite view point, it is the weight of a baseball and that includes the carabiners.

 Grand Trunk Ultralight Hammock hanging in the forest

The Nano 7 is not designed with excess cord at the ends of the hammock instead the wire gate carabiner is used. Thus, reducing weight and bulk. Making this sleep system incredible portable and ultra-lightweight.

PROTECTION

When exploring the great outdoors, you can never guarantee how the elements will fair. There could be bright sunshine one second and a sudden downpour the next.

So how does this hammock fair in terms of protection from the elements. Well, it provides great protection during the summer and fair weather, but if the heavens open there isn’t much between you and the lashing rain. Therefore, in light-heavy rain the protection is poor.

Grand Trunk Nano 7 Hammock in a backpack on the ground

It isn’t just about keeping dry when resting or sleeping, you need to be warm too. Without a sleeping bag or pad you can cocoon yourself to stay warm during a summer night, but if temperatures drop, you’ll certainly need a sleeping bag to keep you warm as there really isn’t much protection between you and the elements.

Sawyer Mini Water Filtration System: Clean and Healthy Water Wherever You Go

0
sawyer mini featured image

At some point, when you are involved in some outdoor expeditions where survival is a real possibility, it’s imperative to have the best water filter the market can provide. It’s a fact that in a survival condition, the need for clean, fresh, and drinkable water is crucial as this may mean the difference between life and death.

The human body requires water to function, and if you go longer without it, you will be as good as dead. There have been situations where people lasted for days without taking water, but the message remains the same – water is life.

A water filter can help you to purify water from various sources, including lakes and rivers so as to ensure you remain hydrated while on the trail. In a survival condition, equipment as simple as a filter can increase your chances of survival.

Today, we review the mini sawyer filtration system, which is just what you need for all your outdoor adventures. Be it for camping, hiking or even for emergencies, this product has been designed to suit your every need. No more worrying about drinking contaminated water or catching bacteria diseases when you are out there.

The filter will come through for you whether you are drinking from fresh or dirty water sources.The best part? It’s easy to set up, use and carry around. Keep reading to get the full details about this amazing product.

Packaging

The mini filtration system comes in nine colors, ranging from black to lighter shades like pink. You can order either a single pack, a 2-pack or a 4-pack. With only a weight of 0.26 pounds when shipping, you will have your package delivered hassle free a few days after your purchase. You can always have your package gift wrapped if you want.

Other items you will get with the package include a 16 Oz., reusable, squeeze pouch, a 7 inch drinking straw, and a cleaning syringe. The total weight of the whole system is therefore 3.98 Oz; filter 1.98 Oz., syringe 1.13 Oz., and pouch with screw cap 0.87 Oz.

sawyer mini water filter in nature

The system doesn’t come with fill adapters. You will have to buy these items separately because they will come in handy. The Fast Fill Adapters will cost you approx. $8.

Design & Durability

This filtration system has been designed for total convenience while you are out travelling, hiking, camping or just for emergency purposes.

It’s made out of lightweight material and weighs 2 ounces, which means it fits in your backpack perfectly. The best part? It has undergone the highest level of filtration which speaks volumes about the performance. And that’s not all. The filtration system is super small and convenient such that it can fit just effortlessly in the palm of your hands.

The product is impeccably designed to enable you sip water from a container or even from a water source easily. If you have a hydration pack, you can also attach it inline and use it without any complications.

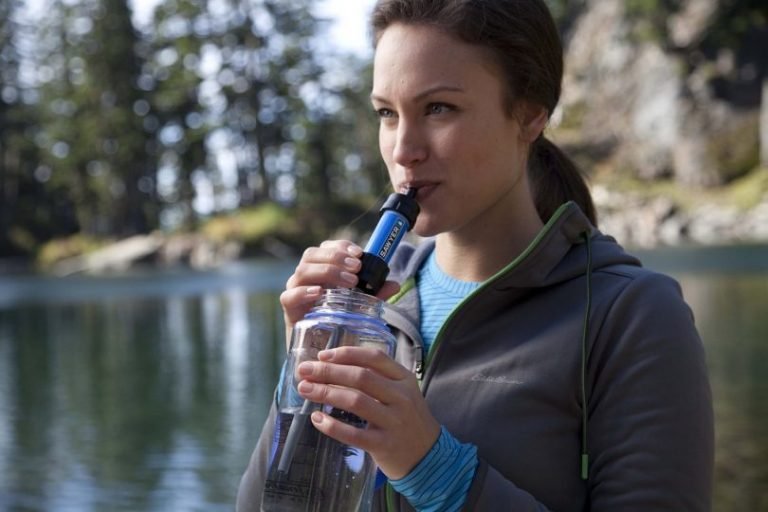
girl drinking from sawyer mini water filter

The Sawyer Mini boasts of a life of a hundred thousand gallons (this is 378,541 liters) so you are confident that your equipment can last for a long time without losing its efficacy.

Size and Weight

At only two ounces and just 8*3*4 inches, the Sawyer Mini Water Filtration equipment is a no-brainer for a person looking to travel light. Before even thinking about its potential drawbacks, the weight and size alone are aspects that justify its inclusion in your backpack

Versatility

Apart from being utilized in a similar manner as a Sawyer Squeeze (filtering from a Sawyer bag into a water containment device), this product lends itself to all kinds of filtering. If you want to drink directly from a store-bought bottle, the Sawyer Mini will attach onto most devices and save you the amount of time you would have used to filter the water.

If you do not want to think about filtration, you can use the Sawyer Mini inline with your bladder. This product also allows you to drink straight from a lake of a river without having to worry about water purification as the equipment takes care of that part.

Effectiveness/Reliability

With the 0.1-micron pore size in the hollow membrane filter, the Sawyer Mini is effective against bacteria, protozoa, and the Cryptosporidium although it doesn’t treat for viruses.

Since this equipment does not utilize batteries and lacks moving parts, it’s highly unlikely that the Sawyer Mini will break or break down when you are in the wilderness where it’s needed the most. If you are an outdoor enthusiast, you will find this equipment very reliable.

However, you will notice that after a few days of utilizing the filter in treating your water as well as your friend’s it begins to get much difficult to squeeze the water out of the filter. As mentioned earlier, when this happens, you have no option but to backflush and this can be done using an included syringe. It’s an easy process and only takes a few minutes.

backflush mini sawyer filter

This process is less involving than with pump filters. The syringe weighs about an ounce and it’s advisable always to have it with you whenever you are in the wilderness for an extended period. Although the included soft bottle is relatively long lasting, you may need to replace it after a few long trips.

Always be keen not to ensure your filter unit freezes as this destroys the hollow fiber membrane. You can take it to your tent at night, to ensure such a case does not occur.

Ease of use

In addition to its simplistic nature, the Sawyer Mini can be used in different ways. You can use this filter to drink water directly from the source. This is achievable if you have an extra straw attachment which is included in the filter package. However, this has a downside in that the straw could get lost since it’s a separate piece, but it’s also advantageous in that having a separate piece allows the filter to be smaller and lighter.

girl drinking with sawyer mini filter with bottle

The Sawyer Mini can be screwed onto any small-mouthed bottle making it possible for you to drink directly as long as you squeeze the bottle. A single 16 oz. soft bottle is included with the filter, but the Sawyer Mini can also work with other small bottles. This is handy as it makes it possible for you to carry water between sources.

Unique Features

Has a high performance filter weighing just 2 oz. which can fit faultlessly in the palm of your hand, making it convenient for use and portable. The mini Sawyer is fitted with absolute hollow fiber membrane inline filter that has 0.1 microns, which make it impossible for harmful bacteria, protozoa or cysts to pass through and contaminate your water.

guy drking from backpack

It can easily remove 7 log (99.99999%) bacteria and 6 log (99.9999%) protozoa, which even exceeds US EPA standards. The product is designed to attach perfectly to your drinking pouch, standard disposable bottles, hydration packs and has a straw you can sue to drink directly from your water source. You won’t have to use any adapters.

The system can filter up to 100.000 gallons of water therefore you will be sorted all throughout your camping trip.

Value for Money & Guarantee

The particular mini sawyer comes as a single pack and will only cost you approx. $20 which won’t break your bank. Keep in mind that if you want the hydration packs and the water pouches, you have to buy them separately.

girl pouring water from sawyer mini

If you need more than one pack, and are looking for the best value for your money, just buy 4 individual systems as opposed to one system with a 4-pack. This will cost you less and you will end up saving money, you can use to purchase the other items. Unless of course you are going for 4 different colors and the price is no factor.

Currently, there is no guarantee or warranty given with the purchase on Amazon. When it’s time to make the purchase, please contact the manufacturers to inquire on whether they offer any refunds in case you are not satisfied with your product.

Shewee Review: A Look into the Shewee Extreme Female Urination Device

0
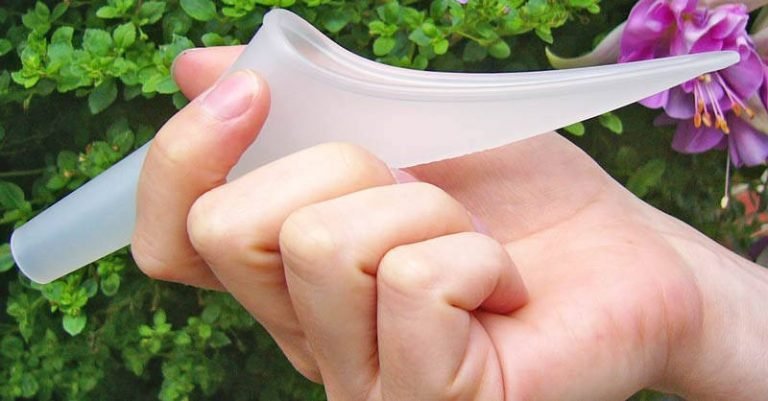
shewee extreme hold in hend

With the release of many female urination devices on the market, the trend in using these products has soared, for many reasons. Females all over the world have a reason to use them now for hiking, running, traveling, and even those in the Armed Forces.

The Shewee Extreme – Purple is a female urination device that allows you to go anywhere when you feel the urge. With various brands on the market, we will discuss why the Shewee Extreme is a great product. The Shewee Extreme is perfect for those who need to take a pee but have no nearby facilities to use.

Those who camp, hike, and backpack a lot know the struggle of having to urinate and not having a toilet to use properly. The Shewee helps you to urinate discreetly and get back to your activities, whether you are on a mountain or at a campsite. There are many reasons why the Shewee Extreme could be the perfect outdoor accessory for you.

Shewee Extreme comprises of an extension pipe for easier aim or when putting on bulky clothing in bad weather conditions and so that all possibilities are taken care of. The Shewee Extreme is sold in a specifically designed case for the user to be able to store the device easily.

The convenient urinating device for females lets women urinate while standing and without taking out their clothes. This device is perfect for camping, hiking, walking, skiing, traffic jams, dirty public toilets and so much more. So, there is no more uncomfortable squatting or worrying who might see or might not see your nakedness.

Before choosing a device you use to urinate, you need to decide what you want to use it for, either your own needs or for something else. Will you go camping in the summer; will you go backpacking on a mountain; or are you planning a winter hiking trip? This is important because the final choice you make will highly depend on these factors.

According to these factors, you will be directed to a urinating device which is made from specific materials. For instance, if you are planning on spending the night on the road when traveling, you should probably decide on a urinating device because you don’t want to go too far at night just to pee.

woman peeing standing

The heavier the device is, the more volume it takes. The more lightweight and natural it is, the more expensive it is. These are just a few of the factors you should consider before buying a urinating device.

In this review, we will discuss the features, both good and bad, about this product, and give you a full analysis of the Shewee Extreme in order to help you decide if this product is going to be with you on your next backpacking trip. It is a highly loved product, and you will see why very soon!

Review

Packaging

The Shewee Extreme comes with an extension pipe and a storage case. The pipe is to protect the user from spilling the urine on herself while the storage case as the name implies is used for storing the device.

white shewee with accesories

If you purchase the Shewee Extreme and it does not come with these extra products you should return it immediately where you purchased it. The pipe also offers comfort while peeing so you don’t inconvenient yourself while peeing.

Design and Durability

The Shewee Extreme is designed with the female in mind. There is a piece that features a wide open area in which to urinate in and will come out of the end of the tube. There is also a connector tube to allow better range. This means you will not have to worry about dripping, or spilling when you are using the product outdoors.

You can keep your clothing free of urine and your shoes, which are the things that are most likely to get wet when you are urinating outdoors without a toilet or a female urination device. The urination device comes with a handy case in which to store your extender piece and urination cup.

This allows for easy storage without a mess that would otherwise get on your clothing or other gear. The piece can be easily washed later with soap and water. This device should not be later washed in a dishwasher, as some can. You do not want to damage your product.

shewee full package

It is made from Polypropylene, which is recyclable and hard to break. You can also find this product in several colors including Purple, Pink, Blue, and Black. The price of each color might differ though, but just a meager amount approximately $1.

Other Shewee products are similar in design, and light in weight. Shewee makes products that fit a range of women so they can relieve themselves easily. Some come with an extender tube, some do not. Of course, some come with a storage case, while others need one to be purchased separately.

The Shewee Extreme is very durable at the same time. The material used in producing this device (polypropylene) makes it strong and very durable.

Weight

This product weighs about 17 grams, making it light in weight and easy to put in your backpack discreetly. It comes with a container to put the urination device in so there is no mess. You will have no issue fitting this small item in your pack.

shewee extereme on bed

Many hikers and backpackers worry about gear weight as they have to store food, water, clothing and a sleeping bag usually. There are no worries about the added weight with this device. So, you don’t have to worry about the weight of the device because it is absolutely lightweight.

Size

The item dimensions for the Shewee are 1.46 x 5.98 x 11.22 inches, which is small and compact enough for any gear. Once you connect the extension pipe, the item will be longer in size, but everything is broken down and stored in the storage case with no problem, making it extremely portable.

woman surprized by shewee

Users love that they can grab it and go without having to worry about a bulking product fitting with their gear.

Portability

The Shewee extreme is very easy to carry and very mobile due to its portability. The device is very lightweight so you don’t even have to worry about the weight at all. The Shewee Extreme should not be a problem to carry when traveling, hiking, and walking or other outdoor activities you might be interested in because it is extremely lightweight.

Value for Money and Guarantee

You will definitely get value for your money due to the usefulness of the device. The Shewee Extreme can be used in different situations, for example, if you are in traffic and you really have to pee you as a female cannot pee on the road where everyone is watching right?

shewee full package

So, definitely, you will need a device like the Shewee Extreme to pee comfortably in traffic or any other situation. You can use the Shewee Extreme for your outdoor activities too, like hiking, mountaineering, traveling and so on. The device can also be used for sports activities like cycling and also can be used when skiing.

The device is therefore very valuable and will last for a long time. If you purchase the Shewee Extreme and it does not come with the case for storing it or extendable pipe, you should return the device immediately as Shewee is not liable for any missing part or parts because the Shewee always comes with the storage case and the extension pipe.

So, if you purchase the Shewee Extreme and its missing a certain part that should have come together with it, you can email us and tell us what is missing and where you bought the product to avoid future occurrences

Similar Models or Competitors

The best thing for anyone who wants to purchase any product is to compare the products with other products similar to it so as to know the best one to choose from ranging from different specifications. There are many female urination devices in the market today, but only a few stands out.

shewee competitor urinal

These few that stand out though are similar at the same time very different from each other. Below are the products similar to the Shewee Extreme, but with little differences which will help you decide which product suits you best.

Sawyer Water Filter Review: Your Personal Bottle with Filter

0
Sawyer Personal Water Bottle with Filter reviewWhen you’re out camping or hiking, there are many chances that the water you have access to won’t be as pure as you want it to be. That can also be the case when you’re traveling or even in emergency situations. Untreated water can be contaminated with organisms (bacteria and protozoa) or chemicals, which is why we need water filters and why we created this Sawyer water filter review. There are other purification options available like boiling or chemical treatment tablets, but using a water filter is the fastest option.

A water purifier is often the most overlooked tools in a survival kit because many people don’t realize how quickly dehydration can occur. Carrying a personal water filter on outdoor adventure trips or during travel is the best way to ensure you always have access to clean drinking water.

Man with Sawyer Personal Water Bottle with Filter

The Sawyer Personal Water Bottle with Filter is the perfect water filtration system for all of your outdoor needs including hiking, backpacking, camping, and emergency preparedness.

Weighing in at just 5.5 ounces, you can grant yourself access to clean drinking water at all times without the burden of unnecessary added weight. This water bottle is easy to maintain in the field, removing 99.99999% of all bacteria, including salmonella, cholera, and E.coli, and removing 99.99999% of all protozoa like giardia and cryptosporidium.

Decide for yourself whether the Sawyer personal water bottle filter is better than the alternatives with this Sawyer water filter review.

Attractive Features:

  • Meets Environment Protection Agency’s (EPA) recommended removal rates
  • BPA free water bottle
  • Field maintainable with backwash syringe to ensure flowing water
  • Cap designed to fit most standard wide-mouth water bottles
  • Comes with 2 replacement drinking straws
  • Durable and easy to use

Features to Consider When Looking for A Portable Water Filter

  • Ease of Use: It’s important to use a water filter that doesn’t require any special knowledge if you don’t have much experience with using filters or spending more than a couple of hours outside.
  • Flow Rate: You want your portable water filter to have a high flow rate so that you can access drinking water quickly. An added benefit of a personal water filter in the form of a water bottle is that you can simply fill the bottle, then sip on the straw immediately and the water will be filtered on its way to your mouth.
  • Can you drink straight from the source?: It’s important to know how quickly your water will be safe to drink when using a purification method. You want a water filter that allows you to drink straight from the contaminated water source by filling a bottle and drinking from a filtered straw right away.
  • Durability: Your portable water filter should be durable in all weather conditions and be long lasting. Consider how many gallons of drinking water a filter is good for and what maintenance is required to upkeep a good flow rate.

Sawyer Water Filter Review

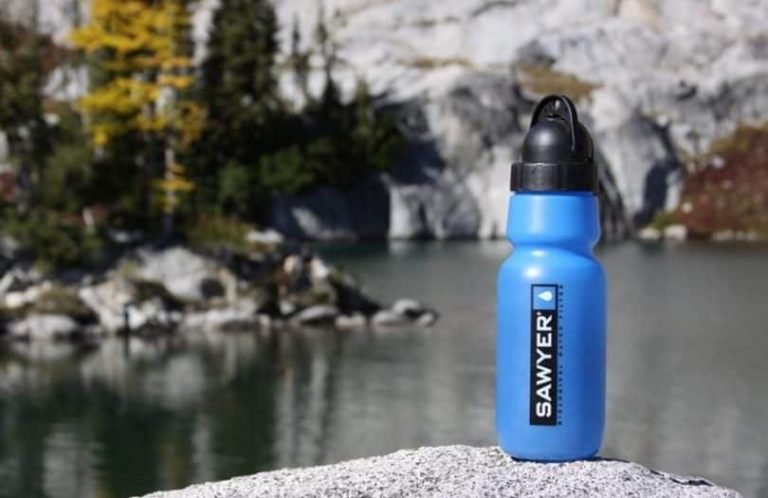
The Sawyer Personal Water Bottle with Filter is a 34 ounce, BPA free water bottle. Priced around $50 USD, this lightweight water bottle gives you access to fresh, clean water no matter where you are.

Durable in any conditions, the Sawyer personal water bottle provides you with a flip-top cap designed to fit most standard wide-mouth water bottles, an attached water filter, 2 replacement drinking straws, a cleaning syringe, cleaning and maintenance instructions, and a lifetime warranty.

Capacity: 34 ounces

Color: Blue

Bottle Dimensions: 12.75 x 4 x 4 inches

Bottle Weight: 5.5 ounces

Uses: Camping, Hiking, Emergency Preparedness

Cost: $50 USD

Whether you are hiking or camping without access to running water or backpacking through a foreign country where it is unsafe to drink water from the tap, you can use the Sawyer personal water bottle to filter out bacteria and protozoa found in unfiltered water sources.

Appropriate for a wide range of uses and activities, the Sawyer personal water bottle ensures that you have access to clean drinking water anywhere in the world. This product is aimed at campers and hikers who need fresh drinking water on the go.

Perfect for areas where water is plentiful, you won’t need to carry a lot of water between sources if you are hiking with a Sawyer water filter. It’s a necessary item for anyone who spends time outdoors, especially if you’ll be spending a few days or more outside.

Product specifications:

  • 34-ounce BPA free water bottle with 0.1 Micron absolute hollow fiber membrane inline filter
  • Removes 99.99999% of all bacteria, such as salmonella, cholera and E.coli; removes 99.9999% of all protozoa, such as giardia and cryptosporidium
  • Designed to have a high flow rate for easy access to fresh, clean water; easily field maintainable
  • Includes 63mm cap, backwash syringe, and 2 replacement strawsThe cap is leak proof to ensure water won’t be spilled in your backpack when you’re hiking, preventing a mess or leaving you without water when you need it. You can feel safe outdoors with a Sawyer water bottle in your backpack to protect you from dehydration and unsafe drinking water.

    The Sawyer personal water filter is remarkably easy to use compared to other methods of filtering water for safe drinking. Water is cleaned immediately by drinking or squeezing it through the filter. Other methods of cleansing water usually include boiling or using iodine tablets which must sit for some time before the water is safe for drinking, but you can drink straight from the Sawyer personal water bottle as soon as you’ve filled it.

    By cleaning the water without chemicals, the Sawyer filter leaves you with fresh tasting water, unlike the residual chemical tastes that can be left behind from other purification methods like iodine tablets.

    To use the Sawyer personal water filter, simply remove the cap, fill your water bottle, then place the cap back on and drink through the straw for clean filtered drinking water. This water filter can treat up to a million gallons of water without needing replacement, a lifetime of water treatment.

    It must still be back-flushed with the cleaning syringe from time to time, but overall this water filtration system requires very little maintenance over its lifetime.

    What are buyers saying?

    Most users agree that the Sawyer personal water bottle is easy to use and provides fresh-tasting water. For outdoor types who enjoy hiking, camping, and backpacking, this water bottle allows them to drink directly from natural water sources immediately without having to worry about illness caused by bacteria.

    Buyers are impressed by how lightweight the Sawyer water bottle is and how durable and long lasting their water bottles are after years of use.

    Users who have bought Sawyer’s personal filter water bottle for use outside the country have also been satisfied with their purchase. One buyer purchased it for a trip to Peru and filled the water bottle at any water source without worrying about illness, saving a lot of money on having to buy bottled water.

    Sawyer Personal Water Bottle

    One complaint was that the water bottle is too large for some backpack pockets, but since the cap fits most standard water bottles, it can easily be moved to a more appropriate sized water bottle.

    Other reviewers noted that the Sawyer water filter needs to be backflushed regularly, especially if you’re using it daily or when it becomes difficult to suck water through the straw. Make sure to carry the backwash syringe with you if you are hiking and camping for a few days at a time. Reviewers also noted that the Sawyer water bottle can be unreliable if frozen or dropped, so be careful in extreme weather conditions and take care of your product.

    Another user who is a frequent hiker commented on how lightweight the water bottle is. For most experienced hikers, water accounts for most of the weight in their packs, but the Sawyer water bottle eliminates the extra weight that often comes with other water bottle brands who sell heavier bottles for the same volume.

    The same buyer noted how the Sawyer water bottle allowed them to drink from any natural water source while hiking without having to worry about ingesting harmful bacteria, making it a great product for solo hikers or travelers.

    Pros:

    • Lightweight
    • High flow rate
    • Lifetime warranty
    • Filters out 99.99999% of bacteria and protozoa
    • Removal rate of 0.1 Micron absolute
    • Durable

    Cons:

    • Does not treat for viruses
    • Difficult to collect water in the bottle without a free-flowing source
    • Can’t treat large volumes of water

    There are several similar products on the market, including LifeStraw, RISEPRO’s Portable Emergency Water Filter, and Survivor Filter. All three products work similarly and offer cheaper products, but don’t have a lifetime warranty and their filters must be replaced every so often.

    Users who compared Sawyer’s personal water filter to alternative products reported that they preferred Sawyer’s product because it is longer lasting, lightweight, and the filter can be used on other standard sized water bottles.

    Lifestraw water bottle

    For budget shoppers or those who are looking for a water filter for one-time use on a special vacation might prefer an alternate product to save money. For example, the Lifestraw is cheaper than Sawyer products and is one of the most popular personal water bottle filters available because it’s inexpensive.

    However, the Lifestraw is only good for filtering 264 gallons of water before it needs to be replaced, compared to the Sawyer Personal Water Bottle Filter which is good for 100,000 gallons. The Sawyer water bottle has a better quality to price ratio for anyone who goes hiking, camping, or traveling on a regular basis.


LifeStraw Personal Water Filter: The Best Alternative Filter System Over Chemicals

0
LifeStraw Personal Water Filter review

Imagine taking those long walks in your favorite countryside with heavy bottles of fresh water that could hurt your back. What if those heavy bottles get depleted and a refill is needed? Having insufficient water means you will suffer from dehydration, or you will be tempted to drink unhealthy water.

That would be certainly inconvenient and could also result in a bad hiking, camping or mountain biking experience. The LifeStraw Personal Water Filter has come to the rescue of millions of outdoor enthusiasts over the world, for which it was particularly designed.

From 2005 this water filter has played a huge role in replacing not only the heavy bottles of water, but chemicals such as iodine and chlorine which were used primarily for water purification prior to consumption. Now an affordable EPA approved filter has hit the market.

All outdoor enthusiasts can now access fresh water in close proximity to their favorite destinations. It’s time to cease worrying about dehydration or the health risks of drinking from flowing water supplies.

Product specifications:

  • Award-winning LifeStraw has been used by millions since 2005
  • Removes minimum 99.9999% of waterborne bacteria (>LOG 6 reduction)
  • Removes minimum 99.9% of waterborne protozoan parasites (>LOG 3 reduction)
  • Filters up to 1000 liters of contaminated water WITHOUT iodine, chlorine, or other chemicals
  • Comes in a sealed bag
  • This personal water filter can easily let users drink water in the event of contamination during floods or any water stream frequented by wildlife. Humanitarian aid organizations have used the product for such unfortunate events wherein the floods have contaminated water in countries such as Pakistan and Haiti.

    The organizations have benefited from this product in rescuing the destitute from heavily polluted water. The features of this water filter coupled with its functionality have led to it being the preferred filter over others.

    What Makes this Personal Water Filter Special?

    It comes equipped with a range of features that are geared to filer virtually 99.9999% of pollutants from water. All the known water pollutants, such as bacteria, are trapped by the hollow fiber membrane featured in this product.

    LifeStraw Personal Water Filter using

    It is solely a mechanical functionality with no chemicals used to remove impurities. Thus the user is guaranteed fresh water irrespective of how contaminated it can be. Check out the important features bulleted below:

    • It can remove a minimum of 99.9999% of waterborne bacteria
    • It can remove 99.9% of protozoan parasites
    • The product filters 0.2 microns
    • It can filter a maximum of 1000 liters of water
    • It is independent of water-purifying chemicals such as chlorine and iodine, to mention a few.
    • It has a hollow fiber membrane that traps contaminants
    • It exceeds EPA standards as proven in independent water filter testing
    • It weighs 55 grams, which makes it lighter
    • It has no batteries to change so users need not worry about the depletion of power
    • The product is manufactured to last longer: it has no moveable parts that can wear out

    How would one describe this personal water filter?

    For outdoor enthusiasts such as campers, bikers and hikers, the size and the weight of the water filter matters. The convenience of purifying water with 100% removal of micro-organisms is also worth-considering. LifeStraw Personal Water Filter weighs only 2oz which makes it lighter to carry for long distances. It has a high flow rate with maximum 1000 liters of water to be filtered prior to its lifespan end.

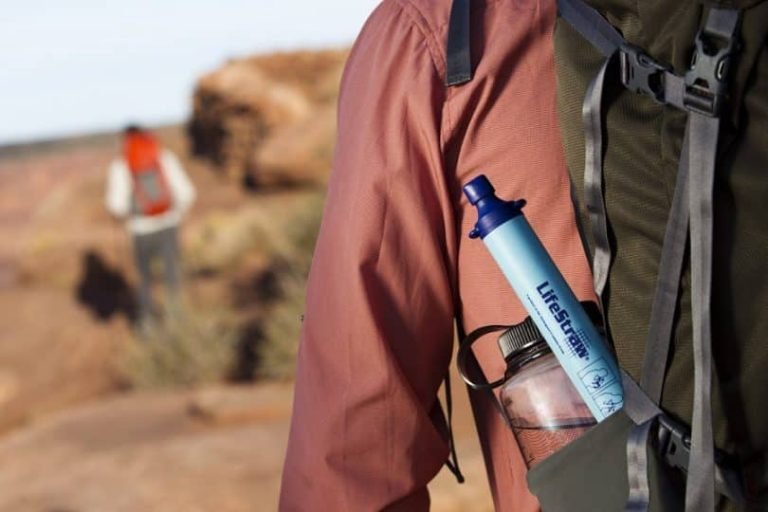
    LifeStraw in the hand

    Considering the physical appearance, this personal water filter has two ends. There is the mouthpiece and the other end, which is inserted into the water for the sucking purposes. The mouthpiece has a cap, which can be closed when not in use.

    The inside of the filter features a hollow fiber membrane that predominantly filters bacteria and other types of waterborne parasites with an accuracy of over 99.9999%. The membrane’s functions help eliminate the need of chemicals in purifying water. It effectively removes pollutants mechanically not chemically.

    How does this filter work?

    When inserted into water, the water enters through the hole underneath the filter. When the user sucks the straw, the waterborne pathogens are being trapped automatically by the membrane, thus allowing only fresh water free of any contaminant. The user will then sip healthy water through the mouthpiece at the top. Dirty water can be expelled by blowing through the straw to help prevent it from clogging.

    LifeStraw in action

    The absence of chemicals for purification enables the filter to retain the taste of water. All pollutants and their smell will be filtered completely by the hollow fiber membrane. Gone is the era of chemicals and their prominence in water purification.

    How to use the filter?

    No scientific experience required to be able to utilize the filter. The user can simply insert in any water supply alongside the road. The mouthpiece is then used to draw water from the supplier without fear of jeopardizing one’s health with bacteria.

    After use, make sure you blow the membrane to expel dirty water. By doing this you will also be extending the lifespan of the filter. This filter is more like a normal straw used to suck drinks with. The design was inspired by the need to end dehydration suffered in outdoor activities.

    Who can use the filter?

    Everyone is suited to use this filter. Over a few years that it came into the market, many non-governmental organizations engaging in humanitarian aids in flooded areas have been issuing this product to the destitute.

    They found it more convenient compared to conventional chemicals often used in purification processes. All members of the population were provided with personal filters to eliminate life-threatening contaminants from their water streams. This has helped prevent many waterborne diseases that have prevailed in the past, in the events of natural floods contaminating main water sources of people.

    Who can use the filter

    Having pre-filtered water in bottles is insufficient still. The LifeStraw Personal Water Filter that is mobile brings more convenience to drinking fresh water limitlessly. As emphasized in the features, the product filters over 99.9999% of pathogens from water, thus leaving the traveler with pure water. Of particular importance is the same taste kept by the filter because of the absence of chemicals.

    In households this personal water filter can also be used, particularly sucking water from containers. It appears to be practically impossible to refill containers with this straw. However, household members can completely eliminate the use of chemicals or hot water in purification. The advantage of this personal filter is more likely the price tag. It is usually priced below $20

    Are there any worthy alternatives to the product?

    Many people are relying on conventional purification methods such as chemicals in purifying water. Hikers, bikers and campers in particular, use to carry big bottles of water for survival. Considering the chemicals, they can be inconvenient with their taste after treatment.

    Alternatives to the LifeStraw personal filter

    These enthusiasts often come across flowing rivers and lakes which are practically impossible to purify. On the other hand, having bottles filled with water is also a burden for long distance walks. The travelers will have to refill with contaminated water in the absence of a personal water filter or alternatively have to travel with many bottles.

    In contrast, a personal water filter comes with light weight for ease of travel. It eliminates the hassles of using chemicals or carrying adequately filled bottles. It is designed to filter virtually 100% of health-threatening pollutants found in any water stream. Whether we are talking about dams, rivers or lakes, the filter is suited for all water supplies. As thus it outsmarts the conventional filtration methods with its convenience.

    What is the importance of having this personal water filter?

    The importance of owning a personal water filter cannot be overemphasized for people that are more concerned with their health when traversing the countryside. It is inescapable that at some stage, amid countryside walks, you will get dehydrated and therefore seek water in your vicinity. But then your health cannot be compromised by unhealthy water seen in flowing rivers.

    This therefore necessitates the need to own a personal water filter to help filter impurities for fresh water consumption.

    Imagine getting ill after hiking or camping adventures because of unhealthy water. This water filter plays a dispensable role in preventing waterborne diseases. These diseases can include diarrhea which can be critical mostly to children if you had gone out with them.

    The filter is affordable so it can be bought for each member of the family upon embarking on journeys. It is such an inexplicable pleasure as a parent knowing that your family’s health is secured from waterborne diseases because of precautionary water filtering solutions.

    Importance of having LifeStraw personal water filter

    Many countries have been hit by major earthquakes. These include Haiti and Pakistan. Had it not been the prevalence of this product, organizations involved in humanitarian could have spent lots of money in bringing pre-purified water to thousands of stranded people.

    The personal water filters made it possible for people to drink water in their close proximity for survival. We know that floods can critically contaminate any water supply which then puts residents in dire need.

    In households, these filters also play a major role. Not only can users suck water from rivers or dams. Household members can suck water from containers using these straws to help curb pollutants. This in turn helps families to save a lot. The straw can be used by many people, although it is recommended for each member to own one.

    What are other users saying with this filter?

    As seen predominantly on reputable sites’ reviews, more users are pleased with the emergence of this personal water filter. They consider it a complete substitution to iodine, chlorine and other chemicals frequently used in purification. Travelers are more pleased with the convenience of the product in that it eliminates the use of bottles when travelling.

    With a guaranteed removal of over 99.9% of waterborne parasites such as e-coli, salmonella, giardia and Cryptosporidium, more users prefer the mobile personal filter over traditional methods of having to boil water before drinking or pouring chemicals in containers. Also noteworthy is the affordability of the product compared to purchasing chemicals for purification.

    Is this filter EPA approved?

    EPA stands for the Environmental Protection Agency of the US whose mission is to safeguard the health of citizens. It therefore approves water filters to ensure that they meet or surpass its standards. The Lifestraw filter has been approved by the agency. It is said to have exceeded the standards required for a water filter.

    LifeStraw Personal Water Filter EPA approved

    How does this approval matter to you? Well, it confirms the effectiveness of the filter in removing 100% of waterborne parasites and bacteria. As a user you can rest assured that your health is not on the knife’s edge because the EPA safeguards it.

    Pros

    As aforementioned in the review, it is evident that this personal water filter commands more advantages than the disadvantages. Mentioned below are its popular pros:

    • It is lightweight: travelers can find it convenient to walk with it to any destination instead of carrying many bottles filled with pre-filtered water.
    • It removes life-threatening bacteria: these include e-coli, giardia, salmonella and Cryptosporidium.
    • It can filter up to 1000 liters: this practically means the filter can last about a year before it can be replaced. No replaceable parts so a new one has to be purchased.
    • It has an accuracy of over 99.9 % in removing parasites: its hollow fiber membrane plays this integral part in ensuring that no parasites pass through to the mouthpiece.
    • It is EPA approved: independent tests were conducted and it was found it surpasses the standards expected from water filters.
    • It retains the taste of water: the same cannot be said with chemicals used in purifying water.
    • It uses no iodine, chlorine or any other water purifying chemicals: the filtration is alternatively done mechanically.
    • It is mobile and multifunctional: can be used to suck water from any water storage or supplier.
    • It is affordable: conventional water filters are relatively expensive, which then prompt other users to expose themselves to unclean water due to unaffordable prices.

    Cons

    Any product can be widely praised for its excellence in designated functions, but there will still be some dissatisfaction from some customers.

    A great product is the one with minimal cons compared to the pros. With this personal water filter, the cons were found to be minimal and cannot divert hikers’ or campers’ decisions in purchasing the product. Some are mentioned below:

    • It takes time to suck water: the user has to put efforts, although, for a few seconds or minutes to sip
    • It is impractical to refill containers with clean water using the straw: it is a straw and thus users will find it difficult to suck water in a bid to refill a 10 liter container.
    • The lower end that gets water in, may not fit any bottle: thin bottle openings may be impossible to use with this water filter.
    • Some users complain that it doesn’t filter salt: salt is however not life-threatening compared to bacteria as they are predominantly filtered.

    Important Tips on Using this Personal Water Filter

    For any product, users need to exercise good user practice to help preserve it and to help optimize the functionality. Below are some tips that are given to users regarding the use of this personal water filter:

    • Blow through the straw to expel dirty water after use
    • The membrane may be clogged by pollutants after use – therefore rinse the filter to help preserve it.
    • Although you can directly insert the filter into the river or lake or dam, it is reckoned to use a container and then suck from it. This minimizes the danger of being exposed to dangerous wildlife.
    • It is recommended to perform rigorous tests on the filter after 6 months of use to verify continued efficacy of water purification. In line with the maximum 1000 liters that the product can filter, the user can keep a record of this by using containers. After the 1000 liters have been reached, it is expected to replace it.

    In conclusion, LifeStraw Personal Water Filter outsmarts conventional filtration methods that employ the use of chemicals. It is relatively affordable to use this filter than opting for chemicals. Hikers, campers, travelers, or any other enthusiast can save a lot by using this mobile personal filter.

    Since its inception, the product has been a regular recipient of awards that include Time Magazine Invention of the Year Award. In addition to that it has the EPA approval. To the customers, this proves the level of excellence in water filtration, and travelers are not compelled to travel with heavy bottles of water anymore.

How to Make a Bow Drill: Doing It the Right Way

0
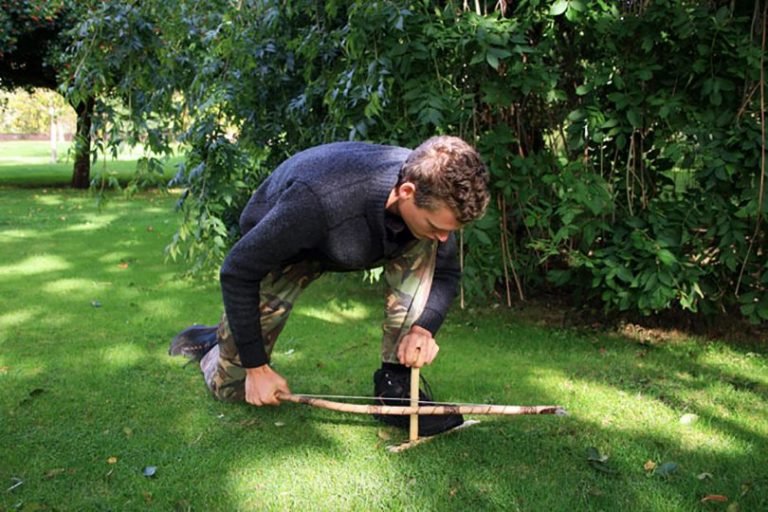
diy bow drill

When you are first starting to learn how to make a bow drill, you need to create some conditions and your bow drill makes such, that the shot of acquiring a coal is the best. If you don’t have a clue about the sentiment a coal beginning to be discovered, then you may not have the capacity to overcome the most difficult situations.

For this, it is good to select the “easiest woods” and do some practice utilizing the set in a protected area, for example, a basement or garage. Discussed in this article are the necessary steps you need to start making a bow drill. So read on and learn!

Selection of Wood

Even if you are yet to get a coal, it is ideal to obtain the wood from the Timberland yourself. Getting it from a wood yard is simple, but you learn practically nothing. Likewise, getting wood from common sources guarantees you don’t incidentally get weight-treated wood, which is usually highly toxic when caused to smolder.

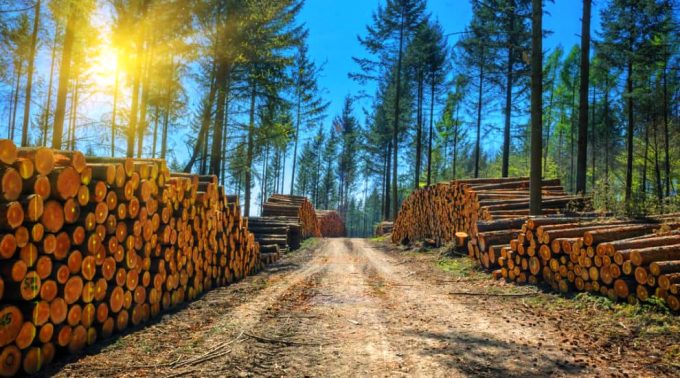
wood from timberland

Here are examples of some great woods for practicing with (and useful for real survival usage as well):

  • Eastern White Cedar
  • Most Willows
  • Basswood
  • Spruces
  • Stag-horn Sumac
  • Balsam Fir
  • Aspens and Poplars

There are still many other ones. These are focused more on the northeastern backwoods communities of North America. A great tree identification book will enable you to know potential fire-effective woods. Also, ensure you make it a normal practice to carve and feel diverse woods when you are in the forest.

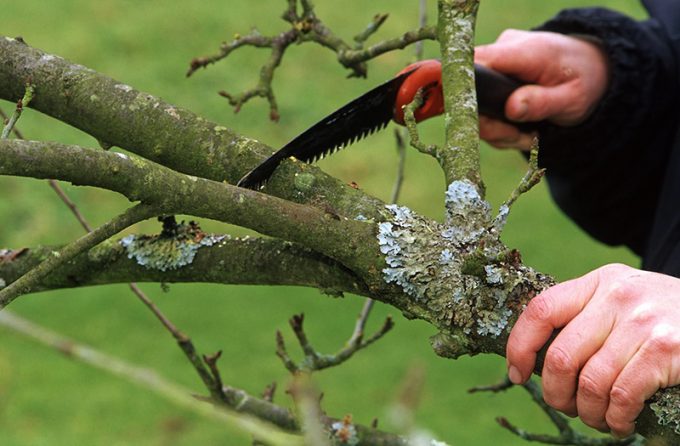
A decent approach to get great wood for practicing with is to look for a recently fallen trunk or branch that is relatively straight and has the thickness of a wrist or greater than that. Then cut the wood with a saw. It is ideal if the wood has recently tumbled off the tree.

guy sawing a branch

The willow and aspen woods usually sever limbs, particularly in ice storms.  If you cannot find any green wood, then make use of strong dry wood. Cedar is always found in pretty great condition just like standing skeletons. Maintain a strategic distance from areas of wood with plenty knots and wood that has cracks in it.

When you have discovered a great section of wood, then split it into equal parts with a knife or axe to make it dry. A branch that has the diameter of a fist and several feet long is a decent size to practice with. You need to have plenty materials to practice with as you burn through spindles and boards.

Give the wood a chance to dry for about seven days in the sun if conceivable, longer in the shade.  And after drying your wood, then you can start making your set. In the next section of this article, we are going to show you how you can successfully make your set.

Making The Bow-Drill Set

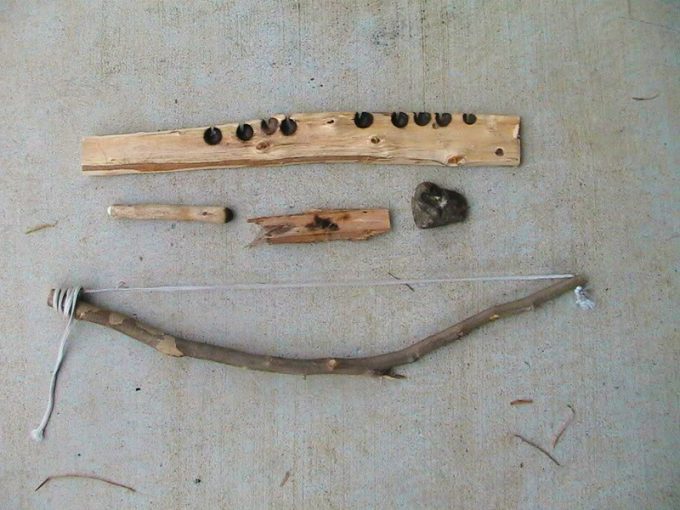
There are five sections when it comes to the bow-drill set. These are the bow, the spindle/drill, the string, the board, and lastly, the handhold. The drill turns against the board on one side and is sustained vertically by the handhold part at the flip side. The drill is then spun by the string and bow.

5 elements of bow drill

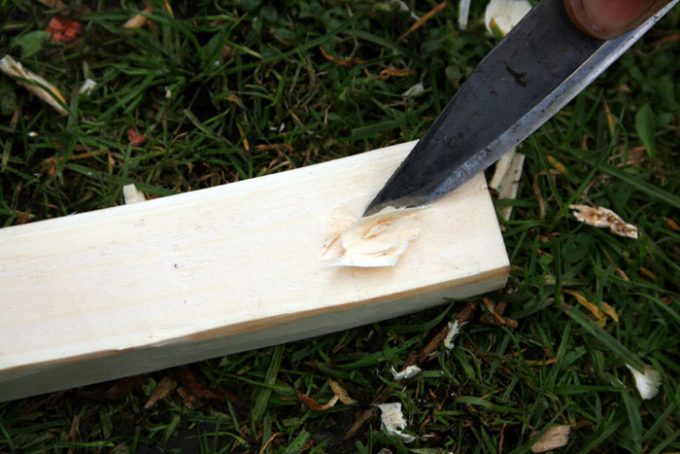
Before making a set, you have to know how to use a knife. Ensure you have an easy knife to practice with because this will make your work more charming and more secure. We suggest you use a light knife that has a blade of around 1/16″ thickness. Slimmer blades require less energy to be forced through the wood.

Don’t try to use knives that have finger guards as these simply act as a burden. A relatively light blade (at around 3″) is simpler to practice with. The handle should not have any sharp, uneven surfaces or boxy angles. Make sure you Keep your knife sharp always. It will be ideal to get many knives.

Mora knives made in Sweden are exceptionally pleasant and not expensive. Do not hesitate to make use of the ground as a surface for bracing your wood. The steadier the wood you are cutting is, the better. The information below shows how you can carve the parts of a fledgling set from a bigger piece of wood.

1. The Board

Carrying the once-split tree branch, cut it with a whittle or saw and snap the wood into a foot-long length. Utilizing a knife or axe and baton (a short, strong branch for beating the back of blade cutting edges) blend, split the branch equally down the center.

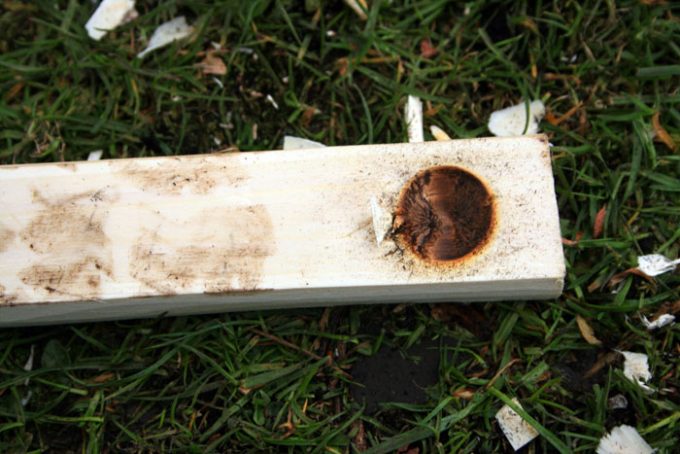
the board of bow drill

Continue splitting it until you arrive at a level board that is around one-inch thick or the thumb thickness. Whittle it down to expel any distensions so you eventually get a level, straight-sided and rectangular shape. Keep in mind that the board needs to be around 3 inches wide, but any measurement above two inches will also be good.

2. The Spindle

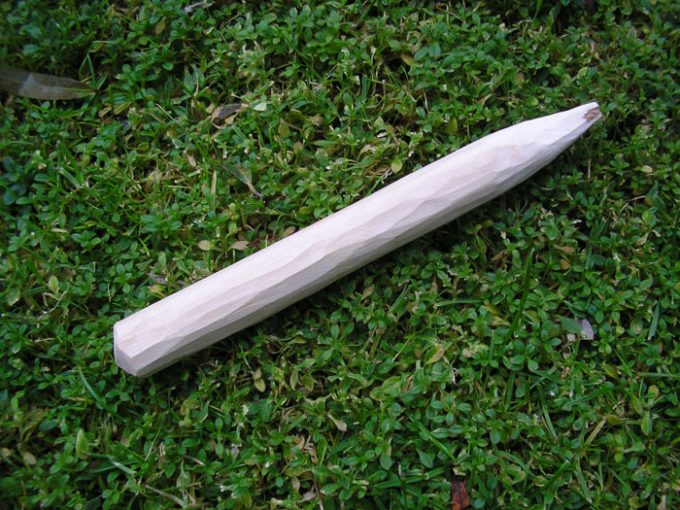
Choose a foot-long straight-grained area of wood (if possible, take from one of your past splits) and whittle the wood into a somewhat less than 1 inch diameter straight and flat dowel. The dowel needs to have a similar diameter like the knuckle of your thumb finger.

the spindel of bow drill

Shave the last inch of every end into sharp edges. The fatter the spindle of the wood, the less wear it puts on the string, however, a more drawn out bow is required to bring about a similar number of revolutions taken for every bow stroke. Basically, this works similarly like the gearing on a bike.

3. The Handhold

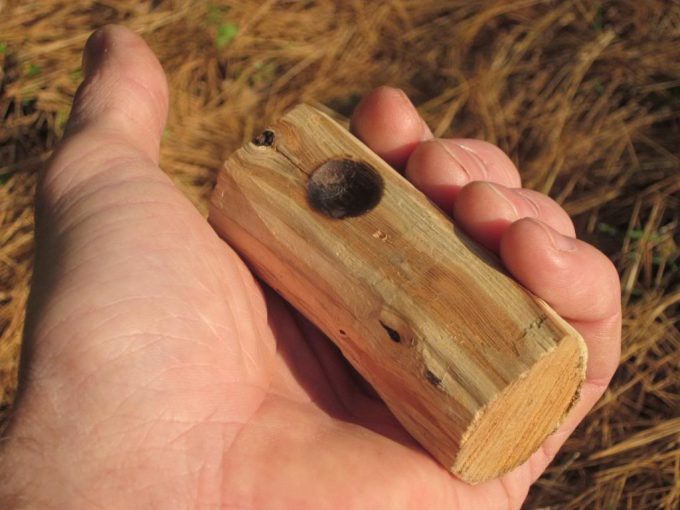
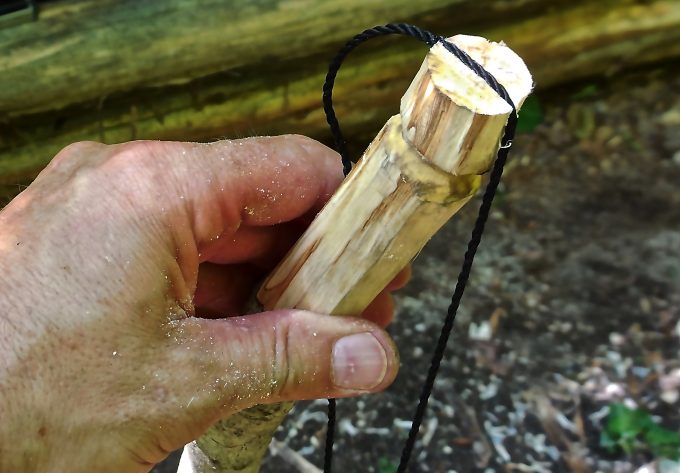
Carry the other half-split tree branch and saw through an area around 4-5 inches in length. Scrape the edges to evacuate any harsh spots and to give a smooth surface to for easy grip. On the level side of this, precisely in the inside from each of the four sides, carve out a hole using the front point of the knife.

the handhold

Make the hole to be about a half of an inch depth. Try to make the side levels of the hole incline out at a 45 degree point in order to frame a cone formed depression.

4. The String

There is a wide assortment of materials that strings can be made with. These are nylon, cotton, leather, jute, rawhide, jute, buckskin, and a wide assortment of wild plants. Generally, utilize a string that is no less than one and a half times your bow length. The string needs to be relatively thick. A quarter-inch thickness will keep going quite a while.

split for the string on the bow

Shoelaces are normally not sufficiently thick for continuous use. The cotton hockey skate bands will work well. It is best to stay away from synthetics, for example, nylon as they in some cases liquefy from the grating unless sufficiently thick. The thick cotton string is just about perfect for continuous use.

5. The Bow

Get a segment of a green (live) tree branch that is around an index finger thickness and straight or marginally bent and the length of an arm from elbow to the fingertip. The bow needs to be sensibly flexible but not unstable. It should not be bendable, more than 2 inches from a straight line when bent utilizing a little energy.

If it twists too easily or is inclined to snapping, get a somewhat thicker tree branch or utilize a thicker wood. If it barely twists at all, then you need to carefully whittle away a little wood within the curve. Ensure it bends equally, to avoid feeble spots. The bow’s flexibility is critical in the general feel of the set.

In the event that the bow doesn’t twist, the bow string will slip much of the time and soon get damaged. If the bow is excessively flexible, the string will likewise slip and you won’t have the ability to apply the required torque. Split the first 2 inches of each bow end with a good knife. This is the reason you require a green tree branch.

bow split for string

A dry tree branch won’t split well. Ensure you have an even split and mustn’t keep running off to the side. The introduction of the split is vital if there is any curve part in the bow. When the bow is placed on a level surface, the splits ought to be parallel to that work surface.

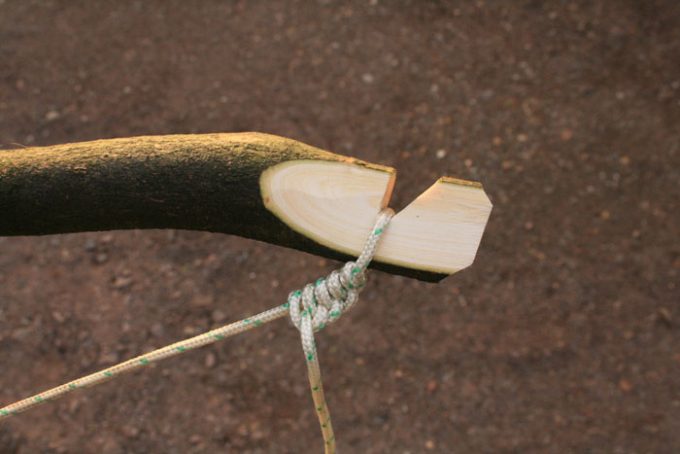
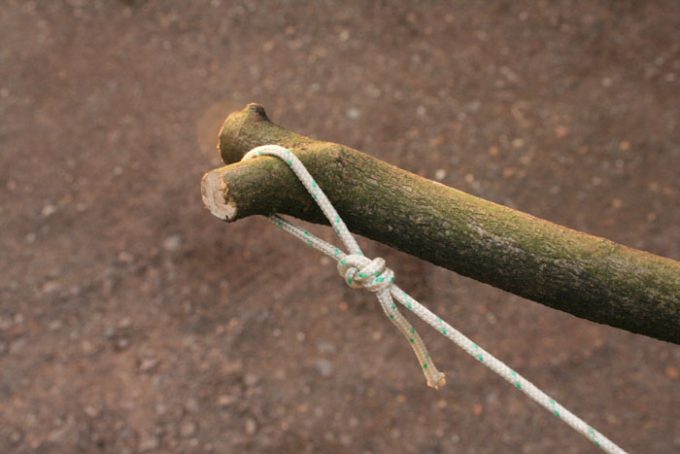
Select two small lengths of cordage and cozily tie them half way around the splits. Utilize square knots of another kind of knots that won’t work loose. The clove hitch is actually useful for this. Tie an end of the bowstring directly into a knot. Then set the end into the bow-split so that the knot will be on the bow’s side that is bending far from it.

Ensure that the string is held firmly by the bow-split by shifting the short area of cordage up to the bow-split toward the bowstring area. This will adequately fix the bow-split. Take the flip side of the bowstring and do it again on the opposite side.

bow string knot

The quantity of slack present in the bowstring is something that should be balanced through experimentation when the spindle is fixed. For the time being, the string needs to be slightly loose or you won’t have the ability to stack the spindle.

Techniques for Bow Drilling

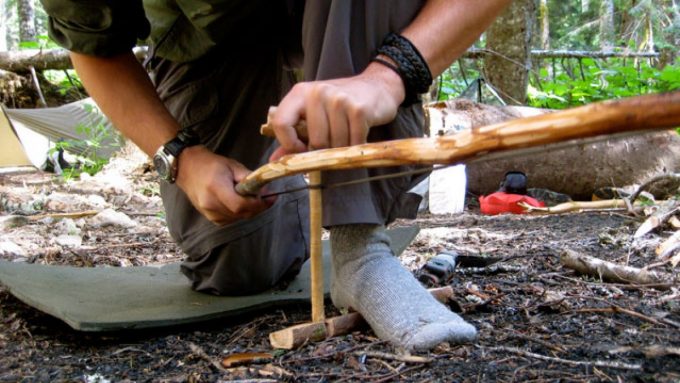
If you are a right-handed person, then hold the bow using the right hand. Put the board on the ground surface so it is steady. Carry your spindle and then force the point straight into the board in order for you to make a stamp. This stamp should be around a full axle width from the board edge (around an inch long).

It should likewise be toward one side of the board so as to have enough space to put your foot. Take your knife and create a shallow opening like the kind present in the handhold. After that, place your left leg on the board (that is if you are a right-handed person) so inside the wad of your foot is beside the shallow gouge.

You should put your right knee on the floor and be sitting on the right foot. Your right side leg ought to be in the same direction with the board. Or, you can elevate your butt away from your foot and rest your chest region on the left side knee – make use of anyone that seems easy for you.

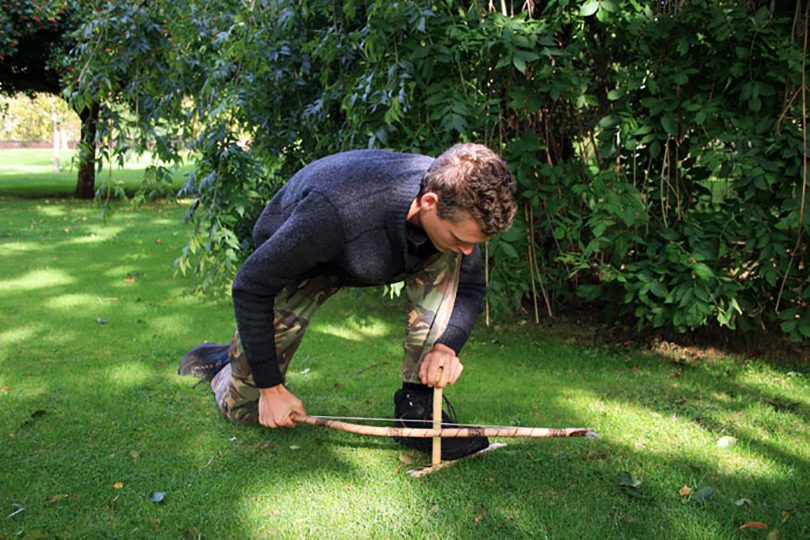
bow drilling position

Fill the spindle by enfolding the string all through the spindle, thus making the spindle to be outside the bow. This process may require some string adjustment. The spindle ought to feel like it will fly out. The more tightly the string turns into, the better, simply do not make it very tight that it damages the bow.

Taking the bow and loaded spindle in your right hand, put the base edge of the spindle into the opening in the board area. Cap the flip side using the handhold and apply some weight to shield the spindle from flying out. Release the bow. The bow ought to be directing itself up towards you. On the off chance that it is pointing down, refill the spindle to make to point upward.

The Burning-In Process

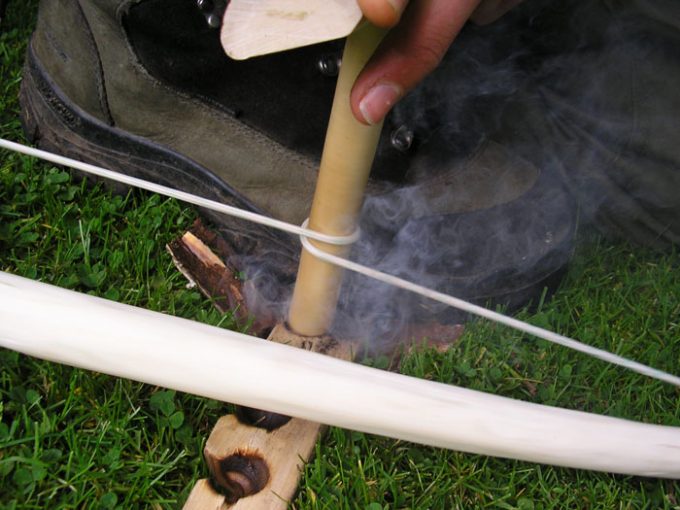
You can now start the burning-in process. The burning-in process is to gouge the handhold opening. Simply start stroking the bow forward and backward gradually. Keep the weight on the handhold slightly high. In the end, you should see a little amount of smoke erupting at a side or both sides of the axle.

Get a tiny bit of speed until both sides are producing smoke. It is most critical that the handhold end produces smoke now. If it declines, even when you choose the speed and push it down harder, refill the spindle so that the top area is now the base and the other way around. Repeat the process again until the handhold begins to smoke.

burning in procces

Continue going until the gap has a similar diameter like that of the drill. It needs to match the drill point curve precisely now. After that, you should grease up this end (monitor which side is down and which one is up!) This is to shield it from smoking and exhausting your energy so that you can concentrate all your energy on the lower end.

Empty the spindle and snag the top into the opening in the handhold. Blow away any dust. Then push the bow-drill directly into the handhold and gradually turn the bore-drill. Once more, Blow away any dust. Then, rub this end at the edges of your nose and into your hair. This is to rub the wood with the natural oils on your skin.

Do the pushing-in process again. You might need to push the spindle-end against a smooth shake. This viably solidifies the spindle-end by packing the wood. Baseball players usually regard it as “boning”. Redo the squeezing of the spindle straight into the handhold opening and then rub the tip into your hair till it builds up a sheen.

Keep all dampness far from this as it will make the wood grow and it will tie in the handhold, thus resulting in burning and friction. You need the frictionless spindle-end to be highly rounded. This circulates the weight constrains over a more prominent region, decreasing the inclination of the spindle to penetrate into the handhold.

getting smoke from the board

On the off chance that you envision an electric bore, a little piece will require less push to bore through a material compared to a big one. In order for you to keep the drill from burning up at the spindle-end, then you should utilize a large surface range.

Getting the Coal

Put something below the board where the notch will get the coal. This can be in the form of birch bark, paper and so on. Always remember that if you are on the floor, the coal will dissolve it. Bring yourself into the position that was clarified earlier and start drilling. Ensure you place the lubricated side of the bow-drill in the handhold.

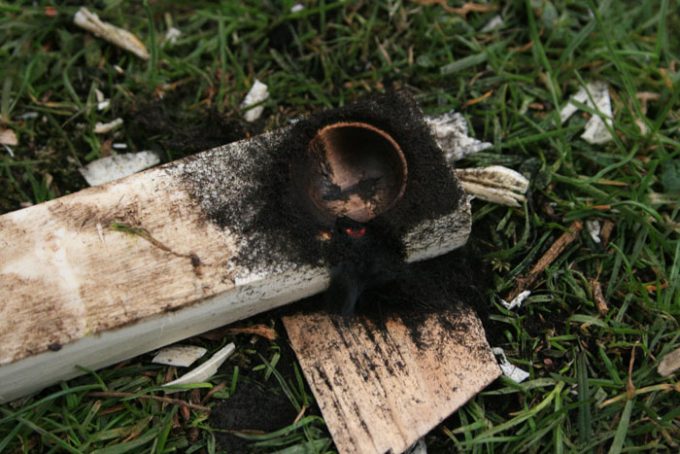
Then you can now start the powder process. Drill gradually and with firm weight until the base end starts smoking. Hold the smoke down to only a wisp. You ought to see powder gathering in the notch. Ensure you keep this moderate pace until the notch is almost filled. Then lighten up the weight and bore quickly. This is the “warm” stage.

powder on board of bow drill

The thought is to make warm, not powder. It ought to start to smoke intensely. If not, apply more force until it does. Continue going until you are completely encompassed by smoke. Now, quit drilling and carefully evacuate the drill. In the event that there is smoke coming out from the powder heap for more than a couple of seconds, then you most likely have coal.

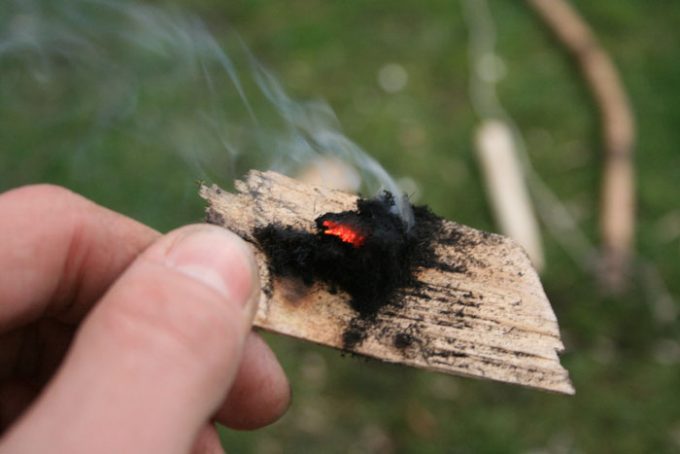
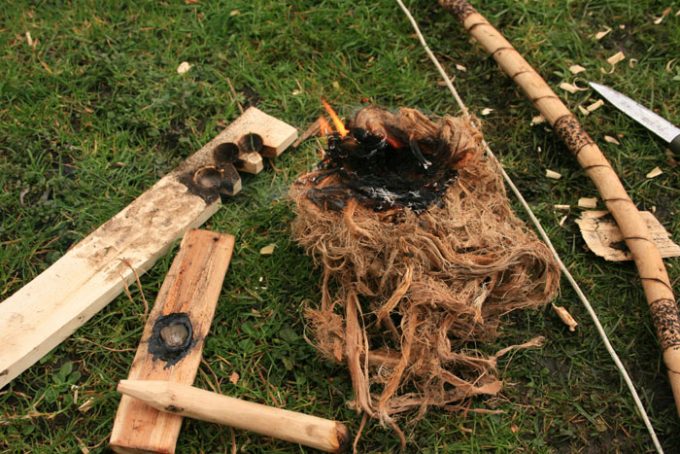
Tenderly blow on the coal till it starts to shine red. You may now transmit it to a tinder package. This is just a fist-sized heap of dry grasses, stringy internal bark of specific trees, and so on. Keep blowing until it flares up.

Powder Reading Process

If the drill starts to smoke at the handhold end, then you should apply more lubrication again. You may need to switch the spindle ends as one end might be somewhat harder than another. Another solution to it is to shoulder the spindle’s lower end. This is basically diminishing the diameter the drill’s last inch or so.

This brings about less pressure being required to bore the spindle right into the board. This always takes care of the issue of the handhold burning and also the issue of the lower spindle’s end refusing to begin burning. Issues can frequently be unraveled by looking at the consistency and color of the powder.

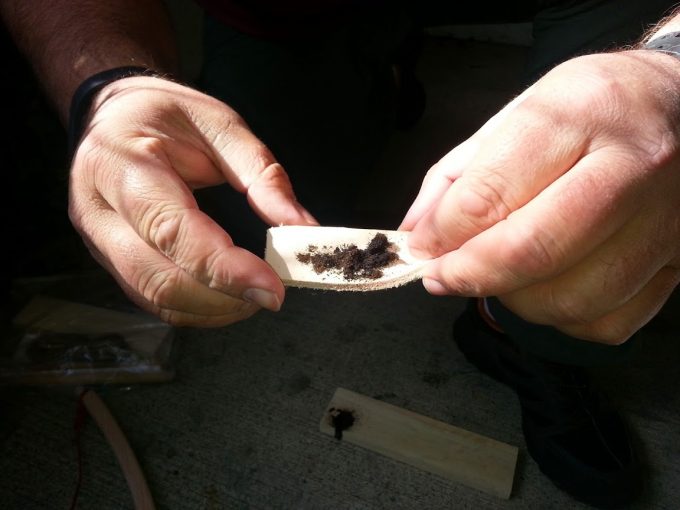
powder from bow drill

Keep in mind, the suggestions underneath are for the powder process. The warmth process should deliver a minimal measure of powder with the most measure of warmth. In other words, you need to be pushing down, just enough to make plenty smoke, but no extra powder.

On the off chance that you push down excessively, you risk making hard powder and pushing all the great powder that you produce from the notch. This isn’t so vital with soft, dry woods, but rather is imperative when utilizing moist or somewhat harder than good woods.

Color is related to speed. Light dark colored means there is insufficient warmth being created, hence you should drill quicker. Black means there is a lot of warmth produced, although you must be mindful so as not to push too heavily. Consistency is related to downward pressure. Dusty implies small floury parts are being scraped off.

This isn’t really an issue in itself, yet it ordinarily happens because there is insufficient pressure down and insufficient speed. Fuzzy is great. This gives the most amount of the surface zone for ignition to occur. Crusty implies there is excessive pressure down. This often happens in blend with a lot of speed.

starting fire from coal

This powder won’t light up easily since there is a minimal surface range for ignition reactions to occur. This will usually enable you to adjust your procedure and get a good coal. However, this is not possible. For example, if you are trying to push down as much as you can and still obtaining a dusty powder or scarcely any powder with all the technique.

Your next choice is to shoulder down the spindle somewhat more as was said before. Along these lines, the set will need less downward force to create more powder enabling you to load the notch with a similar amount of strength. A drawback of this technique is the set turns out to be more sensitive, thus making it less demanding to push too hard!

Final Thoughts

We believe you get a lot of useful information from this article. It is very significant that the basics are learned before trying the more advanced strategies. If you don’t figure out how to know what the wood is letting you know, your coal-making reliability will be eccentric in the more difficult situations.

fire from bow drill

You should have the ability to get a coal almost every time you attempt when utilizing a proven set before moving on to produce-from-scratch bow-drills. Keeping a day to day record of your experiments and experiences will incredibly help in enhancing your ability.

Fire Building Techniques: Know How to Build a Fire in Minutes

2
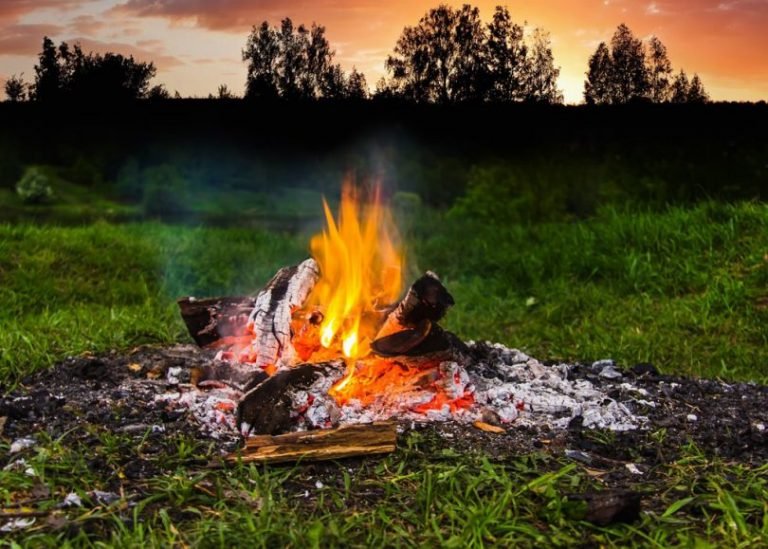
fire burning on sunset

In a survival circumstance, knowing fire building techniques, really matters a lot. A fire can give you enough warmth in an exposed surrounding, enable you to cook your food and enable you to heat up water for drinking purpose. Fire can likewise serve as a help signal, shield you from wild creatures in the bush, and sterilize your personal first-aid kit.

With a goal to build a fire, it is very vital to comprehend the fundamentals of how to begin a fire and how to sustain it. Discussed in this article are essential tips that you need to understand, build, lay and even put out a fire.

Fire Building Basics

A fire requires just three substances to prop and start up: fuel, heat, and oxygen. Fire varies in different environment due to ratios at which these three things are being controlled. In case you are outside, already arranged your firewood and it happens that you forget your fire starter at home.

At this point, you will require a couple of tools to set up your wood and lighten up your fire. A sharp edge blade, a Ferro bar, and Vaseline-covered cotton balls ought to be your most basic need. You can also decide to include an axe, or more preferably, saw to have a less labor force.

fire starting equipment

You will have to get dry woods to get a fire both started and going. Ideally, you can simply get crackly twigs on the ground. In a terrible climate, you will have to work somewhat harder. Even, you can still get some branches, dead trees, and dry woods whenever you encounter an overwhelming snow or rain.

A hatchet or saw will enable you to chop some woods down into appropriate useable lengths and sizes. A hatchet, or a huge blade, will then enable you to part those logs thereby, allowing you to get to the inside of the dry wood and deduce the span of the pieces you desire to make use of.

You can deliver everything down to fuel, from the dry center location of the dead branches and trees. However, you will have to discover or make another source of tinder to start your fire. Dry grasses can be regarded as one common source of tinder. You can also whittle a plume stick from a dry wood piece.

You can likewise attempt to search for a mouse or feathered creature’s nest, pull some lint located around your belly button area or find some Vaseline-covered cotton balls. The Vaseline keeps the inner parts dry, so you simply separate them, hit it with your Ferro pole to make a spark.

ferro rod spark

When handling your wood, attempt to gather things that look, more or less, like a firewood. You require a reasonable length in order for it to be separated into four. This uncovered the dry center section to the flames thereby creating more exposed points from which fire can get to.

Huge round logs still covered in wet bark will be hesitant to light and burn. Once you have arranged your fire materials, you are prepared to build up a fire. We should take a try and understand the triangle of fire.

Understanding the Fire Triangle

Three essential things are important for fire building: warmth, oxygen, and fuel. Think about these three basic substances as the triangle sides important to spark up a fire. Fuel, alone, is not going to burn; however, if you try applying heat to a fuel, it creates a gas.

igniting gasoline

In addition, when this gas consolidates with the oxygen present all around us, the fire is going to spark up. A fire will burn to its fullest when these three substances exist in an ideal proportion. The ideal approach to figure out how to adjust these substances is to practice, so get outside, and begin.

Choosing and Preparing a Fire Site

Whenever you are planning to choose a site to build a fire, always survey the fire site and consider a couple of tips before setting up the site. You need to locate a dry area that is shielded from the raging wind. You need to ensure that you have the capacity to contain any fire that you fabricate while being in closeness to your fuel source.

In a situation whereby you build up a fire in a forested site, ensure you clear any foliage or brush starting right from the bare floor until its surface turns dirt. Contain your fire site by clearing a zone of no less than two feet in radius, and make a fire divider around the cleared zone by stacking rocks around in the form of a circle.

preparing fire area

A fire divider can likewise be built up to be able to divert wind, target enough heat in a specific bearing and contain sparks

Choosing Fire-Building Materials

To begin a fire, you require something to consume. You will require three essentials sorts of materials to build that desired open-air fire:

Tinder

Each great open-air fire begins with a great tinder. Tinder bursts into flames effortlessly, however, consumes quickly. Fire material like dry grass, wood shavings, dry bark, dry leaves and some insects can serve as a good tinder.

tinder for fire

If you are a brilliant camper, you will acquire your own particular tinder that looks like a dryer lint or handmade char fabric. Having your own particular tinder is particularly imperative when everything outside looks damp. Trust it or not, wet tinder does not burst into flames.

Kindling

Tinder consumes quick, so you will require something having a lot of substance to keep your fire going. You can’t move specifically to huge logs. You will simply cover your little fire. That is the point where kindling comes into play. Kindling comprises of little branches and twigs.

KINDELING FOR FIRE

Look for a material that is not more than the pencil’s width. Kindling should be always kept dry or else it won’t consume as effortlessly as you want or desire. In a case that everything in your possession is all wet branches and twigs, make sure you whittle the moist bark with your knife.

Fuel wood

This a fire component that ensures that your fire is always hot and consuming. As opposed to popular thinking, fuel wood does not need to resemble the big logs you use in your fireplace.

fuel wood

If you use a huge log, it will definitely take quite a while for the wood to burst into flames. Search for branches that are like the size of your wrist or lower arm.

Building a Fire

There are a couple of ways to build a fire, yet one of the simplest and commonest ways is to organize the tinder underneath a couple of kindling like a cone shape. Consider building the fire from little to an elaborate one, so that you can increase its warmth bit by bit, and in the end, start including bigger fuel without snuffing out the fire.

Light the tinder that you have successfully organized underneath the kindling in the center of the cone-shaped development, and as the fire method consumes, the kindling present outside will inwardly fall to fuel the fire.

building the fire

Continue adding additionally kindling to the exterior of the chosen fire method until the fire develops in temperature and quality. Start including fuel in the same manner until you see what looks like hot orange coals. At this point when the fire is sufficiently vast and sufficiently hot, you may essentially add fuel straightforwardly to the fire.

Laying your Fire

If you want to build and light a fire, just pack basic things such as a fire-igniter, which can be matches or a fire lighter. There are a few strategies for laying a fire and each has its own benefits. The circumstance you are in will figure out which of the fire method to utilize.

#1 Tepee Fire Method

The least difficult and best method to begin any sort of fire is the tepee, otherwise known as tipi. You will utilize a tepee produced using kindling to begin the vast majority of whatever is left of these styles. We are simplifying this method using big logs of wood.

In order to fully utilize a tipi to get a fire going, form one with the smallest, driest, most uncovered bits of wood you can lay your hands on. At that point, either put your tinder in its inside and firstly light it up, then rush it in. Keep in mind to leave an “entry way” through which to perform that.

TeePee Campfire

The normal thought is to make a structure that focuses the flame of the fire while enabling a lot of air to enter. Begin, with so much wood on your tipi, to go ahead and simply and gradually include more as the fire builds up. Begin little and work up to bigger pieces as suitable; you will build up a vibe for when and how substantial with practice.

Putting a forked branch in the ground as a middle pole for your tepee makes building one less demanding. Furthermore, you can scale a tepee the distance starting from the main heap of kindling up to a huge campfire.

You can even form the whole thing before lighting, simply recall that you need an entry way and recollect the essential amount of wood sizes as you work upwards and outwards.

#2 Platform Method

Need a decent bed of coals to cook on? You need to build a pyramid like a strong log cabin using the biggest logs at the base and one that is about your wrist size on the top. At this point, you simply need to light a fire on the top and leave it to consume through the logs, making a major, thick bed of hot orange coals.

platform fire for coal

Furthermore, you do not have to sit tight for it to consume the fullest before beginning to cook. In the event that you have solid metal cookware, you can put that specifically on the hot coals when the initial layer of logs is consuming.

Utilizing huge logs, this style is otherwise called the “upside-down” fire, prevalent for its capacity to consume for quite a while, untended. Once more, put the huge logs on the base and scale up to littler stuff, at this point light a fire at the top.

With constant practice, you will make sense of the correct size wood to use to make a fire, fit for consuming all alone, throughout the night.

#3 Lean-to Method

Begin with a minimized heap of tinder. Drive a green stick right into the ground at about an angle of 30-degree over the tinder. Point the end of the stick toward the wind. Lean bits of kindling against a stick called the lean-to stick and over the tinder. Then, light the tinder. As the kindling consumes, include additionally kindling.

Lean-To Campfire

An optional strategy is to put a huge log level on the ground. Put tinder alongside the log, on the downwind slope of the log. Shore up the kindling over the tinder and incline it toward the leveled log. Then, light the tinder. This is one of the helpful strategies if you are facing high winds, the log will definitely serve as a windbreak.

#4 Cross-ditch Method

To utilize this method of cross-ditching, scratch a cross around 12 inches (30 centimeters) in the ground. Burrow the cross 3 inches (around 7.5 centimeters) deep. Then, put a huge amount of tinder at the center of the cross. Assemble a kindling pyramid over the tinder.

cross ditch fire

Add extra fuel to the fire as required. The shallow ditch enables air to clear under the tinder in order to give a draft. This sort of fire is so valuable in open territories and zones experiencing a little breeze.

#5 Log Cabin Method

This fire method is less powerless against breakdown, yet it is additionally wasteful. Nonetheless, these qualities make it quite an amazing cooking fire, as it will consume for long hours and its frame can easily back cookware up.
Start with a tinder heap around which you will put kindling.

Similarly, as with the development of a log cabin, put the initial two bits of kindling to each other in a parallel manner on each slope of the tinder. Then, place the second kindling pair on top of the first and opposite to it on the inverse slope of the tinder.

Keep including the kindling in this way making use of more slender wood sticks as you go close to the highest point of the structure. You can likewise lay the kindling over the tinder in the middle of the progressive kindling layers. The tinder will spark off the kindling laid crosswise over it.

log cabin teepee fire

As the kindling is being consumed, it will gradually fall into the center further powering the fire. A crossover of the Log Cabin and Teepee Fire can be fabricated too by building a little teepee structure within the structure of the log cabin.

Firstly, start by erecting a little teepee fire and after that build around it a log cabin. The teepee structure enables the fire to be rapidly lightened up and the structure of the log cabin manages the fire for a longer time frame.

#6 Pyramid Method

To lay the pyramid fire, you need to put two little branches or logs parallel to the ground like the Log Cabin fire method. Beginning a few inches from the closures of the logs at the base, put a strong layer of smaller logs over the parallel logs thereby remaining around at least 2 inches in the middle of each log.

Pyramid Method campfire

Include three to four log layers, each at a right angle to one another in order to produce a pyramid-like structure. Making use of kindling and tinder, implement a starter fire at the pyramid top.

As the starter fire consumes, it will spark off the logs underneath it. This gives you a fire that consumes downwardly, requiring no consideration in the night.

#7 Traditional Indian or Star Fire Method

This is the standard fire method for the people who resides in the old West. It is perfect for quiet conditions. It is less difficult to control and requires little upkeep. Begin by burrowing a little, 5-inch dump around 1 inch top to bottom. Line the dump interior with your chosen kindling.

Make a tinder next at the kindling top and encompass the tinder with a lot of kindling. Set five to six sticks of fuel wood in a star arrangement with the edge marginally overhanging the dump.

Star Campfire

Light up the tinder and blow tenderly until the fire becomes lit. Include extra kindling as required. As the fire keeps consuming, push in more logs by the closures to sustain the fire.

#8 Dakota Fire Hole Method

In a few circumstances, you may find out that a fireplace made in the underground can be the best option at the moment. A hole for this underground fire hides the fire and holds the heat well to cook your food. It likewise decreases and additionally diverts smoke emanating from the fire. Follow the steps below to successfully lay a Dakota Fire Hole:

Step #1: Burrow a hole in the ground around 1 foot wide and 1 foot deep.

Burrow a big interwoven hole for ventilation purpose at the upwind side of the hole. This hole could be at least 10 inches from the fire hole itself and having a width of at least 8 inches. Remember to dig the holes in order to connect with fire hole base.

Step #2: Do all your fire building in the fire hole.

Ensure that you are in a well-secured territory; make use of green logs to form a dry base for your fire. Most trees having a wrist-sized trunk are simple to split in intense cold condition.

dakota fire hole

Cut a few green logs and lay them one next to the other on snow top. Include at least two layers more and lay the top layer of logs in an opposite manner.

Putting Out Your Fire

Now that you are through with your fire, you have to know how to put it out completely when the time comes. The following tips will help you kill your fire dead and good.

Tip #1: Begin early

Putting out a fire totally takes longer than you might expect. Begin to put out your fire around 20 minutes before you go to bed or leave for another place

Tip #2: Sprinkle, don’t pour

You ought to have a bucket filled with water close to your open-air fire for safety purposes. Whenever you are planning to leave, this will act as your fire extinguisher. Don’t ever pour all the water on the fire at once.

sprinkling water over fire

You would want to flood the fire hole since you or another person will be using it later. Rather, sprinkle as much water as you have in order to put out the fire.

Tip #3: Stir

As the water is being sprinkled over the ashes, ensure you stir them with a shovel or stick. This guarantee that any remaining ashes or charcoal gets wet. Whenever you don’t hear any hissing sound or perceive any steam, you know you are drawing near to a totally extinguished fire.

Tip #4: Touch test

Don’t try to run your hands through the ashes to avoid getting burnt by the burning coal. Set the back of your hand close to the ashes.

checking campfire for heat with hand

If you perceive any heat, that means it is excessively hot, making it unsafe to leave. Continue to sprinkle water and keep stirring. When it feels cool, it is now safe to leave the area.

Tip #5: Dispose the Ashes

It is highly advisable that you leave the area the same way you found it by gathering the ashes in a bag and disposing them.

How Long Does it take For a Blister to Heal: 10 Ways to Heal a Blister Faster

0
People Standing on Brown Mountain Near Lake Under Gray Clouds during Day TimeEvery one of us had blisters for one reason or another. They are annoying and painful, fluid filled sacs that appear on your skin due to friction. Mostly, these blisters are caused by wearing uncomfortable shoes, hiking without wearing gloves, from the bite of an insect or from a burn. When you get the blister you want to get rid of it as soon as possible. If you don’t know how to heal a blister faster, and how long does it take for a blister to heal, then you’ve come to the right place.

We are going to explain some really easy ways to heal it faster. Also, when you are outdoors a blister proves to be more annoying and you just want it to disappear in a blink. We are going to tell you the useful and effective ways of taking care of a blister when you are outdoors and ways to make the blister much faster than it would without doing nothing about it.

Hiker legs wearing hiking boots

The time it takes for a blister to heal depends on the type of it. If it’s a small one, then it will heal quickly, but if the size of the blister is big, then it will take more time. Maybe longer than you were expecting. To know how to treat them, first you need to know the types of them.

Types of Blisters

Sunburn Blisters

Sunburn blisters, as the name indicates, are caused by sunburn. They are mostly small and filled with fluid. They usually happen due to exposure of the skin to the sun.

Trekking woman walking success desert

These kinds of blisters usually take a few days to heal.

Friction Blisters

Friction blisters are also filled with fluid and they are caused by constant irritation and pressure on the skin. This usually happens if you wear something uncomfortable and the constant friction results in blisters. Most of the time, they heal quickly, without leaving a scar, but a severe blister can take a few weeks to heal.

Cold Sores

Cold sores, also known as fever blisters, usually appear on the lips and they are caused by skin contact. They cause redness and itching at the affected area and are painful.

Backpacker on top of the mountain

Cold sores usually heal in 8 to 10 days.

Insect bites blister

Blisters caused by insect bites are small and produce redness and itchiness. It will cause a sudden and sharp pain and then cause redness and swelling. These kinds of blisters can take days or even weeks to heal, depending on the insect that had bitten you.

What Can Cause the Delay of Healing Process?

There are a few factors that may cause the delay in the healing process. Exceptions are always there, so if you need to know why your blister isn’t healing fast enough, following the reason of it might help.

A drink in a glass

Here are a few of the most common factors that might slow down the healing process.

  • Affected Area: If the blister is on a sensitive part of the skin, it will take more time to heal. Especially the areas that move with the blister on them, then it will take more time to heal because you are not giving it enough rest and the healing requires rest.
  • Infection: If the blister pops, then there is a risk of an infection and the wound might even get worse because the blister actually protects the inner skin and lets it heal. In case that blister breaks, its fluid should be drained using a sterilized needle so that there is no risk of infection.
  • Impaired immunity diseases and diabetes: Diabetes can also slow down the healing process because of the nerve and circulation issues. And, people with impaired immunity diseases have bigger chances of getting an infection, so that can be a cause of a slow healing too. The weak immune system means more chances of getting an infection.
  • Medicine: There are few drugs that can slow down the healing process of a blister too. You need to watch out for these drugs and take something only after you are sure it will do no harm.
  • Alcohol or Smoking: Numerous researches show that if a person smokes, the healing time is longer. Alcohol consumption affects the healing process as well.

10 Ways to Heal a Blister Faster

To heal a blister faster there are some natural and effective ways that have proved to be very helpful.

Nexcare Waterproof Bandages

Following are the 10 ways to heal a blister faster. They are easy to follow and effective, even if you’re outdoors.

  1. Let it breathe: The first thing that you need to do is to let it breathe and give it air. The air exposure is really good for the healing process. If you are putting a bandage over it, then make sure it’s loose enough that It doesn’t break the skin over it, and allows the air flow. The process of healing surely depends on the state of the wound. If it’s torn open, then the chance of infection is bigger and that can delay the healing. If it’s intact, you need to carefully clean it without tearing it open and try to leave the skin in its place. It will hurt less this way and will heal faster.
  2. Put a bandage on the blister: To keep the blister clean, in the case it broke, and to avoid infection, you need to put a bandage on it. This will cover your wound from any kind of infection, and will keep it covered so that it doesn’t get dirty. Before putting the bandage, clean the wound with a sterilized gauze pad and try to get as much fluid out as you can, gently. After that, put an ointment on it and then cover it with a bandage. Like we just mentioned above, make sure that the bandage is loose.
  3. Topical ointment: Putting an ointment on your blister really helps to speed up the healing. Clean the dirt off of your blister and put an antibacterial ointment on it. It can be a gel or a tube, whichever you prefer. Some gels even offer cooling effects that help with the pain. Make sure that you clean the area before putting the cream on it. To avoid any infection, you can wipe the area with an antiseptic before putting the cream on it. Tree tea oil is known to be effective to speed up the healing of the blister after it’s drained.
  4. Elevating: If the blister is on your foot or your heel area, then elevation will help with the inflammation and reduce the pressure and that will in turn help with the pain and irritation. If the blister is not in the area that will be affected when you walk, you should leave the blister after cleaning it to heal on its own. Additionally, you should elevate your foot to waist level. This elevation will lessen the pressure and will help with the draining of fluid,` and will speed up the healing process.
  5. Draining the fluid: If you have a blister that is extremely painful and irritating, you need to break it and drain the fluid. To prevent infection, wipe it with antiseptic and water and use a sterilized needle to drain the fluid. Try not to remove the top skin because it provides protection against the bacteria. The best way to drain a blister, is to wash your hands with a sanitizer or soap. Then, you need to clean the blister using an antiseptic. After that, take a sterilized needle and break the blister with it. Let the fluid out, don’t try to squeeze it out. Try to leave the top skin intact so that it can protect against infections. Now, you need to apply an antibiotic cream or gel and put a bandage on it. This will speed up the healing process. If you feel like there is an infection, then you should consult a doctor.
  6. Padding: This depends on the area where the blister is. If the blister is on your heel area, then a bit cushioning may help with the healing and the pain. To do this, you can take the sheets of foamy pads and use them according to your required shape and fit, to cushion the blister. In case that you are outdoors and you are not in a clean environment, you must cover it up with a clean bandage to avoid any kind of infection. And, to avoid this in the future, you can put a bandage on the chaffed areas or you can wear padded athletic socks to prevent the rubbing which causes the blister.
  7. Softening the Blister: Softening a blister, if it’s drained, also helps with faster healing. To soften the area, you need to soak the area in a saline solution a few times a day. This will speed up the healing, and will rub away the extra skin. Softening a blister is recommended before breaking it, but if you have an extremely painful blister, to lessen the pain, you can break it. Softening the blister in a clean saline solution before breaking it, will help to prevent infection. Additionally, soaking it in warm and clean water after draining the fluid will speed up the healing and will lessen the pressure and ease the pain.
  8. Preventing Infection: If you want your blister to heal faster, it is important for you to take precautionary measures to prevent the infection. First of all, if a blister breaks, you need to make sure that you clean it with an antiseptic, and cover it loosely with a bandage. The precautions need to be taken more seriously if you are outdoors. If the swelling isn’t going away, even after it’s drained, then you should see a doctor immediately. If you just leave a blister to heal on its own, chances of infection to happen are bigger. Also, if you keep squeezing or rubbing it, it will lead to infection or blister rupture. If the blister gets an infection, it will take more time to heal and it can even cause a skin infection. Furthermore, if it’s not healing and you are not doing anything about it, bacterial infection can happen too, so, you need to be extra careful.
  9. Moisturizing the affected area: Moisturizing of the affected area can speed up the healing and Aloe Vera works as a great moisturizer for blisters. Just apply the Aloe Vera on the blister after cleaning it, and give it time to dry. After that, you can cover it. It will prevent the swelling and Aloe Vera will give the cooling effect too. To avoid blisters in future, if you are prone to blisters, you need to take safety measures. For starters, you need to wear comfortable shoes that you can run and walk in with convenience. The socks you are wearing, need to be of a soft and comfortable material that gives way to air so that the moisture doesn’t cause itching. If you are working out and your shoes get wet due to sweating, you should let them dry off first and then wear them again.
  10. Patience, patience, and more patience: No matter how small a blister is, it’s going to take the time to heal. A few days, is the minimum time a blister takes to heal, so, if you think that it’s going to heal overnight, it’s probably not going to happen. The best you can do is to take proper care of it. Keep it clean and let it take its course to heal. You can try to leave it open in clean air for faster healing.

Natural Remedies to make a blister heal faster

There are a few natural remedies that you can try to make it heal faster. They are very easy to do and will also help with the pain.

Epsom Salt

Epsom salt is one of the most effective ways to heal a blister faster. These salts work very well to dry out the blister, if it is not popped yet.

Epsom Salt on the table

The salt contains magnesium that helps with the inflammation and reduces the pain.

  • Take 1 or 2 tablespoons of it and put it in warm water and mix it well
  • Now soak the injured area in that water for a while
  • After that, dry the blister and put some vitamin E on it.
  • Doing this, even once a day, is enough to speed up the healing.

Green Tea

Green tea is also a very effective natural remedy to speed up the healing of a blister. It is very effective for the swelling and pain.

Green Tea on the table

It reduces the swelling because of the vitamins and antioxidants present in it which promote the healing.

  • Put a green tea bag in warm water and let it soak
  • Then put it out and leave it to cool off for a few minutes
  • Then put that tea bag on the blister for a while
  • Repeat this process 4 or 5 times a day till the blister heals
  • Drinking green tea 2 or 3 times a day helps with the healing too

Apple Cider Vinegar

Apple cider vinegar helps to prevent the infection and lessens the swelling as well. It acts as an antibacterial to prevent the infection and really helps in case of a fever blister. To apply it you need to:

  • Dip cotton wool in vinegar
  • Then apply that cotton on the blister for about 3 to 4 times a day for approximately 3 days

If you start applying this as soon as the blister appear to make the healing faster. Also, you need to know that it might sting a little at the start, particularly if the blister is drained. You can avoid this by tempering the water.

Apple Cider Vinegar and few apples on the table

Another way to use apple cider vinegar is to mix it the apple and cider vinegar with onion paste, and apply that paste to the affected area. Let it dry and rinse it off using warm water. Repeat this 2 times a day.

Proper Diet

Taking a proper amount of food and nutrition is very important for healing. If you are not eating well then that can affect the healing as well. Food that contains vitamins A, C and bioflavonoids really helps with the healing and also prevents infections to happen. The vegetables are really good source for this and for proteins, eggs, fish and nuts are a good choice.

Harvesting bunch of fresh washed carrot on the old wooden background

Another thing that you should know is to try to avoid the dairy products, for example, white flour or sugar, as they can slow down the healing.

Wrapping it up

Blisters can prove to be very painful and irritating if you don’t take care of them. Leaving them as it is, will make the healing slower and will maximize the risk of an infection. So, by following the above safety measures, you can get rid of them conveniently and faster than it would take on its own. When you are outdoors, you should take the first aid kit with you, just in case of any kind of an emergency situation.

Keeping a bandage and antiseptic surely comes handy during situations like this. Give the blister it’s time to heal properly, and you are all good. In case that it’s not healing and is causing extra pain, then you should immediately consult with a doctor.

kit-travel-first-aid kit on a table

How Long Until Poison Ivy Rash Appears: All Detectable Symptoms

0
poison_ivy

Poison Ivy Rash can be a number one enemy to the off-trail hikers, backpackers, and other outdoor activists in terms of skin infections. It has prevailed for many years among other skin infections caused by plants. The rash does affect many people differently depending on the sensitivity level and the amount of exposure. So it isn’t easy to come up with a generic declaration that it can take an hour or so many days because it appears.

Poison Ivy Rash Plant

We will, however, unfold all the detectable symptoms that can be helpful for one to know how long until Poison Ivy rash appears on the skin after the contact with the plant. We will further discuss various treatment and prevention methods to help you overcome the rash.

What is Poison Ivy Rash?

To elaborate more about the Poison Ivy Rash before getting into its symptoms that could help you know if you have it, we will define it in simple terms. As implicated in the name, it is a rash caused by an allergic reaction (contact dermatitis) to an oily chemical produced by the Poison Ivy plant. This oily resin can also be produced by other trees of the same family, such as the Poison Sumac and Poison Oak. It is found on the roots, stems and the leaves of these trees, and appears as a sticky substance.

Pictures of Poison Oak Rash

Because this oily resin is sticky, it can attach with ease to the outdoor apparels, pet’s fur, outdoor tools, or your skin to cause an irritation in the form of red, itchy and pain inflammation. The end result will be rash which can be widespread in a large area of your skin if it has this oily substance rubbed against it. If you have been scratched by the Poison Ivy plant, the rash can be localized to an area of contact. But if you unknowingly touch the irritant and touch your face thereafter, the rash can be widespread.

The Causes of Poison Ivy Rash

The rash is caused by either a skin contact exposure or airborne exposure with the oily resin produced by the Poison Ivy plant. It is named “urushiol”. As highlighted above, other plants such as the Poison Sumac and Oak are the sources of this sticky oil.

So, if you travel in the wilderness, particularly in off-trail terrains, you’re more vulnerable to this skin rash. Open shoes, short sleeves and short pants are first indicators that you might be exposed to this rash at any time. Basically, the Poison Ivy rash is caused by the following:

  • Touching the one of the “urushiol”-producing plants on the leaves, stems or roots. The plants can be potent even if they had died long time ago.
  • Touching any object that has been in contact with the plant. This could be another person who has been in contact with the plant or the pet fur, your shoes, clothes or shoelaces. Almost any object on which the oily substance can stick.
  • Inhaling the smoke particles after the plants have been burned. The oily resin can attach to the smoke particles and then harm your nasal passage or your lungs.

These are the main causes that can expose you to Poison Ivy rash. Note that the rash can only be caught by skin contact or by inhaling the smoke particles. It is not contagious from one person to another. So, do not distance yourself from whoever has the pus oozing from the rash blisters.

Poison Ivy Rash

The blister fluid is incapable of infecting anyone upon contact. The only contagious way is when you touch the oily skin irritant on someone’s skin, or you, yourself, spread the rash to other parts of your body by touching the urushiol.

How long does it take for the rash to appear?

After being in contact with the urushiol, it can be as fast as within 12 hours for the rash to appear if you were heavily exposed to the oily chemical of the Poison Ivy, or about 10 days if you had a mild contact. To some people even 21 days can be spent before the rash appears on the skin. The main factor behind this difference is the amount of exposure and the sensitivity level that varies from one person to another.

Even when the rash is about to fade as it is naturally self-limited, the time varies from one person to the next. It can take from 10 days to 3 weeks after it has appeared to fade provided you are not treating it with anything. Well, there are some lotions and other antibiotics that are used to expedite the process of healing the Poison Ivy dermatitis rash. But we’re talking about a mild rash here. A severe one can be more intense, and may take more time before it fades away.

Poison Ivy Rash

Before the rash intensifies, there are numerous Poison Ivy symptoms that you can spot. Knowing the symptoms helps one to act quickly with remedial medications to counter-effect the impending painful inflammation.

What are the symptoms of Poison Ivy rash?

The following are the common symptoms that may be experienced by the affected. Bear in mind that sensitivity differs, so the same applies with the symptoms; they can be different.

  • Itchiness
  • Pus oozing blisters
  • Swelling around the eyes or the affected skin area
  • Redness
  • Difficulty of breathing if you were exposed to the smoke after burning one of the plants (Poison Oak, Ivy and Sumac).
  • Swelling of the neck, genitals, face or the mouth if the sensitivity and the skin contact are more intense.

For those who are more allergic to the Poison Ivy oily resin, the symptoms will be more severe to an extent of having eyelids shut or the face being swollen. It’s apparent that the rash can really be traumatic if not attended urgently in highly sensitive people.

Poison Ivy Rash

That’s why it is very important to  attend to the more severe rashes as early as possible. Let’s unfold some of the treatments below.

How to treat Poison Ivy rash?

Starting with mild skin rash, it is easy to treat it using homemade remedies. The skin irritation can fade in about 2 to 3 weeks naturally. For a widespread rash with large pus-oozing blisters or swollen face, it can take more to heal on its own. In such instances, it’s therefore mandatory to seek the doctor’s advice. The oral corticosteroid such as the prednisone is often prescribed for severe Poison Ivy dermatitis rash. Other oral antibiotics may be provided depending on your condition.

For self-care methods, please follow the procedure below:

  • Do not scratch your blisters because you might cause an infection or worsen them
  • Purchase the corticosteroid cream over the counter to apply onto your rash
  • Place cool and wet compresses on the affected area to reduce the swelling blisters
  • Apply a wet cloth on the rash, and apply a calamine lotion to ease the itchiness
  • Take the oral antihistamines so that you can sleep better because the itchiness and painful inflammation may make your night miserable

But, please note, that if you’re suffering from other known conditions such as the sugar diabetes and high blood pressure, you need to take oral antibiotics only under the supervision of the physician. Failure to do that may lead to unforeseen worsening health conditions in your body. The same with applying external skin products, you need to seek advice from dermatologists. Some products may worsen the conditions if applied with pre-existing medical conditions.

close-up of antihistamines

If your self-care methods do not yield fruitful results, you can then opt to see the primary health doctor who might eventually refer you to the dermatologist. The following conditions should prompt you to seek medical advice immediately:

  • If your skin persists to deteriorate
  • If the rash does not fade after a few weeks
  • If blisters are oozing fluid and are relatively large in size
  • If you are starting to have fever with temperatures over 100 Fahrenheit
  • If the rash is too painful and more severe
  • If you have difficulty in breathing
  • If the Poison Ivy rash has affected your eyes, genitals and/or the mouth
  • If you self-care medications have worsened the rash

When getting to the doctor, he/she will be able to diagnose you just by looking at the rash. There are no specific tests or diagnosis methods for this typical rash. Just be prepared to respond to numerous questions such as the following that the doctor might ask:

  • After how long did you notice the symptoms of the rash?
  • What kind of places do you frequent in the wilderness?
  • Have you ever had rash in the past?
  • Which medications/supplements have you taken?
  • Do you any other medical condition?
  • Do you know about any skin allergic reaction?

The doctor can surely help you prevent the recurrence of the rash if you’re enthusiastic about the outdoor adventures. He/she will further prescribe specific antibiotics that will speed up the healing process. A skin care specialist might be needed in some cases, if the allergic contact dermatitis has worsened beyond the capabilities of a primary health care doctor.

Among other prescriptions that the doctor may give you, cortisone is also an important and effective oral medication that can cure the severe rash within 2 to 3 weeks. If you’ve taken the sufficient cortisone, your rash should respond promptly and quickly. But as a word of advice, do not use it if you suffer from diabetes, peptic ulcer or high blood pressure.

Poison Ivy, Poisonous Plant (Rhus radicans).

It is important to prevent the Poison Ivy rash than to treat it. Treating the rash is just lots of efforts and sweat to end up winning. The situation might be dire if you’ve inhaled the smoke particles of this plant because they can affect the lungs. Below we will equip you with skills on how to prevent the occurrence of this dermatitis rash.

How to prevent the Poison Ivy rash?

To successfully prevent the Poison Ivy rash occurring or recurring, please follow our guidelines below:

  • Avoid any closure of the plants → it is important to classify these plants among other plants in the wilderness. We will elaborate further on this below to help you spot the Poison Ivy plant. If you find any difficulty in spotting these plants, it is better if you avoid hiking in clustered trees and off-trail terrains. You must opt for the well-groomed paths that are clear of any trees. Furthermore, if you want to pitch a camping tent, do that in an open space to avoid any exposure to the Poison Ivy tree.
  • Distance yourself from affected objects → If you have travelled with pets, avoid touching their furs because the urushiol can stick to them when they are busy hunting. Remember that you can easily get the rash by touching the oily resin. Furthermore, if you have stumbled over these plants, knowingly or unknowingly, it’s better that you wash off your clothes, shoelaces in a machine or wash your shoes with a brush thoroughly to avoid any contact with the urushiol. The same applies to your other outdoor tools if you were doing construction work. Do not touch them until thoroughly cleaned.
  • Wear protective clothes → wearing long sleeves, vinyl/leather gloves, long pants, quality shoes is also a remedial step towards preventing Poison Ivy rash. The aim is to protect your skin against any possible contact with the urushiol. Other gloves such as the cotton wool gloves may not be helpful in protecting you.
  • Remove the plant from your camping precinct → if you’ve spotted a beautiful spot to camp at, but hindered by the Ivy plant, you can remove the plant completely from the roots. Just wear your protective gloves to execute that task. After removing the plant, dispose it far away without touching it or burning it. Even after a few years later, do not touch the plant because it can still be potent. Remember to wash your gloves with a detergent after using them in removing the plant.
  • Wash your skin completely → if you have been exposed to the urushiol, you need to gently wash your affected area with warm water and soap to remove the skin irritant and then rinse. Do not forget scrubbing under your nails because that’s where the resin can remain and then spread to other parts of your body. If your pet shows some oily chemical on its fur, you can also wash it with soap and water.
  • Apply the barrier cream → there are some skin lotions that can be applied to act as a barrier between your skin and the plant’s urushiol. Oftentimes, you can find them over the counter at pharmacy stores.

These are the common ways to prevent Poison Ivy rash on your skin. Knowing the tree and its similar plants is helpful to avoid any exposure to it.

How to spot the Poison Ivy Plant

As we promised above, we will help you spot the difference below.

How to spot the Poison Ivy Plant?

Poison Ivy Plant is native to North America. So, if you like frequenting that location for your outdoor adventures, you have to be vigilant. Normally, the plant may be found with 3 spoon-shaped leaves. It can cling onto other trees or grow independently as a shrub. You can find the leaves in groups of 3 with the center leave having a longer stem than the others. Check the picture below to relate to the tree that how does it look like.

Poison Ivy Rush

Risk factors of Poison Ivy dermatitis rash

The risk factors of getting you exposed to the urushiol are the outdoor activities such as the following:

  • Hiking
  • Backpacking
  • Construction work
  • Farming
  • Hunting
  • Gardening
  • Camping and many more

There are many risk factors that can contribute to this typical rash. Please note that the growth of the Poison Ivy plant is not limited to the forest, but can also grow in your yard.

Overnight Backpacking

So you need to be vigilant when you’re cleaning your yard or doing gardening. Even your dogs that like hunting in the wilderness can come with the oily resin of the Poison Ivy tree and then infect you without you actually going outdoors.

Is Poison Ivy rash contagious?

Do not distance or reject other people who suffer from a Poison Ivy rash because of the fear of getting the infection through the blister fluids. The fact is that the rash is not contagious from one person to another as long as there isn’t skin contact. Even if the person has inhaled the smoke when the plant has been burned and then cough next to you, there’s no scientific proof that it can be contagious.

Woman scratching her skin

The only way that it can be contagious is when you in fact yourself. If, for example, you keep scratching the affected area, the urushiol can be transferred through your nails to another skin area. You can infect your whole body unknowingly if you do not wash off the oily resin thoroughly.

Expert Advice

Before you treat the blisters when they’ve swollen intensively, we recommend that you use the moist compresses first. You can ask for over-the-counter solutions from the pharmacist that can compress the blisters before applying the cream. That way the healing process will be expedited. Applying the cream on its own on large blisters may not be that effective in expediting the healing process.

After the swelling has been solved, you can apply the creams needed to get rid of the rash. And when bathing, please avoid very hot water because it is not good for the rash. Yes, it can calm the itchiness, but certainly not good for your skin.

Ivy block lotion

When heading out to a location wherein Poison Ivy plants are said to be ubiquitous, we recommend applying the Ivy block lotion. It will help prevent the skin contact. If you mistakenly get an exposure to the urushiol, we recommend washing the affected area with “Technu” liquid. The Jewelweed plant can also be helpful by rubbing it on the affected skin because it will get rid of the sticky resin before it causes a rash on your skin.

Final Thoughts

The Poison Ivy rash can be a misery for outdoor enthusiasts. Dermatologists, as the skin care professionals, say the rash can normally appear from 5 to 21 days after exposure. However, if you were repeatedly exposed to the plant’s urushiol, the rash can appear as quickly as within 12 to 48 hours. The situations differ from one person to another due to the difference in skin allergies.

So, to win the battle against the Poison Ivy rash, you need to be vigilant about where you travel to or camp at. Take cognizance of the prevention methods we’ve discussed above to stay out of danger. If mistakenly exposed to the oily resin on your skin, try to wash it off completely using soap and lukewarm water, and then apply cream or take antibiotics under the doctor’s supervision. Those with known extreme conditions should not opt for the self-care oral methods without the doctor’s attention.

The rash caused by poison ivy is the result of an oil called urushiol.