Home Blog Page 28

How to Adjust Compass Declination: Avoid Getting Lost in the Wilderness

0
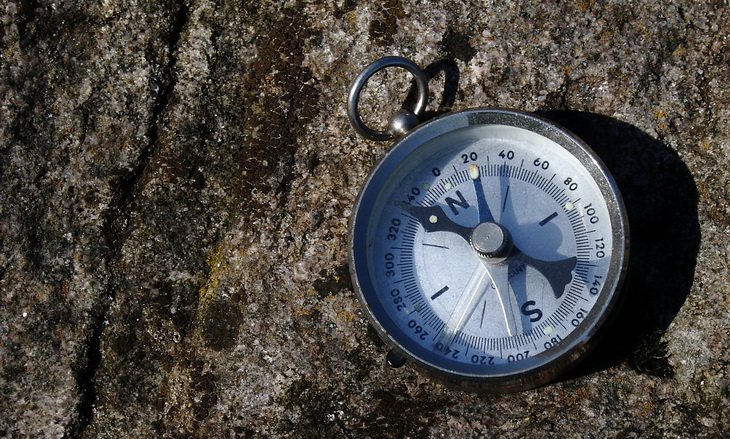
compass on a rock

Navigating in the wilderness, where you find yourself in off-trail forests and with landmark signs being destroyed, can really be challenging even when you have a compass and a map with you. Many people can bear testimony to this. The fact is that, the compass magnetic needle doesn’t point exactly to the True North. It is easily manipulated by the Earth’s magnetic field. It’s only in exceptional locations where the Magnetic North might be lined up with the True (Geographic) North.

Dirty green compass on the ground

You just have to master manual adjustment of the compass to compensate for the local magnetic declination. We will explain below what magnetic declination is and how to adjust compass declination.

What is a magnetic declination?

A magnetic declination is the angle between a True North and a Magnetic North. This angle can be either eastern or western depending on where you are on earth. If it is west of the True North, for example, we call that a negative local declination, and conversely, we call it a positive local declination if it is east of the True North. In some other parts of the world, the angle between these two North directions can be infinitesimal, and thus its effect can be neglected. So, it won’t have much of the impact on your directions.

For significant values of the local magnetic declination, it is important to understand that how to adjust the compass accordingly or how to manually account for that error by performing minor arithmetic calculations. Many people got lost in many occasions because of the overlooked compass declination adjustment. Some didn’t actually know about this effect. So we don’t want you to be like them, hence we equip you will skills on how to compensate for that below.

compass-on a map on the table

The prerequisite to an efficient compass declination adjustment is an adjustable compass. There are some cheaper models of compass that have fixed declination. Those are a no-go area if you know that you travel to various locations with different declinations. Keep in mind that declinations vary from time to time and from one location to another. For example, you cannot rely on local declination that was determined 10 years ago. Simply get to the web to find out about the recent values. Again, you cannot rely on the same value in Francisco as in California. These values do vary due to a constant fluctuation of the Earth’s magnetic field.

If we were to recommend to you a good compass, we would go with the Sunnto adjustable compasses. The adjustable compasses are equipped with screwdrivers and a declination scale so that you can make the adjustment accordingly. Once the declination has been adjusted, you can only adjust it again provided you get into a different location. But the choice of compasses rests with you that which brand is suitable.

Older-Compass on a map

Before we can delve into the main subject of adjusting the compass declination, let’s help you understand the declination values. You’ll then be in a good position to adjust the compass declination without a problem.

Understanding Compass Declination Values

As we’ve highlighted above, a declination value represents the angle between the True North and the Magnetic North in a certain location. East-based values are regarded as positive, while those in the west direction are regarded as negative. For example, if you are in a location wherein it states that you have an eastern declination of 25 degrees; just know that it is equivalent to -25 degrees. We will depict some scenarios below to help you understand these values thoroughly.

Scenario One

Let’s say you are on a hike adventure in the city of Toronto in Canada and current declination value reads -17 degrees, which is the west of True North, and upon that, you want to travel in a 83 degree direction. Meanwhile, your compass indicates that your bearing is 83 degrees, which is actually a direction from magnetic north not a True North. In actual sense, considering the declination value of 17 degrees West, you are actually 66 degrees from the True North.

Toronto in Canada at night

You simply add the declination value and the compass bearing value which will give you 66 degrees. This, therefore, tells you that you have to set your compass to 100 degrees so that it can be equivalent to 83 degrees from the True North Pole.

Scenario Two

Let’s assume you are in Francisco and your current declination value is +15, which is east of True North. Meanwhile, your compass indicates that your bearing is 75 degrees. Just do the same calculations as above and you will find out that your bearing is actually 90 degrees. So, if you want a bearing of 75 as indicated by the compass, you will have to adjust to 60 degrees, which will be compensated in line with the local declination value.

San Francisco at night

With these scenarios, we’ve sought to show you that in order to determine your bearing on the compass and the map, you have to perform some minor calculations. It is important to determine your local declination value so that you can add it to your compass reading to determine the exact location in relation with the True North for an accurate travel. Otherwise, you will get lost.

In simple terms, to understand these calculations, you can perform the opposite of your declination values. For instance, when the declination value is +15, then reduce the compass bearing by 15 degrees. If it is -20 degrees, you have to add the 20 degrees to your compass reading. That’s easy, isn’t?

How to adjust the declination on the compass?

The aforementioned magnetic declination calculations will become handy in a manual adjustment of the compass declination. Once you master how to add and subtract the declination values from the compass readings, you are half way to the right direction in relation with the True North regardless of the presence or the absence of landmarks. These arithmetic calculations are essential in an accurate translation of the bearings to the map.

In a nutshell, translate the bearing read from the map to the compass bearing by adding the local declination value if it is westerly or by subtracting if it is easterly. In addition to these calculations, you need to adjust the compass direction-indicators manually. Adjustable compasses come with small screwdrivers for this task.

The adjustable compass allows you to turn the direction-indicating arrow independently from the compass dial. Before you can adjust it, firstly ensure that you know your local magnetic declination as emphasized above. The next step is to use the screwdriver or the key to twist the screw that can be located underneath or on the compass. Twisting the screw helps calibrate the compass in accordance with the magnetic declination values. Turn the screw until that arrow moves away from the compass ring’s north.

San Francisco at night

If your magnetic declination is easterly, then adjust that arrow until it points to the east direction at the exact value determined by the declination value. That will be in the clockwise directions. If it is westerly, then adjust the arrow anti-clockwise to match with the exact value of the magnetic declination. You may watch this video https://www.youtube.com/watch?v=peu7uMp0cVU to give you an insight about how to adjust the compass magnetic declination.

After performing these adjustments, you will be all set up to continue with your wilderness hike without getting lost. There’s no need to continually check the declination value if you’re in the same location for the period. But there will be a need if you decide to go to another location. For quality assurance, you can continuously check the magnetic declination just to err on the side of caution.

IMPORTANT: The deviation of the compass directions from the True North is not only caused by the magnetic declination. Other factors can be equally liable to that. For instance, your belt buckle, your metallic watch, your car keys, the installed underground pipes, power lines or bridges, can all have an impact on the compass. So, for accurate compass reading, make sure that you stay away from such obstacles even though it can be hard to do so.

Compass In a Hand

If you have these magnetic materials, it is then important that you continually check the compass and the map to see if there are any deviations attributable to them. For the avoidable magnetic materials such as the power lines, please stay away from them to avoid jeopardizing accurate readings of the compass.

How to use a compass with a map?

Given our guidelines above, you might know how to adjust the compass declination thereafter, but understanding the combo (compass and map usage) is equally important too. We’ll guide you below on the assumption that the compass has not been adjusted as yet for magnetic declination.

A compass with a map

In this instance, the direction-indicating arrow will still be lining up with the compass ring’s north. Follow the steps below:

  • When using a topographical map, there is information at the bottom that indicates the difference between the Magnetic North, True North and the Grid North. Firstly, get the magnetic declination of the area depicted on the map. As we forewarned you, do not rely on the figures that were determined years ago because the magnetic declination varies as time goes on.
  • Then take a pencil to connect your destination with your current standpoint with a line.
  • Put the compass on the map and let the needle point to the intersection of the map bearing and that of the neat line.
  • Then rotate the compass until the north of the compass, matches with the map’s north, so that you can read the bearings from the compass dial.
  • Now the declination values come into place. For instance, if the magnetic declination is easterly, subtract the declination value from the compass bearing. If it’s westerly, then add to that. These are the same arithmetic calculations that we’ve derived above.
  • After calculating the new bearing in line with the magnetic declination, rotate the compass dial to adjust to the new value in line with the index line.
  • Then continue with your travel until you reach your destination. The process of aligning the compass with the topographical map to determine the direction is to be repeated as many times as possible to ensure that you are not getting lost.

How to use the compass with the GPS?

GPS is another indispensable tool to be used in combination with the compass to determine the exact direction to your destination. It is versatile in that it can be used with either the fixed compass or the adjustable one for declination. Many devices nowadays come equipped with GPS, so you should be sorted out with it.

Let’s take a scenario where your compass is not adjustable for magnetic declination. Our assumption is that you’re in the city of London with local magnetic declination of 16 degrees west of the True North Pole, whereas your destination is located north of your standpoint. Firstly set your GPS to the Magnetic North. Then the GPS will depict a certain bearing that should be followed to reach your destination. You must dial that certain bearing on the compass.

GPS with compass in hands of a person

Turn the compass until the magnetic needle overlaps with the direction-indicating arrow. It’s recommended that you turn with your whole body. You should then be able to notice a landmark along that depicted bearing. That’s the right direction, continue towards it.

What happens when you use the GPS with the adjustable compass? Let’s find out. Firstly, let us assume that your local magnetic declination is 10 degrees west of the True North. This time set your GPS to True North. It will promptly indicate that a bearing of 0 degrees should be followed to reach your destination. In line with the local magnetic declination, adjust the declination on the compass.

The direction-indication arrow should be pointed towards 10 degrees west. That’s anti-clockwise. Then dial 0 degrees on the compass. Turn the compass until the magnetic needle (red) overlays the direction-indicating arrow. After rotating the compass, you should be able to spot a landmark along the path indicated by the bearing. That’s the direction to follow to your destination.

Handheld GPS vs Compass and Map

The processes should be repeated until you reach your destination. That’s the fruit of using the GPS with the compass. It becomes handful if you are clueless in understanding the maps. Perhaps you have skipped your Geography class in high school, but then you don’t need that comprehensive understanding of maps when using the GPS. Just a basic grasp, is sufficient enough.

Wrapping up!

We have gone all the way to give you the insights on how to adjust the compass magnetic declination so that you can get the correct readings. From our analysis, it’s apparent that compasses without adjustable declination are a no-go area. They are usually cheaper than the adjustable ones. But just to stay out of danger of getting lost, it is better to spend a lot on an advanced compass. We know that there’s a lot on the market, but we’ve recommended the Suunto adjustable compasses.

Furthermore, we have highlighted the fact that local magnetic declination alone does not affect the compass readings. Some factors such as the magnetic materials are to be avoided. Make sure that the keys and other metals are far from reach. Also, stay away from crossing bridges and power lines to get the precise readings from your compass.

Having equipped you with this information, we are confident that you can adjust almost any adjustable compass. It is important to account for such errors to avoid travelling for hundreds of miles to a wrong destination. In some locations, the declination value can be so infinitesimal that its effects are neglected. But most of the locations have a significant difference due to the fluctuation of the magnetic field. It is also important that you acquaint yourself with the basic arithmetic magnetic calculations that we’ve introduced earlier on. They will help you with all the adjustment tasks.

compass-on the table

How to Get Rid of Poison Ivy: And Stay Safe in the Process

0
Close-up of poison ivy

Irrespective of what phrase you use to describe the poison ivy – “the leaves of three” – the impact after you come into contact with this plant is the same – an itchy, blistery rash that is caused by the presence of an oily resin called urushiol. This oily component can be found in the leaves and stems of this plant.  So, before we explain how to get rid of poison ivy without getting in danger, we will get more familiar with this plant, in order to know how to deal with it.

So what’s the deal with poison ivy? If you always have kids playing in a yard filled with this plant, then there is always a likelihood they will come into contact with it. Sooner or later, one of them will drop their toy or ball on the plant, or even worse, fall directly onto it.

Poison Ivy, just look don't touch

Learning about the effective ways to get rid of the poison ivy is one of the most significant survival skills you can ever possess as this could save you or your loved ones if you became victims of the plant’s allergy-causing poison. This guide will feature some of the basic aspects of the plant that you need to know including how to identify poison ivy, how to treat allergies caused by these plants, and how to get rid of them.

WHAT IS POISON IVY

Before we can proceed further, it’s imperative to have an idea of what the poison ivy is. First, this is a plant that causes allergies in seven out of ten individuals by releasing a chemical, urushiol, which causes rashes when a person comes into contact with the stems or leaves.

To get a rash, you will only require one-billionth gram of urushiol. This chemical remains potent on surfaces, including the tools you use in the garden for a long time. That is why this chemical has a reputation of being the most allergenic component. In fact, urushiol immediately causes rashes and itchiness from the time your skin comes into contact with it.

Poison Ivy drops

However, you don’t need to worry when you get rashes from this plant as the problem can easily be treated at home. But if the symptoms persist, and in case of difficulty in breathing or swallowing, it’s recommended to seek medical attention. In the worst case scenario, one may develop rashes on their face that could lead to swelling of their eyelids. In such a situation, this should be considered a medical emergency, and the person must be rushed to the hospital.

PICKING POISON IVY FROM THE REST OF THE PLANTS

When in the outdoors, it’s important to be able to determine how the poison ivy looks like so you may be able to stay away and warn everyone else within your campsite. In general, this plant has three small leaflets and grows as a shrub. The poison ivy grows like a woody plant in Western and Northern Canada, the United States, and the Great Lake regions.

Pretty Poison Ivy

On the other hand, it grows like a vine in many sections of the Midwest, Eastern, and Southern United States, with bear green berries that turn off-white during fall. Here is how to identify poison ivy.

  • The leaves: These plants have three leaves with pointy tips and smooth sides. Besides the longer middle leaf are two smaller leaves with lengths ranging from a quarter an inch to two inches.
  • Growth patterns: Poison ivy can cover the ground (four to ten inches), can appear as upright shrubs and bushes (up to four feet), and as vines which climb other trees.
  • Arrangement of stem: Every group of the three leaflets grows on its thornless stem. The stems are all connected to one vine that is covered in hair.

Note: This short description is to assist you to identify the plant in case you encounter poison ivy. That way, you can advise others when camping outdoors.

HOME REMEDY FOR POISON IVY

Along with its pestilent friends, poison sumac, and poison oak, poison ivy can cause terrible rashes in people who are allergic to these plants. Oil in these plants, urushiol, causes allergic reactions, weeping, burning, and cracking of the skin. If you happen to get a rash from the poison ivy, this guide will tell you how to get rid of the reaction without having to wait for the skin to heal naturally.

Tecnu Extreme as treatment for poison Ivy

Natural healing could take up to three weeks, which is a long time to suffer from allergic reactions. These steps will help you get rid of rashes from poison ivy within the shortest time possible.

Steps to consider

  1. If you do not have a rash or are worried that you might get one, it’s advisable to prevent it
  2. If you already have a rash that causes pain and suffering, make an effort to treat it
  3. The idea is to completely wipe out the rash by killing the urushiol – the oil causing the rash. This isn’t difficult to do. Mineral spirits help get rid of the urushiol
  4. The only poison ivy medication you can obtain over the counter and contain urushiol-killing mineral is Tecnu. This product works effectively to kill the chemical causing the infection, preventing the spread of urushiol to other parts of the skin. You can purchase this product from a local pharmacy or an outdoor retail outlet. The instructions on how to use it are included in the package
  5. If you’re not in a position to purchase Tecnu, then there is also another option you can utilize – paint thinner. The active ingredients contained in most of these products are mineral spirits. Always ensure your thinner has mineral spirits in it. Put some of the thinner on a clean piece of cloth and rub it into the affected parts of the skin. Be careful when applying around the mouth, the nose, and the eyes. Additionally, you should be careful not to ingest the paint thinner. If you are capable, go with Tecnu as this product contains a petroleum-based solvent that is absorbable through the skin.
  6. Let the paint thinner or Tecnu, soak around and into the affected areas for a few minutes
  7. Once the absorption is complete, make sure you thoroughly clean the area with water and soap to wash the chemicals off. The chemicals in paint thinner and Tecnu aren’t particularly good for the skin; nevertheless, in the short term, they are clearly better for it as opposed to urushiol.
  8. The infection should be killed, and the itchiness should quickly subside after applying Tecnu or paint thinner. Nonetheless, it will take a few days for the remnant cracking, swelling and flaking to disappear completely.
  9. Another technique to eliminate the effects of poison ivy on your skin is to run the affected area under hot (but bearable) water for about ten minutes. This will stop the itching, and your skin will go back to normal within two or three days.

Important tips to remember

  1. Do not wait until the symptoms begin to manifest before you can take any action. If you know that you have come into contact with the poison ivy, it’s important to take the necessary measures to prevent its effects
  2. The sooner you seek remedy, the sooner the infection will disappear
  3. The best way to avoid coming into contact with poison ivy is to kill the plant
  4. Poison ivy doesn’t spread when scratched. When the plant rubs on your skin, it will rub the center of the future rash the hardest as it gets most of the urushiol to the middle. The surrounding parts may get the oil, but these will not be as much as the center of the contact. When you start scratching, the rest of the rash just moves inwards and not outwards.
  5. Do not wait to remedy the situation. Wash the affected part immediately you are in contact with poison ivy.
  6. You can apply toothpaste on the infected parts. Let the paste sit for about five to ten minutes. Do this two times a day for three days, and the rash will disappear

POISON IVY HOME REMEDIES

When you are out camping and you happen to come into contact with poison ivy, there are steps you can take to eliminate urushiol. You can make Jewelweed, which is a plant stem that contains juice that stops itching. This fluid can be applied to the infected area of the skin to relieve yourself from the itching. All you need to do is crush the stem and rub it directly on the rash to allow the juice to penetrate.

Alternatively, you can collect some Jewelweed while in the wilderness, crush the stem, adds some water and blend them together. Once you are done, you can store the mixture in a dispenser bottle that will allow you to apply the fluid on the affected area.

Jewelweed plant

If you are camping on the beach and you happen to get some rashes from the poison ivy, take a bath using the sea water. This process will help wash the sores away as salty water will dry out the blisters. However, if you are not close to the sea at the time of contact, you can make a salt solution by using Epsom salt. These products are usually useful in treating dermatitis and rashes from poison ivy. Read and understand the instructions, sprinkle some salt into warm water and apply the mixture on the rash.

Other remedies you could use when camping outdoors include:

  • Baking soda baths and pastes: A typical baking soda is an excellent natural solution for treating itchiness that is linked to a poison ivy rash. To mitigate and relieve itching, place a half a cup of baking soda in a basin or bathtub filled with water (lukewarm). You can also decide to mix three teaspoons of the baking soda with a teaspoon of water. Mix the two components until they form a paste. Rub the paste on the infected part of the skin to relieve the irritation.
  • Oatmeal paste: Prepare a small amount of oatmeal and apply it directly to the affected part. Make sure the paste is thick, so it can stick to the skin. Some experts recommend rubbing the oatmeal while it’s warm, since the heat from the paste will eventually cool, leaving your skin feeling dry and relieved. Always ensure you don’t apply the paste when it’s hot as this will burn your skin. For an extra relieving effect, try adding a teaspoon of baking soda.
  • Organic apple cider vinegar: Smear a teaspoon of organic cider vinegar directly to the affected part of the skin. The apple cider vinegar contains a toxin-relieving action which helps in sucking the poison out of the skin’s pores. You may also create warm vinegar compress using a cotton towel. You can repeat this process until the symptoms subside.
  • Aloe Vera gel: An old curative remedy for your skin, this product can be applied directly to the affected part. You may purchase a high-quality organic Aloe Vera at the most health-food outlets, or better yet, buy the plant and utilize the gel from its inner flesh. The external utilization of the juice from Aloe Vera may also help, but this is not as efficient as the gel.
  • Himalayan crystal salt: Do not forget that poison ivy makes the skin red and wet. Salt is a natural remedy as it pulls the excess water and the poison from the skin’s pore. Make a paste by using Himalayan salt and purified water. You may also take a bath in warm salty water. Experts recommend putting a cup of the Himalayan salt into a bathtub and soaking yourself in it for about twenty minutes. This will help to alleviate the problem.
  • Organic Goldenseal: Mix a portion of the powdered Goldenseal root with hot water in small portions. Rub the paste on the affected area of the skin to minimize the chances of an infection. To get quick results, drink the Goldenseal tea or try consuming a Goldenseal supplement. This type of remedy helps in minimizing the effects of poison ivy.

Aloe Vera gel – one of Mother Nature's miracles

CONTROLLING POISON IVY IN THE GARDEN

Now that you are aware of the step to take to get rid of the rashes as a result of urushiol, it’s also important to have an idea of how to eliminate the poison ivy in your backyard. This plant can be a real nuisance to a homeowner if it’s not eliminated in time. If the poison ivy makes your yard its home, it is essential to have some useful ideas on how to get rid of the plants, which is often easier said than done. Anyway, here are some pointers you need to consider when controlling this poisonous plant in your garden.

The first and most important thing is to decide whether you want to use a chemical or an organic technique to eliminate the plant. Although both methods are effective, a chemical process presents faster results compared to the organic technique. One of the most difficult things to do is to get rid of a plant in its entirety. And if you are utilizing the organic control technique, it means you need to pull the entire plant out using your hand.

POISON IVY IN THE GARDEN

But what is the right time for this procedure? It’s advisable that this process is undertaken after the rains when the roots are easier to pull due to the soft soil. During sunny days, the ground is usually dry, making it difficult to remove the plant due to the compact soil. Unless you have your gloves and long sleeve on, do not attempt this process.

Make sure you don’t come into contact with any other thing that touched the plant and contains the oil as this can transfer easily through the gloves into your skin. And for this very reason, the chemical process is mostly preferred by gardeners. The chemical control method eliminates any chances of coming into contact with the poison ivy.

However, pulling it out of the ground is always the fastest way of getting rid of poison ivy. Interestingly, some individuals are immune to the effects of this plant. If you happen to know someone like that and is willing to help, you are lucky! But if you are doing this yourself, be sure you put on the right protective clothes. You will not only need the gloves to protect your hands, but you will need an attire that covers every piece of your body to prevent exposure to the plant when uprooting it.

Poison Ivy in the Yard

This implies duct taping the pants around the edges of the shirts to the glove and your pants around the socks. When you are through with pulling the poison ivy, wash your clothes at least two times before you can wear them again. Better yet, you can throw them out if you have spare clothes with you. Taking these precautions before and after the task can help save you long hours or even days of discomfort.

After you have pulled the plant out, make sure you dig approximately eight inches beneath the plant so you can be sure that all its roots have been removed. Cover the area using paper or cardboard to prevent any regrowth. Deposit the uprooted plant in a leakproof garbage for collection later on.

Another organic control technique is the use of hot water. However, this approach is only useful if there aren’t any other plants you want to keep. Pour the hot water directly over the plant and its roots to kill it. You need to be careful when using this technique as hot water can kill any other plants it comes into contact with.

Poison Ivy this is what it looks like

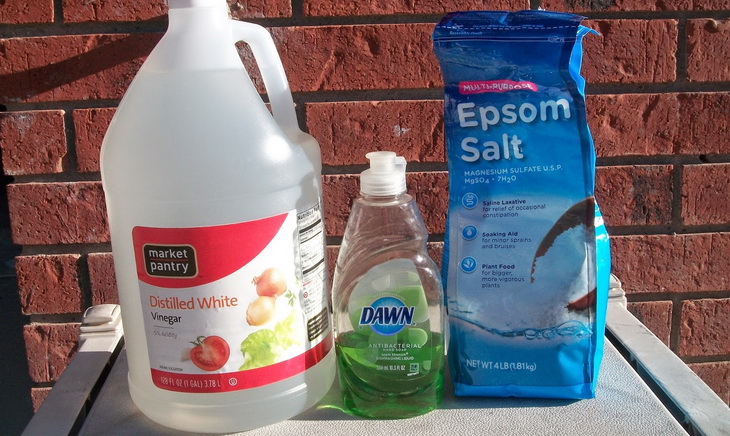
There is another technique you can use if you do not like engaging in manual labor. Combine three pounds of salt in a gallon of water and a quarter cup dish soap. After that, place the mixture into a bottle sprayer. Spraying the mixture will get rid of the plants it gets in contact with, so be keen so you can only spray the mixture on the poison ivy. It’s advisable to undertake this task in a sunny day as the rain can wash off the solution. It may take a while to get rid of the plant, but the technique works!

USING WEED-KILLING SPRAY

If you are getting impatient because the organic criterion of eliminating poison ivies doesn’t work, you may resort to a chemical technique of killing the weed. Sprays which contain triclopyr and glyphosate, are effective in killing the tissues of the poison ivy. After application, the plants die in about a week or two.

The herbicides are efficient when it comes to getting rid of the plant. However, for the best result, spray or apply the chemicals on the leaves and if it happens to grow, spray it again. Doing this several times will reduce the ability of poison ivy to re-grow, and this will kill it completely.

Homemade Weed Killer Spray That Uses Non Chemical Products

Warning: Whatever chemicals you decide to use, make sure you read and understand the instructions and directions of use. Make sure you keep all chemicals out of children’s reach.

WRAP UP

There is so much you could do when you want to get rid of the poison ivy in your garden or when you come into contact with the plant’s feared urushiol. Many of these techniques are simple home remedies as they utilize ingredients such as lemon and vinegar, baking soda, and other over-the-counter solutions including rubbing alcohol and calamine lotion. These can also include fruits and vegetables such as banana, cucumber, and watermelon. And if you are looking to eliminate these plants from your garden, two options are available to you – the organic and chemical techniques.

It should be remembered that while the poison ivy can result in painful effects on the humans, it’s valuable to us. Birds, deer, and even insects feed on the plant, and some tiny animals utilize it as shelter. If you happen to see it in an area where no one can touch it, it’s best to leave the plant for the wildlife that thrives in it rather than having to remove it.

poison ivy in summer

How to Purify Water With Bleach: Remove Disease-Causing Microorganisms

0
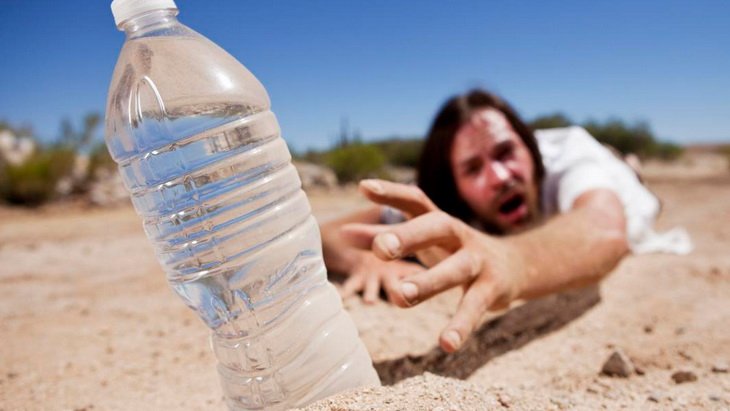
Man-Thirst-Desert-Water-Bottle-Reach

The inevitable occurrence of natural disasters such as the hurricanes and floods often results in contaminated water streams. As thus, our reliable water sources end up having harmful microorganisms. And the sad part is that no one can live without water. Not even 3 days can ever be spent without having healthy water to drink or cook. Such instances of contaminated water, propel us to be well-rounded in water purification systems such as how to purify water with bleach in a bid to have clear water with no disease-causing agents such as the giardia, legionella, cryptosporidium, salmonella, and others. The fact is that, there are hundreds of pathogens in water and they will eventually lead to waterborne diseases such as the cholera as it was a case in some countries already.

To purify the water, we are faced with numerous water purification systems that come with different treatment capacities and prices to choose from. Keep in mind that no purification system can be all-in-one no matter how advanced or how expensive it can be. For instance, some are capable of treating pathogens, bacteria, algae, protozoa, and viruses, whereas others are capable of treating organic/inorganic chemicals.

Purify Water With Bleach

But to get all of them is just another way to break your bank. Among these methods, we’ve decided to equip you with skills on how to use bleach in purifying water as the widely available chemical disinfectant solution, and also the most affordable. We’ll unfold all the advantages and tips on how to treat water using bleach.

Importance of purifying water with bleach

First and foremost, you should note that there is a plethora of bleach solutions available. Our focus is on the household grade liquid bleach (chlorine). The household bleach often contains the sodium hypochlorite, which is the chemical behind its ability to break water molecules of water pollutants. Do not entertain the bleaching solutions that have other impurities. However, as stated above, no system is an all in one. With regard to bleach, for example, some pollutants such as chemical pollutants may not be removed efficiently.

household bleach

One can say that it depends on the extent of the contamination of the water. If, for instance, you suspect that some chemicals have spilled into the water streams, do not opt for bleach to purify it. Perhaps consider other methods such as the reverse osmosis, activated carbon filters or the UV treatment, even though they’re costly. But it’s worth an investment when struck by such an inconvenient contamination of water.

The household liquid bleach has its own importance and excellence in purifying water. Let’s first understand how it purifies water.

How does bleach purify water?

Well, to start with, the household bleach (with concentration of 5.25% to 8.25% of sodium hypochlorite) produces the hydrochloric acid and oxygen as end results when poured in water. There’s a chemical reaction whereby the sodium hypochlorite reacts with water to form hypochlorous acid. The acid will eventually turn into the famously dangerous hydrochloric acid and oxygen. Then the chemical bonds of the water pollutants will be destroyed. There will therefore be no more pathogens and bacteria that jeopardize your health when drinking water.

Bleach tablets on the table

IMPORTANT: You should only use the unscented household liquid bleach that contains a concentration that ranges from 5.25% to 8.25% of sodium hypochlorite. Take a closer look at the ingredients on the bottle. The most popular brand of Chlorox is often helpful. But even if there are plenty of brands on the market, just be vigilant about the composition of the liquid bleach.

Additives and colorants should be eliminated from your ideal bleach solution that is effective in water purification and non-poisonous to human beings. Furthermore, beware of the bleaching solutions with a higher concentration of sodium hypochlorite because they can be harmful.

Where to find the household liquid bleach?

There are many camp stores and supermarkets that sell this solution. This abundant availability of the chlorine bleach makes it one of the best and preferable water purification methods. You don’t have to sweat before you find it. But, just beware of a variety of bleach grades out there. Failure to buy the right one might end with making your drinking even worse water.

So, if you are to camp in a certain location that has been struck by floods or hurricanes, you can simply go to the nearest camp-stores to purchase household liquid bleach to purify your water. Boiling water, as one of the common methods, may not be the best solution when you’re in the wilderness far from an electric stove, unless you are willing to sweat in making the campfire so that you can boil water.

Man using household bleach to purify water

Either way, we do not recommend substituting the chlorine bleach with boiling water. There are some pollutants that are not a match to the bleaching solutions than boiled water. Moreover, when you compare the efforts of having to boil water and having to purify with bleach, you’ll see that buying the bleach is relatively effortless.

Once you have found the relevant bleach solution to purify your water, you should follow a purification procedure with care. There are numerous scientific recommendations stipulated by various organizations out there. For example, some say add 6 drops to 1 gallon of water, whereas some say 8 drops. We stay with the ones that say 8 drops for effective removal of contaminants. But the measure will vary depending on the extent of the contamination. For instance, cloudy water needs about 16 drops in a gallon for an effective purification process.

We have simplified a procedure below to follow. The table with recommended concentrations per a certain amount of water is also provided as a guideline.

Purifying water with bleach

  • Find a clean container first that can store sufficient water for consumption for a long period. The best advice is to use the bleach to sanitize the container before actually storing water in it. To do this, add a teaspoon of house liquid bleach to a liter of water and then shake the container with.
  • Reminder: no any other bleach grade than the one with concentration of 5.25% to 8.25% of sodium hypochlorite
  • Then find a measure like the teaspoon, which you can use to add some drops of chlorine bleach in the water.
  • Please follow the table below when adding the solution
  • After mixing the bleach with water, wait for about 30 minutes to an hour before you can consume the water
  • After that period has elapsed, smell the water to find out if there’s a smell of the bleach. If no smell, repeat the dosage and then wait for about 15 minutes before consumption. If there’s too much smell, try exposing the water to air for more minutes before consuming it again. There should ideally be a slight smell.
Vol of water to purify Amount of bleach to pour in the water
1 liter 2 drops
2 liters (0.5 gallon) 4 drops
1 gallon ¼ teaspoon (8 drops)
5 gallons A full teaspoon

Table 1: Recommended amounts of bleach per volume of water for purification

Please note that you have to double the amounts if the water is found to be cloudy with sediments in it. Unfortunately, liquid bleach is not capable of removing sediment. So, the best way is to filter the water first before adding bleach in it. There are many filters such as the coffee filters or paper towels that you can use in this regard. Use a clean container to filter the water into, and thereafter add the bleach accordingly as recommended in the aforementioned table.

Man purifying-water-with-bleach

The other important thing to note is that, the bleach should not be 6 months old. So before purchasing any household liquid bleach, check the expiry date. The bleach solutions that are over 6 months may be rendered ineffective in water purification. And, moreover, if you have treated water with bleach, it should be changed/re-purified after 6 months. Bleach has a short-life.

Now that you have used bleach water in purifying your water, it’s important to store it in a safe place. Also, follow certain recommendations to achieve that to ensure a safe drinking of water.

Storing water safely

You never know that, when could you face the emergency situations. It is better to stay prepared rather than wait for that moment when the situation of emergency has arrived. Many organizations recommend that you store about a gallon of water for each member of your household that could last at least 3 days.

The failure to save sufficient water may compel the household to rely on factory-sealed water sold in many stores. But then, for how long can you rely on that option? How about the cost implications? That could certainly be unsustainable in a long run. It therefore necessitates the fact that you should purify your water with bleach and then store it for later consumption.

WaterBrick 3.5 Gallon Stackable Water Containers

Well, if you’re an outdoor enthusiast, you have no choice but to travel with water purification systems for unforeseen inconveniences of contaminated water. So, to save water:

  • Purify water first with liquid bleach
  • Fill your containers that are pre-cleaned/pre-sanitized before storing water in them
  • Seal the containers tightly
  • Print the date that you have saved that water with
  • Store the containers in a room temperature
  • A few months down the line, keep track of the date
  • Then, if the 6 months has passed, replace the water
  • Otherwise, you can save water and then purify it later when the need to consume arises. But keep in mind that you have to wait long after purifying.

Did we mention anything about the reliable sources to take water from? I bet not. It is also important to consider the sources from which you take water. Among others, the following are reliable:

  • Lakes
  • Rivers
  • Rainwater
  • Natural springs
  • Ponds
  • Streams

Although we recommend fetching water from flowing streams, we’d like to warn you about the dangers of that beforehand. For instance, flowing water is more likely to be affected by oil or chemical spills. So, liquid bleach will not be a match to some chemical pollutants such as the organic and inorganic chemicals. But bacteria, protozoa, and viruses are effectively removed by this method.


To stay out of danger, we recommend that you personally inspect the quality of water. Perhaps filter the water → boil it thereafter → and then use the bleach, although the boiling temperature will have removed most of the microorganisms that the bleach would also remove. This is done just to ensure the quality of water.

Poket filtrer and a water botle

On the other hand, the stagnant water might have many microorganisms that have grown for a long time. It might have a high concentration of water contaminants. And, if chemicals have spilled into the stagnant water, you are surely going to have a hill to climb before you can successfully purify it. That’s when the other purification systems come into place. But mind the costs.

Is it safe to purify water with bleach?

Some people are reluctant and hesitant about using the bleach in purifying water because of the doubts about its safety. Meanwhile, some end up being admitted to hospitals due to the consumption of high concentrations of bleach. Let’s admit that any chemical purification system can be dangerous if not well executed. It can also be more effective if well executed. So it’s your take.

We should note that bleach was not manufactured for human consumption. It is widely used as a disinfectant of surfaces and other things, but just not to be consumed by human beings. That’s why it is important to take note of the amount that you pour into your water container. That is also why we’ve provided a table above to give you estimates of how much you should add in a certain volume of water.

Household bleach close-up image

If ingested in higher concentration, meaning if you’ve poured more bleach in a volume of water and drank it, the sodium hypochlorite can be detrimental in your body because it is highly corrosive in nature. So when ingested, it will start by damaging the esophagus on its way down to the stomach. In the stomach, it will also damage the lining of the stomach, which might result with vomiting. And when vomiting, the chemical will continue damaging the esophagus lining on its way out. Then you might need intensive medical attention after that. That being said, it is very important to always take note of how much you add to the water container.

Moreover, a high concentration may result when you purchase wrong bleach grade. That’s why we’ve emphasized that your household liquid bleach should range between 5.25% and 8.25% in the concentration sodium hypochlorite. Carefully check the contents printed on the bottle, or ask your physician if it is safe to drink water purified with whichever bleach you’ve just bought. The additives and colorants to the bleach solution may also be unsafe and dangerous.

The Power of Bleach in a Glass

The other important point noteworthy is that, people suffering from asthmatic attacks should not be in close proximity to the bleach. If they inhale the smell, for example, their condition can be more extreme. We therefore recommend that you perform your purification process in a largely ventilated area far from asthmatic patients.

As long as you follow the right instructions, purifying water with the household bleach shouldn’t be that of a major concern. The purification of water with the bleach is not contemptible at all. Otherwise, you might suffer the repercussions.

Overview

Purifying water with bleach turns out to be the easiest, safest, and affordable method among others if well undertaken. The prerequisite to excelling in this method is to follow the instructions meticulously. For instance, you need to ensure that you’ve bought the right bleach that has no additives and it’s within 5.25% and 8.25% of sodium hypochlorite. Moreover, you need to add the correct amounts to the relevant volume of water to avoid over-concentration that could harm your health. One other important reminder is that bleach water needs to be replaced every 6 months.

person taking water in a water bottle

It is also important to note that the bleach solution is incapable of removing all chemical pollutants and microorganisms. So, that being said, we can say that the water that has been heavily contaminated needs not only bleach as a purifier but other methods too. These can include the reverse osmosis among others.

And again, if the water is cloudy, try to double the amounts of bleach to effectively remove the contaminants. Sometimes it is better to use filters before using the bleach to make sure that sediments have been removed because the bleach cannot do that.

Pros:

  • Household liquid bleach is inexpensive
  • It is abundantly available in many stores
  • Only a few drops needed to purify, for example, a quart of water
  • It does not discolor water, unlike other chemical treatments such as the Iodine
  • No unpleasant smell after disinfecting the water because it evaporates quickly
  • It is a multi-purpose solution that can be used to also disinfect surfaces or containers
  • It can be used as a pesticide

Cons:

  • It has a short shelf life of about 6 months
  • Ineffective in killing all harmful water contaminants. For instance, the cryptosporidia, it cannot be killed by the bleach. You will need other purification methods such as UV treatment.
  • Bleach can be poisonous if ingested in high concentrations
  • Not to be used by asthma patients
  • Does not remove sediments from water
  • Have to wait for more than 30 minutes before consuming the bleach-purified water

WRAP UP

If you have always doubted to use bleach to purify water, now is probably the right time to proceed with it since we have equipped you with skills on how to do that. We understand that most people are clueless about using bleach, or do not know that what kind of bleach to use. Our take is that, since there many brands of household bleach solutions, just look for the ones that says 8.25% of sodium hypochlorite as the main chemical. Many scientific findings recommend this percentage of concentration.

For lower concentrations of sodium hypochlorite, you might have to add more of the solution to water. The higher concentrations are just bad news to your body. Just make sure that you follow the instructions strictly. The enticing thing about bleach is that it is widely available in many stores. So if you like traveling, and then encounter contaminated water, you can simply run to the nearest store to get it. It is furthermore the cheapest among other water disinfection/purification systems.

clorox-bleach in a shop

Snake Bite First Aid: What to Do to Lessen Severity of the Bite

0
Close-up of rattlesnak

Hopefully, what you’re about to read will never have to be put into practice.  Receiving a snake bite out in the wilderness is worst-case scenario.  However, it is important to stay informed and prepared, just in case you do have to administer snake bite first aid. Not unlike learning CPR, it’s good to know how to do it, you just hope that you never actually have to do it.

Backpacking Idaho with the group

First and foremost, never hike alone!  Always have a buddy, safety in numbers.  Secondly, always tell someone else where you’re going and for how long you’ll be gone.  If you’re not returned by the time you said you would be, chances are that something went awry.  Having someone else know your general whereabouts, can cut down on valuable hours if indeed you do need rescuing.

Getting to Know Your Snakes

There are about 50 different species of snakes found in the United States.  Less than half of those snakes are poisonous.  That’s still 20 different types of snakes slithering around that can potentially be fatal!  Most of the bites are caused by rattlesnakes, though coral snakes, cottonmouths and water moccasins (a venomous snake that traverses the water and land) can do their fair share of damage. Keep in mind that snakes only attack when they feel threatened.  Not all snakes will deliver deadly amounts of venom with each bite, as they save their venom supplies for hunting and debilitating prey.  More information on dry bites is detailed later in the article.

While we don’t recommend getting up close and personal with a snake to see if it’s venomous or not, there are some telltale signs on which snakes to give a wide berth, and which snakes pose less of a threat.

Pit Vipers

A pit viper refers to a snake with distinguishable heat sensing pit organs located on the side of the head between the eye and nostril (one on each side).  The purpose of this organ is to allow a snake to accurately strike its prey or predator by sensing exactly where the heat is radiating from.

White Tan Snake

These sensors are very precise, and can detect even the slightest change in temperature.

  • If you hear a dry rattling sound, like a baby rattler being shaken very vigorously, then you are very close to a mature rattlesnake. Trek in the opposite direction!  Rattlesnakes are found throughout nearly all of North America, but are predominantly found in the South West region of the United States.  The account for the highest number of snake bites reported in the U.S. each year.
  • Cottonmouths and Water Moccasins look similar to some types of rattlesnakes, as they are brown and camouflage into the dry environment very well. They are missing one key feature however, they do not have the rattler.  As they don’t have a trademark rattling noise, understand that they can be just as deadly.  They live near water and are spread from the southeastern states, and can be found as far west as Texas.
  • Copperheads have a distinct copper color with a series of repeating hourglass shaped figures lining their entire length. While considered a venomous snake, their venom is rarely harmful to humans as it is fairly mild in comparison to some of their more poisonous counterparts.  They reside in the eastern half of the United States, with a good majority in the south and southeastern states.

Another North American Venomous Snake

  • Coral snakes are the only venomous snake in North America that do not have the pit organs. They have a very unique color pattern with the majority of their skin in red, with yellow and black rings surrounding the chunks of red.  There is a little rhyme to help you identify if the particular snake you’re looking at is venomous or not, “Red and yellow, kill a fellow; red and black friend of Jack.”  So, if you see a snake that is black with yellow rings, and no evidence of red on him, the snake is not venomous.  If there is yellow, back away.  Coral snakes are found throughout the south, spreading from Florida to Arizona.

Brown Snake on the Ground

This list is by no means comprehensive.  There are hundreds of other dangerous vipers spread throughout the world.  There are volumes of books and entire college courses dedicated to the study of snakes.

Prevention

We understand that you don’t plan your day expecting to get bitten by a snake, especially a poisonous one.  You also may not be thinking that prevention tactics are useful in snake bite first aid.

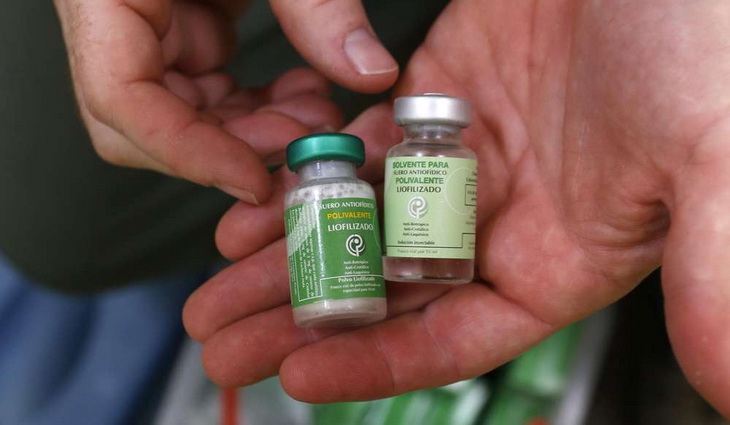
Common side effects of the tetanus vaccine include fever and redness at the injection site.

But there are a number of things you can do to prevent a snake bite from happening in the first place, and some things you can do to prevent yourself from unnecessary suffering.

  • Protect yourself with the tetanus vaccine. The bacteria that cause tetanus and lockjaw, Clostridium tetani, can be passed on to humans by a number of wild animals, including snakes.  The snake doesn’t even have to be venomous.  Any wild animal bite has the potential to be carrying the dangerous bacteria.  While lockjaw, is not usually fatal, it can be easily prevented.  Tetanus vaccines and tetanus boosters will prevent mal effects of Clostridium tetani for ten years.  So, every decade, head into the doctor’s office for your vaccination!
  • Always carry a first aid kit with you. While you don’t need to be toting around a syringe of anti-venom in your daypack, it’s a good idea to have clean bandages, antihistamines in case of an allergic reaction, soap to clean hands and wounds, a towel, and bandages.
  • Keep a mental note of where the nearest hospital was, where the last spot you had cell service was, and where your car is. Keep a map and a compass on you at all times.
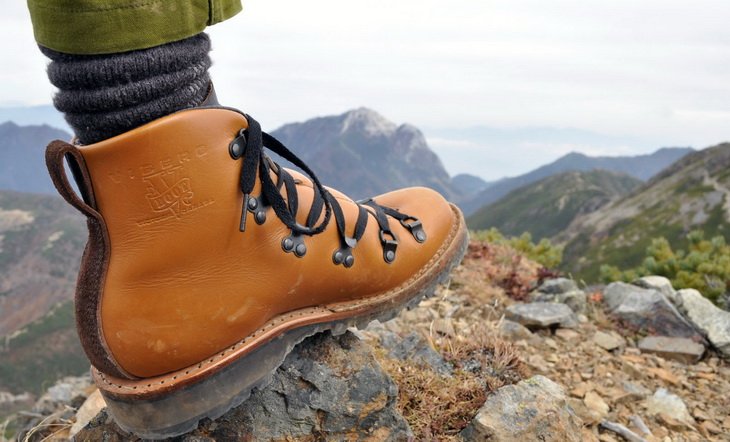
  • Wear hiking boots and long pants. While this doesn’t exactly act like a coat of armor, it will definitely protect your feet and ankles.  Unfortunately, snakes are more active in the warmer summer months when you may be more inclined to wear hiking sandals.  Err on the side of caution and wear the warmer shoe options to avoid snake bite first aid measures.
  • Avoid clearing big rocks and logs. Snakes that are surprised by a sudden hand appearing out of nowhere will be more likely to strike.  If they’re not out in the open, which is where most people see the snakes and the least amount of snake bites occur, they could be hiding under rocks or nestled under tree branches where they feel safe.  Always take great caution when going off trail and exploring in rocks, trees, or tall grass.
  • Keep your eyes peeled. Snakes only bite as a last resort if they feel threatened.  If you see one in the distance, or if you accidentally come across one and it’s much closer than you anticipated, respect the animal.  Give it a lot of space, and don’t waste time in doing so.  Just like with any other wild animal, respect the fact that it is indeed wild.  They are unpredictable, and often times more scared of you than you are of it.  Keep your distance from snakes.  No picture is worth the risk of a potentially deadly snake bite.

First Aid for Snake Bites

At this point, you have taken all the necessary precautions, have familiarized yourself with the dangers of venomous snakes, and were trying to enjoy some time in the great outdoors.  But, as luck would have it, you or someone in your party inevitably fell victim to legless carnivore.  First aid for the snake bite should be administered quickly and calmly.  If it has been established that the snake bite was from a nonvenomous snake, it is still important to follow the proper first aid instructions to prevent any possible infection. Any open wound in the body, whether from a scrape, laceration, or wild animal bite, must be treated with haste or the possibility of infection expounds.

antivenom for snake bite

The main priority for a snake bite is getting to an emergency room.  The only way to successfully recover from a venomous bite is to receive antivenom from a medical professional.  Follow these first aid instructions while making your way to an emergency room:

  • Stay calm. This is perhaps the most important thing to remember.  Keeping a level head is very important in any emergency situation.  If you start to panic, take deep breaths.  The last thing you want to do is send your body into shock.
  • If you suspect the snake was venomous, dial 911 as soon as possible. Additionally, call the poison control center as soon as possible to describe the incident and describe what the snake looked like to the best of your recollection.  The sooner emergency services know what kind of snake it was, the sooner they can begin to administer treatment.
  • Lower the affected region so it rests below the injured person’s heart. Snake bites commonly occur on the lower legs or hands, so have the person lie down and ensure the bite stays below the heart.  Do your best to not elevate the injured person’s heart rate.
  • Remove any jewelry, socks, or gloves as swelling may occur.
  • Wrap the bite loosely in clean bandages to prevent any contaminants entering the affected area.
  • If you have a pen or marker, mark an ‘X’ where the bite occurred. When you get to an emergency services facility, doctors can determine how the venom is spreading if they know where the bite occurred.
  • Once the wound is cleaned, bandaged, and marked, begin to make your way to a hospital as soon as you can. Keep the individual hydrated and calm.  Once you get to a hospital they will administer an antivenom.

If you are absolutely certain that the snake was harmless, but it still bit (which can happen), follow these slightly less dire set of first aid tactics:

  • Clean the infected area. Look closely to ensure that no part of the tooth was lodged into the skin.  If you see part of the tooth lodged in the skin and are unable to remove it, make your way to the nearest emergency room as you run the risk of infection.
  • Rinse the wound with clean water. Wash with soap and clean water after rinsing.
  • Wrap a sterile bandage around the affected area to prevent contaminants.
  • Elevate the affected area to limit swelling. Take an ibuprofen or acetaminophen for pain.
  • If the bite is painful, swells excessively, or causes any other symptoms such as dizziness or confusion, seek professional medical attention as soon as possible.

Caring Gauze Bandage Rolls

Here are some things not to do in any circumstance:

  • Do not attempt to suck out the venom.
  • Don’t try to cut out the bitten area.
  • Never apply a tourniquet or attempt to slow blood flow to the affected area in any way other than elevating the limb.
  • Don’t continue on with the hike or engage in strenuous activity, begin making your way to the emergency room.
  • Don’t drink alcohol or caffeine, don’t eat anything, and only drink water if you feel at risk of dehydration.

What to Expect – The Symptoms

Symptoms for snake bites can vary from individual to individual, and also depend on the type of snake, the amount of venom injected (if any), and the potency of the venom. Elderly people and children are more susceptible to bad reactions.  The same bite delivered by a poisonous snake may have a negligible effect on a healthy, middle aged individual, while it could be deadly for a child.

Venom travels through a person’s lymphatic system.  Lymph nodes are organized throughout our bodies by the hundreds, and one of their main purposes is to deliver vital fluids (not blood) to the heart.  As such, the venom that is introduced to the lymphatic system can reach nearly every corner of the body (including the brain) causing severe damage if not treated with an antivenom in a timely manner.

Backpacker feeling sick

After a snake bite, if venom was indeed spread, the victim might begin to suffer from these initial symptoms:

  • Weakness
  • Dizziness or Lightheadedness
  • Low Blood Pressure (which could result in fainting)
  • Blurry Vision
  • Mental Confusion

More severe symptoms which can potentially develop after the bite include:

  • Convulsions
  • Muscle Cramping
  • Difficulty swallowing
  • Paralysis

Snake bites may also bleed a little initially, and bruise.  If there is excessive bleeding, apply pressure with a clean bandage until the bleeding stops.

More Information about Snake Bites

Even if you received a snake bite from a pit viper (rattlesnake, copperhead) or other venomous snake, there is a high chance that it was a dry bite, meaning no venom was injected into your body.  That’s not to say the bite isn’t painful, it’s probably very painful, and there is a good chance the bitten area will redden and swell.  However, a dry bite is not life threatening.  Professionals sill recommend treating the bite as if it were venomous, elevating the bite and wrapping in bandages while making your way to the nearest emergency service facility.

Little snake biting

Sometimes, the symptoms of a venomous bite will not manifest at first, it may take up to eight hours for symptoms to appear.  If there are no symptoms for eight hours, post bite, the bite was likely dry.  If such is the case, closely monitor the bitten area, checking for any swelling or discoloration.  If the swelling does not increase or become very red, then you’re safe to go about your day.  The site will more than likely bruise over time, as bruising occurs whenever there is a blood vessel breakage (from fresh cuts or localized impacts).

In any case, the number one thing to do after being bitten by a venomous snake is to seek immediate medical attention.  Dry bite or no, it’s not worth the risk to wait and find out if you were infected with snake venom.

The Take Home Message

Always take preventative measures first.  Never hike alone, wear protective footwear, and keep your wits about you.  If you can prevent a snake bite by being cautious and follow practical common sense, then do so at all costs.  If the unfortunate happens, your main priority is to get help from medical professionals.  However, we understand that isn’t always as easy as it sounds.  Staying calm and getting to a safe place, are the best snake bite first aid measures you can perform.

Backpacker watching the mountains landscape

Sugar for Wounds for Healing: Sweet Remedy for Bitter Pain

0

The ideal way to heal any wound such as burns, scrapes, lacerations, diabetic ulcers and bedsores is to use sugar for wounds for healing. At the point when sugar is stuffed in a wound, it makes an intensely concentrated medium in which bacteria can’t survive. Sugar likewise diminishes swelling, enhances the expulsion of dead tissue, and aids the formation of new blood vessels and connective tissue. The net outcome of utilizing sugar to treat wounds is quick healing, with negligible scarring.

wooden-spoon-of-sugar

A lot of sugar might be unsafe for the waistline, still, it could help recuperate wounds faster compared to antibiotics. It was discovered that granulated sugar poured on leg ulcers, bed sores and also amputation enhances healing when antibiotics and some other medicines aren’t working. The sugar absorbs water from the injury into a dressing, thereby quickening the healing process. Read on to know more about the miracle of sugar and sugardyne on wounds.

Treating Your Wounds with Sugar

Whenever you or somebody you adore happens to get a burn, cut, or scrape, you most likely head straight to the first aid looking for some sort of antibiotic or antiseptic treatment, with some swathes, to help improve everything all. While numerous advanced concentration of moisturizers, potions, and creams are one acknowledged method for healing a wound, you might be pleasantly astonished to discover that there is one other effective treatment solution on the line, cheaply, right on the baking shelf of your closest neighborhood foodstuff store.

Now, you are likely pondering about what we might be talking about. A less expensive solution for healing open wounds that can be gotten from the baking area. The previously mentioned solution that we are discussing here is a simple table sugar. Of course, we are talking about the usual, white granulated sugar that you often use in the kitchen to make your coffee or food taste sweet. Sugar is really an incredible antibacterial medium. Sugar has supposedly been utilized since ages to enhance fast healing of wounds. Truly, some reports show that sugar has been viably utilized for its antibacterial features for no less than 5,000 years.

Inscription sugar made into pile of white granulated sugar

With continually increasing anti-infection strains of microbes being discovered more frequently, this is beginning to wind up a major issue. However, what is exceptionally extraordinary about sugar is that it has features that bacteria are just not impervious to. Despite the fact that sugar works extraordinary as an antibacterial aid on minor scrapes and cut, it is likewise exceedingly effective at healing highly intense or contaminated wounds. Sugar additionally has been discovered to work miracles at healing abscesses and burns, even those ones that are very severe.

Basic and cheap table sugar, works effectively that it can, at times, even help spare somebody’s life! For instance, there was a certain situation whereby a patient was almost having a limb severed in order to save their life, but specialists could help in saving that limb, and the life of the patient, by just treating the injury with a basic sugar dressing also known as sugardyne. One additional advantage of sugar is that it functions in various ways in healing a wound very fast, while likewise leaving almost no skin scarring. Any wound, cut or scraped spot is prone to infections if not properly treated immediately and viably. Certain wounds that get to be infected can result in a loss of limb and if possible death.

image of sugar in a spoon

For close to 5000 years, therapeutic experts have discovered the wound healing features of sugar. Presently in Europe and U.K. specifically doctors, nurses and some other medical practitioners directly in charge of the treatment of burns and wounds are bringing back this 5000-year-old treatment solution. Trials, utilizing patients with wounds, have proven that the old treatment works.

The main reason sugar functions to treat wounds is due to the fact that sugar tends to draw moisture through osmosis process. This process both dehydrates the bed of the injury to aid the formation of new tissues and gets dried out the bacterium that causes the wound infections, leaving the bacteria fragile and weak. Sugar consumed orally, however, won’t eliminate bacteria in the body.
Sugar is hygroscopic and works to dry out all bacteria. Bacterium definitely needs water to survive and to increase. In this manner, the absence of water results in the elimination of bacteria. When the bacteria die, there is no way they can multiply. Therefore, infection can’t happen if all bacteria are wiped out in and around the injury. Researchers have discovered that the mixture of honey and sugar can promote the healing. It might be that the thickness of the honey enables great infiltration into the injury and enable better contact with the injury.

sugar, honey, sweeteners

Honey likewise has certain anti-bacterial features as discovered by some specialists. A similar hypothesis applies when cooking oil is blended with sugar to cure wounds. The honey or oil is blended with sugar and utilized as a salve.

The Meaning of Sugardyne

Sugardyne, is known as a specially-formulated dressing solution appropriate for use on a number of wounds, ulcers, and burns. It was produced in its earliest mode by the battlefield surgeons in antiquated Egypt around 4,000 years ago as grease and honey. However, povidone-iodine was later incorporated into the formulation and the product was referred to as “Sugardyne”, meaning SUGAR for its most plenteous part and DYNE for power. That included chemical called povidone-iodine was proven irrelevant and it was dropped directly from the formulation.

Sugardine meaning Betadine and Sugar

However, the composition has advanced to incorporate just two substances, i.e. powdered sugar, obtained from Egyptian’s honey, and cooking oil rather than their grease. These materials have turned out to be effective and have been proven to be far better than all antibacterials in eliminating infections. They have eclipsed a lot of the substantially costly materials and items in battling infections as well as in adding to unparalleled healing also. They not only prevent infections, but also add generously to cost savings, lessen the need for skin grafting and cut the general wound and burn care cost. You are most welcome to the interesting world of Sugardyne!

The Operations of Sugardyne

For a huge number of years, the majority has made due without the utilization of antibiotic agents. Numerous early treatment solutions for infected injuries included honey. Some researchers explain the treatment of serious burns and wounds with coagulated honey and milk held in position by a muslin bandage. However, granulated sugar was later utilized to treat bruises in both humans and horses. Today a mixture typically regarded as Sugardyne is broadly used to treat wounds and sores on horses. It has ended up being effective and is economical.

Sugar is bacteriostatic, anti-infective and fungistatic. This implies that it doesn’t enhance the growth of fungus or bacteria. The sugar alone has been utilized for wound treatment and proven much more effective. But Sugardyne, which is a mixture of sugar and iodine has ended up being more powerful. You can buy different Sugardyne mixtures at various stores that offer pharmaceuticals for horses and some other animals or you can also create it yourself. Sugardyne contains oil, which operates physically.

sack of sugar on the table

The oil coats the external bacterial film or cell wall, meddling with the typical capacity of the cell to convey water and foodstuffs into and wipe out the cell’s ability to move waste out of the cell wall. The oil, therefore, keeps water and foodstuffs from penetrating into the cell; it likewise averts departure of cell waste items. However, the bacterial cell dehydrates and dies off.

It is important that all microbes, both Gram positive and negative sorts, are influenced in an unfavorable route by the oil and sugar present in Sugardyne. Furthermore, not at all like antibiotic agents whose power is chemically worked, bacterial resistance can’t happen with Sugardyne due to the fact that its energy depends on its physical features.

 What Should Be in Your Survival Medical Kit for Wound Treatments

  1. Add granulated sugar to the item lists. Any sugar, you are able to find on the grocery racks, will be effective as long as it is a pure one. The physical features of granulated sugar play a vital role in wound treatments.
  2. Ensure you have bandages or clean material to make the bandages. Clean water is important so you will require the means to gather and cleanse a water source.
  3. Topical sterilizers, for example, povidone-iodine should also be in the medical kit.
  4. Get material necessary for a tourniquet in your medical kit and know when and how to utilize one. There are certain circumstances when one is required. Stopping or constricting the flow of blood to the limb can cause harm to tissue that is Incapable of being reversed and can bring about the loss of the limb. Ordinarily, a tourniquet is utilized when an amputation occurs or when there is, a blood vessel wound and bleeding can’t be controlled be adding pressure.
  5. Have a suture medical kit, but still know when and how to suture an injury.
  6. Have thermal covers for treating shock
  7. Gloves
  8. Scalpel or Razor knife that has been shielded from infections
  9. Prescription pain medications or over the counter

The item list is not comprehensive enough, but It must be adjusted to suit certain needs. Sugar should be stuffed so it doesn’t take in moisture from the air and therefore it isn’t defiled with dirt and some other debris. Enabling the sugar to take in moisture may diminish its viability in wound treatments.

Latex vs Nitrile vs Vinyl Gloves

The amount to pack, this depends on. Just imagine that you would need to treat yourself and any other person with you. One packet of sugar, a similar kind found on eatery tables likely would be taken as a treatment if the injury is little. You would require up to at least four treatments for each day, per wound. Try not to neglect expert medicinal treatment since you now have sugar on the injury. Look for medical assistant quickly if available.

How to Use Sugar On Wounds?

Healing wounds with the use of sugar is an old-fashioned convention that has been utilized by both Native Americans and some other tribes in Africa. In the year 2009, many tests were done in British hospitals to figure out if there is any truth behind the possibility that sugar can be utilized to treat wounds and prevent pain.

image of sugar in measuring spoons

After numerous tests, it was eventually proven that the treatment had turned out to be a successful one. Here are the necessary steps to follow when using sugar on wounds:

  • Step 1: Clean the wound properly by utilizing soap and warm water. Then pat dry the wound until you are certain that there is no more moisture left. If some sort of debris or dirt is seen inside the wound, remove everything and clean once more.
  • Step 2: Pour sugar directly on the injury, ensuring that it gets straight into the wound and does not stick to the surface only. If the injury is large, firstly use honey to cover it and after that sprinkle some sugar on top of it. The honey will enable the sugar to remain in position and gives its complete healing advantages.
  • Step 3: Cover the wound with a bandage quickly and hold the bandage firm with tape. The bandage will keep debris and bacteria from getting access into the wound.
  • Step 4: Replace the bandage and do the cleaning and sugar application again once every day. Rip off the bandage, instead of softly, pulling it. The hard motion will eliminate damaged tissue and clear the injury.
  • Step 5: Make sure you are consistent. Healing wounds with sugar is a slow process which can possibly take a while for severe wounds to heal up. However, you will begin to see positive outcomes immediately, as the sugar will decrease throbbing and pains in the injury and the encompassing tissues.

Cautions When Using Sugar On Wounds

Honey without glycerin might also be utilized instead of sugar, but when it comes to the cost, sugar is preferable. Honey and sugar are ideal to use on diabetic injuries since they don’t enter the bloodstream. They won’t work on pustules or abscesses that are secured with skin. Likewise, don’t utilize these sugar on a bleeding injury, as it enhances bleeding.

All bleeding must be totally controlled by utilizing Sugardyne on a fresh injury because all sugar, including syrup and honey, are binding with calcium. If there is a lack of calcium, there is no clotting. The utilization of Sugardyne after the injury is quite easy; Sugardyne can be applied gently to the injury without the fear of any bleeding once the clots are formed. It usually takes 1-2 days for clot formation. A bounteous measure of Sugardyne is used to fill or cover the injury and after that covered with a dry bandage.

Honey drip in jar on the table

Intense wounds are pressed loaded with Sugardyne to the fullest. Dressings are changed once in a day. Dressing changes proceed until the wound is completely healed up. However, there is no need of skin graft. The skin will automatically coat the granulation tissue that fills the deformity, entirely. Treatment of burn is quite simple. At the point when Sugardyne is applied, all the pain stops quickly.

So, no opiate analgesics are required. No fastidious debridement, of the surface of the burn is required. Sugardyne will guarantee that the burn really self-debrides. When the wound is covered and monitored properly, skin islands will show up and after that skin will comply to finish the complete process, and generally leaving the patient with less scarring.

sugar on the table

Those in charge of treating severe injuries should always be aware of the possibility of gas gangrene, especially where there are open fractures or puncture wounds. In these cases, meticulous and irrigation debridement are very important in order to maintain a strategic distance from infection. Sugardyne can’t be relied upon to be successful if the bacteria are covered deeply where they can’t be in close contact with Sugardyne. Seeing how sugar and oil function by means of physics in Sugardyne has been able to assist in comprehending the riddle of old Egyptian injury healing with their usage of grease and honey.

Wrapping it up

Sugar goes about as an osmotic stun treatment by drawing, engrossing and dehydrating the wound, and also hindering bacterial intrusion while gently enhancing the formation of new tissues. As explained earlier in the article, you can make use of granulated sugar alone, or blended with povidone iodine, which you can get at any nearby local drug store, to create a spreadable sugar paste. You may likewise keep any unused remains of the paste in a close container so as to make use of it later. Similarly, as with a traumatic wound, wash and flush away the cavity with neat water and peroxide and apply pressure until the bleeding stops. Packing a wound for the application of sugar could make the wound bleed exorbitantly.

To help keep the injury consistently safeguarded against infections, ensure that you check the dressing and packing often. At the point when the sugar pack gets to be liquefied or syrupy, flush away the old liquids and damaged tissue matter with neat water, repack the wound with sugar and apply the bandages.

Sugar word written with sugar on a table

How to Choose Hiking Boots: Keeping Your Feet Happy on the Trail

0
hiker wearing hiking boots and a landscape in the background

If you are going to get into hiking there is not much gear that you really need to get.  Sure, there is a whole range of awesome gadgets and gizmos that you can pick up that claim to make hiking easier, safer, more fun and any other list of claims.  Some work, others don’t.  But really the only thing that you truly need is to make sure you have a good set of hiking boots.  Now if you are reading this you probably have some experience buying shoes, however, there are a few areas that you might want to pay special attention to when it comes to buying a pair of hiking boots.  Let’s take a tour of how to choose hiking boots for you.

The first thing that you might consider is why can’t you just wear your normally day to day shoes when you set off for a hike.  Now, there are several different reasons and some of them depend on what you are wearing on a normal day.  If your normal footwear is something that goes well with a suit or is styled for an office setting, you probably don’t want to get them messed up while hiking through the wilderness.

Arctery'x Bora2 Mid GTX Hiking Boots

But if you are someone that wears more of a gym shoe on a daily basis, you still should look into getting a good pair of hiking boots.  Most gym shoes are meant to be lightweight and don’t always provide a lot of traction.  But for a better idea, why not take a look at the different things that make up a good hiking boot.

Keys to a Good Hiking Boot

We’ll go through and break down some of the most important things to look for while choosing a quality hiking boot.  A boot that performs well in one area might not do as well in another, so you will want to consider what features are the most important to you.  While there is no one “perfect” hiking boot for every person and every situation, once you get a feel for these considerations you’ll have no problem in choosing the right one for you and your plans.

Weight

Weight may be one of the most important things that a person overlooks in shopping for the boots that they will wear out on the trail.  Sometimes a person will try on a boot and not be comfortable with the weight, but still purchase it because of other features.  It is highly important to consider the weight of a boot when looking for your next pair.  Many experienced hikers say that a pound on your foot is about the same as five pounds on your back.

Man wearing the Zamberlan 960 Hiking Boots

A heavy boot will end up draining your stamina, but it can also cause pain in your knees and hips as you trek on mile after mile.  A featherweight boot might not be the best option since it might not provide all the support you need, but remember to take a moment and consider just how heavy a pair of boots are before you purchase them.

Comfort

Sure, it may seem obvious that you want to pick a boot that is comfortable for you to wear.  But if you are testing out a pair, how do you measure comfort.  The standard way seems to be to put them on and stand up then take a few steps.  This is a good first step, but it leaves out some very important considerations.  While this will tell you if your choice is highly uncomfortable, you need to consider the longer haul.  After covering some mileage your feet tend to swell some, while this is normal, it means that a boot will fit differently at the start of your hike and at its end.

Woman passing the river wearing hiking boots

When you are testing out a pair you aren’t going to be able to go for a hike, but you should do more than take just a few steps.  If you are in a store, do a lap around the store, if you are home wearing them for an hour.  Also, consider taking some inclines if possible.  Some stores will have a demo area set up to give you the feel of climbing an incline, while stairs aren’t the best choice they tend to be better than nothing.  You will also want to make sure your test fit is as close to hiking conditions as possible.  Did you remember to wear a pair of your hiking socks?  If you normally have a pair of inserts you should bring them along with you to test out a new pair.

Waterproofing/Breathability

Sometimes, when you go out for a hike you get rained on.  Other times you are hiking on a perfectly sunny day, but the trail has 50 stream crossing and none of them have a bridge.  Having a waterproof shell around your foot can be quite an intriguing idea.  Many hikers complain about having wet feet while hiking.  Some even say that having cold, wet feet are the worst thing that can happen to you while out on a hike.

With that in mind, many companies are adding some level of water resistance and waterproofing to their products.  Be careful when you read the description that you are given on a boot.  Generally, water resistance means that the boots will keep out some degree of water (like in a rain storm) but not necessarily keep your feet dry if the boots are submerged.  True waterproofing would be when, even submerged, your feet will stay dry, though even on a waterproof boot, water may find a way in through the top if it is that high.

Waterproof hiking boots

The problem with some waterproofing methods is that they seal the foot in, not allowing any air to get through the shoe.  While this may keep outside water off your feet, it means that any sweat that your foot produces will also stay trapped in your shoe.  There are some waterproof linings that do allow your foot to breathe as well.  You will no doubt see GORE-TEX or a GTX version of a shoe pop up in your hunt for a pair of hiking boots.

And if not them, then a company’s proprietary version of it.  This style lining gives your foot some breathability while still keeping a shoe waterproof.  No matter what style waterproofing you have gone with, be careful of how you take care of your shoes.  Certain styles of waterproofing need to be cared for in a specific way to keep the waterproofing.

Waterproof hiking boots and a fish in the water

While waterproofing is important, some people may find that breathability is the more important of the pair.  This can come from hiking mostly in desert climates, where you aren’t looking at encountering a lot of water.  If you find that your feet sweat a lot and get very warm no matter where you are, you might find that opting for a non-waterproof option that gives you a lot of breathabilities may be the better road for you to go down.

Stability and Protection

Depending on the terrain that you are going through on your hike, you may encounter sometimes that the ground under your foot is a bit wobbly.  Depending on how high up your hiking boot comes, it can offer some level of support for your ankle as you go on your trek.  While it may not have as much support as wearing an ankle brace it could still be the difference between a twisted ankle and completing a hike under your own power.

hiking-shoes on the grass in the sun

Additionally, consider the protection that your boot can offer you.  Your terrain may offer some threats to your feet.  They could come in the form of sharp rocks or perhaps thorns and needles of the local plant life.  They might also be the teeth or fangs of an animal that you surprised.  While your boot isn’t a suit of armor and it isn’t the best idea to go sticking your foot into places just to see how tough your boot is, a good boot may be the difference between the safety of your foot and needing stitches when you come up against that on the obstacle.

Traction

Hiking takes you to some amazing places, but sometimes those places aren’t flat, level and even. There might be rocks that are slick with water, loose gravel or just a lot of mud.  Most footwear isn’t prepared to offer you a good grip on all of these surfaces. That is one of the areas that a hiking boot can shine. When looking at traction, you’ll want to consider the material that the sole is made from as well how big the lugs are (The lugs are the various bumps and protrusions on the sole of a shoe.)

hiking boots on a rock in the sun during day time

When looking at your options you will also what to consider if you will need to clean them out between hikes or if they are of the self-cleaning variety.  If your lugs get jammed up with mud and pebbles you may find yourself starting to lose some traction.

Types of Hiking Boot

As you have seen there are a number of key points to consider when looking at a hiking boot.  One of them is the style of boot that you need, and that may take a bit more discussion.  The type of hiking that you choose will depend on what kind of hiking you are looking at getting into and the types of terrain that you are likely to encounter.  Remember, that these are guidelines, you can wear whichever type of boot you feel most comfortable with.

Hiking Shoes

These types of footwear tend to be a low-cut model that resembles a gym shoe.  These tend to offer a good deal of flexibility from their Mid-sole.  This makes them very popular with day hikers.  There are plenty of people that choose them for backpacking hikes to drop the weight they carry, and some trail runners go with these style shoes over a running shoe for the extra traction.

Salomon hiking shoes

While they don’t offer as much support or protection they do normally help you to move along the trail a bit quicker.

Hiking Boots

This style tends to sport mid to high tops and can range from nearly the same style as a hiking shoe to the backpacking boot end of the spectrum. Overall, these boots offer a good choice to start with as you develop your own hiking style. They can also be a great help if you are prone to rolling your ankle as the higher cut and stiffer materials, tend to offer more support and protection than a hiking shoe.

North Face Ultra Fast Pack GTX Women's Hiking Boots

While they are great choices for day hikes, they can also handle some backpacking trips, though it may be best to pair them with trips that are only a few days long and ones that you’d be carrying a pack that is a bit lighter.

Backpacking Boots

These boots are designed to be worn for days upon days while carrying everything that you need to survive.  These tend to be high cut in design and stiffer than the hiking boots.  This offers even more protection from abrasions and offers more support for your foot and ankle. The soles tend to be less flexible and have a very aggressive outsole, to provide you with more traction while you are out on your journey.

Backpacking-boots in a man's legs

Often times, this style will be compatible with cold weather gear, such as snowshoes or crampons.  While it is a good idea to break in any hiking footwear, this style demands it.

Other Options

There are an array of things that some people will use for hiking.  Sandals have become quite popular and a number of brands are now making a hiking style sandal.  Mountain climbers have used shoes called approach shoes that are a cross between a hiking boot and a climbing shoe that some feel is a great option for the trail.

Having a rest after a long walk in the mountains of Gran Canaria

Some people will choose to wear water shoes if they have a lot of stream crossings or if their hike is paired with a water activity, like rafting.   While these options may work well for specific hiking trips, a hiking boot is probably still a more well-rounded choice for hiking.

Anatomy of a Hiking Boot

As we go over how to buy hiking boots, the final section that we will cover is the anatomy of the boot itself.  We’ll touch on some of the materials that are common for each component and why that component is there.

Upper

This covers everything in the boot that goes over your foot.  This is the area that is most affected by your choices for waterproofing and breathability.  The upper also provides you with ankle support and abrasion protection.  Most hiking boot uppers are made from some type of leather, the most popular options being full grain, split grain and Nubuck.  There are some companies that will use a synthetic material so that their boots can be labeled as vegan.

Arc'teryx Bora2 GTX Mid Hiking Boot side

The upper may also sport a waterproof lining, such as GORE-TEX, and some level of insulation.

Midsole

Think of this like your car’s suspension.  This part of the boot cradles your foot and determines how stiff a boot will be.  A stiffer boot gives you better support on rocky terrain and it will tend to last longer.  The midsoles of hiking boots are generally made from EVA (ethylene vinyl acetate) or polyurethane (sometimes abbreviated PU).

Danner Mountain 600 Boots

This part of the boot will generally feature any of the internal supports.

Outsole

This is where the rubber meets the road, or in our case the trail.  In most cases, the sole will be made of rubber, but there are times when other materials are added, generally to make the sole stiffer.  This is where you will get a look at the lug pattern that will play a major role in how much traction a hiking boot has.

Salomon breaks from the mold and does their own outsole design work

You want a lug pattern that is fairly widely spaced, this will help to shed mud and other debris while still providing you the traction that you seek.

Wrapping it All Up

With all this information you should be fully armed as far as how to choose hiking boots.  It is important to remember that there is no single best answer out there to cover everything that you might want to do.  You will need to take a look at your hiking styles, where you go, how many miles you generally cover and make a selection that you think will work well for you.  There are a few things to consider, no matter what hiking boots you are looking at.

It is always a good idea for you to break in a pair of hiking boots prior to taking them out on the trail.  Poorly broken in boots can cause a fair deal of pain as the miles rack up.  If you are headed out on a backpacking trip, remember to take a pair of “camp shoes” to give your feet a rest from your boots.  And lastly, hiking boots are similar to running shoes in that they don’t last forever.  A good rule of thumb is that about every 500 miles you should look at replacing them, so you don’t lose support and comfort.

Image presenting hiking boots

How to Seam Seal a Tent: Deter water Penetration into Your Tent

0
No leaks. While the sealant can easily be seen on the tent, I don't consider it a problem.

When camping in the rainfall-frequented areas, you are more vulnerable to the penetration of water through the seams depending on the quality of your tent whether it is brand new or second hand. This is, however, not something that should bother you for long, making your nights a misery when thinking about the downpour. The fact is that, by knowing how to seam seal a tent, you can upgrade your tent to repel any water drop through the seams. Normally, water drops can penetrate the tent or the tarp through the needle and the thread holes at the seams, more especially if your tent is not factory-seam taped.

There are fortunately some tents and tarps that come seam-taped as a form of waterproof on their seams. With such tents you might not see the need to seam seal them at first. But the fact is that, as time goes on, the seams might peel away or deteriorate. For this reason, you need to know how to improve your tent, in case that inconvenience materializes.

How to Seam Seal a Tent

As for the tents that come unsealed at the tents, you must prioritize the seaming process to them as you prepare to hit the road in a couple of days. Failure to that will only expose your valuables to water damage in the wilderness. After all, it isn’t a complicated to be able to seam seal your tent once you are versed with the techniques. The primary aim of this article is to equip you with the techniques needed.

What is to seam seal a tent?

For a beginner, it might not be clear that what we talk about when we discuss about the seaming process. This is basically the process of adding another layer of a seal on the exposed seams of the tent to repel water drops from leaking through. Manufacturers do use needles and threads at the joints of the tents. Those areas are the first to suspect when there is any water leakage into the tent, well unless there’s a pinhole done mistakenly. The seam seal can still help with that.

A man seam sealing his tent

So, seam sealing the tent serves as the precautionary measure anticipated to stop the miserable nights propelled by the heavy downpours into your tent. There are products used in this regard. But, the different fabrics are treated differently. You therefore have to apply only the sealant materials that are compatible with the fabric of your tent. Watch this video https://www.youtube.com/watch?v=MO6NLV-bsiU on YouTube to get an idea about the procedure. Let’s get started with the process below.

How to prepare for a seaming process?

Before we can continue, you need to understand that tents and tarps are made of different fabrics. So, there is no standard seam seal to be used across all the tents. The best advice is to follow the manufacturer’s recommendations. Check the fabric used. Some may have used the silicone-coated nylon (silnylon), nylon, synthetic materials, and other fabrics. They all need specialized seam seals that can attach securely on the seams. On the other hand, other tents come with recommended seam seals in line with the fabric used.

McNett Seam Grip Seam Sealer & Adhesive

If your tent doesn’t have any recommendations as to which seam seal to use if not already sealed, please follow the recommendations we give below. For the best tent seam sealer, we recommend the McNett products, which are popularly used by many manufacturers. Other brands may include the Kenyon and the Aquaseal.

But make sure that you follow the seam sealant specifications for a perfect project. For our project guidelines today, we will focus on the SeamGrip and the SilNet as the McNett Products. Let’s first compare them below:

SeamGrip SilNet
It is for fabrics made of synthetic materials, nylon, waterproof laminates, natural fabrics, vinyl and leather It is for fabrics that are made of silicone-coated nylon (silnylon) and others.
Can be used to repair pinholes Can also be used to repair pinholes

If you check very well, these seam sealants basically the same, but applicable on different fabrics. Even when applying them, the process is the same, mutatis mutandis. All you need to do is to determine the exact fabric used as per the manufacturer’s guidelines. Randomly applying any brand and any composition of the seam sealant may not yield great results because each fabric is different.

Tenacious Tape Field Repair Kit

Now that you know that which seam sealant to use on your tent, let us get started with the procedure. Just follow the steps below in preparation of your tent. Our procedure can either be applied to a brand new or an old tent. We have tried to demystify the process as much as possible for a beginner to comprehend.

Preparing the tent

  • Secure an open space in favorable weather conditions to undertake this procedure
  • Clean the tent/tarp and the rain fly. Use water with a non-detergent soap to thoroughly clean it, or simply follow the manufacturer’s recommendations. If the manufacturer’s seam tape has peeled away or has deteriorated, we recommend using the 70% isopropyl alcohol to thoroughly remove it before reapplying the new seam seal. Make sure you clean all the seam areas such as the tent floor, the bottom of the tent, and the rain fly. Leave the mesh alone.
  • After cleaning your tarp or tent, rinse well so that no chemical remains on the seams
  • Taut your tent by pitching it so that it can dry thoroughly. Do not use any machine dry.
  • Leave the tent pitched to start with the seaming process.

Now that you’ve completed the first step of cleaning the seams, let’s proceed with the seam sealing procedure.

Seam sealer and a brush on the table

Make sure you have the following tools before you can start:

  • SeamGrip/SilNet – depending on the fabric to seam seal
  • Paintbrush
  • Damp cloth
  • A mug or bowl to mix up
  • Paint thinner (optional)

Procedure to seam seal the tent

Firstly, if your tent wasn’t seam sealed before, or its seam seal has worn out, you will need to seam seal all the seams simultaneously. The ones ot the floor, in particular, are more vulnerable to the leakage of water. Well, if you have spotted an area of a leakage, you can seam seal it alone instead of applying the SeamGrip on all the seam areas.

A man applying a SeamSealer on a tent

Provided you have stretched out the tent efficiently, all the seams should be visible. The rainfly interior seams may be exposed by putting it upside down. For an effective repellent of water, we recommend both the exterior and the interior joints. But please leave out the zippers when seam sealing the tarp, or the tent. Let’s get started in applying the seam sealant:

  • Apply the painter’s masking tape for a size of about ¼ an inch in the interior walls. This will prevent the spill of the seam seal and pave a way for a great project that is professionally pleasing.
  • Then apply the seam sealant on the interior walls of your shelter
  • Apply a thin layer of the seam sealant with the same size of ¼ an inch past the seams. This will help it to soak effectively into the stitches.
  • Do the same on the bottom of the tent. Apply the same seam sealant.
  • Then attend the exterior seams. Apply the same size of the sealant on all the exterior seams to enhance the waterproof feature. If you have spotted an area of leakage, we recommend you continue applying the sealant just to strengthen the water repellent property. It’s highly likely that the manufacturer has used the same seam sealant. Otherwise, to avoid ruining your project, inquire further because there are many brands that can be used.
  • After applying on the interior or exterior seams, leave the tent or tarp in favorable conditions for the seam sealant to cure for a day. You can also leave it to dry out overnight. Just make sure that there are no anticipated downpours.
  • Repeat the procedure on your rainfly seams. As stated already, turn the rainfly upside down to expose the interior seams while still attached to the tent.

The SeamGrip is urethane based. So bear in mind that you need an open space with sufficient ventilation because it could be detrimental to your health. For a water-based seam seal, there is the SeamSure product, manufactured by the same company, the McNett. But this product is recommended to be applied on camping tents that are not used frequently. These could be the family tents as they’re rarely used regularly as compared to the small hiking tents.

MCNETT Seam Grip Field Repair Kit

In order to apply this product, you should follow the same procedure. Prepare your tent by cleaning the seam areas, preferably with the 70% isopropyl alcohol. This chemical will make sure that there are no previous seals or adhesives remaining before you reapply the SeamSure that is water-based. To apply it on the seams, squeeze its contents and apply on the seams using the paint brush for an even application. Then use a damp cloth to wipe out the excess sealant. Unlike the SeamGrip, it can take a maximum of 4 hours for this solution to cure, and you will be ready to go.

Going back to our SeamGrip procedure as our main focus, we have to put a closer eye on the procedure. After letting the seams dry out, it doesn’t mean that we are all set up to hit the road. What if the project has not been successful and there are still some drops that penetrate the seam joints? You may still be subjecting yourself to miserable nights in the wilderness where there might be no more an opportunity to reseal the seams.

SPRINKLER SYSTEM

We therefore need a quality assurance procedure thereafter as outlined below:

  • After leaving the tent and the rainfly seams to cure, it’s time to undertake a simulated downpour experiment. But first make sure that the sealant has cured completely.
  • Leave the tent pitched without any wrinkles. Then ask someone to set the sprinkler while you got into the tent. Otherwise, do it on your own and get into the tent.
  • The sprinkler will help you observe if the seams are perfectly sealed. You can reduce or increase the amount of water to make sure simulate the varying rainfall fluctuations. Do that as long as possible because, sometimes, shorter rainfalls are repelled with ease.
  • If there are any drops leaking into the tent, repeat the seam sealing procedure and be careful this time around. Try to increase the amount of the SeamGrip mixture.
  • Then repeat the quality assurance procedure as well. If all are fine now, it’s time to store your tent.
  • Pack your tent in a good condition to wait for the next adventure outing.

How often should I seam seal my tent or tarp?

In actual facts, the frequency with which you should seam seal your tent depends on how frequent you use the tent. Other factors such as the quality of the seam seal applied initially also take the center stage. So, if the quality is in doubt, then the seal can wear out quickly, which will then prompt you to reapply frequently.

Normally, you may be required to apply the seam sealant at least twice a year. Alternatively, you may decide to apply it at the beginning of your outdoor adventure just to err on the side of caution. Otherwise, put the tent to test and set up the sprinkler again to see if the water doesn’t penetrate the seams. If that’s the case, then re-seal the tent accordingly.

Mono Seam Sealing

If you like camping out in the areas notorious of heavy rains, applying a seam seal on your tent may be an order of the month, especially if you frequent that place. To prevent this, you will have to shop with a meticulous focus on factory seam-taped tents unlike going for the unsealed seams. Either way, it is relatively cheaper to apply the sealant on your own.

Why are other tents not seam sealed?

When purchasing camping tents, you might find out that some are not seam-sealed or seam-taped. If you can remember very well, such tents are often affordable. The manufacturers might have evaded the additional costs incurred and the time of sealing such tent seams, or, quite frankly, the manufacturer has designed the tent for a particular purpose whereby waterproof features were not even prioritized.

Waterproofing Tent Seams and Coatings

The factory-taped seams can still be seam sealed just to enhance the waterproofness quality in case the original one wears out. It’s a fact that waterproof coated seams do wear out after multiple uses. So taking the tent to the manufacturer for a re-coat, is maybe unaffordable, compared to purchasing the SeamGrip or SilNet to do it on your own.

Is it safe to seam seal a factory seam-taped tent?

Unless you doubt the quality of the tent, then do not carry on the procedure. As encompassed in some terms and conditions, some manufacturers regard any other alterations as a void of warranty to the product sold. So beware of that before thinking about sealing your brand new tent unless it’s an old tent. We reckon that you do not seam seal the brand new tents immediately. Rather put them to a test first to inspect the effectiveness of their waterproof property. If it’s unsatisfactory, then seal them.

seam-sealing tent

But please check with the manufacturer first to see if there are any recommendations. If not, then follow our procedure before by carefully analyzing the type of the fabric in line with the MCNett product to be used.

Additional Tips and Recommendations

Before planning a hiking adventure in a certain place, please check the weather forecasts of that place beforehand. This will guide you if you have to seam seal your tent or not. If you like hiking predominantly during winter, it is recommended that you certainly seam seal your tent because winter is known for its ubiquitous rainfalls. Focus predominantly on the floor seams because of the possible snow surfaces whereby water can penetrate with ease.

In spite of the tent coming with factory-taped seams, we still recommend to seam seal the tent just to improve the waterproofness for in case. It’s better to be prepared up front, than to be sorry afterwards. But, warning, you have to inspect the quality of the tent before because the manufacturer might not help you with product warranty after you have done some personal alterations on it. Anyway, if the seam seal is perfect, it may not be visible as an add-on when returning the product to the manufacturer in the case of quality defects.

No leaks. While the sealant can easily be seen on the tent, I don't consider it a problem.

Whichever seam sealant you apply, just make sure that you apply in an open space that has enough ventilation. The odor may be unpleasant if you do that in a small space. Furthermore, do not perform a seam seal amid anticipated rainfalls. The weather conditions should be favorable.

Wrapping Up!

We have discussed, perhaps the most important procedure to all outdoor enthusiasts. The outdoor camping adventures need substantially waterproof tents and tarps. The factory-taped seams alone may not be sufficient in a long run. So it was long overdue for people to know about how to seam seal their tents. It saves more money to do this procedure on your own. We have explored the topic to an extent of demystifying the preparation process and recommending the MCNett’s SeamGrip and the SilNet as the popular products used.

waterproofing a tent

How to Break in Hiking Boots: Stay Comfortable on Your Hiking Adventures

0
It should feel good to take them off after the hike, but don't let a bad fit keep you parking-lot bound.

From the moment you bought your brand new hiking boots you’re surely dying to go outside and try them on. We understand it. We’ve been there and done that for sure. In fact, lots of hikers did this mistake as they didn’t follow the protocol and felt sorry real soon. The protocol you ask? Yes, there’s a protocol that you need to follow if you want to keep your feet happy and that’s breaking in your new hiking books.

How to Break in Hiking Boots

Before you start breaking in your boots, we assume you already chose and bought the right hiking boots and first you should know, is that it all comes down to anatomy – when you’re breaking-in your boots, you’re breaking-in your feet too. Although, this sounds a bit painful, don’t worry – it’s not. There are some simple and easy ways to follow in order to keep your feet blister-free and happy and if you want to know all about them read on!

What are leading causes if you don’t break your boots before your hiking adventure

You keep asking why do you need to break in new walking boots? Well, there are leading causes that can occur if you don’t break in your boots. The “breaking” term means the process of wearing new shoes (and boots in our case) to mold them to your feet. This is the process that will soften the leather or any other material of the boot in order to prevent any discomfort and rubbing. Here is the number one leading cause that can occur if you don’t break in your boots:

Blisters

If you don’t break in your hiking boots, expect blisters on feet. They happen when you rub your feet in a tight boot or a wrinkled sock. Also, moisture and heat can affect your feet in a negative way and cause blisters. In order to prevent you from getting blisters, you need to focus on some factors such as wearing proper size boots, breaking them in and avoiding pressure points. You should also pay attention and detect if you feel an uncomfortable sport in order to prevent it early.

The minute you sense you could get a blister stop and take off your boots and socks. If you see the area is reddish, dry it completely and apply a moleskin (which is a classic blister coverage that sticks well and is long-lasting), tape (use the surgeon’s tape that is slightly more effective at blister prevention than the normal tape) or an anti-chafing balm (great option for those who are sensitive to adhesives).

Hiking boots in the forest

In case you ignored the uncomfortness of your hiking boots, and you got yourself a full-blown blister there are several options that you can consider:

  • Use a mole foam with a doughnut hole to keep your sock from irritating the area and tape over with a surgeon’s tape over the blister.
  • You can use gels and pads to cool the blister off and prevent it from getting worse.
  • Don’t you ever open the blister and release the fluid as this way you’ll create a chance to get infected. If you have a blister that is too painful to bare leave it undrained, but if it opens on its own than treat it like an open wound. Use a sterilized kit (Band-Aid or antibiotic ointment and gauze) and prevent the area from further irritation.

Breaking in Fabric Boots vs. Leather Boots

It’s commonly known that it will take more time to break in the boots that are generally heavier so this is something you should keep in mind when buying hiking boots. If you opt for leather boots you should know that it’ll take you more time to break them in and there is no way you can “cheat” and speed up the process. You can only make your boots or feet uncomfortable for wearing.

Break in Your New Leather Hiking Boots

A leather boot will take longer to break in than the suede or fabric ones because leather is much stiffer. So, if you’re planning to go hiking soon, this would be good to consider and maybe choose somewhat lighter fabric or material when it comes to weight.

General tips on how to break in hiking boots

  • Keep in mind to buy shoes in advance: Allowing yourself to have enough time to work on your boots is important, so if there’s any big walk you have planned you should buy a pair of boots at least one month before the big hike. Waiting for the last moment to buy them won’t end well for you. When you have time you can slowly adjust your boots to your “hiking conditions” for example, breaking them in, while wearing your full weight pack.
  • Avoid all shortcuts: There are several videos and tutorials on how to speed up the process (for example, soaking your boots), but trust us, this is a bad idea! You don’t want to murder your feet. For every job, if you want to do it well you have to put in the time and this is no different. Eventually, if you want to speed up the process, you can try with applying heat by using a common hair dryer and slowly warm up the boots. Leather is one of the materials that are more pliable under heat. Let them cool and rest for a while and then try it again. Your boots won’t be ready to wear by doing only this and we don’t suggest replacing the traditional break in by walking with this process.
  • Treat the leather: The co-founder of the Oboz boot manufacturer Josh Fairchilds, says that it’s really important to treat the leather on the upper side of the boot before taking any other step. This will prolong your boot life and make the leather soft which is why your boots will be more comfortable to wear. Getting the shoe to flex the way your feet flex, is part of the breaking in your boots says the president of the American Academy of Podiatric Sports (APPS) Paul Langer. Your footwear affects you in terms of joint loading, muscle activation and movement parts. The first thing you need to do is to oil your boots. There are all sorts of greases and oils for leather on the market and some of them are specifically meant for boots. Whatever you choose it will do. You can apply it with your hands, brush or a rag and after the first layer, you’ll see how “thirsty” your leather boots are. The grease and oil will soften the leather and allow it to bend a bit easier to form to your feet. Just keep in mind to read the certificate before using any treatment on particular boots as if you use the wrong treatment, on Gore-Tex for example, you can ruin the breathable liner on your new boots.
  • Waterproof your boots: If you bought good boots, they’re either waterproof and have some special solutions to waterproof them. We suggest avoiding fabrics that are not waterproof as you never know when the rain might start or the terrain. Although it is possible to treat such materials (we suggest using liquid silicone) it is generally not useful to have non-waterproof boots because, as we mentioned above, as soon as your feet gets wet you’ll get blisters. If you have leather boots then you can use Sno-seal or any other durable solution (beeswax for example). If maybe, you bought boots that are made out of a fabric that is not waterproof you can also opt for Gore-Tex socks as they will keep your feet free from moisture and depleted of water. They are available in almost all hiking gear stores and online. Amazon, for example, has the best pricing offer – $50 – $100 per pair.
  • Choose high-quality insoles and socks: Make sure the boot fits perfectly and if you invest in some high-quality insoles and socks we assure you it will pay off. Having a high-quality insole will provide stabilization of your foot inside the boot and minimize all the friction that can occur. Also, a good pair of socks will make the boot fit right and will prevent any blisters.
  • Advice for those with specific issues: In case you have some specific issues or illness with your feet, for example, Achilles tendon pain, we suggest visiting your local backpacking gear store. They usually have great boot fitters that will solve all your problems and soften up your boots for you. If you still have issues with particular boots, we suggest some customization. Studies show that 25% – 40% of people need a customization for their footwear so instead of trying to find the right boots, maybe you should think of what you can do to make certain boots perfect? Customizing your boots can really mean everything, from adding pads, buying new insoles, adjusting the heel to relieve pressure or stretching the boot. The price of making customized boots depends on the type of customization itself, but keep in mind that it’s likely going to be less expensive than spending money on boots that don’t fit.
  • When You’re Not Wearing Them: You invested a lot of money in your pretty new hiking boots so it’s obvious it’s not enough to just kick them off and cram them in your closet. If you protect them (make sure they’re clean and upright) you will get longer life out of them.

Waterproofing boots

Steps on how to break in hiking boots

After you read all those general tips and did everything we suggested your boots are ready for walking. Here are some steps on how to do it:

Go Slow

  • Once you have everything you need to fit the boot, we suggest you wear boots around the house in order to get some idea of potential “rubbing” spots.
  • Choose the insoles and socks you should usually wear on the trail
  • Don’t tie your boots too tight (snugly is a good way to do it for start)
  • Place your gussets and tongues straight. It’ll feel stiff at first, but that’s okay.
  • Start with light walks around the house, then a half-hour walk around the block, and later an hour walk around town. (Keep in mind that your feet need to feel comfortable before you start with longer distances)
  • Put on your daypack first and increase the distance.
  • Slowly increase mileage and the weight of your backpack as this is where serious breaking happens.
  • Flex the soles after a crease begins to form. Once you notice the crease, connect the toes sole with the balls of your foot. Bend them just for a bit each day as this will make your sole more flexible, allow your feet to move wider and decrease stiffness. You should be gentle while doing because you don’t want to overstretch them. (Idea: Perform squats while wearing them as squats help loosen the soles)
  • After a couple of short hikes, you will be ready to go on a two to three hour hike (choose closer places and consider the time to get back before you start). Soon, your boots will be made for long hiking walks.

two persons laying on the ground and watching the view

How to know when your boots are ready to go

After you worked on all those suggestions to break in your new boots above, there are few ways to know if your boots are ready to go after you:

The “Use Your Finger” Test

This is the first thing most professionals do when they want to see if their new boots are ready to wear. Simply move your feet forward (as much as you can) and if you can slip your fingers at the back of the boots they’re ready to go.

Persond checking the boots with "Use Your Finger” Test

This test should be done with your boots fully unlaced and proves that your feet will have all the space available when hiking down the hill as feet then slide forward especially when you carry a heavy pack.

The Sense Test

After you have done the finger test now it’s time to try the sense test. Take off your socks and wear your boots with bare feet. Try to determine if some parts of both boots feel tight by simply using your “sensory” powers. Special attention should be on small toes as you don’t want it to be jammed, especially if you’re a person who usually wears 2 pairs of socks. If you feel the “pinch” of your small toes, this test will bring this problem to light as well as any other issue.

Take off your socks and wear your boots with bare feet.

Now it’s time to do put your socks on and do the same test once again. Your boots should not feel loose nor tight. Boots should fit perfectly and “snug” your feet. If your feet feel “jammed” or “pinched” in any way, try lighter socks and do the test again. If it doesn’t help then these boots are not for you.

The Stride Test

While walking around in boots what do you feel? Do they break on top of your tops comfortably when you’re walking forward? How about the feel when you’re running? Does it feel like the back of your toes are jammed? If you say yes to all of these questions, then you’re good to go, if not, these boots are not for your feet.

The Stride Test for hiking boots

Do you feel your heel sliding in the heel area? They’re too big for your feet and won’t work for you on the longer hikes.

The “Paper” Test

Wear socks you usually wear on your hikes. Place a blank sheet of paper under both of your feet. Trace a line out of your feet with a pen and cut the outline. Gently place the paper inside the boot, then press it on the bottom of a shoe and use the finger to go over the corners of your boot.

Image of a person sitting in hiking boots

When you remove the paper and see that the paper folded up at places this is a position where your boot is still too tight. Walk it off a bit longer.

What have we learned? (Conclusion)

Breaking in will not make uncomfortable boots comfortable. If the boot doesn’t fit (it feels tight or pinches) when you try it for the first time, then you probably should opt for different boots. Listen to your feet before going on a serious hike adventure, they’ll tell you if you’re ready. Also, be vigilant about pain points as what seems to be a small problem can become a big one in no time. As a hiker, your primary objective should be the avoidance of dreaded blisters, or any other sores and uncomfortness.

By taking little steps, you can go a long way to keeping you in a good shape so it’s sure worth taking the time to do it. Now it is time to put your new boots to a true test with a weekend backpacking trip or a day hike.

Image of a person checking the hiking boots

How to Waterproof a Tent: Stay Dry on Rainy Days

0

You are planning to go on a hiking trip on a wet terrain or a weatherman says it is going to rain and you don’t have a waterproofed tent, but you need one quickly? What are you going to do? Buying a new waterproof tent can cost you hundreds of dollars and you can’t afford a new one. You are going to learn how to waterproof your old tent, of course. If you are not that enthusiastic about waterproofing your tent by yourself and you are thinking of giving up, we believe that we can reassure you to continue your planning.

It is possible to waterproof any kind of tent (even the old one that was used for years) and, fear not, it is not that hard. We are going to show you and explain everything you need to do to go on a happy hiking adventure even if it’s pouring outside. Let’s start!

Frozen ice droplets on a camping tent in the morning.

First, we need to stress the importance of having a waterproofed tent if you are planning to go on a hiking or a camping trip on rainy days, so, this is why we will mention some of the things that can happen if you don’t follow the rules and bring your old (not waterproof) tent for your trip.

First things first – A few tips before you start waterproofing your tent

Let’s start from the beginning. The first thing you need to do before you start with waterproofing is to know exactly which tent areas need to be waterproofed. If you previously had a waterproof coat did it come off? Does the floor of your tent leak? Do you think your tent needs a waterproof fly? The golden rule here, doesn’t exist, and it is pretty simple – different parts of your tent will need different types of maintenance and care, and in order to determine the area, there is one thing you can do and we’ll share that tip with you (and other tips as well).

Inside is safer than outside

Fill your bathtub with water (if you don’t have a bathtub, a small children’s summer pool will do). Put your tent under the water and if you see air bubbles coming to the surface, that’s the spot that will leak and the spot you have to take care of. Take out the tent from the bathtub and place it in the shades to dry out (or if the weather is already bad, hang it over something in your garage). Why we say to put your tent under the shades is because some tents don’t have UV resistance. If you are 100% sure that your tent is UV resistant, then feel free to leave it under the sun to dry out (it will surely be faster). If you are not 100% sure, don’t risk it, it’s not worth it.

Photo of rain drops on tent

Another important tip we need to share with you, is to do all waterproofing techniques, inside your home in your tub, or place the small kid’s pool inside the garage. You never know when the rain can start or what can happen outside. It’s better to be safe than sorry, and even if you encounter some problems, it will be easier for you to handle them inside than outside of your home.

Clean it before you start working on it

This is common sense, you have to clean your tent before waterproofing it. If you did the technique of searching for leaking spots in the bathtub above, then it is okay for you to only make sure that your tent is dry enough. If not, keep in mind that any part of your tent can’t be waterproofed if it is dirty or wet. Layers that you will later apply will cover that dirt and fall off at the first use. You surely don’t want this to happen, right?

A man cleaning his tent before waterproofiing

You can simply use warm water and a sponge that you probably already have at home. Use the one that has a soft side, never use a rough sponge or the rough side as you may tear the fabric of the tent. Also, we don’t recommend washing the tent in a washing machine as the perpetual rocking and turning can damage your tent once and for all – it will stretch and tear the material, so the only thing you’ll be able to do is to throw it out in the trash.

Steps on how to waterproof a tent

What if the floor of my tent is leaking?

This is the most important part of any tent, especially if you’re planning to go camping or hiking on wet terrain, and when it comes to waterproofing in general. Even if the weather is nice, you can have your tent wet if it has a leaky floor. Wet terrains will make the vegetation and the ground moisture, and it can appear inside your tent. In order to prevent that from happening, you can put a tarp underneath your tent when you’re setting it up.  Generally, this is a good idea to do. This way you will prevent any dirt, vegetation and rocks from getting stuck underneath your tent and damaging or ripping the floor.

Most manufactured tents are taped, but they are not factory sealed, which means you can have water penetrate at places where the floor and the walls are connected. If you have a factory taped tent, then your tent is probably made of materials that are waterproof on double stitches. Read the label carefully. We agree that it is better to have something than nothing, but it doesn’t mean that it will be perfectly waterproofed, so we suggest applying a seam sealer.

gear aid sil net silicone seam sealer

A seam sealer can be bought online (on Amazon, for example) that can be easily applied to the seam. We suggest applying it in a thick layer and leave it to completely dry off. This is a great waterproofing solution for your tent and will provide you dryness because the seam won’t let the water enter your tent through small cracks. Here are the steps on how to do it:

  1. Determine the spot that leaks and which needs to be sealed.
  2. Read the labels and instructions carefully in order to determine which side of the material should be sealed.
  3. Use a toothbrush to prepare the seams before you start the process, remove any leftovers from the previous sealant (you can use swabs dipped in alcohol)
  4. Apply a coat of seam sealer that you bought in a gear store or online
  5. Leave it to dry
  6. Place your tent under water or a sprinkler in order to see if there are any more spots that need to be sealed. If there are spots, repeat the process.

The second step to waterproofing your tent floor is to apply a spray that is meant to be used for waterproofing materials (it can also be bought online).  Apply it to the entire floor inside the tent (soak it!). After you do that, use a cloth to spread out the fluid. Leave it to dry off.

waterproofing a tent

It is always better to do this process outside on the open as most sprays are not healthy to inhale. In order to get your tent dry faster open all the windows and doors. When the tent is dry, repeat the process.

What if the walls are leaking?

This issue can be solved in a similar way as we suggested waterproofing the floor above and you can use the same waterproofing spray for the walls and the floor too. The process is no different from the one for the floors. Spray the walls of your tent (also soak it) and spread the fluid with a cloth (you can use the same cloth you used when waterproofing the floor). Generally, you don’t have to spray that much if you previously waterproofed the floor, so you can simply spray a little bit on the cloth (or if you use liquid to just pour or squeeze a little bit of liquid onto the cloth) and spread it all over the walls.

We suggest it’s best that you use a rainfly as it is made out of plastic and basically, it covers the entire tent surface which adds an additional layer of waterproof to your tent. Today, almost all tents that can be bought in gear stores come with a rainfly as an additional gear. A rainfly can be found as an addition to almost all tents when bought, but in case your tent doesn’t have it, there’s no need to worry about it.

Apply a coat of seam sealer that you bought in a gear store or onlin

You can also buy it online or if you have 2 tarps, you can use one under your tent and the other one as a rainfly. Just keep in mind not to have your rainfly touch inside of the tent (the inner walls). It is a bit easier to work with a tarp as you can simply use rocks (found near your camping place) and fix tarps place on the edges. It’s not that hard.

Considering the fact that today’s post is all about tent waterproofing, we cannot leave out the standalone ground feet. The rainfly is necessary, but in addition, a standalone or customized ground feet should be in every hiker’s waterproofing gear arsenal. It protects your tent’s base and keeps it moisture-safe. We recommend looking for a high-quality tent footprint made of polyethylene coat that you can add to your tent. If you already got some ground sheet with your tent, it usually won’t last longer than one (or max. two) camping seasons as these sheets that come with tents are usually too thin.

good tent footprint

If you’re not a big fan of hiking and you are going on one trip with your friends, colleagues or family than the one you got with your tent will suffice. If you’re on hiking trips more than you are home, invest in a good tent footprint. They can be bought online and if you find them expensive, it is easy to save some dollars and make one out of a thin tarp by yourself. This is a simple DIY process which everyone can do it. With a combination of waterproofed, sealed tent, rainfly and a ground sheet there is no way you will get wet as you will not have double, but triple protection.

How to know which spray to buy?

We are not big experts on sprays, but we surely heard a lot from hikers and campers who recommended the Nikwax TX Direct Spray. As a matter of fact, most of the people said that this is the best waterproofing spray on the market. We tried it and we have to say that it is on our Top 5 list, especially because it has several features such as enhancing the breathability of the material and its scent.

Nikwax TX Direct Spray

Most of the sprays have a really bad smell, but this one has a very soft, modest scent. All in all, it is water repellent, serves its purpose and is highly recommended by the professionals.

What to avoid?

Although you can read everything on the internet today and some advices are strange, our suggestions really work, but if you plan to use that tent for a relatively long period of time we need to warn you that almost all processes will ruin your tent over time.

Some people say that, in order to waterproof your tent, you just need to apply lard or grease to the rainfly. This is not an entirely wrong statement as lard and grease will keep the water out of your tent, but it will also ruin the waterproof coating you already have on your tent. Plus, the smell and the feel is not that pleasant, especially when sleeping and trying to pack it. It also attracts insects, so if you don’t want to wake up covered with ants use lard or grease to waterproof your tent.

Pastured Pork Lard

Another advice that can be heard or read on the internet is that you apply a duct tape. We don’t suggest this also as, when removing it (it’s pretty hard to remove the duct tape of the tent’s material), it can rip the walls, especially those made out of fine materials.

Then, there is advice to waterproof your tent with a candle. Supposedly you should take lighten candle and drop the wax on spots where you noticed that your tent has holes. We find this process and advice, very risky, as it is pretty obvious that you can set your tent on fire. Also, the hot fuzz will destroy tents with plastic walls because they’re not heat resistant. It’s better that you spend a couple of bucks than ruining your tent or setting it on fire.

How to know when your tent is ready to use on rainy days

After you worked on all those suggestions to waterproof your tent above, there is an easy way to check if your tent is ready to use on rainy days and we already mentioned it above – simply sink it in a water-filled bathtub or under a sprinkler. If you see that inside of the tent is completely dry, you’re ready to go.

Camping on a rainy day

If you simply need to patch a small hole use a waterproof nylon that is a bit wider than the hole and use a contact cement to apply it. After you stick on the patch you can use a pot of hot water to place it on top of the patch and a book or a board underneath the patch. Leave it rest for 30 minutes.

What have we learned? (Conclusion)

Old tents can be easily waterproofed and the process we explained is cheap and useful, especially for those who are not regular hikers or campers. There’s not much of a point to buy a new waterproofed tent if you know you’re going to use it once, maybe twice. You don’t need to be “fancy” while going on hiking. Simply, buy a waterproofing spray, a seam sealer and a tarp.

These three things will cost you a few dollars and you’ll get the same good time with your friends and family as you would get with a new fancy waterproofed tent.  If you plan to go on hiking tours regularly and still don’t have a tent, then it’s best that you invest in one that is factory sealed and waterproofed.

We are hoping you enjoyed this post on how to waterproof a tent and that you find it useful. If you decide to try the process and our tips, please feel free to let us know how you managed to do it. If you have any other suggestions or ideas we would also love to hear them as there is not many pieces of advice that work.

the best night's sleep for a long time and the tent felt nice and warm in the rising sun.

Night Hiking: What You Need to Know

0
If you want to make the most of the great outdoors, the night can offer you just as much opportunity to enjoy a good hike as the day does. Night hiking can be a great experience, but once the sun has gone down the outdoors can be a very different place. It contrasts from daylight hiking in many ways. You should always consider your approach and be well prepared for the challenges you may face. Many individuals go out ill-equipped and unaware of their surroundings and this is when accidents can happen.

Night Hiking Adventure

If you go out at night you need the right equipment and it helps to have some knowledge on the subject.

Why Go Out at Night?

Temperature can make a big difference, it is often cooler at night. In hot climates, these temperature differences can mean it is preferable to walk once the sun has gone down. However, in some parts of the world the changes in temperature between night and day can be drastic, the temperature can change from a sunny day to below freezing at night, so make sure you know your environment.

You can witness the world in a new light, or better said, in moonlight, or only under the stars. To be able to gaze at the stars is an amazing experience and being out on a clear night without the interference of light pollution means you have the opportunity to view the milky way. Stargazing is great and if the moon is out, it can assist in shedding light on your surroundings, so you won’t need to use torches.

backpacking at night

Many animals are nocturnal and the world becomes theirs at night. This means you have a good chance to go out and see a wealth of wildlife. Owls and bats come alive at night, as well as a host of other animal life. Their calls and scratchings can appear to sound amplified as they go about their nocturnal business. Be on the alert and you may have the pleasure of spotting something wonderful.

You may have walked the same trail a multitude of times and know it like the back of your hand. Going out at night brings a new dimension to a hike: landmarks, noises and terrain features can appear very different. Welcome to a whole new world of adventure!

How to be well prepared

  • Always Let Someone Know Your Plans: Leaving a proverbial trail of breadcrumbs can make a huge difference! Always inform someone that you will be heading out and give them as many details as possible. You should always inform them of your planned starting point, end destination and the route you will follow.
  • If You are a Newbie: If you are new to this type of nocturnal adventure, then ensure your first planned expedition follows a route you know well. Stay in your comfort zone and stick with a well-trodden path you are very familiar with. You can use this time to accustom yourself to the change of environment, gain confidence and learn about things such as natural night vision.
  • Do Not Go Alone:Having company is great, not only to share the experience, but it also means you can keep each other safe should anything happen. Lack of visibility can be a big contributing factor that can lead to an accident occurring when outdoors after dark. Even by day, an accident could befall you for any number of reasons and more so at night. Safety in numbers as the saying goes, if anything were to happen to you, it helps to know there are people available to assist.

night-hiking - partners

A couple of rules worth sticking to

Always wait for a member of your party to return to the group if you separate (toilet breaks) before continuing on your journey. Stay within a sensible distance of each other. Space yourselves adequately, not too close together or too distant. This helps to ensure you know where you all are and helps to avoid the chance of a domino-style accident if one individual were to slip, trip or fall. An advisable distance is normally at about two meters apart.

Bring the Correct Gear

It is of the utmost importance to head out prepared and well equipped no matter the hike. This advice is even more applicable when you are tackling nighttime conditions. Safety is paramount, so make sure you have everything you need, just in case. Always remember to pack your bag methodically as it can be challenging locating objects in a dark environment.

Man Stand on a Cliff in the Night

It is important to know where your equipment is and know how to find it in a hurry.

What Gear to Take

Here’s a list of some key items:

  • Map
  • Compass
  • GPS
  • First Aid Kit
  • Head torch
  • Hand torch
  • Extra Illumination Devices
  • Extra Batteries
  • Extra Food
  • Extra Water
  • Extra Clothes
  • Flairs
  • Fire Lighters and Kindling
  • Knife
  • Warm Blanket
  • Bug Spray
  • Cell phone
  • Wrist Watch
  • Toilet paper

compass on a map

Choose a Decent Bag

You should be prepared for unexpected weather conditions so a waterproof bag is essential. Nylon treated or UPVC bags are a good option to go for and you want to avoid canvas or cotton bags as they are not as weather resistant and a bag of wet items is not what you want or need. It is also advised that you keep the weight of the bag down, if possible. Your bag will be one of the heaviest items you take with you. If you are planning to go on a short hike there is a great range of purpose made lightweight hiking bags that are definitely up to the job, if you are going for a longer stint and need to carry more the options vary.

Being able to adjust the bag to your body frame and requirements is very important and always look to bring a bag that has customizable straps, these will help you carry weight and ensure greater comfort.  Also, remember to take a bag with good shoulder strap padding, this is crucial as padding improves comfort and relieves pressure and chafing.

Hiking-at-night (1)

If you know you have to carry a heavy load choose a bag with a lifter strap, sternum strap and a hip belt. Lifter straps, sternum straps and hip belts are specifically designed to aid you in optimizing the distribution of weight that you have to carry and keep your bag securely positioned in the right place. You want to find the balance between your hips, back and shoulders when it comes to taking on weight and these straps will help you do that.

Now it is important to remember that the nature of a trip may vary in terms of the time it will take, the environment you are in and the equipment you will need. As a result, the requirements that a bag has to fulfill may not always be the same. The volume of the bag will depend on a number of the above variables, so do a mental check before you head off and make sure you pick the right bag for the job. Today the range of hiking bags on offer is huge and some bags come with nice design elements such as inbuilt hydration pack and a whistle. All these design elements are helpful and provide essential bits of hiking gear.

Wearing the Right Pair of Boots

Your footwear makes a big difference to your comfort and protection, so choose a pair of boots that fit and are flexible and are sturdy. At night you want to be able to feel the terrain underfoot as you often might not be able to see it. Bringing a good pair of waterproof ankle height boots is advised, either day hiking or backpacking boots are perfect. Be warned, mountaineering boots can be too rigid and are not designed for all purpose conditions and the high cut of the boot can be restrictive. Unless they are necessary it is advised that you a lighter boot which is more flexible and comfortable, so you feel freer to move your feet. This makes it easier for you to pick your way through varied terrain.

The Quest 4D has a great combination of stability and comfort

A firm tread ensures stable grip and should protect you both on and off the trail. Most decent boots have Vibram soles which are perfectly designed for your needs and are extremely durable. Remember, a boot that has a stiff midsole will be good for weight support, so useful for carrying heavy loads. However, the stiffness can take away from the sensation of feeling the terrain, so do be aware of this factor when choosing your footwear. Most importantly, your footwear choice should be comfortable as you will be covering some distance, make sure they fit correctly and feel secure.

Testing the Terrain

Your ability to judge your surroundings can be hampered by a lack of daylight. It is important to go slow, measure your footing and test your surroundings. Loose rocks and unstable terrain are harder to spot at night, so always ensure you test the ground before putting your full weight down if you are unsure.

man hiking at night

With a light, you should be able to gauge what is underfoot easier, but even still shadows, obstacles and changeable landscape can pose hazards and bring surprises. If it has been raining or weather conditions are averse, then you should be even more alert.

What Clothes to Wear

A range of layered garments is always advised to manage the temperature, ensure breathability and also protect against the elements. You want to bring a range of clothes that are comfortable and soft, light in weight and moisture wicking, as well as waterproof.

Packing waterproof and windproof essentials are always advised. You need a decent coat and trousers, as well as a good hat in case the weather picks up. All items should be easy to store for use when needed depending on the weather. Finding the right textiles to wear is also very important. For example, clothes made from textiles like merino wool or alpaca are perfect for hiking as these materials provide you with warmth and comfort and are moisture wicking.

Guided night snowshoe hike across Suspension Bridge

The three layer clothing system is an excellent means of managing your temperature, especially at night when the temperature could plummet or in colder climates:

  • Base Layer: Thin body-hugging, comfortable and breathable layers should be applied first. These are used to keep the skin dry and stop the buildup of sweat. Try to avoid cotton clothing and instead go for synthetic textiles, wool, or if you are feeling particularly extravagant you can go for silk.
  • Secondary Layer: The middle layer of clothing provides insulation and should be loose fitting and moisture wicking, a good option is a woolen garment, fleece option or clothes made from synthetic textiles.
  • Outer Shell: This last layer is used to protect against wind and rain and should be a hard shell product. Hard shell refers to items of clothing that are waterproof and windproof, as well as breathable.

Remember your clothes should be well suited to the environment you will be walking in so tailor your approach to the outdoors to make sure you are protecting yourself adequately.

Illumination

One of the biggest problems to think about is how you will find your way, locate other members of your group or find necessary objects whilst on your night time hike. You have to consider how different environments and weather can affect your hike, visibility can be affected by cloud cover, or no moonlight. Different environments will offer different visibility issues.

Guided night snowshoe hike across Suspension Bridge

For example, thickly forested areas can throw a great deal of shadow onto your path, so when you are walking in a ravine and the moon is out, the light may not reach you. Whatever the conditions, you need to be a good light source when out at night, therefore it is essential to have an adequate supply of lighting, like torches or glow sticks:

  • Hand Torches: Getting a decent torch is a must and you want to make sure you take a torch that suits your hiking needs. A good battery life paired with a strong beam and adjustable focus is very important when considering what torch to bring with you. Also, a well built and durable torch counts in order to ensure it will not break if dropped. Your torch does not have to be big or heavy, go for a lightweight and easy to pocket option. Hand torches are good for pinpointing specific objects or nightlife from a distance, but do be considerate if sighting wildlife as a torch can be blinding, this applies to people too. Also, carrying a torch takes away the freedom of having the use of your hands.
  • Head Torches: Head torches are a great addition to your kit. They have many benefits. Two of the greatest benefits they provide are that they follow your line of sight and free up your hands. When wearing a head torch, ensure it is angled towards the ground and not directly at eye level, otherwise, you might blind your fellow travelers. Look for head torches that are comfortable and have adjustable light settings, good battery life and a strong beam. Good head torches should have a red light option, as you can apply this setting when encountering other groups on the trail. Also, the red light does not detriment night vision.
  • Glow Sticks: If you want to use a light source that is effective but not overly powerful, glow sticks are excellent. Glow sticks are waterproof, so work in wet weather and require no batteries. Most glow sticks will last for around twelve hours and are perfect for use when stopping to eat or setting up camp. A good idea if you wish to remain visible is to attach one to your bag, they are brilliant visual markers and can help keep a group together.
  • Batteries are essential: Torches are essential, but without a functioning battery, they soon become useless. Always bring a healthy amount of backup batteries and remember to keep a mental note of the battery life of your torch and keep on top of the replacements. Being left in the dark is not fun and can quickly change the atmosphere of a situation from pleasant to worrying. Having control over your lighting situation is very important, so make sure you are well stocked up on batteries.

Night Vision

One of the wonders of nighttime hiking is you have the chance to use your natural night vision. Adapting your eyes to your nocturnal environment is a fun and great way of exploring the hidden world around you. Using artificial light will not only destroy your night vision it can also scare off wildlife. A lot of the time you can hike without the need for artificial light, the stars and the moon and a clear night sky can offer all the light that you need.

Man hiking a tnight

Remember to build your night vision, it is not develop in an instant and it takes time for your eyes to adjust. Do not stare directly at a light source and use peripheral vision to your advantage. You will be amazed at what reveals itself once you have fully adjusted your eyes to the night. In consideration to your fellow hikers night vision as well as when you encounter another group of hikers on the path, please remember to watch where you point any torch light, as it can be rude, or ruinous to night vision as well as blinding.

Finding the Way

It is important to be vigilant when out in the night as finding the path and sticking to it can be a challenge even with the aid of a torch. You must always keep an eye out for place markers, signposts and landmarks and be extra observant of your surroundings. Darkness can throw you off course with ease and if you venture from the path it is crucial that you memorize the way back or you can lose yourself in an instant. To help you find the right route slow the pace of your expedition and take your time when traversing the terrain, this also helps ensure you stay safe and lowers the chance of unexpected injuries.

Backpacking at night

Communication is crucial when in a group and can be a great way of keeping people aware of any present dangers on the path and of your location if for any reason you are not visible. Do keep in mind that any sound you do make will travel and if you are on a wildlife hike you can scare animals easily, so be mindful of your volume and tread carefully.

When confronting Wildlife

If you are lucky enough to stumble across some wildlife when out at night you should be considerate in your approach as you are in its habitat. For both your safety and the comfort of the animal think about the proximity between you and the animal and consider what type of animal it is. Obviously, if it presents a threat, then you should move away from that animal at a sensible pace trying not to startle it.

The wildlife at night

If it is an animal that you wish to observe and it poses no threat, then approach it cautiously and quietly and find a nice vantage point and remain as still as possible. Most animals probably have better hearing and night vision than you do. Never impose yourself. If you are carrying a torch avoid shining it on its face or even turn it off if you can.

Wrapping it up

Well, there you have it, all you need to know regarding night hikes. We hope that you learned something new and that you found our article interesting to read and useful.

Away from the city lights of the West, the night sky promises a dazzling celestial show