Home Blog Page 29

Types of Backpacks: A Comprehensive Buying Guide

0
Backpackers sitting on a bridge in the forest

With hundreds of backpacks available on the market for outdoor activities, it can be freaking and confusing to find the perfect match for your next hiking or backpacking adventure. All you need is a comprehensive buying guide to know that which types of backpacks are suitable for you, and what’s the attributes of such bags. With this guide, we’ve sought to explore the many choices of backpacks that we believe can cater for your travelling needs based on, among others, size, features, and capacity.

Backpackers on a hill looking down

The different kinds of backpacks are distinguished by the intended utilization, design, capacity, duration of use, and the materials. We might have, for example, the day packs, hydration packs, weekend packs, overnight packs, expedition packs and technical packs. Their naming is basically activity-specific. For example, the overnight backpacks can be used to carry your light sleeping bag and the portable camping tent for an overnight sleep out whereas the weekend ones are for weekend outings. We will explore their key differences below. Let’s start with the features that are predominantly important.

What to look for when buying backpacks?

Many people might have varying preferences. But there are common features to look for, particularly with regard to the capacity, material, design, and a proper fit of a bag. These features also differ from one bag to another. For instance, the capacity of a day backpack is normally smaller than that one of an expedition backpack that is designed to carry lots of essentials for multi-day hiking. Obviously it will be needless to stuff a sleeping bag and excess food in a day backpack. Let’s unfold these features below:

Capacity

The capacity of the backpack is an important consideration because it determines the amount of essentials you can store. So, as you decide upon the backpack to buy, think about the type of the hiking gear you want to have. Also think about the number of the days that you’ll take in summit camping. If you are going out for a weekend, perhaps a 50 liter backpack can be suitable to hold all your essentials. These could be sufficient food, clothes, camping tent, and the sleeping bag.

Backpackers on top of the mountains taking a selfie

If you’re going out for more than 5 days, an 80 liter backpack could be suitable for your case so that it can hold all your essentials. But take into account the weight on your hip and your feet whenever packing your back. Ultralight backpacking could be helpful in minimizing the hiking gear. This means you should make a checklist of everything you want to carry to your next excursion prior to determining that which backpacks could be the best fit for that.

Material

The material also plays a significant role in a backpack, especially when considering durability and the types of tools to have. For instance, the materials of inferior quality might be torn by some of the sharp tools you pack in the bag. It’s therefore important that you choose well.

Man backpacking in Australia

Moreover, inferior quality materials could wear out after several uses, which will then prompt another expensive purchase.

Design

This feature can be the most important one, if you’re in multifunctional backpacks. For instance, the backpacks with extra pockets eliminate the need to have extra bags to hold your camping tent poles. Luckily, some have shoulder pockets or side pockets to accommodate such. There are in fact a lot more tools to save for ease of access. You can’t always take out everything in the bag when you need something stored at the bottom.

The other design attributes go to the difference in frames. Some backpacks, usually the day and hydration backpacks, have no internal or external frames at all. This is probably due to the amount of essentials they hold, which is, by nature, not too bulky or too heavy. They normally have soft foam to cushion a load, and are designed for short distances.

That’s why there was no need to incorporate frames. On the other hand, the large backpacks that are designed for overnight and expedition packs have internal frames. The frames can be plastic or aluminum, or any other metal. Their primary purpose is to distribute the weight of the backpack evenly. You can comfortably have a hiking gear that is over 20 pounds.

theres-an-elite-club-that-you-can-only-join-if-youve-traveled-to-over-100-countries

The external frames can be found in large multi-day hiking backpacks. These frames help in providing adequate ventilation between the backpack and the spine. Normally, the bag will not ride against your back in summit hiking. But even the other backs with solely the internal frames can have a great deal of ventilation through the mesh panels integrated.

The amount of built-in pockets and divisive compartments also count as the design part of the backpack. Other backpacks come with elasticized side pockets, which can efficiently hold squeeze bottles or tent poles. The hip-belt pockets can also be helpful in holding the small items such as the matches, snacks, multi-chain tools, or anything that can be needed quickly.

Furthermore on pockets, some backpacks come with shovel pockets. These are flaps that are affixed on the front side of the bag with the buckle closure. In these pockets, you can store additional winter apparel or any other lightweight essential such as the snow shovel if you plan to go out in winter. The shovel pockets can be further extended with some front pockets for an additional storage of small items. In actual sense, a backpack may have as many pockets as possible. The choice will then depend on the number of items you plan to carry. It’s a personal preference.

Happy backpackers

Did we mention anything about the compartments? I guess not yet. The sleeping bag also needs a compartment in the backpack to avoid having the stuff sack for it unless if that stuff sack can fit in the backpack. The compartment can be sewn inside or near the bottom of the bag with zippers to hold the sleeping bag. Also, this feature can be intriguing when considering the design of the backpack. We can mention a lot with the design of the backpack. Remember the straps and the detachable top lids. The adjustable suspensions as well do count a lot to make sure that the backpack fit well.

Proper fit

Now the torso length comes into effect when we refer to the proper fit. The bags are available in varying sizes from extra small to large. You might find out that some are gender-specific. For instance, women backpacks usually come with contoured shape at the waist to accommodate the women shapes. So they will be needless and irrelevant for men to have them.

Other backpacks feature an adjustable suspension to fit a wide range of torsos. Some may have an interchangeable suspension or a fixed suspension. Let’s differentiate them below:

  • Adjustable suspension: As already pinpointed above, the backpacks with adjustable suspensions help modify the size so as to fit everyone. There may be a shoulder yoke that can be augmented to fit any body type.
  • Fixed suspension: These, as it is self-explanatory, have no adjustability feature. They are, however, stable and solid between the bag and your body. The only problem is that you have to find the exact size that will fit properly. Otherwise be ready for a long trip with no wiggle room.
  • Interchangeable suspension: This form of suspension is probably the best when coming to customization. The backpack will allow you to fit, for example, a hip-belt of your choice. Even the shoulder straps can be customized.

So, it is important to take note of various suspensions when purchasing a backpack. The waist size is also worth-notable. Normally, the hip sizes, may range from 20 in to 40 in. The best way to avoid the waist size inconveniences is to look for the backpacks that have interchangeable hip-belts, unless you’re certain about your size before purchasing.

Backpackers near a river

The straps are also worth-considering when you need a proper fit. There are load lifter straps and the sternum straps that are important in adjusting the backpack. For instance, the load lifter straps are attached to the top of the shoulder straps to connect to the top of the bag. They tighten the bag so that the upper portion doesn’t pull away from your body. The sternum straps, on the other side, are the mid-chest straps that attach to the shoulder straps with ease to stabilize the backpack.

You now probably have a broad knowledge about what to look for from now on. Let’s introduce the types of these backpacks below.

Kinds of Backpacks

As reiterated above, the types of these backpacks depend on a number of features such as the intended use, capacity, and a proper fit. Below we will discuss popular models of backpacks. Our list is not meant to be all-inclusive due to the unpredictable launches of new products into the market.

  • Weekend Backpacks: These can be the backpacks that are suitable for 1 to 3 nights over the weekend, and they have about 30 liters to 50 liters of capacity that is basically designed for a less-bulky gear. So you need to work out your way to having a light gear. Get rid of excess tools that you do not really need in a short period of hiking. In the weekend backpacks, you can pack essentials such as the following: the small tent, sleeping pad and sleeping bag, a few clothes, food to last for a weekend, first aid kit, water and others depending on your choice.
  • Day Backpacks: These are the smallest of them all because for a day you do not need a bulky gear. Things such as the sleeping bag/pad are excluded. These bags can range from 20 to 40 liters. It all depends on the amount of things to carry. But all in all, these bags may carry food, water, and a few clothes in case the weather changes.
  • Multi-day Backpacks: Now you need large backpacks with internal frames and with a capacity of between 50 to 80 liters. These bags are popular among people who hike for a week long adventure. You might be exposed to various inclement temperatures, so it is important to take that into account when choosing these backpacks. Conditions such as cold nights and downpours should be accounted for. Normally, you might have the following items: kitchen tools, camping tent,  sufficient food for the week, sleeping bag/sleeping pad, extra shoes and clothes, and other necessary items of your preference.
  • Expedition backpacks: Now these are the largest of them all. They become helpful when you plan to camp in the wilderness for over 5 days. They can help you carry adequate non-perishable foods that can last even a month. Usually, such backpacks have a capacity of between 70 liters to 95 liters. They are huge enough to carry almost all of the items needed, including the foldable pillows. The following may be packed in these backpacks: extra clothes,  cooking utensils, sleeping bag/pad, 4-season tent, camping tent poles, and many more.

We have come to the end of the various backpacks that we have for outdoor enthusiasts.

Backpackers looking at a map

To make the best out of these backpacks, you have to know how to pack them. Failure to pack nicely and properly may lead to a bulky gear or unnecessary additional bags needed for excess gear. One must know how to pack, for instance, the bags with internal frames, different from the way the bags with external frames would be packed.

How to pack the backpacks efficiently

Here we will guide you to pack your backpack nicely. We focus more on the difference between the internal and external frames in loading the items to make sure that a minimal weight is sustained by the hips and the spine. The small backpacks, ideally the daypacks, need no comprehensive guidelines to load them because only a few items are loaded in a small capacity backpack. Usually a gear that ranges between 10 to 15 pounds is loaded in day backpacks, unlike in the larger backpacks that hold a tremendous amount of items at once.

Loading Internal Frames

  • Start with the sleeping bag, wrapped in a waterproof stuff sack, unless the backpack has a waterproof feature. Load the sleeping bag at the bottom because you won’t need to have it along the way until the evening after pitching the tent. Packing it first helps create a stable base for the bag.
  • Follow by packing the tent next with poles removed to be inserted in the external pockets of the backpack.
  • On the side that is to ride against the spine, align the clothes to avoid sharp tools pressing your spine hard.
  • Heavy objects should be stuffed next to the spine to maintain balance on the road
  • Load the food items thereafter.
  • Excess items should be stuffed in the external pockets that are built-in on the backpacks.

Backpack on the ground full of clothes

Loading External Frames

  • Heavy gear should be stuffed close to the spine and higher up on the frame. These could include the 4-season tent.
  • Wrap the sleeping bag in a waterproof sack and put it at the bottom to maintain balance and a stable base
  • It is not a requirement to align the clothes against the spine because the external frame normally creates sufficient space between the bag and the body. So it’s highly unlikely that the body may suffer from blisters.

REI backpack laying on the ground

These are just recommendations not the rules of the thumb on how to pack the backpacks. Everyone may derive customized plans to optimize the loading of the bags. If you’re an amateur in these backpacks, rather stick to the expert advice.

Expert Insights and Recommendations

  • If you plan on hiking for hundreds of miles, we reckon that you focus more on loading your backpacks because having to wait in the middle of the summit to take the handkerchief or energy bars that are stuffed at the bottom is just a terrible idea. You may be causing tension in your muscles and slowing your pace unnecessarily. With this in mind, please make use of the extra pockets on the outside to store essential items that you will need along the way. The less important ones can be stuffed inside. The pockets are primarily made to store items so you can access them with ease when the need arises.
  • If your backpack has no waterproof coating, we reckon that you get one or, otherwise, all the items should be wrapped in a waterproof sack before fitting them in the bag. Usually, water drops penetrate through the zippers and the seams. We reckon that you seam seal your backpack to prevent any seepage of the water into the bag to damage your items. Having a rain-cover for the bag is also a good precautionary measure.
  • When storing your food in your bag, only stuff the food that can be preserved under hot temperatures because squeezing items will inescapably create heat. As a result, the food might deteriorate. It would be better if the bag has sufficient ventilation. We reckon that you look for the backpacks that have mesh panels for breathability purposes. It is also important to immediately unpack the bag the minute you reach your destination.
  • If you’re set to purchase a backpack online, go for the ones with interchangeable or adjustable suspensions. Some online displayed products look different to actual sizes. So to stay on the safe side with a proper fit, avoid fixed suspensions. If buying in a local store, then it shouldn’t be that of a problem.
  • The larger the backpack, the more the price tag. So be advised to cut as many pounds as possible. Do not stuff unnecessary items. If you are going to hike next to the village, for example, do not stuff excess food from home. Rather, take some money to purchase when you reach your destination.
  • It is also important to cut the costs when purchasing these backpacks. The higher, the number of features, the higher the price. Go through a range of manufacturers to compare the prices. It is also noteworthy not to compromise the quality because of the price. Take your time and read the customer reviews on the online marketplaces.

Daypack capacities

Wrapping Up!

With the information we have given you, we believe that you are well-rounded to choose the best backpack based on capacity, design, proper fit and other important features. The difference between the backpacks is primarily created by their intended use. If you recall the names from above, they are named based on the intended use. For example, day backpacks and weekend backpacks. So, you have to take that into account when buying these bags that, what kind of hiking to take and for how long you will be camping in the wilderness. Plan your food accordingly, especially if you are devoted to an ultralight hiking.

In our endeavor to show you the difference in capacity of the backpacks, we’ve mentioned the estimated liters for each type of a backpack. We actually have mentioned the range that can be suitable for a certain bag. The bottom line is that, your intended use prevails and supersedes anyone’s recommendations. We wish you all the best in your shopping endeavor.

Two backpacks ready for adventure

Camping Games for Couples: Forget About Boring Camping

0
Friends playing a board game

Those stretched for cash, up for the thrill of it, and especially those with a taste for it, love to camp. Camping brings you out of your comfort zone and slap bang into the middle of nature, with as little or as many necessities as you deem fit, to aid you in harnessing the outdoors. This vacation pass time is best suited like most things; bettered with more people involved and when there are camping games for couples included, it becomes even more interesting.

In the past decade, camping has become a vacation style of choice for people in the United Kingdom, the United States, and globally for its ease of planning, cheap destinations, and an accessibility to the outdoors not many other styles of travel can boast. The freedom of camping has made exploration of a new destination that much easier. Experiencing the great outdoors with a partner and/or a friend is a sure fire way to strengthen any bond.

Camping-Games-for-Couples

In this article, we will discuss a variety of different camping games and activities that require little to no preparation or props, all designed to make sure that you are never left bored with nothing to do. Because let’s face it, there are always some quiet moments in any relationship and after reading this, we hope that there are less.

Pre-camping games

Before actually making it to where you are vacationing – be it a campsite or a camp friendly area – you are going to have to journey to get there. Extensively or not, now is an excellent chance to start your gaming rapport with your partner.

A couple in the tent looking at each other

A couple of these you would have already played, perhaps as a child or parent, but it is safe to say that none of these games lose their charm when played in the company of just you and your partner.

  • Punch-Buggy: If you have yet to play this game, let alone hear of it, your childhood was pretty good. The premise is this; any time a Volkswagen Beetle passes you by on the road, and you see it first, you get to take a jab at the person sat next to you whilst stating the name of the game. Though, if you live in an area void of Beetles, just change the name of the game.
  • License Plate Possibility: Taking the license plate numbers of the passer by vehicles and attempting to decode them into their actual meanings. For example; making ‘SYT 041’, ‘Send Your Thoughts, Only For $1’. Thankfully, this game takes a lot of imagination and offers the players artistic leniency in its playing.
  • Would You Rather: This game is a real gem of creative genius. Would your rather pits your imagination and nerves against your partners by giving them the choice between two options and which they would rather pick. ‘Would you rather have a learn a foreign language, or learn how to play the trombone?’. The questions do not have to stay tame. Sometimes the weirder the options, the more laughs and difficulty choosing you will have.
  • 20 Questions: A game that should go without saying, but there we feel the need to provide you with its addition. 20 questions, is a spoken word game where you and your partner take it in turns to think of an object (subject) and your opponent has to figure out what it is using twenty questions or less. The catch is you can only answer using yes or no. Really keeps the gears turning.
  • Buzz Word: Though this is a game better suited for more than two participants, it is still an extremely fun game as you get deeper into its playing. Pick a word, any word, as long as it is commonly used in your vocabulary, and assign it as the Buzz Word. From now on, neither of you can use that word. This will keep you creative, with your eyes on the prize of winning. Though this may prove difficult for the driver the entire trip as they have to focus on the road as well. Tough break. Taking a vacation away from your ordinary lives is in part to relieve yourself from the stress that everyday life involves. So now that you have made it to the camping grounds and assembled your gear, let’s look into games and activities that will keep you on your feet and active.

Activities that will bring You Together and Active

All the games that we have spoken about above are little activities to keep silences shortened and to maximize your vacation time with your partner. These games and activities are to help form a stronger bond with each other, connect on different levels, and perhaps learn new things about both of you as a pair.

Building a Hammock

Yes,  this is less a game and more of a woodcraft activity, but nevertheless, it is fun to do and provides you with a romantic seating area for your stay. This does demand a little home-prep by way of a sewing machine. If you have one handy, then this activity is definitely for you.

Items needed How much you will need
Drop Cloth (thick cloth material) ‘9 x 6’ foot
Grommets 36. Preferably metallic.
Rope 30+ feet. Preferably nylon.
O Rings 2 Metallic.

The quickest and easiest way to build a hammock is by taking a nine foot long, six feet wide piece of material (anything from a thick blanket, netting, or even a tarp). Make sure to reinforce the ends of the material by folding the lengthway edges by two inches.

Two hammocks in the campsite

After making good on the edges, set 18 grommets into the reinforced lining. When all the grommets have been laid into the material, take your 30+ rope and start to tie it through the grommets in an over and under style. All the while, pulling every second loop through the O ring. Now that the hammock has been finished, take two lengths of rope and tie them around two parallel running trees and their other ends through the O rings. This whole project will be an extremely fun addition to your DIY camping vacation.

Pantyhose Bowling

A game that has made the rounds at weddings, parties, fun filled family evenings, and can be played whilst camping, is the ever hilarious jousting match that is Pantyhose Bowling. Taking a pair of pantyhose and wearing the band as a hat, whilst placing a water bottle in the end of it, may sound stark raving mad. It is, but it is the apparatus necessary to knock down the line of water bottles (bowling pins) in front of you.

Pantyhose Bowling Game

Knock the pins down before your partner and claim victory in this crazed game of wits, cunning, and knocking things over!

Junk in the Trunk

All that is needed for this game are ping-pong balls, an empty kleenex tissue box, a roll of tape, and the dancing moves of a belly dancer. Tape the empty kleenex box to lower area of your back and have your partner place ping-pong balls through the boxes slit. Using a timer, the game is on to try and shake out all of the ping-pong balls.

junk in the trunk party game with ping pong balls

Player with the shortest shake-to-escape time is the winner.

Board Games that Stave the Boredom away

At the beginning of the article we mentioned the fact that little to no props or prep will be needed, but with the introduction of this section there is a little bit of both involved. Use the camping trip as a double thread to learn chess, introduce your partner to your favorite board game as a child, spool through the seemingly endless selection of travel-ready kits there are available to you. Just remember to keep your cool and maintain focus. No one likes a sore loser or an arrogant winner.

Table of chess game

Though when you are camping, we would suggest attempting games that you have made yourself so that they follow the DIY stylings of a camping vacation. But we all know how hard a game of monopoly is to turn down.

Bring a Splash of Vegas with you

A forever steady rival to that of the board game is the incredibly versatile and exciting opportunities brought by a simple pack of cards. Make sure to always leave one in your glove compartment. Never know when you will want to kill a bit of time with a deck of cards at your disposal.

Playing Gin Rummy

Here, we will look into a few simple card games to while away the nights after dinner, wait for the rain to stop, or just to see if you can beat one another with a spectacular hand. No camping excursion is complete without a good old game of snap, and there are many other variations of card games that can be enjoyed on your trip. Such as:

  • Gin Rummy: Easily the most popular version of the card game rummy. Remember that card values, often change depending on the card game. Gin Rummy runs the Ace as 1 and Face Cards as 10. Each player is given 10 cards, and the 21st card starts the discard pile in the middle of the players.  Attempt to acquire a set or a run of three cards or more (i.e. 4 though to 6 of Diamonds, or cards of the same ranks like three or four numerative valued cards. Three 5’s of diamonds, spades, and hearts). At your turn, you can take a card from either the stock pile or the discard pile. As the discard pile is constantly upright, it is easier to know what you are working with. The goal is to gain a set or a run, so whichever pile you take a card from has to be strategic. When you pick up a card, you must then discard a card into the discard pile face up. Knock on the playing surface to finish your turn. Beat your opponent by attaining the first set or run.
  • Texas Hold’Em: A poker game that all card players need know of. Obviously, this is a game designed to gamble over so remember to bring your small change (or if you fancy your luck, your big money) to the table with you. As Texas Hold’Em is a game with many rules dependent on the size of the cards in your hand and those in the river (the five cards laid out), it is best taking a rule book or a comprehensive list of hand sizes with you. Half of the game is all about the bluff and your ability to be able to lie well and strategically to your opponent. When your opponent is your partner, this skill is seldom warranted anywhere else, but necessary whilst playing poker.
  • Strip Poker: And last but not least, the tumultuous game of strip poker. Always a treat to play with a deck of cards. Sink your competitive side into this game and reap the rewards. Or you could instead end your card games with a fun little set of ‘52 Card Pick-up’, where you throw the cards to the ground and run away. Leaving your opponent to pick them up. Funny up till the fourth time you do it.

Games of Truth or of Dares

Truth or Dare is an age old game, for all ages. Its simplicity and versatility allows it to be played anywhere by anyone. There are few games that offer this kind of gleaming insight into your partner’s past, present, future, and mindset.

Trut or Dare Cards

There are other games like it that make the players feel more mature. Such as a game of would you rather (previously spoken about in Pre-Camping Games), or:

  • Drunk or Child: This is an extremely entertaining game set to see how much you know about your other half’s life and personality, as they regale you with stories of their least perfect and most embarrassing moments, and then you must ascertain whether they were drunk or an adolescent during this time.
  • Never Have I Ever: A drinking game, turned parlor game where the aim is to start small and end up being as outlandish as possible to win. Never Have I Ever is played by stating something you have done in efforts to one up your opponent. If they drink, they have done this thing too. Example, “never have I ever… read a novel to impress someone”. And so on, and so forth, until it becomes as cringy or as hilarious as you want it to end up.

Wrapping It Up

All of these little games and activities have all been created to maximize any camping trip taken with your significant other. From no props or preparation, to the most being some pre-vacation prep for added comfort, this article has provided you with an ample supply of fun and games to occupy the time that could have been spent in silence and boredom.

Couple camping near a lake

Hiking Safety: It Should be Common Sense

0
summer hiking in the grand canyon

If you are considering heading into the back country or wilderness in the near future, it might be time to take a closer look at or remind yourself about hiking safety. Of course, whatever you do in life there is no such thing as complete safety, however, there are always ways of managing risk as best as possible.  Before setting out on a hike, here are some simple assessments that will help.

Hiking in Cape Town

Planning for hiking safety requires research of the overall hike. Ask yourself questions to evaluate the how to proceed.

  • Who? – Assess the people going hiking with you
  • Where? – Learn about the trail you plan to hike on
  • When? – Decide the best time of year, day and time to start
  • Why? – Make sure all your group members are on the same page
  • What? – Shall your group carry while hiking

Who are the people involved on the hike?

A good place to start with hiking safety, is considering the people who intend to take part in the hike. If you don’t know each other it would be wise to meet up during the planning stages and get to know each other socially, if possible. Ask everybody to share their previous hiking experiences and skills to understand the strengths and weaknesses of the group.

Everyone has to start somewhere so it is understandable if group members have different levels skills and expertise. Some might be complete beginners which is not usually a problem; just make sure that they are not overtaxed with too much responsibility they are not ready for. However, if some members are reticent about literally carrying their weight or not participating as much as others it could lead to grievances and unpleasant hikes.

Hiking Trails in Stellenbosch

Group dynamics do not always call for a leader as many hiking groups operate by consensus, but those with more experience may naturally give more guidance. However, no one can be made to do something they don’t want to. Personally make sure you are in good enough physical shape for the planned hike. It is not fair to other group members if you have not made an effort to be fit enough.

Also reveal acute or chronic injuries if they may have any bearing on the hike. A reccurrence may not only be unpleasant for you as others may be compromised as well. If they know about any issues and agree to the risk, fine, but they should be in the loop before starting out. I know some hiking tour companies that do a fitness assessment before accepting people on the longer hikes.

VIPs who won’t be joining you

There are also a couple of very important members who won’t actually be on the trip. These are the people who you will tell of all your plans before you leave. These are the people that will be the first point of contact if there are any problems or changes. They are the ones who will notify relevant authorities if your group has not returned as planned.

911 Emargency Service on a Phone

There should be a minimum two contacts, but so many that might invite confusion. These people will at a minimum have each other’s contact phone numbers, if they don’t know each other as they may have to discuss any decisions that have to be made concerning hiking safety. Consider these as mature VIPs willing to take this important responsibility.

Where does the Group intend to Hike?

The whole group should have an understanding of the route where you all will be hiking – be on the same page, so to speak. Google earth and Google Maps may the group a great overview of the trip. Collate maps together and map out your intended route on a topographical map. All of the group should have some skills at map reading or be in the process of learning with regard to the complexity of the trip.

Try to ascertain which parts of the trip will take longer and perhaps require more energy than other sections and plan accordingly. Decide on bail out points if you need to, so that there are safety factors built into the plan. If you are hiking along well trodden paths there maybe huts and camping areas to aim for.

As well as sharing maps between all members of the group, discuss who has other sources for guidance like Global Positioning Systems (GPS). These have been available for many years now and can be seriously fun tools to utilize on any trip. However, be wary of relying on them totally – they can break, get lost, fall in rivers or just stop working.

Lost hiker with backpack checks map to find directions in wilderness area

Always stay on the trail unless you encounter some unforeseen problem. Staying on the trail is also a good ecological choice to ensure you do as little damage to nature as possible. Bush bashing breaking through vegetation is not wise for direction, hiker safety or good for the environment. If there is a problem that stops you following the trail, consider retracing your steps or how to get around the problem and return to the trail without risking getting lost.

Always err on the side of caution as chances are if there is some reason you cannot easily continue, there may be a growing problem to contend with.  For instance, if extreme weather is causing damage to the trail in one section it may mean there is even more damage ahead.

When does the Group intend to go?

Weather is not Small Talk

Deciding the best time to undertake the hike includes that variable that enters the daily small talk – the weather. However, concerning hiker safety “The Weather” is not at all small talk; it is vitally important as you and your group’s lives may depend on making good decisions concerning it.

Make sure you ALWAYS check current weather and long term. With the ubiquitous internet, not knowing the weather is never and excuse. That is not to say you shouldn’t start out if there are a few showers likely, but if there is any sign of heavy or extreme weather, you should seriously consider cancelling or postponing your hike.

hiking in Greenland

Bad weather is one of the most likely things that will cause a hike to go terribly wrong become dangerous. This can be anything from fog coming down and you lose your way, to floods that cause rivers to rise to dangerous levels, landslides destroying the trail, or snow and freezing temperatures risking group members suffering from hypothermia.

Some trails are definitely best to undertake in certain times of the year so seek local advice if it is not an area you are not familiar with. If the trail is closed, it will be closed for a reason. Most trails are more accessible in the summer simply because of the warmer weather but it may not always be the case if packed snow makes hiking easier.

Agree to Stick Together

Decide on the day and time for departure, the daily time spent hiking, the estimated time en route, how many days it should take – plan the whole trip. If things change, so be it, but at least you all start out with the same goals.

Also, discuss the daily trail timetable with your hiking partners and agree to a system before you leave. Some people are early risers and have no trouble being packed up and on the trail by 6am while others are more reticent to climb out their sleeping bags. Some mountain trails require you rise in the middle of the night so you cover the distance before the snow gets too soft in the heat. Other times it may be important to start walking early to cover the daily miles if you are hiking in desert climates where you rest during the day.

Group of hikers on the moutains

Also learn about what animals are likely to be in the area at certain times of the year and when they are more likely to cause any issues. Possible dangers concerning animals are often related to the seasons. Bears may be more aggressive when hungry after winter hibernation or have young cubs with them. Male animals may be more aggressive during their breeding season – deer, wild goats (yes, wild goats – seriously). Snakes are more active in spring and early summer.

Why is the Group going on the Hike?

While this factor may not seem an essential point discuss concerning hiker safety, but it does help to know “everyone is on the same page”. It may seem obvious that no one would be thinking or discussing the plan if they did not want to go. However, we may all have our own agendas for choosing to take the same route. Try to hike in groups of like-minded people even if you are not friends.

Hiking in East Greenland

Question yourself and others about whether the hike is to be a casual stroll or a race challenging time and distance. Imagine the scenario where one person wants to stop all the time to photograph dung beetles crossing the path, while other members are jumping up and down with frustration. They may even want to leave him or her behind which is never a good idea. The other extreme is “Harry Hare” who is always racing ahead to the lunch stop and again, it is never a good idea to go too far ahead. This may also cause others to get exhausted trying to keep up with the front runner.

What will each Group Member carry?

What you will take depends to some extent on how long you expect to be on the hike.  This is probably one of the most important factors to staying safe hiking. It would be wise to know what equipment each person has so that all the options are covered and maybe there will be alternative cooking methods within the group. For instance, one person may have a gas canister stove while another has an alcohol stove which will offer alternative methods to suit different cooking methods.

Canister gas stoves on the ground

Canister gas stoves are better fast boiling and rehydration of meals as opposed to being used for simmering. Find out what emergency equipment each person carries with them. With a group there may be some things that can be shared to lighten the load, but safety items like basic First Aid Kits and the like should still be carried by each individual.

Make a list of what you personally need and what the group could share. At a minimum there are some items that should be carried:

  • Methods of navigation – maps, a magnetic compass, digital compass, GPS, altimeter
  • Lights – flashlight, head torch preferably with LED lamps for longevity
  • Clothing – suitable for the worst possible weather during the season
  • Shelter – tent, tarp, sleeping bags, insulation mats
  • Fire lighting capabilities – waterproofed matches, lighters, fire lighters
  • Food – daily rations for all, emergency ration, nutritious snacks
  • Water – unbreakable water bottle, 2L emergency ration
  • Knife and tools – sharp knife, multi tool, cable ties, duct tape, string or cord, fish hook and line, aluminum foil
  • Sun protection – sunscreen, sunglasses, shaded hat, clothing
  • First Aid Equipment – enough to deal with any likely small injuries plus perhaps some items that can be innovated
  • Emergency Equipment – heat blankets, signal devices, whistle, locator beacons, flares

Blue Water bottle

Recommendations for a minimum personal first aid kit might include:

  • Sunscreen and lip balm
  • Insect repellent
  • Pain relief – Ibruprofen or paracetamol
  • Antihistamine tablets
  • Triangular bandage sling
  • Crepe bandage 3-4”
  • Sterile dressings – various non stick
  • Gauze dressings
  • Strip dressings
  • Fabric dressing strip
  • Disposable CPR face shield
  • Notebook and pencil
  • Safety pins
  • Scissors
  • Disposable gloves

Each of the above can be discussed at length. You or the group will have to decide how much you can safely carry and how much you can safely leave behind.

What am I going to wear?

Make sure you have adequate clothing for the most likely extreme weather of the season you are hiking. You don’t need the most expensive fashionable hiking clothes, but some fabrics are better than others. I personally like a mixture of natural products like silk or merino wool for warmth and comfort, and synthetic for easy drying and waterproofing.

Backpacker looking at a map

Layers of clothes are the key to versatility – sometimes I will start out with quite a few layers that I can peel off as the temperatures rise or put back on as they cool. It is better to have 3-4 thin layers than just two bulky ones as layers trap heat more efficiently and allow you to dry off when sweating. Make sure you have suitable headgear too, either to keep you warm or keep the sun off. Extremes of temperature can kill; too hot leads to dehydration and high body temperatures leading to heat exhaustion while to cold leads to hypothermia.

What if?…Risk Management

Every day we take risks doing everything and anything, even lying in bed. Without thinking about it, we minimize risk by deciding to put the light on at night so we don’t knock into something, or we look both ways before crossing the road. Experience teaches us risk management. The problem is when we are about to do something we are not so familiar we don’t know what the risks are or how to prepare to minimize them.

When it comes to hiking, learn from other’s experiences until you are confident yourself. Brainstorm the more common risks that you might encounter and prepare to deal with them. Within your group discuss likely “what if..?” scenarios so less things can take you by surprise, for instance, “What if one of us gets injured and cannot walk…?” “What if fog closes in…?” “What if we are getting seriously chilled…?” “What if we lose a water bottle…?”

Hiker on top of the mountains

Hopefully none of these scenarios will eventuate, but the fact you have discussed them and what plan of attack to take will make you more aware. This planning will you give some confidence to be able to deal with situations confidently. If you do find yourself in an emergency situation, remember the STARR acronym:

  • STOP – pause, sit down and stay calm
  • THINK – be aware of what is around and actually happening, brainstorm ideas
  • ASSESS – evaluate various options re potential consequences
  • REMEMBER – water, warmth, shelter, and will to survive
  • RESPOND – act on the best response

Make sure everyone in the group has attended some sort of Emergency First Responder/First Aid course. These only take a few hours of one’s life to complete, but can literally save your own or another’s regardless of where you are. However, in the middle of nowhere, this knowledge is even more important to make sure what is not life threatening remains that way. There is no point where only one or two group members having First Aid knowledge and they are the ones to be badly injured, leaving no one else confident of the best plan of action.

Hiking in Boone with the group

Everyone should know how to use the emergency equipment that you intend to carry – this includes the GPS, the Emergency locator beacon, heat blankets as well as how to rig a tent or tarp quickly for shelter. In some countries like New a you can hire Emergency Locator Beacons for inexpensive rates from government departments. If you are in serious  danger (and not just out of coffee) you can turn the beacon on, which will alert regional Search and Rescue Teams who will know where you are and come find you.

Do not rely on mobile phones. That is not to say, “don’t take them” but do not rely on them. They can break, run out of battery, be out of range of signal, or all of the above. If you do take one, make sure it is in a robust waterproof container.

WRAP UP

Following this advices will not guarantee to keep you safe but it will certainly help. It will also help to give you confidence in your fellow hiking buddies and keep you enjoying your hikes.

Close up of shoes on a Poconos hiking trail

Plan your hiking with safety in mind so you and your hiking buddies can get outdoors and enjoy the fresh air.

Hiking with Kids: Adventure Time for the Whole Family

0

To hike with your kids might perhaps be the best way to spend a quality spare time, combining who you love the most with your favorite activities. You should be relaxed and free of any stress, but to make sure that  hiking with kids will be a great experience, you need to prepare your kids well and minimize any risks which would turn your hike into something it is not meant to be.

The good news is that hiking, as a low-level activity can be enjoyed by almost anyone. However, you first need to take care about your kid’s readiness and your readiness to take care of your kids while active. Certainly, the approach will be different than before, but the goal is to feel a little change from the time before kids.

Two boys go hiking with backpacks on a forest road bright sunny day

So, in short, the aim is to have the whole family well prepared and minimize any risks, such as kids catching the cold, you becoming tired too far from your base, or muscle inflammation the next day. The key is in optimal planning, and staying careful during the course of a hike.

PLANNING

Before you start planning your first hike with a child or children, you should revise your last hikes without a child.  If you’re with your partner, the things are even better because combining experiences will always bring better results. But even if you’re the only adult accompanying children you should find much useful info from the last hikes you used to perform before getting the children.

If you’re the mother and had to take a break for pregnancy and caring for your toddler, you certainly lost a lot of your fitness, and in such cases, you should try going on a hike without children at all in order to learn your current physical abilities.

Before you even start on planning, you need to learn that hikes with kids have a completely different scope and focus, which is now switched from motion to teaching and helping kids remain active and entertained. While your hikes were all about your own goals such as distances passed and calories spent, now your primary focus is keeping child able to accomplish the route and let them learn some new things about recreation and the environment, where the activity takes place. To make your hikes pleasant for both you and your kids.

Find a great trail

The trail you choose for going on a hike with kids needs to have the following features and properties:

  • Little or no elevation, children would become exhausted quickly if they’ve not been active before.
  • Have no much obstacles such as tree roots or rocks your kid can kick and fall or get bruises. Smaller children would fall, but you shouldn’t neglect the risks associated with it.
  • Have some fun features kids can find interesting: plenty of various plants, wildlife, ponds stone formations close to the trails. You use this as an opportunity to teach children more about the environment.
  • Find locations where you can park conveniently and close to the trail. Long walking distances between the car and the actual trail can unnecessarily tire your children.

For the very first hikes, it would best be a trail you have already visited. So you will know what the kids would be expecting there. Over time, if brought to hiking regularly, your kids will develop trail versatility and have more energy.

Mother hiking with her childrens

They will have the power to explore and encounter the trail at least as efficiently as you.

Weather and Clothing

When going with your kids, you should know that they catch cold with ease, much faster than adults, and wet clothes are one of the most common reasons. Kids will often disregard having wet things on themselves and won’t complain so easily.

The best way to avoid kids becoming wet is avoiding any chance of rain. Follow the weather forecast and compare forecasts from various sources to make sure there will be little or no chances of rain. Also, keep an eye on kids anytime they’re close to water surfaces. Kids are attracted to water, and everything spanning from small ponds, creeks, to rivers and watering holes.  Learn them to stay cautious near water.

Parents hiking with their children in the summer

Even when there is little chance of precipitation, it is strongly recommended to bring extra clothing, dry and warm, for any children accompanying you on the hike. To keep the child in case dressing is needed you need to bring a soft towel.

The Backpack

The contents of your backpack when you bring kids with yourself is significantly different from what you need when you’re alone or with other adults. Since it is all about kids, you need to reserve most of the storage space for their needs.

Hiking with your kids forms memories that last a lifetime

On the other hand, these hikes are much shorter, relieving you the need of bringing plenty of food and camping gear.

Hydration

While you need to take care for bringing most of the kids’ necessities, children aged 6 or older can freely bring their own water with themselves. Now you can find hydration packs for children or convenient kids water bottles. Make sure to bring enough electrolytes in the form of salted nuts and other healthy snacks.

Osprey Moki Kids Hydration Pack

Electrolytes are important for adults, too, but retaining hydration in kids is even more important since infant metabolism is much faster and they will always lose water faster than you. Owing to that, you should bring an extra large hydration bladder to refill the water reservoir of everyone who runs out of it.

Nutrition

Children like to stay very active and always be in motion, owing to which they consume excess calories, even if they eat well, they will need a good refill while on a hike. That’s why your kid’s nutrition there should be based on carbohydrates. Of course, these need to be healthy, but even simple sugar sweets such as muffins or chocolate bars can be a good choice, though you should never bring only that kind of food.

Cereal bars

The best food for any child’s hike comes in the form of snacks and tiny meals they can take several times during the course of a hike. This way your kid’s stomach would never become full, nor it will be empty. The snacks you bring can include:

  • Cereal bars
  • Fruits: bananas, apples, pears, oranges, plums, cherry, grapes, or any other fruit of similar sweetness depending on the season and availability.
  • Chocolate bars, muffins, candy.
  • Nuts of any kind.
  • Sandwiches with butter or margarine and jelly or jam.
  • Crackers, cracker sandwiches, and veggie sticks.

Of course, you can only bring three or four of these food types, for example fresh fruits, nuts, and muffins. Also, make sure you bring only those nutrients your kids know of in order to avoid any allergic reaction – it goes primarily for nuts and cereal bars.

Kids Necessities

On every occasion, kids have different priorities than us adults, and hiking is not an exception. You can allow them to bring one or a couple of their favorite toys (exclusive of any electronic devices) which should keep them away from boredom while on the trail. Also, some vehicles such as kid’s bike, balance bike, scooter or a trike would be great. The kid will always have something to sit on, move faster and keep more energy. However, it will influence the overall goal of the whole activity – in this case, it wouldn’t be quite a “hike”, at least not for them.

There are kids backpacks even specially designed for hiking, but if it’s your kid’s first hike, you should stay away from adding much burden to his or her back. One or two medium-sized towels, a smaller toy, water, part of snacks and a teddy – already enough to fill a small backpack designed for kids. Everything else will require space in the backpack.

Little kid on a bike

The last, but not the latest, do not forget about a good first aid kit. People often neglect the need for a first aid kit. However, whenever in the backcountry with kids it is good to have something at hand to improve the situation in case of injury or catching cold. Bring a first aid kit even if all kids have protective pads on themselves. You can either make a first aid kit from items you render necessary, also you can buy a complete hiking or backpacking kit. Besides the first aid kit, or within it, there should be room for the following: wet wipes, safety whistle, magnifying glass, a good camera and lip balm.

ON THE TRIP

Before you go on a hiking trip, note that now with kids you will be spending less time and pass shorter routes. Dress appropriately. It is no needed to bring a lot of clothes for yourself. It is instead to put several layers of clothes on your children should they be prepared for any changes in weather conditions and temperature. In most cases, it would be good to bring rain clothes – even if there are zero chances for precipitation. Raincoats offer good wind protection, too. Depending on the weather, you should opt for gloves and hats for anyone in the group.

For each child in your group, you need to bring an additional change of clothing which you leave in your car. Your children will sweat in all weather conditions, so a quick change of dry clothes is needed in the end,  even if you have been changing it during the hike.

Little kid hiking in the backcountry

When you go on a hike, always bear in mind that you should need to get back to your car. That can be boring and frustrating for children who will find enjoyment in exploring new parts of the trail. To avoid this choose a loop trail if available. The kids won’t even notice the hike is over when you reach the car

Pick the group leader. As an adult, you will always have to be behind and supervise the group. That explains the need for a whistle. It will make you sure they can hear you, even if they’re out of sight. Do not let any of your children wander away from trail unless it’s a part of the planned activity.

Planning Activities

To plan your first hikes with kids, it would be ideal to go and inspect the trail on your own, find things you render interesting for children and record that in your notebook or a GPS connective device with a geotag and reminder.

Little girl talking with her parents while resting

Some of the things that can attract your children and keep them entertained include:

  • Extraordinary live beings: plants, creatures, which can be insects, worms, rodents, reptiles. The reason you need to inspect the hike alone before bringing children includes inspecting the trail for all dangerous creatures – primarily those venomous.
  • Water surfaces of any kind. Kids simply adore being close to the water. That may be ponds, creeks, waterfalls, lakes, rivers, any water surface which can have some specific creatures such as fish, frogs, crustaceans, mollusks, snails and insects.
  • Rock and stone formations. Various formations of rock and stone, which can even appear on the trail’s course are pretty common in dry parts of the country where water surfaces are less common. These also can offer a plenty of interesting creatures and plants, though there you need to be more cautious about venomous species, animals that can bite or plants that can sting your children.
  • The presence of other children: your kids will simply adore any trail where they can find a company of their age: For you, it is a chance to communicate with parents or caretakers and organize a hike better, making an ad hoc group of children and accompanying grownups

Communication with kids while hiking

To make sure your hike is a good experience for both sides, it is needed to know how to talk with your children on the trail and address their needs properly. The environment where you hike is pretty different from your backyard, even if your backyard is large. First: your kids are in an unknown environment. They do not know the whereabouts of the things around and will be keen to explore a lot. You, thus, need to keep their curiousness under control. Learn them to explore the world, part by part, letting them learn only some basics about the environment for the first time.

little-girl-hiking-and-resting-on-a-rock

After that, they will be more interested in going for the next hike. They will be curious, for example, to see whether bird eggs they used to see the last time will hatch, or whether an interesting plant will blossom. Stories about seasonal changes in the living world are always a good way to keep your kids in the safe zone and let them await the next hike. With every new hike, children will learn how to perform tasks on their own. Respect their opinion and their will to do some things on their own. They will grow self-esteem allowing you that in a couple of years you can freely let them hike separately on a trail, and you will not have any reasons to worry about.

Why Will You enjoy Even More than before?

Hiking with your children is not just another way of maintaining a good relationship and love with them. It is a way you kids will learn more about the environment, how to protect it, , and how to take care of the common property and grow into responsible citizens. You will     now have an opportunity to teach them about staying active, health benefits of exercise and remaining in nature.

Kids climbing over fallen trees in Yellowstone National Park.

Day Hike Checklist: Everything You Need To Pack

0
2 Person Hiking on Top of a Hill during Daytime

It’s always the water bottle. Or the lunch box. Or the sunscreen. Whatever you forget at home is bound to be something important. That’s why it’s better not to forget anything. As an experienced camper and hiker I can definitely say that the best way to avoid leaving important items behind is to create a checklist. That’s why in this post I’m going to share with you my very own day hike checklist.

Now some of the items you may be familiar with and others you won’t be, but I can assure they have all been selected very carefully. The aim is not to over pack while also not to under pack – a delicate balance. You can print this list out and rest assured that following it will ensure that next time you go camping you aren’t leaving anything important behind.

A great day hike

By important I mean crucial to your survival. Whether you choose to pack knitting needles and the kitchen sink in as well is completely up to you. I’ll be covering items that will affect your safety and convenience on day hiking trips. It’s worthwhile gaining an understanding of why these items are necessary for day hiking trips so that you can make informed decisions about what needs to be taken along in your unique situation. I think you’d do best taking them all, but clearly it’s up to you what actually goes in the rucksack. So without further ado, let’s get into it.

Parameters Of This Hiking Checklist

This list is built for daytime hikes lasting 2 – 8 hours. You’ll find that the items for a 2-hour hike are very similar to those required for an 8-hour hike. The dissimilarity in your packing is due to occur more often due to temperature difference. What you pack for hot zones may be different than what you need to pack for cold zones. I’ve tried to clarify the different items you should pack for varying temperatures in each item’s explanation below.

Young backpacker with backpack traveling along rain forest.Tourist hiking in the deep jungle

Now that we’re clear on what type of hikes this list should be used for, let’s get into it. (For a summary form of the list to print out or use as a checklist, just skip through to the last paragraph of this post.)

Clothing & Shoes

Clothing & shoes will play a big part in how comfortable you are during your hike. So take note of these important list items.

  • Sunhat: For those hiking in sunny open land terrain this is an absolute must. Nothing will take the pleasure out of your hiking trip memories quite like waking up the next day with a toasted face. We recommend opting for one of the broad rimmed circular variety hats to ensure maximum coverage of your neck as well.
  • Belt: The last thing you need when going for a long walk is to constantly pull your pants up, so a belt is obvious for poor fitting pants. But even for those with absolutely perfectly fitting pants a belt is still a good idea. It can be modified to attach little items like pocket knives, string, carabiners, food pouches and other useful items to as well as being used as a rope in an emergency situation.
  • Long pants: Regardless of whether you’re going out in hot or in cold conditions, long pants are your best hiking choice. In cold weather, good pants will keep you warm, and in hot weather, good pants will keep you protected from sunburn and mosquitoes. Clearly, in hotter whether you’d opt for super breathable options. What’s important in both temperature zones is to buy quick drying pants in case of sweat or rain.
  • Long sleeve shirt: For exactly the same reasons as long pants, a long sleeve shirt is a great idea for a hike of any kind.
  • Sunglasses: Sunglasses provide two, scratch that, three main benefits. They stop sand, swinging twigs and other debris from getting into your eyes, protect your eyes from the sun (especially important in cold climates where snow glare can have severe effects on your eyes), protect your eyes from premature aging by reducing the amount of squinting done. So there, three good reasons why wearing sunglasses on your day hiking expeditions is smart.
  • Hiking boots: Hiking boots can make a massive difference in terms of your hiking enjoyment level. You want something well fitting, waterproof and padded for comfort. Often you get what you pay for in the footwear industry (excluding women’s heels) so you may find dishing out a bit extra for a quality pair of hiking boots that will go the distance with you every time is a worthwhile investment.
  • Waterproof layer: This could be a thin jacket or full on rain coat depending on the temperature around you. It’s quite simple really: If it’s raining put it on and if it’s not raining, keep this layer in your pack. That being said, if your pack is getting full, you can also just tie it around your waist. Ah, the options.
  • Watch: Having some sort of timekeeping device is super important as it will allow you to keep track of how long your trip is taking you, when last you ate and drank, when last you applied sunscreen, etc. I recommend a watch because it’s strapped to your arm and so unlikely to become lost. Clearly waterproof is the best option, as is one that shows the actual date – just in case you get lost for a period of time.
  • Jacket: If it’s cold you’ll likely already be planning to wear one of these. If it’s hot, well let me tell you, it’s still a good idea to keep one of these in your pack. Having it there means if your trek takes slightly longer than anticipated and the heat of the day gives way to the coolness of the night you will be prepared, not shivering. So just chuck it in the pack.
  • Gloves: In hiking gloves you’re looking for wind proofing, waterproofing and warmth or breathability depending on the temperature zone you’ll be hiking in. Those fancy gloves with the zip off fingers can be super handy if you’re planning on using your cell phone or pocket knife at some point but are not a necessity. (Where are you hiking that has cell phone coverage!?)
  • Comfortable Underwear: Whether you’re going for a 2-hour hike or an 8-hour hike will make little difference here, comfortable underwear is paramount to your happiness. The idea of chafing for even two hours puts me off the idea of hiking completely, so check that your gear up is going to be comfortable before heading out.
  • Socks: Synthetic or wool are your best options for hiking socks. These draw moisture away from your feet and can help you avoid those nasty foot conditions…

Woman hiker driking water from a bottle

Pack Contents

The aim is to keep your pack as light as possible while still carrying all the necessities to get you through your day hike. My personal day hike pack list includes:

  • Water Bottles: The liquid will probably be the heaviest thing in your backpack when you start your hike, but never fear, as you deplete your resources your pack will get substantially lighter. And this happens when you’re getting tired at the end of the hike, kind of beautiful how it works out like that. Anyway, insulated water bottles (think steel) with 1 – 2 liters of water capacity between them should set you right.
  • Sports Drink: When we sweat our bodies lose valuable electrolytes. For particularly long treks I’d recommend taking along a sports drink (PowerAde, Gatorade, etc.) that can replenish those electrolytes for you.
  • Sunscreen: If you’re out in the sun (not under tree cover or cloudy skies) for the majority of the day, then you really do need to be wearing sunscreen. This stuff saves lives from skin cancer and faces from premature aging. The recommended application is every 2hours. Remember that even in snowy conditions if it’s sunny the sun will be reflecting off the snow back up into your face, so sunscreen is important regardless of the temperature around you.
  • Lip balm: Keep those lips comfortable with a gentle lip balm application. This is an especially useful thing to do if you’re going to be hiking in windy or mountainous conditions.
  • Food: High energy, low mass food is a good idea for hiking. The aim is to take minimal space in your pack (and to enable your pack to weigh less as a consequence). I’d recommend scroggin, a couple of pieces of fruit, and tinned meat as a decent day’s food.
  • Insect Repellent: Mozzie riddles climates may call for you to even wear mosquito net covers, but for the average traveler, a strong insect repellent should do the trick. You can even make home-made/natural insect repellent at home before heading out.

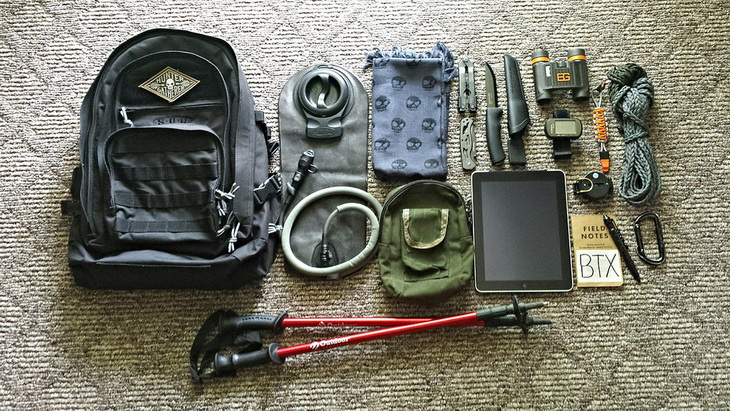
What I carry in my pack for a day hike

Emergency Supplies

It’s easier to get lost in the wild than you might think. Therefore, even when you’re going on a simple day trek it’s worth packing the essentials that you’d need in a survival situation. Here’s hoping you never have to use them, but the list to take with you is:

  • Map: Cell phone and GPS batteries can run out, so it’s important to have a paper map on hand to help guide you should you get lost at any point. This map should include the regions surrounding your trek quite broadly as there is the possibility that you might wander quite a way from your original intended path.
  • Compass: A compass will help you navigate the aforementioned map. It might also help you walk in a straight line as the idea that humans walk in circles when given no landmarks is not a myth. Make sure you mark wherever you walk very clearly so that rescue teams can find you.
  • First aid kit: Minor injuries can quickly become serious obstacles in a survival situation. That’s why you need to be well prepared to handle them. A simple kit containing a bandage, sterilizer, plasters and tweezers should suffice. Sterilizer is the most important item as you need to avoid infection. Pain killers might not be a bad addition as well.
  • Fire making supplies: A fire can serve four purposes. It provides you with warmth, enables you to cook food, enables you to boil water, can act as a signal to rescue teams, increases your range of visibility at night (saving you on torch batteries). These are all very useful functions in a survival situation so it’s worth taking waterproof matches or a waterproof lighter along with you as well as a couple of pieces of Firestarter and a waterproof container to store dry wood in.
  • Pocket knife: Pocket knives can be incredibly handy to have around. A decent one will incorporate a knife that you can cut the rope or branches or food with, tweezers that can pluck thorns with, and a spoon that you can eat with. Those are all just ideas off the top of my head.
  • Tarpaulin: A Tarpaulin can be rolled up pretty small so that it takes minimal space in your pack. Having one on hand means that in an unexpected evening stay in the bush you can wrap yourself up in it to protect yourself from both rain and dew/ground cold.
  • Sleeping bag: If you’re hiking in particularly cold conditions (and take note that while it’s hot during the day, some areas still get cold at night – like the desert) then it’s necessary to carry a good sleeping bag with you. This will help to keep your body warm when it’s not moving at night and help you get a much needed night of sleep.
  • Water filter: Your body can’t go for very long without water, so it’s important that you have a way to access clean water easily. A water filter straw or other water filtration device is always worth keeping in your day hike pack just in case.
  • Lighting device: Lighting devices can include anything from torches, headlamps, to lanterns. Personally I’d recommend either a headlamp for its hands-free pro or a self-powered torch for its non-battery dependency. If opting for the headlamp, please take some spare batteries along with you.
  • Extra day’s food: This is a staple requirement on many people’s hiking lists. Having some extra food not only means you could help any other travellers you find along the way on your day hike, but also means you should have some extra food to go off if you get stuck on the trail overnight.
  • Toilet paper: For those who aren’t hiking in areas with big leaves or running rivers to substitute with, taking along some toilet paper is probably a good idea. Even if you’re not in a ‘survival/emergency’ situation, you may still find yourself needing to go during your day hike.
  • Hand sanitizer: For the peace of mind that comes with knowing that you won’t get sick, a small bottle of hand sanitizer in your backpack can go a long way. This should probably be kept with your first aid kit, as if you’re ever addressing wounds, you’ll want to use this.
  • Signalling device: A whistle or a flare can alert rescue teams from quite a long distance away. For mountainous terrain where you can get stuck in crevasses, this is particularly useful to have.
  • Rope: My dad used to say that you would never not be happy that you brought rope along. So that’s my final item on the packing list – a good piece of rope can help you set up shelters, create a makeshift belt, cross rivers and even leave clues for rescue teams to follow on your path.

Simple Day Hike Pack

The Short Version

Here’s a quick summary that you can print out or use as a checklist to check your day hiking gear against:

Clothing & Shoes Pack Contents Emergency Supplies
Sunhat Water bottles Map
Belt Sports drink Compass
Long pants Sunscreen First aid kit
Long sleeve shirt Lip balm Fire making supplies
Sunglasses Food Pocket knife
Hiking boots Insect Repellent Tarpaulin
Waterproof layer Sleeping bag
Watch Water filter
Jacket Lighting device
Gloves Extra day’s food
Comfortable underwear Toilet paper
Socks Hand sanitizer
Signalling device
Quick dry travel towel

Pack Well, Have Fun

The important thing is to enjoy yourself when hiking. Packing well will help ensure you are comfortable and therefore fully able to enjoy your hike. This list has been put together specifically to ensure you have a great hiking trip, use it or don’t use it at your own peril. If you’re interested in compiling your own list, I would say, imagining yourself walking through the brush is a good way to identify what you might need in different situations.

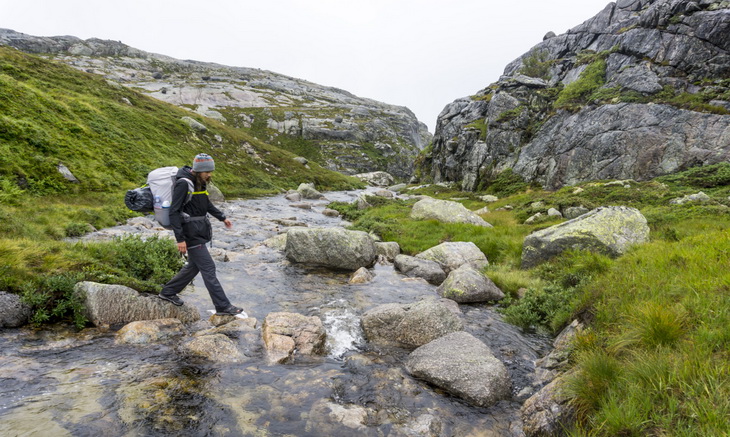
Hiking in Norway

How to Make a Hiking Stick: You Can Do It By Yourself As Well

0

Hiking sticks are not only sticks we use to hike around, some of the sticks are made with love and are passed through generations, holding a  lot of emotional value to their owners. In this article, we will teach you how to make a hiking stick on your own, and be proud of it. Many people love to write lovely notes, names and much more on their sticks. That way, even when they are no longer hiking, their daughters, sons or even grandchildren will remember them.

How to Make a Hiking Stick

Every now and then you might catch yourself in need of a good hiking stick, it does not have to be perfect and new, right from the store. You can actually make one on your own, and it will probably serve you well enough. Making a hiking stick can be a truly rewarding and extremely fun experience. Being able to develop and improve your own hiking stick is a big plus for those who hike very often and very often need a good hiking stick.

Important things to consider

  • Creation of the good hiking stick requires a decent amount of knowledge related to woodcutting and design. The hiking stick has to be a very versatile and utilitarian instrument, used for an everyday walk, or a true hiking adventure with your friends and family.
  • The hiking stick created by you can have various details and be designed so it fits only your needs and ideas. You can crave in various words, shapes and drawings to show off to your family members or friends – doing so will surely make everyone laugh and motivated to make their own hiking stick with their name carved right into it.
  • Before you decide to actually give it a try and make your own hiking stick, there are many things you could take into consideration and learn. After all, you want to make a good hiking stick which will be in good condition, strong enough to keep you standing and much more. Selecting the right kind of a stick for your creation plays a huge part when it comes to hiking sticks and their creation.

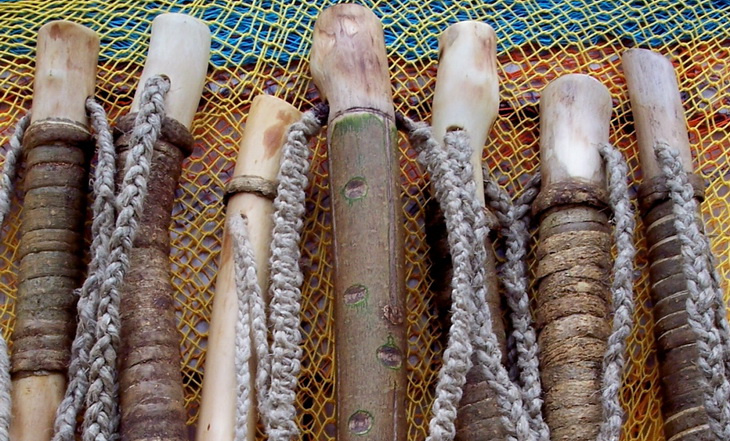
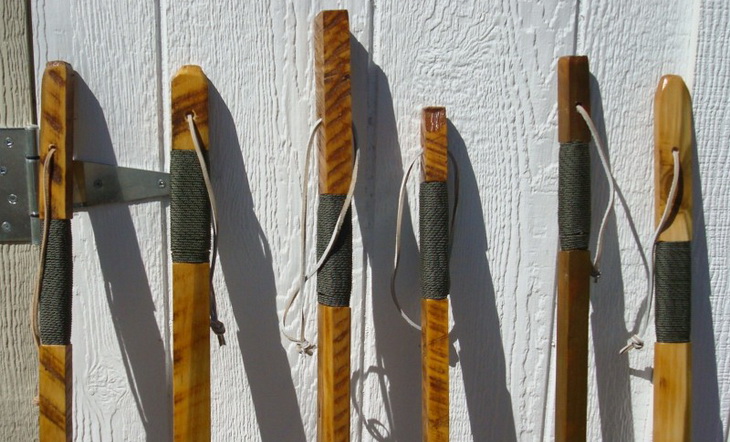
Woodland Hiking staff with macrame strap, 60 inch natural finish

There are a couple of important factors to take care of when picking the proper stick

  • Diameter, weight, knot, branches, insects and the wood sound –  these are only a couple of things you can think about when picking the stick for further development of your hiking stick. The length of the hiking stick depends on how you plan to use your stick, if you will be casually walking around, a stick which reaches your wrist will serve you well enough. If you are hiking up the mountains and things alike, you will want to have a stick which reaches your shoulders, that way you will have it easier to climb up and go down whenever it is needed.
  • The girth or the diameter of the stick depends on the weight of the person – the heavier you are, the diameter should be larger, that way you get the most support. Take into the consideration that the bigger and heavier your stick is, the harder it will be to carry after a while of hiking.
  • Depending on your strength, time of use and condition, the weight plays an important part. If you are a healthy adult person, this should not be an issue at all, but in case you have health issues and problems carrying certain weights, you should avoid heavy sticks and equipment and speak to your doctor for further advice.
  • In case your stick lacks of character, knots are always a great way to make it look entertaining and interesting to use. If using knots, make sure you know how to tie them properly, otherwise this might be slowing you down and making your stick less versatile than it should be – looks are not everything we look for.
  • Branches are an awesome thing, do not just cut all of them and think that now you have the best hiking stick in the world. Some of the branches can be used as handles and second foot at the end of your stick.
  • The wood sound can be very useful when picking a stick, to test out your stick just place the end of the stick at the crotch of the tree and press as hard as you can towards the other end of your stick. Be careful, though, the stick can snap and cause injuries.

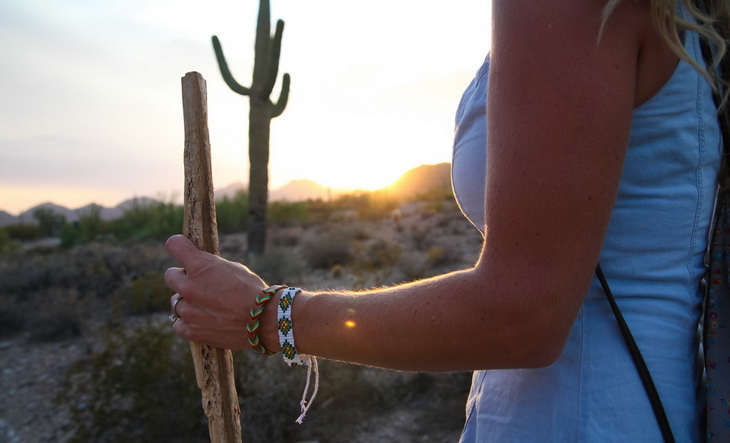
Woman holding a walking stick

After picking the right stick for your needs, there are five simple steps to follow in order to make an amazing hiking stick.

How to make a hiking stick

Try picking a fresh wood stick not a dead, dry wood since dead and dry wood is usually less strong and will break easily in your hands as you walk and climb around.

The tools you will need:

  • Five-minute epoxy glue
  • A sharp pocketknife
  • 1-inch-long piece of 3⁄4-inch diameter copper water pipe
  • A wood burning tool and a spokeshave (both optional)

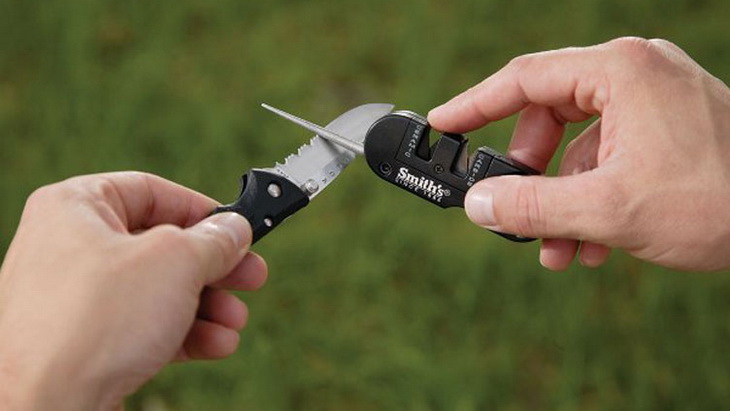
sharpening a pocket knife

Steps to follow

  1. Trim the stick carefully: With proper tools and knowledge related to woodcutting, you should be safe enough, while trimming the hiking stick you are creating, in case you lack experience and knowledge to do so, please visit some of the various woodcutting websites and see what are the things to take care of when using wood cutting tools and equipment. Hold the knife at a tiny angle and apply strokes extremely gently. The deeper you go into the wood, the more additional touches you will have when it comes to sanding the stick for a smooth finish – make sure to not overdo it. The wet fresh bark is believed to be removed rather easily. On the other hand, a dry bark is much more complicated to get rid of. Little branches you might find on the stick you want to create, should be removed with care right towards the stick so there are no branches left which can cause an injury. Always use gloves when trimming the stick, it protects your hands and skin from the dirt and sharp edges.
  2. Removing the bark and drying the stick: Start off by removing the bark carefully, reaching a red layer or removing it, it is optional and is related to the looks of your stick only. Removing the bark is important because it will not peel the bark and keep it on your hands as you hold the stick and hike with your friends and family. Dry your stick after you removing the bark and peeling it off as you wish. You might discover your stick has an inner layer of bark. Carve it away too, otherwise, your stick will darken as it dries. The slower the drying process goes, the stronger your stick is going to be. Don’t rush and dry your stick, for example – placing wood in the hot sun. If the certain parts of wood crack way too much, try drying your another piece at a little bit cooler temperature. In order to protect your stick from splintering at the bottom, you will want to whittle it down until the piece of copper pipe slips easily onto it. The copper tip should be  secured with a couple of screws without any issues at all. You can also use the hot glue.
  3. Smoothing the knots: Sometimes it might be rather annoying and complicated to smooth stubs or knots where twigs used to be, using a decently sharp knife. Using a good bench grinder, a grinding wheel, in order to smooth the wood. A flat wood rasp will surely get the job done as well. You can also just whittle what you can and start with sanding. Your stick is now ready for use unless you want to let it dry for a month and then use and apply a protective coat. Using sandpaper or a spokeshave (if you have or wish) to make the surface of your stick even smoother.
  4. The sanding process: Starting with coarse grits and going further down to finer grits. To make the sanding process a lot easier. Red cedar is surely very nice. Finding a good straight piece from that species will not be easy, but it is extremely important and worth all the trouble. Hang your stick in a clean area and prepare for sanding. Most of the people will pick the linseed oil, which is usually the very best choice for wood tool handles. For walking sticks, it is advised to be way better to use full gloss polyurethane in spray cans. 4 coats are usually more than enough. Slowly and carefully sand your hiking stick between every coat with approx. 200 to 400 grit.
  5. Decorations: If you edit and take care of your stick every year or two, you could even pass the stick down to next generations and friends. With enough care and effort, your stick could last for a couple of centuries. If the stick is done well enough, you might wish to sign your name for someone or gift the stick to someone in the family who also hikes often as you. Now when you are finally done, you can put various details, words and things on your stick and finally brag to your friends how you have gotten the best hiking stick out there.

A man making a walking stick

Interesting facts about hiking sticks

  • Which wood looks the best when turned into a hiking stick? One of the extremely interesting looking woods, after the sanding was done, is Japanese maple, but sadly, it is said to be very heavy and hard to use for hiking on a long distance.
  • Why do people buy wooden sticks over metal ones? Wooden hiking sticks are popular, and will always be because of their natural look and holistic appeal which will never be given by an ordinary metal hiking stick you can buy in any hiking equipment store.
  • What differences do men and women make when buying a new hiking stick? Men prefer a taller stick with a lot more ‘’beef’’ on them, while women like to pick a little bit lighter sticks,  like bamboo for example.
  • Which is the lightest wood to use in the creation of a hiking stick? The lightest wood you could use is cedar, it might feel very fragile, but a stick made out of it should not be used for prying and long hiking trails due to possible breaking.

walking sticks in the sun outside

The best things about making your own hiking stick are:

  • It’s not pricey
  • You don’t need to know anything about curing, types or collecting wood
  • You don’t need to be a true wood working expert
  • You need only patienc

How to Navigate by the Stars: Using Celestial Bodies to Get Your Bearings

0
Milky Way seen night at Grand Canyon

Our ancient ancestors figured out the mysteries of the stars long before any technological advancements that have made modern life so easy.  As early as the 7th century BC, or about 2,700 years ago, ancient Grecian myths and stories account for a number of recognizable constellations. These same constellations are recognized (and utilized) even today.  Sailors and early explores heavily relied on the position of the sun and stars to navigate their ships.  Early philosophers, poets, scientists and mathematicians looked to the stars for answers.

Pythagoras was the first to write a proof for his defining mathematical theory using the stars.  Plato wrote a book speculating early on about the rotation of the planets and the Earth.  Ptolemy published a book on the order of the planets in their special relation to the sun, the very same order which was recognized and used until recently, when Pluto was demoted from planetary status.

milky way by the night in the wild

Star navigation can be a life saving skill if you find yourself lost after dark.  If you are lost without a compass, GPS, or other navigation system, if you know how to read the stars, you can navigate back to safety with the oldest method known to man.  As you learn to read the night sky, you will learn how to find your way, no matter where you are.

Expect the Unexpected

As you head out into the wilderness, you always want to be prepared.  However, the unexpected expectedly seems to happen more often than not.  Perhaps you’ve run out of batteries for your headlamp, your phone battery died, you need to alter your night hike, or whatever the reason may be, if you find yourself out at night, knowing how to get to your destination without the use of any devices can potentially be life saving.  Relying on the stars for navigation will be your most reliable source, you don’t have to worry about malfunctions or battery life!

Group of People Sitting on Wooden Farm Fences Star Gazing

Always know which direction your starting point is, or the nearest safe spot.  If it’s your campsite or car, always know which direction you started from.  I.e. if you set out toward the setting sun, this means you are walking westward.  If you need to return to your starting point, you need to head east.  Your situation will often be a bit more complicated than that, as you probably are not walking true to one direction your entire hike, but it can still give you a general direction to head back to.

Hemispheres and Seasons

Reading the stars is a bit more complicated than reading a book. As the Earth rotates on its axis, the stars appear as if they move across the night sky, sometimes making it hard to memorize where you will see the telltale constellations.  As the Earth orbits the sun, changing with the seasons, the location of the constellations in the sky will change with the seasons as well. Some stars are only visible during winter or summer, some are only visible for a short time before the sun reappears.

It can be difficult learning to read the sky if you aren’t familiar with any of the constellations.  Here, we suggest a number of ways to get you started in recognizing some of the more easy to spot constellations.

White Camper Van Under Star Lit Sky

Let’s first go over a couple strategies for navigating by the stars, regardless of where you are, what season it is, and even if you don’t know a single name of a constellation or star in the sky.  Again, you do not have to be familiar with the constellations in these first two methods in order to navigate by the stars.

Methods to navigate by the stars

Two Sticks Method

This method can be a bit more time consuming and requires scavenging for some materials, so you’ll have to be patient.  It will, however, work no matter where you are in the world.

  • Chose a bright star in the sky. One that you can pick out again.  Some stars may have a slightly different color to them than the rest, or can easily be set apart from the others.  It doesn’t matter which star you choose, just so long as it’s one that is a bit closer to the horizon, and not the North Star, or Polaris.  Polaris gives off the illusion that it is unmoving, and for this method, you need to watch the stars move.  More information on Polaris will be explained later.
  • Find two sticks (or something similar) one that is a bit taller than the other. Aim for finding one that is roughly 2 feet, and another that is roughly 3 feet in length.
  • Line the sticks up with the chosen star. The shorter stick will be in front, closer to you.  Push the sticks in the ground, keeping them as straight as possible.  You want to make a line from the top of the sticks to the star, with your eyes being level with the shorter stick.
  • Ensure that you don’t lose track of the star, and wait as it “moves.”
  • Follow the movement of the star. This will take anywhere from 10 minutes to 30 minutes to get an accurate reading.
  • Now to determine what direction you (and the lined up sticks) are facing. To us on Earth, the sky appears to move from east to west (though in reality, it’s the Earth that is moving, not the stars).
  • If your star moves upwards, you’re facing East.
  • If your star lowers, or goes below the line of the sticks, you’re facing West.
  • If the star moves left of the sticks, you’re facing North.
  • If the star moved to the right of the sticks, you’re facing South.
  • If the star moves two directions, such as down and to the right, you’re facing South West.

Silhouette of Tree on Mound during Night Time

Crescent Moon Method

This method is useful only if you have difficulty identifying the constellations, and only if there is a crescent moon in the night sky.  The moon will look appear in a crescent shape (sometimes referred to as a ‘fingernail moon’) in both the waxing and waning phase, as it is closer to the sun.  The moon appears full during its orbit when it is closest to the sun, which is why we have a full moon about once every month.

The crescent shape is only present in the night sky before and after a full moon, for about a week as it either orbits away from or approaches the sun.  If the moon is too close to a full moon, this method will not be possible to find your direction.

  • Find the two very distinguishable points of the crescent moon.
  • Draw an imaginary line with your hand or use a long, straight stick to the horizon, from the top point of the moon, to the bottom point, and finally to the horizon line.
  • Where your hand (or stick) meets the horizon on this straight line, that is South if you are in the Northern hemisphere, or North if you are in the Southern hemisphere.
  • If you are in the Northern hemisphere, looking right at that point is South. Your right will be West, left, will be East, and behind you, will be North.
  • If you are in the southern hemisphere, looking at the spot on the horizon is North. Your right will be East, left, will be West, and behind you, will be South.

Crescent Moon over Snow Mountain

Locating Polaris

This is the more traditional method for navigating by the stars.  Finding Polaris, one of the brightest stars in the sky, will point you in the direction of true north.  It is situated almost directly in line with the celestial North Pole.  It is only visible in the northern hemispheres.  In Southern hemispheres, you can use a similar method of star navigation with a different constellation.  Read on in the Locating Crux section for southern hemispheres.

  • North Star: The North Star, or Polaris, is the last star on the tail of the Ursa Minor, known also as the Little Dipper or Little Bear constellation.  In the Northern hemisphere, this star gives off the illusion that it stays in the same spot throughout the night as it is only one degree off from being directly above the north pole, while you can clearly see other constellations rotate across the sky.  In the southern hemisphere, you cannot see Polaris any time of the year. To find Polaris, sometimes it is easier to first identify the Big Dipper, or Ursa Major.  It’s a similar looking constellation to the Little Dipper, except it is much bigger and sometimes easier to spot on an especially starry night.  Identify the ‘ladle’ of the Big Dipper, it will be four stars that make an almost trapezoidal shape.  Find the top right corner, the star farthest away from the tail or the ‘handle’ part of the ladle.  From there, you should be able to look upwards, drawing an imaginary line from the corner of the Big Dipper to Polaris. Polaris will be the last star, and the brightest, in the Little Dipper constellation.  The Little Dipper has three stars that make the tail, or the handle of the ladle.  The last star on the tail is Polaris, or the North Star. Once you’ve identified the North Star, draw a straight line down to the horizon.  The point on the horizon is North.  Behind you is South, the west will be on your left and the east will be on your right.
  • Spring Up and Fall Down: Memorize this little saying, Spring up and fall down to help you remember where in the sky you can find Ursa Major or the Big Dipper.  For the warmer half of the year, or in the spring and summer, it’s located high up in the sky.  In cooler months, or in the fall and winter, it will be lower in the sky, closer to the horizon. This can help you save time when you’re searching the night sky for the telltale stars.

Polaris star

Locating Crux

Crux, otherwise known as the Southern Cross, is a constellation of five stars that align in the shape of a cross.  Australian Aborigine tribes would use the Southern Cross to navigate at night.  They called it The Emu of the Sky.  Identifying the Southern Cross will point you in the direction of true South.

Southern Cross Panorama

The Southern Cross constellation is visible year round in the southern hemisphere, and visible during the summer months at the equator and in regions just above the equator, for the summer months.

Southern Cross

First, identify the four characteristic stars. The two brightest and biggest stars make up the vertical length of Crux. Using your finger or another object, measure the length between the top and bottom stars by fully extending out your arm and marking the length. Then, from the bottom star known as Acrux, go about five times the length of the constellation.

The true Southern Cross

Keep your arm straight so you can accurately determine the distance. At the point that is five times the length away from Acrux, draw a line straight down to the horizon. That spot on the horizon is south.  North is behind you, east will be on your left and west will be on your right.

Stargaze for Safety

Take a few minutes out of your nightly routine to go outside.  Practice locating the helpful constellations on your own time, when you aren’t in an emergency situation. Bring a compass, outside with you and observe.  Watch how some constellations move across the sky over time.  Look at which way they move as time passes by using the compass to help you.

Silhouette of Person Sitting on Rock

Consider investing in a book about constellations, printing out a star chart, or just doing some simple research.  The more familiar you are with some of the more easily observable constellations, such as Orion, Gemini, the Big Dipper, the Little Dipper, or the Southern Cross, identifying these constellations will become second nature.  Learn to spot some of the planets that have characteristically identifiable colors such as Mars, which looks like a fiery red star, or Venus, which is ultra bright and looks pure white.

The Take Home Message

One final tip for navigating by the stars is to pick a point on the horizon, if possible.  If you are in a thickly wooded area, this may be a bit hard to do.  However, if it is possible, find an oddly shaped tree or some other definitive object on the horizon as a destination point.  If you are trekking out at night, check your direction periodically by employing one of the above methods to ensure you haven’t strayed from your path or planned direction.

We cheer for adventure and are major proponents of encouraging people to enjoy the beautiful outdoors.  Observing the night sky in all its beauty, the planets and infinite stars is one of the many ways to experience nature.  After all, the word planet is derived from the Greek word for ‘wanderer’, and we hope you are inspired to do some wandering on your own.

Milky Way seen by camping in the forest

We hope that you found our article to be informative and that you will share it on social media so that more people will familiarize themselves with these simple techniques on how to navigate by the stars.  If you have some questions, or have any tips of your own, feel free to leave them in the comments section below.  We will attempt to answer your questions or concerns as soon as we can.  Thanks for reading!

http://hikingmastery.com/wp-content/uploads/2017/06/Lipo-Battery-680×408.jpg

0

Having to recharge your Lipo batteries individually in order to power your drone can be such a tedious approach because you might have to wait for many hours before they are all full. Imagine having 6 empty batteries, where each takes an hour to be full. It means you will have to spend about 6 hours before using them. That’s intolerable.

With parallel charging, on the other hand, you can alternatively charge many batteries at the same time, thus saving time more effectively. You will surely be ready at an hour’s time with up to 6 batteries that are charged at the same time. That’s the wonders of parallel charging compared to series charging.

How to Charge More Than One Lipo Battery at a Time

We probably are narrating parallel charging in a foreign language to a beginner now. Read through the article to get a glimpse of what we refer to when we talk about parallel charging. We have compiled all that you have to know to get started. Let’s first start with the importance below.

Importance of Parallel Charging

You probably know the first importance as saving you time and charging the batteries effectively. This helps you fly your drone in no time without having to wait many hours due to series charging or 6 batteries individually.

LIPO BATTERIE ON THE TABLE

The other importance is that, parallel charging helps in reducing the internal resistance of individual batteries connected together. If you were to charge individually, for example, your charger will need more power to charge all the batteries. So, according to Ohm’s law, which states that the electric current is inversely proportional to the resistance and directly proportional to voltage, the total resistance will be halved when these batteries are all connected in parallel.

 How does parallel charging works?

In order to master Lipo battery parallel charging, you have to understand how it works first. The first note is that, when the batteries are all connected to the parallel charging board, they will be balanced and then charged. If there’s any voltage difference, for example, it will be stabilized before the charging proceeds.

The main aim is for the voltage to be the same. This stabilization of the voltage will be done by the surge of a current flow to all the battery packs the result of which will be a single, large battery. Say you are about to charge 4 1500mAh batteries, the overall capacity for parallel charging will be 6000mAh. It is then easy to charge a single, larger pack than individual batteries.

Venom Pro Charger Power Supply

During parallel charging, there will a cell balancing between the batteries. For instance, the cell 1 in the first battery will be connected to the cell 1 in the second battery, etc. The balance leads are used in accomplishing this balance.

That’s how basically this form of charging works on how to charge more than one Lipo battery at a time. Now let’s give you insights on how to safely proceed with this. More importantly, an extensive knowledge is needed to execute this process. If you feel unsure, please ask for an intimate assistance from a qualified technician, or devote more time reading through to get a grasp. Sometimes it takes time to master. Just start with 2 batteries and increase as you advance in knowledge.

How to get started with parallel charging

It is quite an easy process, but, as aforementioned, requires an extensive knowledge of electrical connections such as counting the maximum charge current needed, understanding voltage and the battery types. However, a determined mind can comprehend the guidelines given.

As a result, we will give you an insight in this article that how to go about this process. Firstly, you have to acquaint yourself with the requirements prior to commencement. These include the following:

Requirements for parallel charging

  • A wiring adapter for the main leads and for the balance leads (should all have the same number of connections)
  • Lipo batteries up to 6 packs
  • Lipo battery charger
  • A parallel charging board

If you do not have the Lipo batteries already, or think of buying new ones, consider this “best seller”, Venom RC. You can also find the parallel charging boards at affordable prices on Amazon as well as the lipo battery chargers. The other step to take is to make sure that all these components are actually compatible with each other.

Venom Pro 3 and Pro 2 Charger

Keep in mind that this form of charging comes with limitations so as to prevent the possibility of burning your charging board or the batteries themselves. Below are some of the warnings that shouldn’t be overlooked to ensure a safer charging. Overlooking the warnings is a one step towards jeopardizing your safety with the possible explosion of the batteries and the charging board.

Warnings for Parallel Charging

  • The batteries should all be of the same cell count. For example, you are not allowed to charge 3s with the 4s or with the 2s. 3s should be paired with the 3s Lipo batteries.
  • Although it’s not mandatory to ascertain the exact capacity and C-rating, it is recommended that the voltage difference should at least be reasonably small. For example, an 12.4V 800mAh 10C and 12.5V 1000mAh 15C can be charged parallel provided the cell count is identical.
  • You should not, for example, pair the half-filled batteries with empty ones because there could be a tremendous current flow that may have adverse end results. That’s why the voltage difference should be reasonably small.

Close-up of Parallel charging board

How safe is Parallel Charging?

Parallel charging is a safe way of charging more than one Lipo battery at a time. All you need is to adhere to and comply with the warnings aforementioned to ensure a safe way of charging. Take note of the voltage discharge levels to deter the destructive current flow due to the inequality of the voltage between the batteries.

It can be equally dangerous to use this method if the precautions have been neglected. The first thing to note is that, if anything goes wrong, then all the battery packs shall be affected equally.

Charging, discharging, and maintaining LiPo batteries properly

We therefore recommend a further study into understanding electrical connections, or then associate with the technician to perform the connections on your behalf. We recommend watching this video https://www.youtube.com/watch?v=7wj-EB4-71M to get an insight on how to perform parallel charging safely.

How to charge multiple batteries safely on a parallel board?

As you’ve probably understood the warnings and requirements above, you have an idea of what is needed prior to starting. You should get the parallel board, interchangeably called the “para-board”. Usually, these boards come with up to 6 slots for a maximum of 6 batteries. So you can charge any number below that. With the development of technology, more slots over 6 may be unfolded.

But note that charging more batteries require more wiring, and for an amateur hands-on person, it can be challenging. For now let’s base our assumptions on 6 slots and 6 batteries as the maximum.

Lipo batteries on a black table

The next thing you need is the main plug “discharge lead’ and the balance plus to be inserted concurrently during parallel charging. Depending on the number of batteries to charge at the same time, we reckon that you put an equal number on either side, well if it’s an even number, and try to keep a distance between them.

Although we’ve never heard of Lipo batteries bursting into flames in parallel charging, you better be prepared and err on the side of caution. Perhaps people have been more cautious enough. Our assumptions signal that it could be the case when charging the batteries while in contact with each other.

When charging, it will be advantageous if you are using smart Lipo chargers that adjust the charging current automatically. If not, then you will have to do some calculations manually and adjust accordingly. Don’t worry, calculating the current is an easy by following a simple, though demanding set of formulas. Let’s discuss this below.

  1. Calculating the Maximum Charging Current for your Batteries:  To start with, it is important to calculate the maximum current allowed by the charger for a safer charging. So using some electrical mathematics, dividing the power by the voltage (I=P/V) can give you the charge current. Let’s assume that we have a Lipo battery charger rated at 50W and we want to charge 4 1500mAh 3s batteries and you want to charge at 1C which can be equivalent to 4.2A total charge current. Meanwhile the voltage of a single battery is 5.6V, so for 4 batteries it will be 22.4V. To calculate the maximum power needed, we multiply the 22.4V by the 4.2A to give us the power of over 94 W, and that is way more than 50 W. This interprets danger to us that the charger can blow up and damage the batteries because of more power needed to charge 4 batteries at 1C. Change the C-rating and then calculate accordingly. To avoid these hassles of calculating manually, get the smart chargers. The charge current of multiple batteries is not the same as when you charge individual batteries. When charging single batteries, for example, a 1500mAh battery would need to be charged at 1.5A and a 2200mAh at 2.2A when charging at 1C. Now consider the sum of the capacities in parallel charging. For instance, 4 1500mAh batteries will total to 6000mAh and can be charged at 6.0A. These are just typical examples. Now let’s leave these calculations aside because they can be confusing if you’ve never done any quantitative module in your school. Nonetheless, it doesn’t mean that you won’t be able to charge more batteries at once. Just follow the basic rules and the maximum allowable power to avoid the destruction.
  2. Getting Your Hands on the Parallel Charging Board: Now, for the hands-on technicians or enthusiasts, it’s time to get your hands on the job or charging. When starting the process, always connect the main plug “discharge leads” first before the balance leads to avoid the dire consequences particularly when plugging batteries with varying voltage levels. What happens is that, there could be a huge current flow in the para-board in response to the difference in voltage among the Lipo battery packs. And the balance leads are normally thinner so they can be damaged as a result of that the current flow. That’s why it is advisable to plug the discharge leads first as they can withstand that flow. But if you are about to charge the batteries with the exact same voltage, it is not mandatory to start with the discharge leads before the balance leads.

Additional Tips & Recommendations

To err on the side of caution, you need to be more vigilant when conducting this form of charging. Take note of the following tips:

  • Get yourself a high power Lipo battery charger and a reliable power supply. This will eliminate the need to calculate the max power limit for your batteries. This could be an alternative solution for those who have never done elementary electrical calculations before.
  • Under no circumstances should you, midway charging, take out a certain battery to fill the charging board with another battery. The entire process might be interrupted and your intensions might be ineffective. So let the initial process end before plugging other sets of batteries. You should in fact keep in mind the dangers of plugging different voltages.
  • If you’re really a newbie with no electrical background, do not attempt wiring the parallel charging board. The possibility of the entire connection bursting into fire exists due to wrong connections of the batteries.

The battery compartment can fit 2-cell or 3-cell LiPo batteries

Overview

Charging Lipo batteries at the same time is now easier than before. It is an effective and fast way to use parallel charging instead of a serial charging which is time consuming. As long as you have followed the instructions, and have collected the parallel charging board/adapter, the charger, the connectors and the batteries, you can proceed but with caution.

Those with electrical backgrounds will find this hands-on approach a marvel to undertake. But the under-privilege of not having that knowledge should not hinder you from mastering these tasks.

If you think of the financial implications, it is relatively inexpensive to purchase the required components. You’d better save time by performing parallel Lipo battery charging than wasting time charging  the whole day. Let’s discuss the advantages and disadvantages below:

Advantages of Parallel Charging

  • Time saving: can charge multiple Lipo batteries at a time rather than charging them individually the process that can take you the whole day
  • Efficient and effective: When charging multiple batteries at once, the voltage gets reduced, so that’s an advantage to your charger to quickly charge the batteries compared to charging individual batteries.
  • Safe: it is safer than serial charging because the batteries can be connected in a random order.

Lipo battery pack laying down

Disadvantages of Parallel Charging

  • Collective damage: if anything goes wrong, all batteries will be affected
  • Collective indicators: you cannot monitor the progress of an individual battery, but all of them.
  • Dangers of voltage difference: connecting the batteries will huge difference in voltage could be catastrophic. A tremendous current flow in response to that can be destructive to the para-board and subsequently to the Lipo batteries.

Wrapping it up

Having read through this review, we’re confident that you have acquired sufficient knowledge to undertake parallel charging in order to get exposure to its wonders. We have discussed how it works, the dangers, the benefits and the tips on how to accomplish this task. What’s left for you is to find the required components of high quality to get started. One last final warning, please perform this task vigilantly. We don’t want to exaggerate the impending dangers thereof.

Now flying drones with speedily powered Lipo batteries will be exciting. No more pausing your flight adventures because of the ridiculous long times of charging many batteries individually.

LiPo Battery and a Drone

How to Charge More Than One Lipo Battery at a Time: The Wonders of Parallel Charging

0
With parallel charging, on the other hand, you can alternatively charge many batteries at the same time, thus saving time more effectively. You will surely be ready at an hour’s time with up to 6 batteries that are charged at the same time. That’s the wonders of parallel charging compared to series charging.

How to Charge More Than One Lipo Battery at a Time

We probably are narrating parallel charging in a foreign language to a beginner now. Read through the article to get a glimpse of what we refer to when we talk about parallel charging. We have compiled all that you have to know to get started. Let’s first start with the importance below.

Importance of Parallel Charging

You probably know the first importance as saving you time and charging the batteries effectively. This helps you fly your drone in no time without having to wait many hours due to series charging or 6 batteries individually.

LIPO BATTERIE ON THE TABLE

The other importance is that, parallel charging helps in reducing the internal resistance of individual batteries connected together. If you were to charge individually, for example, your charger will need more power to charge all the batteries. So, according to Ohm’s law, which states that the electric current is inversely proportional to the resistance and directly proportional to voltage, the total resistance will be halved when these batteries are all connected in parallel.

 How does parallel charging works?

In order to master Lipo battery parallel charging, you have to understand how it works first. The first note is that, when the batteries are all connected to the parallel charging board, they will be balanced and then charged. If there’s any voltage difference, for example, it will be stabilized before the charging proceeds.

The main aim is for the voltage to be the same. This stabilization of the voltage will be done by the surge of a current flow to all the battery packs the result of which will be a single, large battery. Say you are about to charge 4 1500mAh batteries, the overall capacity for parallel charging will be 6000mAh. It is then easy to charge a single, larger pack than individual batteries.

Venom Pro Charger Power Supply

During parallel charging, there will a cell balancing between the batteries. For instance, the cell 1 in the first battery will be connected to the cell 1 in the second battery, etc. The balance leads are used in accomplishing this balance.

That’s how basically this form of charging works on how to charge more than one Lipo battery at a time. Now let’s give you insights on how to safely proceed with this. More importantly, an extensive knowledge is needed to execute this process. If you feel unsure, please ask for an intimate assistance from a qualified technician, or devote more time reading through to get a grasp. Sometimes it takes time to master. Just start with 2 batteries and increase as you advance in knowledge.

How to get started with parallel charging

It is quite an easy process, but, as aforementioned, requires an extensive knowledge of electrical connections such as counting the maximum charge current needed, understanding voltage and the battery types. However, a determined mind can comprehend the guidelines given.

As a result, we will give you an insight in this article that how to go about this process. Firstly, you have to acquaint yourself with the requirements prior to commencement. These include the following:

Requirements for parallel charging

  • A wiring adapter for the main leads and for the balance leads (should all have the same number of connections)
  • Lipo batteries up to 6 packs
  • Lipo battery charger
  • A parallel charging board

If you do not have the Lipo batteries already, or think of buying new ones, consider this “best seller”, Venom RC. You can also find the parallel charging boards at affordable prices on Amazon as well as the lipo battery chargers. The other step to take is to make sure that all these components are actually compatible with each other.

Venom Pro 3 and Pro 2 Charger

Keep in mind that this form of charging comes with limitations so as to prevent the possibility of burning your charging board or the batteries themselves. Below are some of the warnings that shouldn’t be overlooked to ensure a safer charging. Overlooking the warnings is a one step towards jeopardizing your safety with the possible explosion of the batteries and the charging board.

Warnings for Parallel Charging

  • The batteries should all be of the same cell count. For example, you are not allowed to charge 3s with the 4s or with the 2s. 3s should be paired with the 3s Lipo batteries.
  • Although it’s not mandatory to ascertain the exact capacity and C-rating, it is recommended that the voltage difference should at least be reasonably small. For example, an 12.4V 800mAh 10C and 12.5V 1000mAh 15C can be charged parallel provided the cell count is identical.
  • You should not, for example, pair the half-filled batteries with empty ones because there could be a tremendous current flow that may have adverse end results. That’s why the voltage difference should be reasonably small.

Close-up of Parallel charging board

How safe is Parallel Charging?

Parallel charging is a safe way of charging more than one Lipo battery at a time. All you need is to adhere to and comply with the warnings aforementioned to ensure a safe way of charging. Take note of the voltage discharge levels to deter the destructive current flow due to the inequality of the voltage between the batteries.

It can be equally dangerous to use this method if the precautions have been neglected. The first thing to note is that, if anything goes wrong, then all the battery packs shall be affected equally.

Charging, discharging, and maintaining LiPo batteries properly

We therefore recommend a further study into understanding electrical connections, or then associate with the technician to perform the connections on your behalf. We recommend watching this video https://www.youtube.com/watch?v=7wj-EB4-71M to get an insight on how to perform parallel charging safely.

How to charge multiple batteries safely on a parallel board?

As you’ve probably understood the warnings and requirements above, you have an idea of what is needed prior to starting. You should get the parallel board, interchangeably called the “para-board”. Usually, these boards come with up to 6 slots for a maximum of 6 batteries. So you can charge any number below that. With the development of technology, more slots over 6 may be unfolded.

But note that charging more batteries require more wiring, and for an amateur hands-on person, it can be challenging. For now let’s base our assumptions on 6 slots and 6 batteries as the maximum.

Lipo batteries on a black table

The next thing you need is the main plug “discharge lead’ and the balance plus to be inserted concurrently during parallel charging. Depending on the number of batteries to charge at the same time, we reckon that you put an equal number on either side, well if it’s an even number, and try to keep a distance between them.

Although we’ve never heard of Lipo batteries bursting into flames in parallel charging, you better be prepared and err on the side of caution. Perhaps people have been more cautious enough. Our assumptions signal that it could be the case when charging the batteries while in contact with each other.

When charging, it will be advantageous if you are using smart Lipo chargers that adjust the charging current automatically. If not, then you will have to do some calculations manually and adjust accordingly. Don’t worry, calculating the current is an easy by following a simple, though demanding set of formulas. Let’s discuss this below.

  1. Calculating the Maximum Charging Current for your Batteries:  To start with, it is important to calculate the maximum current allowed by the charger for a safer charging. So using some electrical mathematics, dividing the power by the voltage (I=P/V) can give you the charge current. Let’s assume that we have a Lipo battery charger rated at 50W and we want to charge 4 1500mAh 3s batteries and you want to charge at 1C which can be equivalent to 4.2A total charge current. Meanwhile the voltage of a single battery is 5.6V, so for 4 batteries it will be 22.4V. To calculate the maximum power needed, we multiply the 22.4V by the 4.2A to give us the power of over 94 W, and that is way more than 50 W. This interprets danger to us that the charger can blow up and damage the batteries because of more power needed to charge 4 batteries at 1C. Change the C-rating and then calculate accordingly. To avoid these hassles of calculating manually, get the smart chargers. The charge current of multiple batteries is not the same as when you charge individual batteries. When charging single batteries, for example, a 1500mAh battery would need to be charged at 1.5A and a 2200mAh at 2.2A when charging at 1C. Now consider the sum of the capacities in parallel charging. For instance, 4 1500mAh batteries will total to 6000mAh and can be charged at 6.0A. These are just typical examples. Now let’s leave these calculations aside because they can be confusing if you’ve never done any quantitative module in your school. Nonetheless, it doesn’t mean that you won’t be able to charge more batteries at once. Just follow the basic rules and the maximum allowable power to avoid the destruction.
  2. Getting Your Hands on the Parallel Charging Board: Now, for the hands-on technicians or enthusiasts, it’s time to get your hands on the job or charging. When starting the process, always connect the main plug “discharge leads” first before the balance leads to avoid the dire consequences particularly when plugging batteries with varying voltage levels. What happens is that, there could be a huge current flow in the para-board in response to the difference in voltage among the Lipo battery packs. And the balance leads are normally thinner so they can be damaged as a result of that the current flow. That’s why it is advisable to plug the discharge leads first as they can withstand that flow. But if you are about to charge the batteries with the exact same voltage, it is not mandatory to start with the discharge leads before the balance leads.

Additional Tips & Recommendations

To err on the side of caution, you need to be more vigilant when conducting this form of charging. Take note of the following tips:

  • Get yourself a high power Lipo battery charger and a reliable power supply. This will eliminate the need to calculate the max power limit for your batteries. This could be an alternative solution for those who have never done elementary electrical calculations before.
  • Under no circumstances should you, midway charging, take out a certain battery to fill the charging board with another battery. The entire process might be interrupted and your intensions might be ineffective. So let the initial process end before plugging other sets of batteries. You should in fact keep in mind the dangers of plugging different voltages.
  • If you’re really a newbie with no electrical background, do not attempt wiring the parallel charging board. The possibility of the entire connection bursting into fire exists due to wrong connections of the batteries.

The battery compartment can fit 2-cell or 3-cell LiPo batteries

Overview

Charging Lipo batteries at the same time is now easier than before. It is an effective and fast way to use parallel charging instead of a serial charging which is time consuming. As long as you have followed the instructions, and have collected the parallel charging board/adapter, the charger, the connectors and the batteries, you can proceed but with caution.

Those with electrical backgrounds will find this hands-on approach a marvel to undertake. But the under-privilege of not having that knowledge should not hinder you from mastering these tasks.

If you think of the financial implications, it is relatively inexpensive to purchase the required components. You’d better save time by performing parallel Lipo battery charging than wasting time charging  the whole day. Let’s discuss the advantages and disadvantages below:

Advantages of Parallel Charging

  • Time saving: can charge multiple Lipo batteries at a time rather than charging them individually the process that can take you the whole day
  • Efficient and effective: When charging multiple batteries at once, the voltage gets reduced, so that’s an advantage to your charger to quickly charge the batteries compared to charging individual batteries.
  • Safe: it is safer than serial charging because the batteries can be connected in a random order.

Lipo battery pack laying down

Disadvantages of Parallel Charging

  • Collective damage: if anything goes wrong, all batteries will be affected
  • Collective indicators: you cannot monitor the progress of an individual battery, but all of them.
  • Dangers of voltage difference: connecting the batteries will huge difference in voltage could be catastrophic. A tremendous current flow in response to that can be destructive to the para-board and subsequently to the Lipo batteries.

Wrapping it up

Having read through this review, we’re confident that you have acquired sufficient knowledge to undertake parallel charging in order to get exposure to its wonders. We have discussed how it works, the dangers, the benefits and the tips on how to accomplish this task. What’s left for you is to find the required components of high quality to get started. One last final warning, please perform this task vigilantly. We don’t want to exaggerate the impending dangers thereof.

Now flying drones with speedily powered Lipo batteries will be exciting. No more pausing your flight adventures because of the ridiculous long times of charging many batteries individually.

LiPo Battery and a Drone

How to Survive in the Wild With Nothing: Important Survival Guide

0

We live in a world of convenience where most people do not have much experience in the great outdoors, and don’t have the basic skills needed for outdoor survival. Many of us will hopefully never encounter a situation where we will be put to the test in an extreme survival situation. Having a bit of knowledge behind you truly can make the difference between life and death.

A man in the wild near a fire looking at the camera

The most common reason people find themselves in life or death situations in the great outdoors is either because they lost their way while hiking, or have had an accident whilst out hiking, camping, climbing, skiing, etc. The great outdoors can be unforgiving and you must adapt and react fast to ensure your safety should an emergency arise. Your first 24 hours can be crucial to your survival.

Outdoor Survival Situations

First and foremost, you should check your situation, where you are and what immediate supplies you have (equipment, food and water). If you have had an accident, you will need to assess physical condition. Do you have any serious wounds, sprained muscles, broken bones or have suffered a serious concussion? If you have, you must attend this first, before undertaking any further action.

If you are fine, ask yourself, can you detect any immediate and present dangers that you need to be aware of or react to? Your exposure to the elements must be considered and you must evaluate the risks posed by wild animals or the terrain itself. First advice, assess your situation and stay where you are, before taking any further actions.

Man-with-backpack-trekking the mountains

In an emergency, your focus should be on staying safe, finding shelter and sourcing food and water until a rescue party locates you. The further you move from your original location the harder it may be for a rescue team to locate you.

You should only move location if you absolutely need to. The only reason to move should be:

  • To avoid immediate danger.
  • Seek a more advantageous location to establish where you are.
  • Look for shelter and food and water, if there is an immediate need to do so.

Once you have taken the time to assess all the above, then you can decide what line of action to take. Also, remember that energy is precious and the less distance you cover, the better. Remember, stay calm, do not panic and do not make rash decisions.

Ideal location

The ideal location is one which provides safe shelter, food and water. Seek an area that can provide shelter or the materials needed to construct a shelter.

Constructing or finding adequate shelter

The shelter that you fashion or find, will vary greatly depending on the environment that you find yourself in. Your shelter will provide you with protection from the elements be it rain, snow, wind, sun and hot or cold temperatures. It will also serve to keep you safe from wild animals.

Trees

Trees are a great source of shelter and can be a ready supply of decent shelter making materials. A tree can provide you with a natural area of dry ground. You want to maintain and enclose a dry area as a sleeping space and protect it from the exposure.

  • Felled Tree Shelter: A felled tree offers a great base to start building your shelter from. Severed branches and bows can be propped against the body of the fallen tree trunk. By layering up the branches and leaves you can create walls providing protection and insulation. Search for a well weighted and sharp-edged rock and you have a crude axe. With such a tool, you can cut branches to size. Having a stone axe or the use of a hatchet will help you in your construction and is useful for collecting firewood.
  • Standing Tree Shelter: Standing trees also provide a great existing frame from which you can support beams from and build a shelter around. If you can find four well positioned trees you have four pre-made uprights from which you can then build your shelter. Standing tree shelter video: https://www.youtube.com/watch?v=GL_3PFDYxk4.
  • Free Standing Wooden Shelter: It is also possible to create a bender or a stone age hut by creating an X frame like that of a frame found in a standard tent design. You must lash the support beams together and bury the foundations, then construct the walls using branches and leaves. Trenches can be constructed to help secure foundations. Use a strong stick as a makeshift shovel and it is a good idea to dig up and compress your floor. Free standing wooden shelter video: https://www.youtube.com/watch?v=Reav7ZnOrw8.
  • Creating Rope or Lashing with Roots: Green tree bark or tree roots make effective lashing material and can be used to secure joins in a structure. Make sure you peel the bark from well sized branches so they will be long strips. Willow is also another great flexible material that is great for lashing. You want to create strong joins. How to make rope from tree bark video: https://www.youtube.com/watch?v=yhKOSAd_Jng.

A tree shelter in the forest

Caves and Rocky Outcrops

These natural formations can provide you with a great form of shelter from the wild. The smaller the space the greater the heat retention, this is important to keep in mind if you want to stay warm and equally so if you wish to stay cool. For instance, a large cave will not provide much warmth meaning a fire would have to be lit if you find yourself in a cold temperature zone.

Snow

In winter and in some parts of the world, snowy conditions can present a real challenge and are a threat to your safety. However, it is also true that snow can provide you with the perfect shelter to ensure you are warm enough to keep you from freezing.

Snow Cave for Five

Here are some snow shelters to consider:

  • Snow Caves: Snow caves are excellent shelters and are easy to construct. They don’t take much time or energy to make. A snow cave should be constructed in a well sized snow drift. Ideally you are looking for snow of a good compactable consistency, this quality is important as it ensures structural stability. First, locate a snowdrift, the larger the better. Always dig your entrance tunnel at a rising incline, making sure to build your habitation area at a higher level than that of the entrance. This design will create a heat trap and stores warm air in your habitation area, meaning you will not freeze. When digging out the habitation area, construct it in the shape of a dome. The dome shape stops the ceiling from caving in.
  • Tree Den: In deep snow conditions, it may be possible to locate fir trees that provide a natural shelter under the branches. Once you have located a tree, it is then possible to excavate a circular area around the trunk, digging downwards with care. Make sure the snow doesn’t pile in as you dig, compact the walls as you descend. Pack the floor with fir branches and fashion yourself a makeshift lid to create an insulated environment that will be free from snowfall. Tree dens are a great way of staying warm and safe.
  • Igloo: The classic snow structure, igloos are great and provide excellent protection from the cold, as well as being spacious. It is important to consider the validity of constructing an igloo as they are time consuming and often a snow cave will suffice. Building an igloo first requires the creation of a mound of snow, this has to be sited on relatively flat terrain. It is important to make sure the mound is sizable as you will be burrowing into it. As a rough guideline, it is recommended that you make the mound at least 1.5 meters in height and two meters wide. Once the mound has been completed it is important to let it sit and set for a period of two hours, conditions permitting. To create the inner chamber, you need to begin by tunnelling into the centre and slowly begin your excavation. Use the removed snow and loosely throw it onto the outside mound, this will keep the walls at an even thickness. Remember, you want to aim to construct the igloo in the classic circular shape. Hollow out the inner chamber in an even and methodical manner, making sure to go at a slow, steady and safe pace. Use a circular arcing motion when hollowing out the chamber, you are looking to produce a dome like interior. Feel free to fill in any holes as they appear with compact snow and make yourself a comfortable space that fits your needs adequately.

Making a Fire

Learning how to make a fire is a crucial skill that is a high priority. Being outdoors in the cold can be fatal. Hypothermia can set in quickly and being able to create a fire and generate warmth is a sure way of avoiding such dangers. Food preparation can also require the use of a fire and fire can be helpful it warding off unwanted creatures.

How you go about making a fire will depend on the resources you have available. Most importantly, it is good to have a source of dry fuel, in the form of tinder, kindling and then larger longer burning pieces of wood. Tinder can be made from a variety of flammable substances. For example, dry fungus, dry wood fibers or cotton work well. These are the first materials that you will use to start your fire.

Man trying to start a fire in the forest

You should then have an ample selection of kindling available. These should consist of small dry sticks that you will then add to your burning tinder to build on the existing flame. Lastly, it will help to have a pile of larger pieces of wood, or dry branches, are great and can be snapped by hand into segments. If you will be in the wilderness long term, it helps to have a dry store of fuel for fires saved for future use.

  • Starting a Fire with Rocks: It is possible to light fires using two pieces of rock, or a rock and the blunt side of a steel blade. The technique is the same as the one you would use when striking a ferrocerium rod. Quartz and flint are the ideal stones you want to look out for, they are great for starting fires. You must use the quartz or flint strikers in accompaniment with a larger piece of stone or the blunt side of a high carbon steel blade. If you fail to have a knife handy the stone that you will be striking the flint or quartz against should ideally be a stone containing some iron content. You can experiment with different rocks to see which combinations work best. Also, make sure your quartz or flint has a good sharp edge, as this ensures a good spark.
  • Starting a Fire with Sticks: This method of lighting a fire is well known, but can require a large amount of effort. The stick method requires the build-up of friction between two pieces of wood. There are three different variations that are commonly used: Hand Drill, Bow Drill and Fire Plough.
  • Hand Drills & Bow Drill: The hand drill and bow drill are practically the same, the only real difference is the use of a bow which will save your hands from blistering. Hand drilling is not for the faint hearted. These techniques are energy intensive in comparison to the other methods, but work effectively if done correctly. You need a stick with a sharpened point which you will spin to create the friction and a piece of wood that you will drill the sharpened point into. It is possible to create variations on these methods and the video below is an excellent example of this: https://www.youtube.com/watch?v=ZEl-Y1NvBVI.
  • Fire Plows: For the fire plow, you will need to create a channel in one large dry branch using a stick and drag a smaller stick along the channel, rubbing it vigorously backwards and forwards. This creates friction which creates heat and eventually smouldering coals How to make fire plows video: https://www.youtube.com/watch?v=0iI-eF84ctg.

Drinking Water

Keeping hydrated is crucial and you will not last very long without having access to a supply of freshwater. Most people can last for around 3 days without water, so locating clean drinking water should be a high priority. It is recommended that you drink water at regular intervals if possible to prevent dehydration. However, if you do not have a constant supply of water, it is important to ration the water that you have available, try and strike a balance between regular consumption and water rationing.

The process for tapping birch trees is so wonderfully easy and low-key

Rainwater is the best source of clean drinking water. If your water is sourced from anywhere else always look for clear water and try and drink water as close to its spring as possible.

  • Catching Rainwater: If the situation gets desperate, it is possible to drink rain water off non-toxic plant leaves and it can help to create rain catching pits. Rain catching pits can be constructed easily, you must dig a small hole in the ground and use either a waterproof coat or some leaves to line the hole. When it rains the water will collect in the hole and you should have a decent supply of water to quench your thirst.
  • Getting Water from Plants: Plants not only provide food and shelter, but they can also offer a source of water. If you are lucky enough to have a small plastic sheet or bag on your person, it is possible to use this plastic to capture water from plants. This method requires you to wrap the plastic around the green leaves of a tree or shrub and bind it to the branch. Through transpiration the plant will release water, which the plastic bag will collect, this is a neat trick and can be effective in generating some much-needed purified water. Getting water from plants video: https://www.youtube.com/watch?v=avZtD4gkM84.
  • Tapping Birch: Tapping birch trees is another means of sourcing water and a birch tree can supply you with a good amount of liquid. This method involves removing an area of the bark on the tree, fashioning a wooden stake and piercing the exposed trunk at a steep upwards pointing angle. Make sure you insert your steak no more than an inch into the trunk as this will ensure you won’t damage the tree. The water retained in the tree will then drip down the stake and can be harvested for your needs. Tapping water from birch trees video: https://www.youtube.com/watch?v=UW1LV6D3oLU
  • Solar stills:  Are a fantastic way of purifying salt water and can also be used to collect fresh water from streams or lakes, as well as source water in a desert. These stills work using the process of evaporation. To construct your still you will need some plastic sheeting, a vessel of some description and ideally a piece of tube, although you can do without it. The process involves digging a small pit in the earth. Dig a pit that is roughly 3 to 4 feet wide and to a depth of about 3 feet, or until water starts to appear (if near an existing water source). You will then need to place your vessel in the pit, making sure to secure it if there is water present, rocks will help secure the vessel if needed. The next step, if applicable, is to place your tube in the vessel. Then proceed to cover the pit with your plastic sheet. You can secure the sheet around the edges using sand or dirt to create a seal. The final stage involves you placing a small stone in the middle of the plastic sheet above the vessel. The water will evaporate on to the underside of the plastic sheeting and be channelled towards the lowest point, collect and drip into your vessel. If you have a tube remember to tie the end so you don’t lose any moisture.
  • Purifying Water: Having pure water is of huge importance, waterborne diseases can be life threatening and you want to avoid any chance of becoming ill. The easiest way to prevent this is to boil your drinking water, it is recommended that you do this for a minimum of three minutes.

Sourcing Food in the Wild

Finding adequate food is a real problem in the wild, especially if you do not possess a good knowledge of edible plant species. The average human can survive for around three weeks without food, so be aware of this fact. If you get hungry do not make rash decisions, if you do not know if a plant is edible, it is best to avoid, many plants can be poisonous so try and stick to foods you recognize. It is always a good idea to do research into your environment before entering it, so if possible you will have an awareness of edible and easily foraged food stuffs.

Man alone in the wild trying to get him some food

However, generally, if you spot a bird or mammalian animal consuming a fruit, nut or type of vegetation it will probably be edible. There can be exceptions though, so be wary. It is also possible to hunt. Animals can be a great source of protein and if you are lucky enough to find one and capture one, remember to cook it thoroughly. However, the task of hunting an animal if you have no training can be hard work and physically draining.

Wrapping it up

Always be well prepared when heading into the wild as the more equipped you are and the greater the knowledge you possess, the greater your chance of survival should anything happen. Always inform people of your planned destination in case you need to be rescued and stay calm and remember the first 24 hours in a survival situation can be critical.

A man trying to survive in the wild