
Home Blog Page 30

How to Wash Fleece Jacket: Best Cleaning Tips

0

Planning to go out for a backcountry adventure, amid inevitable inclement temperatures and climate, needs one to be well prepared with a durable and a clean fleece jacket. But then, it’s unlikely that your jacket will stay clean forever, no matter how dust-resistant it could be because of repeated wear. There could be some spills on it that might result in the toughest stains on the outer-shell.

Also an unpleasant smell due to frequent wear might be one of the reasons you should wash your jacket. And quite frankly, it can be tempting to think that you can wash the fleece jacket like any other fabric garment. The sad part is that, that step is a precursor to the destruction of your jacket. To help you avoid that, we’ve compiled the best cleaning tips on how to wash fleece jacket efficiently.
How to Wash Fleece Jacket

Whoever washes the softshell fleece jacket recklessly with other garments without any proper classification in terms of color or make, has no clue about the properties of the polar fleece. The fleece material was solely manufactured for the extreme outdoor temperatures and that’s why it was named polar fleece. This is a potential synthetic material that serves as the best competitor, or rather a replacement for the wool garments that were used in the past predominantly in extreme temperatures. The wool garments, on the other hand, are easy for one to take care of, but have disadvantages.

Let’s compare these two fabric materials:

Fleece Jacket Wool Garments
Great insulating material Great insulating material too
Light weight Heavy weight
Breathable Breathable too
Moisture resistant and absorbs less Absorbs more moisture
Easy to dry fast Take long to dry fast
Doesn’t fray or pill that easy Notorious of pilling and forming some tiny fiber balls
Water repellent Absorbs water

Knowing the properties of fleece will surely serve as a guideline for you to wash it accordingly. Bear in mind that there are various types of fleece jackets. Nevertheless, our cleaning tips discussed herein are all-inclusive of any material. But some variations and exclusions can apply. For instance, you might find out that a certain fleece jacket is suitable to be ironed with low heat, whereas the other fabric prohibits the use of the iron.

This stresses the importance to look for the tag of any garment to see the cleaning/care instructions as recommended by the manufacturer. Often in those garment labels, manufacturers warn the wearers with things that can degrade the garment’s quality. With regard to the fleece fabric materials, things like heat and friction are to be restricted.

man hiking in forest wearing a fleece jacket

In addition to the manufacturer’s recommendations and restrictions, you need to be well-taught about the properties of fleece that compel people to wash it vigilantly. Let’s discuss some of them.

Properties of Fleece Jackets

Water repellent

One of the main characteristics of fleece jackets is the water repellent feature that helps outdoor enthusiasts to enjoy the wilderness damp conditions. So, instead of moisture or the morning dew being absorbed, the garment will repel most of it and absorb only less. Subsequently, the part of the fabric that has absorbed minimum moisture will dry fast. There’s therefore no worry about getting cold due to the aftermath of the heavy downpours because a fleece jacket will keep you warm.

It is this water repellent that prompts people to wash the jackets gently and meticulously. The jackets are coated with highly sensitive waterproof coatings that could deteriorate prematurely if exposed to, among others, an unbearable heat. For example, if you decide to wash your softshell fleece jacket using the washing machine, make sure that you set it on a cold water cycle because the warm water is bad news to the garment.
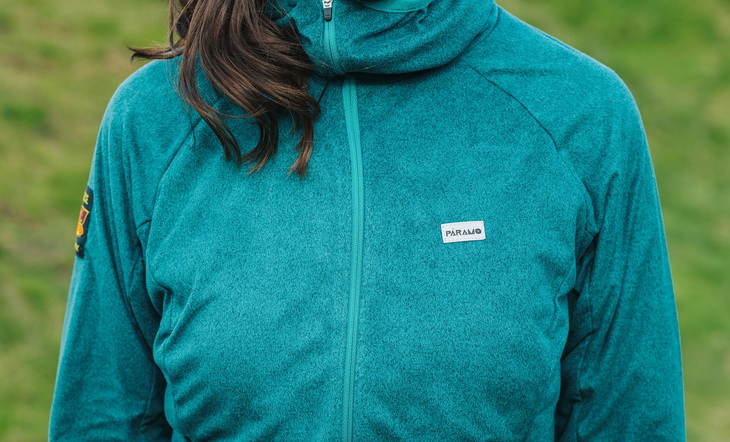
Woman wearing a stretchy, soft, water-repellent and wind-resistant fleece

Fleece is a synthetic fabric that is predominantly made of polyester materials. It is likely that the fine fibers of the garment can get melted if exposed to heat. Consequently, the water repellent property will be compromised. What would be the use to continue using the garment for inclement temperatures then? Of course, no more use if that transpires

Light weight

Being as lightweight as it is, you are advised not to mix heavy weight garments with the lightweight fleece jacket. Failure to do so will cause friction between the garments and it could be bad news to the durability of your fleece. It has finer fibers that can be easily affected by other garments. Eventually, that fuzzy softness will be diminished. It won’t feel as comfortable as before when wearing it. Even the insulation properties might be compromised.
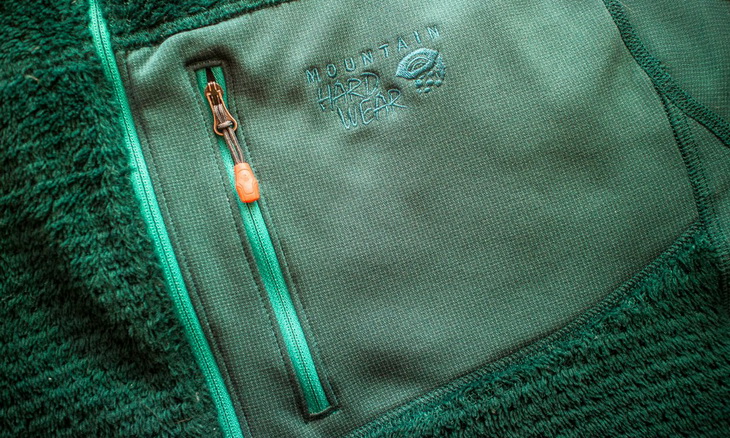
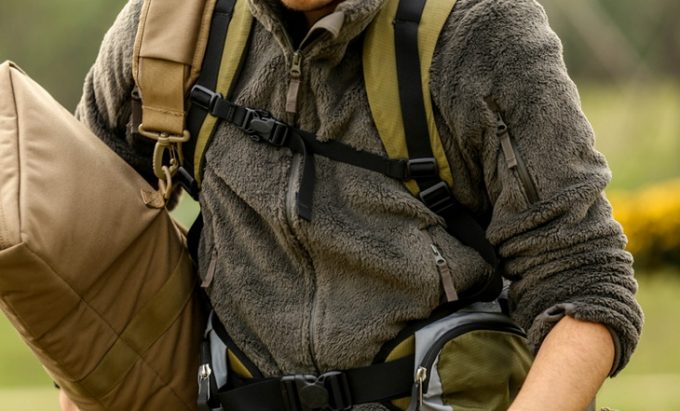
Close-up of Mountain Hardwear fleece jacket

Having mentioned this, you’re advised to classify your light garments from the heavy ones, particularly if fleece fabric materials are included in the washing machine or washing tub.

Color Integrity

The enticing part about fleece is that it can be designed in many ways and be coated with numerous colors. But, its color integrity could be compromised with ease if not being attentive to other garments you mix with. Our take is that, same colors should be classified and be washed separately. Save your beloved fleece jacket from other unwanted colors that could be taken from other garments that lose power when in reaction with water.
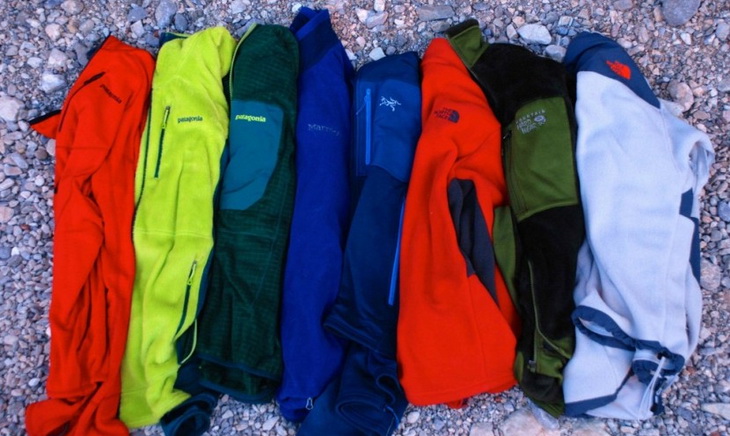
Fleece jacket on the ground with different colours

These are the minimal properties of the fleece materials that could help guide you that how to clean the garments. The main problem with some people that wash the garments recklessly is that they are clueless about the properties. Each fabric has got its characteristics and demands a special treat. What makes the fleece special is what and how it’s made of.

How is the fleece made?

As emphasized above, the fleece is a man-made fabric material that simulates the functions of the wool fabrics except with a few deviated properties. For instance, the fleece garments have a fraction of weight compared to wool materials and dry faster. The synthetic materials that were used in crafting fleece include the recycled plastics and other polymers. That’s why there are various types of this fabric.

But the main characteristic is the insulation quality that all the fleece jackets provide for outwear adventures. Further details on how it is knitted are beyond our scope here. It’s a subject for another day. The main aim is to care for the fabric and know how to clean it efficiently.
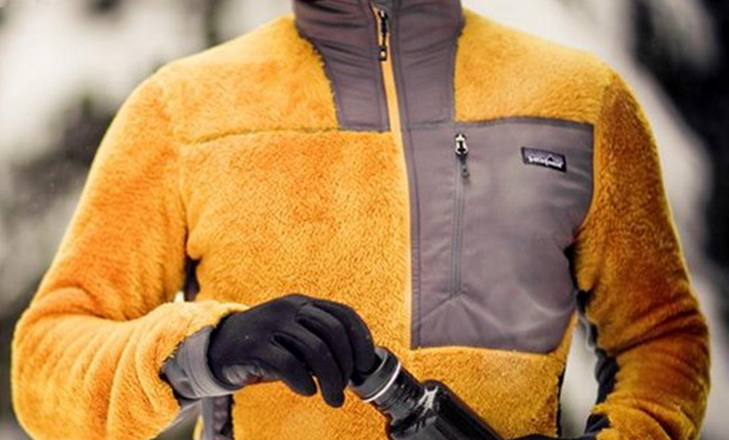
MOUNTAIN HARDWEAR fleece jacket

We believe that you now probably have a clue that what to do to wash the fleece jacket. Knowing the properties will help you prohibit other generic ways of washing ordinary garments. As we emphasized yet again, check the garment label to see some guidelines as per the manufacturer’s recommendations. Below we will unfold the easy way to wash the fleece jacket.

How to wash and care for the fleece jacket?

Firstly, let’s name the accessories that you need to wash and care for the jacket depending if you decide to hand-wash or machine-wash. Either way chosen, the end-results are the same.

What do you need to wash the fleece outdoor jacket?

  • Machine washer or washing tub
  • Cold/lukewarm water
  • Mild detergent
  • Dryer with the lowest temperature settings
  • Clothing rack

Washing a fleece jacket

Washing the fleece jacket

  • Simply prepare water in a washing tub or a washing machine. If using a washing tub, pour lukewarm water or simply cold water. Using warm water will degrade the quality of your fleece jacket and its waterproof coatings in a long run. The jacket will then be ineffective in water repellent feature, and that might prompt either another purchase or recoating of the jacket if that easy and possible. The same applies with the machine washer, set it to cold water gentle cycle.
  • Use a mild detergent soap to wash your jacket. The use of other chemicals and household bleach or fabric softeners can be detrimental to the jacket’s quality and durability. They could affect its waterproofness. Your jacket might lose its softness and comfort. So, no matter tough the stains are, find a way to repeatedly wash it than to add strong chemicals.
  • If you are using a powder, mild detergent, we reckon you mix it with water first to prevent the remaining of residues.
  • Pour the detergent in water before putting your jacket. Remember to turn the jacket inside out to prevent pilling. If mixed with other lint-producing garments, it might start to pill and have some fiber balls formed. To remove that is another effort.
  • Remember to separate the fabrics according to color and weight.
  • If after washing there’s pet’s hair remaining on the jacket, use some wet rubber glove to wipe down the jacket to remove that.
  • After washing, rinse the jacket in a machine or in your washing tub. Also use cold or lukewarm water to do this. If there are visible residues left on your softshell jacket, repeat the rinsing activity until is perfectly clean.
  • The subsequent step to rinsing the jacket is to dry it. You should also be careful with dryers when drying the jacket. It is sensitive to too much of heat as it might affect its effectiveness and waterproofness. That being noted, use the lower settings of the dryer to reduce heat to as low as possible. Be tolerant of the longer it might take when following the lower settings.
  • We’d advise you to air-dry the fleece jacket just to stay on the cautious side of heat. However, you need to monitor its drying process if the sun it out in full potential. Remove the jacket immediately after it has dried completely because longer exposure to the sun can also degrade the jacket’s quality in a long term.
  • After drying the jacket, it’s time that you store it safely. When storing it, you shouldn’t mix it with other lint-producing garments such as the wool towels. Also beware of the wrinkles because the iron is prohibited.
  • Do not iron a fleece jacket unless otherwise stated by the manufacturer for low-setting irons. But generally, do not iron the jacket unless you want to melt the polyester fibers. The good thing is the fleece garments have resilient finer fabrics that will not easily cause wrinkles after washing.

The aforementioned is a simple yet extremely helpful procedure of washing your fleece jacket perfectly. Do not be like others who have degraded the quality of their great fleece jackets by washing them recklessly.
Homemade Liquid Laundry Detergent

You need to adhere to the prohibitions as stipulated by the manufacturer or as per the properties of these garments. We’ve discussed some prohibitions in a nutshell below that you should avoid when treating this fabric material.

Warnings when washing the fleece jacket

  • Do not use hot water when washing the fleece jacket
  • Do not use household bleach or fabric softeners as they degrade the waterproof qualities
  • Do not mix the garment with lint-materials such as the cotton towels because they might form fiber balls on the shell
  • Do not use a hot dryer. Rather use an air by hanging the garment on the clothing rack
  • Do not iron the fleece jacket. The polyester materials can end up melting and thus affect the softness of the jacket
  • Do not wash with heavy jackets to avoid friction
  • Do not wash the jacket before reading the garment tags that could possibly show you more prohibitions

You probably have noticed that the fleece jacket has many warnings than other ordinary garments you used to wash it with.

Close-up of the North Face fleece jacket

If you’ve fallen for the negligence of washing this jacket with the disregard for these warnings, it’s time you change.

Additional recommendations & advice

Your ticket to excelling in washing fleece fabrics is to listen to expert advice to avoid repeated purchases for one thing. And the way you care for the jacket is the way you want it to be preserved. No fleece garment, no matter how tremendously durable it is, it can withstand a reckless abuse. So, you need not only take care of how you wash, but how you wear it.

We advise you not to wear the fleece clothing more than it’s needed. Although there are no strict limits to that, we reckon you wear at most twice per 5 day outdoor activities. When you limit that, you will be limiting the dirt and the stains that might later prompt a vigorous washing. Bear in mind that the more you wear the jacket and wash it promptly, it is the more the softness and the waterproof qualities are being diminished. So, the best way, provided you have enough budget, is to purchase a few fleece jackets to interchange, rather than focusing on only one garment.
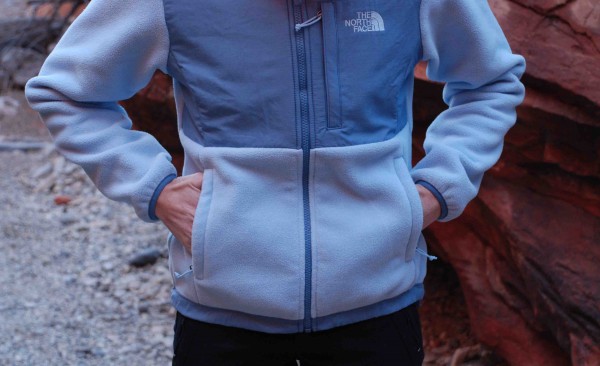
Fleece lined pockets are comfortable and help keep you hands toasty

In case it rains, do not dwell in the rain for the main reasons that the jacket is waterproof and can dry quickly. The fact is that it will eventually absorb some water, although not as much as wool garments do. And the longer exposure to the rain diminishes the waterproof property as well. So, you must be vigilant about that. We reckon that you take rain-shell jackets when heading out to your outdoor activities if it rains. The fleece jacket can be worn as the inner layer for almost any other jacket because of its softness and unparalleled comfort. Doing this cuts the need to dry the jersey after it had rained on it. It also extends its durability.

Even if you’re going to do the construction job, we advise you to use the fleece jacket as the inner layer not the outer. Exposing the fleece to that job might lead to the formation of stains and too many stains which will be hard to remove when washing. You might be tempted to resort to bleach and other chemicals which will then diminish the water repellent property even further. Avoid this by wearing the fleece garment underneath your construction overalls.
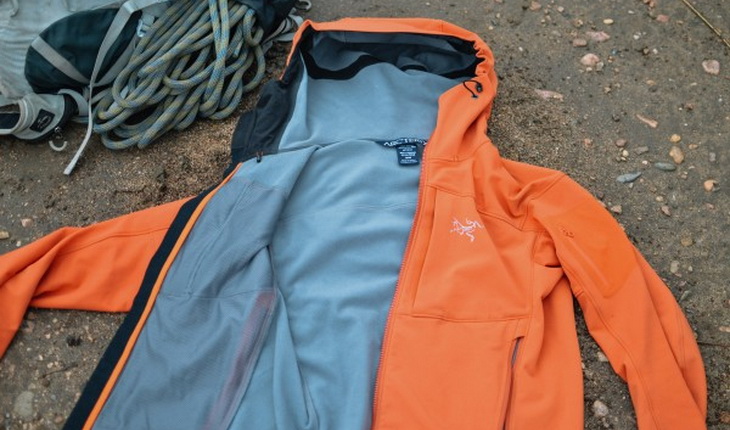
The Gamma MX has fleece lining throughout that is comfortable and cozy.

When traveling to your desired backcountry location, please store your fleece garments far from wool garments to avoid pilling. The fleece is sensitive to lint fabrics as the lint balls might remain on the jacket shell even after numerous washes unless you use the et rubber glove to remove them. You might consider a separate small bag for them.

Final thoughts

Having your fleece jacket cleaned is a requirement for every outdoor enthusiast who love a good smelling jacket with retained softness. Because these jackets have good insulating properties, we are often subjected to body perspirations in spite of how breathable the jacket is. As a result, we end up experiencing some smells when we continue wearing the jackets for longer periods. The odor could worsen if the jacket is worn repeatedly without being washed properly. But as we’ve advocated above, a proper cleaning procedure is paramount to retain the jacket’s quality.

We have compiled the best cleaning tips for all the fleece garments. Fleece is commonly used in pants, jackets and blankets, among other apparels. With our cleaning tips, you can clean almost any fleece-made garment to preserve it for a long time.  What matters a lot when cleaning these garments is to take into account the highly sensitive properties of the polar fleece. Among them, water resistance is likely to be degraded by a negligent washing. For example, hot water and other strong chemicals should be totally eliminated in the washing tips.
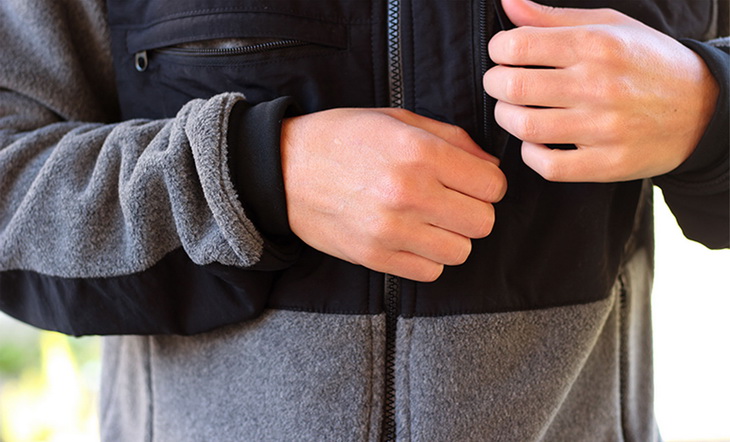
Man wearing the-north-face-denali-2

We believe that you are now in a better position to clean that dirty fleece jacket that you’ve worn in your recent outdoor activities. If you’re in the dark, always check the instructions on the garment labels. Even when following our guidelines, confirm with the manufacturer’s requirements/recommendations of washing your jacket.

How to Fix a Zipper: You Don’t Need to Throw Your Gear Away

0
Close-up of a backpack zipper

Having all your hiking gear in one pack is usually important, especially when you are planning to take part in an extended outdoor expedition. As long as your pack can accommodate all your essential gear, then you are ready to go. A well-designed and fully-functioning pack is important as this enables you to arrange your equipment in one place. Problems arise when the zipper of your backpack malfunctions. As a vital component not only for your backpack, but also other equipment like your pants, jackets, and tents, malfunctioned zipper can create havoc and spoil your entire expedition.

It’s impossible to sleep comfortably at night if the zipper of your sleeping bag does not close. Likewise, your rain jackets are useless if their zippers cannot close to lock out the rain and the cold. Therefore, when you are out in the wilderness, it’s important to have some pointers on how to fix a zipper in case it malfunctions so as to avoid these kinds of situations.

How to Fix a Zipper:

Zippers have not changed much since their invention, and neither have the issues people have with them. From teeth that won’t clinch, to stuck zippers, the problems associated with these components can be frustrating. If you are an outdoor enthusiast, you need to know how best to handle such situations when they arise. This guide offers some guidelines on how to fix a broken zipper. Before getting into the details, let’s look at what makes up a zipper.

THE STRUCTURE OF A ZIPPER

  • Slider: This part of the zipper separates or joins the elements when it’s opened or closed. There are different kinds of sliders available depending on the use.
  • Elements: The elements, also referred to as the teeth, are the parts of either end of the zipper that engage or mesh with each other when the zipper is in operation. When the right and the left side engage, they form a chain.
  • Tape: The tape is designed exclusively for the zippers. It’s typically made of polyester. Depending on the application, cotton tape, vinyl tape, and synthetic fiber tape are also available.

emerald green riri zippers

DIFFERENCES IN ZIPPER MATERIALS

  • Metal chain: The metals zippers can be found in three different finishes: aluminum (this is a chain that is made principally from aluminum); black oxidized (this chain is made from brass which is chemically treated to create a black matte finish); brass (this chain is made of brass, a combination of zinc and copper); antique Brass (this chain is constructed of brass which has been chemically treated to provide the appearance of a tarnished brass).
  • Molded plastic chain: These kinds of zippers have teeth that are individually molded, fused directly onto the zipper’s tape. The resin used in the manufacture of the molded plastic chain are strong. These types of zippers are suitable for the medium to heavy-weight application.
  • Coil (nylon) chain: The teeth of the coil zippers are extruded plastic that is sewn onto the tape of the zipper. These chains are flexible and can be found in different sizes. The coil zippers can be used for different applications from the fashion wear to all sorts of canvas goods, tents, and bags.
  • Gauge: The size or gauge of the teeth is available in #10 and #5 (#15 gauge is found in molded plastic only).

Large Vintage Industrial Salvaged Brass Metal Zipper

HOW TO SMARTLY USE THE ZIPPERS

  • Unsmooth closing and opening of the slider: The gearing of elements can be destroyed by forcing a slider which doesn’t open or close smoothly. To avoid this problem, apply lubricating spray or paraffin to the back and front of the elements to ease the friction. Move the slider back and forth a few times to work the lubricant. This process will make the slider to work smoothly.
  • A slider caught in the garment: Problems may arise when opening or closing the zipper. The slider can get stuck on the cloth or thread making it difficult to operate it. Trying to free the slider by force only worsens the issue. Pull it back removing the trapped cloth or thread. When the bite on the zipper is deep, don’t force back, but rather be gentle to ensure the trapped cloth or thread is removed.
  • Loss of elements: Attempting to close the zipper of your overfilled bag will create pressure on the elements. As a result, this can force the elements to break out of its tape. This is a major problem, and therefore, it’s advisable to complete the zipper only after the elements near each other so it can be possible to move the slider with ease.
  • Wearing and removing your clothing: Clothing should be worn or removed once the zipper has been opened completely. When attempting to close the zipper, the slider moves smoothly when the top button or hook is fastened beforehand. In case you leave the slider midway, more force is put on the elements, and this could lead to damage. You should give the same attention to gloves, boots, and accessories that have zippers to keep the problems minimal.
  • Ironing your garment: When ironing your clothing, it’s important to use the right amount of heat so as not to tamper with the zippers. These components can be maintained and kept durable if they are ironed with the right amount of heat. Before iron, you are required to close the zipper and slider should be in the right position. Cover the zipper using a piece of clothing irrespective of what material it’s made of.  The table below shows the iron heat resistance of zippers by materials. It should be noted that sliders and elements may be affected by direct ironing.
CONCEAL  160oC
EFLON  150oC
VISLON  130oC
L-type  160oC
  • Suitable cleaning method: Before cleaning, the zipper should be fixed and closed. When left open, the tip of a slider could damage the fabric, or its tape could shrink or become stretched. Chlorine bleaching agents or strong alkaline detergents must be used with care when cleaning the zipper. If it does not function smoothly after it has been cleaned, apply paraffin or any lubricating spray, and work the slide several times until it moves smoothly.

Broken Zipper Slider

FIXING THE COMMON ZIPPER PROBLEMS

  • Stuck zipper: When the zipper is stuck, it’s always caught on something. In that case, it may not come down, and until the problem is fixed, you won’t be able to remove your jacket. There is a fast and easy way to rectify this issue. Get a graphite pencil and rub its tip on the teeth of the zipper. Try moving the zipper to see if it works. If it doesn’t, you can resort to using a lubricant. Windex is preferable since it’s not oil based, but you may also use lip balm or soap. Start applying the lubricant on the teeth from the zipper’s top to the bottom. Again, move the zipper down, reapply, and continue with the process until it can move freely.
  • The teeth don’t close: One of the most frustrating issues with zippers is when their teeth won’t close. This problem results from a few reasons. Sometimes, the trick of using a graphite pencil or a bar soap will work, but in other cases, different techniques are required. When you experience this problem, double check to ensure that a piece of thread or cloth is not stuck in the zipper. After that, examine the teeth to ensure they are not sticking out. If they are sticking out, use a pair of pliers to place them back into position. If the teeth are clean and straight, take a look at the slider. With time, sliders come apart, and they stop clenching the teeth together. If that is the problem, use a pair of pliers to close the slider together. The solution is a bit completed when it comes to jeans. Where possible, you will have to remove the metal bumper at the zipper’s bottom and replace it using stitches. If this process fails, you may need to replace the entire zipper.
  • The zipper doesn’t stay up: Zippers that don’t stay up can lead to all manner of embarrassing situations. Unluckily, this problem can’t be fixed permanently unless the full zipper is replaced. That said, there are two temporary fixes you choose. The easiest way is to slide the zipper pull, using a ring from your keys and attach it to the button on your pants. If you want flexibility, you may also utilize a rubber band.
  • The slider and pull broke off: If the zipper pull and the slider come off completely, then you will need to replace them. For the pull, you can use a key ring, a paperclip, or a telephone wire in place of the pull.

Slide either of these items into the slider tab, and you have yourself a new zipper pull. You will need a pair of pliers to remove the slider and add a new one.

Replacing a slider is a simple process that should only take a few minutes. A step by step guide for replacing a slider is given below.

A man fixing broken gear

STEP BY STEP GUIDE ON HOW TO REPAIR A ZIPPER

FIXING A BROKEN OR MISSING TOOTH

  1. One of the common problems that occur with a pant or jean zippers is that their teeth get removed from the tape. This mainly takes place at the bottom end of a short zipper. There’s no sufficient space to the material on and off, so it exerts pressure in the zipper resulting in the popping of the teeth. If the teeth are broken are the bottom or top of the zipper, it’s quite easy to repair. If the teeth in the middle are missing, the zipper will need to be replaced. However, though repairs can be made on the top or bottom side, it should be noted that the fix is only temporary. If the zipper broke due to an improper fit or poor quality, there is a probability that it can break again. Therefore, if you intend to make it last, avoid putting pressure on the zipper when wearing your garment.
  2. Move the slider to the zipper’s bottom.
  3. Angle the slider and place the opposite side of the zip in the slide’s bottom
  4. In some cases, the edge of a zipper is thick to get into the slider’s side easily. If you encounter such an issue, use a screwdriver to push in the edge
  5. Once all sides of the zipper are inside the slider, pull its tab to move the zipper. It may be a little tricky to move it at first, so wiggle the slide to and fro to get its teeth interlocking. Pull the slider further up, to lock the zipper and prevent it from coming down while closing the bottom.
  6. All you need to do is to free up the zipper’s backside to close the bottom. Use a razor or a seam ripper to cut the tack holding the placket layers together on the inside of the garment.
  7. To close the bottom, you require a stop.
  8. Insert the prongs of the bottom stop, in the space created at the zipper’s bottom. The insertion should be between the old zipper stop and the teeth.
  9. Flip over the garment and ensure the prongs are inserted correctly. This should be perpendicular to your zipper at an angle of 90o.
  10. Secure the prongs by crimping them using a pliers
  11. Using hand-sewing or a sewing machine, re-tack the stitching you remove in step six.
  12. You have successfully fixed a broken tooth!

Missing tooth on a waterproof vislon zipper.

FIXING A BROKEN SLIDER

  1. One common problem that occurs with zippers is that their stops at the top fall or get pulled off, making the slider to come free. To reinsert the slider, you’ll first need to open the zipper’s bottom. It’s impossible to return the zipper from the top as this would reverse its direction and make the entire process fruitless.
  2. Cut the thread tuck as illustrated in step six of the first demo
  3. Pull off the stop at the bottom using a pair of pliers
  4. Slide one end of the zipper into each end of the slider. Be careful to ensure that the slider is facing the right direction to prevent the zipper from functioning inside out.
  5. Ensuring an even tension on both ends of the zipper, gently pull the slider to work the zipper. Do not apply so much pressure when pulling so as to prevent the slider from coming off the top
  6. Zip all the way and push the tab down so as to lock the zipper while closing up things.
  7. Use a prong to close the bottom of the zipper as demonstrated in the previous guide. Make sure the stop is inserted against the last tooth. Do not leave any gap.
  8. You will also need to insert the top stops so as to prevent the slider from coming off the top.
  9. Directly place the stop over the top of the first tooth on the edge of the zipper tape
  10. Crimp the stop, using pliers. Make sure you obtain a good clamp on the stop and crimp it several times just to be sure it’s secure
  11. Re-tack the inside of the zipper using a sewing machine

Replacing the Slider on a Plastic Tooth Zipper

FIXING A SPLIT ZIPPER

You are rushing to get to work when all of a sudden you slam the zipper of your favorite jacket in the door of your car. The zipper splits when you try to zip it and you are saddened by the fact that your favorite clothing has been ruined and you have no idea of how to fix a broken zipper. If such a case occurs, do not panic. As long as the tabs at the bottom and the teeth of the zipper are not damaged, you can still salvage your jacket.

The following process can also be useful if the slider removes the top of the zipper, the pull tabs collapses, or the teeth pull off close to the zipper’s top.

  1. Remove the stops at the top section of the zipper. You are to replace both stops so they can match one another. However, if matching is not a priority for you, you will need to remove the stop on the zipper’s side.
  2. After you have removed the top stop, take off the slider. When you look at its side, you will notice that there’s a gap that is not entirely straight. This is the case to allow the zipper to separate when zipping it. Since the slider does not properly engage the teeth of the zipper, you will need to replace it. However, if you are in a bind and cannot find a replacement, you can bend the edges back and see if it will work. It’s important to note that this is only a temporary solution as you may need to replace it later on in the future.
  3. Most zippers are usually numbered on the back to let you know what their sizes are. Sometimes, numbers that are not the usual zipper sizes may be included, but rather an arbitrary number that was added by the manufacturer. For instance, if the zipper says 5, then that is correct. Most zippers fitted in jackets are numbered 5. The heavyweight zippers such as those found in motorcycle jackets or the leather coats are numbered 7, 8, or 10. Most jackets are fitted with molded plastic or metal zippers, but there are some that have coil zippers. This makes it quite challenging to get one. In most cases, you will have to try various sizes if the damaged slider does not have markings on the back. You may also take the slider to a fabric shop and match it with the zippers they sell. If you get a match, just take the slider from the new zippers and use it to repair your garment’s zipper.
  4. On the side of the square tab at the bottom of the zipper, angle the slider in such a way that the tape’s edge enters the slot at one end of the slider. You should also remember that sometimes, the tape’s edge is thick and you may be forced to push it using a screwdriver. Wiggling also helps.
  5. After the edge has gone all the way, it should be able to move freely up and down. Trying zipping it as you would when operating a zipper, and check that the teeth don’t split. If there are splits in the zipper, you may be required to use a slider of different size
  6. Once you are confident that the zipper is in full operation, insert stops at the top. It’s important that both ends of the tape are fitted with stops, especially the side with a square tab at the zipper’s bottom. This is the side which always has the slider. If you work the zipper without putting the stops, the slider will most definitely come off.

FIXING A SPLIT ZIPPER

WRAP UP

Zippers are an essential part of your outdoor gear. Not only do zippers enhance the aesthetic value of equipment, but also help in providing protection. Jackets and coats cannot function efficiently if their zippers malfunction. Tents and canvases also need functioning zippers to offer protection against external elements when you are out camping.

When it splits, it’s important you have an idea of how to get zipper back on so as to get the full benefits of wearing or using your outdoor gear.

This article has provided some of the most useful tips on how to repair a zipper so you can continue enjoying the comfort and serene of the outdoor environment without having to worry about the cold or the excess heat since zippers help to regulate temperatures.

close-up image of a zipper

How to Clean a Tent: Tent Care & Cleaning Tips

0
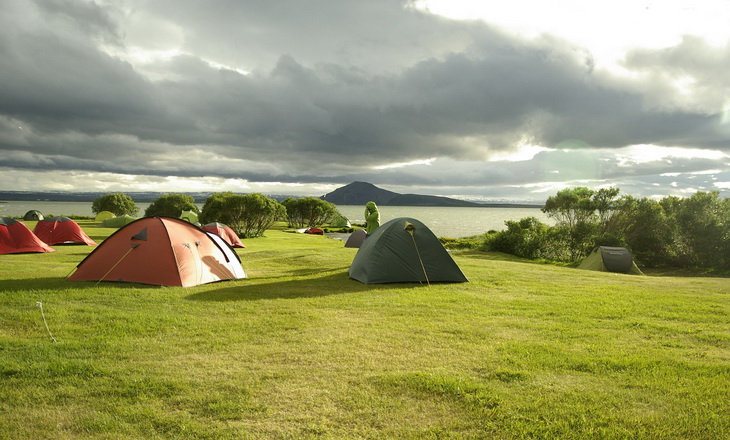
People camping in tents in Iceland

One of the best rules of thumb is to keep your tent cleaned at all the times, especially after taking your summer outdoor adventure. Cleaning a tent not only keeps it user-friendly and fresh-smelling but lengthens its durability. So the more you clean it, it’s the more you preserve its quality, and thus you will be preserving your outdoor camping asset. But, bear in mind that cleaning a tent is not as easy as machine washing your fashion or winter clothes. Some tents end up being damaged by the attempt to wash them cluelessly. In this article, we’ve endeavored to share with you our expertise on how to clean a tent efficiently.

In addition to equipping you with skills on how to clean your tent, we’ve extended our generosity to discussing the best care techniques that are needed to make the tent durable. We are aware that cleaning alone is insufficient to ensure that the tent is well maintained. One needs to know how to store the tent or care for it during any use in order to limit the need to clean it frequently. Our main focus is, however, on cleaning the camping tents.

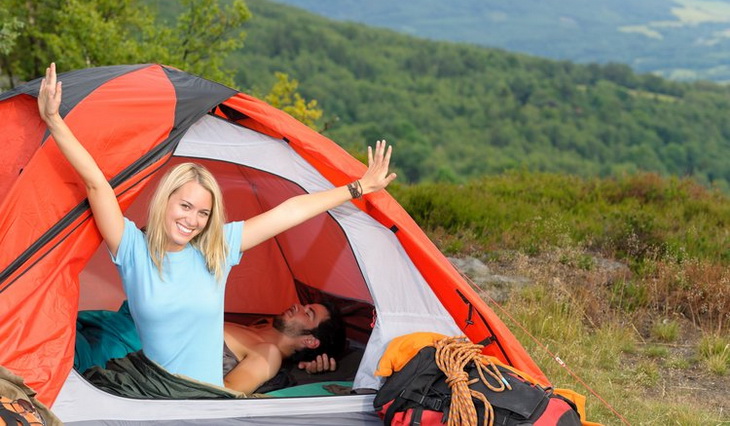
Image of a girl smiling in a tent

The tent cleaning techniques that we’ve discussed apply to all the brands of camping tents. Majority of tents, irrespective of the brands, predominantly use either the nylon or polyester as their fabric materials. So it should be easy to care for such fabrics and to clean them successfully. You’ll be lucky if the manufacturer of your tent has provided some user manual giving instructions on how to care for it. If not, then read through our tent care and cleaning tips below.

How to clean the tent?

Before washing off the stains, mold, and the mildew microorganisms that have infested on your tent, you need to procure your cleaning materials. These include the following:

  • Warm/cold water
  • Garden hose or shower head
  • Vacuum cleaner with brush attachments
  • White wine vinegar
  • Soft scrub brush
  • Spray bottles
  • Mild soap and cloth
  • Dustpan and dust-buster
  • Broom and paper towels
  • Sufficient water to rinse

With these basic cleaning materials, you will be able to thoroughly and efficiently clean your tent. But the first warning that we have to issue is that never use the machine to wash your tent because you will compromise the quality of its fabric coatings. The hair dryer or the machine dryer should not be used as well as the heat might also damage the fabric coatings.

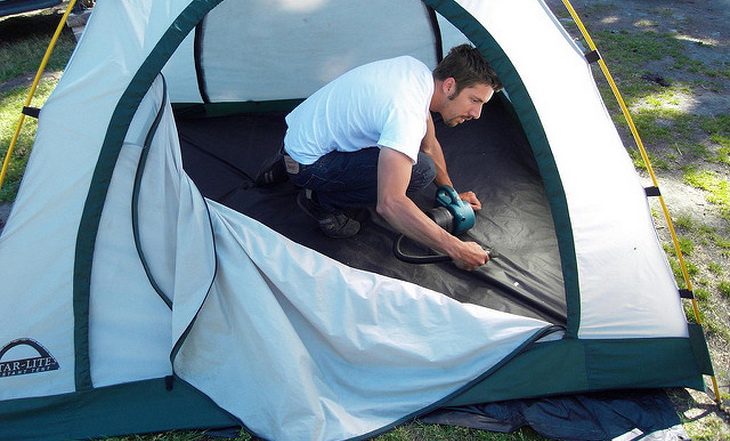
A man cleaning his tent

All you need is a hand-washing ability to remove even the toughest stains on your tent. There could be two ways of washing your tent; one being to spot the dirt and then clean the spots accordingly, and the other being to wash the entire tent by submerging it in water or by sprinkling more water on it. But beware of submerging the tent longer than it is needed as the waterproof coatings on the fabric may start to peel off.

So far you’ve noticed how demanding it is to clean a tent. We’ve demystified the process on how to wash a tent efficiently using your hands below:

  • Pitch and taut the tent → It is important that you stretch the tent to iron out the wrinkles for an effective removal of the toughest stains. You can also drape it over a fence, if deemed necessary. With either method, just avoid overly exposing it to too much UV rays as they may damage the fabric regardless of the fly material used. But usually, the polyester rainfly can protect the tent against the UV rays better than the nylon rainfly does. So, pitch the tent under shadows to avoid these UV rays and in good weather conditions.
  • Remove the dust and debris → Before attempting to use water to wash the tent, use the broom and the vacuum cleaner to remove the dust and other debris inside and outside the tent. Even the soft scrub brush can be used. This will help reveal other stains such as mosquito blood or bird droppings from the dust. Do this after pitching your tent on a clean surface.
  • Hand wash the tent → use a soft scrub brush or sponge with cold water and a mild soap that is non-detergent to clean the tent from the inside to the outside. Clean the rainfly separately. You can simply spread the rain fly on a grass for effective cleaning or drape it over some shrubs. When hand washing the tent, avoid a vigorous scrubbing because it might peel off the waterproof coating, and that could be costly to re-coat it. Instead, some alcohol-based solutions can be used for the targeted tough stains. But, do not use household cleaning solutions such as the chlorine/iodine bleach and the dishwashing liquid as they can compromise the quality of your DWR (Durable Water Repellent) coatings.
  • Clean the poles and the zippers → the zippers and the poles need special attention when cleaning. For instance, there are outdoor formulated lubricants that can be applied on them to clean off the dirt. Attempting to scrub the zippers with the brush may prompt a vigorous scrubbing, which may compromise the waterproof coating as well.
  • Dry the tent → Here comes the important step of drying your tent. Keep in mind that mold and mildew are likely to grow spontaneously if the tent is stored while damp and wet after cleaning it. The resulting funky odor will not be tolerated the next time you unfurl it at your campsite. So, to avoid that, leave your tent taut and pitched in direct sunlight for it to dry. But, before that, use a regular garden hose or shower head to sprinkle water over the tent so that the soap residues are washed away particularly at the zipper straps and the seams. That’s when you can dry it under a sunny day, but do not leave it for a long time to avoid UV rays.
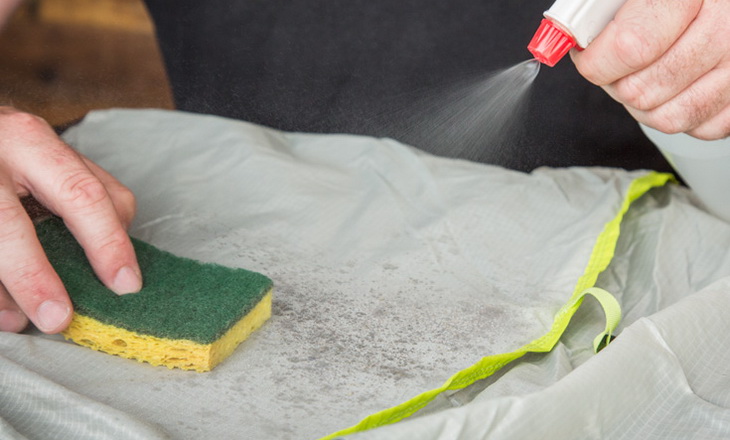
  • Remove the mold and the mildew → it might happen that the odor-causing microorganisms do not get removed that easily with your soft scrub brush or sponge at their infested areas. You can use an enzyme cleaner to kill them so as to stop their further growth because their odor is intolerable. A white wine vinegar and warm water can alternatively be used as the best home-made remedy to remove these microorganisms. Simply prepare ¼ of white wine vinegar and a cup of warm water, and pour them in a spray bottle. Sprinkle the mixture at the areas where mold and mildew are visible or are suspected to have infested.
  • Rinse the tent again → rinse the tent again so that no residues are left on the fabric. Use water pressure to accomplish them.
  • Store your tent → Under no any circumstance should you store a tent in a wet or damp conditions or while it is wet. It must be completely dry before storing it to avoid the emergence of odor-causing microorganisms. We reckon that you store it in an overly-sized mesh bag with the adequate ventilation.

The stuff sack is not a good storage bag, but is a portable bag to travel while packing the tent in the stuff sack. The area in which you store the tent should be dry as well. Otherwise, wrap the tent in a refuse bag before storing it so as to protect it against wet surfaces.

In addition to washing your tent, it is of paramount importance that you know how to care for it. Keep in mind that tent manufacturers exclude the negligence of water damage from their product warranties in the event of failing to follow the care instructions.

A man cleaning a tent

That being said, we’ve seen it necessary to equip you with the skills on how to care for your tent so that it can be more durable. Below are some tent care tips.

How to care for the tent?

We have compiled some tent care tips from how to store it to how to avoid dirt and grit on the tent floor. Caring for the tent is as equally important as knowing how to clean it.

  1. Setting up the tent: The area in which you pitch your tent is a contributory factor to its dirt. If pitching it on a dirty grass, with possible dust and debris, you will have created a needless job of cleaning, well, unless of course you love it. So, before setting up the tent, clear the area and remove all the dirt particles such as small rocks, debris, twigs and pine needles. Using the footprint as the custom-made ground cloth can extend the durability of your tent’s floor. It protects the floor from abrasion, and creates a clean surface to neatly pack your tools.
  2. Do not leave the tent pitched in direct sun for long: If you are going to camp for more days in the wilderness, you’re advised to pitch the tent under the shadow of your surrounding trees or mountains. The extended exposure of the UV rays will damage the waterproof coatings of the tent. The rainfly can also be degraded if overly exposed to the sun regardless of how impressive its UV resistance is. Alternatively, you can pitch in direct sunlight if it’s the only solution available and then unpack it whenever leaving the campsite for a long time just to preserve its durability.
  3. Only pack a dry tent after rainstorm/morning dew: If it has rained in your camping site, leave the tent pitched and taut, until it dries out completely before you can pack it. Otherwise, if mandatory to leave, dry the tent immediately after you got home before you can store it in a mesh bag or any other storage. The failure to dry it thoroughly before storage may lead to the accumulation of mold and mildew within 24 hours. The tent will eventually smell like a wet dog.
  4. Open the tent doors for adequate ventilation: No matter how intensively waterproof a tent is, there will always be a gathering of moisture in it depending on the temperature levels or the climate fluctuations. With this in mind, you have to make space for ventilation to get rid of the moisture before it leads to the unbearable mildew growth. If your tent has a large mesh area for ventilation, you can rely on it and leave opening the windows and the doors.
  5. Leave your hiking boots outside or store them in a vestibule: Getting into your tent without checking the sole of your boots will put it at risk of pine needles that could puncture the floor or other debris that could leave stains on the floor. You’ll then have to repair the floor or wash it immediately to remove the stains. If the tent has the vestibule, it’s better storing the outdoor shoes/boots in it.
  6. Leave the pets outside: No matter how lovely your pet is, leave it outside of your tent to avoid dirt on the tent fabric. The pet’s claws and teeth can also damage your beloved camping tent. So, do not leave the pets in the tent unless you’re prepared to supervise their actions.
  7. Air-dry the tent after every trip: Even if it had not rained on the tent, it’s important to thoroughly air-dry after your summer trip to get rid of the possible occurrence of moisture. To do this, pitch it when you get home to let the air dry it. You will also be getting rid of the odor that has been caused by the condensation. This after-trip inspection will also help spot the possibility of mildew/mold appearance so that you can remove them as early as possible.
  8. Store the tent loosely: We do not recommend storing the tent in a stuff sack. This stuff sack can be useful when you have to travel with the tent from one place to the other. Instead, put it in a large bag to allow more ventilation. If the tent is stored without being cleaned, for example, it can accumulate more nasty smell due top moisture. The fabrics have to breathe and relax.
  9. Reseal the seams and re-coat the fabrics: If the waterproof coatings have peeled off when you wash the tent, or after the rainstorm, or after a long use, the best encounter is to re-coat them. There are various seam sealant products on the market to revive the coatings at the seam in order to prevent the leakage of water inside. Note that every fabric material has got its own seam sealant material. Alternatively, you can approach the manufacturer, and ask if they can revive the water repellent coatings on your behalf.
  10. Inspect the tent continuous: The tent seams are more vulnerable to water leakage. It’s therefore important to pitch the tent at home before going out to your outdoor adventure and then sprinkle water on the tent to see if they are still functional. They can be damaged by scrubbing them vigorously. We therefore reckon that you do not scrub the seam corners roughly to avoid compromising their quality.

These are the important points to take into consideration when caring and when cleaning your tent. The best practice of preserving your tent quality is by caring for it and cleaning it accordingly.

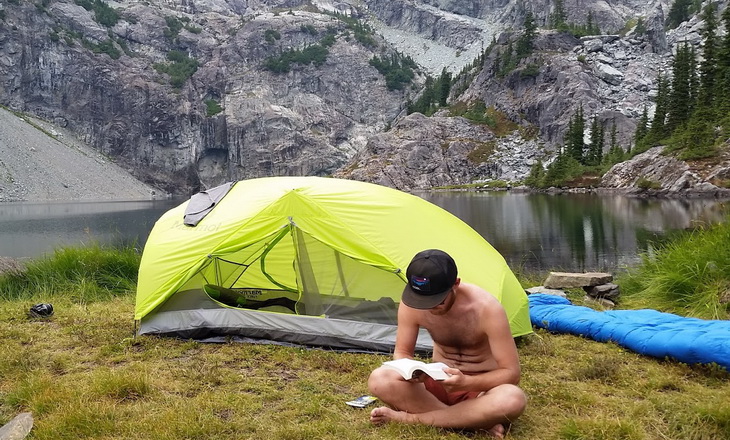
Man on the grass reading a book near Marmot Force 2P and 3P Tent

As long as you adhere to the precautionary measures before cleaning, you will then continue enjoying a fresh outdoor shelter. We’ve highlighted the precautions below.

Precautions of cleaning a tent

  • Do not use detergent soaps or other strong chemicals as they can damage the fabrics
  • Do not use the machine to wash the tent to avoid tearing of the fabric
  • Do not store the tent while wet/damp to prevent the growth of mildew/mold
  • Do not dry the tent for a long time in direct sun as the UV rays can damage the waterproof coatings
  • Do not use a hair dryer to dry the tent as its heat can have an adverse effect on the fabric coatings
  • Do not store the tent in a stuff sack after cleaning as it needs enough ventilation
  • Do not scrub the tent vigorously
  • Do not immerse the tent in water for a long time as hydrolysis may damage the waterproof coatings

Final thoughts

Cleaning a tent is an indispensable initiative that must be taken by all outdoor enthusiasts in a quest to preserve the durability. The tents that are not being cared for can end up getting damaged prematurely, and then compelling the owners to make new purchases. The sad part is that the manufacturers do not entertain the damage resulting from uncared tents.

Only factory faults are attended. It is thus your responsibility to make sure that the tent is well taken care of before and after any outdoor adventure. The tent doesn’t necessarily need vigorous or frequent cleaning sessions. Only when the need arises, that’s when you can bother to clean it.

Having provided you with the aforementioned tent care and cleaning tips, we are confident that you are now well-equipped to clean any tent on your own. These cleaning tips apply for any size of the tent and for any brand. After all it is not a hard work to clean the tent effectively as long as you adhere to the precautions and follow the steps meticulously. The other emphasized area, is the caring part of the tent. We’ve given you some insights on how to care for it in the wilderness and at home. Our cleaning tips will give answers to plenty of outdoor enthusiasts who suffered from stinking tents because of mildew or dirt.

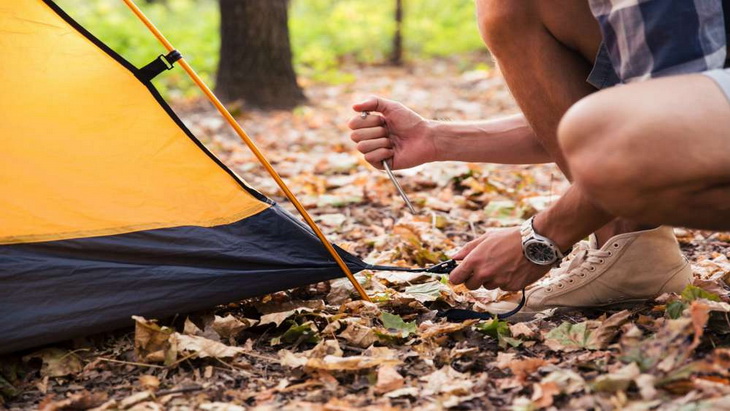
Man in plaid shirt and sneakers crouches on leaves to push tent peg into ground

Sunscreen with Bug Spray: Are They Effective as a Combo?

0

When the nicer weather starts coming around again, people of all ages want to enjoy the outdoors. However, that means the sun is going to be beating down on you, and you need to stay protected. Using a sunscreen with bug spray is one option. This is a mixture of bug spray to keep mosquitoes and nuisance bugs at bay while still using SPF protection to keep the UV rays away from you.

A sunscreen with bug repellent can be a convenient way to apply two things at once to your body. Plus, it is just one bottle so you can save space in your backpack or beach bag and save money at the store by not buying two products. This seems to be a home run, right? You will find out.Some say that you should not use a sunscreen with bug spray because it might not be potent enough on either side to truly protect you from both bugs and the sun’s rays.

Sunscreen and Bug Repellents

We are going to dig deep into this subject, including whether or not the combination of both is effective, and features that you should look into when it comes to sunscreen with bug sprays, and some opinions on the subject so that you can make up your own mind after seeing the facts.

Features to Consider

You will want to take into account several features before you head to the store for the cheapest brand of sunscreen with bug spray. You may want to find something that lasts a long time and has a great smell to it.

bug spray sunscreens

Consider the features below.

  1. Sunscreen SPF: SPF is the Sun Protection Factor and it protects you from the Ultra Violet (UV) Rays that the sun emits and are damaging to your skin. Most dermatologists recommend using an SPF 15 or higher to get greater protection. If you have sensitive skin or pale skin, you may need to use a really high SPF number.
  2. How Long It Lasts: You should expect your sunscreen with bug spray to last about 2 hours, unless otherwise directed on the bottle. You should reapply it after that and especially after going swimming or profusely sweating. Read the directions on the bottle for more accurate information.
  3. Absorbency: You sunscreen will reflect the sun’s light from your body, while absorbing the sunscreen itself. The sunscreen is absorbed into your skin by chemical reaction from the lotion and your body’s ability to physically take it in. You will definitely want an absorbent sunscreen.
  4. Greasy: Nobody likes the greasy feeling that lotions and sunscreens can have. This makes things slippery when holding them and leaves a gross feeling on the body. Seek out a sunscreen with bug spray that is not too greasy but will still protect your skin. You do not want to be at the beach, playing in the sand, and have the sand stuck all over you because the greasy sunscreen made it stick to your body.
  5. The Feel and Smell: Sunscreen with bug spray should have a nice feeling going on your body. It should go on smoothly and rub onto your skin with ease, with no leftover greasy feeling. And it should have a nice smell, as you do not want your sunscreen with bug spray to smell like a bunch of chemicals which can be off putting.

A Review of Sunscreen with Bug Spray

Before you buy, let us take a deeper look into sunscreen with bug spray and find out more about it. In this section, we will compare brands, and take a deeper look into whether sunscreen with bug spray is actually better than using the two products separately.

First of all, we will compare some popular brands so that you can get a feel of the most purchased products on the market. Keep in mind the considered features above when you are purchasing a new sunscreen with bug spray.

Popular Brands of Sunscreen w/ Bug Spray and Specs Avon Skin So Soft Bug Guard Plus Insect Repellent Moisturizing Lotion Bull Frog Mosquito Coast Spray Sunscreen w/ Insect Repellent Avon Skin So Soft Plus Expedition Unscented Bug Spray SPF 28 Green Can Babyganics Mineral Based Baby Sunscreen Spray Plus Insect Repellent Badger Sunscreen All Natural Insect Repellent Cream Cactus Juice Sunscreen and Repellent by Cactus Juice
SPF Amount 30 30 30 50 34 20
Spray or Lotion Lotion Spray Spray Spray Lotion Spray
Scent Gentle Breeze Unscented Unscented Unscented Unscented Unscented
Bottle Size 4 fl oz 6 fl oz 4 fl oz 6 fl oz 2.9 fl oz 8 oz
DEET Free Yes Yes Yes Yes Yes Yes
PABA Free Yes Yes Yes Yes Yes Yes
Amazon Rating 4.4 of 5 4.4 of 5 4.1 of 5 4.1 of 5 3.1 of 5 4.5 of 5

While using sunscreen with bug spray may be more simple, experts agree that using a sunscreen with bug spray may not work as well as people think. Experts say to use a separate can for sunscreen and one for bug spray. It is said that using both in one bottle can be less effective because UV radiation prevention is lessened when bug spray is added to the mix, plus the toxicity of the bug spray is heightened by the sun. Also, the SPF can be reduced by more than 30 percent if using both products in the same bottle.

Avon Skin So Soft Bug Guard Plus Insect Repellent Moisturizing Lotion

Another thing is that sunscreen needs to be applied more often than bug spray, and bug spray should never be applied to the face, which it is when it comes mixed with sunscreen, because you want your face to be safe from the sun, right? Bug spray should be applied less often than sunscreen, thus making it harder to decide when to reapply. Using two separate products will allow each to work more effectively.

With sunscreen, the active ingredients include:

  • An organic compound for absorbing UV light.
  • Inorganic particulates that are used for scattering, reflecting, and absorbing UV light.
  • Organic particulates that are used for absorption of UV light but also include chromophores.

These active ingredients can be less potent if it is mixed with bug spray. For bug spray, the active ingredients include:

  • A tar made from birch tree bark.
  • DEET (not all bug sprays have DEET)
  • Oil of lemon eucalyptus
  • Icaridin
  • Nepetalactone

These ingredients work together to keep mosquitoes, and other bugs away. This can prevent you from getting a number of diseases, such as:

  • Lyme disease
  • West Nile fever
  • Malaria
  • Bubonic plague

Keep in mind that a baby’s skin is much more delicate than an adult’s skin. You will want to keep them in a shaded area with a hat on rather than use a lot of sunscreen with bug spray, or using the products separately. Babies and toddlers can burn from the sun very easily.

Keeping them in the shade and giving them protective clothing is the best way to enjoy the outdoors with your baby. Another thing is that babies can dehydrate faster than adults because they are smaller. Be sure to keep your baby hydrated while they are outdoors for extended periods.

We will now look at a table of some of the most popular sunscreens without bug spray. Remember, sunscreen alone is more potent than when mixed with bug spray. You will not have to worry about applying too much bug spray when you need to reapply the sunscreen.

Popular Sunscreens and Specs Neutrogena Ultra Sheer Dry Touch Sunscreen Banana Boat Ultra Mist Sport Performance Broad Spectrum Sunscreen Banana Boat Sport Performance Sunscreen with Power Stay Sun Bum Moisturizing Sunscreen Lotion Neutrogena Beach Defense Sunscreen Lotion Broad Spectrum Elta ME UV Clear Sunscreen
SPF Number 45 30 30 50 70 46
PABA Free Yes Unknown Unknown Yes Unknown Unknown
Dimensions 6 x 3.5 x 1.6 in 4.2 x 2.1 x 7.8 in 1.5 x 2.3 x 7.5 in Unknown 1.3 x 2.4 x 6.7 in 4.8 x 1.5 x 1.5 in
Weight 3 fl oz 6 oz 8 oz 8 oz 6.7 oz 1.7 oz
Water Resistant Yes Yes Yes Yes Yes Unknown
Amazon Rating 4.5 of 5 4.1 of 5 4.5 of 5 4.7 of 5 4.5 of 5 4.4 of 5

Since you have now seen some of the top sunscreens without bug spray, we will show you some of the top bug sprays that also do not include sunscreen. Keep in mind that while most bug sprays have DEET included, which can be harmful, some of them do not. If you are wondering if your bug spray has DEET included, simply look at the ingredients on the back of the bottle. The percentage will range wildly, too.

Cutter All Family Insect Repellent

For example, you will see below that the Cutter All Family Insect Repellent has 7 percent DEET included. But if you take another look, the Repel 100 Insect Repellent has 98.11 percent DEET. Always check the level of DEET in your bug spray as it is not a safe chemical.

Popular Bug Sprays and Specs OFF! Deep Woods Insect Repellent Repel 100 Insect Repellent Cutter All Family Insect Repellent Repel Lemon Eucalyptus Natural Insect Repellent Skedattle Natural Insect Repellent Made w/ Essential Oils Sawyer Products Premium Insect Repellent w/ 20% Picaridin
Weight 6 oz 4 oz 6 fl oz 4 oz 2 fl 3 oz
Dimensions 4.3 x 2.1 x 6.8 in 6 x 0.75 x 2.2.5 in 8 x 8 x 8 in 5.5 x 1 x 2 in Unknown 8 x 2 x 2 in
DEET Amount 25% 98.11% 7% None None None
Spray or Aerosol Aerosol Spray Spray Spray Spray Spray
Scent None None None Lemon None None
Amazon Rating 4.5 of 5 4.3 of 5 4.1 of 5 4.2 of 5 4.1 of 5 4.4 of 5

As you can tell, overall, sunscreens with bug spray are nearly all DEET free. The ones included in the first table are all free of DEET. However, those with sensitive skin could find themselves with skin irritation if they have to apply too much of the mixed product. This is due to the fact that bug spray does not need to be applied as often as sunscreen. You will also not want to put this on your face or your kid’s faces because bug spray is not meant to be applied to the face.

Another thing is, many sunscreens with bug spray come in a lotion that needs to be rubbed in and can seem messy or even greasy when covering yourself or your child. Using a spray, which is what most bug sprays come in, or aerosol, is easily applied and does not require getting your hands messy or getting a child to stand still long enough to rub it in. You can spray and go when it comes to the bug spray.

Neutrogena Ultra Sheer Dry Touch Sunblock SPF 50+

While sunscreens with bug spray are effective, they are not as effective as they could be when applied separately. If you are using the sunscreen with bug spray and are not going to be outside long or are not anticipating too many bugs, you should be fine overall. But if you are going to be outdoors all day at the beach, hiking, camping, or other outdoor activities, you will probably want to use two separate products. Keep in mind if you are using 2 products, you should always apply the sunscreen first and then the bug spray. This is for maximum effectiveness.

What Do Others Think of Sunscreen with Bug Spray?

Those who have used sunscreen with bug spray say that it has not only saved them space, but money as well. Buying two separate products can get costly, especially if you want to use great products. Parents have enjoyed using sunscreen with bug spray because they can apply it to their older children easily, even if they are fussing about putting it on and cannot stay still. So, we can see how families would really prefer using a sunscreen with bug spray.

On the flip side, it is true that small children cannot use these products, as shade and protective clothing is better for them. Some users do not like that the sunscreen with bug spray is less effective. Some people are very sensitive to the sun and need to be fully protected. That is why having this mixture would not work as well. The sun’s rays will still be penetrating the skin more than you would want them to. While using a sunscreen and bug spray separately may be more costly, you are getting more protection that way.

Avon Bug Guard is DEET free

Many users were united in saying that they could use this type of product for short term periods outdoors or in areas where there are not a lot of bugs or too much sun exposure, due to the product being less effective than buying both sunscreen and bug spray. Some users stated that they preferred using separate sunscreen and bug spray when enjoying the outdoors by camping, hiking, mountaineering, or going to the beach for the day.

Pros and Cons of Sunscreen with Bug Spray

Sunscreens with bug spray are going to have their pros and cons.

Bull Frog Mosquito Coast Spray Sunscreen Insect Repellent

Let us take a look at the list below to give you the good and the bad when it comes to this product.

Pros:

  • It is cheaper than buying 2 separate products.
  • Space saving
  • Still does the job
  • Comes in sprays and lotions

Cons:

  • Not as effective as using two separate products
  • Reapplying can irritate the skin because the bug spray does not need to be applied as much as sunscreen.
  • Not all stores carry sunscreens with bug spray included.
  • May not keep all bugs away.

How to Wash Hiking Boots: Prolong Their Lifespan

0
Two pairs of hiking boots on the grass


Most hiking boots are designed to take muddy, rough trails in stride. However, that does not mean it is a good idea to hurl your dirty buddies in the storage room and disregard them. There is definitely mud on the padded sole and dust on the mouth.

Do you abandon it or go for an intense wash? No, only clean boots are great boots. Clean them properly and you will surely enjoy numerous years on the trail together.

How to Wash Hiking Boots

In case you are excessively stressed up after a hiking trip, then clean them the next day. Here is all you have to know about how to wash hiking boots.

When is Your Boot Dirty?

When newly bought, your boot is in a great condition. Implying that you won’t need to do any kind of treatment to, or washing off, your boot, particularly if it features the GORETEX membrane inside it. As long as you make use of the appropriate break-in process, you don’t have to worry. However, once you venture in your first hiking trip with your boots, and they are filled with mud, campfire ashes, residual creek or fall leaves, ensure that you clean them.

A man with a dirty hiking boots

Regardless of even if the boots are not that dusty or dirty, it doesn’t make a difference. Every step you take on a hike attract sand, dust or dirt inching in. Any kind of debris in your boot, that goes unchecked, prompts severe wear and tear. So, you need to promote the lifespan of your hiking boot by washing or cleaning it before and after hiking. Try not to sweat it in case you are stressed out after a hike. A proper clean can hardly wait a day or two, inasmuch as you use the right washing directions.

Why Are Hiking Boots Always Smelling?

Occasionally, it is the best hiking boots that turn out to be the most stinky. This is due to the fact that boots that are waterproof imply that they are not capable of allowing as much air to enter into it since they cannot breathe. That implies that all the grime and sweat from your feet is caught inside the boot and it absorbs those smells. It is pretty much tempting to believe, however, there is no assurance that men’s boots are innately smellier.

Pair of Hiking Boots

The fact of the matter is presumably that everybody’s feet are similarly smelly when trapped up in a confined space and drowning in their own sweat coming out from the leg. This is a typical observation, however, and it might have some premise, in that it was customarily men’s, heavy leather and waterproof style hiking boots, while women generally selected a lightweight style of boot. Hiking boots nowadays are usually built with synthetic materials. However, the majority of the boots can give some level of waterproof insulation while also utilizing a breathable textile.

Cleaning or Washing

Whether you are a beginner or an expert, when it comes to hiking, your boots are your most essential gear. They shield your feet from the trail and also keep your feet dry. In the long run, those pleasant, new boots will wind up canvassed in mud. To extend the lifespan of your boots, intermittent cleaning is necessary. Regardless of whether the boots are leather or fabric made, the cleaning process is generally simple. Your boots, feet, and pocketbook will be happy, as your clean, without mud boots, continue trekking for miles.

Man cleaning hiking boots

While most footwear, in the long run, wears out, you can enhance the lifespan of your hiking boots with adequate care and maintenance, particularly higher caliber boots. Most hikers spend a good amount of money for a great pair of boots, so it bodes well to extend their lifespan and to make sure that they stay comfortable, resistant, waterproof and supporting. Maintaining hiking boots is a general activity that starts with breaking-in first, and after that needs care both before and after hiking. Here are some important things needed when cleaning hiking boots:

  • Water
  • Cloth
  • Mild dish detergent
  • Non-detergent soap
  • Toothbrush
  • Leather conditioner
  • Dryer sheet

Boot Care Guidelines Before Hiking: Breaking-In

When you first buy your hiking boots, it is quite imperative to put them on around the house together with your hiking socks until you are completely sure they are the appropriate fit for you. Putting them on at home gives you the chance to spend some time in them, just in case you have to go down or up a size before venturing on your trip

It is also necessary to break-in your boots by going for some short strolls on hiking terrains. This will definitely help mollify the leather to enhance solace and help prevent any form of friction when you wear your hiking boots for a long mile hike. How rapidly a boot takes to break-in depends solely on the sole and an upper unit combination. Stiffer sole and units give much stability and insulation, but take more time for your feet to adapt to it.

a hiker walking in their boots in an urban environment

Breaking-in your hiking boots is an important approach that most people commit the error of skipping. This approach conforms the boots to the shape and size of your feet, setting them up for more drawn out stretch when hiking. Keep in mind however that a comfortable fit is important before trying to break-in. While shape will conform, breaking-in your hiking boots won’t settle issues with fit. Go for a cozy yet comfortable fit on your feet before breaking-in.

Most people do say that there are faster breaking-in processes, but none of them are sufficiently dependable unlike the one stated above.

Of course, setting aside the time to break-in your hiking boots is pretty much worth it instead of hurrying it and regretting it when used. Whether your boots are waterproof or not, it is quite essential to give new hiking boots a water repellent treatment before venturing on a hiking trip with them on, so as to help extend the lifespan and performance of the boot.

Boot Care Guidelines During Hiking

When you are hiking, it is quite essential to clean your hiking boots by the day’s end so as to dispose of dried mud, which is able to absorb the moisture content from leather, and also dirt and grit, which can cause damage to your boots if they get straight into the seams.

In order to give your hiking boots a great clean, first, let muddy and wet boots dry naturally. Ensure that you don’t expose them excessively to the sun or dry them by a fire because this will bring about any leather or suede to shrivel and harden up and possibly peel far from the sole unit of the boot, and can likewise affect the glues utilized in some footwear.

Hikers climbing the mountains

After that, brush away dirt or bang the two pairs together so as to dust off the dirt. If your hiking boots are greatly clogged, take out the boot laces to enhance drying on the inside and the tongue, so as to avoid odor. It is likewise a great idea to evacuate the insoles by the day’s end to give them a chance to dry out as well, which will help avert the growth of some smell-causing microorganisms. Sunlight is an awesome deodorizer for boot insoles.

Boot Care Guidelines After Hiking

The slightest and quickest attempt you can do for your hiking boots is to wipe off dust and dirt whenever you take off the boot. Give the hiking boot a waterproof treatment in order for your feet stay dry and comfortable as long as you want it to be. If you are the real owner of boots made with full-grain leather, remember to moisturize the leather after every usage. Ensure to always check your boots for spots and stains and make use of some dish cleanser, a sodden tissue paper to clean them before you put them away.

The majority of us do not think about this, yet you likewise need to break-in the hiking boots before cleaning them so as to ensure that the shape is in place. Following these easy approaches implies that you care for your boots and you want them to last longer. As it was quite difficult to locate the best fit, it should not be that hard to properly maintain and care for them. You would prefer not to do that over again at any point in time, right?

Pai of dirty hiking boots on the wooden table

After completing a major hiking trip and when your hiking boots are now messy, give them a good clean. Removing the boot laces to start with, brush them clean and after that utilize a cleaner to evacuate any installed contaminants, for example, oils and dirt. Utilize a soft brush for the upper layer and a hard brush for the sole unit. Once more, let your hiking boots dry naturally and take it far from the direct sun. You can prevent odor residue by washing the inside of the hiking boot with lukewarm water together with a small measure of washing detergent, but keep away from soapy suds, because it will affect the breathability, and glues of any waterproof liner inside the hiking boot.

It is a decent idea to always check the state of your boots in case of any wear and tear, instead of checking just before your next hiking trip. If you take note that the leather or suede is looking dry or getting to be scratched, make use of a conditioner to keep up the suppleness of the leather so as to avoid cracking. Keep in mind to condition the boot sparingly, as excessive conditioning can be a hindrance to the long lifespan of your hiking boot. After many wears, you may want to waterproof your hiking boots again on the off chance that you have seen water beginning to sink into the outside layer instead of rapidly beading off. If you often wear your hiking boots in wet climate conditions, you may have to apply a water-repellent treatment many times each year.

Reproofing Your Hiking Boots

If you are considering that just water and brush method is not doing well, it is an ideal time to properly wash your hiking boots. Get a cleaner that fits the material then follow the guidelines so as to give the hiking boots an intensive cleaning. However, cleaners are ideally utilized only when there is seeable debris and dirt that a brush cannot wash off. This avoids overuse and saves money.

If you have discovered that water droplets are not taking a form on the material as they always do, it could imply that they are definitely entering into the material. Now you will need to consider utilizing a water-proofer to take the lining back to its normal brilliance. Before using a water-proofer, ensure that the hiking boots are entirely clean with a good cleaning product. When prepared, follow the directions on your waterproofing item intently.

The waterproofing process of hiking boots will differ contingent upon their material. Hiking boots are required to be clean before using a waterproofing treatment and new hiking boots should be dealt with before putting them on outdoors; however, numerous treatment directions recommend that you break-in boots so as to ensure that they fit the feet and to loosen the leather before using the treatment.

Man Reproofing Hiking Boots

Waterproofing solutions are in two forms i.e. wax-based and silicone-based items, which can be in non-water-based or water based forms. Non-water based waterproofing solution are always used to dry hiking boots. While many water-based liquids or sprays are used on to damp hiking boots, and as the boot dries up, the leather ingests the waterproofing solution. Reproofing your hiking boot is a phenomenal approach to prolong their utilization and can actually add to the life expectancy of your most loved boots. It is likewise conceivable to condition leather boots so as to keep up the leather and keep them great.

Keep in mind however that nothing keeps going forever and eventually reproofing may not work well also. So it is best to proceed onward and get yourself another pair of hiking boots. Contact your producer or place of procurement for some information on waterproofing items for your hiking boots. And finally, after performing that waterproofing process, enable leather boots to dry up at room temperature since setting them close to direct heat will destroy the leather and debilitate glue.

Hiking Boot Drying and Storage Guidelines

Almost all hiking boots, if not all, are built with leather. The leather is sensitive, particularly with regards to heat and moisture. Excessive moisture means that your boots are soaked and insufficient prompts to cracks on the boots. At the point when your boots are immersed in water, the shape may twist while drying. So as to be erring on the side of caution, it is ideal to buy waterproof hiking boots.

Drying hiking boots in the sun

Almost all hiking boots are pre-waterproofed these days, yet this waterproofing solution keeps going for only a couple of months. Utilize a leather conditioner to keep your hiking boots saturated and they may be like chemical sprays, creams, oil. You may never try too hard with the leather conditioner! Do not abandon your boots, especially leather-made under the direct sunlight because they dry too quickly and crack. Here are some additional drying and storage tips:

  1. Remove the insoles and air-dry them separately from the hiking boots.
  2. Dry the boots at normal room temperature with low humidity.
  3. Never utilize a heat source (campfire, fireplace, wood stove, heater, radiator and so on.). High heat debilitates glues and rashly ages the leather.
  4. For speedier drying, make use of a fan.
  5. You can likewise load newspapers inside the boots for speed drying; whenever it is damp, change the paper.
  6. Keep boots in the area where temperatures are steady and normal. Never store your boots in garages, attics, auto trunks or any soggy, unventilated or hot place.

 Concluding thought on this topic

If you properly maintain and take care of your boots, not only would you be able to guarantee that your favorite hiking boots last for a long time but they will likewise keep your feet dry when hiking. This implies that you can enjoy your hiking adventure on wet as well as muddy ways this autumn period and directly through the winter as well. Always remove dirt particles with a damp fabric before keeping the boots. If the water droplet shifts off your boots, they are waterproof so you, therefore, needn’t worry about waterproofing them.

You need to pay special attention to your hiking boots and utilize conditioners and moisturizers on them daily. Check the dirt on the boots and wash them with some dish cleanser and a sodden paper towel. And finally, keep your boots away from direct heat. Regardless of the extent at which you want to have them nearby. Hiking is a continual learning experience and definitely, there are some other tricks and tips that one can venture in to accelerate the drying process of hiking boots.

hiker_tying_hiking_boots

How to Keep Bears Away from Campsites: Tips for Coexistence with Bears

0

When it comes to bears proofing your campsites, the smell of food can be the main reason why a bear would want to go near your camp. Food is apparently the bear’s only most effective, inspiring force on a daily basis, therefore, an essential part of every camping should be knowing how to keep bears away from campsites.

Smell is simply the main factor that we worry about here. The American Association for Bear affirms that a mountain bear’s smelling sense is amazingly keen – seven times more effective compared to that of dogs – and can detect scents from a couple of miles away.

Brown Bear near a tent

You need to dispose as much food-like odor from your campsite as could reasonably be expected. However, even before you take off into the woods, there are some important things you need to do in order to have a bear-free camping trip.

Tips for keeping the Bears Away from Campsites

Do you want a bear-free camping trip? If yes, then you need to follow the steps below.

Two adults setting up the tent

These steps will help keep bears away from your campsites:

  1. Find a good campsite: You need to locate a good campsite that bears don’t like to go near. If possible, pick a location that will be in the opposite direction of where your cooking area and food stores will be, that is far from natural food sources such as berry patches, and is obviously a campsite without any sign of a bear.
  2. The “bear-muda triangle” technique: This technique involves maintaining a strategic distance between your sleeping area and your food stores, dinning and cooking area. The design usually goes in this form: you will make a triangular floor layout, with your camping tent in one region of the triangle, then your food stores in another region, and your dining and cooking area in the remaining region, with about hundred yards between each region. Your tent will likewise ideally be upwind of the other two food zones.
  3. Make a bear hang: If good trees are available, then utilize what is regarded as a “bear hang.” The main idea is to safeguard your food stores in a smell-free and waterproof bear pack, up and far from a bear, and additionally out of reach from the bear’s astute endeavors to move closer to it.: Keep in mind, bears are clever and have great memories. In the event that they have effectively gotten to the past, ineffectively built, bear hangs, they will attempt similar strategies once more. The standard approach is to hang your food up to 10 or 12 feet and 4 to 6 feet far from the tree’s trunk because bears can climb.
  4. Maintain a clean campground: No food should be permitted in your camping tent or sleeping region. Neither should any substance that may have the scent of food. No energy bar wrappers, toothpaste, snacks, garments that you put on while doing the cooking. Do the cooking and consumption away from your sleeping region. The cooking and eating region is a part of your campground as well, regardless of the possibility that it is a hundred yards away. It ought to be given a similar consideration that your sleeping region gets. Keep in mind, leftover foods need to be buried or burned well far from camp and water. Each spaghetti noodle and popcorn grain must be assembled and discarded.
  5. Wash eating and cooking tools quickly: Try not to hold up to tidy up after eating., make sure you do it immediately. Holding up to tidy up allows food scents to linger and be circulated. Bears can perceive food scents from a mile away. Also, try to discard your dishwater downwind and far from the eating region.
  6. Apply wisdom when choosing foodstuffs: For you to have a bear-free camping trip, then you need to be wise when choosing foodstuffs. Maple syrup and bacon most likely aren’t the best choice of foods when going outdoors in the bear community. Bears are pulled to the aroma of frying bacon in any event as much as we may be. Pick foods that don’t have much delicious smell!
  7. Have a separate set of clothes for different activities: You need to have a separate set of clothes for eating/cooking and the ones for sleeping. Food scents will stick to your garments, so have a set of garments for eating, and before you come back to your camping tent to go to sleep, make sure you change into your sleeping wears. Likewise, ensure that you change garments some range outside of your cooking territory. Sack your eating/cooking garments.
  8. Pack or discard everything that smells: Carry additional water/air proof plastic sacks to store smelly waste or, if you are able to do so properly and safely, then you can burn it. Pull your waste out and discard it in appropriate, bear resistant disposal units. In summary, keep a carefully clean camp – all of it. Keep everything from right from food to apparel, when not being used, in impermeable, smell restraining packs or compartments. Utilize the nature (trees, wind and so forth.) to your preference in safeguarding food and limiting scent.
  9. Bear Fence: An extra item that might be valuable to additionally stop inquisitive or hungry bears is an apparatus that is really intended to physically deter a bear from going near your campground. It is known as an Electric Fence and is promoted by UDAP, a bear deterrent and bear spray organization in Butte, Montana. The electric fence is lightweight and portable that you can just set up around the edge of your camp.

Camping Safely in Bear Territory

Most bears keep away from human. Numerous hikers never at any point realize that they passed near a bear due to the fact that the bear did a great job in trying to avoid them. Most experiences end with human and the bear departing in inverse bearings, without harming each other. Your danger of being harmed by a bear is lesser than your danger of being struck by lightning and much lesser than your danger of being harmed in an accident as you head to bear territory.

What follows are a few recommendations from bear specialists on what is needed to be done and how to act when camping and hiking in bear territory. Following these tips should enable you to lessen your hazard, however, keep in mind, there is no assurance of your well being. Each experience is remarkably similar to each bear.

Beach camping in the Great Bear Rainforest

The most significant thing to remember when outdoors in bear territory is, never give bears a chance to get your garbage, food or other attractive substances. Bears that figure out how to acquire food in campsites frequently turn out to be progressively strong and forceful in their endeavors to get these foods. They may destroy tents, vehicles and other property.

In uncommon cases, bears that figure out how to acquire human foods may even enter camping tents and attack campers, bringing about harm and sometimes demise. Bears that have this kind of behavior are normally executed by bear managers.

Clean dishes can attract bears

In case you don’t know, most bears are usually attracted to the items below:

  • All human foods
  • Garbage
  • Livestock feed and pet food
  • Cooking oils
  • Utensils and cooking pots
  • Unopened canned beverages
  • Fuel for lanterns and stoves
  • Insect repellents, lotions, cosmetics and toothpaste
  • Hummingbird feeders and bird seed

All the items listed above should be kept in a place where bears cannot access them. Such places include:

  • In a bear-proof food storage bag provided at the campground
  • In a hard-sided vehicle. Remember; tents, coolers, fly-up campers aren’t bear resistant
  • In a bear-proof backpacker food store

What to Do If You Encounter a Bear While Camping

The most significant thing to remember if you encounter a bear is, do not run! If you try to run, you might just trigger the bear’s savage impulses and if the bear wants to get you, it certainly will. A bear has the ability to run at 35 mph and cover up to 100 yards in around 7 seconds. Halt and placidly survey the circumstance.

If the bear doesn’t know you are around, gently leave the zone in such a way as to abstain from being detected by a bear. Try not to approach more intently for a photo or for whatever other reason. But, if the bear knows that you are nearby, know yourself as a human and converse with the bear in a quiet voice and raise arms out to the other side and move them gradually here and there.

Black bear in the forest

You need the bear to know rapidly and without uncertainty that you are a man and not a bear or some sort of prey creature. Avoid any eye contact with the bear yet do watch it in order to know the next thing it will do. The bear may flee immediately or it might take a gander at you and after that continue what it was doing before, or it might move close to you. The action you should take next will depend solely on the action the bear will take.

If the bear flees, walk toward a path, not the same as where the bear ran. Get away from the region so as to keep away from any other encounter. But If the bear takes a gander at you and afterward appears to disregard you, or keeps looking, however, does not withdraw or approach, step back while you keep conversing with the bear. Try not to turn your backside on the bear till you can’t see it and it can’t see you any longer.

Again, even if a bear appears to be unconcerned about your nearness, don’t approach more intently for a photo of better view. On the off chance that the bear approaches you, stop, hold fast. Stay cool and watch the bear for signs to its temperament or expectations. A cautious bear feels that you are a threat to it. It might woof, gnashing its teeth, snarl, weave its head forward and backward, use its front feet to slap the ground, charge abruptly or thwacks its lips and then salivate. It is worried by your nearness.

mother bear and three small and adorable puppies in the Finnish taiga

A bear that has this kind of behavior may act aggressively when defending cubs, food or personal space. A predatory or curious bear doesn’t make any noise, it will have its ears pointed forward and have all its attention concentrated exclusively on you in a quiet, non-disturbed way. If you have attempted to move down and the bear keeps on tailing you in a slow, intentional way and hints at none of the guarded animosity, you might need to attempt another approach.

Act aggressively in order to make the bear know that you aren’t an easy feast and that it wouldn’t like to upset you. Make yourself look as huge as could be expected under the circumstances, look at the bear, shout at the bear, get a huge stick and hit it at the bear if it comes near you.

Close-up of a bear's face

In the event that a bear acting along these lines assaults you, fight it back, concentrating your attention on the face of the bear. While wild bears are often a great deal less aggressive compared to mountain bears, most wild bear attacks are ruthless in nature. Some bear professionals now suggest that anyone assaulted by a wild bear should fight since the bear is most likely not acting protectively.

Facts About Bear Spray as a Means for Keeping Bears Away

Bear spray has proven to be extremely effective at repulsing aggressive or approaching bears and lessening the rate of human injury. Indeed, it is significantly more effective compared to a gun in avoiding injury. Statistics have shown us that individuals protecting themselves with firearms were harmed around half of the time while individuals utilizing bear spray often get away from injury.

Bear spray is a unique chemical arrangement containing 1-2% capsaicin. This kind of chemicals originates from hot peppers; thus making the solution to be very irritating to the eyes, throat, nose mouth and lungs. It incidentally renders the bear powerless yet causes no permanent mischief.

Using Bear Spray while Hiking

Bear spray is required to be released only at approaching, aggressive or charging bears. Try not to splash it on knapsacks, attire, tents or individuals; it isn’t a repellant such as a bug spray. If you choose to take bear spray along with you, then ensure you search for the following features in the item you buy:

  • An EPA enlistment number discloses to you that the item is a guaranteed bear spray and that testing has proven it to be viable.
  • The bear spray ought to have a base net substance of 7.9 ounces. Larger cans are far better
  • The bear spray ought to leave the can in an extending cloud and move out to no less than 30 feet.
  • The label on the cans should plainly state that the splash is for use on bears. Try not to utilize the spray as an individual protection item for individuals.
  • If you are planning on carrying bear sprays along, then read the producer’s directions intently and follow them. Rationally practice how you would utilize your bear spray.

How to Find Water in the Desert: Surviving the Heat and the Sand

0
Green Tree Surrounded by Weathered Bush on Brown Soil Under White and Blue Sky during Daytime

Deserts are lands that get at least 250 mm (10 inches) of precipitation per year. They are dry and hot in the day and very cold at the evening time. Therefore an essential thing you will require if you happen to find yourself in the sea of sand, should be knowing how to find water in the desert. The hot temperature in the desert will dry you out rapidly, particularly if you can’t really go away from the sun.

Deserts take about a quarter of the world today, and approximately a billion people now live in the desert. These lands get at least 20 inches of rain per year, which implies that finding clean water for the purpose of drinking and cleaning can be tedious and even unsafe, particularly when it requires trekking to a faraway spring or well. The issues may deteriorate if on-going weather change strengthens dry seasons and human actions, for example, irrigation absorbs most of the world’s available fresh water sources.

Photo of Brown Bare Tree on Brown Surface during Daytime

Advanced approaches to discover moisture are required. A few researchers are drawing motivation from the natural world, drawing different tricks from animal creatures and plants that have adjusted to living in dry areas. Others are thinking up their own one-of-a-kind techniques for gathering water from more subtle sources. Discussed in this article are the ways of finding the water in the desert. So read on and learn!

Searching for Wet Areas

Here in this section, we shall be looking at how we can accurately search for wet areas.

Brown Mountains Under Black Clouds

Just follow the steps below:

  1. Moderate the rate at which water is lost: Sun exposure and exercise will accelerate dehydration. Be careful whenever you look for water. Ensure you stay in a shady area far from the wind if it is hot outside. Keep your skin secured to lessen the loss of water as a result of sweat evaporation.
  2. Take after wildlife: A gathering of animals quite often implies the water is close by. Search for the accompanying signs: listen patiently to birdsongs and watch the sky for birds circling around, if you have experience with swarms of mosquitos or flies, search close-by for water, bees regularly fly in a straight path between hive and water sources,  watch out for animal creature trails or tracks, particularly ones pressing towards downhill.
  3. Search for vegetation: Thick vegetation and most trees can’t get by without a relentless water source. In case you are new to nearby vegetation, go for the greenest plants you can find. Both wide-leafed and deciduous trees are a common sign than the pine trees having a tendency to accommodate more water. In North America, search for cattails, weed, arrow, cedar, salt, hackberry, sycamores, willows and cottonwoods. In Australia, search for water bush, desert oak, needle-shrub or desert kurrajong. Watch out for eucalyptus (otherwise known as mallee eucalypts) that develops with numerous stems rising outward from a similar underground tuber.
  4. Look up valleys and canyons: Your most logical option is the canyon that remains shaded amid the hot dawn. This implies a southbound canyon if you are in the Southern Hemisphere or a northbound canyon in case you find yourself in the Northern Hemisphere. Discover these with the help of a geographical guide if you have one in your possession, or eyeball the encompassing landscape. Snow or precipitation will probably be held in these cooler canyons mostly after a major rainstorm.
  5. Discover dry stream or waterway beds: You can discover water simply under the surface most of the time. The best place you need to consider is a curve in the waterway located on the exterior edge. The streaming water may have dissolved this land down thereby causing a depression effect of the leftovers of water.
  6. Recognize promising rock properties: Groundwater gathers at the foot of and mountains partitioning lines of a landscape. In a perfect condition, ensure you dig where a hard, non-porous rock slopes underneath the surface. Soft stones as sandstone, can create holes that help hold water for some time after a rainstorm. In case it drizzled as of late, look along leveled areas of these kinds of stones, or at the highest point of rocks and disengaged domed outcrops.
  7. Discover sand ridge close to the shoreline: In case you’re close to the sea, the sand ridge along the shoreline may trap and channel the sea water. Burrowing over the high tide line may uncover a thin layer of water, residing on above heavier salt water.
  8. Discover high ground if you’re left with no other alternatives: Climbing the high ground will give you the proper vantage level in order to search for the features discussed above. By the time the sun is getting low, search for a reflection glare on the ground. It might be in the form of a water body. In case you find yourself in a zone being used for cattle rearing, you may see features of artificial water below the gently inclining ground. Remember to take a pair of binoculars along with you if you are planning on going out to a desert. This can be more than a help to spot ranges where you might discover water from a long distance.

Burrowing for Water

Now that you’ve to know how you can successfully search for water, it’s high time we discuss how you can actually burrow the ground and gather enough water for survival.

Woman Burrowing for Water in desert

Let’s go!

  1. Pick a conceivable spot: Once you’ve gotten to a zone that appears to be encouraging, check for any surface of the water body. Most of the times, you won’t be that fortunate the very first time and you have to burrow until you get one. Here are the best zones to carry out this activity: the base of slanting rock features,  close thick vegetation holes, particularly where lumps and cracks may demonstrate tree roots, any place the surface soil feels moist, or possibly more clay-like, least point in the zone.
  2. Hold up until a cooler period of the day: Burrowing during the sunny period is unsafe and cause you to lose sweat to sun exposure. If you can patiently hold on, remain in the shade until there is a drop in the temperature. In the early morning, groundwater has a tendency to be close to the surface, particularly in vegetation zones.
  3. Search for dampness under the surface: Burrow a thin hole around 30 cm (1 ft) deep. In case the ground is still not wet, proceed to another spot. If you see any soggy soil, proceed to the subsequent stage.
  4. Expand the hole: Expand the hole until it reaches around 30 cm (1 ft) in diameter. You may see water leaking in sideways, yet get done with burrowing regardless of the possibility that you don’t.
  5. Hold on for the water to gather: After a couple of hours or toward the closing of the day, come back to your hole. If you find any water in the soil, wait for it to gather at the hole base.
  6. Accumulate the water: In case the water is hard to get to, drench it up with a fabric and press it into a makeshift container. Gather all the water immediately. Water holes can exhaust quickly while in the desert.
  7. Purify the water: If possible, ensure you disinfect the water before you drink it. Sieving it using an anti-microbial filter, applying iodine tablets, or even heating the water up, will help to expel every single microorganism.

Waterborne diseases may bring about diarrhea and vomiting, which get you dried out quickly. In any case, these diseases frequently take a couple of days or weeks to bring about genuine side effects.

Drink the water now in case there is an emergency, and visit the specialist when you’re back on track.

Other Places to Discover Water

Apart from burrowing the ground for water, there are still many water sources available in the deserts.

Prickly Pears on Cactus

Some of the are discussed below:

  1. Gather together dew: Search for dew drops on plant vegetation before the first light. To accumulate it, hover a permeable fabric over the dew and squeeze it into a container. In case you don’t have any permeable fabric, improvise one by forming a bunch of grass into a ball.
  2. Look in tree hollows: Dead or rotten trees may still contain some amount of water inside their storage compartment called “trunk”. In order to get into the little tree openings, you need to tie a fabric around a stick and insert it through the tree opening to soak up water. Insects and Bugs entering into a tree opening might be a water indicator.
  3. Search for water under and around rocks: Rocks slow down water dissipation, so dew or water may tend to wait around them for quite a period of time. Because the stone base is much cooler than the encompassing air, we have to turn over the half-covered stones in the desert before sunrise so as to make dew land on their surface. Check for scorpions and all other creatures turning the stone over
  4. Eat Cactus Fruit: These succulent fruits are eatable and contain enough water to supplement other water sources you may have. Gather the fruit with care in order to avert any form of injury. Roast them for about 30 to 60 seconds in a fire for the hairs and spines to be consumed. You can also eat thorny pear cactus pads too. They are really best when assembled still green in the spring and cooked. They are always hard to eat in other seasons.
  5. Gather water from eucalyptus roots: The eucalyptus is a conventional source of water in the Australian deserts.  However, it can be hard to access for an untrained individual. Every eucalyptus resembles a furrow of medium trees, developing outward from just one underground plant. In case you see a eucalyptus that corresponds with the above description, attempt to acquire its water as follows: burrow a root anywhere you see a crack or bulge in the ground or search for them at around 2 – 3 meters (6.5 – 10 ft) from the tree. The most encouraging roots are as thick as the wrist of a man; haul out the length of the root, severing it close to the trunk; break the root into small pieces 50–100 cm (1.5–3 ft) long; stand the roots vertically and allow the water to drain into the container; search for extra roots. There are generally 4-8 of them that are close to the surface.
  6. Drink barrel cactus water only if there is no option: Most waters inside the barrel cactus plants are toxic. Drinking them can bring about pain, vomiting, and even paralysis. Here is how to get the water: the only eatable barrel cactus is called “the fishhook”, found mostly in drainages just in the northwest Mexico and the southwest US. It’s around 0.6 m (2 ft) in diameter, with longer spines that end in a hook or curve. It might have yellow or red flowers at the top; remove the highest point of the cactus plant with a machete or other appropriate tools; squash the white interior part of the cactus into a mash and press out the water; limit the measure you drink. They usually contain oxalic acid and tastes bitter thereby causing bone pain and even kidney disorders.
  7. Wrap plants with plastic bags: Shake the plant to limit potential contaminants. Then, wrap them in a plastic bag, closely fixed around the stem. Cause the bag to weigh down with a stone to form an indicator for water flow. Return before the day ends to check whether the water has gathered, because of the plant discharging vapor.
  8. Test a strange plant with maximum precaution: If you have been left with no other options, you may need to look for liquid in plants that you can’t recognize. Take after these precautionary measures if possible: test just a single portion of the plant at a time. Flowers, buds, roots, stem and leaves may have distinctive impacts. Select a portion that produces liquid when it is being broken; select plants with strong or acidic scents out if you have different alternatives; ensure you don’t eat for 8 hours before the test; the last step is to touch the plant to check for any response.

What Water Sources are in the Abandon?

If you are short of water while in the desert, what other natural substances can you drink, and where would you be able to discover them?

  1. Search for sycamores, willows, and cottonwoods: These are some of the trees, mostly found in canyons where there is quite a lot of water in the soil. It might be that you climb to a forest of cottonwoods and there is a pool or spring of water or, you may need to burrow down a couple of feet along the roots and check whether it tops off with water in a dry year. These trees can be located from miles away and are known for their seriously splendid green foliage (contrasted with the dull green of a juniper or pine tree). I have additionally depended upon aspen trees located in the Great Basin Desert for springs search. Palm trees found in the Mojave Desert can likewise serve as a harbinger of water. These trees are regularly the destinations of desert springs in the Middle East and Africa.
  2. Northbound Canyons can frequently hold extensive pools of water: Perusing a topographical guide can help you with finding these, alongside investigating such Canyon from a long distance with the help of a good binocular.
  3. Focus on birds and insects when climbing: Gatherings of butterflies and bees can be an indicator of a nearby pool of water. Being aware of your environment can be of extraordinary advantage in discovering aqua.

cottonwoods tree in desert

Survival Tool

Luckily, there is a survival method for getting water from the driest deserts amid their most fierce seasons. It is usually called “the solar still”. It is a standout amongst many survival tools available and was created 40 years ago by two physicians working for the U.S. Bureau of Agriculture. After testing carried out by the U.S. Aviation based armed forces on the solar still in the Arizona desert, the result demonstrated that the still could spare your life.

solar-still-in-desert

The solar still operates under the general rule of the so-called “greenhouse effect“. Solar energy warms up the ground by going through a transparent plastic container. Dampness from the soil, then dissipates rises and gathers on the underside of the plastic container above. The still additionally can clean contaminated water. Truth be told, it gathers pure water together from pretty much anything. Indeed, even pee will deliver perfect, drinkable water.

Materials

There are just two basic components to develop the solar still. They are compartment – to gather the water and a clear plastic. A scoop or trowel, plastic tube, and tape are the optional components. The compartment can be a collapsible container, a vacant plastic bottle, a lightweight cooking pot or pretty much anything sufficient to contain falling drops of water. Even tin thwarts or a sandwich pack can be formed into a workable repository.

The sheet of clear plastic can serve as a ground material used under tents when thin painting or backpacking drop fabric. Both functions admirably the length of there are no tears or openings. This is the one thing that ought to be conveyed at all circumstances since there is no normal substitute available in the boonies. Some desert rats love to keep their plastic sheets collapsed inside a hip sack or as a major material of their emergency treatment kits.

vacant plastic bottles for solar still

A 6-foot length of adjustable plastic tubing, like the kind utilized in fish tanks, is an unimportant yet alluring expansion to the still material. This will enable you to drink aggregated water without expecting to break down the solar still, definitely influencing its proficiency.

Development

The best aspect of this life-sparing gadget is that for something that gathers water from apparently nothing, the solar still is incredibly easy to construct. Here is how you can successfully build one:

  1. Burrow a pit of around 3 feet deep and 4 feet wide. Make use of a burrowing stick, hand trowel, scoop or even your bare hands in the soft soil. Search for a depression where water may be gathered.
  2. In the middle of the pit, burrow another little opening sufficiently profound for the water compartment.
  3. Put the compartment inside, then run the tube from the compartment to the outside of the pit. If there is a tape accessible, tape the tube within the compartment.
  4. Cover the pit with the plastic sheet, equitably on all sides, yet not touching the base of the pit. Grapple the corners with rocks.
  5. Locate a little-rounded stone to put in the middle of the sheet, over the water compartment. This should centralize the plastic and control any fluttering that may possibly be caused by the wind. Tenderly push down on the middleweight until the sides incline to 45 degrees. In case the pit is burrowed deeply, this ought to leave the middleweight only a couple inches over the water compartment.
  6. Next, secure the plastic sheet edges with soils and rocks. Ensure there are no spots where dampness can get away.
  7. Close the tube end using a knot, or twofold it and tie it tightly.
  8. Within the range of 1 – 2 hours, the air inside the solar still will wind up noticeably soaked with dampness and start to gather onto the plastic sheeting underside. Due to the edge of the plastic, water will keep running towards the middle. Lastly, drops will accumulate and start to fall right from the apex into the water compartment

The solar still just takes around an hour to be fabricated. If developed accurately, it can generate about a quart of water per day.

Burrowing a pit for solar still

Furthermore, in spite of the fact that the palm trees might be perceptibly missing, you would have made your own one of a kind desert spring, faster than Hollywood could.

Final Thoughts

Most importantly, the exploration and the research carried out from the Grand Canyon by some scientists demonstrates that a man who is lost and short of water can still survive up to 48 hours in this situation if he knows how to manipulate his own sweat. So have a similar thought as a cowboy, take cover in the shade, keep secured, escape the wind and sit tight for searchers.

If you don’t want to do that and start to push yourself looking for water in the warmth of the day, you could eventually drop dead as a result of warmth stroke in a matter of 3 hours for trekking. Therefore, if you’ve told someone you’re hiking arrangements, sit tight and hold on for assistance.

Landscape Photography of Desert Ground at Daytime

How Far Do Mosquitoes Travel: How to Avoid Mosquitoes When Backpacking

0
Black White Mosquito

Mosquitoes can be a nuisance if you happen to encounter them during your backpacking or camping trip. They cause itching and due to  their irritating bites, you can have a lack of sleep. No matter how you had planned your trip, it can end up being ruined by those small yet irritating creatures.

So, how to prevent that? Using mosquito repellent will help if there aren’t too many of them around, but if you happen to find yourself near water, where there are swarms of them, the repellent won’t help much.

How Far Do Mosquitoes Travel

So, how far away from water do you have to be safe? How far do mosquitos travel? Keep on reading to get all the answers. But first, a few facts about those pesky little insects.

Facts about Mosquitoes

Mosquitoes depend on plant juices and nectar for nourishments and survival; they suck blood to provide protein for their eggs. This explains why only female mosquitoes are involved in blood sucking. Surprisingly enough, there are very few creatures in the world that do not harbor an abhorrence for these creatures. Their first choice source of blood is not from humans, but cattle, birds, and horses.

Therefore, they can be pretty dangerous for us because they carry some of the humanities deadliest diseases including malaria. It gets worse with the fact that they have an annoyingly strong ability to sense danger. If you want to kill them, they can feel your murderous intentions and take a flight within milliseconds.

Close up of mosquito adult

There is a wide range of mosquitoes, with millions available in over 3000 species worldwide. The best thing is that not all of these are known for biting. Only three female species are known to cause trouble for humans. These three species have the ability to transmit diseases. They are:

  • Anopheles– it causes malaria, elephantiasis, and encephalitis.
  • Aedes Mosquitoes– they carry yellow fever, dengue, and encephalitis.
  • Curex Mosquitoes– these are known for carrying encephalitis, filariasis, and West Nile Fever.

These three types have a mouth structure that allows them to bite and suck blood.

Furthermore, mosquitos have the ability to sense dinner when they are 50 meters away. They can travel up to 40 miles away looking for a meal. People who have high cholesterol levels and steroids in their blood stream, have a tendency to attract mosquitoes. Younger people and those who have blood type 0 are the most vulnerable to mosquito attacks.

Other factors that tend to attract mosquitoes include sweating and panting. These two act like a mosquito magnet and, therefore, you are exposed if exercising heavily in an area known to have mosquitoes.Mosquitoes hide in shelters, bushes, and farms, during the day, and become active only at dawn and dusk. Therefore, these are the time periods when you have to avoid them because a 2 hour encounter  with a swarm of these blood sucking little creatures, is enough to make you lose about 50% of your blood!

Mosquito on a leaf

Many people believe that mosquitoes die after their first bite like bees. But remember their bites are not for protecting the mission, but a feeding spree. If they died after their first bite, then would have no use biting in the first place. The only time a mosquito dies when biting, is if you squash her after her first attempt.

Also, they have little brains, but surprisingly enough, they have outwitted human beings for centuries. As much as they are a bother, they are preyed by lizards, bats, birds, spiders, and fish among other small creatures. Despite having a list of enemies, their population is too high to wipe out from the face of the earth. One female mosquito hatches up to a hundred eggs in one batch and after only one mating.

Places Most Prone to Mosquitoes

The largest population of mosquitoes can be found in Tropical regions, where you can find the widest varieties of mosquito species. The largest numbers can be found when the climatic conditions are warm and humid. During cold times, they go into hibernation. But, there are places where they are present throughout the calendar. Mosquitoes breed in wet areas and especially in stagnant water.

To avoid them, you need to keep off all wetlands, marshy areas, swamps, creeks, and rivers. They can also breed in a puddle as small as a bird bath or run-off ditch. Some mosquitoes require fresh water, when others reproduce in salty waters. Whatever the case, avoid any place with stagnant water. Fish ponds are nevertheless safe since the fish will feast on the larva.

Big group of Close up of mosquitos

Mosquitoes are attracted to animal smells. You should, therefore, be careful when visiting the zoo. You can either use the traditional mosquito repellent, or the modern sunscreen that is incorporated with a repellant. Since you cannot keep off your pet, make sure you regularly check your dog’s kennel and spray it often. This will keep you both safe from these irritating creatures. Another place to avoid, is a big crowd, since they are associated with carbon dioxide that is exhaled and sweat. However, it is uncommon for mosquitoes, to show up during the day.

Another important thing to know is that fruit and flower scents are strong mosquito magnets. If you have to put on colon when backpacking, it should smell different from those two. Or, you can avoid wearing any at all for your safety. Some plants, such as marigold, repel mosquitoes.

In case you have a kitchen garden with flowers, consider planting a few of these. They also tend to be attracted to dark colors. When buying your hiking gear and especially sleeping bags, consider buying luminescent materials. Knowing the things that can attract mosquitoes towards you is crucial in helping you keep them at bay.

Mosquito Range

The species determine Mosquito range. However, the most common distribution is between 1-3 miles. Other varieties spread to as far as 7 miles.

Genetically Modified Male

A hungry female mosquito will fly up to 50 miles, looking for an animal or human to feed on.

Means of Dispersal

New mosquito species can be introduced to areas where they aren’t indigenous, through various ways, including:

  • During transportation of cut flowers.
  • Delivery trucks, personal vehicles, and even aircraft.
  • Eggs and larvae inhibit water filled tires.

How to Deal with Mosquitoes

There are two ways you can handle mosquito bites, either by preventing it or treating a bite.

Avoiding the Bites

There is nothing that can disturb your backpacking trip on a summer afternoon more than a mosquito bite. This, however, doesn’t mean you should cancel your plans. All you have to do is not to expose yourself to these irritating insects.

vaseline on a woman's hand

To avoid an encounter with mosquitoes when backpacking:

  • Ensure that you have covered your hands and legs using light clothing.
  • Do not wear shorts when hiking in a mosquito infested area.
  • Get into the habit of hiking during morning hours and midday when these insects are less active.
  • Mosquitoes rarely like being in the hot sun. When hiking, you can keep your route in the opening and avoid going under shades as much as you can.
  • While sleeping, avoid using dark-colored sleeping bags or sleeping clothes, primarily black and blue. Mosquitoes are known to be attracted to these colors.
  • You can use anti-repellant lotions to keep them off.
  • Petroleum jelly is known to repel mosquitoes. Apply it to every part of your uncovered skin when going to sleep.
  • Since mosquitoes are attracted to lactic acid, which is found in sweat, make sure you always take a shower before going to bed.
  • Citronella plants are good at repelling mosquitoes. In case you are hiking in a place where they grow, cut a twig and put it near your sleeping bag and you will enjoy a quiet night.

Dealing with the Bites

Avoiding mosquito bites when you are outdoors is not 100 percent possible. There are still chances that you will encounter them and especially at night.

antihistamine products on the table

You can mitigate the bites by doing one of the following:

  • Place ice cubes on the spot where the mosquito bit you, and avoid itching as much as you can. Sometimes the bite is made worse by the constant itching, which can at times lead to infection. Funny enough, other animals also experience the itching after a mosquito bite, it’s only that they do not complain much as humans do.
  • Use antihistamine products to lessen the bumps and the itching after a mosquito bite. You should use these products before going to sleep since they are known to cause drowsiness.
  • The calamine lotion is also a good solution for treating mosquito bites.
  • Always make sure you keep the bites as clean as possible by washing them with anti-bacterial soap. By doing so, you reduce the chances of infection. Rubbing the spot using bar soap also lessens the urge to itch.

Getting Rid of Mosquitoes

Mosquitoes are hard insects to get rid of. In addition to their thousands of species, their breeding rate is also very high. Weather changes don’t affect their breeding patterns. During the winter, they seem to disappear, but in the real sense, they are usually in the larvae stage. By the time summer comes, they are already mature and flying all over, causing a nuisance.

Even if you cannot get rid of mosquitoes, you can try to control their number and minimize the chances of these insects ruining your camping trip. There are people who seem to attract mosquitoes more than others. This attraction is caused by the smell of your sweat, which in most cases, is affected by what you have eaten.

garlic on the table

For instance, if you eat a banana and another person eats garlic, mosquitoes will be more attracted to you than the latter, this is because garlic acts as a repellant. Since you cannot avoid bananas or eat too much garlic while hiking, why don’t you try to make your own mosquito trap?

Requirements

  • 2 cups of water
  • A knife
  • Pinch of yeast
  • An empty two little soda bottle
  • Four tablespoons brown sugar
  • Black construction paper

Instructions

  • Cut the soda bottle into two halves, where it starts to curve and keep the upper side as you will require it.
  • Place one cup of water on a stop, and bring it to nearly boiling before adding the four tablespoons of sugar and dissolving it completely. Then add the remaining cup of water to cool down the mixture. Once you are confident the mixture is cool enough, add a pinch of yeast. Doing this, makes the mixture produce carbon dioxide, which mimics the exhaled human breath. Then pour the mixture on the lower part of the cut soda bottle.
  • Take the upper part of the bottle, which you cut, and place it inverted on the top of the bottom part holding the mixture. Press it down so that it completely seals that bottom part. Make sure it doesn’t touch the mixture base, but it needs to be close enough. The design allows mosquitoes to fall into the liquid once they fly into the trap.
  • You need to disguise your trap to help catch unsuspecting mosquitoes. You can do this by wrapping the trap, using a black construction paper. Place the trap in any near water body; you can place it near your camping site before going to bed. The smell will lure the mosquitoes into the trap, leaving you to sleep in peace.

The trap is easy to make and highly versatile so that you can carry it every time you go hiking. You can also extend its use for your home. The best thing about this trap is that it is durable and can, therefore, be utilized for a long time.

Mosquito Homemade Traps

The only thing you need to do is change the liquid, at least once a week. Doing this minimizes the chances of mosquitoes breeding in the liquid.

Plants You Can Use to Keep Off Mosquitoes

There is nothing that can ruin your backpacking trip like a swarm of mosquitoes. They can deny you peace, both during the day and at night. Luckily for you, there a number of plants that are known to repel these irritating pests. You can use these plants either on your patio, gazebos or carry them with you while on a hiking trip.

  • Citronella– it has a sweet lemony smell and is commonly known for repelling mosquitoes. It’s strong enough so that it is referred to as the mosquito plant. Several mosquito repellant products include this plant as an ingredient. The best thing about it is that it doesn’t require lighting or spraying. It repels these insects while in its normal status.
  • Ageratum- the plant produces white or blue flowers which have Coumarin. Mosquitoes are known to fear these flowers more than anything else. The plant is up to 4-6 feet tall. It can, therefore, make a good part of your hedge near the patio. With it around, you are assured that mosquitoes will keep a distance from your home.
  • Marigolds– these plants are annual plants and are easy to grow. They are strong mosquito repellents and for this reason, they are incorporated in making mosquito repellant products. You can grow them in containers, patio or on a porch. They also come in different colors including blue, yellow, red, orange, and gold. Some are available in multicolor. In addition to spurning mosquitoes, marigolds are also very powerful in keeping off other insects away from your home.
  • Catnip– this plant is stronger than DEET, so have studies shown. It has heart shaped leaves and produces lilac, white, pink, or blue flowers. By planting this plant, you will kill two birds with one stone; keep off mosquitoes and make your cat love you more.
  • Horsemint plant– it has purple flowers and works just like a citronella plant. It has a lemony smell, which makes it add a sweet smell to your flower garden, in addition to repelling mosquitoes.

While going for hiking expeditions, you should consider picking the leaves or flowers of these plants to bring them with you. Crushing the parts will keep off the mosquitoes as much as carrying conventional repellents. You can also try applying the juice of these plants to prevent bites.

Ageratum plant

However, you need to try on a small part of the skin to see whether there will be a reaction.

Homemade Mosquito Repellant

Summer is way too beautiful to spend the day indoors, however, you do not want to be feasted on by the mosquitoes either. Even though there are a number of repellents that you can purchase, you can also make some, using ingredients readily available in your house.

Ingredients

  • Citronella Oil/ Eucalyptus oil
  • Hazel/ vodka
  • Apple cider vinegar
  • Lemon balm oil

Mix a third of a cup of apple cider vinegar, a third of a cup of witch hazel, and five drops of citronella oil. In case you do not have citronella oil, you can use eucalyptus oil, and you can also replace hazel witch with vodka. Mix the ingredients thoroughly in a spray bottle, and you are ready to go. You can carry the mixture even when going for hiking in a far place.

Ingredients for Homemade Mosquito Repellant

You can also use aloe Vera gel, sweet almond oil, clove, thyme, lemon eucalyptus, rosemary and peppermint. Mix the ingredients thoroughly. However, since essential oils are known to cause skin irritation, make sure you dilute using neutral carrier oils such as sweet almond oil. You can also use Neem oils as a repellant. Due to its unpleasant smell, consider using it during the day when you are busy hiking not at night.

Wrapping it up

Despite their small size, mosquitoes can be a nuisance and make your outdoor experience a nasty one. The worst thing is, that in addition to their irritating bites, they also spread life threatening diseases.

The only way to keep yourself safe is by using repellents and making sure you drain all water near your campsite. However, when going for hiking expeditions, covering your skin and using repellants might be your only option.

You can also do a survey on the area you are going camping. By doing this, you have a clue on the mosquito population of the area you are going to. This way you will be able to apply the right measures of protecting yourself.

Close-up of Mosquito

Ultralight Backpacking Tips: The Ultimate Guide to a Lightweight Backpack

0
a group of backpackers on the trail

All outdoor adventures begin with backpacking. Either you want to overcome a giant mountain or merely expediting in a forest, you will need some supplies to carry along with you right? Nevertheless, the volume of the provisions you require depends on the distance of the adventure. Veteran hikers know how significant it is to travel light when it comes to lengthier expeditions. Nevertheless, at the end of the day, too much load is one of the principal things that will drag you down in the course of a hike.

Ultra-light backpacking is a rather new theory. It started happening roughly in the past 20 years. Before that, most hikers would carry supplies as heavy as 70 pounds. After some time, hikers came to realize that having less weight in your backpack is a lot more efficient than carrying heavy loads.

At present, virtually all the hiking trails have campsites and stores along the way, which allows campers to get more supplies as they travel. Now, why will you decide to carry that much load on your next outdoor adventure, when you can go light and burst forth the road just like a mountain lion?

When going for adventures that may take days or weeks to complete over rocky terrain, reducing the total weight of your backpack to less than 21 lbs for holiday expeditions and less than 31 lbs for any trip longer come with some benefits.

An ultra-light load denote less sore, pains, and aches, and also makes it probable to walk in running shoes lightweight trail rather than heftier hiking boots (because one pound joined to the foot is the same as adding five pounds to your backpack). With an ultra-light backpack, you will be capable of traveling around more easily and get to where you are going quickly.

Women hike the Pacific Crest Trail

Now to the main question, how precisely do you reduce your burden? The best approach is, to begin with, the basics, what are the important things you cannot leave at home? You know your backpack is important, the shelter you plan to use, and the sleeping bed you will use to sleep.

These are what we think are the essentials, but you are free to think it over again what your important items are taking it one step further. The strategy is to stabilize your well-being in camp with the same on the trail; don’t be surprised if you get to discover that it is possible to be comfortable with a reduced amount of load.

Things to consider for an ultra-light backpacking

Backpack

According to the general beliefs of ultra-light backpackers, your bag needs to be as light as possible. So, given that you will carry fewer items, you will need a smaller container for all the elements. When you want to purchase a backpack, look for the ones that weigh around 1 pound which you can find on Amazon or other websites that sell camping items.

You should not buy a pack that increases your load weight by 3 lbs or more. You can achieve savings both by decreasing the magnitude of your backpack and by picking a bag with lightweight production (lighter materials, zippers and fewer pockets, etc.). If you are carrying loads less than 14-21 pounds, contemplate a backpack without a frame, and you will be capable of reducing your pack weight below two lbs.

Man with a backpack walking on the trail

But weight is not the only issue in selecting a bag. Frame Backpacks assist in distributing your cargo weight to take the burden off of your shoulders, frame packs frequently come with broader, more comfortable strips than ultralight packs without frames, and many contain ventilation functions that have been enhanced. Several people also discover a loftier backpack to be less bulky and have a superior balance than a small backpack with a full core compartment and things tied around the exterior.

That apart, some ultra-light hikers fancy walking with a reduced frameless backpack to force them to leave unimportant things at home to keep the weight of the backpack down. At that point, they use different methods like moving their packs from one shoulder to another shoulder for improved aeration and comfortability or bring loads lightweight enough (probably under 15 lbs) that the thin straps are not a problem.

Shelter

The moment you need to take your tent in your rear, particularly for longer days, your meaning of shelter is possible to vary vividly, and going with a light backpack has many benefits. If the weather conditions are dry, temperatures go up, and insects are not a problem, you can go devoid of shelter. Just tie up a hammock, or extend your bag outside. If you fancy your privacy or shelter away from the sun or some other components, a frothy tarpaulin is good in these situations. If insects are a problem, you can make a small shelter beneath the tarpaulin that makes use of your poles to hold up the shelter.

The ZPacks Altaplex Shelter

With an abundant of tents on the market now weighing 3 pounds and below, an ultra-light tent is a feasible alternative option. Ultralight tents are a tad heavier and undoubtedly more costly than simple options, but they give the most privacy and security, mostly in winter. If you later decide on a tent, it is advisable to leave the foot-mark at home since it is not important, and you will save extra weight. But, if it seems like the weather is going to be favorable, you can leave the rain fly at home too.

Sleeping bag

Similarly to a shelter, how a sleeping bag functions, are the first thing that needs to be taken into account. It is essential to sleep in a warm bag as you need to save enough energy during hiking. Alternatively, you should not get a sleeping bag that is much warmer than needed because; warmer bags will only mean more weight to carry. All birds depend on down in order to be warm in the forest, which should be the same for you too. It is by far the warmest choice of insulation; it is one of the most compressed and also the most resilient insulation type. You can endeavor to give additional cash in just one area if needed, make sure to procure a down bag with a high fill number even if it takes paying extra because down bags are the best.

PHD Minix Sleeping Bag on the Grass

One downside of down sleeping bag is its capability to provide warmth when it is wet, because almost all down bags come with coatings on the exterior fabric which repels water, and some firms are producing the down in a way that it resists water, allowing it to stay insulated even during wet conditions. By using a down sleeping bag in place of a synthetic sleeping bag, you can save up to a pound of the load.

The down bag’s ability to compress permits you to store it into an angle of your pack, and its capability to rise back up repeatedly certifies, with appropriate maintenance, that the sleeping bag maintains its softness and warmth all through your outdoor adventure trips.

How Do You Manage Food, Fuel, And Water?

Consumables are a large factor when on an outdoor adventure and this is where most hikers go wrong. It is a fact that you cannot go hiking deprived of energy. But, it does not mean you should overstrain yourself. Most outdoor adventure and mountain destinations are well prepared these days, and you can quickly more supplies as you go. There are conventional sources you can get water on the trails and places to get some food to eat.

We have provided some tips below that will help you manage your food and water:

Water

Water is the first and most significant item on our list. You should on no occasion bring with you more than one liter of water (except you are hiking in summer). Also, make certain to drink a lot of water when you are at the springs.

Woman with a water filter system

But, you might need to treat the water as food, by drinking sufficiently at once and small sips all through the rest of the day.

Food

Most people like to prepare big meals when they go hiking. Nonetheless, lightweight backpackers have a preference for efficiency. Backpackers know that meals should primarily serve a purpose and not desire. Always take energy rich food when you are on a trail because you will be deprived of energy constantly. You can even eat more than necessary, but make sure you eat food that can be prepared swiftly.

Greenbelly_in_hands of a man

Also, you can save some extra space in your pack by drying and packing the food by yourself. Industrial packaging can be too large for the backpack.

Fuel

You will mostly use fuel for cooking. In that respect, it all rest on how much you plan to cook. Maybe the best way out is to find other hikers and cook a meal with them. This way, you can use that same fuel for cooking without wasting it pointlessly.

Vdealen Portable Outdoor Backpacking Multi Fuel Oil Gas

There are several other ways to be effective with your consumables. Take, for instance, some hikers create a detailed plan and place food supplies along the road. Whichever way, you will need to prepare suitably and acquire all the required information concerning natural springs and shops.

Extra Methods to Reduce the Weight of Your Backpack

There are numerous extra methods to reduce a load of your backpack, starting from coming along with food that has been dehydrated to restraining your things to the ones that have various purposes only. You can reduce the amount of water you will take with you by constantly refilling your supply every time you come across a spring (make sure to purify or filter it before use though). Make sure to plan and prepare because they are significant; it is also essential that you are skilled in packing, carrying, and modifying your pack to be able to carry it for long and firmer.

Pack Your Things and Make Some Alterations

As you are going over the course of lessening down what things to pack in your bag, the first thing to do is load everything that you want to bring with you on your journey in the backpack; you should then attempt to carry the backpack and see how heavy it is first hand. When filling your backpack, the universal law is to move heftier objects to the center of your backpack and move them near your rear as probable. Store items in little spaces, for example, your cooking pot which is a great place to store these small items to make sure the items do not move while walking, which can affect the balance of your load.

If you notice that you need to tie too many items on the backpack exterior, you will have to work on reducing more of your load: as many objects dangling on the backpack will upset your load balance and stability. If you possess a backpack that is frameless, it is possible to enfold your sleeping pad in the pack to generate organization and protect your rear from the remaining things in the pack.

Man wearing an ultralight backpack

As soon as you have your bag packed, put it on and modify the hip belt. Your hips support the bulk of your bag weight, so it’s vital to get this set first. Then you can start changing the sternum, shoulder and compression straps so as to make your load sturdy for optimal balance. After your backpack is good to go, the next phase is to try out the backpack with a short trip on a local road with diverse landscapes to determine how heavy the pack is when walking. You can make adjustments to the straps as you walk if it is necessary.

You would be willing to reduce the weight of the backpack if your load seems unpleasantly hefty if you encounter any trouble writing your list before the above exercise. Also, play with the location of objects in your backpack to determine the easiest arrangement, in addition to that try diverse setting for different types of terrain. Some backpackers propose putting heftier items a little higher when you are on a smooth road to feel a bit less burdened, or lower for stability when on rough, bumpy terrain.

How  Can You Fit Your Backpack?

By choosing big indispensable things intelligently to decrease the weight of the backpack, packing your backpack resourcefully, and knowing how to arrange your contents for optimum comfort, you won’t feel heavy on your feet, and you will be able to go extra miles in a smaller amount of time on outdoor adventures. The best thing, however, is to know how many ‘necessities’ you can be able to leave at home. You might be amazed—and enlightened—by what you will find out.

Ultra-light backpacking needs some know-how. If it’s your first outdoor adventure, you possibly won’t know what exactly you’re doing. But, as you learn new things, you will be able to adjust and amend your routines accordingly.

However, even if you are a novice to the camping game, that doesn’t mean you cannot lose some weight. Newbies are commonly abysmal when climbing a mountain or hiking a trail, so they frequently tend to pack heavily. They will find the above tips more useful than experienced hikers.A shortage of physical planning is prevalent amid new adventurers, which is why you will appreciate the ultra-light outdoor adventures.

Lightweight Backpacks on the Ground in the Wild

Primaloft vs Down: Which is the Best Insulator?

0
Man wearing an insulated jacket

Spending the adventurous moments in the fluctuating outdoor temperatures and climates requires a proper planning and preparation in terms of insulated clothing or camping sleeping bags. From warm clothes to warm sleeping bags, these are the necessities that one should have in order to survive the inclement temperatures outside.

But then, what would you do when faced with the choice between synthetic and down insulating material? That’s not an easy choice to make unless you’re well-informed about the cons and the pros associated with each choice. We’ve provided the Primaloft vs Down review to help you select the best insulated fabric.

Primaloft vs Down

The bottom line with regard to the choice between synthetic and nature’s best Down is that no perfect answer applies to everyone. The choice solely depends on a personal preference of the wilderness destinations as well as the climatic and temperature conditions one wishes to hike or camp in. But we also have to take into account that there are various models of Down garments as there are different types of synthetic insulating materials. We will unfold such conditions and recommend the best insulating material between Primaloft and Down for such a condition. Let’s start by differentiating these insulating materials.

What is the difference between the Down and Primaloft?

The difference goes down to how these insulating materials were manufactured, and how performing are they in providing the wearers with, among others, warmth and comfort properties. We are comparing the man-made and the natural insulating material here. The victory might be obvious to others, but it’s not always the case that nature’s best materials can be all-in-one because there are some drawbacks as we will see below.

Primaloft insulating material

Primaloft is one of the best synthetic insulating materials, and it is characterized by ultra-fine microfiber. The ultra-fine fibers of this material are incredibly soft and lightweight. As a result, they provide the best warmth and comfort that mimics that one of the Down material. The other unique feature of Primaloft is its water-repellent feature that helps one to survive the snowy mornings in the mountains.

Many outdoor apparels such as the blankets, footwear, pants, hand-gloves, jackets, and the sleeping bags feature the Primaloft as the main insulating material. To know more about this insulating material, you may visit its manufacturer site.

Note that there are numerous synthetic materials characterized by their features. Nonetheless, their main aim is to emulate what the Down does. Primaloft, for instance, has evolved in the mid-80s as a response to the military requests to produce an alternative for the Down that can retain its loft and warmth in damp and wet climate conditions.

PrimaLoft Insulation Jacket

Today, this material prevails in many clothes, sleeping bags and outdoor shoes due to its lightweight, warmth, compressibility, water resistance, and comfort. Some people are opting for such materials due to their affordable prices and unshakeable warmth in wet conditions. However, that doesn’t mean that it is the best as compared to the Down-filled outdoor apparels. It depends on the conditions.

Down insulating material

The Down insulating materials come in different Fill Power ratings and grades. Generally, Down material has been derived from ducks and geese as the animals that dwell in the water. These animals, nature made them to withstand the harshest temperatures in water. As a result, humankind has seen that as the advantage to use their undercoating as Down to integrate into numerous garments to enhance insulation. Contrary to popular belief and perception, Down is not derived from the feathers of these animals but, their undercoating fibers.

Down has various Fill Power ratings, which are basically measured in cubic inches per volume. For example, you might a jacket with 550 Fill Power. Such jacket will be more insulated and warmer than the one with 350 Fill Power. The quality of the Down is tied to the Fill Power rating. The higher the rating the best the warmth-to-weight ratio and the more expensive it is to secure such garment. For ultra-hikers, higher ratings are the best companions, even though they are quite expensive.

Down insulating jacket

The tiny air pockets of the Down play a significant role in providing an unmatched insulation and warmth as compared to the synthetic garments such as the Primaloft. The trapped air space makes Down a super hero of insulation in many clothes and sleeping bags. That’s why a lighter Down-filled fabric is warmer than a heavier synthetic fabric. Moreover, the Down is more durable and compressible.

The above descriptions should now give you clue that what are the key differences between these insulation competitors. Let’s compare some of the key features that are prioritized for outdoor dwellings below. These are durability, water resistance, comfort and weight.

Features of outdoor dwelings

Durability

In terms of durability, Down-filled fabrics are more advantageous. Synthetic fabrics, on the other hand, gradually lose the ability to rebound when compressed after numerous uses. Their fibers tend to lose quality. Down, if well cared for, it can last you for many decades while enjoying outdoor activities.

A close up of the fabric of the Down Sweater Hoody

It is important to know how to care for such fabrics to extend their durability. Nothing synthetic seems to have more durability than natural fibers. But, you must invest for the high-loft goose Down if you want to enjoy more durability.

Water resistant

Some Down materials are not hydrophobic, and as thus the synthetic materials emerge victorious over them. Manufacturers can coat the Down fibers with water resistant features to enhance the waterproofness. In nature, Down performs poorly in water-resistant feature than the synthetic Primaloft. It is better if you avoid rainy days because Down takes long to dry and it performs badly when wet.

Primaloft-Water-Resistance

Primaloft, on the other side, performs well with water resistant properties. It is made of polymer fibers that are coated to repel water. The tiny fibers of the synthetic fabrics do not absorb water the same way that Down fibers do. So, for waterproof qualities, Primaloft jackets emerge victorious.

If you plan to go for skiing or hiking in areas that are frequented by rain, you better consider the Primaloft because of its superb water resistant feature and its ability to retain its loft and insulation even when wet.

Comfort

In terms of the comfort, Down is unrivaled by the Primaloft apparels. But we have to agree that the less-loft duck Down can be challenged by the Primaloft when considering comfort. Primaloft is also made light and warm to help you survive the cold temperatures. Its fibers are soft and bring more comfort. But if you compare it to the high-loft goose Down, it will be overcome.

Man wearing Primaloft jacket

Nothing compares to the feeling of being wrapped in a light and soft jacket or sleeping bag made of, for example, 850 Fill Power Down. But that comfort comes with a hefty price incurred to secure it. It is however a good investment.

Weight

This should be obvious that Primaloft materials cannot be as lighter as the high-loft goose Down because they have unmatched warmth-to-weight ratio. The higher the Fill Power of Down the lighter the weight. For ultralight outdoor devotees, high-loft or standard goose Down is a great and an ideal choice because it can pack small and can be compressed easily. If you plan to pack your Down-filled sleeping bag, it will be a cinch to compress and fold it in a stuff sack for long distance travels.

Triple-FAT-Goose-Down-Natural-Insulator

On the other hand, the synthetic Primaloft isn’t as light as the Down is. But it is still comparably light when we consider other synthetic garments. To provide more warmth, more volume is needed for synthetic materials. But you can still consider Primaloft even if you’re an ultralight hiker.

Breathability

Breathability is important in order to regulate the moisture between the fabric and the body. Down is also considerably breathable in that regard. It can allow perspiration to escape the body. But then it depends on the Fill Power rating. On the other hand, Primaloft is designed to be breathable as well and perform well in treating moisture when compared to Down.

Black-Diamond-Primaloft

Note that too much sweat is bad news for the Down fabrics because the micro-fibers absorb that sweat and it will take longer to dry. Once damp, it may lose its insulation and loft ability. The Primaloft will dry faster after letting the moisture escape through its pores. So, if planning to undertake any outdoor activity that is intensive and results with too much perspiration, synthetic fabric is the best choice.

These are the paramount features that help one to differentiate the capabilities of the Down and the Primaloft. They will help you take an educated decision that which outfit will be most helpful. We will help you decide below.

Which one is the best insulating material between Primaloft and Down?

In actual sense, it isn’t easy to declare either Down or the Primaloft as the best one generally because of the variable features they have. For instance, we cannot recommend using the Down-filled jacket/pants in damp or wet conditions, knowing very well that they perform badly. Let’s discuss their advantages below to help decide on your own.

Primaloft insulating material advantages

  • Performs well in wet areas → you can survive well in wet areas amid the morning dew or the downpours in the wilderness with the water-repellent feature of Primaloft jackets or sleeping bags. As already substantiated, the polymer fibers do not absorb too much water as does the Down material. As thus, it can take about an hour for a synthetic fabric to get dry completely after being rained on.
  • Retains warmth even when wet → even when wet due to too much sweat or during snowy day, you can still rely on the insulation ability of Primaloft to keep you warm. The Down loses its grip of power in wet conditions. The comfort and the warmth are affected until it is dry again after a long time though.
  • Breathability → in addition to performing well in ventilating the moisture, the Primaloft is highly breathable. Because its fibers do not absorb too much moisture, more of it escapes through. So if you like biking or skiing when you might end up sweating a lot, the Primaloft can be best suitable for such activities.
  • Less Expensive → If you are on budget, Primaloft garments may be the best selections for you. They are relatively cheaper than having to spend hundreds of dollars on high-loft Down. However, remember that Down is the best insulator all in all, except in wet conditions.

Two adults wearing Primaloft insulated jackets

Down insulating material advantages

  • A higher and incredible warmth-to-weight ratio → Down-filled garments are generally lightweight compared to their insulation counterparts. The higher you go with the Fill Power, say 850 FP, it is the lighter you go, and that comes with high performance and consequently higher prices.
  • Incredible comfort → synthetic materials, Primaloft, are not a match to an incredible comfort and loft offered by the Down materials. Natural supersedes synthetic fabrics with the fluffy softness.
  • Compressible → Down is highly compressible compared to the Primaloft. Primaloft is also compressible, but may not last as long as the Down does. As times goes on, Primaloft compressibility fades away, whereas you can spend decades with a high quality Down still being compressible.
  • Water resistance → some Down fabrics may be made to be hydrophobic whereby the water resistance is enhanced. In general, high performing synthetic fabrics such as the Primaloft can be more water resistant than Down.

Man wearing Canada Goose Hybridge Hoody

Given the above advantages, it transpires that Primaloft can be best suited for the conditions that are frequented by rainfalls due to the fact that it dries quickly if wet and has top notch water resistant feature. It is also performing well in treating moisture in case you perspire massively. The Down cannot overcome the wet conditions. Instead, it will get wet and then dry after a long time. The ultrafine microfiber of Down absorbs water. But note that there are various grades and ratings some of which perform well.

If you plan to go to dry places that are extremely cold, the high-loft Down is the best choice. It has the warmth you will need to survive such conditions in the wilderness. The micro-fibers can absorb your body heat and then keep you warm no matter how inclement the climate or the temperatures are. But should it rain, you better run for cover in your camping tent.

Different types of insulation

So, actually, there isn’t the best insulating material between the Primaloft and the Down. It only depends on your preferred conditions. If, for example, you go for skiing or backpacking in snowy conditions, go with the Primaloft because it dries quickly in case you get wet. If you go to dry areas that are extremely cold, go with the Down because it has the best insulation properties but fail to retain them in wet conditions.

Additional Tips

Whether you buy the Primaloft or the Down, you need to care for them in order to extend their durability. You can machine wash or machine dry the Primaloft garments with ease. But just beware of the strong detergents as they might degrade the waterproof coatings on the polymer. The best way is to follow what the garment label says. Many come with the care and washing recommendations. Nonetheless, no matter how frequent you care for it, it will fade in quality eventually than the Down.

To care for the Down, preferably use mild-detergents or Down-designated treatment products. Surely the manufacturer can help with such recommendations. Check the label of your garment. A well treated Down jacket or sleeping bag can last you many years to come, as does the duck and the goose. After washing it, put it in direct sunlight for quick a dry time. But do not wash it frequently.

Privus Insulated Jacket

If you know that you are going to hike or camp in the downpour-frequented backcountry, it’s best if you take your rain-shell with you and then use the Down or the Primaloft as the under-cover for warmth. Exposing your jackets to too much of rain can prematurely deteriorate its quality.

The Down is not hypoallergenic especially if you opt for the low quality Down such as the duck Down with low-loft. It can accumulate dust particles that can affect you. Primaloft is hypoallergenic. We recommend that you invest a lot in high-quality goose Down for better results as always.

Wrapping up!

From our review, it emerges that there is an obvious winner between high-quality Down and Primaloft. They all excel in different conditions. But in overlapping conditions such as the dry weather conditions, Down takes the lead with its superb insulating capabilities. The Primaloft was basically designed to mimic the geometric structure of Down.

The main advantage of the Primaloft is the best treatment of moisture and retainment of its loft and warmth when wet, whereas Down fails to. But then Down is for the ultra-hikers whose priority remains to be the best warmth-to-weight ration. With synthetic materials you will need a heavy garment to get the best warmth equivalent to the Down.

But we guarantee you that once you know the properties in full like we discussed above, you will be well positioned to take an educated decision. Primaloft is available in many outdoor apparels such as the trousers, gloves, sleeping bags and jackets. The same applies to Down. But when selecting Down-filled garments, you must take note of the various Fill Power ratings as well the grades. For example, a garment that says 85% goose down means that 15% of feathers was not removed during the manufacturing process. Rather look for 100% goose down for effective comfort and warmth.

Vulpine Men's Ultralight Quilted Jacket (Pic: Mark Bishop/Factory Media)