Home Blog Page 31

How to Make a Walking Stick: And Pass it On to Future Generations

0
Woman with a walking stick

Walking and hiking are forms of exercises. Walking doesn’t require any expense or equipment and is an excellent way for you to become active. Hiking and walking can help improve your stamina, confidence, and energy. It’s also an ideal way to cut on calories and reduce weight.

As a form of exercise, walking can help to keep the heart strong, reduce stress and give you energy.  When you are planning to embark on an outdoor expedition, be it trekking or hiking, or even walking in the mountainous regions, you need to have some trekking poles as they could help you traverse the outdoors with ease. If you cannot afford to buy one, or you are running low on budget, you should know how to improvise.

How to Make a Walking Stick

This article will provide a step by step guide on how to make a walking stick, so you can have an idea of how to go about the process of making your own trekking poles. A nice walking stick can become an excellent companion as you take part in your healthy walk or hike.

WHY YOU NEED WALKING STICKS

As bipeds, human beings spend a tremendous amount of time and energy maintaining their balance when standing or walking. Logically speaking, people balance their torso and upper body using just two points that come into contact with the ground – the feet. The act of balancing can be assisted using trekking poles.

Woman using a walking stick

Not only do walking sticks improve posture and balance, but also minimize the stress on the knees and the lower back. Other benefits of using walking sticks are as follows:

  • Improve upper-body workout – The use of walking stick requires lifting, putting it ahead and helping to support your entire weight with your hands as you move. When this process is repeated over the course of a long trek, it can be an excellent workout for your shoulders, arms, and your body, helping to burn calories as you move. Although you may not feel exhausted after using the trekking poles, the sticks will enhance the intensity of the workout.
  • Joint and back health – Walking sticks aid in redistributing the weight of your body. Instead of your entire weight coming down on the hips, knees, and the back, the sticks displace some of it from your back and lower parts of the body and supports it through the arms and poles themselves. This helps in minimizing wear and tear on the muscles and joints, which is very useful for people with back problems and arthritis. Walking sticks also create the right posture as you utilize them, particularly in the upper back. The right posture helps in distributing your weight safely and evenly, minimizing the risk of injury and enhancing the health of your back.
  • Improved balance and stability – When walking on the trail or an uneven surface, various objects and obstacles can make it quite difficult for you to maintain your balance. This can be problematic when walking in loose or soft dirt, going uphill, or stepping on the rocks as you walk. Trekking poles help in stabilizing your body and reducing the risks of slipping or falling. The poles also help on hills by offering stability, especially when you become fatigued and your balance and muscle strength become less certain.
  • Safety and impact reduction – When on the trails, poles act as extra feet on the uneven terrain, helping to minimize injuries. People who use walking sticks are less likely to lose balance, minimizing sprains and stress fractures. These sticks also assist in reducing knee strain, particularly when moving downhill. With every pole plant, you are removing 3-5% of the impact of every step.
  • Self-defense – Carrying a stick when on the outdoors gives you a sense of personal safety and added protection. Aggressive animals are less inclined to create problems if you are in possession of a stick. You can also use the walking stick to protect you against any attackers, pickpockets. Apart from that, the poles can be used to gauge the depth of river or swamp before you can decide to cross.

WHAT ARE THE DRAWBACKS OF WALKING STICKS?

Although there are numerous merits attached to trekking poles, these objects also fall short in some aspects. Some of the common drawbacks include:

  • Increased energy expenditure
  • The sticks can get caught up in the rocks, or tangled in the bushes
  • They minimize hand function
  • Walking sticks cannot be stored conveniently

Some guides complain that walking sticks lead to elbow pain, although this aspect is debatable. However, most of these drawbacks can be minimized or neglected. For instance, the increase in energy expenditure can be offset by decreased leg stress and increased speed.

Two adults using Walking Poles

A lot of outdoor enthusiasts prefer walking sticks without the wrist straps since it’s possible to quickly transfer to place both poles in one hand so you can use the other hand for purposes such as eating and phone operation.

FEATURES OF TREKKING POLES

  • Adjustable – Most walking sticks, especially those acquired in outdoor shops, can adjust in length to enhance the user’s stability on different terrain. The length of adjustment is about 24 to 55 inches. When going uphill, it’s advisable to shorten the poles and lengthen them when moving down the hill.
  • Shock-absorbing poles – These sticks feature internal springs which absorb shock when walking downhill. The good thing about this feature is that you can turn it off whenever you don’t need it. Shock absorption usually recommended if you have damaged or weak knees, ankles, or hips. This aspect adds to the cost of the trekking poles.
  • Standard poles – These walking sticks don’t have the shock-absorbing feature, hence are less expensive and lighter. While these poles do not absorb a lot of impact when moving downhill, they offer the same level of support and balance as the shock-absorbing sticks.
  • Ultralight – The ultralight walking sticks offer less swing weight, making them quicker and easier to move. This means less fatigue over the course of an extended hike. Another advantage of these poles is that they are easier to carry. The shaft material of a walking stick is a significant determinant of the overall weight of a pole.
  • Camera mount – Some walking sticks and hiking equipment incorporate a built-in camera mount below the handle to make it possible for you to use them as monopods.

Trekking poles locking mechanism

OTHER FACTORS TO CONSIDER

  • Baskets – Walking sticks feature a small, removable basket at the tip. Larger baskets may be substituted and used in a muddy or snowy ground.
  • Wrist straps – Most walking sticks make it possible for the user to adjust the length of their strap so as to create comfort. Models that have lined and padded straps can help in preventing chafing.
  • Pole tips – Steel or Carbide tips are usually used to create traction, even on the snowy ground. The rubber tip protectors prolong the life of the tips and also protect your equipment when the sticks are stowed in the pack. They are ideal for use in areas that are sensitive to help minimize impact to the ground. The angled rubber tips are for use on surfaces that are hard.
  • Size – If you are taller than six feet, choose walking poles with a maximum length of about 51 inches. In case you’re shorter than six feet, the adjustable trekking pole will be your ideal choice. If you are buying a fixed-length pole, make sure you have a size chart so you can choose a stick that is unique to your height.

Black Diamond brand poles on rocky ground

GRIP MATERIALS IN WALKING STICKS

  • Foam – This material absorbs moisture from your sweaty hands and is soft to the touch.
  • Cork – The cork material resists moisture from your hands, minimizes vibration and conforms well to your hand’s shape.
  • Rubber – This material insulates your hands from shock, cold, and vibration and, therefore, rubber is ideal for cold-weather activities. Nonetheless, it’s more likely to blister or chafe your hands, so it’s not recommended for warm-weather hiking.

Foam and cork are the two most popular grip materials for hiking

MATERIALS USED TO MAKE WALKING STICKS

Trekking poles or walking sticks have been designed from different kinds of synthetic and wood materials.

Burning rattan sticks

Some of the common ones are:

  • Rattan – This is a flexible, durable and a common material used to make walking sticks
  • Ash tree – A trekking pole made from this material is referred to as ashplant stick
  • Supple jack – This is a climbing plant which makes an excellent walking stick. It’s also referred to as a rattan vine, although it’s unrelated to Asian rattan palm.
  • Hercules plant – This material is called the devil’s walking stick.
  • Yew wood – This material is known for being shaped into bows, though it can also be utilized in crafting trekking poles
  • European Cornel – This is an excellent dense wood which makes a suitable walking stick. This material is used in crafting tool handles. It’s a tough and durable wood.
  • Carbon fiber – Most expensive trekking poles made from carbon fiber. Although it’s lightweight, carbon fiber is costly.
  • Titanium – This material is durable, but heavier as opposed to some modern materials. Titanium is well worth the price if you don’t consider its weight.
  • Aluminum – Heavier compared to carbon fiber, aluminum is also used to make the shaft of trekking poles. When looking to acquire one, ensure you go for a high-grade aluminum since the cheaper ones tend to snap or bend when used by a hefty individual.

STEPS FOR MAKING A WALKING STICK

If you are a hiking enthusiast or you just love to walk, a trekking pole can be a useful accessory. A walking stick helps to improve your balance, enhance your posture, can get your arms involved and can be used in clearing brushes and small obstructions.

And if you prefer a DIY walking stick, creating a practical tool becomes a point of pride. If the boy scouts can make their walking sticks, so can you. There are two parts involved in making a walking a walking stick:

  • Choosing and cutting
  • Personalizing your stick

CHOOSING AND CUTTING

Find an excellent stick: A suitable stick begins with an excellent piece of wood.

retama walking sticks

The shape, size, age, and sturdiness of the wood are all essential when it comes to picking the type of wood to use.

  • A perfect walking stick normally begins as a fairly straight piece that is about 1 to 2 inches in diameter. Make sure you find a stick is tall to your armpits (in the range of 55 to 56 inches). If you find something longer, you can trim it that that length.
  • Hardwoods are often the sturdiest and most manageable walking sticks. Suitable options include alder, maple, aspen, cherry, sassafras, among others.
  • Make an effort to find fresh hardwood, but do not cut it from a live tree. Enjoy nature, but don’t destroy it. If you search around, you’ll find the right stick which is still fresh but not living.
  • Do not go for the sticks with holes or signs of insect activity. Insect boring usually weakens a stick making it unsuitable for hiking or trekking. Moreover, if you choose a stick with insect activity, you may unknowingly transport the bugs into your house.

Trim the stick to length: If it’s a DIY walking stick, stand it on the ground and place it in front as you would do when walking. Mark the stick approximately two inches above hands or the height of your armpits. You can include some extra inches if you intend to include some decorative top carving.

pine for walking sticks

Cut the stick at the marked position using a saw of your choice. However, make sure you don’t use a power saw as this could easily take a finger.

  • If you are looking to size the stick for another person, make sure you take their measurements before you can cut a stick that fits their height. You can use a tape measure or a string to determine their length.
  • If you are making trekking pole for sale or making to give to unknown recipients, do not forget that 55-65 inch range is the most suitable length of the walking sticks.
  • Whittle off the bark – When making your stick, you may leave the bark on if it doesn’t bother you. However, most people love the feel and appearance of a stick that is stripped as this reveals a smoothed wood beneath. You’ll also want to trim off the bumps and twigs by cutting them off.
  • You may use a larger knife, a pocket knife, or even a plane to get rid of the bark. You may also use any other whittling tool you are comfortable with.
  • First, shave away the bumps and twigs, then begin removing the bark. Use quick, short, shallow stroke when shaving off the bark so as not to dig deep into the wood.
  • Make sure you whittle away from your chest, and your feet must be clear of the whittling motion. Any knot on the stick could force the cutting tool to jump and puncture or slice you. If you don’t have whittling skills, ask for assistance from someone with the experience.
  • Continue shaving the bark, until the bright surface beneath is exposed. Some sticks have multiple bark layers, so continue whittling until you see the wood grain.

Leave the stick to dry: Fresh stick is ideal for whittling and trimming, but dried woods offer more durability and rigidity.

Walking stick on a wooden working table

Patience is your best friend during this process.

  • The drying time will depend on some factors, including the type of wood used, the environmental condition, as well as personal preferences. The drying process can take weeks to a month.
  • Give the stick time to dry to a point where it becomes rigid and not brittle. Rotate the position from time to time or better yet, strap the stick into a place to prevent it from warping.
  • Sticks that dry quickly can become brittle. Therefore, it’s advisable to dry your piece of wood indoors. You may also want it cured in a covered location, such as an outdoor shed or a garage.

PERSONALIZING YOUR STICK

Add creative touches: If you love trekking and hiking, chances are you have seen hiking sticks or trekking poles with carved tops. Depending on your skill level, you can carve your patterns using a pocket knife or a woodworking tool.

Cedar Morel Walking Stick.

It doesn’t hurt to try. Remember, if you happen to mess up, you’ll just chop the stick off, a little shorter.

  • For some simpler form of decorations, you may choose to carve the initials of your name on the stick. To make this effect, you may use a wood-burning tool. However, regardless of the method you select, make sure you practice extra caution.
  • Additionally, you may find it of great value to carve grooves in the handle section of your stick. The undulating indentations you find on the steering of most cars can act as an inspiration, but spiral grooves around the handle can make comfortable grip as well.

Stain and seal the stick: After you are through with whittling, trimming, curing, and carving, the next thing you need to do is protect the stick so that your creation can last for a longer time.

Sealing and staining the walking stick

Sealing and staining the walking stick is optional, although it’s a recommended process if you want to enhance its appearance and durability.

  • Regardless of whether you are sealing or staining the stick, make sure you smoothen it using a coarse and then a fine sandpaper. Get rid of the dust using a rag or a piece of cloth moistened with paint thinner.
  • Apply a wood stain according to the instructions in the package. Expect each coat of the stain to dry overnight, and lightly wipe clean between different applications. The more the coats, the darker the finish.
  • Apply three coats of clear urethane varnish (or the recommended number of coats according to the package instructions). Lightly sand using an ultra-fine sandpaper and clean between applications.
  • Make sure the staining or sealing is done in a ventilated area. Ensure you have your gloves on and put on safety glasses and a nose protection for your breathing.
  • Get a grip – If you did not carve a grip on your stick, you could apply a grip instead, after you are done with the staining and sealing process. However, you also need to note that this is an optional step.
  • Practical and visually-attractive grips can be created from twine, leather, nylon, or braided rope. These components can be wrapped around the grip section and secured using small nails or pins. You may also opt for the adhesive gripping wrap that is used for golf clubs or tennis rackets.
  • You may also add a wrist list for an extra measure of assistance in enhancing the grip of your walking stick. Drill a hole above the grip section (before staining and sealing). Feed through a piece of leather or any other preferred material and tie the leather into a loop that fits comfortably over your wrist.

Protect the base: When using a walking stick, the bottom part usually undergoes the greatest wear, which can lead to splitting, cracking, rotting, or splintering.

retama walking stick

You can decide to leave the tip as it is or add protection to prevent these cases from happening.

  • Rubber caps used for walkers and canes are an affordable and easy solution. Look for the rubber caps in any outlet where medical supplies are sold. You may also opt for large rubber stoppers.
  • A copper pipe of short length can also be a suitable base protector for the trekking poles. Take an inch diameter of the copper pipe and carve the base such that the pipe just slides over its tip. Use a quick-drying glue to secure that pipe.

WRAPPING IT UP

Walking sticks are essential accessories when it comes to hiking and trekking. They offer a lot of benefits to the hiker including creating balance, enhancing posture, improving health, among others.

If you are looking to create your own trekking poles, make sure you follow the guidelines provided in this article. That way, you can own a DIY walking stick without having to spend a dime.

DIY walking sticks

How to Get Sap Out of Clothes: Make it Look Like New Again

0

Your hiking and backpacking trips have been successful. You traversed all sections of the outdoor including the Appalachian, and you accomplished all your objectives of the season. You are back home with all your equipment. Everything is intact except there is something that has been nagging your brain – how do you get the sap of your gear?

Since you have been outside for weeks, and you made a choice not to do your laundry until you went back home, you understand how difficult getting rid of the stain is going to be. If you face this kind of situation, you don’t need to worry anymore. This article offers a guide on how to get sap out of clothes. Before we can go into details, it’s important to understand what a tree sap is.

The sap is a substance you may never think of until it gets on your garment, outdoor cushions, or sleeping bag. While this substance seems to stick to everything, it’s quite difficult to get it out of fabric. The menace created by sap is similar to that of a chewing gum. Although there are chemical-based bottles on the market that can be used to remove it, most of them are costly, and their safety is questionable.

How to Get Sap Out of Clothes

With its goo-like texture, sap quickly adheres to anything it comes into contact with, from your hair and skin to clothing, cars, tents, and more. Although removing the sap from your clothes can be a tedious affair, there are some common household items you could use as stain removers. One of the greatest substance used to get rid of this stain is rubbing alcohol. This component acts as a solvent, breaking up and dissolving the sap. A step by step guide on how to remove sap from clothes will be provided later on in this guide.

WHAT YOU NEED TO KNOW ABOUT SAP

The sticky substance that seeps out of trees known as sap is an essential component of the tree’s life. It transports important nutrients, hormones, and water, which are essential if a healthy plant is to thrive. Damage, pests, pruning and diseases are the common reasons why plants ooze or drip sap. Nevertheless, certain tree species, naturally produce sap and are more susceptible to issues that result in excessive dripping of sap.

Trees that drip sap

When in the wilderness, it’s important to have an idea of the tree species that emit sap so you can know which ones to keep away from. Some members of the Aceraceae family, produce excessive sap; it’s the sap from the sugar maples that is used for the production of maple syrup. Sugar maple grows in the Sunset zones one through ten, and fourteen through twenty, while Japanese maple grows in zones one through ten, twelve and fourteen through twenty-four.

drops of water on green-pine tree

Belonging to Ulmaceae family, the elms release excessive sap when the bark or the limbs of the tree are wounded. Members of the Betulaceae family, birches release a large amount of sap that is harvested for different uses including as beer and as a syrup. Apart from that, the honey locusts, like the elms, will produce an abundance sap when the plant is pruned or wounded.

Trees which do not produce sap

Since most trees drip sap, every species is susceptible to leakage. Nonetheless, certain trees and plants are resistant to disease and pests that induce sap. Planting these kinds of trees will minimize the chance of sap problems from occurring. One of these trees is the English Oak.

Growing the Columnar English Oak

This is a hardy tree which doesn’t produce excess sap and is resistant to diseases and pests that induce sap leakage including fungus which causes Verticillium wilt. Another species is the Japanese snowdrop which reaches up to twenty-five feet and emits fragrant blooms. This pest-free plant is native to Korea, Japan, and China.

Pests and Diseases

Some pests can increase the likelihood of trees releasing an excessive amount of sap. For instance, the bark beetles lay eggs underneath the surfaces if tree barks. After the larvae have hatched, they bore through the trees, leading to the formation of tunnels. As a defense mechanism, the trees begin producing sap into the tunnels to prevent the pests from laying additional eggs. The excessive sap can be observed seeping out of the barks through the holes. The best defense against these pests is prevention; nonetheless, infected plants can be saved using insecticides by licensed applicators.

tree releasing an excessive amount of sap

Common garden pests such as aphids, scales, and mealybugs consume the sap and excrete honeydew which you may mistake for sap. If they are not treated, the honeydew will raise the likelihood of sooty mildew growth. The sap-sucking insects can be treated using horticultural oils and insecticidal soaps. Many diseases and fungi that attack plants or tree cause the seeping out of sap. A bacterial infection called wetwood commonly infects elms and causes the sap to flow from wounds or crack of the bark.

WHAT DOES SAP CONTAIN?

Many individuals are amazed when they see tree sap. As an outdoor enthusiast, there is a high chance you have seen sap ooze out of a tree. One question you may have asked yourself is; what does sap contain? Well, here is your answer. Xylem sap mainly contains water, hormones, nutrients, and minerals. Phloem sap mainly contains water, hormones, sugar, and mineral elements in it. Sap from trees flows through the sapwood that produces carbon dioxide.

Sap from a tree at a park

In other cases, the carbon dioxide leads to the buildup of pressure within a tree, and if there are openings and woods, the pressure eventually forces sap to drip from the tree. The oozing of sap can also be related to heat. In the early spring, when a lot of trees are dormant, temperature fluctuations can affect the flow of sap. For example, warmer weather creates pressure inside a tree. This pressure is what causes the sap to flow out of a tree through its injury or cracks. During the cold weather when temperatures get below freezing, trees pull water from the roots, replenishing the sap in the tree. This cycle continues to a point where the weather stabilizes and everything normalizes.

PROBLEMS OF SAP

Sometimes, trees experience unnatural blistering or dripping of sap, a situation that is caused by various factors including fungus, pests, and diseases. On average, nevertheless, trees don’t leak sap unless they are damaged or injured in some way. For instance, bacterial canker is a condition that affects trees that are injured, pruned, or contain cracks, allowing bacteria to get in through these cracks. As a result, the bacteria forces the trees to form a high sap pressure that forces the fermented sap to flow from outwards through the opening. The trees that are affected may have wilted on the branches.

image of bacterial canker on tree

Another bacterial problem is the slime flux which is characterized by the oozing of tree sap. Slimy-looking, sour-smelling sap leaks from the wounds or cracks in the tree, changing into gray as it dries. Insect pests such as borers are usually attracted to tree sap and mostly affect fruit trees. The borers can be present if there’s a gummy-like sap dripping on the top of bark and sawdust at a tree’s base. Root rot fungus exists when either a trunk is too moist, or the soil is overly saturated for a long period.

WHAT CAUSES EXCESSIVE SAP

A network of channels that operate in the same way as the vascular system carries sap that contains nutrients and water from the roots of a tree to its other parts. During the dominant era, deciduous plants withdraw their sap from the trunk and branches, but then in the late spring and winter, the sap is drawn from the roots.

A man Pruning the Tree

Dripping of excessive sap takes place because of mechanical injuries, insect damage, canker development, and pruning.

  1. Mechanical injuries: Mechanical damage to a tree by landscape equipment or storms can cause it to drip sap. Back-chewing animals and woodpeckers can also lead to sap dripping. The sap dripping may attract pests and provide suitable conditions for fungi to thrive.
  2. Pruning: A small portion of sap resulting from a pruning cut, doesn’t harm a plant. As time passes, the cut will heal, and the sap will stop flowing. Nevertheless, excessive and prolonged dripping, can result in the loss of vigor, susceptibility to diseases and pests, which eventually lead to the death of a plant.  Luckily, it’s possible to minimize the likelihood of prune-inducing sap by pruning at the right time. For instance, if you prune conifer during their dominant season, they won’t produce sap.
  3. Insect pests: If you own a garden, it’s imperative you take measures to ensure your plants are not infected in any way. The oozing of sap from a tree could be an indication of bark beetle damage. The sap gathers near the hole forming what is called a “pitch tube.” The production of excessive sap is often a defensive mechanism that plants use to protect themselves from bark beetle. When trying to solve the sap problem, you need to be careful, so the substance does not stain your clothing. Getting rid of the sap from your garment can be a tedious affair and will require the use of the right products, tools, and equipment.
  4. Fungal canker: Cankers are tree lesions or phloem, which are caused by a bacterial or fungal disease. Some of these cankers drip large amounts of sap that could cause havoc to your outdoor gear. Most of the bleeding cankers are as a result of the Phytophthora fungus. On the lower trunk of silver maples, dark brown sap oozes and is caused by the Phytophthora cactorum and other related fungi. The Sudden Oak Death which is caused by Phytophthora ramorum produces cankers that drip thick, reddish black sap. This fungus may also attack the big leaf maples. Irrespective of what fungi cause the sap, the substance can be a stubborn stain once it comes into contact with your clothes. It’s important to have to have some idea of how to get rid of the sap once it stains your clothes.

GETTING RID OF SAP

Now that we’ve learned a thing or two about sap and its causes, it’s important to look at some of the techniques you would use to remove the sap.

Hair and skin

One of the greatest ways to get rid of the sap from your skin is to use the nail polish remover or the alcohol-based hand sanitizer. Simply rub either of the substances onto the affected part and follow the process with soap and water. Utilizing grease-cutting dish soap or Crisco is also effective. There’s nothing that is as worse as sap getting in your hair.

Woman using nail polish remover

When that happens, you can use peanut butter to remove the substance. The oils contained in the peanut butter, help in breaking down the sap. This will smoothen the hair and make it easier for you to comb out the substance. Simply cover the areas with sap using peanut butter and use a dryer to soften the substance. Comb out and wash the hair as usual. Apart from peanut butter, you can also use mayonnaise. Allow it to sit for some minutes before rinsing your hair.

Removing sap from cars

You can use household items to remove sap from cars. One of the readily available products is the nail polish remover. However, care should be taken when using the nail polish as this could also remove the paint. Soak the cotton ball in the polish remover.

Rub the wet cotton onto the affected section in a circular motion. Rinse it off using hot water and baking soda (3 cups of water and 1 cup of baking soda). Wash the car after removing the sap. An oil-based solvent, mineral spirit, is a useful substance that can also be used to remove sap from cars. Soak the substance into a towel and rub onto the affected section of the car. Repeat the process until the sap is gone, and wash it as usual.

WD-40 Multi-Use Product

Another great product that can be used to remove sap from a car is WD-40. The mild solvent properties of the WD-40 can easily break down the sap. This substance is safe to use on most kinds of paint. Once you have used it, rinse it off using vinegar and water solution, and wash the car as usual.

Removing sap from wood decks

Do you have an idea of how to remove sap from wooden surfaces and the wood decks? As an alternative to the harsh, strong stain removers, you can utilize non-diluted Murphy’s Oil Soap. Pour directly onto the stained area, or apply using a mop. Allow the substance to sit for 10 to 15 minutes. Scrub the place using a brush and rinse. The solution softens the sap, making it easier for you to remove it from the surface.

Murphy’s Oil Soap

It’s important to note that Murphy’s Oil Soap works best on sealed or finished decks. Sap is often difficult to eliminate, especially after it has hardened. Nevertheless, knowing how to remove it using the common household products can make the task easy.

GUIDE ON HOW TO REMOVE SAP FROM CLOTHES

When tree sap clings to your clothes, it can take forever to come out. But there are two techniques you could use to get rid of the sap, and these are quite similar to removing adhesives. The most effective methods are, to dry the sap out to remove it, and to lubricate the sap, so you can get it out of your clothes. Having said that, here are two simple ways to eliminate sap from your outdoor attires.

Method 1

What you’ll need:

  • Hand sanitizer
  • Peanut butter
  • WD-40
  • Rubbing alcohol
  • Nail polish remover
  • Goof off
  • Cooking oil
  • A piece of cloth
  • Laundry detergent

Step by step guide

  1. Begin by getting a cleaner. As you select your remover, you should first know the type and color of your clothes’ fabric. Do not use a nail polish remover on colored clothes as this may destroy the color. If you still doubt, test out a portion of the fabric to determine whether the remover alters the color.
  2. Once you have selected a cleaner that fits your clothing in terms of color and fabric, put a small portion of it. After that, damp the piece of cloth and try blotting it on the sap.
  3. If the sap is large or thick enough, you can place the cleaner directly on the affected area. Spread the substance using your fingers.
  4. Before washing the clothes or putting them in a dryer, it’s imperative to ensure that the sap has been removed.
  5. If you can still notice some sap on the fabric, repeat the steps once more.

Peanut Butter for Removing sap from clothes

Method 2

What you’ll need:

  • Wax paper
  • Ice pack
  • Packaging tape
  • A piece of cloth
  • A plastic knife
  • Rubbing alcohol
  • Mild soap
  • Citrus-based remover
  • Water
  • Powdered laundry detergent

Step by step guide

  1. Position the section of your shirt or pants containing the sap. If the clothing can fit in the freezer, put it in for about an hour or two to allow the sap to become breakable. If the clothing is large and cannot fit, cover the affected sections using wax paper. Place an ice pack on the wax paper to make the sap brittle.
  2. Try moving the affected clothing back and forth. Also, try pressing the fluid so it can crack. Apart from that. You can scratch off the sap using a plastic knife. After that, wrap a packaging tape inside onto your fingers. Blot the tape over the sap to remove its smaller portions.
  3. You can also decide to apply some small portions of the citrus-based remover. You may also pick the same removers used in getting rid of stickers. Place the remover on the affected parts of your clothing and let it soak for some time.
  4. Additionally, you may need to use some rubbing alcohol on the garment. Make sure the clothing material is white so that the solvent does not dye or stain it. Gently blot this solvent above the sap, and allow it to dissolve
  5. You can put some small amount of soap or any other detergent on the dampened fabric. Wipe the clothing off, so the goo will come out.
  6. Rinse the clothing ad allow it to air-dry.
  7. Lastly, you can mix a thick consistency of laundry detergent in powder form with some water. Apply this mixture over the residue. Allow the mixture to sink into the clothing for about a half an hour. Wide off the detergent and allow the garment to air dry.
Scraping The Sap Out Of The Clothes By A Knife

ADDITIONAL SAP-REMOVING TIPS

Here are some pointers you may use to get rid of sap on your garment:

  • When placing your shirts in the freezer, make sure they are positioned correctly. Be careful to ensure the sap doesn’t come into contact with other parts of the material. Otherwise, this will only scatter the goo to other areas of the fabric.
  • If your shirt is washable in a washing machine, try washing it once the sap has been removed. Be careful to follow the instructions on your machine. If suggested, you may opt for hot water. Once you are done, allow the fabric to air dry.
  • If you are planning to place the clothes in a dryer, it’s important that you ascertain all the sap has been removed. If there are some remnants, the heat from the dryer will melt the sap and distribute it to other parts of the fabric.

Close-up of Tree Sap

FINAL THOUGHTS

Sap is just a substance you hate to have on your fabric. While this goo can cling to just about anything, it’s possible to remove it using the right techniques.

Fortunately, this article has provided some guidelines on how to get rid of sap. What you have to do is follow either of the two processes given if your clothes happen to get sap.

Cherry Tree Is Oozing Sap

So, did you find this guide helpful? If you still have questions, reactions, or concerns, feel free to air your view by posting on our comment section. We’ll be more than glad to respond to all your queries.

How to Clean a Sleeping Bag: Keep it Clean and Ready for Your Next Adventure!

0

Everyone who has ever used a sleeping bag is aware of the fact that they make your nights warm and cozy, thus, making your camping trip feel more pleasant. In certain weather conditions, sleeping bags are an inevitable and necessary addition to your backpacking or camping gear. Sometimes, we are only carrying them for their cozy features.

However, after a while of using it, you must clean it somehow and this is certainly not an easy task. Most sleeping bags are not machine washable, which makes it very hard for some users to maintain. Nevertheless, in this article, we will advise you on how to clean a sleeping bag, while maintaining its warming features and prolonging its life span.

How to Clean a Sleeping Bag

The first thing you need to know before cleaning your bag is what kind of material is it made of. If you don’t already own a sleeping bag, it would be good that you read this article before the purchase of a sleeping bag. After all, maintaining and cleaning a sleeping bag should definitely be considered as an important feature. The fact remains that synthetic sleeping bags are much easier to clean than down sleeping bags, but we have included instructions for each type of sleeping bag just in case.

Advices for cleaning your sleeping bag less frequently

Regardless of the material your sleeping bag is made of, it needs to be cleaned from time to time. However, if you try to keep it dry and clean during and after every camping trip you are taking, the cleanliness will last longer and you wouldn’t have to subject yourself to this process so often.

Clean body and clean clothes

After a day of hiking, backpacking or even hanging out in the sun with your friends you are not clean. Even though you might not feel sweaty, your body is eliminating the oils and dirt from your body through the pores, thus making your body and your clothes smell a bit. For this reason, if you have a water source nearby, don’t hesitate to use it before going to sleep. You will do your body a favor as well as your sleeping bag. Also make sure you change your clothes into pajamas or clean ones that you are going to use only for sleeping. Even though this sounds a bit hard to carry on your back, if it is possible, it is recommended.

Girl in a sleeping bag

Another good idea is not to apply sunscreen or any other body milk before getting into the bag. Even though at the time it might smell very good and even help deepen your sleep, these chemicals are known to deteriorate over time and they are causing your bag to smell after a few days or weeks, depending on the product.

An especially important advice considering your clothes, is to never sleep in the clothes that you cook. Although this is important for the cleanliness of your sleeping bag, it is vital to apply this if you don’t want a bear visitor in the middle of the night smelling you and maybe trying something more.

Always use a sleeping pad

A sleeping pad or some other type of isolation could go a long way if you want to clean your sleeping bag less frequently. Some grounds could be muddy or even a grass covered ground could get your bag dirty enough so that you have to clean it.

Man hiking in Sarek National Park in Sweden

Sleeping pads are also good isolators; this means that you could get a double usage with one item.

A bag liner

Bag liners are especially recommended for down bags. As you will see later in this article, down bags are advised to be cleaned as rarely as possible. For this reason, a barrier between your body and the sleeping bag could do the trick. It will absorb the dirt coming from your clothes and you could only wash the liner instead of the whole bag. Sleeping bag liners are even a better option than carrying extra clothes with you since they are extremely lightweight and very suitable for backpacking. They also have an additional function of adding a few degrees to your body temperature.

Man in a sleeping bag smiling at the camera

Sleeping bag liners are mostly used with down filled sleeping bags. If you have already purchased a down sleeping bag, make sure you also get a bag liner. There are different types of bag liners you could choose from. The silk and cotton sleeping bag liners are the most common and best liners available on the market.

Cover your bag when it is not used or air it out

Leaving your sleeping bag directly on the sunlight could damage the fabric. It is also recommended to do so because leaving it uncovered will absorb dust and you will have to clean it more frequently.

A stiff breeze on Everest is one way to dry your sleeping bag

The best thing is to air it out, but if it is too much work for you, covering it will do just fine.

How to clean your sleeping bag

The care of the sleeping bag mainly depends on the material your bag is made of. If your bag is synthetic, you are in luck, cleaning it will require much less time and effort. Down bags on the other side require much more attention and cleaning instructions. If you feel like you are not up to the task, there are professional services which could take care of it for you.

Spot cleaning

Before proceeding to the full cleaning instructions of your sleeping bag consider spot cleaning it. If you feel like your whole bag is not for washing, but there are certain stains which you prefer not to exist, try the following procedure. For cleaning the shell of your sleeping bag you should first make a paste. The paste could be made out of a non detergent soap or baking soda based pastes. When applying the paste on the outer shell, make sure you stay away from the insulation and be careful not to wet the inside fill.

Cleaning sleeping bag with a toothbrush

The outer shell which is made from non insulating material require less frequent washing since they have less ability to absorb the sweat and dirt. Most sleeping bags could be spot cleaned only, most of the times, and they could only be fully cleaned and completely washed after the end of the season.

Washing a sleeping bag, full instructions

If after doing so, your bag still smells weird and it has also become darker in color, it should probably use a full washing. The first thing you should do is choose a place where you will do the washing. It must be washed in a tub or something similar which could fit the whole bag in a horizontal position. If you are washing a synthetic bag, this is optional. However, if you are washing a down bag, the horizontal position is a must.

It allows the feathers inside to align properly.  After filling the tub with cool water, add the cleaner which you are planning on using. The cleaner should be gentle, preferably a non detergent soap. If you happen to put too much cleaner inside, cleaning the bag would be even harder since it would become harder for it to be rinsed out and thoroughly cleaned.

After that, you should rub the dirtiest parts with your hands or with a brush. Whatever you do, don’t change the horizontal position of a down bag since you may reorder the filling and create thermal holes. After thoroughly rinsing out the sleeping bag, drain the water from the tub and press out the water that remains inside the tub. This way, the bag will be able to dry out faster and more efficiently. In order for this to happen, make sure you squeeze the excess water from the sleeping bag as much as you can.

Blue sleeping bag on the ground

When transferring it to the drying place, gather it up and don’t squeeze it into a ball. This is especially important if the sleeping bag is made from a down filling. If it is synthetic, feel free to squeeze it into a ball before transferring it to the dryer. When transferring, make sure you avoid ripping and straining the seams. This is very important for keeping the thermal properties of the sleeping bag. If the sleeping bag is very filthy and it has a specific smell, make sure you leave it soaking in water for 20 minutes before draining it out. This way, the bag will be able to absorb the smell of the cleaner and it will clean more efficiently. Repeat the rinsing process several times if the sleeping bag requires a heavy washing.

Two hikers on the mountains preparing cofee in the morning

If you are planning on using a dryer it should be large enough so that the sleeping bag doesn’t stay rolled up in a ball. If it dries out this way, there is also a possibility that the bag loses its thermal properties. However, it is best that you choose not to use a dryer and dry your sleeping bag on a flat surface. It is best that the surface is outside where there is a lot of aeration. If you are planning on drying it outside, it is best that you choose a sunny area with a partly shady spot because if it is too sunny it could change the color of the bag. And if it is too shady it could smell moldy if it is dried for a longer period of time.

Machine washing your sleeping bag

Even though machine washing your sleeping bag is not recommended, if you are in a hurry, you could manage to do so. This is only recommended if your sleeping bag is made from synthetic blend. If you choose to clean your sleeping bag in a washing machine, make sure there is enough place for the bag to tumble. This is necessary in order for the bag to be thoroughly cleaned.

If you choose to go with this option, keep in mind that the gentle cycle is the most convenient option. A gentle soap cleaner is also recommended. An interesting note is that adding a towel or some other cotton material would help balance the spinning cycle of the machine and your sleeping bag would be better cleaned. It is also recommended that you rinse your sleeping bag twice in order to remove all the soap residues from the bag. This way, you will avoid all the soap white spots which would potentially occur if you fail to do so.

Sleeping bag in washing machine

Important note: It is highly recommended that you avoid twisting your sleeping bag. By doing so, you are risking that lumps are created in the filling part of the bag. If you are intending on machine washing your sleeping bag, it is of vital importance that you check the label if this is recommended. If your sleeping bag is not for machine washing, by all means avoid this procedure.

Drying a sleeping bag

Drying your sleeping bag is a process which goes together with the cleaning process. It is equally important and if you get either of them wrong your sleeping bag would be destroyed. The sleeping bags which are made out of a synthetic blend could be hanged upside down on a washing line. However, the down sleeping bags are not recommended to be dried this way as they could create lumps. It is interesting to note that even though you wash a sleeping bag properly, by drying it the wrong way, there is a possibility that it loses part of its thermal properties.

Sleeping bag in the dryer

The other option at your disposal, is that you dry your sleeping bag by popping it into a large drier on a very low heat. This is also recommended for synthetic bags only. The very low heat is an important recommendation since the higher temperatures are known to melt some of the synthetic fibers, thus lowering the quality of the sleeping bag itself. This could cause the bag to lose some of its features, such as comfortableness.

Difference between synthetic and down sleeping bag washing

Since they are made of a completely different type of materials, they have various differences in their cleaning processes. The main difference is that down bags are almost never allowed to wash in a machine. Synthetic ones however are sometimes recommended to be machine washed. Other than this important pointer, there is also the dry cleaning recommendation.

The synthetic sleeping bags are not recommended to be dry cleaned since they are producing dangerous fumes during this process. This process could also cause the synthetic sleeping bag to age prematurely. Down sleeping bags, however, are made from completely natural materials, feathers and they are safe to be dry cleaned. Another very important difference is that synthetic sleeping bags could be washed in a warm water of up to 30 degrees. Down sleeping bags, however, are recommended to be cold washed only.

Big Agnes Haybro Sleeping Bag

Also, you should soak the synthetic sleeping bag in the tub for up to 4 hours, depending on the synthetic blend it is made of. Down bags, however, should be washed as quickly as possible with cold water and as little massaging the bag as possible. Every draining, massaging, lifting or any kind of handling it, while it is soaked is increasing the possibility of damaging it. They are very delicate for maintenance and if possible, it is always better to leave this job to a professional. The best you can do if you own a down sleeping bag, is to focus on the “Maintaining it Clean” part of this article.

The reason for doing so is because the construction of the down sleeping bags is very specific and it is made with an internal baffle construction. This means that your down bag contains mesh panels that put the down filling in specific areas in order to ensure that the warmth is reordered throughout the bag and there is enough loft and insulation inside.

Wetting it could cause these baffles to get damaged and your down sleeping bag will become just a low quality sleeping bag. Keeping your down bag dry is also important while you are camping or backpacking. Wetting it out on the field could cause the same consequences which would affect the insulation and reduce its warming and lofting properties.

How to Clean a Camelbak: Keeping Your Water Bladder Clean and Safe to Use

0
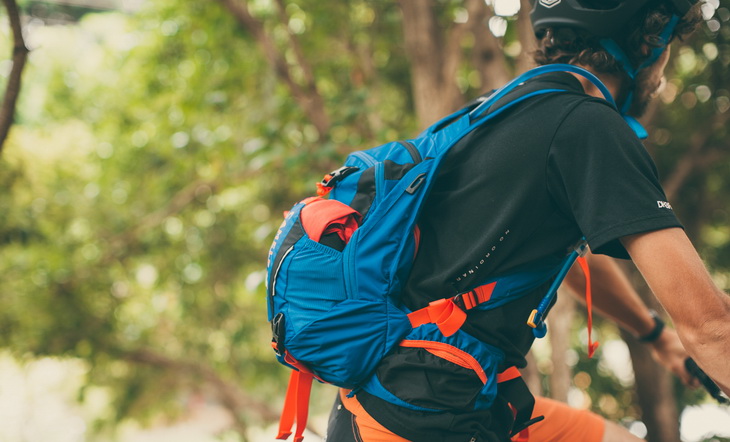
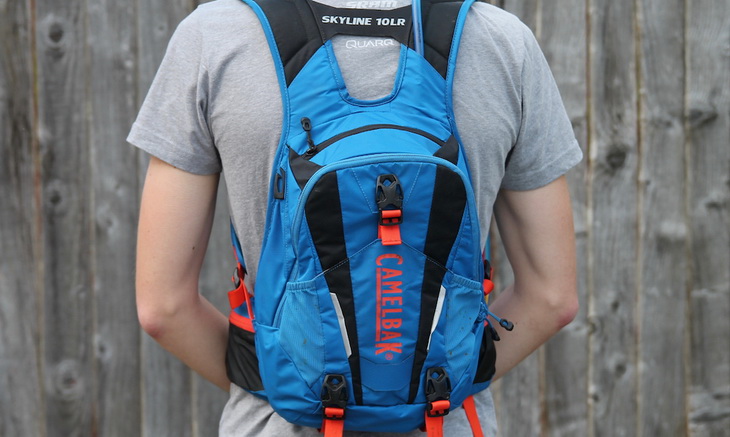
Man on a bike wearing CamelBak Skyline 10LR pack

Camelbak water bladder cleaning is necessary and should be done after every usage, whether you are utilizing the water bladder for camping, biking or hiking. If you fill the water bladder with some other drinks aside from water, it should be cleaned instantly after use so as to forestall the growth of microbes, discoloration or mold. Fruit juice left in a Camelbak water bladder can serve as an incubator for bacteria and mold and this is exactly why you need to know how to clean a Camelbak properly.

Freezing the empty water bladder between uses is ideal, but you need to be careful because water increases more when frozen. However, freezing forestalls the growth of bacteria if the water bladder is not totally dry before storing it. If any water residue remains in the mouth spout, it will definitely freeze and increase and expand the opening. This can prevent the spout from self-sealing. To avoid this, take off the spout before freezing the water bladder. Water residue left inside the tube could likewise bring about an extension when frozen. Make sure the tube is water-free before freezing.

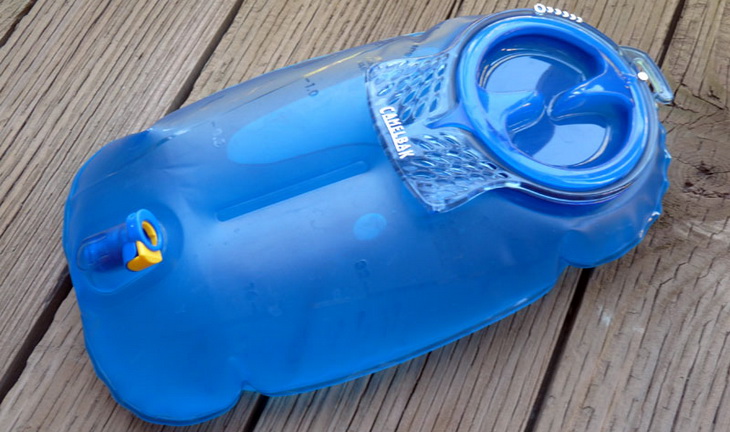
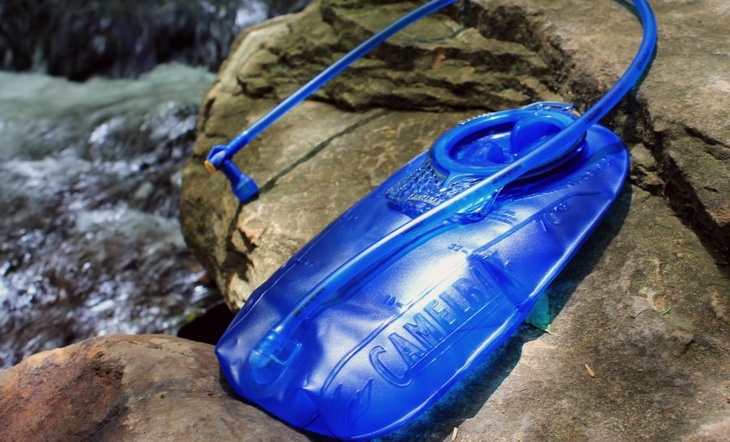
CAMELBAK Water Bladder

Figuring out how to keep a Camelbak clean, is an essential approach to Camelbak hygiene. Just in case you don’t know what a Camelbak is, in this article we are going to show you what a Camelbak water bladder is, and show you the best techniques and methods, with specific guidelines on the cleaning process and storing of a water bladder.

What Is Camelbak Water Bladder?

The Camelbak water bladder is a definitive piece of hydration gear, transforming any pack directly into a hydration bladder. The water bladder framework makes changing reservoirs easy. The Camelbak hydration bladder has a comfy low-profile fit. The hermetically sealed fill port, cuts bulk and weight in your pack, and the fast snap top enables you to fill the bladder with ease.

Remaining hydrated when hiking or camping, is absolutely important. If you turn out to be dehydrated, you are prone to falling sick or even causing harm to yourself. However, you can become dizzy, disorientated and end up getting worse or lost. Anyone who likes outdoor activities, knows how imperative this is, and will be accustomed to carrying water or other liquids with them. However, heat waves, losing your way on a hike, or just neglecting to take a drink, gets out the most experienced outdoors folks at times.

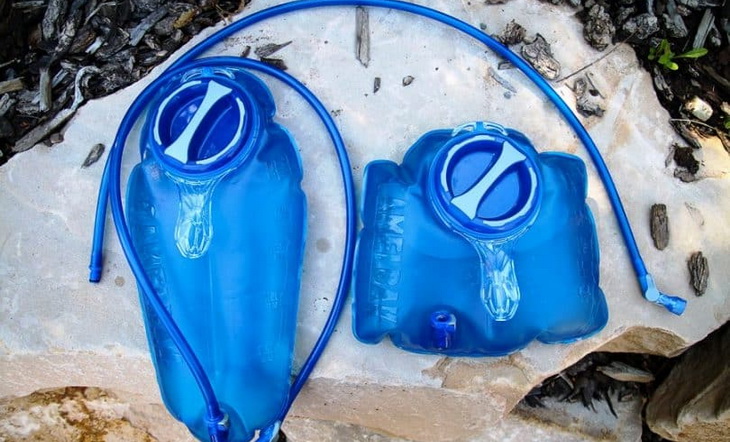
Camelbak Water System

The simplest solution for keeping liquid available to you most of the times, is packing a Camelbak hydration bladder. Normally utilized by athletes, and now by backpackers and hikers. Water bladders concealed in your rucksack, make the liquid available through a tube, all the time. However, could there be anything more awful than slurping down bacteria and mold chunks from the water bladder that has been residing in the trunk for many weeks?

Most likely, but we would prefer not to take note of it. Such water bladders are quite convenient, however, they can be whimsical with regards to sanitation. Leave it sitting for quite a long time, seven days, or since last hiking trip, and the organisms that develop inside could definitely kill a vulture. At that point, what is needed is a thorough cleaning process.

Cleaning a Camelbak Hydration Bladder

Camelbak is a trademarked brand that produces hydration bladders for hiking and climbing lovers. Every water bladder system is intended to enhance the hydration of hikers, with hands-free water capacity. A Camelbak hydration bladder has removable pack parts that require consistent cleaning: the water bladder, mouth piece and plastic hydration tube, and a sturdy textile pack. Intensive cleaning of every component will ensure a comfortable and healthy trip in the outdoors.

Ideally, water bladders would be drained, washed and air-dried, each time you utilize them. Nowadays, packs are removed and hurled in the storage room or secondary lounge of your car, until the next trip, which means it is already stuffed with a large portion of a packet of chews, and some drink the next time you held onto it. Definitely! While that may seem like an efficient win, it actually isn’t. Friends don’t give friends slimy water to drink—the stale chews are pretty much up to you.

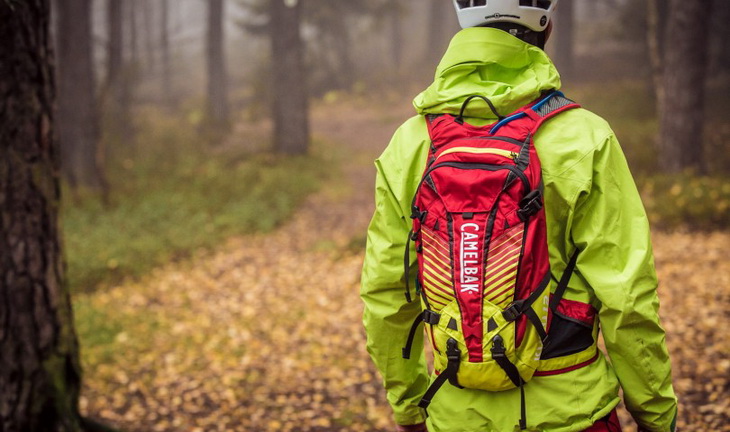
Hiker wearing Camelback-Kudus

Those stale chunks in your water bladder? They shouldn’t be there. However, they happen to be. So do mildews, mold and funky flavors—particularly if you include electrolytes or some other sort of drinks to your water bladder. Through consistent usage, your hydration bladder will amass debris and get to be dirty. The amassing of this debris can bring about mold and can result in sickness. These guidelines will guide you through the straightforward process of cleaning your hydration bladder in less than 10 minutes. Listed below are the materials required for cleaning:

  • Bleach
  • Measuring Cup
  • One-Eighth Teaspoon

Eight Steps to Follow

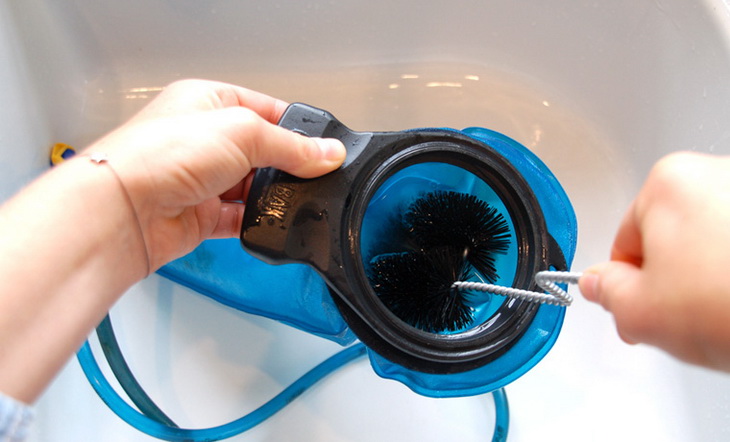
  1. Step one: Remove the bladder from the Camelbak pack. Rinse with water, both the inside and outside of the bladder with a small drop of fluid dish cleanser and warm water. Don’t use hot water. Utilize a froth paint brush or infant bottle to gently wash the inside of the water bladder.
  2. Step two: Wash the bladder with spotless, warm water and do the washing process again. Flush the bladder with water after every cleaning. After numerous cleanings, the water will definitely clear out the soap throughout the entire water bladder.
  3. Step three: Leave the opened water bladder out to air dry. Make sure the bladder is totally dry before putting it back into the Camelbak, keeping or utilizing out on the hike.
  4. Step four: Aerate and disinfect Camelbak water bladder all the time. Douse the unlocked water bladder overnight in warm water with two tablespoons of bleach. The following day, gently scours, wash and flush out the bladder until it is completely spotless. Leave the unscrewed bladder to totally dry.
  5. Step five: Stretch out the hydration tube for cleaning. Utilize a little measure of dish cleanser blended with moderate water and flush out the tube. Utilize a universally handy pipe cleaner or sponge to gently scour the inside of the water tube. Be mindful so as not to penetrate the fragile plastic tube.
  6. Step six: Flush out the water tube with spotless, cold water. For thorough cleaning, drench the hydration tube throughout the night with two teaspoons of bleach and warm water. Completely flush the tube and placed in a place to dry before storage and usage.
  7. Step seven: Hand-wash the fabric Camelbak pack in cool water. Utilize a mild soap to remove dirt, aerate and disinfect. Immerse it in the sink for close to 30 minutes. Flush the pack with cold water and hang dry. Do not attempt to put your Camelbak water bladder in the washing machine, because it will void the guarantee and most likely destroy the pack.
  8. Step eight: Reassemble the already washed, dry Camelbak parts. Hang them on a hanger and keep in a cool, dry place, (for example, a lobby wardrobe) between uses.

Person cleaning a camelbak

Bleach, White Vinegar, and Baking Soda

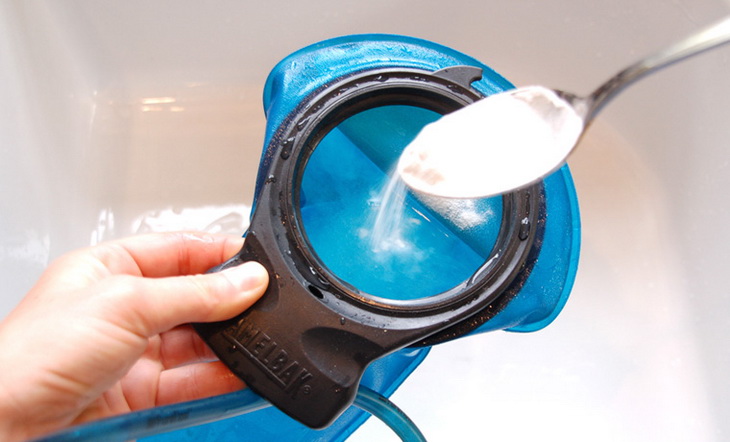
This is an ideal way to clean a Camelbak hydrating bladder. Baking soda prevents of foul tastes and odors from the plastic section of the water bladder. Make use of hot water together with bleach or two tablespoons of clean baking soda. Do not empty boiling fluid into your Camelbak water bladder; it can bring about damage. You can likewise include 1.5 ounces of white vinegar substance, which will execute germs, mold, and mildew.

Set up these ingredient solutions and put it inside the water bladder. The baking soda will bubble. After the bubbling has settled, make the solution sit in the water bladder for five 5mins. Lift the water bladder up slightly, over your head, and squeeze the bite valve. Make sure that the bleach moisture is uninhibitedly going through the bladder tube to clean and sterilize it. It is highly recommended to give the cleaning solution a chance to settle in the bladder for no less than 30mins before pouring out the bladder.

Baking Soda in a Camelbak

Clean the Camelbak hydration bladder with slightly warm or hot water and a mild cleanser. Always thoroughly wash off any cleaning cleanser or bleach content. If you have Camelbak brushes close by, utilize them to wash your tube and bladder. Brushes guarantee broad scrubbing of all the sections of the bladder bringing about a perfectly clean water bearer.

Air-drying your bladder subsequent to washing diminishes the chances of dampness getting caught inside, which give mold the chance to grow. If after intensely cleaning the Camelbak water bladder, and there are still some mold spots in them, then the Camelbak is permanently defiled, yet should be still safe to utilize.

Most of us are already satisfied with utilizing bleach to clean the water bladder, however, there are some other alternatives out there. Camelbak produces tablets that dissolve in water, like denture cleaning tablets. Most people utilize the baking soda, too. In the next section, we are going to take you through to the efficacy of hydraulics cleaning tablets.

Hydraulics Cleaning Tablets

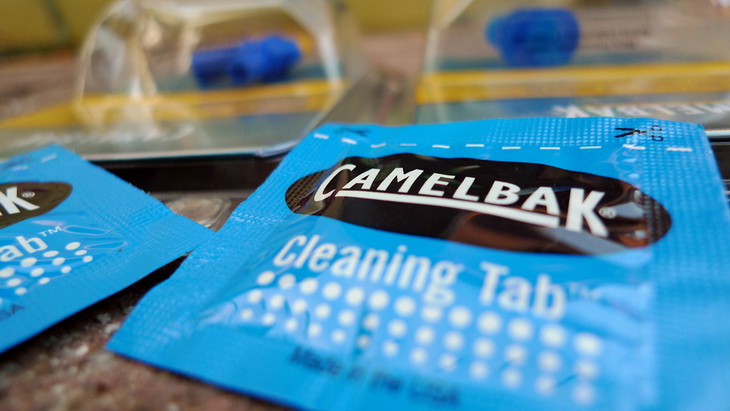
This is another ideal option for cleaning a Camelbak water bladder. Fill the bladder with moderately hot or warm water; do not use too hot water. Put one cleaning tablet into the bladder and cover the top. Leave the water bladder lying on its backside for close to 5mins. Shake the water bladder for 40secs for mixing and spreading the cleaning solution. Slightly squeeze the nibble valve and softly press the bladder to evacuate any gathered air. From that point forward, fill the bladder bite valve and hose with the cleaning solution. After 15mins, empty the cleaning concoction, and wash the bladder with spotless water. You need to be mindful when utilizing iodine or other disinfectant tablets since their longtime usage could add stain to the bladder.

Camelbak Cleaning Tabs

Fill the Camelbak water bladder with warm or somewhat heated water and a gentle washing cleanser; do not make use of boiling water or bleach. Take off the hose away from the water bladder and the nibble valve away from the hose. Utilize a little bladder washing brush to clean the inward area of the hose. Take off the silicone valve cover and the nibble valve. Clean them gently with a mild cleanser. Keep the bite valve and hose in ventilated region to dry; don’t place them in direct sun. Embed the drying rack through the top and into the water bladder and allow it to dry in a very much ventilated region.

 Tips and Warnings

  1. Try to use hydration cleaning tablets to help eliminate water bladder microbes. Camelbak water bladder and tube cleaning kits are accessible for procurement. Simply utilize water present in your Camelbak bladder, since sugary drinks enhance the growth of bacteria and therefore makes cleaning a Camelbak a more complex task.
  2. Be cautious when utilizing strong cleaning solutions, like bleach, on Camelbak parts, as strong solutions can cause damage to the plastic coating. Never utilize more than two tablespoons of bleach. Fully flush and wash all hydration areas after each usage in order to guarantee user security and enhance healthy outdoor activities. The components that uncover staining may need to be replaced.

Storing Your Hydration Bladder

The greatest threat associated with a clean CamelBak water bladder is the storage. You can keep a water bladder in a refrigerator, yet after some time, the steady thawing and freezing can harm the tubes and O-rings. What you need to do is to Bend a vinyl-secured metal garment hanger so that the two wings are in the same line with one another. String them directly into the bladder opening and the wings will support the bladder sides separately for drying. On the other hand, clip off the top of the wire in one arm side of the hanger and string the long flat piece directly into the water bladder. Hang it in a warm, dry spot.

After every utilization of the hydration framework, the pack is a no-brainer and we can either hang the bladder to dry or give it a plunge and a fast wash to clean. When dry, it can be easily kept. However, the issue begins with the bladder. While washing it isn’t an issue, drying and storing it will definitely be a potential wellbeing risk if not done in the right way.

If you enjoy cycling, mountain biking, hiking or any other outdoors, it is ideal to get a good hydration pack. Conveying your water in a Camelbak bladder kept in your pack keeps you hydrated and your hand free.

Man wearing Camelbak Skyline

The issue when it comes to using hydration bladders, however, is keeping it clean at any point in time. Attempt as you may, you won’t have the capacity to get most of the water out of the bladder when you return home. A breeding ground for microbes is stagnant water, and which will make water poured in your bladder taste crazy and with a possibility of becoming hazardous to drink.

Camelbak water bladders are not cheap, so you would prefer not to supplant them the moment they begin to smell bad. Things being what they are, how would you protect your water bladder and make it safe and clean? Here is a straightforward tip, to stay away from awful smells and more terrible microbes.

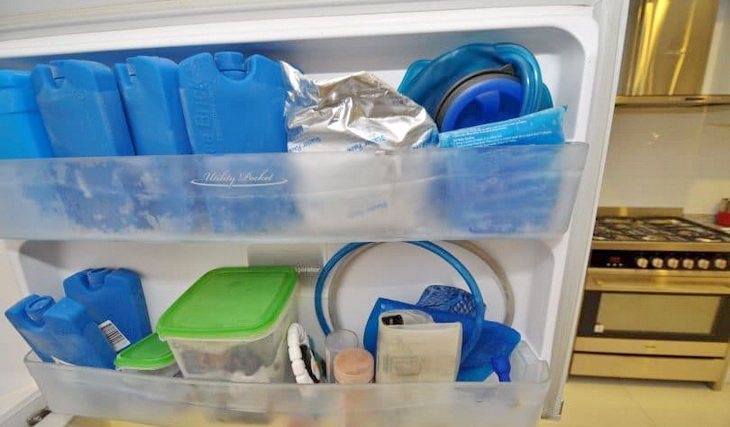
Store your Camelbak hydration bladder in the refrigerator. The bladders are not that large when emptied, so you will undoubtedly be able to get some space in your freezer for one. Simply go ahead and place the hose in there, as well. Any water bladder part that may have water residue in it, are required to be put in a chilled storage. The frosty temperatures will eliminate any bacteria and keep eruption of bad smell. Whenever you are in need of your hydration pack, just remove the bladder from the refrigerator, top it off, as you usually do and enjoy how frosty your water stays due to the bladder’s temperature. Your water will definitely have a great taste and pure smell, however, only if you are filling your bladder with clean water.

Hydration bladder in a freezer

Of course, you can spend the cash on a cleaning gear, however, even those are not ideal for eliminating bacteria and do not guarantee that you get the majority of the water from the bladder once you are done. Also, they cost a lot of cash. You already possess a refrigerator. Storing your hydration bladder inside it is free, simple and an approach to keep it new and fresh.

Wrapping it up

If you want to drink safe and clean water while hiking, biking or hiking, always take the time to clean your Camelbak water bladder by making use of white vinegar and baking soda until it is completely clear and clean.

If you want to employ an ideal approach to clean a Camelbak water bladder with a narrow opening and a longer body, utilize a vinegar and breaking soda solution. A vinegar and baking soda solution blend disinfect and leave the Camelbak water bladder free of mold and bacteria.

In case you are searching for chlorine-free and biodegradable cleaning tablets, make use of Hydraulics Cleaning Tablets. They stand out among the best in keeping up Camelbak water bladder hygiene. These are natural tablets and will keep your water bladder fresh-looking and bacteria-free. Camelbak water bladders are available independently of the entire Camelbak rucksack system, and even with cleaning the bladder frequently, there is also nothing bad, in possessing more than one and exchanging them between the use.

Camelbak hydration bladder

How to Keep Food Warm During Hiking: You Don’t Have to Eat it Cold!

0

Food is an essential part of keeping your energy up during hiking or camping expeditions into the great outdoors. It becomes especially important to consume enough food when you are out in icy cold conditions as your body will burn extra energy trying to keep your body temperature warm. Your body temperature has very little room for fluctuation to maintain safe levels so your body will automatically allocate a lot of your calories to this crucial function. As such, knowing how to keep food warm during hiking is an absolute must for anyone planning on going exploring in sub-zero temperatures.

Eating enough food will not only help to keep you safe, but a hot meal can also be very satisfying when you’re surrounded by sleet. Now, whether it’s eggs frozen solid or wilted vegetables, food left to take care of itself in cold conditions will simply become inedible. This happens because most food contains some water content which quickly turns to ice when you venture below 0 degrees Celsius. As the water within your food freezes it hardens the overall food item into a rock-like substance.

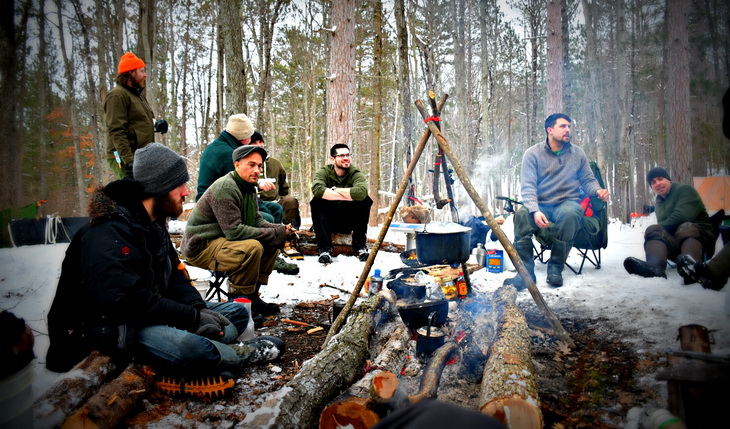
Preparing food while hiking in the winter

Anyone who’s been hiking or camping in the great outdoors during cold winters, will know that this can be a real problem. So if you’re planning a hiking trip in sub-zero temperatures then you’re going to need to learn how to unfreeze your food to cook/eat it and also how to keep it warm/unfrozen until you’re finished consuming it.

There are a few different solutions to the age old problem of heating up frozen food, namely traditional fire pit cooking and also the more recent inventions of hot tenting and stove top cooking. We’ll go over the best in-snow practices for all of these methods and also show you how to enjoy your food whatever the temperature is outside.

Other than actually heating up the food in the first place, we’ll also cover how to keep your first day’s food warm so that it doesn’t require reheating, and also how to keep your food warm on the trail once you’ve cooked it. But before we get started on the nitty gritty how-to instructions, here’s a list of the best foods to take with you if you’re going on a winter hiking trip.

Best Foods to Take with You On Cold Weather Trips

Some foods on this list have been specially packaged by their manufacturers for easy transportation and cooking in cold hiking conditions. Other ones have merely got a lower water content than regular food or come highly recommended by experienced cold whether hikers.

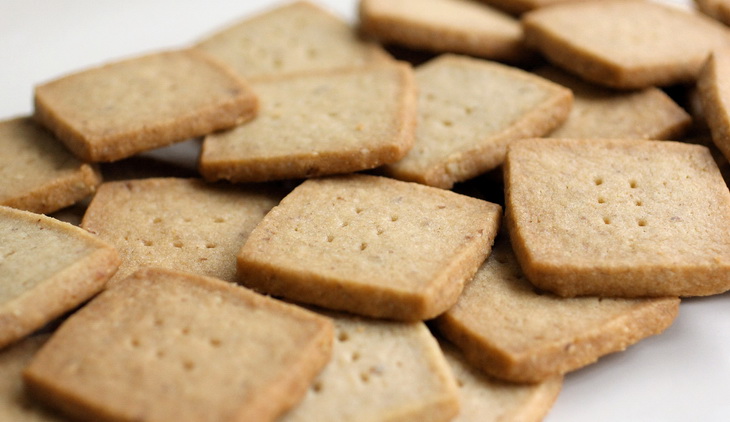
Brown Sugar-Pecan Shortbread Cookies

Here they are:

  • Fruitcake
  • Baked bannock (this is less likely to freeze than bread)
  • Shortbread
  • Cheese (pre-sliced and separated by cooking paper to avoid solidification)
  • Dried meat (pre-sliced and separated as per cheese above)
  • Bacon
  • Stew
  • Shepherd’s pie
  • Chicken Fajitas
  • Beef tacos
  • Dehydrated food packets

In general, we’d recommend doing as much preparation as you can BEFORE heading out. There are several reasons for this. Firstly, slicing food while it’s at room temperature will be a lot easier than trying to cut it up while it’s super cold and hard and secondly, pre-cooking food reduces the amount of water content in your food (as this is released in steam while cooking) which will make it likely to freeze more slowly.

baked dehydrated apples chips in a bowl

As an alternative to making food yourself before heading off you can visit your local camping/hiking outdoor shop. These stores will usually stock a few pre-prepared food options – often times dehydrated. The easiest day to pack for will be your first day as this food doesn’t even need to be reheated or cooked while you’re on the trail – provided that you store it properly.

How to Keep Your First Day’s Food Warm

There are lots of methods for reheating food, but ideally during your first day of hiking you won’t need to. Our recommended approach for preparing your first day’s food requires:

  1. Hot liquid thermos
  2. Insulated bag
  3. Wax paper

Once you have the above winter hiking essentials for your day’s lunch box composition, you can get started. The best thing to do is to fill your thermos with hot water, or premade tea, soup or hot chocolate. Make sure your thermos is of a good quality that is made to handle sub-zero temperatures.

Once you’ve made your thermos place it inside your insulated bag. Once again, be sure to go higher quality with your insulated bag to ensure it will be able to stand up to the harsh conditions. Having a double layer of insulation around your hot liquid (first the thermos, then the bag) will help to ensure that your tea, soup or hot chocolate is steaming hot for you when you want it.

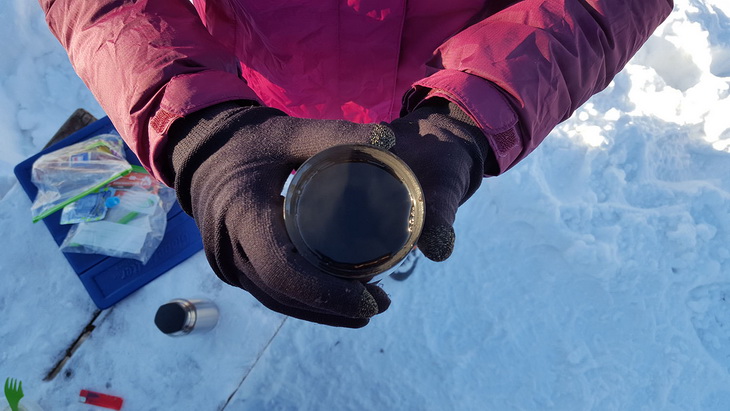
Hot liquid thermos in hand of a man

There should be enough room left in your insulated bag for you to place homemade snacks like sandwiches and sliced meat and cheese into the bag as well. We recommend separating your snacks with wax cooking paper to ensure that they don’t stick together by the end of the day.

This approach will generally ensure at least your first day’s lunch is warm and ready for you without any fuss. But what about dinner that night? Or food every other day if you’re going on a multi-day trek? Well, we’ve narrowed down the best two ways to reheat food when you’re out hiking, the first is traditional campfire cooking which we’ll get into now.

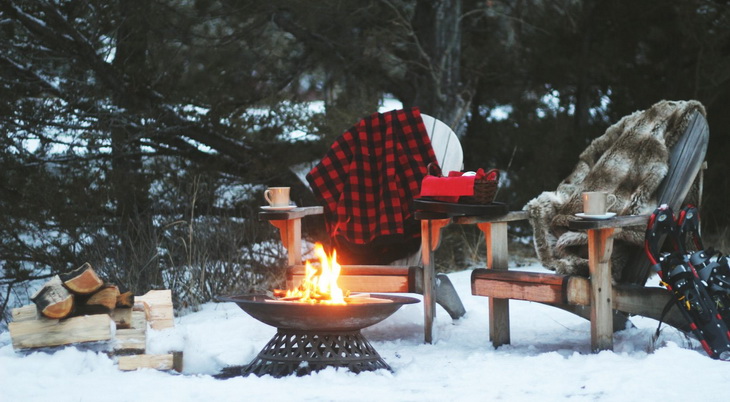
How to Reheat Food Using a Campfire

I know what you’re thinking – cooking food over a campfire is easy. Well, let me tell you, even though we’ve been doing it since forever, it is a lot harder to cook food using a campfire in the snow. It doesn’t have to be an insurmountable challenge, though; you merely need to know HOW to do it. And that’s what we’ll get into now.

Preparing grilled steak salad and tomato soup lunch

Take these steps next time you are using fire to warm up your food in the snow:

  1. If you do choose to use a campfire to heat your food, then your first port of call is finding a sheltered area where any wind or snow won’t drown out your fire. Often this place can be found under canopies. Fortunately, you are able to make your campfire close to trees in the snow as they’re not likely to catch fire by accident.
  2. Now that you have your camping spot you should dig a depression in the snow – preferably all the way through to the underlying ground or stone. A depression will not only mean your fire isn’t built on melting snow, but will also mean it is shaded from any wind that does happen to get into your area.
  3. The third step is placing your kindling into the depression. A layer of green sticks at the bottom is a good idea as this will help to prevent your fire from sinking down into the cold base below it.
  4. Place your fire kindling on top and get the fire started!
  5. Once your campfire is going you can chuck your pan over it and get that frozen curry, chickpea soup or stew cooking.

EXPERT TIP: Eat quickly! It’s a lot easier to clean your pot while it’s still warm than when the food has refrozed and solidified on it. Plus, staying still too long while cooking your phone may not be comfortable for your body, so down that food as fast as you can when you need to.

Cooking over a campfire may be the most traditional approach to warming up your food in the snow, but it’s also one of the most difficult. We’d recommend either hot tenting. Or stove top cooking as described below.

How to Warm Up Food Using a Camping Stove

The instructions for cooking using a camping stove are pretty short. These devices are made to be used in cold conditions, where making a campfire would be difficult.

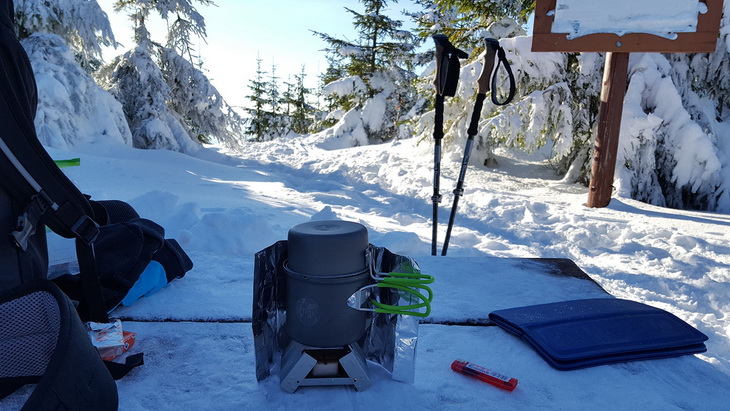
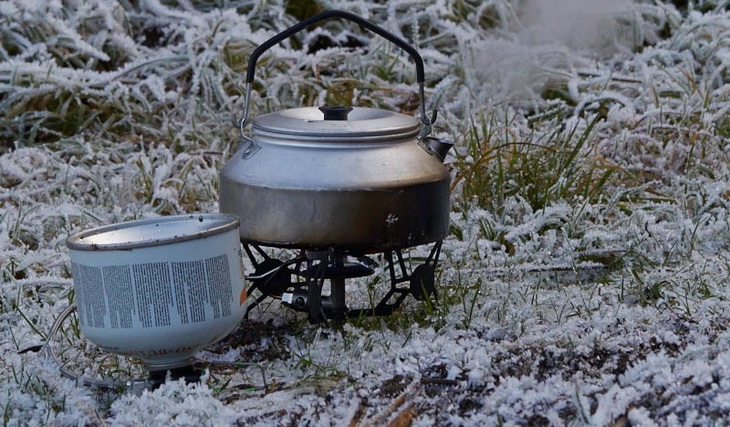
Heatin food with a Camping Stove

That being said, there are a few things that will make using a camping stove to heat up your food in sub-zero temperatures a lot easier. These are:

  • Placing an insulated pad beneath the stove to stop the snow from melting underneath it (thus stopped the stove from becoming unbalanced while you cook).
  • Making good use of the stove’s heat reflector and windscreen in order to keep its flame alive.
  • Holding the fuel canister inside your clothing – preferably under your armpit – for a few minutes before wanting to use it to ensure it works well.

You’ll find it’s similar to cooking in regular temperate conditions. Just remember to heat up that fuel canister with some body warmth awhile before you actually want to start cooking! The instructions for cooking using a camping stove are pretty short. These devices are made to be used in cold conditions, where making a campfire would be difficult.

EXPERT TIP: Some alcohol stoves come with snow specific fuel pre-warmers. These are a lot easier to light in frigid temperatures and will help to ensure you don’t spend too much time in one spot waiting to get your camp stove going.

The last method remaining is probably the most comfortable, if the most expensive. Let’s take a look at hot tenting.

How to Use Hot Tenting to Get Hot Food

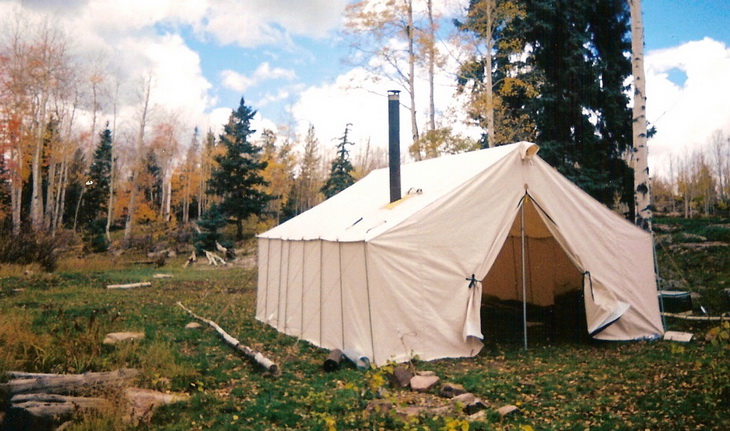
We’ll start by being clear about one thing: in order to do this, you will need a canvas prospector’s tent. These tents won’t catch on fire easily or let all the heat escape from them, but they do come at an extra price. Most of these tents come with a wood stove to heat food with on their inside’s. There is really no toastier and a more comfortable way to spend your winter evenings outdoors!

Hot tenting is best done when you’re planning on staying in a spot for more than one night and don’t need to hike too far on either side of it as carrying everything can get quite heavy. It’s certainly cozy, though, and we assure you sitting inside with your stove roaring and a pot simmering at 25 degrees while it’s freezing outside will feel amazing.

A good canvas tent is one you buy once

EXPERT TIP: Hot tenting may seem less ‘extreme’ than going it cold, but honestly, who are you trying to prove something to? Hot tenting is much safer than going ‘cold camping’ and can make for a very comfortable and even romantic trip out into the wild.

This is our favorite option but it really depends on whether the major part of your trip is hiking or staying put. If it’s hiking, then you’re probably more interested in learning how to keep food warm while you’re on the go. So let’s take a look at that.

How to Keep Your Food Warm While You’re On the Go

After you’ve cooked your food chances are you’ll want to get going again as soon as possible. It can get very cold stopping for any period of time while hiking in the snow, so as soon as your food is cooked we’re recommending getting back on your feet. This means that you’ll need to find a way to keep your food from freezing as you walk and eat it.

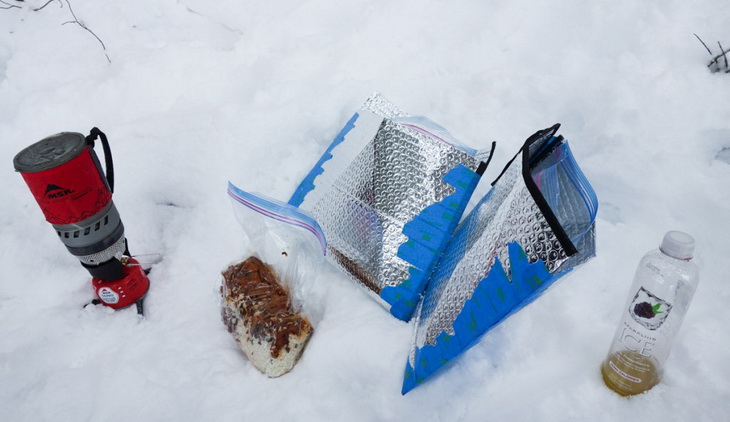
The easiest way to keep your food warm on the go is to get yourself an insulated pouch. You can then place your newly cooked food into the pouch and eat straight from that as you walk. This works especially well, for rehydrated and freeze-dried meals.

insulated pouches and some food on the snow

Whatever you do, please make sure that your spoon is heated up before using it. Getting your tongue stuck to metal cutlery is a real problem in the snow! To avoid this horrible dilemma just put your spoon under your clothing next to your body for a few minutes before using it. This should help to lift its temperature above frigid.

If you’re in super cold temperatures, then you’ll definitely want to close the lid on your insulated pouch of food in between bites to keep it from freezing. At the end of the day the faster you eat, the easier it will be when you’re consuming food in snowy conditions.

EXPERT TIP: There are certain foods that are better than others to eat on the go as they actually help to keep you warm (scientifically proven). These include pemmican, sardines and spicy foods.

Never Go Hungry in The Snow Again

When you’re hiking in cold conditions your body burns more calories than normal in order to keep its body temperature inside safe levels. This is a matter of serious safety and means that you need to know exactly how to make food when you’re out and about in the winter wilds.

Hopefully this article has clarified the best ways for you to both heat food and to keep it warm as you hike along. Remember that food isn’t the only thing you need to think about giving your body. Despite being surrounded by snow dehydration is a real problem for winter hikers, so ensure you learn how to stay hydrated in the snow as well.

Hiking equipment in Himalaya Mountains, Nepal. Trekking pole, stick and water bottle on mountain rock outdoors in nature. ** Note: Shallow depth of field

Once you’ve got your food and water needs sorted you’re about ready to set off on your winter expedition! We wish you all the best with it and would love to hear about any prior winter hiking experiences you’ve had below.

Gore-Tex: What is it and Why is Everyone Talking About it

0
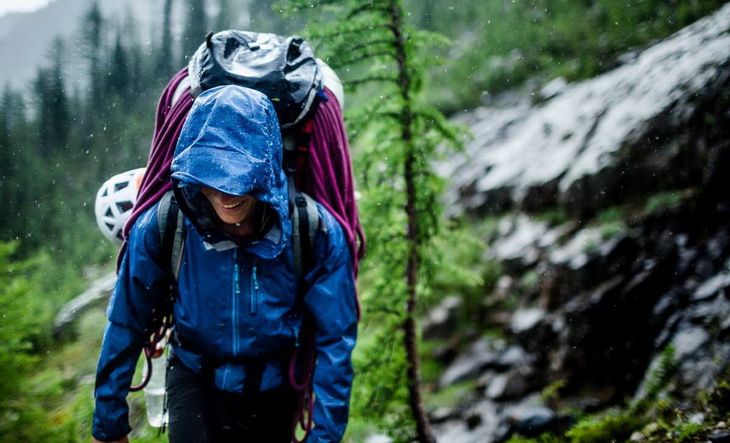
Woman wearing a waterproof jacket on a rainy day

Henry Wadsworth Longfellow, one of the greatest poets in the history, said: “The best thing one can do when it’s raining, is to let it rain.” Well, if he only lived a couple of years longer, he might have had a different thought. The best thing one can do when it’s raining today, is to grab his Gore-Tex and keep himself dry.

When it comes to coats and walking boots, Gore-Tex should be your number 1 choice, as it is waterproof and amazingly breathable. Compared to plain synthetic materials like nylon, Gore-Tex material will stop the water (read: rain) from penetrating your coat or boots, plus it also lets sweat out, which means that it will do both, keep you dry on the inside and outside at the same time. You’re probably thinking “It sounds too good to be true”, right? Believe us, it’s not too good to be true.

We’ll explain how Gore-Tex works and prove that it’s a really great material for your mountain coat and hiking boots.

Close-up of Finest Gore-Tex

The day when Wilbert Gore saw that polytetrafluoroethylene (PTFE) has its market opportunities, Gore-Tex started. It was the year of 1958 when Wilbert Gore had a remarkable idea to use DuPont Teflon (another name for PTFE) as an insulation for electric wires. He and his wife decided to set and open up a shop in their home basement to start making and producing PTFE-insulated ribbon cables. You might know Teflon as a coating used for cookware and many users think it’s something that NASA made for their moon-landing programs, but it’s not.

It was actually invented by a chemist Roy Plunkett (therefore the name DuPont Teflon) while trying to update the fridge. Teflon is used in many things and not just for cookware, from buildings (famous Millennium Dome, London), to roofs. It’s not invented so that people could bake an egg on top of the roof, but because Teflon’s main feature is to keep the rain from penetrating in.

Gore-ONE-Active-Jacket

A few years later, in 1969., Bob Gore (Wilber’s son), after long experimentation, with using “slow stretching” technique and high temperatures, found out that PTFE can be stretched and form a porous, strong material. After that, he also discovered that the same material can be stretched by using a “fast stretching “ technique with a combination of high temperatures. Many people love to think that he was frustrated when he accidentally made this discovery, but we can only guess. Some of the unique properties of the PTFE material made a variety of applications possible. Bob Gore patented the material and gave him a trademark – Gore-Tex.

New Physical Forms of Gore-Tex PTFE

It is well-known that PTFE has been treated in some new physical shapes and forms. Polytetrafluoroethylene (PTFE) is a well-known polymer that is called “Perfluorocarbon resin”. In it, all the atomic carbons that can be found in the spinal column of this polymer chain, are completely tied to atomic fluorines. The C-F connection/bond (the fluorine to carbon bond) is a really strong connection that neither ultraviolet light nor oxygen has sufficient energy to break the bond. The source of the good aging properties and chemical immobility is what makes this bond strong.

Close up of Arc'teryx jacket fabric

The Gore-Tex material has passed through multiple tests in order to prove its durability and that the material will last over 100 years when exposed to external outdoor conditions. The strengths of the carbon-fluoride connection is another reason why these tests proved this material resistant, durable, and possible to survive different weather conditions over 100 years. The connection between the larger expanses of PTFE are the strings which are, looking under the micrograph, directly connected to the “ C-F” bond strength in each molecule.

Gore-Tex expanded PTFE

Expanded type of PTFE is chemically neutral. The material itself has a friction coefficient, which is pretty low, which makes it really smooth and soft to the touch. The material has great aging features and it functions really well in a combination to a wide diversity of temperatures. It is also hydrophobic, porous, strong, biocompatible, weather durable and permeable.

Gore-Tex mates a ptfe layer with a thin pu liner

Gore-Tex material is non-polar, therefore it’s resistant to polar substances (liquid), such as water. It also has a low energy surface which makes the material impossible to get wet. The material is also resistant to temperatures from range -240 to +280 C degrees.

Medical Features of Gore-Tex material

It is also important to note that Gore-Tex, when expanded, can be used as a substitute for human tissue which is remarkable. Most arteries’ portions can be alternated by this material’s tubes, because it is biocompatible, strong and can run blood through arteries without any leakage. Vascular grafts of Gore-Tex have been used as implants in patients for years now, and it doesn’t matter what age the patient is, as it can be used almost in every part of the human body.

Another great feature of expanded PTFE is that can be used as a material for implants. This has been tested a long time ago and more than 700 000 patients have clinically implanted this material and there is no record of any material rejection when it comes to the human body. In medicine practices, it’s called “patches” as they’re soft tissues that supply enough thickness and strength that is needed for the softest of tissue repairs. Even for the most demanding ones, where difficult reconstructions are needed.

image of an empty surgery room

Due to the material’s softness, all that the patient can feel is comfort. The material’s structure doesn’t scratch, therefore surgeons can sew this material a.k.a “the patch” with ease. They’re mostly used in the stomach and heart tissue repairs. Amazing, right? Different types of Gore-Tex materials have been used in knee surgeries (when ligaments replacement is needed) as they provide strength over the longitude of the knee where is needed.

Humidification Features of Gore-Tex

As you can see from our article, Gore-Tex material has been used in a variety of areas, and the most useful feature of it is its repellent to humidity. Here are some humidification features and functions:

  • Gore-Tex equally humidifies sensitive media or controlled supports objects; locally or overall
  • It equally humidifies big objects
  • It slows down drying of wet objects
  • It works as a resistant barrier as it allows vapor and air to go through the material
  • It is flexible
  • It can be used as a support
  • It’s non-stick
  • It has a non-abrasive surface

Gore-Tex lets the humidity and perspiration out without letting water (or any other liquid) in. It’s not a magic trick, believe us. It’s quite simple actually. Think of it this way – picture yourself in the kitchen, boiling water on a stove while it’s cold outside (stormy weather, the weather blows, the rain is pouring).

Your kitchen windows will be steamed up, right? It’s due to the condensation. What do you do? You probably open the window just a little bit to let the steam out. Roughly speaking, you’ll let water (condensation) out without having rain coming into your kitchen. This is how Gore-Tex works. It has three layers – 1 layer of Teflon and 2 layers of nylon.

Shoe mande of Gore-Tex fabric

Okay, now that we established that, it is also important to note that the Teflon used in Gore-Tex is not that waterproof as everyone thinks it is. It has small pores and this is why it is called microporous Teflon. The small holes (pores) are smaller than 1 micrometer and the water in its liquid form can’t penetrate in, but in a gas form, it can. Water, in its fluid shape, is completely different from water in its gas shape (a drop of water is 20 thousand times larger than the Gore-Tex’s pores), therefore there is no possible way that the water is going to come through inside the material. This is why when your feet or body sweats, it produces water in the shape of a gas (steam) which is possible to penetrate the pores and get through the material.

Why 2 layers of Teflon?

This is actually very easy to explain. Like we mentioned above, Gore-Tex footwear and clothes are mostly made from 3 layers – a formal piece of material (usually, nylon for coats and jackets) and 2 Gore-Tex layers that are separate and similar only to the human eye. But actually, both layers are totally different as they have different breathable/waterproof features. Inside the material is a thin membrane that doesn’t allow water in, but allows vapor out, it’s called a hydrophilic layer.

Next to the hydrophilic layer is a layer that is thicker and made from a material such as Teflon – MPP (microporous plastic polymer) and it’s called a hydrophobic layer. It is resistant to water coming from the outside, even in a form of heavy rain (high pressure and speed). It does not soak up water, but allows perspiration to get out by diffusion.

rain-jacket-made-of-gore-tex

So, why we have 2 layers of Gore-Tex material instead just one? The layers on the outer side provide support and protection for the layer that is inside, plus it reduces body heat loss (thermal insulation) and helps the human body keep the warmth. In a simpler explanation, if not used properly, the outer layer will soak up the water (rain) which immediately cools the layer on the inner side which will make your body lose body heat. These 2 layers work as a team and one can’t be without the other, as one keeps water out and the other keeps the body heat and allows sweat to exit through.

Substitutions

Although Gore-Tex is one of the most popular brands it’s not the only one for sure. There are other waterproof, high-performance, breathable materials on the market. There are lots of “rivals” to opt for and just because it doesn’t have the Gore-Tex name on a boot or a jacket, it doesn’t mean it’s no good. We did some research on what are the most popular alternatives to Gore-Tex material and found out that many hikers prefer SympaTex and eVent brands.

SympaTex Features

SympaTex is rather different from Gore-Tex material. It doesn’t have micropores like Gore-Tex as it uses a copolymer. The copolymer is a material made of hydrophilic polyether and hydrophobic polyester. It’s well known that polyester fights off the water from the outer side, keeping it away from penetrating inside and getting in touch with your body.

Jacket made of SympaTex fabric

It also absorbs sweat and moisture and sends it out. Therefore, there are no pores through which water passes.

eVent Features

This brand is quite similar to Gore-Tex. It has 3 layers of materials used with 2 layers of backing materials on the inside and outside and Teflon in the middle, which draws moisture outside the boot/coat and is repellent to water from the outside.

Person wearing a jacket made of eVent fabric

Is it Eco-Friendly?

You’re probably thinking that you couldn’t be greener than green while walking around nature, but think again. The fact that Gore-Tex is made from PTFE makes you no Eco warrior. But the real issue with Gore-Tex is not in PTFE but PFOA, a synthetic chemical that has been used in material’s production. PFOA is known as environmentally durable, especially when it comes to outdoor clothing.

Patagonia Torrentshell Jacket

Even the company that started making jackets out of recycling waste bottles Patagonia uses PFOA in their eco label (famous for their Rain Shadow Jacket). The experts have divided opinions, but Patagonia is the most eco-friendly company out there on the market. Another brand that has an eco-friendly hiking gear is Klättermusen, a famous Swedish brand, who have PFOA-free jackets, which are even more eco-friendly.

Basic Cleaning Procedures of Gore-Tex Rainwear

In order to get the most of your Gore-Tex clothing and outerwear make sure you clean it properly. Here is some basic cleaning information, but we advise that you read labels on your new garment before you start with cleaning.

When it comes to washing a Gore-Tex outerwear there are 2 tips we want you to remember:

  • Washing in a machine is possible, but only with warm water and a small dosage of detergent (possibly liquid)
  • Drying in a machine is also possible, but only on medium heat

The company and the brand do not recommend washing their products with powdered soaps that contain stain removers, bleach, conditioners or fabric softeners. For more information, we suggest visiting their official website, where they provided more detailed instructions.

When it comes to coatings on outerwear that is water repellent, you also need to be cautious with regular wash as although it has high exposure to different elements that DWR (durable water-repellent) fabrics can take, the material can eventually absorb some water. The best possible way to improve durable water repellent material is to wash Gore-Tex clothing according to the suggested instructions by the brand. In this way, you can restore the outer water beading surface of the material.

A couple wearing Gore- Tex jackets on a rainy day

If someone tries to sell you a water repellent spray or a cream that is permanent, don’t buy it. Such things don’t exist, at least not yet. After some time of use of the material, you’ll probably have to buy a spray that renews water repellency of the material, but it is not permanent. You can use and repeat the procedure as much as you need in order to renew the material.

What if my Gore-Tex material is leaking?

If you, by any chance, notice that the inside of your outerwear is moist or wet after standing only a couple of minutes outside in the rain then your outerwear (and you, after all) have a serious problem. A potential problem may lie in a defective (faulty) seam, or maybe the material itself.

A man wearing a rain-jacket

If you’re still in doubt what might be the issue with your outerwear just call 1-800-431-GORE as they will help you identify the problem and solve it. They will offer you returning your outerwear to the store where you bought it with a full refund included or return for an evaluation.

Tips on removing stains from your Gore-Tex material

It will often happen that your outerwear will get stained, especially if you’re a hiking lover.

Gore Power Trail jacket coat gore-tex

There’s no need to worry about as there are some tips on how to remove stains from the material safely:

  • Use an aerosol pre-wash spray in order to impregnate stained areas. Just remember to do this before laundering.
  • Wash the stain right away. Use only liquid detergent and warm water. You will probably have to repeat the process if the stain is bigger or harder.
  • Press the stain with a warm iron (not hot)
  • If the stain is harder (grease, for example), then, we suggest consulting with a professional dry cleaning service or calling Gore’s Official Service (same number – 1-800-431-GORE)

What about salt water?

Salt water doesn’t decrease the breathability, harm or contaminate Gore-Tex materials. You’re free to paddle, cruise or sail with a sureness that you will ruin your Gore-Tex outerwear. Just keep in mind to rinse your boots or coat with fresh water in order to keep salt from gathering on your outerwear.

Rain on Active Run Jacket

Even if you’re outside in the open and low on water supplies, simply rinse it in sea as this will also make a reduction in accumulating salt.

Is it safe to take it to dry cleaning service?

Some Gore-Tex materials for outerwear use wool or silk. We suggest that you take such outerwear only to dry cleaning service, so yes, with some materials it’s necessary to take it for dry cleaning.

Laundry pickup delivery

Don’t forget to ask for a spray repellent and distilled rinse, once you’re there.

Wrapping it up

If you used to toss your hiking boots into your basement every time it was a bad weather outside, – stop doing it. Your Gore-Tex boots are made for walking even during rainy or snowy seasons. Trust us, there’s no better thing to do than walk through quiet snowy woodsy wonderland in warm boots.

Man Wearing Marmot Precip Rain Jacket

Gore-Tex Waterproofing Tips: Best Way to Retain Water Resistance

0

Unlike the regular garments, Gore-Tex waterproof garments can be demanding to care for. If not properly taken care of, the jackets’ or pants’ outer layer of DWR (Durable Water Repellant) can wear off prematurely, and then probably prompt you to ditch the garment for a new one.

Fortunately, the waterproof qualities of the garments can be revived using a number of products such as the Gore Tex spray, among other products. Essentially, a proper implementation of Gore-Tex waterproofing tips is paramount to ensure that water resistance is retained.

We will explore these tips broadly in this article.

Close-up of Gore Tex label

To apply the waterproofing tips on Gore-Tex garments, we first have to understand how to care for the garments. How you care for the garments dictates how long the waterproof properties will last on the fabric. Some factors such as sweat, oils, dirt, washing detergents, conditioners, perfumes, and softeners may have negative impacts on your outdoor apparels. With this in mind, we have to know how to wash, care for the garment and retreat it to revive the water resistant qualities. In return we will be saving so much cost of returning to stores to purchase new garments, whereas the remedial measures are cost-effective.

How to wash Gore-Tex products?

Gore-Tex brand is renowned for its wide range of unisex waterproof products that are multi-functional in the outdoor setting. You may find pants, jackets, and footwear as Gore-Tex products, and each have to be washed properly and accordingly. For any product, it’s advisable to take note of the garment tags as they provide recommendations as to which cleaning techniques to be used.

For instance, the Gore-Tex garments that are made of silk and wool require only dry cleaning, and not hand wash. Some garments can be optionally dry cleaned, machine or hand-washed. But still, vigilance is required to ensure a proper care.

Gore-Tex washing products

To make washing a breeze, you need the following to wash your garments:

  • Washing machine
  • Laundry tub
  • Mild liquid detergents
  • Waterproof-specific washing solutions such as the NikWax Tech Wash/ ReviveX Synthetic Fabric Cleaner

After procuring these tools, you can now prepare your garment to wash in either the machine or the laundry tub. But, firstly, as elaborated above, make sure that you read carefully the garment tag as it may have recommendations regarding the methods to be used. There are some restrictions with regard to washing detergents and other chemicals when washing waterproof products because they may be prone to damage.

Man looing at his Gore-Tex jacket

These restrictions include washing with bleach, powdered detergents, conditioners and fabric softeners. Instead, you are advised to use mild liquid detergents or simply purchase the recommended solutions as aforementioned.

The washing procedure for Gore-Tex garments is demystified below:

  1. Prepare warm water in a tub or front load of the machine. With the machine, wash on a gentle cycle. The water should be moderately warm when washing Gore-Tex cloth that has Down as the insulator because it is vulnerable to hot water damage.
  2. Prepare your ordinary liquid detergent
  3. Separate your garments from the other clothes that are too-dirty. Preferably wash like colors to avoid color stains.
  4. After washing the garment, dry it on a washing line or let it tumble dry on a warm setting. Re-tumble dry it for an extra 20 minutes after it got dry to revive the waterproof coating.
  5. Alternative to the tumble dry, you can iron the garment on a warm setting too. Preferably put a towel between the iron and the garment to avoid overheating as it may be adverse to the cloth.

This washing procedure applies to many Gore-Tex garments except the footwear like the waders. Footwear needs to be hand-washed by also flipping it outside if possible. Well, it’s possible with the waders. But you can still use the liquid detergent. The other garments such as the gloves should not be ironed.

Additional guideline on the machines is that you should set it on a permanent press cycle with an approximate temperature of 105 degrees Fahrenheit. Then rinse the Gore-Tex twice to make sure that no residues of the liquid detergents have remained on the fabric. You should minimize spinning the garment to avoid creasing.

Close-up of Gore-Tex fabric

If the garments you bought are made of silk or wool, do not use the washing machine or hand-wash them. They require only dry cleaning. You may ascertain this by checking their tags. And when taking them to the dry cleaner, command the dry cleaners to use a clear, distilled hydrocarbon solvent rinse for perfect results. The spray repellent should also be used before drying the garment. More instructions can be found in the garment’s tag instructions.

Given this procedure, it should be quite easy to care for your waterproof garment now. The keynote is that you must avoid some washing solutions/methods that could jeopardize the quality of your garment. These include the following:

  • Do not use chlorine bleach
  • Do not use fabric conditioners and softeners
  • Do not dry-clean a garment that has the Down insulation
  • Do not use powdery detergents
  • Do not use a very hot iron on the garment
  • Do not use tumble dry on high heat for Gore-Tex + Down garments

Keep in mind that Gore-Tex garments are treated with Teflon to excel in water repellency. As thus, you need to be vigilant of the Teflon’s vulnerability to chemicals and heat. Using fabric softeners, conditioners, bleach and other washing chemicals can have a negative impact on the performance of the water repellent coating. The DWR coating penetrates the fabric’s fibers to coat the outer surface. Using these restricted solutions can remove the layer.

The Gore-Tex garment may start to underperform when faced with rain or other damp conditions if the waterproof coating has been damaged. The following may be noticed in the event that the water repellent coating has worn off:

  • A heavy garment that is water-logged. Water will no longer bead off, instead will be absorbed into the fabric’s fibers, although it may not reach your skin due to the underlying waterproof membrane beneath the outer surface. As a result of too much water being absorbed, the jacket or pant will feel heavy.
  • Appear to be wet. As more water is being absorbed, outer fabric will appear to be wet because the water no longer beads off but remains logged.

Many people often mistake the above as factory faults. They therefore decide to return the garments to the seller or consider ditching them for new ones. It is important to re-coat the water repellent fabric before blaming it on factory fault. But if your jacket is heavily leaking, there could be problems with its seam or it could have been torn off somewhere. Observe that and see if it can be fixed.

nikwax waterproofing and cleaning products

Otherwise purchase a new one because the waterproofing tips will not help in such cases of massive leaks. To solve the problem of a worn out water-repellent coating, we need to re-coat it before going back to the store. The products to accomplish that are readily available in local outdoor stores or even online.

Revive the waterproof coatings

Before you decide to ditch out your Gore-Tex garment, try to revive and restore the DWR coating. The spray designated for Gore-Tex fabrics can be helpful in this case. There are many specialized treatments found in retail stores worldwide. But, before resorting to specialized treatments, as highlighted before, you must consider reactivating the DWR treatment.

The DWR treatment on Gore-Tex can be reactivated by heat. This can be done after washing and drying your jacket. For instance, after doing the initial tumble dry immediately after washing the garment, re-do the tumble dry for 20 to 30 minutes on a warm cycle in order to reactivate the treatment. Just beware of the garments that are paired with the Down insulation. Alternatively, you can iron the garment on a warm setting as well.

Active Products with New Permanent Beading Surface

After this attempt to restore the DWR coating, try to test if the method has indeed worked. Perhaps if you can sprinkle water on the garment to simulate the rain or let someone do it while you’re wearing the jacket could help proof the results. If the garment still feels heavy and appears to be wet, you need to consider replacing the original DWR treatment now by applying a new water repellant.

There’s a plethora of water repellant treatments on the market. Just make sure that you choose the right one in line with your fabric. The manufacturer can also be consulted in this regard to ask for recommended products. But, popularly, the NikWax TX Direct wash-in and the NikWax TX Direct spray-on have performed well as such treatments. We’ll discuss how they work below:

NikWax TX Direct wash-in

This wash-in water repellant treatment helps restore the water-repellency of synthetic outerwear. It will revive the coating while at the same time maintaining the breathability of your Gore-Tex garment. Follow the instructions on this water-based water-repellent treatment.

Nikwax product near a goretex jacket and a washig machine

But you’re advised not to use it on a Down material. For Down + Gore-Tex fabrics you can preferably use the spray to spray on specific areas without affecting the inside layer of a Down insulator.

NikWax TX Direct spray-on

This spray formula is the best match for Gore-Tex garments to restore the waterproof coating on the outer fabric. Simple application by spraying on the entire jacket/pant on on specific areas. Oftentimes, the underarm area and the sleeves are vulnerable areas where the coating wears off quickly. You can simply spray the treatment in such areas. The other benefit is that the spray maintains the breathability of the garment.

Nikwax spray-on treatment

All these NikWax treatments are water-based and are biodegradable. They can also be used on other waterproof laminates such as the eVent, Ultrex and the Entrant. The other products include the Gear Aid ReviveX wash-in and the Gear Aid ReviveX down cleaner. We summarized their capabilities below:

ReviveX Wash-In waterproofing

You can apply this fluorine-free water repellant treatment to restore the waterproof qualities.

Man using Gear Aid ReviveX Wash-In Waterproofing

It helps repel, among others, oils, water and stains on your Gore-Tex garment. It can be applied a wide range of Gore-Tex products, and it is durable.

ReviveX Down Cleaner

For the Gore-Tex garment that includes the Down as the insulator, it is advisable to use a specific treatment for Down because it can be sensitive to other products. This treatment maintains the Down’s warmth and loft. It will not affect the quality of the insulation and can be used in a broad range of Gore-Tex products. A bottle can clean up to 24 garments.

We are aware of the face that there could be other products than these. However, we’ve selected these ones based on their excellence and also based on the excitement of other customers after having used the products in treating the waterproofness of their Gore-Tex garments. Just be advised not to purchase damaging treatments. The best advice is to confirm with the manufacturer to ask if the product is suitable for your garment.

Gear Aid ReviveX Down Cleaner

These products should be your last resort to restore the water repellent properties of your garments. After applying these products, you should wait for some time until the coating is perfectly restored, or you can apply tumble dry on a warm setting for faster results. If satisfied that it has settled, you can perform a test by wearing the garment and let someone sprinkle water on you. You cannot risk going to the wilderness with the water repellent coating you’re not sure of.

If the test fails, then it could be a sign that the water repellent coating is no longer renewable due to the fact that the garment has also worn out. There’s nothing such as a permanent water repellent finish. As time goes on, and as you wear the garment frequently, the finish will be depleted. Waterproofing tips may not be applicable any longer on such garments.

Additional Tips

In addition to knowing about the waterproofing tips, you have to acquaint yourself with guidelines on how to care for the garment to minimize the depletion of the DWR coating.

Man wearing GoreTex jacket

Below are some guidelines:

  • Do not wash the garment frequently – as you wash the Gore-Tex garment, you reduce the longevity of the DWR coating. The detergents used in washing contribute to that depletion. We reckon you wash once after every outdoor adventure.
  • Do not wear the garment frequently – wearing the garment frequently dictates the frequency of washing it of which it is not good. It also exposes it to stains and oils, which are a challenge to remove them. We recommend that you purchase a few of these garments to avoid wearing one more frequently.
  • Remove stains before washing – before washing the garment, make use of specialized toughest stain-removal products to remove stains.
  • Rinse the garment twice – leaving the detergent residues on the fabric’s surface can clog the pores and then compromise its breathability. More sweat may be accumulated inside.
  • If you’re going to do a construction job, we reckon that you use the Gore-Tex as the inner layer to avoid stains on it unless if it rains and your other garments are not water repellent.
  • Do not dry the garment in direct sunlight for a long time.
  • Before washing your garments, close the Velcro tabs and the zippers to avoid abrasion to it.

You can also watch this video about how to wash and treat waterproof outerwear. The video demonstrates the procedure while using the NikWax products as we’ve recommended above.

Watch the video and relate with our waterproofing tips for better results.

Wrapping Up!

The Gore-Tex water-repellent restoration tips we have provided will surely save you unnecessary costs of purchasing a new garment every time that you feel that water has leaked through. Do not run to the store when this happens. It might be a sign that the DWR coating needs to be restored. The best way, as substantiated, is to care for the garment, wash it and then apply the waterproof spray. Only when the condition seems to be deteriorating even more that you can consider purchasing a new garment. But please note that you have to take a good care of every waterproof garment. Otherwise, you will revisit the stores endlessly for every occasion.

We’ve also provided you the restrictions of the washing detergents to use when washing Gore-Tex waterproof garments. As it is treated with Teflon, it can be susceptible to the damage of chlorine bleach, fabric conditioners and fabric softeners. So you should not use any other detergent other than the liquid one.

Also important is the choice of washing the garments. Silk and wool fabrics should only be cleaned using the dry cleaner. You can apply the waterproof coatings after or the dry cleaner can do that on your behalf. The others can either be cleaned using the washing machine or hands. But those with embedded Down as the insulator should only be washed using the hands.

Gore-Tex treatment on a jacket

Backpacking on a Budget: Get the Most Out of Your Trip!

0
Backpacking Nepal

Backpacking can be defined as an independent, often global, low-spending way of traveling. An individual who backpacks is regarded as a backpacker. Backpackers do travel for a lengthy period of time compared to most tourists, and they have the tendency of traveling in several different nations amid their leisure period like holidays. The number of nations varies and a backpacker can keep on going from a few months to several years.

Backpacking is not the most fabulous way to travel. Very few backpackers are flying with every available amenity, tasting on champagne and eating at popular venues. No, most backpackers are either opting in for the train or hitchhiking, tasting on the goon and rationally planning for one more night of mi-goreng. Backpacking, however, is a great way to travel.

backpackers on a mountain trail in the daytime

However, just because you don’t have the cash to hire a driver does not mean that you should miss out on experiences that accompany a cost. Be it surfing on the Australian drift, snorkeling in Fiji or bungy hopping in New Zealand; it is possible to take part in these events without foregoing a supper a day throughout the following month. In this article, we will be expanding some helpful tips that can give you the best backpacking on a budget.

Tips for Backpacking on a Budget

To have a great backpacking trip, you need some helpful tips. These tips will help you spend less and also to stick with your set budget.

Pack Light

When planning a backpacking trip, packing light should always be your goal. Four set of jeans, is simply going to overload you when you are running or hiking to get a train. You have to leave some load behind and scrutinize what you are carrying along.

backpacking gear on a wooden table outside

Leave your preferred jewelry or your granddad’s watch at home as well; carrying important or nostalgic stuff will prompt a disaster. Just pack what you are able to put back, and save cash of overweight baggage charges when you fly.

Stay Outdoors

If it is possible, you should be able to stay outdoors throughout your trip. In many nations, there are a lot of comfortable campgrounds that won’t deplete your spending plans. This is an amazing choice if you have been camping before and you have the choice of conveying your own camping tent.

a tent and a beautiful sunset

In case you’re prepared and willing to grasp your internal Bear Grylls, it is possible for you to do outdoors work just about any place. Ensure that you remain safe, though, particularly in case you are backpacking alone.

Get a Hostel that has a Kitchen

Backpacking isn’t for everybody. You may not have the capacity to bring along all the equipment you need, or you may very well need the solace of a bed. Attempt one of the several backpacker-friendly lodgings across the globe.

Backpackers cooking up some fine Food

The best hostels have free meals or even a collective kitchen that has a lot of cooking gear. If you purchase foodstuffs and make some meals in the lodging, you can save a huge amount of cash over a long trek. Reward: you make new companions in the lodging kitchen.

Take along some snacks

Being on a trip and living outside of your trusty rucksack can actually deplete you. Snacks may appear like a silly expansion to your apparatus, yet it can truly help you keep vitality levels high between dinners and rests.

Cookies for backpacking

Indeed, even in the least expensive nations to visit, nearby sellers have the understanding that snacks are important amid trips, and they have the tendency of jacking up the costs of fast foods to eat; evade these unexpected expenses, and bring along some granola or protein bars.

Purchase a Train Ticket

In many places, particularly Western Europe and throughout Asia, train passes are available that you can pre-buy. These train passes can enable you to travel everywhere throughout the nation you are in, without being anxious about cost after the initial purchase of the train ticket, for a set time frame.

Traveling with the train

In case you’re going to bounce around a specific area, a pass can reduce your expenses throughout your whole backpacking trip. Traveling by Train can truly get you an awesome view of a nation.

Walk and Don’t Take a Taxi

Try not to give the ease of a taxi ride a chance to lure you in. At times, taxicab chauffeurs drive you on the “panoramic route” to raise your taxi fare, or just cheat you. Walking, while likewise being good for the earth and your body, is really great for your budget.

travelers walking down the street

In the event that you need to go someplace and it is too far to trek, find an open transit to drive you to your destination. Trains and busses are cheap and always reliable.

Be Careful of Scam Artists and Pickpockets

Regardless of where you are backpacking, if it is Southeast Asia, Europe, or elsewhere, urban communities have some kind of scam artists or pickpockets. They can detect a traveler from a distance away, and will make a special effort to exploit you.

A Pickpocket in Action

It would be disastrous to remain on a spending plan and then have it all destroyed by a theft. With that, you should keep your cash and resources close nearby. An ideal approach? Money belts and hidden pockets.

Visit the Liquor Shop

Local organizations enjoy profiting off voyagers, and that is obviously, big time in clubs and bars. The ones close to destinations of tourist will overcharge since they figure you won’t understand. Pre-gaming at the lodging will comprehend that. Check nearby public drinking confinements before you move.

Inside a Liquor Shop

Additionally, many European clubs and bars have cards for coffee, and you can cash out when taking off. Try not to let your barkeeper over-punch, and do not lose your punch card.

Keep away from Tourist Traps

Pay attention and watch where local people go. Have lunch where local people eat. Spend Friday evenings where local people do. Keep a rundown of the nicest events to do in an area that does not cost anything: heading off to a garden and park or carrying out some window-shopping.

backpacking paris on a budget

Enjoy free strolling tours, but keep in mind that you need to tip your lead. Look for attractions that are affordable and cheap. Playhouses and museums are the right sources of these.

Go backpacking with a Group

Going backpacking alone is a freeing encounter, yet, there is always quality in numbers. Going backpacking with a group can reduce your expenses by sharing various obligations. If you have a great cook, among you, then that will help no doubt.

backpacking with a group

If one of you has much detail, then give them a chance to organize the train trips. If one of you is a seasoned backpacker, then they will have the right gear to camp easily and economically. A group muddles the planning procedure, but don’t be scared by that. You can always split away and get together later.

Profiting While Backpacking on a Budget

Do you want to make money while backpacking?

make-money-online-while-backpacking

If yes, there are a lot of ways you can employ to make money as you backpack on a budget, so read on to get enlightened!

  1. Busking: Can you play an instrument? If yes, then you can create an arena in the street, instead of your room and arrange some sort of things, near your feet to gather donations. Why not expand the motivating force to donate and make an indication that tells bystanders of your travel intents?
  2. Teaching: If you can speak in multiple languages, then offer classes to educate others. Make some pamphlets and show them on road poles around town. The individual walking their puppy along the road side could possibly be your next student!
  3. Mystery Shopping: There are organizations that will pay you to write a review on your experience when shopping, catching a flight or eating out. Hop on the web and sign up to be a mystery shopper and you could possibly get both compensated for costs and paid furthermore to purchase your next dinner, movie ticket or clothing item.
  4. Freelance: Jump on the internet and publicize any of your skills you think you can make money. There are websites devoted to specialists of all professions, you will undoubtedly get a task you can finish.
  5. Hostel Work: Most lodgings will give you free accommodation in return for work. Two or three hours at the reception or taking care of the pool, could make you get free bed space for the night.
  6. Create: Think of what you can involve yourself in so as to make cool cash and once you’ve figured out how to, repeat the procedure. Maybe you can purchase a case of beer and offer for singles for two or three dollars each to the hikers relaxing by the pool?

Places You Can Go Backpacking on a Budget

Do you think that backpacking in some places in the world is not possible? There are a lot of places over the globe where you can effortlessly backpack for some dollars per day, from Africa to Asia, while as yet encountering authentic foods and astounding cultures. At a similar cost of an Ikea sofa, you could spend some weeks doing water-skiing in Malawi, or climb some of the world’s tallest mountains in Nepal. Prepare to gather wonderful experiences instead of things, and go through each edge of the globe without spending a fortune.

In this section, we are going to take you through some astounding and affordable places you can experience backpacking and still maintaining your budget!

Thailand

Yes, you read that well. Despite the fact that Thailand has developed from its moderately obscure and out-of-the-way destination into a nation loaded with inclusive resorts, there are still a lot of chances to appreciate the Thailand’s excellence and culture without the tourist or hordes or expensive drinks.

For the perfect way to appreciate Thailand on a budget, go to the northern districts and inland-fundamentally wherever far from a beach. Their hikers can still appreciate tropical desert spring and amazing, fascinating sights while just spending a couple of dollars per day.

Backpacking Thailand

In case you are willing to live together with others, the apartments will only make you spend $3 US dollars per night, and the really prosperous individual among us can get a private bath and bed for a little above $5. The Thai meal is less expensive: genuine Pad Thai from the street may cost you $1 for a satisfying and life-changing lunch.

Albania

Need amazing Mediterranean views, design, and culture without the costly sticker price you’ll discover in Greece or Italy? Albania is a magnificent option, with similarly the same number of lovely beaches, urban communities, and museums at a small amount of the cost. While costlier than other places on the planet earth, it is an incredible place to visit the Mediterranean and Europe without having to spend much money compared to what you will spend in other nations.

Backpacking Albania

You can effortlessly arrive there from the main center points in Europe, and their room will just cost you around $20 every night, and a cheap food at an eatery will just cost you around $5.

Nicaragua

Costa Rica might be extremely English talking friendly, yet it’s expanding fame as a tourist place and retirement desert garden has additionally made costs spike rather drastically. Fortunately, neighboring Nicaragua is the ideal option and offers a lot of Central American appeal for backpackers without having to spend much.

Backpacking Nicaragua

Indeed, even the most touristy places only cost about $10 every night for a lodge, and any number of the little towns have a lot of inns with considerably less expensive sticker prices. The regular South American charge will just cost you a couple of dollars per meal, thus making Nicaragua one of the ideal ways to visit Central America’s magnificence while on a budget.

Colombia

When planning to go on a backpacking trip in the US, it is best to go to places where travel warnings have been placed. While you may somewhat be at risk, but if you apply common sense and travel astutely, you can undoubtedly appreciate modest backpacking without a traveler in sight. This experience is common in Colombia. While the nation is significantly more secure than it was before in the 80s, the majority of America appears to be persuaded that Colombia is still regulated by ex-mafia members and drug cartels.

Backpacking Columbia

However, utilize this to your good fortune and travel a great deal; you can effortlessly discover an inn room in the center of Cartagena at a cost below $10 each night; a loft on the shoreline on an island, will only cost you about $3 each night, and up to $10 for a boat ride. The meal is more expensive, but if you are willing to purchase most of your food from road merchants you can easily make due on only a couple of dollars for every meal.

Nepal

Are you prepared for some serious backpacking trip? Nepal offers something beyond living out of a knapsack: the nation has a portion of the world’s tallest pinnacles and a great many miles of hiking trails and treks that are loaded with unending skies and mountain vistas.

Backpacking Nepal

The best part is that the trails are loaded with hotels, sanctuaries, and houses that give cheap lodging, sights, and meal- i.e. all the backpacking fundamentals of an extraordinary outing. Kathmandu, which is the main city of Nepal, boasts the second least expensive lodging on the planet earth, where you can secure a bed inside for just $2 every night.

Malawi

Africa has many things to give to an average backpacker on a budget. While the traveling ticket to Africa may set you back, exploring around Malawi is shockingly cheap; you can effortlessly get buy off of under $20 per day, thanks partially to the nation’s poor economy, and the absence of tourist centers. Getting around the nation is considerably less expensive than arriving there, and the spending costs mean you are in for an adventure, from filled-up buses to pick-up taxis and trucks. You can effortlessly get a bed for a price around $2+ and food can make you spend as meager as $1 if you go to local eateries.

Backpacking Malawi

Entertainment is cheap also in Malawi: for just a couple of dollars, you can enjoy a similar standard water skiing event that would cost you seven days’ pay in other touristy territories of the world.

Turkey

Cheap backpacking experiences aren’t restricted to only Southeast Asia. For an essence of West meets East, go to Turkey, a place where you can enjoy exploring around the nation for well below $40 each day. A night in an apartment lodging begins around $5, while Turkish food offers a lot of conventional and traditional meals that help you feel satisfied for just a couple of dollars per meal.

Backpacking Turkey

Going to eateries in the streets is one of the ideal ways to spend less, and many markets in Turkey are incredible spots to get meals for less than $5. Transportation costs wouldn’t burn up all available resources either; flight fares to Istanbul are shockingly affordable, and transport fares around the nation are considerably less expensive, with an extravagance transport ride around the nation at a price around $20 per individual.

Vietnam

Vietnam is extraordinarily backpacker friendly and isn’t only in prices. The nation has a lot of sights, events that are either free or should be possible for only a couple of dollars. A quarters style lodging rooms, can be gotten at a price less than $3 per night, and often incorporate breakfast.

Backpacking Vietnam

Your dinners and suppers will cost even less; a lot of road merchants and cheap eateries in Vietnam enable you to attempt some amazing ethnic meals at a price less than $2 per meal.

Bolivia

South America is clearly not cheap as it once might have been, yet there are still some concealed spots where travelers can explore for just a couple of dollars per day. Bolivia is definitely one of the best locations, with a lot of South American appeal and intriguing destinations with friendly accommodations on a budget.

Backpacking Bolivia

You can get rather primitive spots to stay for up to $5 per night, and meals loaded with rice and beans will cost you just a couple of dollars a meal.

New Zealand

Are you planning on going backpacking with a group? If yes, New Zealand is the perfect destination for you! The best, and least expensive, and exceptionally prominent way to see the nation is to purchase and offer a camper van; gas is not expensive, and you can get huge amounts of free or extremely economical campgrounds that are reserved for camper vans.

Backpacking New Zealand

If you would prefer not to invest the cash in advance to get you, you can undoubtedly lease one for around $100 per day, which with a gathering of people can get at around $15-25 an individual for each night; not an awful price for a day’s travel costs and accommodation.

The best wagered for cheap food on the go will be to purchase locally grown vegetables and fruits or to locate a couple of good shoddy roadside stands and pile up on grub. In any case, you can effortlessly backpack New Zealand while adhering to your budget.

DIY Tarp Tent: Building a Shelter in the Wilderness

0
DIY Tarp Tent

If you’ve ever constructed something before, you understand how important planning is if the project is to be successful. Building a DIY tarp tent in the wilderness is no different than constructing a homestead project. You should not rush into the construction stage without making proper plans. Before selecting a site for the shelter and building, make sure you have all the materials in place.

Many videos and articles have been posted online about building a tarp in the wilderness. However, these have all failed to tackle the most important phase of building a shelter – planning. To avoid wasting your energy and time, it’s essential, first to have an idea of what it is you want.

tarp-tent-for-hiking

This guide will give you a good start on what to think about when considering a shelter in the outdoors. You can check and recheck your plans as the work continues; and although you may need to evolve the plan as a result of emerging factors, at least you will not be caught off-guard.

What to Consider When Building a Tarp Tent

Before you even start  working on the tent project, you need to know how to make a tarp tent and to know what you have to pay special attention to. So, to make it easier for you, we have included all the important questions you need to ask yourself before the start.

What are the tools available?

If you have a small knife, you will not be in a position to cut large wooden poles for the main frame of your shelter. When facing such situations, you’ll need to utilize fallen dead wood. All the green sticks you may harvest will be utilized in creating the main frame.

wooden poles frame tarp tent

This will influence the durability and design of your shelter. You will need to adapt the tarp’s design based on the available resources. It is recommended to have a survival shovel when building a shelter in the wilderness.

Is it a solo or a group thing?

If you are solo, you will need to construct a simple shelter, which doesn’t require assistance from another individual. Nonetheless, if there are other people in your group, it’s advisable to get everyone involved in the construction. Divide the workload depending on the number of those present.

Even those who aren’t participating in the construction can be kept busy by doing other activities such as fetching firewood, water, or preparing the meal.

Do you have adequate time?

When stranded in the wilderness and you need to construct a shelter, you’ll always have a deadline, and that is the evening. Since you’ll want to get the roof over your head, it’s important to know what the local sunset time is.

Tarptent-in-the-mountains

If you don’t have much time left, it would be sensible to concentrate on gathering firewood to last the entire night. In such a case, your sleeping bag will also be of great assistance.

How big do you need your shelter to be?

While this aspect mainly depends on the situation you are facing or the number of people you’ll need to accommodate, it’s important to have an idea of the size you want your shelter to be. A two-person tarp will be large enough to squeeze inside and utilized the heat generated by the body of occupants to stay warm.

If there’s a larger group and you’ll need to face cold condition, a larger design will be necessary; something which can accommodate a fire. Most individuals will be ambitious and build something large. They don’t think about the availability of materials and the availability and capability of the workforce.

huge-tarptent

You’ll need to find a suitable spot in the wilderness. Caves, rock formations, or other natural structures would go a long way into making your construction easier. Make sure to indicate some marking on the floor so as to create the limit of your shelter.

This has to be done to establish whether or not the shelter is big enough to accommodate everybody. You may lay down on your sleeping positions inside the marked footprint so as not to undersize the shelter.

Know about the local weather and how it can affect the shelter

You need to do some research about the place you’ll be camping before you begin your explorations. Learn about the environmental elements of the region so you can protect yourself. You need to know about the wind direction so you can know how to build your shelter to avoid destruction.

diy-tent

Additionally, the wind’s direction is instrumental when you want to make your fire. You need to know the kind of fire you’ll need so as to build one based on the wind and the direction it is blowing.

The position of the sun is not essential, but this is important as it helps to keep you warm in the cold season. There are large snow patches which never receive sunlight. You can quickly identify these places in the summer long once the snow has melted. This is the last place you should be setting up your shelter.

What are the dangers you should be aware of?

When you are planning to build a shelter in the wilderness, you’ll need to put the environment into consideration. This aspect is important as it will help you to identify the potential risk you could be facing. Floods, rising water, falling rocks, falling trees, dangerous animals, avalanche, poisonous snakes, among others, are the kinds of hazards that you could be facing.

poisonous snakes hiking

Look around to see if there are any animal tracks within your camping zone. You don’t want to build your tarp in an area surrounded by predators. Also, look up for a potential avalanche, rock falls, or falling trees. Ascertain the strength of the wind so you can assess whether your shelter is safe or it will be blown away.

However, falling trees are the most dangerous risk anyone could face in the wilderness. Therefore, be on the lookout for these kinds of hazards.

Tarp Shelter Designs

There are a dozen tarp tent designs and we have made a list of the basic ones.

Sunshade tarp design

To build this kind of shelter, you’ll require four anchoring points that you’ll use to tie the paracord. This shelter is parallel to the ground and is meant to give a hundred square feet of shade during sunny conditions. Some people will use this kind of shelter in rainy conditions as the water collects in the middle making it easier to collect it.

Sun shade tarp

If you want to make your shelter sturdier, add poles to the corners. The sunshade tarp shelter will offer maximum protection against the heat from the sun but is not ideal for use during cold weather. Moreover, this tarp cannot support the rain for long.

The A-frame design

This kind of shelter is probably the easiest and most common design anyone can make. The A-frame can be built by stringing the paracord between poles. Draping over and staking the tarp are the last steps needed to make it. The thirty-degree angle of the roof creates a ten-foot-long area to live.

The A-frame design

This shelter will be 2.5 feet tall and 8.6 feet wide. It offers an excellent snow and rain runoff, as well as a perfect deflection of the wind. The greatest drawback of this design is that there is no floor. Additionally, if the paracord has not been stretched tight enough, the shelter will sag in the middle.

The Lean-To design

This is another tarp design that is simple and straightforward when it comes to building it. The Lean-To tarp is ideal for deflecting the wind and offering sunshade.

To create a shelter of this kind, you’ll have to secure the tarp on the windward side and build support with the paracord between two anchor sections. A thirty-degree angle will offer eight feet in width and five feet in height.

The Lean-To design

This model is an “on the go” design since it is much easier to set up and you can take it down with ease. It offers superior wind deflection, and it provides protection against the sun and rain. However, this shelter has no sides to protect you from other outside elements.

The tube tent design

This is a sturdy design that offers a floor. When well-secured to the ground, the tube tent will prevent the rain from seeping in.

girl-in-tube-tent

To build this model, you’ll have to secure the paracord between two trees and wrap over the tarp with the opposite sides secured together. The 60 degrees walls will offer 3 feet of headroom and 3 feet of width. This should be adequate for a single adult.

The cornet tarp design

This model uses the entire length of a paracord strung from a pole or tree to the ground. In this design, the tarp is draped over diagonally, while the edges, fold under to create the floor.

When building it, the corner should be faced towards the wind’s direction. You’ll need to tie some drip lines above the shelter’s entrance to prevent the rain from getting into the shelter.

The cornet tarp design

The cornet tarp is an excellent design for rain/debris shedding and wind deflection. However, this model has a downside in that it does not provide adequate head room. Tall people will not have enough room to accommodate them as well as their gear.

The mushroom fly design

This model is quite similar to the sunshade shelter, but it incorporates a central support pole at the midpoint of the tarp.

Mushroom fly tarp

This design is meant for snow and rain runoff, and it is sturdy when the four corners of the tarp are secured well enough. You can make the mushroom fly design as short or as tall as you want, depending on the pole’s length. This shelter offers a perfect runoff from snow and rain, but there are no sides to protect you from cold and the wind.

The dining fly design

This design is preferred by campers, and it is quite a simple model to build. It offers an excellent sunshade and adequate headroom without giving up too much space.

This model keeps away the rain, but it offers limited protection against the external elements since it lacks sides. When it is tied down and staked, the dining fly design becomes a sturdy shelter.

The dining fly design

The height of its support pole often dictates the size of headroom. This shelter is a perfect model for desert survival since it offers adequate coverage as well as proper ventilation.

Fold-Over Wind Shed design

This model is similar to a traditional wind shed. However, it provides more coverage by giving up the groundsheet. The paracord ridgeline’s height, determines the roof’s angle as well as the footprint of this model.

Fold over wind shed tarp

The Fold-Over Wind Shed provide suitable wind deflection and rain and snow runoff, but it does not offer complete protection against other elements as it lacks sides and a floor.

The wind shed model

This kind of shelter needs some practice to build it the right way. You’ll need to fold your tarp into thirds and ensure the leading edge of its roof to hang above the groundsheet for sufficient runoff. While stretched between two pole/trees, the ridgeline needs to be secured using paracords.

THE WIND SHED MODEL

A paracord needs to be added the fold’s bottom, where the groundsheet and the back panel meet. It offers superior wind deflection, but requires many secure points. A hanging roofline could sag when under rain loads and direct the runoff onto the groundsheet.

The arrowhead design

Begin the construction of the arrowhead shelter by supporting the midpoint of two perpendicular edges using a five-foot pole or by using paracord to attach the edges to trees. You’ll need to stake to ground the opposite corners so as to create four-triangle series. This model will offer thirty-five square feet of living room and five feet of headroom.

Arrowhead tarp

The poles should be supported using paracord tie-downs. This is an ideal shelter for windy environments as it deflects the wind through its low profile. It also offers adequate room for occupants.

The diamond fly tarp

This model is ideal for two individuals, and it is easy to set up. When building this design, you will need to secure the paracord to the ground and a tree, and drape over your tarp at a diagonal.

The angle to which the tarp is tied and the length of the paracord will determine the width and headroom of your shelter. The steep sides will shed rain and deflect the wind if these sections are well staked.

The diamond fly tarp

This tarp design requires drip lines, the same way as the cornet shelter. Depending on its size, the shelter can even accommodate more than two individuals, but its lack of flaps and floor will not keep out the outside elements. The shelter could easily be compromised if the wind happens to change its direction frequently.

How to Make a Tarp Tent

Having in your backpacking bag a versatile equipment such as a tarp will be instrumental or your outdoor survival. This item will help you collect water, camouflage your other equipment, and provide a perfect shelter in case you have nothing else to use.

However, to keep your head dry and ensure you are protected, it’s imperative to have an idea of how to make a tarp tent when out in the wild.

man-in-tarptent

A polyethylene tarp will be significant, and you should pick one for the bug out bag. This product is durable, lightweight, waterproof and draft-proof. A tarp is available in a variety of color and sizes, and they do not cause a dent in your pocket.

Building a tarp shelter is not a tedious affair, and there are many patterns and ways to construct a shelter with a single tarp.

Before you can create one, you need to put the following pointers in mind:

  • Your shelter’s location is quite important, and you should plan carefully about where you are going to set up your shelter
  • The direction of the wind is also worth putting into account, to prevent your shelter from sailing away
  • If you are planning to have a good night’s sleep, the floor of your shelter should be as comfortable as possible. Pointy rocks and other debris will keep you awake.
  • Make sure you construct your shelter in a slight slope for the rainwater to run off
  • In case there are no slopes, you’ll need to dig trenches around the shelter to help with the drainage
  • Take into consideration the function of your shelter and ensure it is as large as it is required to be
  • Consider the weather condition and select a model which is stable and doesn’t collapse when it rains

A Step-by-Step Guide

This guide will explain every step from the beginning to the end. Read carefully.

Begin by learning knots

When you want to build a tarp shelter, begin by learning the simple knots, and practice tying them until you can create an effective knot in a bad weather or in the dark. Chances are, that is the time you will most desperately need an emergency shelter and you don’t want to fumble around.

person-making-knot

The A-frame is one of the simplest shelters to construct. Basically, this is a line that is set up between two points, with the tarp draped over it. The A-Frame resembles a pup tent by without ends. The knots will assist you to set up a line between the two anchor points.

You can use a timber hitch to secure one end of the line. The friction knot is quick and easy to tie, and the more the pressure used on the knot, the tighter it gets. On the other end, use a trucker’s hitch. This hitch makes it possible for you to tighten the centerline by pulling on a tag. The hitch will allow you to stretch the rope tightly.

Choose a campsite

The next step is choosing your campsite. Try to find a place with solid objects that can secure one end of the tarp. Remember to check out for fallen and dead branches around any potential site.

tarp-tent-nature

Ideally, you need to find a ground that is slightly slanted for easy drainage. If this is not possible, you’ll be forced to dig trenches to help with the drainage.

Insert a stick

You will need to insert a stick in a rope loop in a grommet. This is a simple concept. The line is threaded through a grommet, and the stick is positioned in the loop.

This holds the tarp at a given point on the line, allowing the rope to be tightened. You can evenly tighten the tarp, and the rope/stick combination helps in protecting the grommets from tearing in heavy winds.

tarp-sticks

You can use this technique in windy and rainy condition to secure a tarp over your gear and the cooking area. It will help in draining the water easily, and your tarp will not be compromised.

Use aluminum tent stakes

These items are quite beneficial and weigh less. The aluminum tent stakes can be used in taking down the sides and corners of the tarp. While you may want to use rocks to anchor the tarp’s corner, these are sometimes not handy.

tent-stake-tool

Don’t forget the trekking poles

Ski poles, walking sticks, or trekking poles are essential as these can be used as potential support for the tarp shelter. Within minutes, you can use a pair of the trekking poles to make your A-frame shelter.

Prevent the corner grommets from tearing

The idea here is to distribute the strain and stress, so the corner grommet will not get torn out by prolonged gust or a blast of wind. Ideally, you thread a paracord between the grommets on a corner.

Prevent the corner grommets from tearing

The resultant loops are threaded through the carabiner. With the stress distributed between the three grommets, there’s no way the full brunt of wind gust can focus on one grommet.

Mountain Climbing Gear List: Everything You Need for a Successful Climb

0
Two adults canyoneering

If you love backpacking and spending time outdoors, mountain climbing is an exciting new adventure to try. It’s a relatively simple sport, but it requires a lot of preparation and awareness of the extreme range of situations you might encounter, especially as you take on bigger and higher mountains over time.

Your first climbing trip doesn’t have to be a major expedition – start out slow with careful preparation that includes making a mountain climbing gear list, and you have a plan for success! This should include taking the time to train, especially if you are a novice climber. Training will help you feel prepared, making your first climbing experience a lot more fun.

You can train anywhere, but trail running is one of the best methods for building cardiovascular fitness which you’ll need for mountain climbing. Trail running also helps you get comfortable with dirt and rock. Indoor climbing walls are another great way to practice putting yourself in some of the situations you’ll be in on a real mountain.

Mountain climbing is harder than you think, so don’t underestimate the strength and endurance it takes before hitting the trail for the first time. However, you’ll also discover an inner strength you didn’t know you had if you push through the challenges and make it to the summit.

A woman climbing at Serra da Bocaina

Enthusiasm and determination are both necessities for successfully climbing any mountain, but let’s talk about what else you’ll need to do and take with you to be fully prepared. Beginner climbers will likely want to start out with a one-day hike, but we’ll include additional gear you’ll need for longer treks as well. And remember, when it comes to gear, buy quality gear for your own comfort and safety. From novice to experienced mountain climbers, we’ve covered all the gear you need from essential items and technical equipment to clothing, backpacking gear, and basic first aid.

Ten Essentials for Every Mountain Climber

This list covers the ten essentials every mountain climber should include in their day pack.

Image of hydration system

These items will ensure that you will be safe if you get lost or find yourself in an emergency situation where you need to camp out on a mountain overnight.

  1. Navigation – Map, compass, and GPS (optional)
  2. Sun Protection – Sunscreen, lip balm, sunglasses or goggles, hat
  3. Insulation – Jacket, vest, pants, gloves, hat
  4. Light – Headlamp or flashlight, extra batteries
  5. First Aid Kit – We’ve included an additional list below covering the essential items you’ll need in a first aid kit.
  6. Fire – Matches or lighter, fire starter
  7. Repair Kit – Knife or multi-tool, duct tape
  8. Nutrition – Carry an extra day’s supply of food in case of emergency. Make sure you carry some food that doesn’t need to be cooked.
  9. Hydration – Water bottles, hydration system, water treatment system
  10. Emergency Shelter – Tent, tarp, and reflective blanket

Technical Equipment

Every mountain climb requires some technical gear for your safety and comfort.

Image showing climbing equipment

Our list covers all of the necessities for most climbs, and especially for novice mountain climbers.

  • Rope – Choose a dynamic rope, which should be a bit longer than your longest pitch. Most ropes are 60-70 meters.
  • Helmet – Make sure your helmet is adjustable so that it fits your bare head in the summer and over a hat in the winter.
  • Harness – Harnesses have adjustable straps and are typically one size fits all so you don’t need to worry about size. Focus on comfort when you purchase a mountain climbing harness to make sure you’ll be comfortable walking with it on and sitting in it for long periods of time.
  • Boots – You want mountain climbing boots that will also be comfortable for any hiking portions of your summit so that you don’t have to worry about carrying extra shoes. Make sure your boots are crampon compatible, so that you can use them in winter conditions and in higher elevation climbs.
  • Crampons – It’s always a good idea to carry crampons even in the warmer months if you are climbing a higher elevation mountain where you might need them as you approach the summit. Try them on over your hiking boots to make sure they fit before you head out on the trail.
  • Ice axe – For high elevation climbs and winter climbs you will need an ice axe to assist your climb. For comfort and safety, purchase an ice axe with a hand rope to help you hold on to it.
  • Belay/rappel device – A belay/rappel device acts as a brake on your climbing rope by applying friction. This keeps tension on the rope and helps protect the climber, an essential item for climbing safety. There are three primary types to choose from depending on the type of climbing you’ll be doing: tubular, assisted braking, and figure 8.
  • Pulley – Pulleys come in all shapes and sizes depending on the size of your rope and weight needs. Do your research to make sure you’re choosing a pulley that works for you.
  • Climbing pack – Your climbing pack should be a small backpack just big enough to fit the items you’ll need for the day like food, water, and gear. If you’re on a longer backpacking trip, this would be your day bag while the rest of your gear stays at the campsite.
  • Route guidebook – Make sure to carry a route guidebook or map to ensure you are familiar with your climbing route.
  • Carabiners – Carabiners have a variety of uses for mountain climbing. Carry a few different sizes so you’ll always have what you need for your rope, belay device, etc.
  • Hand protection – This isn’t a necessity, but you might want to consider bringing something on your climb for hand protection.

The climbing rope can hurt and damage your hands as it runs through them and a pair of thick, protective gloves can make a huge difference in comfort and safety.

Mountain Climbing Clothing

You will want to make sure that your clothing is high quality to keep you warm and safe while mountain climbing.

Keep in mind that it gets colder as you approach the mountain summit. Even in the summer, it can be quite cold at the top depending on where you are and how high the elevation is.

Two mens climbing the mountainsa

Layers are key so that you can add on warmer items as you make your ascent, and remove layers as you descend. Here is a list of the basic clothing items you’ll need.

  • Wicking base layers – Bring a set of base layers or long Johns to wear against your skin under the rest of your clothing. These are essential for keeping warm in cold conditions and should be made of synthetic or wool material.
  • Fleece jacket or vest – Carry a fleece layer for added warmth on colder climbs.
  • Insulating jacket – For winter and high elevation climbs you will want two jacket layers, a fleece layer covered by an insulating layer to keep out wind and cold.
  • Rain jacket with hood – Always carry a rain jacket in case of unpredictable weather conditions. This will keep you warm and dry if it rains or snows unexpectedly.
  • Fleece pants – Consider a layer of fleece pants in cold conditions to be worn under your waterproof layer.
  • Waterproof pants or bibs – For winter or high elevation climbs, wear waterproof pants or bibs over your base layers to keep you dry and protected from ice and snow.
  • Insulating hat or headband – Remember that you’ll want your helmet to fit over your hat so make sure your hat is functional, not fashionable.
  • Hat for sun protection – For the hiking portions of your approach to the summit you’ll want to carry a hat for sun protection, especially in warmer months.
  • Socks – Wear synthetic or wool hiking socks under your boots for comfort and warmth, and always remember to bring extras in case they get wet.
  • Gloves – Carry warm weather gloves and durable gloves to wear as hand protection during your climb.

Backpacking Equipment

If your mountain climbing excursion will only be for one day, then you might not need some of the items on this list. However, you might want to consider carrying items like a sleeping bag in case of an emergency that requires you to stay on the mountain overnight.

Goal-Zero-Camp-Lantern

For longer climbing trips, make sure to pack all of the appropriate backpacking gear.

  • Backpack – The size of your backpack will depend on the length of your trip. Just make sure it has comfortable straps that you’ll be comfortable wearing for long hikes and climbs.
  • Daypack or summit pack – For longer backpacking trips you will want to leave your backpacking gear at your campsite for the day and carry a smaller daypack or summit pack for any climbs you’ve planned for that day.
  • Pack cover – Most backpacks come with a pack cover, but double check that you have a cover to keep your gear dry in case of rain.
  • Tent and tarp – Carry as small a tent as possible to minimize weight and bring a lightweight tarp to place under your tent to protect it from the ground.
  • Sleeping bag – Do your research when purchasing a sleeping bag and make sure you find one that is lightweight and warm enough for the mountain conditions you’ll be sleeping in.
  • Energy food and drink mixes – In addition to carrying food for your climbing trip, bring energy food and energy drink mixes to give you electrolytes and energy to keep going. Energy foods should include beef jerky, trail mix, nuts, chocolates, and other protein sources.
  • Stove – Carry a small camp stove for cooking a hot meal at the end of each day.
  • Fuel – Be sure to bring the right fuel for your camp stove and enough to last through the entirety of your trip.
  • Dishes and utensils – Bring washable dishes and utensils so you only have to carry what’s necessary.
  • Bear canister – Bring along a lightweight bear canister for safely storing your food each night.
  • Lantern – Carry a lantern for your campsite at night. You might also want to consider a small head lamp.

Personal Items

In addition to your climbing and backpacking gear, there are a few personal items you’ll want to bring along on your mountain climbing trip for comfort and safety.

Camera on a wooden table

  • Watch – Wear a wrist watch to keep track of the time and make sure you reach a safe point for setting up camp before dark each night.
  • Two-way radio – Cell phone reception isn’t a guarantee in the outdoors, so it’s a good idea to carry a two-way radio in case of emergency for contacting park officials.
  • Cell phone – Carry a cell phone for emergencies, but be aware that you might not have reception as you begin your approach to the mountain summit.
  • Camera – Reaching the mountain summit is a memory you won’t want to forget so bring along a camera to capture the moment.
  • Quick-dry towel – Pack a lightweight, quick-dry towel in your backpack for a variety of uses.
  • Toilet paper – Carry a roll of toilet paper in a Ziploc bag for any bathroom breaks you take on your climbing and backpacking trip.
  • Hand warmer packets – This isn’t a necessity, but can make a big difference in keeping you warm and comfortable on cold mornings.

Understanding the Inherent Dangers

There are a few inherent dangers you should be aware of before your first mountain climb, but keep in mind that there is a lot you can do to minimize the risk of these dangers occurring.

Free alpinist climbing the mountain

  • Rock falls – Rock falls are fairly common in the mountains, but there are typically signs in place to warn you in areas where rock falls occur more often. Watch out for warning signs and you should stay safe.
  • Unpredictable weather patterns – Always check the weather before preparing for a climb, but be aware that the weather at the summit may be drastically different compared to the weather at the base of the mountain. Weather at the summit is also far more unpredictable, so be prepared for any conditions.
  • Altitude sickness – This is a common ailment for mountain climbers. Be aware of the symptoms and ways to treat it as discussed below.
  • Exhaustion/dehydration – Exhaustion and dehydration can occur quickly and without warning so be aware of your own limitations and don’t push yourself into a dangerous situation that could have easily been avoided with a short break and pack of rehydration salts.
  • Frostbite and hypothermia – Frostbite and hypothermia can occur in cold conditions and in emergency situations where you find yourself stuck on a mountain for longer than expected. Bring cold weather items to prevent these conditions and be willing to turn around and head back when needed.

Symptoms and Treatment of Altitude Sickness

Altitude sickness is one of the most common ailments that mountain climbers experience. It’s extremely important to know how to recognize the symptoms and treat them before it becomes a serious condition. Symptoms of altitude sickness include nausea and vomiting, fatigue, lethargy, loss of appetite, and difficulty sleeping. If you’ll be traveling somewhere with extreme elevation your doctor can prescribe you altitude sickness medication ahead of time.

Two persons climbing during daylight

However, if you don’t have medication or are still feeling the effects of high altitude, the best treatment is to descend to the last elevation you slept at without feeling any symptoms and rest until you feel better. Remember to always sleep low and climb high.

First Aid Checklist

Always carry a prepackaged or DIY first-aid kit before heading outdoors. Don’t just carry the kit with you; also know how to use it. Consider taking a training course to make sure you understand basic first aid in case of emergency. Knowing how to use your first aid kit could be lifesaving, especially while mountain climbing. We’ve included a list of the items you’ll need:

  • Basic care – Antiseptic wipes, antibacterial ointment, assorted bandages, gauze pads, medical tape, blister treatment, pain-relief medication, insect sting relief treatment, antihistamine for allergic reactions, tweezers for splinters, safety pins, first-aid manual
  • Wraps, Splints, Wounds – Elastic wrap, triangular cravat bandage, finger splints, SAM splints, rolled gauze, large bandages, hemostatic gauze, eye pads
  • Medications and Treatments – Hand sanitizer, aloe Vera (for sun exposure relief), aspirin, antacid, throat lozenges, diarrhea treatment, poison ivy/poison oak treatment, glucose or sugar source for hypoglycemia, oral rehydration salts, prescriptions medications, Epi-pen for common allergic reactions
  • Tools and Supplies – Knife or multi-tool, thermometer, duct tape, emergency heat-reflecting blanket, headlamp or flashlight, and a whistle.

Concluding Thoughts

If you’re a frequent backpacker or love spending time outdoors, mountain climbing could be your next big adventure! It’s a simple sport if you’re properly prepared and aware of the possible dangers. Mountain climbing can be an exciting adventure sport or a short day trip for novice climbers who are just starting out.

We’ve covered all of the gear you’ll need for short day climbs and longer backpacking trips. Focus on quality, comfort, and safety when purchasing gear using our comprehensive list and tips! With slow and careful preparation, your mountain climbing endeavors will be a huge success.

Close-up photo of a climber gear

Did you find our mountain climbing gear list useful? Let us know if we missed anything in the comments!