Home Blog Page 32

Tips on Sleeping in a Cold Tent: 11 Tips for Staying Warm While Enjoying the Outdoors

0
Camping near mountains

One of the most important things you can do when you plan on camping, hiking, or backpacking is to know the weather in the area in which you plan to camp. By doing so, you can prepare yourself by having items ready for when the weather dips down into cold or freezing temperatures. Here, we are going to discuss tips on sleeping in a cold tent, and how to stay warm when the temperatures are frigid.

You want to ensure that you have all of the right gear that will keep you warm through the night. With the correct gear and being well prepared, you will appreciate your journey much more, as you will be sleeping warm and comfortably. Warm clothing, such as fleece, can mean the difference between chattering your teeth freezing and being comfortable in the cold.

Tent above mountains

While some of these tips might seem like common sense, some may be new to you, so consider each item and think about if it is right for your next camping trip. By considering some features, and being armed with the knowledge of these tips, your next chilly camping adventure can turn out to be warm and comfortable!

Features to Consider

Before you take a camping trip during the winter, or during the times of year where temperatures drop far at night time, you will want to take some time to think about what you need and what you an do when it gets cold on your journey.

Have the Right Gear

Gear is highly important when it comes to camping in cold weather. You will want to have a sleeping bag that is well insulated and made for negative degree weather. Taking along a car camping bag or a backpacking sleeping bag can be helpful as they are comfortable and will keep you warm.

Breakfast in tent on a sunny Winter morning

Bring along a sleeping pad for comfort and to be off the cold ground. Pillows can help keep your head warm if they are made from fleece or down comforting. If there is a lot of wind or earthy noises around, you can bring along ear plugs to reduce the noise level and get proper sleep.

Have the Right Clothing

In cold weather, you will want to have 3 layers of clothing on. The bottom layer should be insulated like long johns. The middle layer can be a fleece shirt and then the third layer should be protective gear, like a warm coat good for outdoor use. This will help keep you warm in cold temperatures.

Woman near a tent driking hot coffee in the morning

Of course, you can also add hats, gloves and other warming items to that list. Try to wear socks that have wick in them so you do not sweat through them.

Preparing for Bed Time

When preparing for bed, there are a few things you want to do so that you can turn in for the night:

  • Find a good tent site on a flat area that has no debris like sticks and rocks.
  • Bring along a headlamp or flashlight so that you can prepare for bed.
  • Do your nightly routine that you would at home (brush your teeth, brush your hair, grab a bottle of water if you are thirsty at night).
  • Be sure that all of your food and toiletries are outside of the tent. This way, if a bear or other animal comes along, they will not be trying to break into your tent.
  • Be sure you are wearing clean and dry clothing to bed. Wearing long johns and socks should cover it. You do not want to over dress during this time.
  • Go to the bathroom before you settle in, as you do not want to make a trip in the middle of the night to go outside. You can also use a bottle or can to urinate in.
  • Do not panic if you hear noises outdoors in the night time. As long as you have stored everything properly and done what you can, you should be fine and can wear ear plugs if there is too much noise.

A tent and the night sky

11 Tips on Staying Warm

Below are the 11 tips on staying warm if you are caught up in some cold, freezing weather. Adhering to these tips can help you stay warm during the night, and allow you to sleep a lot better.

Ventilate Your Tent

After you have selected a good camping site, you want to ventilate the tent off of the ground. Find a spot that is out of the wind. The body heat you give off does cause condensation within the tent and will make things damp, which causes the tent to get cold. As long as it is ventilated, you will not get any condensation and the tent will stay dry, which means it will stay warmer.

Image showing roof vent and pole and clip system

Be sure your site is free of any debris so that you do not have an uneven area in which you are sleeping.

Use a Space Blanket

Many people do not think of bringing along a space blanket, but really, it can be helpful when attempting to stay warm. Space blankets will reflect heat back to your body, and is also known as an “emergency blanket”.

a space blanket on a tent

You can simply attach it to the top of your tent with duct tape, and the heat will come down to your body and heat the whole tent, which keeps you and your camping partners cozy warm all night long.

Use a Sleeping Bag

It cannot be said enough that you need a really good sleeping bag when you plan to camp in frigid temperatures. Find one that is temperature rated (some go up to -30 degrees and more) and made of quality materials that will last and keep in the warmth. If your sleeping bag is temperature rated, but you find yourself still chilly, you can bring along a sleeping bag liner to add up to 10 degrees more of the heat.

Two Womens in Sleeping Bag Liners

Be sure to air out your sleeping bag, and liner, each day by rolling it up food to head and leaving it open so that the air can cool it out. When you go to use your sleeping bag the next night, shake it out and fluff it up before you get inside of it.

Use a Sleeping Pad

Find yourself a durable and insulated sleeping pad to provide padding between you and the cold ground. Experts say that having warmth on the bottom of you is more important than on the top.

Sleeping pads are more insulated than if you were to use a regular air mattress, because those are not insulated at all. If you do want to use an air mattress, use a sleeping pad between you and it so you can keep warm through the night.

Backpacking Sleeping Pads on the Grass

Remember, getting a good night’s sleep is very important when you are camping and doing other outdoor activities.

Take Care of Your Feet

Before you turn in for the night, you want to be sure that your feet are clean and dry. You can use some dry socks for sleep to keep your feet dry. If your feet are damp, or the socks are damp, you can lose heat through your feet because dampness means there is moisture, which causes cold feelings in the body.

Use garbage can science to help keep your stuff dry. Line your backpack with a plastic garbage bag and fill 'er up.

Keeping your feet warm is important for the whole body as you tend to lose the most heat through your feet and hands. Keeping these parts warm will keep the rest of you warm as well, for the most part. If your feet tend to get cold, you can bring along a half bag that heat the feet and legs and uses a drawstring to keep it closed. If you find yourself in a pinch, use a piece of insulated clothing at the bottom of the sleeping bag.

Face Placement

When you breathe, you are exhaling moisture, and again, moisture means you are going to be cold. This is why you do not want to put your face inside of your sleeping bag, not to mention your body could overheat. Keep your nose and mouth outside of the bag. If your face is very cold, you can use a scarf or a light face mask to keep warm. Stocking hats work well too, to keep heat from leaving your head.

Woman sleeping in a tent with her face up

Being too warm means you can sweat, which means you will feel cold and wet soon enough. If you find yourself getting warm, you can open up the sleeping bag a little bit or take off a layer of clothing.

Get Warm Before Bed

As we mentioned before, you will need to wear layered clothing, but it is important to heat the body before bed by going for a brisk walk or doing some light exercise to get the body heat active. Then get in your sleeping bag and you will retain heat better.

Two adults in sleeping-bags

You can also cuddle up to your mate at bed time to retain body heat for both of you.

Stay Hydrated

During the day, you need to stay properly hydrated so you do not get overheated. At night, try not to drink a lot of fluids so that you do not have to leave the warm tent in the middle of the night, or use the urinating can, you brought along.

Woman getting hydrated before bedtime

Keep some water next to you while you sleep so you can drink some if you get thirsty at night. The water should stay cold on its own if the weather is cold outside.

Get Your Calories

Calories are, in essence, part of the heat. Your body stays warmer when it has a lot of calories. At dinner time, you should eat foods with a lot of calories so that you can stay warm at night time. One good idea is that if you wake up hungry at night time, you can reach for a snack next to you for more calories and renewed warmth.

Cooking diner in a pan

While you should store your foods outdoors safely, you should also store it safely in the tent in case bears or other dangerous animals come along and try to get your food. Using containers that seal and are air tight will keep the scent away from animals that might come lurking for a midnight snack.

Use a Water Bottle

You can fill a water bottle with hot water before you tuck in for the night and place it in any colder areas of your sleeping bag. If you do not have a water bottle to use, or hot water, you can always use hand warmers, or heater packs, both of which are disposable. You can place these in your sleeping bag as well, or use them in your hands.

Woman lying in a tent with coffee ,view of mountains and sky in Carpathians mountains, Ukraine,

Some old school campers would heat rocks at the campfire and put them in a sock and then put them in the sleeping bag. As long as the rocks are not too hot, you can feel free to try this method out.

If You Got To Go

If you have to use the restroom at night, you do not want to let out the warm air by opening the tent to do your business. This also makes your bed space colder, and you will have a harder time getting comfortable and warm again. Instead, you can use a urine bottle or a can to do your business in it, and keep it inside the tent for later proper disposal.

Person in a sleeping bag in tent looking outside

Do not hold in your urine, because your body will use those heating calories to heat the urine in your bladder. So if you have to go, go in a container inside of the tent so you can retain as much heat as possible.

What Do Others Think of These Rules Tips?

The campers say that adhering to these tips will surely help keep you warm at night. By staying in the tent, you are not risking the cold elements entering the area, say if you were to leave the tent to relieve yourself. While it might seem a little gross keeping urine inside of your tent, you will be much more comfortable with the head inside and you can dispose of any waste in the morning. They also say that having warm and insulated gear, helps you get a great night’s sleep. Overall, campers adhere to these tips and have achieved success on staying warm on those cold, freezing nights.

Man moving the snow near a tent

Some campers like to implement that is newer to the camping world. They are camping heaters. You can take them with you when the weather is frigid, and you can find them in an electric version or a propane version, so you get to choose which version you like better. The thing about these items is that you should not ever sleep with the camping heater on. These need to be used to strictly warm the tent before you go to sleep. Otherwise, damage can occur to the tent or you, which could be harmful.

Pros and Cons

It is not always ideal to sleep outdoors when the weather is cold.

Tents on a Snow Covered Mountain

Below are some pros and cons that can help you along the way:

Pros

  • Having warm gear will ensure you stay toasty during the frigid temperatures.
  • There are many items on the market for campers that help with staying warm.
  • Warm clothing can make a huge difference.
  • You can still enjoy nature, no matter the weather.

Cons

  • While the temperatures are cold, you might have to wear bulky layers at times.
  • You can not leave your tent if you want to keep the heat inside of it.
  • Waste and trash will have to stay in the tent until morning when it can be properly disposed of, or you will risk losing precious heat.
  • If you are not prepared, you risk freezing and getting frostbite.

Concluding Thoughts on This Topic

Using these tips can keep you from freezing during the night. Staying in the tent and using blankets and other ways to keep heat in will make a huge difference. When the weather is in the single or below zero temperatures, you need to do everything in your power to create and preserve heat.

It is not always about the tent warmth. Remember, you need to have the proper warm clothing and proper warm sleeping bag and gear to round out the experience of staying warm. Use items that will buffer you from the ground so the cold from the ground floor does not come up to your body. Remember, you should never wait until you are cold so you can warm up. Being properly prepared by planning ahead on clothing and sleeping gear is the difference between being cozy or chilly.

Girl sitting in a sleeping bag and watching the landscape in the morning

Tips on Training for Backpacking: How to Get in Shape for Hiking

0
A man backpacking in Iceland

Backpacking calls for hauling a 40 or more pounds pack on your back for several days. As fun as the adventure might be, it can also be daunting and tiring. For this reason, you will require a lot of strength doubled by cardiovascular fitness to ensure you survive the uneven terrains.

In addition to investing in the right hiking gear, you will also require getting in the right shape for the adventure at hand. In this article, we look detailed tips on training for backpacking. But before that, let’s look at why you need backpacking trips.

tips on Training for Backpacking

Benefits of Backpacking

Hiking and going for backpacking trips is associated with several benefits including getting a closer connection with nature, breathing fresh air, access to great views, and sounds and sweet smells of mother nature.

A Man Overnight Backpacking

But did you know that hiking is also a form of cardio exercise that can help you achieve several health benefits? Below is a list of advantages that you leap from backpacking:

  • Helps in improving blood sugar levels as well as minimizing chances of blood pressure
  • It lowers the risk of heart attacks
  • Walking is a weight-bearing exercise and therefore by hiking you boost your bone density
  • It helps in improving your weight as well as improving your balance
  • By hiking regularly, you help strengthen your quadriceps, glutes, hamstrings, and the lower legs and hip strength
  • Hiking is also a great way of improving your moods. As you connect with nature, your moods are raised and stress and anxiety combated in the process

Ways of Improving your Hiking Power

Whether you are a hiking beginner, or are planning on a big hiking trek, pre-hiking preparation is important. You will need to engage in a backpacking workout to get your body in shape for the experience ahead. Pre-backpacking exercising gets you in shape for hiking by developing your strength, flexibility, and builds your endurance. When exercising, you should give more focus on the following three areas:

  • Cardiopulmonary – for adequate air supply of the body during the hiking expedition, you need to make sure the heart and the lungs are properly prepared.
  • Hiking muscles – the legs and core body support are crucial in hiking and need to be prepared before the real adventure kicks off. The arms and the upper body part can also be exercised , although they are not most crucial.
  • Hiking gear – make sure your feet are comfortable with the hiking boots and that your shoulders are comfortable with the pack before kicking off.

Getting in shape for hiking should be done strategically and not in an impromptu manner. The tips below will assist you get the most out of your fitness-boosting journey.

Seek out the doctor’s advice

Before embarking on any physical exercise, it is advisable that you seek a doctor’s advice.  Your doctor will advise you on any possible contradictions or conditions that might impede your exercise therapy.

A doctor looking at the camera

He/she will also in a good position to offer you advice on the best alternative fitness methods or preventive measures if you have stayed for a long time without exercising.

Start at a slow pace

You do not require a vigorous exercising, you should rather start slowly and advance gradually. Doing this gives your body an opportunity to adapt to the exercises. Having a daily routine and taking it slowly when increasing gradually provides your body with the right amount of exercise.

Image of uneven terrain

Within a period of two weeks, your body will have gotten used to exercising and especially if you start including uneven terrains. Uneven terrains are important in helping your body achieve balance and stability while at the same time strengthening your muscles.

Types of Effective Backpacking Workouts Strategies

Going on a journey of weeks supporting a pack about 30% of your weight through an irregular landscape requires sufficient strength and cardiovascular competence. Backpacking workout helps improve the fitness of the body muscles and lungs in readiness for the adventure. You can begin by preparing a training schedule for both resistance and cardiovascular workouts.

Resistance Workouts

While out on the trip, the weight of the backpack raises your center of gravity and increases the strain on your muscular system. Training with resistance gets the body ready for the stability challenges and the impacts of walking on uneven landscapes. Include at least two or three days of resistance training coupled with cardio workouts. Both can be done on the same day, but in this case, resistance workouts should be done first to ensure you are not entirely fatigued.

Note that strength workouts should not be performed on the same days as interval workouts. Before the resistance training workout, it is necessary to do a five to ten minute warm up of light aerobic activity then subsequent sessions of dynamic stretching.

The following are types of resistance work outs that should assist you in training.

Weighted Glute Bridge on a Bench

This technique strengthens the hamstring muscles which are powerful in making strides. A barbell is held at the top of your legs.

A Man Showing Bench Supported Glute Bridge Exercise

The steps are as follows:

  • Keep your feet flat on the floor and squeeze your buttocks at the top of the motion.
  • Repetitively lower your gluts after holding for a few seconds.
  • Keep the weight light and thrust your hip on the up, squeeze in the middle and then an easy release.
  • Repeat 10 – 15 times.

Goblet Squat

This workout targets all muscles in the legs, hamstrings, the glutes and the quadriceps. In this case, a dumbbell is grasped between your arms.

A Man Practicing Dumbbell Goblet Squat Exercise

Steps:

  • Slowly squat maintaining your thigh level with the floor. Do not bounce your knees at the bottom of the movement.
  • In order to lift, apply effort on your heels while squeezing the gluteal muscles together, keeping the head in an upright posture and the weight close to your chest.
  • Repeat 10 – 15 times.

Bosu Squat

Bosu Squat works to strengthen the hamstrings, quadriceps and gluteal muscles. Here you do a standard front squat on the round side of the Bosu.

A Man Practicing Bosu Squat Exercise

Steps:

  • Position your head up and put your hands in front of you.
  • Keep your thighs parallel to the floor to maintain a good form. Be careful not to bounce your knees at the bottom of the squats.
  • Slowly return to the starting position by contracting the gluteal muscles and extending the knees.

Kettlebell Deadlift

It enhances safety in performing the deadlift exercise.

A Man Showing Kettlebell Deadlift Exercise

Steps:

  • Grasp a Kettlebell with both hands and squat down ensuring the head is up and the thighs parallel to the floor.
  • Drive down through your heels while straightening your legs and squeezing your gluteal muscles together at the top of the movement. You should be careful not to bounce the knees on the descent.
  • 15 repetitions are recommended.

High box step up

This is a difficult lower body exercise that targets the hamstrings, gluteal muscles and quadriceps.

Man practicing high box step up exercise

Steps:

  • Place your entire foot up onto a platform higher than your knee.
  • By pressing on the heel, pull your body up while extending the hip fully and the knee at the top.
  • Finally, lower yourself back down to the starting position.

Split Dumbbell Lunge

It’s also referred to as the Bulgarian Spit Squat. A dumbbell and a bench are used in this case, and it targets the quadriceps and muscles on the front side of the thigh.

Man Performing The Right Way The Bulgarian Split Squat Burner Exercise

The steps followed include:

  • Hold the dumbbells at your side with one leg slightly in front of your body and the other foot up on a bench.
  • While maintaining good posture and neutral spine, lower your back knee to the floor.
  • Keep the larger weight of your body over your front wheel.
  • Rise back to the original starting position by pressing the heel of your front foot through the floor.

Stability Ball Glute Bridge

The gluteal muscles are targeted here.

Woman performing Stability Ball Glute Bridge Exercise

The steps followed are:

  • Lie on your back with legs flexed and feet on top of the stability ball.
  • Place hands aside from the glute in an open hand while the palms are facing down.
  • Lift your hips in the air about 8-12 inches.
  • Retract the hips back down without touching the floor and repeat until the muscles are fatigued.

Reverse Lunge on a Bosu Ball

The target muscles are the gluteus, thighs, and hips. This workout is a better option for those worried about knee injury because it restricts extension of the knees beyond toes.

Woman Performing Reverse Lunge on a Bosu Ball Exercise

Steps:

  • Place one foot on the Bosu ball while taking a big step backward with the other leg.
  • Lower your hips to the floor till the front knee forms a 90-degree angle.
  • Pressing with the heel, push yourself up by straightening your front leg.

Single Leg Dumbbell Press

Target muscles are the hamstrings, hip flexors, and ankle muscles.

Man Performing Single Leg Dumbbell Press

Steps:

  • Balance on one leg while holding a dumbbell.
  • Curl the dumbbell on your shoulder as you straighten your leg.
  • Press the dumbbell up to the Ceiling.
  • Bring the dumbbell back down to its original position.
  • Bend the leg and straighten your arm back to the start.
  • Repeat a few times before switching sides.

Cardiovascular workouts

Before you go backpacking, you’ll be required to perform cardio workouts at least four days a week. These aren’t meant for weight loss, but rather to improve you’re your heart rate and overall health for more enjoyable hiking expedition. There are several cardiovascular exercises and none is better than the other, however, you can choose your best depending on the results you achieve from either.

The Stairmaster

This machine benefits the cardiovascular system upon regular use for about 20 minutes daily. Three to five days a week are enough for starters. To suit one’s fitness level, it has speed and resistance settings that can be adjusted appropriately.

Man Getting Ready for The Stairmaster Exercise

The Stairmaster increases endurance and boosts stamina. It is also responsible for aerobic conditioning by working the heart and raising its heartbeat. This is achieved by continually climbing a moving set of stairs.

Running/Walking

From time immemorial, running has been the key cardiovascular workout. 15 – 30 minutes of running daily is a great tool for burning fat and also improving the heart rate. To make the running more effective for your backpacking trip, you can make it a walk to train your gear. Doing this will help you get the idea of how effective your hiking kit is. You will also know whether your boots and kits fit appropriately.

Ideally, you can plan a one night or two camping trips before the main trip to have a chance to test your kit. A one night backpacking trip is essential as you can forget one item for a night and face no harm, but forgetting it for a week will be disastrous.

Two adults running near water

Walking around the neighborhood or wherever r is convenient for, you can help will help your body keep fit. If you work far from home, consider walking to the bus stop instead of driving. You will find this walking enjoyable once you get used and by the end of the day, you will be fit for a backpacking trip. If you can manage walking in unpleasant weather such as during winter, the better as the hiking trip will not be a smooth one. Harsh training conditions will prepare your body to be in a good state for an enjoyable trip.

Circuit Training

Circuit training involves interspersing and strengthening, aerobic moves with resting intervals in between.

Changing Things Up With Circuit Training

The main aim of this exercise is to help you work on rest and recovery period, which means you must take a minimum of 15 seconds to catch your breath and take a sip of water.

Indoor Cycling

Focus on pulling the pedals behind you to maximize the exercise. Focus on an upward motion to help target the hamstrings and the glutes.

Two people doing an indoor cycling fitness class

This exercise is also good for increasing heart rate, increasing your resistance while at the same time maintaining a healthy body weight.

Aim of Exercising before a Backpacking Trip

The main aim of exercising before a backpacking trip is marinating a healthy body. As you may know, too much body fat is a hindrance to long hikes, but you may have never known that too little fat in the body is also a problem for long hikes. You need enough body fats as an energy preservation during hiking trips and hence the importance of maintaining a healthy body weight.

Backpacker watching the landscape in front of him

While working on your calorie intake, it is important to note that you lose approximately 5,000 calories after hiking for 12 hours daily. The long backpacking trip is a weight loss exercise and at the end of that month, many people tend to have lost at least 5-8 pounds. It is therefore important that you start hiking with 10-15 pounds over your ideal weight such that you will still have your normal weight by the end of the trip.

Benefits of Backpacking Training

Doing a backpacking training has two major benefits: one is that it improves your health, strength, and general body fitness. The second benefits is that it improves your self-discipline, a trait necessary for successful long backpacking trips.

You see, training will force you to lazily drag yourself out of bed at 5.30 am when the alarm rings. If you think about it, this is preparation for cold mornings that you are bundled in your sleeping bag, but would rather wake up, enjoy a bowl of cereals to enable you hit at least 30 miles before sunset.

Man running before sunrise

Since backpacking requires high tolerance to pain and discomfort, doing a serious workout regimen will help you develop the self-discipline and tolerance required.

Concluding Thoughts

Whether you are planning a three day to over a week backpacking trip, you will need appropriate cardiovascular exercise. Performing high intensity exercises will help you build the required body strength and resistance. Invest in both good hiking gear and couple it with solid level cardiovascular fitness, for a more enjoyable backpacking trip.

Backpacking in the Eastern Sierra Nevadas

If you found our article informative, please share it on social media so that your friends can learn about these tips, and also feel free to share your thoughts on this topic by leaving a comment in the comments section below.

Facebook

Twitter

Google+138

Pinterest27

ABOUT THE AUTHOR
Henry Silva
Henry Silva

Henry was hiking since he was 4. He was lucky enough to be born in Boulder, Colorado and enjoy Rocky Mountain National Park hikes growing up. His favourite is Longs Peak, which rises to 14,259 feet (4,346 m) above sea level. It is the highest point of the park. Henry likes to explore new hikes and spend his spare time in the wilderness.

DIY Sleeping Bag: Make a Sleeping Bag That Suits Your Needs and Size!

0

Who needs a DIY sleeping bag when there are tons of ready to use models on the market that are simply an easier solution? But, feature this: you have been out all day on a hike and there’s nothing you wouldn’t give to have a few hours of interrupted and comfortable sleep. Unfortunately, your own sleeping bag is not all that comfy. You can’t even fit your long frame in the thing. You even dread the idea of camping. The experience is just not worth it. Well… tell you what; there’s a simple solution to your ‘sleeping bag problems’.

Why don’t you just make your own sleeping bag? As we will demonstrate in this article, there is nothing complicated about making a sleeping bag. Sewing two-parts of the quilt together and inserting down in between the fabric is grade-school home science.

To ensure that your sleeping bag features the necessary quality, we have come up with a step-by-step guide on how to get the best material and how to sew a lightweight sleeping bag that’s suitable for camping. Ask yourself this: why would you be comfortable sleeping under a quilt at home, but a sleeping bag becomes very important when you go on a Campout? Once you determine the reason, making a sleeping bag becomes a very easy task.

Waking up in the tent

Another thing that you will need to consider before you embark on making a sleeping bag is the season you are making it for. Why would you need an 800-gram sleeping bag while all you do is go to camp during the warmer months?

Factors to Consider Before Making a Sleeping Bag

Dead Space Inside the Sleeping Bag

Air is an important insulator. The air around your body, when it is not lost to the surrounding environment, will very quickly assume your body’s temperature.

Two Sleeping Bag Liners on the grass

When you make the sleeping bag, insulate the hot air from escaping through the bag’s material.

Keep the Head Warm First, the Rest of the Body is Easy

The head, through the brain, instructs your body to keep warm. Once the nerve center of your bodily functions is warm, the rest of the body will be warm too.

Cells burn food to generate energy. Some of this energy is in the form of heat. Some organs, such as the brain, burn more energy than the rest of the body. The heat is then transported to the rest of the body by the blood.

Double Sleeping Bag for Car-Camping Couples

Your sleeping bag should be top-heavy.

The Hood

If you are making a sleeping bag for the winter, ensure that it has a hood.

Hood of a Patagonia Sleeping Bag

This way, the wearer of the bag will have the hood over during cold nights thus ensuring that the exhaled warm air is kept inside the hood.

Waterproofing is a No-No For Summer Sleeping Bag

You will need to allow the moisture from your sweating to escape through the fabric.

Mountain-Hardwear-Hyper-Lamina-Spark-35-Sleeping-bag

If you water proof it, then you will have a very uncomfortable sleep.

Weight

Unless you are making a bag for the winter, you can do away with the hood to minimize on its weight.

A man with patagonia hybrid sleeping bag

Instead of the hood, you can use other forms of heat insulation.

Materials Used For Making Sleeping Bags

Durability, warmth and weight are the most important things to look out for when making a sleeping bag. The materials listed below are premised on the fact that you would want to make a durable and a lightweight sleeping bag to improve its usability when out on camping.

Material Its Use
700 loft down Many a manufacturer goes for the 700 and 600 loft downs, but the best grade is 800. The down helps you determine the weight of the sleeping bag without compromising the warmth.
Lightweight Fabric You have two options. You can go to online portals such as AliExpress and buy Asian fabrics that are cheap but are heavier than the state-of-the-art fabrics sold over the counter in fabric stores in the West.Alternatively, you can visit the local fabric stores and select the fabric that best suits your needs.
Down Proofing Fabric You will want to have a material that will help proof your down material from leaking out.
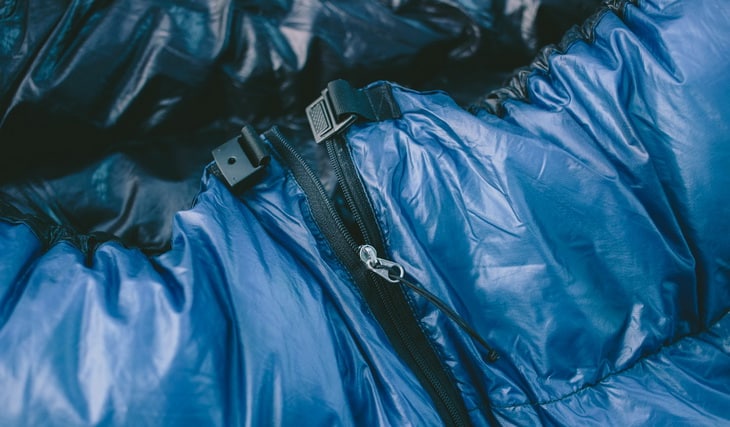
¾ Length Zip You may decide to either have a zipped sleeping bag or one that does not have a zip at all. The advantage of making a zipped sleeping bag is that it can also serve as a quilt.
10 – 50 mm thickness sewn-through shells To limit the weight of the sleeping bag, your sewn-through walls ought to be between 10 to 15 mm for summer bags and 40 to 50 mm for winter sleeping bags.Anything more than this will require a lot more down than is necessary to keep you warm.
Flat hood The most common hood on sleeping bags is the narrow-shaped. It is argued that it is cozy on the head and thus allows you to keep warm in chilly weather.What most people do not know is that when the hood is wrapped around your head, it gets greasy and sweaty. Instead, a flat hood allows the sweat to escape. It is also easier to make and attach to the sleeping bag.
Waterproofing A mix of good quality down and light waterproofing nylon stuff sack will not only keep your sleeping bag dry when water gets into your pack but also keeps it lightweight.You do not want to use the conventional stuff sacks that are very heavy and thus have to be tightly sewn to compress them. This in effect also destroys the down.
Smooth Inner Fabric The smooth inner fabric is not only soothing to your skin, but also helps you to turn the sleeping bag inside out when cleaning it. If it is a zipped sleeping bag, the smooth fabric will also serve you very well as a quilt.
Outer Cover Fabric The outer cover fabric should not be very smooth. It prevents your sleeping bag from sliding off the mat when you are tossing around at night.

Patagonia Hybrid Sleeping Bag on the ground

Popular Sleeping Bags Designs

There is a host of sleeping bags’ designs in the market today. Each one is suitable for a particular kind of weather. Below are varieties of designs that you may want to adopt for your DIY sleeping bag.

Design Best For
Mummy Traditional Sleeping Bag This is best used in very cold weather. It is cramped up to maximize on warmth. Unfortunately, it is not the most comfortable sleeping bag.
Tapered (semi-rectangular) Sleeping Bag It is also great for winter conditions. It is best made with double-layer of clothing, usually cotton or wool. The tapering at one end is to accommodate the head during the chilly conditions
Rectangular Sleeping Bag It is used for warm weather. The hood is flat to allow for air circulation during the warm nights.
Topside Sleeping Bag This is best used during warm months. It offers reduced weight and packing volume since its downside is not covered.
Quilted Sleeping Bag Quilted sleeping bag is best used indoors, e.g. at home where there is air conditioning.

marmot-helium-on the ground outside

Tools You’ll Need To Make a Sleeping Bag

For every DIY project, you will need the proper tools to get the job done properly. In this case, you will need the following:

  • Sewing machine: You don’t need to buy one. You can rent it or ask a friend to help you with theirs.
  • Scissors: Among the popular brands used by tailors include; Fiskars Easy Action Bent Scissors, Gingher Knife Edge Dressmaker Shears, and Fiskars 8 Inch Softgrip Pinking Scissor etc.
  • Marker Pen: You will use the pen to mark out the pattern.
  • Chalk: You can use chalk instead of mark pen to trace out the pattern of the sleeping bag on the fabric.
  • Needle + thread: These are for sewing your fabric together.
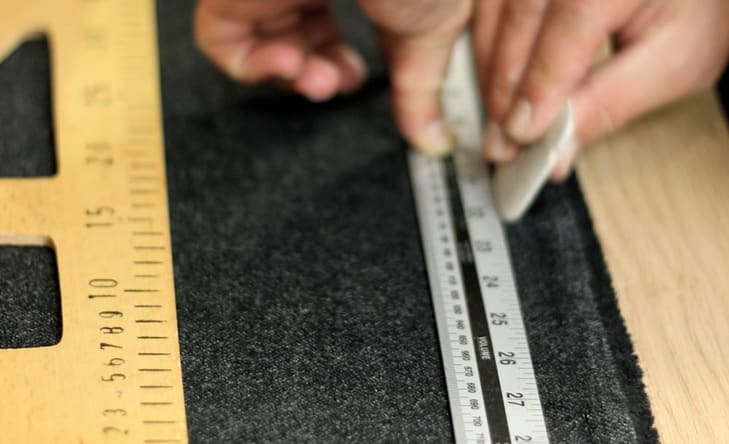
  • Ruler: Use a ruler to mark where the seam will pass through to ensure that your stitches are straight.
  • Crochet: Used for hand stitching.

Picture of a Sewing machine

Step-by-step Instructions on How To Make A Sleeping Bag

Method 1

  1. Cut the Fabric – You will need to determine the size you want for your sleeping bag. After this, you will use the chalk to mark where your scissors are going to cut.
  2. Pinning Together – The next step will be to pin the cut fabric together. Here, you will need to place the patterned end facing inwards. This makes it easier to sew. Note that, for your sleeping bag to be easily turned inside out, you will leave about 3-foot opening.
  3. The Batting – Ensure you place the batting flat to reduce the lumpy look of the sleeping bag. The batting should be cut to equal the size of the sleeping bag and then slid slowly into the sleeping bag’s folds.
  4. The Seams – To ensure the seam runs are not crooked, use chalk and ruler. You will then pin the seams and sew it together. The seam in the middle of the sleeping bag gives your sleeping bag a point for folding the batting.
  5. Hand Stitching the Decorations – If you have any decorations that you want to put on your sleeping bag, you will need to hand stitch them on the front side of the sleeping bag.
  6. The Straps – When stitching the straps, you need to be careful not to interfere with the zipper’s threads. The best practice is to cut 2 long rectangular fabrics and then stitching them lengthwise as the right side face inwards. You will then turn the straps inside out and sew them to the bottom of the sleeping bag.
  7. Zipper – The best practice when installing a zipper is to fold the bag halfway and then placing the zipper at the right place. You will then unzip and stitch the zipper along the perimeter of the bag.

The Seams of a Sleeping Bag

Method 2

  1. Lay a paper on the ground. Spread an old sleeping bag on top of the paper. Trace the space that your older sleeping bag occupies using a marker pen. Note that the bag should be fully zipped.
  2. Do not forget to trace around the hood. If you want to change the shape of the hood, you will have to estimate that one.
  3. Estimate/calculate the area the bag will occupy when the fabric is zipped using the traced diagram.
  4. Double your estimate in the (3) above to know the amount of fabric you will need to buy for your sleeping bag.
  5. Cut out your paper pattern so that you can use it on some real fabric. After you purchase your fabric, lay it on the ground and place your paper pattern on top of the fabric. Using the marker, trace through the fabric to match your paper pattern. To avoid wastage of the fabric, make sure you place the paper pattern as near the edges of the fabric as much as possible.
  6. After tracing the paper pattern, it is time to cut through your fabric. Ensure that you cut as close to the marked pattern as possible.
  7. Sometimes you will need to create a pillow pocket for your sleeping bag. You will use your ruler to draw a rectangular shape at the top of the already cut sleeping bag fabric. Make sure it extends about 20 inches above your hood.
  8. Another thing you will need to take care of is the liner for your pillow pocket. It should be cut in such a way as to create an opening for your head.
  9. The next step is to stitch together your fabric. Fold it in half to expose the exterior of the fabric. You will then stitch together the bottom ¾ of the two pieces of fabric, leaving enough space for the zipper. Note that your stitching should be about 1 inch from the edge of the fabric.
  10. If you want, you can have snaps or ribbons stitched at the bottom of the bag on both sides. To secure the liner of the sleeping bag, have it attached with two equally spaced snaps. This allows for easy removal of the liner for cleaning.
  11. Turn the bag inside out. You will then need to place the liner on top of the bag to mark out the places where your snaps and ribbons for fastening the liner will go. Sew the snaps and ribbons in the bag. Ensure you hem the top of the liner. It should also not extend beyond your chin when you are using the bag.
  12. Finally, you will need to hem the liner in place for the pillow pocket and the sleeping bag hood. Note that the pillow pocket should be sewn on the bottom and one vertical side and on top and attached to the main sleeping bag. This will leave one side for stuffing the fleece and/or puffy jacket to create a pillow.

Materials used to make a Sleeping-Bag-Liner

Final Thoughts

By making your own sleeping bag, you will not only be making a bag customized for your needs but also cut an unnecessary expense.

Besides, being able to stitch is an invaluable skill to possess not just for making a sleeping bag, but for numerous other things you can make on your own.

Sleeping-bag on the grass

DIY Backpacking Gear: 10 DIY Gear Projects for Backpackers

0

Backpacking gear can be quite expensive, so it is only natural to want to make your own gear to save money and maybe be more earth friendly. Even if you are not a crafty person, you can make some basic DIY backpacking gear from scratch and use it on your next adventure! Since there are so many items you do need to buy, why not save some money and make certain items yourself?

It would be so great to be able to save money to go backpacking in a place you have longed to go. Instead of purchasing some of the backpacking gear you need, making it will allow you to save that money for the adventure you have always dreamed of, which can get costly. The world of crafting your own homemade camping gear can allow you to build something to be proud of, while saving you a ton of cash.

DIY-backpacking-gear

In this article, we are going to show you many DIY camping gear items you can make on your own, for a huge fraction of the cost of buying it new. Here, you can learn how to sew a sleeping bag liner and make a survival bracelet, among other projects. Are you ready to learn more about the world of homemade backpacking gear? Let’s go!

Things To Consider Before You Start

Before you head out to the nearest camping gear store for new, costly gear, know that making your own can save you hundreds of dollars or more! While making your own gear takes time, there is a huge sense of accomplishment and savings that comes when you are finished with the product. See below for some features to consider when you decide to make your own backpacking gear.

Know What You Want To Make

What items do you need that you cannot afford? Or rather, what items would you prefer to make, over purchasing? Knowing what outdoor items you need can help you narrow down what type of gear or food to make. Do you need a new hammock? What about a backpack? Maybe you just need to figure out how to keep extra warm in your sleeping bag.

backpacking-gear-outside

Either way, you will need to do a little research to find out what to do and what items you will need. You can find patterns, maps and other items to help you along your creative journey. Being prepared is the first step.

Know Which Fabrics or Ingredients To Use

Let us say that you need to make a sleeping bag liner, but you are not sure on what fabric to use as insulation. While some people might think cotton is the way to go, you actually will want some type of down fabric to insulate your sleeping bag. The reason behind this is because down fabric, holds in the warmth better than cotton, plus it offers more comfort so you can sleep through the night.

close-up picture of nuts

If you want to make food, you will need to know which ingredients you need and how much you need to make. For example, if you are making trail mix, you need to get nuts, raisins, and other items you enjoy in the mix.

How To Store Food And Keep Food Edible

If you are bringing along food, know how long it will stay good for so you do not have it go bad while you are on the mountain. Find yourself some airtight containers or bags to tote along your trail mix, beef jerky or any other foods you want to bring along. If you plan to bring a cooler, be sure you keep ice inside of it so food stays edible.

Superfood-trailmix in a jar

You can find a metal food locker to store your food, or a bear bag. At night, you can hang your food on a pole so that bears cannot get to it. If you do hang food, you should hang it at least 10 feet high, out of the reach of bears. Any spoiled food should be disposed of properly.

Your Budget

Since crafty people tend to be those on a budget, you need to total up all of the costs of what you plan to make and create a budget to stick to. Some craft items are not cheap, so you will need to know how much you need so you do not over spend.

man calculating his family budget

Search around for sales at local stores as well as coupons to help you keep the price down, while still getting quality materials and ingredients.

Be Confident!

Not everyone is super crafty, and sometimes DIY projects can seem overwhelming. Having some confidence in yourself can help you to succeed in your projects! As long as you are prepared, have what you need, and can follow the instructions, you are on the path to success.

DIY Hiking Backpacking Gear

Just believe in yourself and you can accomplish your DIY projects!

10 DIY Projects For Backpackers

Now we have come to just some of the many projects you can create on your own confidently! Now that you know what you need, you can invest in some of the ideas below to save money and have a sense of accomplishment of something you made.

Sleeping Bag Liner

When making a sleeping bag liner, you will first want to lay your sleeping bag flat out and estimate the area in square yards you will need. Once you have your liner fabric, you can add the exterior fabric and begin sewing it to the sleeping bag. There are several steps involved, but once you get the insulation attached to the fabric, sewing it on will not be that hard. You can choose which insulation you need, depending on the weather. Down fabric and fleece, are better for colder temperatures and overall warmth, but using cotton can be a good choice for summer time camping.

DIY Sleeping Bag Liner

Making your own liner can save you upwards of around $80, and you can also add your own pockets for storage, or even add on a new zipper while you are making changes to your sleeping bag. The possibilities are endless!

Survival Bracelet

A survival bracelet is also called a para cord and is made of nylon, and can be used for more than one use. For example, you can use this para cord for tying your hammock to a tree, making a tourniquet, and connecting it to important items you have with you. The inside threads can be used for repairing gear, as fishing line, and setting a trap.

To make this item, you need an 8 foot piece of the cord. From there, you can thread the cord through the buckle and loop it through. From there, you will weave the cord until you have about a half of an inch of material left.

Close-up photo of a Survival Bracelet

You will cut the end and use a lighter to burn the ends to melt them to the rest of the bracelet. It’s stylish, you can choose which color you like, and its highly useful outdoors!

Dehydrate Food

If you are outdoors and want to dehydrate food without a dehydrator, you can sun dry the food. Sun drying works great with tomatoes and some herbs. You slice up your food and put them on a baking sheet outside under the sun and wait a few days. You will need to cover the food somehow so that it does not go bad or get flies surrounding it.

Dehydrate Fruits on the Table

When drying herbs, you can make a drying box and use a twist tie to keep the herbs together. Following that, you will need to wrap it in cheese cloth and let it hang in the sun.

Create Maps

If you are creative and computer savvy, you can create maps online of the area in which you plan to camp or backpack. You can make them show topographical areas, which gives you much more than just plain old directions.

A Woman Creating Maps

You can make your maps and guides specific to show altitude, type of land and more! Plus, you have less of a chance of getting lost with the maps. Print these out and take them with you on your adventure!

Lantern Candle

If you need a little light while you are outdoors at night, you can make your own lantern candle with just a few items! Simply take a baby food jar or small mason jar and add a wire around the neck in a loop, so you can carry it later.

DIY Jar Lanterns Hanging

From there you can add a tea light candle and have enough light to guide your way. Just be sure to bring along a lighter or matches, as well as extra tea light candles, as they are small and you will need more than one.

Trail Mix

Making trail mix is fun anytime, not just for camping or backpacking. The best part is you can add whatever you like to your mix, tailoring it to your taste. You simply can not get that with store bought trail mix! Trail mix is a fun and easy snack to make that offers protein and extra vitamins and minerals your body needs, especially if you are hiking or getting active outdoors. Simply gather the foods you want to add to your mix and follow a recipe.

For example, get 2 kinds of nuts you like and add 3/4 cups of each to a bowl. Then gather 2 types of seeds you like and add 1/2 cup of each. From there, choose 2 dried fruits and add 1/2 cup of each to the mix. You can add sea salt, nutmeg, and cinnamon if you wish, in just small teaspoons to taste.

Homemade Trail Mix

Examples of foods you can add to your trail mix includes cashews, almonds and pecans for nuts, as well as pumpkin seeds and sunflower seeds. For fruits, you can find bananas, raisins, cherries and more!

Soap

Making your own soap can be an all natural way to cleanse your body anywhere. Using 2/3 cup of coconut oil, olive oil and almond oil, as well as 1/4 cup of lye and 3/4 cup of cold water, you can make your own soap!

First, you will add your oils and heat them up for a minute. You will add the lye and mix for a few minutes. From there, the herbs will go in and be stirred and the combination can be added to the soap bar mold. Leave them for 24 hours and check them for firmness. If not firm, leave them for up to another 24 hours, and let the bars cure for a month.

Handmade Soap with natural ingredients over wooden background

Once they are ready, you can wrap in wax paper and put it in with your backpacking gear and go!

Bug Spray

Homemade bug spray can help you use all natural ingredients, which are safer for your skin. DEET is a repellent that can be hazardous, and is dangerous for your body. You can make your own safe bug spray in mere minutes for a relaxing time outdoors, bug free!

First, you want to choose which essential oils you will use. This can include Lemon Grass, Mint, Lavender and Eucalyptus. Grab some Natural Witch Hazel, water and vegetable glycerin. Using an 8 ounce spray bottle, fill it half full with boiling water and add the witch hazel to fill the bottle. From there, add 1/2 tsp of vegetable glycerin and up to 50 drops of the essential oils.

DIY Essential Oil Bug Spray

Shake up the combination and spray for a bug free time!

Backpack

You may want to find a pattern for making a backpack so you have something to go off from. You will have to decide how big you want the backpack and what fabric to use, plus what features you want it to have. This is a big project, but it does not have to be complicated. You will have to measure and cut fabrics fro the front, back and sides, as well as the shoulder straps and pockets, plus anything on the inside. You will probably use nylon and ripstop nylon to create your backpack. You can also use mesh lining for any outside pockets you want to add.

DIY Backpack on the ground

There are many types of backpacks out there, so like we said, you will want to find a pattern, get the correct materials and begin sewing your new backpack together, adding features you like, and choosing color options that suit you.

Hammock

Having a hammock to use on your backpacking trip can be a great way to relax after a long day of being outdoors. They are easy to hang and do not take up too much space with the rest of your gear. You can even sleep in them if the night is warm and there are no bugs around! When making a hammock, you will need just over 3 yards of ripstop nylon, as well as a para cord and 2 carabiners or clips that will hold the weight.

You will need to sew up the edges to look even and nice, and the fabric will not fall apart as easily. Fold part of the fabric over and sew it together, making a space for the para cord to hold up the hammock on each side.

Man sitting in a DIY Hammock

You can put the rope in on each side and cinch it up. Then find two trees and attach the ropes and use the carabiners to secure the hammock to the ropes. From there, enjoy the nice day in your handmade hammock!

What Do Others Say About DIY Backpacking Projects?

While most people agree there is not only a huge savings, but also fun to participate in DIY projects for outdoor gear, there are some who think it can take too long to create.

They may also think that they simply do not have the knowledge or patience to create something like this. Sure, it can be hard to create something that is a necessity when you are on an outdoor adventure, but having this product can mean saving lots of money and feeling proud of yourself.

DIY SURVIVAL KIT

Overall, people think it is a great idea to make your own gear and many have even tried with a few items, like the survival bracelet, or making their own sleeping bag liner. These things are not that difficult, and do not cost a lot to gather the necessary items. While some items might seem more complicated, like making your own backpack, using a pattern and following the steps can be extremely helpful.

Pros And Cons

There are definitely positives and negatives when it comes to making your own outdoor gear, so below we are going to give you the good and the bad when it comes to crafting these items.

PROS

  • Cost effective
  • Sense of accomplishment
  • Can make items how you want them to be
  • Choices are unlimited
  • Fun way to be creative
  • Items are extremely useful when backpacking or camping

DIY Dehydrated Ranch Carrot Chips

CONS

  • Takes a lot of time
  • Can get complicated
  • Some people do not have time to make such projects
  • People who are not creative may shy away from this

Concluding Thoughts

Now that you know what you need in order to make your own outdoor gear, and have a few ideas of what items you can make, you can now run to the store and start your own creations! With a little bit of creativity and work, you can make your own sleeping bag liner, lantern, backpack or anything else you need for your backpacking trip! Hopefully, your creation will last you a long time and make you feel proud because you created something so useful!

DIY Organic Trail Mix in a Jar

DIY Sleeping Bag Liner: Why Buy One When You Can Make One

0
A five baffle hood is designed to fit snugly round your head

Backpacking and spending time outdoors is a great experience, and more so, very cheap regarding getting camping gear.

While it is possible, to get affordable hiking gear in big box stores and specialty stores, you can also stretch your hard-earned cash by making your own gear. One of the simplest pieces of gear to make is the sleeping bag liner.

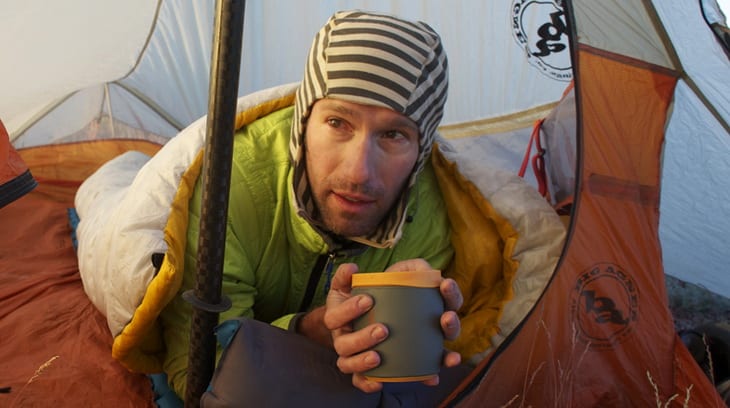
A Man in a Mummy Sleeping Bag

Below, we are going to look at simple steps for DIY sleeping bag liner and the importance of including it in your backpack.

Why do You Need a Sleeping Bag Liner?

It is common for a hiker to start camping season early and end late. If you do this, it means that you usually sleep in temperatures lower than your sleeping bag rating. To add temperature to your sleeping bag, you will require adding a Microfleece or a standard fleece liner. Additionally, sleeping bag liners also play an invaluable role when it comes to maintaining the cleanliness of your bag.

Unfortunately, sleeping bag liners tend to be the most undervalued items in the hiking gear, despite being lightweight and extremely packable. Before you underestimate the need of using them, ask yourself how long you would be willing to use your duvet without bed sheets or duvet cover. The liner plays the same role as the sheets and the cover, providing an easily removable barrier between you and the sleeping bag.

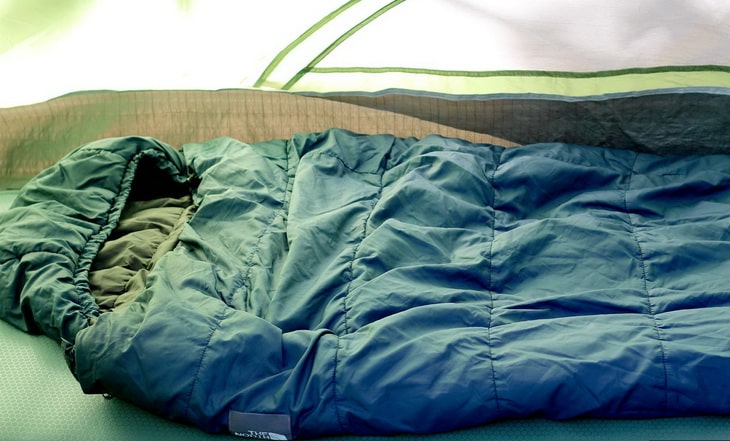
Sleeping-bag on the grass

The moment you try using a liner, you will appreciate its use once you realize it’s keeping your sleeping bag clean despite the various sources of contamination during hiking. It also adds additional comforts and 2 degrees Celsius during winter. During summer, you can use it as a standalone lightweight sleeping bag.

To add to the above benefits, you will also enjoy the following:

  • Protection against biting insects.
  • Protecting your sleeping bag from dirt accumulation since it is easily washable.
  • Using in overseas hotels to protect you from potentially contaminated beddings.
  • For use in warm climates instead of sleeping bags.
  • To provide next to skin comfort hence a good night’s sleep.

Types of Sleeping Bag Liners

There are different types of sleeping bag liners made from different materials to match personal taste and preferences. When making a DIY sleeping bag liner, you have the freedom of choosing the material and also determining the size of your liner. You can also make your liner depending on the climatic condition of your hiking destination. As you will see, each liner type has its own advantages and drawbacks, and it’s upon you to decide which suits you best.

Here are the most common types of sleeping bag liners:

Fleece Liners

Fleece liners are typically slim and made from natural material such as sheep wool or yak. They are exceptionally warm and hence most suitable for freezing weather. You have the freedom to pick the material color of your liking.

Although they are washable, either by hand or machine wash, they are not the perfect choice if you are looking for an all-weather liner.

Cotton Liners

These liners are cool, crisp and easy to wash and dry.

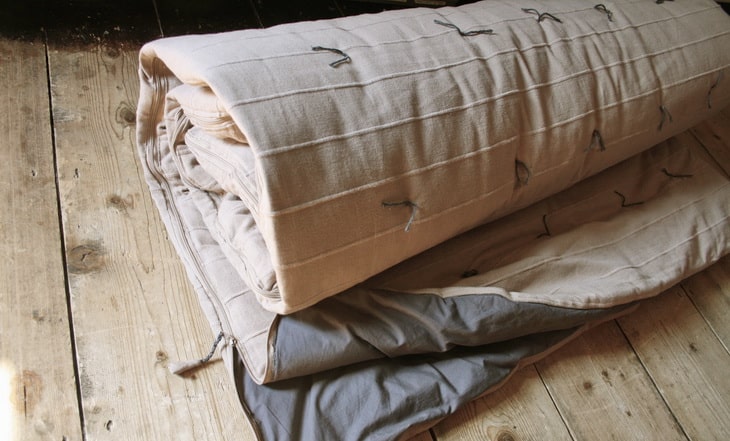
Luxury cotton Handmade Sleeping Bag on the Floor

Most people prefer them, but when you think about insulation and weight, they cannot compare with silk liners.

Silk Liners

These offer better absorption and also dry up easily. They have superior thermal insulation properties, soft on the skin, easy to pack and are lightweight.

camping sleeping bag in a tent

For these reasons, they are available at a fortune, but they are worth every penny.

Silk-Cotton Liners

Being a blend, they are cheaper than pure silk and are light and less shiny.

Sea to Sumit Silk and Cotton Blend Travel Liner

They also drape well with the sleeping bag hence providing a comfortable night’s sleep.

How to Make a Sleeping Bag Liner

Sewing your own sleeping bag liner is a great idea since you can make as comfortable as you want. Knowing how to sew, also gives you an added advantage that you can sew an extra liner at no extra cost just to be safe in case accidental dirt lands on your current liner.

Requirements

  • Desired material type with color to match your sleeping bag. Determine the size guide by the size of your sleeping bag.
  • Matching thread
  • Scissors
  • Sewing machine or strong needle
  • Packing paper or newsprint- This will be useful in tracing the pattern.
  • Marker
  • 8-10 tab snaps for attaching the liner to the sleeping bag

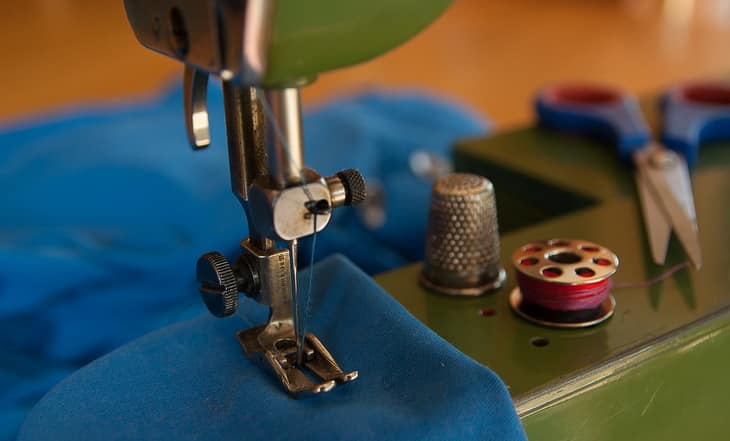
Scissors Thimble Couture Sewing Machine Wire

Steps for Sewing DIY Sleeping Bag Liner

  1. Lay the sleeping bag on a flat surface and determine its size when the zipper is closed. Double the size to determine the amount of material you will require purchasing. Once you have all the supplies at hand, roll the packing paper on the floor and place the bag on top completely zipped. Using the magic marker, trace the shape of the bag on the paper. Ensure that even after tracing the hood, you also draw a line just below the chin marking where the top side of the bag ends.
  2. Remove the sleeping bag and cut out the shape to create a paper pattern. Now lay your textile on a flat surface and double it just like a folded sheet. Lay the paper trim on top of the sheet and make sure the pattern edges are near the folded edge of the fabric and pin it down if necessary.
  3. Carefully cut the fabric long the open side of the pattern and the open side, but do not cut the folded side.
  4. Using a yardstick, draw a rectangle on one side of the material to make a pillow pocket. The rectangle should have the same width as at the top of your sleeping bag, but with a 20 inches extension length so that it leaves enough space for the pillow. Use this pattern to mark and cut the head opening on the other side of the material. Cut the top side of the fabric in a straight across so as to allow flush with the sleeping bag.
  5. Once you are done cutting the fabric, fold it into half such that the side you don’t want against your skin is exposed. Approximate about an inch from the edge of the fabric and stitch the bottom and ¾ on the open side.
  6. While still in the same state, sew short pieces of ribbon or snap tabs on both sides all the way down the liner. These will help secure the liner to the sleeping bag suing two equally spaced attachments at the bottom and three on either side. They will also play a great role in helping remove the liner from the washing machine.
  7. Now, turn the sleeping bag inside out and place your newly mend liner on top of it and make marks on the fabric where the ribbons or snaps will go. Use a tack to stitch the attachments on the side of the bag and also hem the top side of the liner to prevent it from sliding when you get inside the sleeping bag.
  8. Hem the areas where the pillow pocket will go on the opposite side of the liner. To make sure it fits on the sleeping bag hood, double the hemmed extension into a rectangle. Make sure the rectangle is closed on three sides by sewing once vertical side, along the bottom and attached to the fabric underneath. The open vertical side will be for stuffing fleece or a puffy jacket to make a removable pillow.

A person measuring some material

Making a Zipper Sleeping Bag Liner

You can also choose to make a zipper sleeping bag liner, and while the two types serve the same purpose, a zipper one is a bit complicated to make. These are the steps for making such a liner;

  1. Fold your sleeping bag lengthwise and use your sleeping bag to trace its pattern on the newspaper roll using a magic marker. Make sure you include an extra 2-3 inches on each side for the seams.
  2. With the two sides still folded together, cut the folded side of the fabric. Then pin one of the sides fully before using a basting stitch to sew along that side with your sewing machine. A basting stitch is rather loose but not to worry since you will be removing it later.
  3. With one side of the fabric sewn, open it with the seams facing upwards and butterfly the edges. Where you want your zipper placed, and its length will determine the positioning. You should, however, make sure that the top edge of the zipper is close to the top of the bag. Also, leave excess material at the top of your fabric for finishing the edge of your liner opening.
  4. Line up the zipper with the lining you just created while it’s facing downward. Pin it in place and sew each side of the zipper. Once done, you can now remove the basting stitch made in step 2 above. Carefully pull and remove by cutting, the excess thread on the front side of the zipper. You can either use a seam ripper tool of sharp scissors if you don’t have the latter.
  5. With the hardest part of making your DIY sleeping bag liner, realign the edges so that you will have the right side of the liner is facing inwards. Then pin the open edges of the liner and sew the bottom and sew the seams. This last step gives you liner its shape, and it is almost complete.
  6. Fold and sew the top edge to finish your liner. Pull the pattern side of the liner such that it if facing out and hurrah, you are done.

Sewing a sleeping bag liner can take you approximately 1 hour, but if you are a sewing machine guru, then it will take even less.

Zpacks Solo Down Sleeping Bag

Making your own sleeping bag liner is better than buying since it saves you money.

Caring for your Sleeping Bag Liner

After sewing you handmade sleeping bag liner, you need to take good care of it to avoid repeating the task anytime soon. Make sure you regularly clean your liner to keep it fresh of sweats and body oils. While buying sewing fabric, make sure you choose the one that you are comfortable cleaning either by a washing machine or hand wash. It is also advisable to let your liner dry in natural air.

Make sure you are conversant with the right detergents to use on your liner. While most cleaning detergents are permitted, fabric softeners may interfere with your liner’s ability to absorb moisture, so use them sparingly. If you are using a washing machine, prevent the drawcords from being entangled in the machine by wrapping them in a pillow case. That way, you will have your liner in the right shape even after washing.

quilt-and-a-sleeping-bag on the grass

Although liners are meant to absorb the sweat and body oils, it is advisable that you sleep in clean clothes to prevent it from getting dirty quickly. No matter how tired you are feeling after a long day’s walk, make sure you change into clean clothes before getting in your sleeping bag. While washing, use the right shampoo and later rinse it properly using lukewarm water and remove as much water as possible through squeezing not wringing.

Wrapping It Up!

While sewing your DIY sleeping bag liner, make sure you make your measurements well, such that it perfectly fits in your bag. A well-fitting liner absorbs moisture and provides better comfort that a liner that is larger than the bag. Since there are different shapes of sleeping bags, you will need to use the exact sleeping bag you will be using the liner when tracing the shape of the liner you are about to sew.

Another thing that you need to be cautious about is the material of your liner. While buying the fabric, make sure you know the kind of weather that is in the region you plan to go camping and as well as the season.

With the knowledge on how to make your sleeping bag liner, you can make several liners for different seasons and locations. Making your liner gives you the benefit that no matter which material you choose to use, you will end up saving compared to buying a ready-made liner.

backpacking gear on the ground

Duck Down vs Goose Down: Which is the Best Insulator?

0

Most of our winter gear such as the pillows, sleeping bags, sleeping pads and duvets are filled with the natural-fill of duck or goose down. It was derived from the ducks and geese as the well-insulated birds that dwell in water with geese being the larger of the two. The base-layers of these birds are exceptionally good in insulating our outdoor gear against the extreme climatic conditions. Because of such properties, manufacturers of winter apparels use either duck or goose down as insulators over synthetic ones. But which is the best? I have compiled a comprehensive review that entails the duck down vs goose down in a quest to help you decide that which is the best.

Others probably know the duck down as an abundant insulator in most products such as the sleeping bags and duvets, but seldom know about geese down because of its scarcity. The abundance of duck is made possible by its abundant and regular consumption as meat in other countries. Goose, as said already, is the most scarce of the two. In case you find it, it will certainly be at higher prices, more especially for the highest fill powers.

close-up photo of down

The gap in qualities between the duck and the goose down is gradually reaching an intersection due to innovative technologies that enhance the duck down after processing it in order to reach high fill powers and mimic the goose down. With that being said, I believe I have already given you a hint that, in fact, these two materials do differ. I will delve into some features below in a bid to compare these powerful insulating materials. But, precisely, it all comes down to the warmth and price. Other features are essentially identical.

Duck vs Goose Down features

Fill Power

The strength of the down is reflected in its fill power and fill power is defined as the cubic inches per ounce of down. Larger down clusters have higher fill power. As thus, goose down is seen to have the largest down clusters and this makes it the winner when coming to down fill power. But, as indicated above, some new developing technologies gradually close the gap between these insulating materials.

There are various fill power ratings with the lowest, ranging from 550 to 650, the medium typically from 650 to 800, and the highest from 800+. Goose down can have the fill power rating of up to 1000, but with such high rating you will have to break your bank to have it because they are too expensive. Keep in mind that goose down is scarcely available mainly due to the reason I indicated above regarding the scarcity of this goose bird. The other attributable factors could be the economic costs, because designers may be reluctant to spend so much money on fewer consumables.

A visual comparison shows down versus synthetic insulation options.

On the other hand, duck down can have higher fill power of 850. But with recent technologies, it has been anecdotally reported that it can even reach 1200. That will be the highest duck down that offers a fierce competition to goose down. It will, however, be available at exorbitant costs too.

Fill Weight

There is also the fill weight to take into account as the feature of either duck or goose down. Fill weight should, however, not be confused with fill power. Having the high fill weight doesn’t consequently mean that the garment will be warm. In fact, the higher the fill weight is the lesser the warmth. As an advice, if you find a duvet that weighs more, you must be skeptical of its warmth. Obviously, it will be relatively inexpensive.

Down fill on a bed

In terms of comparison, it isn’t clear as to which one commands the highest or the lowest fill weight between duck and goose down. But, because of the inverse proportion between the fill weight and the warmth, we might come to the conclusion that goose down has the lowest fill weight due to its relatively high warmth.

Warmth

Warmth is a selling point of down insulators. It is the main reason why would others choose down over synthetic insulators. To compare duck and goose down with regard to warmth feature, seems to be a mammoth effort due to infinitesimal differences. However, my research findings have proved that goose, the largest bird of the two, still comes on top with that.

Because of the larger clusters that goose has, more of the body heat is being trapped and distributed evenly. So, similarly, goose down, with its larger clusters (fibers) will be able to trap more heat and distribute it evenly for you to get warm. This is one of the reasons why some customers are willing to invest more in goose down garments because of these unmatched warmth qualities.

Outdoor-Research-Diode-Hooded-Jacket

But, nonetheless, duck down is still equally competitive as well with its greater warmth. Just not as great as the goose down. As I have already cited the emergence of new technologies, processors are being able to maneuver the high fill power of duck down by carefully selecting the clusters and weaving them together. This is of course quite demanding, and promptly leads to higher prices in response to enhanced warmth that matches the geese down. And for this reason, it will be virtually challenging to even separate the insulating strength of these down materials beyond the physical appearance of clusters.

Durability

Durability is also the toughest feature comparison between goose and duck down. Many may be tempted to conclude that they are equally durable. But looking at it closely, the durability of these insulating materials is partly reinforced by the fat and oil content that each bird has. It is, however, not clear that which bird has more oil and fat content than the other. We may have to assess the feeding plans for these birds.

Moreover, processing process also plays a significant role in durability. For instance, we need fat and oil content included in our down for resilience and pliability purposes. If more fat and oil, have been removed, the down material may have a limited durability, because then it will be susceptible to brittleness once dry. That being said, you mind out that a certain garment from one manufacturer with the same features is more durable due to how it was processed. This is beyond our control. All we need is to check that which manufacturer is more reliable with quality down.

A person filling a pillow with duck-down

But the final thoughts are that, goose down may emerge as the winner with regard to durability because of its larger clusters. The difference isn’t that significant but worth considering. Also noteworthy is how you care for your garment in order to improve its longevity, although caring as well doesn’t give us an obvious conclusion about durability.

Odor

As natural products derived from animals, goose or duck down may signal some scent. As I have just indicated that fat and oil content is included in order to enhance pliability and resilience of these insulating materials. So much of the scent is attributed to that. There’s nothing you can do about that other than treating it and making sure that it is cleaned. Some manufacturers treat down with DWR (Durable Water Resistant), which somehow lessen the odor. But the odor isn’t that unpleasant that you can be discouraged to buy a down garment. Also the eating habits of these birds play a role in the odor since the odor is vested in their fat and oil content. Because goose primarily feed on grass, it emerges as the less odor-causing bird.

A duck in water

These are mainly the critical features that warrant comparison between these insulating materials. The other factor may be the pricing. Apart from fill powers, the goose down is quite expensive compared to the duck down with the same fill power and fill weight. The main reason behind that is, as already cited, the scarcity of goose down. So, because of limited supply versus an increased demand, the companies that derive the goose down up the prices. But a goose down of, for example, 550 will cost less than a duck down of 850. Fill power also takes a center stage of the pricing of these natural insulating materials.

Caring and Cleaning Duck and Goose Down

There is no much of the difference between caring and cleaning the duck and the goose down. To enhance durability, you have to care and clean the down-filled garment, but not frequently. It is important to check the label first that is usually affixed on to the pillow, duvet, or sleeping bag to see the care instructions. Some of the instructions may indicate to you if the fabric is machine/laundry washable or only take it to dry clean it. Comply with the instructions to avoid the devoid of warranty.

As a generic advice, stay away from bleach and other chemicals in washing either the duck or the goose down. Such attempt could mess up your garment and send you to the store again. A mild liquid detergent is recommended in this case as an effective solution. And also avoid hot water because it might affect the fat and the oil content of down. Luke warm water is recommended to make sure that the loft and comfort of your down is retained.

A pillow on top of a washing machine

For machine wash, set it low settings. And do not over-burden the machine with many clothes. Otherwise your beloved down garments may end up fraying. Also important is to separate the garments. Like colors should be washed separately. And when tumble-drying, also set it to medium settings to avoid too much heat. I recommend drying the down-filled product on a clothes rack or line for optimal results. If drying the duvet, continually turn it upside down for an even dry. By following the washing instructions well, your goose or duck down may last you many years. Even after washing, it isn’t quite obvious that which down material is more durable. It actually depends how you care for it.

Which down should I purchase?

Given the aforementioned comparison of features, it shouldn’t be overwhelming anymore to pick the down of your choice. But my advice would be based on warmth and price.

Warmth

Assuming that goose down is readily available as well, for extreme temperatures goose down is the best pick. Because of the high fill power and greater warmth that I endorse it for harsh temperatures. Preferably go for high fill powers over heavy garments. You may find goose down in a broad range of outdoor gear such as duvets, sleeping bags, jackets and pants. The advice is to go for the 100% goose down. The garments that say, for example, 85% goose down have the other 15% attributable to feathers not the base-layers of the bird. The feathers are unfortunately not as warm as the base layers.

A person wearing patagonia-down-sweater-hoody-zipped-up

Duck down is also a great choice for mild temperatures compared to goose down. Only when compared to goose down! But you can still survive the inclement climatic conditions with duck down of high fill power although exorbitantly expensive. With the gap between duck and goose being gradually closed by additional processing techniques, it may be hard to say which has a superior insulating power later on. Once again reiterated, do not be deceived by the down with a high fill weight. It doesn’t necessarily mean greater warmth. Only fill power is essential.

Pricing

Even if you may desire a high fill power, the budget can be the ultimate decision-maker. For budget-constraint buyers, duck down is the best choice, particularly the mediocre one with a fill power of 500 to 650. For higher fill powers and loft, you have to spend even more. On the other hand, goose down is for the die-hard investors in outdoor gear. It commands high prices to secure a piece of goose down. High fill powers are a no-go area for budget-constraint buyers.

Down insulation removed from a baffle of a down-insulated coat

Remember that you can find a goose down that can rate up to 1000 FP. The exciting part about higher fill power goose down/duck down is the fact that it is lightweight. So that will be a great buying decision for ultra-light hiking enthusiasts.

Final thoughts on This Topic

If you were confused about the difference between goose and duck down you probably know by now that which one is close to being superior. Both materials are exceptionally in heat insulation. You can opt for any one of them to protect you against the cold nights in the wilderness. Choosing any of them can be encouraged by personal preference because there’s not much of the difference. Only the warmth and the price are the selling points.

The goose has once been more readily available insulating material until recently when its consumption has plummeted. Duck down is a byproduct of meat consumption, so it is readily available among a wide range of outdoor gear. The result of this abundance of duck down is the cheaper price that is also dependent on the fill power from 550 to 800+.

Pure duck down insulation, with a minimum fill power of 700, provides some serious warmth

Hiking 101: Hiking Basics for Beginners

0
Hiker standing near a glaciar lake in America

If you have much interest in hiking, but do not have much experience, it can be somewhat overwhelming when you’re first beginning. So we wanted to take you through a Hiking 101 post to discuss some essential hiking tips and preparations for beginners. Most hikers have numerous reasons behind exploring the wild.

For a some of them, it is an approach to get away from the worries of present day life and realign with nature. And for others, it is a most-loved approach to stay fit as a fiddle or interface with family and friends. For most hikers, it is a mix of these reasons, and for all, it is a most-loved approach to spend a free day.

Group of People Waking on Road With Brown Grass and Green Plants and Brown Mountains during Daytime

An awesome aspect concerning hiking is that it does not require much equipment and gear to begin other than comfortable, and sturdy footwear, a trail guide, some water and so on, which we are still going to discuss. In any case, we have come in contact with many ill-equipped hikers out on trails. On account of that, here is our quick beginner manual for hiking.

Basic Precautions for Hiking

Hiking is a phenomenal approach to see nature, encounter nature, and partake in a good exercise. You can do your hiking pretty much anyplace, from neighborhood parks, mountain ranges and national woods everywhere throughout the world. Devoted hikers will set out on adventures that can last anyplace, from a few days, to quite a while. Regardless of whether you are a fledgling hiker or an expert, hiking can be a great pleasure only if you take into consideration some fundamental precautionary measures:

What to wear

When it comes to walking or hiking any place, you need to ensure that you wear the right boots or shoes, put on clothing that shields you from potential ecological risks, for example, prickly and thorny plants, bug nibbles, sunburn, and even snake chomps which are greatly rare.

hiking boots on the ground outside

Durable footwear and good socks shield you from leg and foot wounds. Make use of good sunscreen cream and convey, or wear extra garments just in case the climate condition turns out to be cold. Utilize a hiking stick to help you have a good balance.

What to eat

The amount you have to bring will depend incredibly on your kind of hiking trip, but you need to ensure that you are highly equipped for your hiking adventure. Here are some consumable things to take along:

  • Nuts: Walnuts or almonds. Awesome for nibbling on and stacked with healthy protein and fat.
  • Water: Ensure that you take along sufficient water along with you so as to keep you hydrated always throughout your trip – 1-2 liters of water should be adequate. That, as well as ensure that you have been taking water before hiking in order to ensure that you are not taking off at a hydration shortfall.
  • Fruit: Put some apples in your backpack. Fruits such as bananas, raisins, and some other organic product are great choices too – pick in light of your own tastes and preference.
  • Bread and almond spread: If you will be gone throughout the day and you are a bread consumer – hurl a roll of wheat or flaxseed bread, a margarine cut, and a container of almond margarine or nutty spread in your backpack – doesn’t get substantially more straightforward than that. In case you are not a bread consumer, slice your apples and plunge the cuts into the almond margarine.
  • Hamburger jerky: Prepare your own or get some good ones from the stores. Heaps of protein, simple to stuff, and keeps well.

nuts in jars on the table

Hike with somebody

Abstain from hiking alone and ensure that another person knows your hiking plans and then adhere to it. Take along with you a phone but don’t anticipate that it will work wherever you go. Hiking alone may have its favorable circumstances, but it is likewise more perilous if there is any occurrence while you are out on the trail alone.

Two people hiking in forest

It would be suggested teaming up with a relative or family, especially for your first hiking trip.

Know where you are going

Getting acquainted with the hiking trail you want to use is quite essential. It is good to hike with somebody who has already made the trip and knows about the territory and conditions. However, In the event that you are yet to decide on a hiking area, search on Google to locate the nearest national park, or inquire from your friends or families if they are aware of any great spots. Do some exploring as you’d be astounded what number of spots are available for you to embark on.

Switzerland Hiking 101

And after locating a trail, make sure you remain on such trail. Lurking in the bush can get you punctured and even lost. Try not to hike up or down any trail unless you are certain there is a means for you to get up or down. Never go near areas where you are not permitted to go.

Go for the high ground

Climbing to the highest point of a mountain, high altitudes in a town, or the top of a building gives you an incredible midpoint to stop, have some lunch or supper, and have fun with the view.

Another reward for going up is that you definitely know precisely the extent have to hike on your way down. A recommendation on going down a precarious mountain or a ton of steps: abbreviate your walk.

woman hiking on forest trail

Also, be careful when landing on the feet balls with a twisted knee if conceivable – in case you are landing down on your heels for a huge number of steps, it can cause harm on your joints and knees as there is no stun ingestion.

Check the climate

Check the climate condition before you go and comprehend what the forecast is. Try not to climb in rainstorms. Remain out of arroyos and gorge amid downpours. A stream of rain can transform into a life-threatening glimmer flood in no time. If you are planning on doing a small hike, then you’re your plans around the climatic condition.

weather forecast on a smartphone

Keep checking the weather forecast. There are some mountains that may need early morning summits for serious rains toward the evening. Having an unpleasant time climbing in the rainstorm or lightening can be maintained a strategic distance from with a tad of research early.

Be informed

And lastly, be informed. Know and follow the rules and regulations for any region. Find out about the plant life and wildlife, so you can know about any potential threats. In state and national parks, utilize the leave-no-trace hiking morals. Deal with the environs and appreciate every biological community.

Two hikers taking pictures on the trail

Take along an extensive plastic pack to do your junk or litter that you may discover.

Preparing for your First Hike: Things to Take Along

Overnight and hiking are two entirely different pursuits and so we have made available some lists of gears to bring along on your hiking trip.

Backpack

You will require a little day pack to convey your hiking gears, and basically any bag you find lying around your house will be good. In the event that you are in the marketplace for another daypack, think of one as that has a water bladder compartment or water bottle for simple drinking access.

adult with a backpack

Abdomen and trunk straps are also useful components on a daypack that help appropriate the weight and shield the pack from moving as you walk. A few alternatives include:

Water bottle and Hydration Reservoir

One of the real essentials for any hiking trip is water, so ensure that you bring a lot of water. As already mentioned earlier, 2-3liters is will be ideal, however, in the event that you are climbing in a dry, hot atmosphere with a great deal of height gain, you may require more.

Camelbak Military Issued Reservoir for Your Go Bag

If you can bear the cost, hydration bladders make it convenient and easy to drink your water, and they can likewise help build continuance since you can take in water without ceasing and removing your pack.

Communication Device

If you will be out of phone networks, it is a smart thought to bring some kind of gadget that you can make use of to communicate.

Satmap Active 12 GPS

And you also need a device that can help you to send pre-decided messages to your phone contacts or an SOS flag to crisis responders.

Pedometers

If an outside GPS kit is out of your financial plan, and you need to burn through $15 to $75 rather than $150 – $400, try out pedometers. In addition, in case you’re a runner, walker or hiker who appreciates setting objectives, a pedometer is unquestionably a thing you will need to have.

Pedometer Counter Hiking Step Counter on the Table

Find out about heart rate screen pedometers, watches, and the ones that can be joined to or worn in your shoes or boot for better estimation.

Sleeping Bags and Pads

According to scientific proving, since ladies are normally colder than men, you need to purchase a ladies’ particular bag with additional cushioning in the foot quaint and the spot that your hand rest, and ensure that you take note of the temperature appraisals.

REI Sub Kilo +20 Sleeping Bag in a Tent

Don’t give up thickness for weight, since the normal ladies are much shorter than the normal man, you can spare the space and pack weight by purchasing a ladies’ particular sleeping pad.

Emergency treatment kit

There are some extraordinary lightweight kits accessible, and they always leave space for you to include some personal items, for example, physician endorsed drugs, and so forth.

Mini Waterproof Portable Outdoor First Aid Kit

Water purifier or filter

That mountain stream certainly looks clean and neat, isn’t that right? All things considered, so did that spinach you purchased a week ago. Keep in mind that? The particular spinach that offered you that frightful E Coli disease?

Man using Pump Filters and Purifiers

Furthermore, in case you are climbing in the hot climate, or on more than a day hike, you should get a water purifier and a day pack that enables you to convey a 3-liter water compartments with implicit a drinking hose.

Hiking clothing

For your first hiking trip, the primary concern to take note of is the climate. The exact opposite thing you need is to be excessively cool, excessively hot, or, to be caught up in rain ill-equipped. Check the climate and bring suitable layers which enables you to adjust as required.

Hiking in the High Country

As you are picking what to put on, it will be better if you can maintain a strategic distance from cotton since it holds sweat and dampness.

Health Benefits of Hiking

Hiking in the outdoors, has a horde of advantages for both the mind and the body. Hiking is less demanding and simple to begin, so you can take an interest regardless of how fit you as of now are. The majority of people, abides within driving range of magnificent hiking areas and finding these areas is a decent method for becoming acquainted with a territory. Here is a glance at some of the health advantages of hiking:

Promotes Mental Health

Hiking activity is substantially more varied than numerous different sorts of workout, especially those attempted in a recreation center. Not exclusively, but your exercise can be different every time, contingent upon the trail you take on, but the scene will likewise change, if just from the seasons. Outdoor hiking can definitely help you to keep up your inspiration for workouts, by making it additionally intriguing. Hiking can likewise be as social as you prefer. You may feel humiliated about doing workouts in a recreation center or on the street when you are first beginning, and hiking on a separated trail will diminish the odds of feeling like people are passing judgment on you.

Man on top of the mountains watching the landscape

On the other hand, hiking with a gathering or a companion, can feel more like amusement than a workout, and campgrounds are regularly inviting spots, where it is conceivable to meet new faces. The workout is a decent anxiety reliever in any way, including hiking, and can likewise diminish a sleeping disorder, prompting to better mental wellness. Outdoor hiking will surely help you feel nearer to nature and common rhythms, which may expand your joy and help you achieve satisfaction. A troublesome hike, for instance, up a slope or mountain, can likewise help you have an inclination that you’ve accomplished something more substantial than finishing a wellness circuit in the recreation center.

Promotes Physical Health

Outdoor hiking is an awesome exercise since it is quite easy to change in accordance with any fitness level. Hiking outdoors can definitely be on a level, very much maintained way, or up to an untrodden mountain. This makes it fabulous for individuals who are planning to enhance their wellness, as they can basically take increasingly troublesome hikes.

Shedding off weight is another advantage of hiking. This is especially valid for climbing uphill, as this can smolder comparative measures of calories to running. Workouts can help lessen the effect of insulin in both the long and short haul. As an outdoor hiking puts weight on your bones, it empowers sound bone structure and decreases the odds of osteoporosis. Being opened up to too much sunlight will likewise build your vitamin D level.

Person in Blue Hoodie Jacket Wearing Red Hiking Backpack Standing at the Top of Mountain Under White Sky during Daytime

Hiking is actually a cardiovascular process, contingent upon how hard you inspire yourself amid hike, and in this way has advantages for your cardiovascular framework, for example, decreasing the odds of coronary illness, and expanding your general wellness. Hiking is fantastic for muscle tone, especially cross-country hiking, as your legs and body needs to make up for the harsh landscape by working intensely. Hiking is a magnificent action that is less demanding to begin and proceed, because of its customizable and varied nature. Hiking, outdoor, can help you get fitter, clear and facilitate your mind and make your body healthy.

Hiking Etiquette

Abandoning civilization does not mean living thoughtfulness behind, as well. You aren’t by any means the only one getting a charge out of nature, so check out these etiquettes for hiking and make sure you leave no trace strategies and remember the following:

  1. Give other gatherings some space: Do not crowd other gathering of hikers; either gently pass them or hold up to offer them some room. Likewise, let speedier gatherings pass and respect those climbing uphill when you are coming down. And finally, keep in mind to greet passers-by.
  2. Watch your level of noise: Let yourself (as well as other people) appreciate the hints of the outdoors by restricting your gathering size to six or less and reducing your noise level. If you bring along your phone, kill it or silent it and only utilize it if there should be an occurrence of crises.
  3. Limit your effect: As the expression goes, leave just impressions, take along only pictures. Make sure you pack out all your waste, never endeavor to move toward, or feed a wild creature and remain on the trail to abstain from trampling sensitive verdure.
  4. Be a decent gathering member: Set a fitting pace, caution others about loose stones, rocks and other perils and hold hanging branches off the path so that they don’t smack those following you in the face.

Obviously there are extra contemplations, both for etiquette and safety when embarking on hiking with kids or bringing your pooch on the trail, so try to check through the above etiquette before taking off!

Hiking In Jeans: Is it a Good or a Bad Idea?

0
Close-up photo of a pair of boots in a man's legs

Jeans look so stylish and beautiful in line with the current fashion trends. You may find plenty of jean pants or jean jackets or jean shirts, in stores today, which other people find to be heavy and seemingly warm to be suitable for hiking.

As such, some even pack their backpacks with jeans clothes to their hiking adventures, but surprisingly express their dissatisfactions on their return. They complain mainly about feeling cold when faced with stormy or rainy days, despite wearing their “thick jeans”. It then turns out that hiking in jeans is not as pretty amazing as some have perceived.

Man in White Printed Crew Neck Shirt Standing on Isle of Mountain

It turns out again that jeans seem to be the stylish and attractive to hike in shorter hiking trails and for normal dry days with no foreseen rainfalls. This makes it hard to hike in unknown locations. It becomes even worse when the jeans-wear gets wet or simply damp because of the void of moisture wicking properties. Wet jeans expose you to various illnesses such as catching flu and hypothermia. It is understood that many people may be putting on jeans without knowing the fabric that they are made of. It helps to know that so that you can make an informed decision.

What discredits jeans wear for hiking?

Jeans are discredited by their cotton fabric. Those denim jeans that you see in stores are wholly made of 100% cotton wool, which comes with unfavorable properties for the outdoor’s inclement temperatures. They were precisely designed for casual wear in dry conditions not for winter because of the greater possibility of precipitation during winter. If it has rained on the jeans, there could be some ice crystals on the fabric for a long time than it could be with the standard hiking pants.

Man hiking 10 miles in jeans

And it will also take too long to dry the jeans. At times you might have to pause your hiking because the jeans are wet and it brings you discomfort when wet. The cotton wool has no properties needed for outdoor temperatures. All outdoor clothes have a wide range of properties to keep you warm and some of them are discussed below. We have made comparisons between the standard hiking garments and the jeans to help you decide.

Features needed for hiking adventures

To start with, hiking is such a breathtakingly beautiful outdoor adventure where you get to explore scenic views, climb elevated summits and trek on various terrains. However, all these come with the possibilities of a harsh weather which can bring an abrupt pause to your adventure if not well clothed. It then becomes challenging to brainstorm the relevant fabric for outdoors. And given a broad range of clothes on the market, some marred by hype of being the best, it also becomes more overwhelming to pick that gear deemed the best.

That salesperson in the denim stores will never discourage you from buying a denim jean for hiking because all he needs is the sale. All can be solved if you know that which paramount features you should take into account. Among others, warmth, comfort, waterproof, breathability, flexibility and lightweight are the essential features expected from outdoor clothes. These are some of the features that the denim jeans do not possess.

Warmth

Because of the inclement temperatures in the outdoors, we need warm jackets, shirts and pants with inherent insulating properties. In this regard, we have a choice between naturally down-filled insulators and the synthetic fabrics. Natural insulators have proved to be the best in this category since they provide more warmth to weight ratio. For example, when you compare the Down-filled jacket with the eVent jacket, the Down jacket emerges victorious. However, the eVent/HyVent/Gore-Tex synthetic insulators also have their own advantages. For example, Down takes longer to dry if it gets wet and can also lose loft and comfort, whereas the synthetic insulators dry quicker and still maintains their comfort. This is the choice we are faced with when considering warm outdoor clothes.

A woman hiking in skinny jeans

Unfortunately, we cannot say the same with the denim jeans. Yes, they weigh heavy and seem to be rugged and stiff. However, it appears that those properties are not viable and ideal to withstand the freezing temperatures. When the day is too hot, for example, the jeans are too hot too, and when it is cold, the jeans are also cold. In simple terms, they are directly proportional to outdoor temperatures. So you cannot rely on such gear because you may be susceptible to hypothermia. It’s not a joke that there have been some reported cases where people have succumbed to the extreme temperatures wearing jeans and then eventually died.

In conclusion, jeans perform poorly in providing warmth in the wilderness. So stay away from them. If you are taking a day hike in normal conditions, then they would be ideal.

Comfort

Because of the insulating properties and maximum cushioning needed, designated hiking clothes offer the best comfort. You still have the choice between natural and synthetic fabrics here because it is still the battleground for the best with the natural fabrics still emerging as the best, but not always. There are some factors that dictate the winner. For instance, not all Down garments are the best because of the varying fill powers. High quality Gore-Tex may be the best when compared to low quality Down garments.

Looking at the jeans, they are the worst recipes of discomfort if they get wet. To start with, it’s inevitable and inescapable that your body will perspire at some point as a result of the intensive nature of hiking. Climbing summits and ascending slopes may be a precursor to a sweaty body. As thus, the sweat will turn into vapor that needs to evaporate outside. If the clothing that you’re wearing is not breathable enough, that sweat may wet it and chaffing may result as well as blisters.

Man Climbing the Mountains in Paramo-Montero-Technical-Jeans

Cotton in jeans has the ability to absorb moisture and dry over a long period. During that drying period, you will have subjected yourself to the discomfort of hiking in jeans. So it is a bad idea to use jeans in extreme temperatures. If you take a hose pipe and sprinkle water onto the jean and onto a Gore-Tex hiking pant, you will see the difference that we are referring to. If you insist on wearing jeans to the harshest temperatures, be ready for the possibility of hypothermia.

Waterproof

Waterproof is also an essential quality of outdoor clothes. The outdoor elements such as the downpour may be unpredictable in some locations. We may also meet some water streams that we have to traverse through them. A waterproof jacket or trouser is, consequently, a need to have for you to have an outstanding adventure. Most of synthetic and natural fabrics have the waterproof membrane to achieve that. The membrane has some porous capillaries to let moisture molecules to escape, but thin enough to block the penetration of water molecules from the outside. You will then remain dry despite being rained on.

Close-up photo of jeans

In addition to the waterproof, there is water resistance. Most outdoor garments are coated with the DWR (Durable water Resistance) to repel water so that you remain dry. But that coating deteriorates with time and may need restoration. We cannot say the same with jeans in hiking. They are merely just garments made of wool with no water resistance coating, unless a few.

But waterproof is completely not a feature in denim jeans. Consequent to this, jeans exposes you to the freezing rainy days. It becomes worthless to even think of them. Otherwise, you may be compelled to pack extra gear like the designated rain jackets and rain trousers even for mere precipitations.

Breathability

Breathable garments are the ones that help you escape the hot days’ perspiration. As highlighted above already, sweating is an inescapable process when the days are extremely hot. If not, well evaporated outside, it can dampen your clothes. This has led the manufacturers of outdoor garments to strive towards breathable fabrics. The fabrics may have tiny pores to let moisture out, but cannot let the water molecules, in.

One other property of breathable fabrics is that they are made to repel the absorption of moisture. Keep in mind that most of these fabrics are predominantly made of nylon and polyester. Jeans tend to do the opposite. Cotton is inefficient of letting moisture out. Instead, it absorbs most of the moisture particles because it is not breathable. It is this lack of breathability that leads to wet jeans due to perspiration.

Man in jeans sitting down and taking a break

That’s why jeans are recommended for short hikes during normal conditions where we know that too much sweat is unlikely to occur. In such instances that’s where you can say jeans are WOW to travel with because they are stylish but not functional. Perhaps some manufacturers could launch some jean products that have composite synthetic materials to aid in outdoor temperatures.

Lightweight

Minimalist hiking hobbyists know how important it is to have lighter clothes. Heavy garment is a bad idea, particularly for long hikes in the wilderness. They will surely make your hiking pursuit unpleasant. It is everyone’s dream to have lightweight gear. That being said, if you check many outdoor pants, they have many pounds trimmed off. But having a light weight doesn’t mean that some features have been compromised.

Brown Button on Blue Denim Bottom

Jeans, on the other hand, are heavy weight. They are rugged and heavy, but that doesn’t necessarily translate to top notch warmth. In spite of being heavy, jeans perform poorly in extreme temperatures. That thick jeans will make you wet in case it gets wet either from rainfall, snow or from body sweat. It turns out that jeans in hiking are again bad moves for minimalist hikers. Your gear will be heavy because of the jeans jacket, jeans shirt and jeans trouser.

Flexibility

Flexibility relates to a proper fit and mobility of wearing outdoor clothes. Most of these outdoor garments are knitted with extra cushioning so that they do not rub against the skin and no chub rub noises whenever walking. You won’t feel any noise no matter how intensive your walk is. That’s what we term as flexibility. Moreover, they won’t restrict your mobility because of the softness of the fabric they are made of. You can participate in strenuous exercises or any other outdoor activity with such garments.

With jeans, however, you may not enjoy mobility when participating in outdoor pursuits. The garments are stiff, so it is not easy to be flexible in them, let alone running in them. They are notorious for subjecting the wearers to blisters and bleeding sores, especially when they are wet. And they can also cause the chub rub noise when walking in them because, quite often, they rub against your skin. This is just one of the reasons why they are recommended for short hikes. Hiking for a long time in jeans is red flagged because they are not flexible enough.

Hiking on mountains with kids

Having discussed the aforementioned features, you should now have a glimpse of why we discredit jeans in hiking because the reasons should be quite obvious now. The main enemy of jeans is their cotton wool. But if you meet any jean made of merino wool, you may consider it for outdoor wear because it is a natural wool from merino sheep.

Below are succinct reasons that substantiate our rejection of jeans in hiking:

  • Jeans are not waterproof or water resistant
  • They have no moisture-wicking properties
  • They are not breathable so more moisture is being absorbed instead of being evaporated
  • They are not the insulating materials and never made of one
  • They are not warm
  • They dry gradually
  • They are cold in cold temperatures and hot in hot temperatures: direct proportionality
  • They are made of 100% cotton wool
  • They feel heavy and bulky, so may not be comfortable for hiking on long trails

The other remarkable difference from the hiking pants and jeans is the features of multiple pockets for additional storage. It is rare to find jeans having large pockets on the trousers, shirts or jackets. As a hiking enthusiast, you will understand that the additional storage is important to store your digital valuables in them. Jeans are very stiff and are not easy to store large valuables in them. You will then be prompted to store your essentials in a backpack where they are not within immediate reach.

Furthermore, because of the fluctuating outdoor temperatures, hiking pants often have zippers around the knee to be converted to shorts if the temperature is too hot so that enough air can circulate. To make the jeans convertible, you may need the knife and a pair of scissors to cut the legs. Knitting them together in harsh temperatures is yet another issue. But we don’t rule out the possibility that some may have such zippers to make them convertible. The bottom line is that they are not as easy as the hiking pants.

So is it a bad or a good idea to have jeans?

Please do not get us into trouble with denim jeans manufacturers on the perception that we discredit their products and discourage their loyal customers. The fact is that, they are not good for hiking due to reasons paraphrased above. They just do not have those essential features that hiking pants have or must have. Hiking outdoors comes with lots of challenges. It is not for fun only as jeans may symbolize. One needs to get ready for the unforeseen extreme temperatures by having great outdoor apparels that provides warmth, comfort, breathability, water resistant and waterproof qualities.

Man with a backpack hiking in jeans and boots

You can buy your jeans and get them ready to attend those extravagant weddings in your proximity, or even chill at the beach with your friends. They are beautiful and very stylish, and you may need to own one. But when hiking, you must try to pack them nicely in your wardrobe so you can use when you come back. Only hiking garments are endorsed for outdoor use. Hypothermia is real and the precursor to having it is when you persistently wear jeans despite being warned not to hike with them in harsh climatic conditions.

Final thoughts on this topic

Hiking is not an ideal outdoor activity to be enjoyed while wearing jeans. Had they been made of other materials such as nylon or polyester with wicking properties, we would endorse them. It seems the cotton in the jeans is the first enemy. Its moisture absorption discredits the denim jeans as the suitable garment for hiking.

Vigilant outdoor enthusiasts know what to look for in outdoor apparels. The features we have discussed in the beginning are some of the prerequisites that are checked for when selecting the best outdoor clothes. Unfortunately, jeans do not possess any of those features. Their warmth is only applicable in dry weather conditions until you start to sweat.

Young woman in jeans walking on a road

Our final conclusion is that; do not use jeans to hike in the wilderness when you are faced with the possibility of downpours or snowy mornings. Jeans are the recipes of hypothermia in freezing temperatures. For shorter hikes, it’s okay, you can put on them for that day. You can even consider the short pants jeans.

Hiking Movies: What We Learn From Hiking Films

0

Nothing keeps you pumped up for the outdoors like watching a movie that’s devoted to the topic. Irrespective of whether you’re in need of some inspiration or hoping to go on a retreat to a certain place, watching a few scenes from hiking movies can give you the motivation you need to forge ahead. Hiking can be a strenuous activity, especially if you have never done it before. To get the best out of your outdoor activity, you’ll first need to know a few survival tips which can be obtained from watching these films. Outdoor films create a sense of excitement for those who are about exploring nature.

Some people find the joy in driving the fastest automobiles while others fantasize about surfing the world’s largest waves. Among these are the individuals who don’t feel alive until they explore the highest mountains. Hikers are, for lack of a better word, enthusiastic. They brave the toughest natural settings at altitudes that require oxygen tanks, and discuss edema, death zones, and losing limbs like everyone else talks about paper-cuts and blisters.

The_replica_of_the_school_bus_that_Chris_McCandless_lived_in

What makes these individuals want to subject their lives to danger for a few minutes on frozen mountains? This issue is a common denominator of all films with mountain-climbing themes, and a major reason why the audience of these movies are attracted to such perilous extremities. This article will talk about some of the best hiking films and what these movies teach us about outdoor exploration.

WHAT YOU NEED TO KNOW BEFORE GOING ON A HIKE

When you think about hiking, perhaps you imagine a group of road-tested individuals with oversized backpacks finding their way through epic mountains for an extended period. Hiking is more than just climbing.

Group-hiking-in-the-mountains-on-a-classic-hike-in-the-Smokies

As revealed in many movies about backpacking, a lot is involved, including planning, making important decisions, deciding to live or die, making sacrifices and many other intricate factors. Before you can hit the trail, here are other important aspects you’ll need to know.

  • Decide whether you’ll be hiking alone or with a group: Hiking solo can present an excellent time for self-meditation. However, what some hiking films teach us is that exploring solo can be dangerous in case anything happens when you’re on the trail. Therefore, if you are a cautious individual, them it’s advisable to find a friend or a loved one to hike with. This can be an excellent bonding opportunity.
  • What is your beginning level: If you’re a newbie in hiking, or out of shape, it can be a wrong decision to send yourself out to the wilderness for over eight hours. Begin slowly, and choose places around town that will make it possible for you to stop or get back home with ease. In the wilderness, you don’t have to be a hero. You should do what is possible for your case and do not attempt to go for the impossible.
  • Choose your hiking location: Before hitting the trails, be certain to pick a place that is suitable for your case. You can search the internet for trails around your city or drive around town to determine whether there are any parks that look exciting to explore. Ask your colleagues of friends if they are aware of any good spots to hike.
  • Let somebody else know: When you are planning to hike solo, make an effort of letting your family or friends know where you’ll be hiking and when you plan to get back. You can do this by calling or emailing them. This aspect is quite significant if they are to find you in case you get lost in the woods. Leave a trail and let your people know about the important details so if they have not heard from you for a while, they know how to alert the authorities.

PACK ESSENTIALS

If there’s anything to learn from the best movies about backpacking is that it’s always important to carry the right essentials as these are crucial for outdoor survival. Here is a list of the items all hikers should know about.

  1. Navigation – Use a good map, compass, and GPS to stay on the trail. Make sure you can read these navigation systems.
  2. Sun protection – In the outdoor, there’s so much UV exposure, particularly on mountains which lack tree cover. Look after your skin and eyes using the UV-blocking sunglasses, sunscreen, and hat.
  3. Illumination – Even when planning to be out in the day, carry a lightweight flashlight or a headlamp. Make sure its batteries are fully charged before you can leave your house
  4. Insulation – Be certain to pack some extra non-cotton clothing irrespective of how hot it is. It’s recommended to always have some extra layer of clothing just in case the weather changes
  5. First-aid kits – Every individual has different health needs. However, when in the woods, it’s important to have a basic kit which contains the following items: povidone iodine or alcohol wipes, bandages and gauze, anti-inflammatories (acetaminophen, ibuprofen), antibiotic ointment, a roll of medical tape, non-latex gloves, tweezers, antihistamines (for bug or bee bites), eye drops, bear spray (when hiking in places with bears), an epi-pen (for those with severe allergies), a card with information of every hiker, a snake bite kit, personal medication such as diabetes or asthma
  6. Repair kit– Anything crucial for repairing trail gear including the multi-tool device, Swiss army knife, needle and thread, wire, scissors, rope, shoelaces, etc.
  7. Fire­-making supplies – waterproof lighter/matches
  8. Nutrition – Sufficient lightweight, calorie-dense meal to last your entire hike. You can also include energy bar to your list.
  9. Hydration –The capacity of water you’ll require will vary based on the intensity and length of the hike. As a rule of thumb, pack multiple water bottles for each person. Also, plan for refills while on the trail. Carry water filtration and purification systems such as chlorine tablets and iodine drops.
  10. Emergency shelter – Carry with you an emergency tarp or blanket, or a large trash bag in a pinch.

Apart from the above, it’s advisable to carry an insurance card, a photo ID, and a credit card of emergency cases.

A red first aid kit with hiking boots in the woods.

Also, bring your toilet supplies so you can conduct your business with comfort.

BEST HIKING MOVIES OF ALL TIMES

The Edge, a 1997 film

The synopsis of this movie is that Hopkins Anthony is a Gazillionaire. He is married to a lady who is cheating on him with his business partner. While heading to the mountains, Anthony and Alec (his business partner) crash land in the woods where they have no option but to survive and outrun a bear. Through his prior survival techniques, Anthony Hopkin is able to survive the wilderness while his friend Alec doesn’t.

Green and Gray Mountain

What we learn from this movie is that reading a survival manual can help a person to save their life in the wilderness. Additionally, composure under pressure can help save a life when on the outdoors.

Into Thin Air, a 1997 film

This tragic movie is based on a book by Jon Krakauker, an author, and adventurer. The intense drama in the movie details the events of the infamous Mt. Everest disaster where eight mountaineers died, and several others got stranded when an unexpected storm struck the mountains rendering the hikers helpless.

Beautiful Landscape of Mount-Everest

There are some takeaways from this thrilling film including:

  • Always observe safety precautions on the outdoors, whether going for a mere brisk in the wilderness, or hiking the highest mountain in the world.
  • The outdoors can be fatal even when exploring with a group. Try as much as possible to avoid death

The Vertical Limit, a 2000 film

This movie is a survival thriller which is not based on a true story. It features siblings Annie Garrett and Peter Garrett. Their father, Royce, dies while climbing the Monument Valley. After two amateurs leave the entire family dangling, the father forces the son to cut him loose so he could help his children to survive. After the fall, the son (Peter) retires from climbing and resolves to become a wildlife photographer while Annie decides to become an established mountain climber.

Landscape of Rocky Mountains

A few years later, Annie resolves to climb K2, the second-highest mountain in the world. After inclement weather forces Annie and her crew to be trapped, the brother – Peter – must assemble a team to attempt and save Annie from a fate that is similar to that which befell their father. As the movie progresses, we get to learn about survival instincts and skills, aspects which are crucial for outdoor survival.

Touching the Void, a 2003 film

The bonds of hiking partnership, human resilience, the capacity of a man to survive, and the travails of mercilessly scaling dangerous terrains – KevinMacDonald’s film, “Touching the Void” has everything you would expect from a hiking movie. This film is a true story of Simon Yates and Joe Simpson, two climbing peers from Britain who in 1985 ascended the West of Siula Grande in Peruvian Andes. As they went down from the peak, Joe’s greatest nightmare becomes a reality after he broke his leg.

Using a clever rope technique, their descent suddenly transforms into a rescue mission. Their predicaments get worse when a sudden storm hits to interrupt their mission down the cliff. Over one steep, Joe is left suspended and out of Simon’s hearing or sight range. Believing that Joe is dead, Simon decides to suddenly make a decision that would be filled with controversy in the eyes of the viewers – he cuts the rope. What transpires next is better left unsaid for those not familiar with the events that occurred next.

Landscape of Park Mountains

The events that transpired have recounted to us in a classic talking-head style, while the hike is excellently reenacted by Nicholas Aaron (Simon) and Brendan Mackey (Joe). Complex close-ups of ice-axes and crampons, add an almost strange effect and the scene arrangements by MacDonald’s furiously collocate fragile human with the unforgiving nature. One of the horrific yet legendary hiking stories-turned-survival accounts to have ever occurred, the events in this film ignited continuous debates among the hiking community over the decision made by Simon, and also make for a remarkable and extremely visceral experience among the viewers.

The Wildest Dream, a 2010 film

One of the best and most fascinating films made on the topic of mountaineering, “The Wildest Dream” by Anthony Geffen follows parallel tales seventy-five years apart. The film is narrated by Liam Neeson, with the first story of 1920 that recounts the first fateful attempt to hike and reach the peak of Mount Everest by George Mallory and his climbing peer Andrew Irvine. The second tale talks about the events of Conrad Anker, the person who discovered the frozen body of Mallory in 1999. Along with his peer Leo Houlding, Conrad followed Irvine’s and Mallory’s steps in an effort to find a solution to the mystery of whether or not they had reached the summit.

A man passing a bridge in Nepal

One of the greatest questions that surround Mallory’s body was whether he was on his way up or down the summit. Intertwined with a thrilling vintage mountain film from the twenties, the amazing person of George Mallory along with the two loves of his life – his wife and the Everest itself – make this movie an infinitely compelling film. As intoned by Natasha Richardson and Ralph Fiennes, the letters between Ruth and Mallory are ingeniously insightful, not least in how the letters uncover George’s obsession with the mountains.

When Mallory was asked why he so much wanted to climb the Everest before, his reply was simple and straightforward, a three-word phrase that is now ingrained in the mind of every hiker – “Because it’s there!” How the stories unfold in “The Wildest Dream” is what makes this documentary one of the greatest films of recent times that touches on the subject of mountaineering.

WHAT WE CAN LEARN FROM HIKING MOVIES

  • Select the mountain to hike – Some people tend to go on an outdoor expedition without making plans of where they’ll be visiting or the types of mountains they’ll be climbing. Don’t pay attention to what people say about specific mountains. Since you’ll be spending your energy outdoors, make sure you choose the terrain which is right for you.
  • Respect your body – You are only able to hike if you give the body the attention it deserves. Make sure you are fit, and your body is in perfect shape when you want to climb the mountains. Also, move at a slow pace to ensure to don’t get exhausted. If you move very fast, you’ll get tired and fail to continue with your journey. If you move very slowly, the night will fall, and you may get lost. Enjoy the outdoors and take delight in everything Mother Nature throws at you, but move at a moderate pace.
  • Respect your soul – When on the outdoor, avoid doubting your soul. If you think you are going to make it, then be determined to achieve whatever mission you’ve set out to attain. From actual life stories to fictional films, it’s clear that people fail in their outdoor mission by failing to trust their instincts. Getting obsessed about reaching a certain objective can be fatal or may end up driving out the pleasure you would expect to get from a climb.
  • Expect the landscape to change – Of course,there has to be an objective in mind when going out on a hiking mission. But as you make attempts to go to the top, you may discover some changes in terrain and other aspects of physical nature. Do not get worried; use your adventures to discover things you never thought you would find.

mount-everest during daytime

HIKING AND SACRIFICE

What can be gathered from all movies about backpacking is that determination and sacrifice go a long way in ensuring that you help yourself or the loved ones survive the outdoors. Doing what is important to anyone involves making sacrifices. The outdoor life is about acknowledging the fact that we have the capability of doing anything we desire if we simply realize that it’s not possible to do everything we want.

It is possible to throw away your current obligations and decide to take a hike on the Appalachian Trail, but this will include some element of sacrifice. You may have to leave your loved ones behind or even quit your job so as to achieve you long time desire of hiking the Everest.

italian-mountains-landscape

In scenarios that are less extreme, we can use this thinking to other sections of life. You may decide to quit your job and move to another one that is less stressful, prompting you to take a pay cut. You may obtain an early retirement, but you’ll have to forego buying a new automobile every two years. You can do whatever you desire, but you will need to acknowledge that sacrifices need to be made.

Sacrifices can also be made on the trail. We have seen movies where people give up their lives so as to save the lives of their loved one. Being an outdoor enthusiast can also require you to possess the ability to sacrifice on behalf of everyone else. Be ready to give up whatever you have so you can save the life of someone else even when it means giving the last piece of snack you had with you to save the life of a peer who is almost dying of hunger.

CONCLUSION

Movies about backpacking teach us a lot about aspects of survival. Among these are the issues of perseverance, preparedness, determination, self-awareness, and sacrifice. To cultivate a life which revolves around meaning, you will need to make sacrifices. In the wilderness, a sacrifice is worth it.

You simply need to identify what’s more important to you and conquer that fear of missing out. That way, you’ll be able to live without worrying about the things you are missing and instead focus on what is ahead of you. This is what hiking is all about!

Landscape of mountains and lake

How to Plan a Backpacking Trip: Making the Best of Your Backpacking Trip

0
A backpacking trip is an inexpensive way to see some of the most beautiful places on the planet, whether in your hometown or halfway around the world

There is no better way of experiencing the thrill of the wilderness than going on a backpacking trip. It diverts from the annoying crowds and crowded RV sites. You get a chance to spend time with your loved ones and more so connect with nature. But for the trip to be successful, you need to plan for it carefully.

Here, we focus on how to plan a backpacking trip for it to turn out not only successful, but also exciting. Using the tips discussed here, helps you get the best trip preparation using minimal effort while, at the same time, getting the best experience.

How to Plan a Backpacking Trip

Whether you are planning for a long or short trip, local or international, these tips should help you get the best out of it.

Detailed Understanding of Backpacking

There are many types of hiking, and backpacking is one of them. It involves bringing your gear on your back while hiking, and lasts more than a day. At times, it may be an extended journey requiring camping, though not always. Backpacking is referred by different names in various regions, with some calling it bush walking and trekking, in Africa, hill walking in Britain, and tramping in New Zealand.

hiker passing queulat bridge

Different regions around the world, cater differently for backpackers camping options. There is a variety of tenting around hiking areas in N. America, while Europe has invested heavily on shelters and mountain huts. Similarly, South Africa uses simple huts.

Planning a Backpacking Trip

Different people have different backpacking needs.

Couple hikers with map in mountains

That is why, it is important that, before embarking on that trip, you ask yourself the following questions.

  • What’s your desired destination?
  • What’s your budget?
  • How long do you wish your journey to last?
  • Who are you after a given period? Your partner, alone, or as a group?
  • What is desired mode of touring?

Answers to the above, act as a sound basis for making the best choices and rewarding yourself with the best travel experience.

Decide on a Destination

A decision on your backpacking destination is the most crucial. It sets the tone of the trip by dictating the adventures and experiences you will encounter throughout the whole trip. It also profoundly affects your next possible destination. For these reasons, you need to be careful when making your decision on where to backpack.

A camera, a compass, agenda and a pen on a map

When making this decision, the following choices are important and must be factored into your decision making.

  • Research – As obvious as it sounds, it is as equally important to carry out research on the places you have in mind. Confirm the cost of staying there and whether it fits your budget. Other things that you need to consider, when doing your research, include the security of the place; as you may know, your safety is of paramount importance. The internet makes it easy to research on the canceling of any place you want.
  • Take advantage of blog forums – To check out other travelers experiences in different areas, visit blog forums. Most backpackers will leave reliable information that will profoundly determine your experience in various places.
  • Focus on your favorite places – Places you have always desired to visit should come at the top of your options. If they fit your budget and prove to be safe, why not try them out?
  • Be definite about what you want to accomplish during the backpacking trip. Are you looking to add more experience in your CV, or you are looking forward to being involved in charity work? Are you traveling for getting exotic cultural experience, or you want a place to divert your mind from your daily busy schedule and just relax? Depending on what you want to achieve, you can choose a place that will help you fulfill the desires of your heart.
  • The amount of time you want to travel, helps you make a realistic plan of the things you can achieve during your trip.
  • After settling for the destination, check the seasonal calendar of the place. In case there is some cultural festivity that takes place in the country you will be visiting, you might consider visiting during the period so as not to miss.
  • Finally, check your travel insurance if it applies in the place you want to visit. If it doesn’t, you might be faced with loads of bills to pay, in case you fall ill or accidentally lose your travel documents.

Booking your Flight

If there is anything backpackers are known for, it is their ability to find the cheapest way out of anything, hence making the best of their trip even with little cash. This saving goes a long way, even in booking their flights and choosing the means of transport during the expedition.

Although, there is no such thing as the time when you cannot book your trip, even a day before the travel date, it is highly advisable that you do it in advance. Booking in advance helps you secure flights at a cheaper rate. Also, if possible, consider subscribing to airline newsletters, as they always have announcements on any available cheap flights. Similarly, consider joining travel hacking websites, as they also increase your chance of scoring cheap flights to different destinations.

Ariplane on sunset

Your flexibility as a backpacker, is what will enable you to land cheap flights. The following tips will be useful in helping you get cheap plane tickets for backpacking trips.

  • Booking multi-city flight is the best option when visiting more than three domestic cities within the US.
  • Book multi-city national flights when you fly to over three cities abroad.
  • Get around the around the world tickets as they offer you exceptional value when it comes to multi-stop international trips.
  • Air-passes give you an opportunity to see more of a region/country at an affordable price.

Before You Fly Tips

After you have chosen your destination and have booked your ticket, it is time to ensure that all your documents are in order. The airline industry is known to enforce strict regulations whether you are flying domestically or internationally. For this reason, ensure your travel documents are in order before the flight date.

Double check you have the things listed below to ensure everything is in order before your flight.

Air-tickets

Technology came to make things easier, and that is why e-tickets took over from the paper tickets hence shorter lines at the airlines.

Economy class tickets on a laptop

However, this doesn’t overrule the fact that there are still some details about your e-ticket that need clarification. Confirm you have the following when going to the airport;

  • You either have the booking number or credit card at the check-in.
  • An identification photo and a copy of your ticket to be shown at the security gate.
  • Ticket confirmation before the flight, which you can do on the airline’s website. Also, any changes on your trip will be posted on the website 24 hours before departure.

IDs and Passports

Crossing the border without your identification documents is hard. To avoid any inconveniences, always confirm that your documents are in order.

different colours passports

If you are backpacking domestically, you will be provided with a government-issued photo identification such as a passport or a driving license.

Visas

There are certain countries that you will require a travel visa to visit. To know the visa requirements of the country you are visiting, double check with the embassy of that country or go to their website to check.

Image of a China visa.

In case you don’t have a visa yet, you need to go through the application process early enough, as it takes even two weeks to complete. Do not let the inconveniences of the lack of a visa delay your backpacking adventure.

Money

While going for backpacking trips internationally, ensure you have your money distributed across traveler’s checks, credit cards, and cash.

Credit card on cahs

Getting money via ATMs has made it easy to get cash when overseas as the machines will produce the money in local currency. Regardless of this ease, you need to ensure that you have;

  • Enough cashed money to help you pay for your taxi money from the airport, your first meal and accommodation.
  • You keep your receipts separate from your traveler’s check.
  • You have a secure way to carry your documents and cash; you can consider money belt.

Immunization

Certain countries have a restriction that you must get immunized before entering; ensure you do it to ease your acceptance in the country.

Mosquito on a person's skin

Also, anti-malaria medication should be taken days before the travel date.

Backpacking Resources

Once you are set with the travel issues, it is time to look for backpacking resources. These will make your hiking encounter easy.

Travel Guidebooks in Sunlights

To ease the route searching pressure, use resources that match your skill level. Some of the resources that you should consider include:

  1. Guidebooks and website are the best backpacking resources as they clearly outline trail features including difficulties, elevation, water sources, elevation gain, and directions. Additionally, websites have an added advantage as they can give you an insight of how the trip is likely to be from recent reports from other hikers.
  2. Word of mouth from other backpackers who might have visited the area you are planning to go. You can be sure that these will give you first hand experience and from it, you can know what to expect during the trip.
  3. Talking with the local hiking organization is another great way of getting information about an area. Since they are more acquainted with the place than any other person, you will get the most up-to-date information regarding the hiking trail.
  4. Topographic maps are also an intelligent way of familiarizing yourself with the trail and especially is you have a slight idea of what to expect in the place you are going hiking and are conversant with reading these maps. To get more accurate information about the trail, try cross-referencing what you read from the map with information gathered from other people who have already used the route before.

Get Clear Route Details

After choosing the trail, it is time to familiarize yourself with it to avoid unpleasant surprises while already backpacking. Having a clear image of the path will help you outline your day to day hiking plan. Consider looking at the below features on your trail.

Terrain

Understanding the terrain helps you know what exactly you are getting yourself into. By correctly interpreting a topo map, you will know where you will start gaining elevation and the best place with a clear view for resting.

Man Carrying Black Backpack Standing on Brown Wooden Dock during Daytime

Check the trip reports to keep you informed about any washed or re-routed trails, muddy paths, or even poisonous plants.

Campsites

You can either use topo maps or information from previous backpackers who have used the route to help you in determining the details about campgrounds.

Hiker at Howard-Creek-campground

You need to know the distance from one campsite to the other or if there are optional places where you can stay.

Water Resources

Previously, we discussed the benefits of bringing along water filters. They are, however, useless if you have no clue where the water will come from. When checking out the trail details, be sure to check the available water sources along the way and the distance between one source to another.

A man using a water filter

This information will help you in determining the amount of water you need to carry from the starting point to the first source, and the distance between the sources. Knowing the type of water available in the area is also important in determining the type of water filter to bring along.

Gear Supplies Preparation

After acquainting yourself with the terrain, it is time to prepare and ensure that your hiking gear is in place. There are many benefits associated with preparing your supplies in advance, including avoiding forgetting anything that is crucial for your trip.

Packing in layers ensures enough space for everything.

When packing, it is crucial to keep the following tips in mind:

  • Know your airline baggage free policy so as to avoid carrying too much luggage that might lead to paying for your backpack.
  • Have a packing list ready and start the packing process early such as days or weeks ahead of your travel date. Doing this gives you ample time to ensure that everything is in place and also purchase anything that might be missing.
  • Roll your clothes instead of folding them. Rolling clothes tightly helps minimize spaced used that you would by folding them.
  • When packing, avoid packing stuff that will get you in trouble with the airport security. Being held at the airport due to something you would have avoided is the last thing you want to encounter.
  • Park dual purpose clothing to help in maintaining your baggage light.

When planning your backpacking checklist, you should have the following things in mind:

  • Permits and passes are required when entering certain wilderness areas with some locations requiring entry through an annual lottery system.
  • Find out about the insects inhabiting the region you will be hiking and carry insect repellant to keep them off. Insects are a nuisance and can turn your expected fantastic trip into a nightmare.
  • Animals such as rodents, raccoons, and mice are a certain encounter in most backpacking areas. Know the best way to pack your food to avoid these little animals from harassing you. You also need to learn whether there are dangerous animals such venomous snakes and cougars dwelling in the region. If so, what measures should you take in case of an encounter?
  • You should carry enough food to last you during the backpacking trip, preferably 1.5 to 2.5 pounds daily per individual. Factors such as distance traveled, elevation, and the walking speed will affect the amount of food you will consume per day. For emergency purposes, you should always pack extra food.
  • Fuel is another important thing for your backpacking trip. The amount of fuel you carry is highly determined by the amount of food you consume per day. Other factors include whether you will require ice melting, making breakfast, and enjoying your cup of coffee while hiking.
  • Finally, check your gear condition and make sure that everything you have packed will serve its purpose accordingly. In case you are backpacking as a group, you need to set shared gear and decide on the best carrying measure.

Final Preparation

After you have packed everything, it is time to check the weather and plan accordingly. Depending on what you learn, you might consider postponing your trip or canceling it all the same. You cannot risk going out in a harsh weather just because you have taken time planning for the voyage.

weather forecast on a smartphone

Before leaving, make sure you leave your itinerary with a trusted person as anything is possible during backpacking. You should leave detailed information about who to contact in case you are not back after a certain period. Also, when leaving your car, leave behind a note with contact information in your car seat.

Useful Precaution Tips after Landing at the Airport

When going backpacking overseas or in a different state, it is important to be sure of your security after landing at the airport.

London Heathrow Airport

Doing the following will minimize chances of getting yourself in trouble in a foreign land.

  • Avoid unmarked taxis– there will be taxi parked at the entrance of the airport that will offer you transport at an affordable rate. There are also chances of either public transport means including busses. You can use these, but avoid boarding cars that you can’t affirm are taxis. Better still if you can find an Uber cab, they are trustworthy and will take you anywhere you want without overcharging you.
  • Ask for Help as at first it will be odd finding yourself in a new country, and you do not know where to eat or avoid visiting. Do not feel ashamed of asking for help from people working in your accommodation place.
  • Consider hanging around the dining area of your guest house and especially if you are backpacking alone. The high chances are that you will mingle with other guests and maybe find some of them have been in the area longer and can update you on what to expect.
  • Do eveything you can to fight the jet-lag as it can result in anxiety or even depression. To avoid sleeping too early, take a walk around your guest house or hang out with other visitors. Do your best to distract yourself from sleeping early. Get your meals at the right time and go to sleep during then right hours. Keep the phone off to avoid distractions while sleeping. In case you lose sleep in the middle of the night you can keep yourself engaged by reading a novel while slowly sipping a glass of wine.
  • Finally, make friends and have lots of fun! Create memories and capture every moment of your backpacking trip.

Concluding Thoughts on This Topic

Planning for your backpacking trip in the right way ensures that your trip runs smoothly and that you are ready for any unexpected dangers. Planning gives you an opportunity to come up with a solution to any encounter you might come across during backpacking.

Following this guide will lead to a successful trip and make you enjoy every moment you spend in the wilderness. Whether you are backpacking as a group or solo, backpacking should be fun and a great way to help your mind stray away from the daily routines.

A man with a map in his hands