Home Blog Page 33

How to Stay Warm in a Tent: Cold Weather Camping Survival Tricks

0
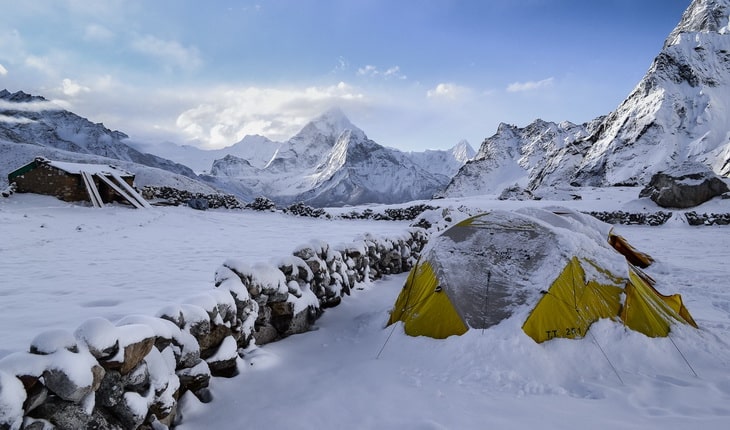
Winter camping in mountains

During winter, when the weather is crispy cold, and it’s all snowy, that’s the best time for camping. The summertime campers will be on retreat, leaving you all the space. Better still, the moonlight makes the snow-draped forest glow, giving you a feeling like you are in snow castle.

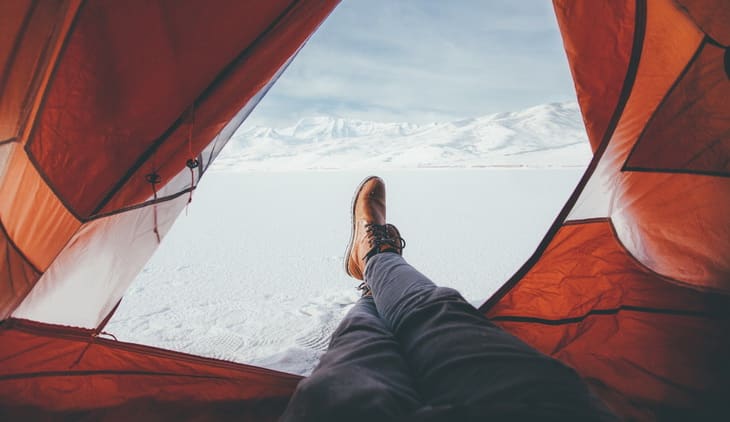
However, it can also be biting cold to the extent of ruining your camping trip. With a little thought and planning, however, you can easily manage to keep your tent warm at night. This article discusses how to stay warm in a tent with the intention of making your camping trip enjoyable and memorable.
How to Stay Warm in a Tent

Getting the Right Gear

The first tip for increasing the odds that you will sleep soundly outdoors, is choosing the right camping equipment. The equipment you choose will be determined by the place you are going camping.
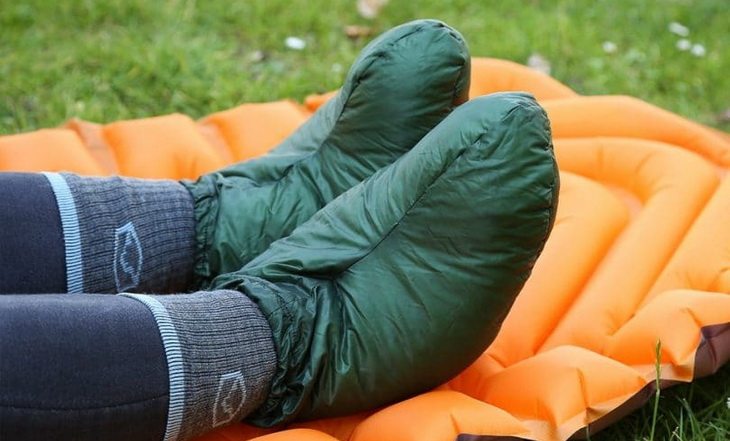
Woman wearing Camp booties

For a successful winter camping trip, ensure you have the items listed in the following checklist:

Outer layer Base layer Footwear Accessories
Breathable waterproof jacket Expedition-weight long john tops and bottoms Camp booties Fleece or woolen hat
Breathable waterproof pants Middleweight long john tops and bottom Extra pair of sleeping socks Sun hat or visor
Insulated down jacket Synthetic/ brief Synthetic/ woolen socks Middleweight insulated ski gloves
Softshell hiking pants Synthetic bras Waterproof snowshoes Balaclava
Waterproof gaiters long sleeve shirts pants Bandana
Insulated pants Down mittens
Waterproof over mittens
Synthetic liner gloves

Choosing the Right Winter Tent

A winter sleeping tent is not your ordinary camping tent as it needs to be robust enough to withstand snow and the wind. The best tent should have the following features:

  • Sturdy poles, which can easily withstand loads of snow.
  • It should have the ability to shed off the snow. This is enabled by a roofline that allows the snow to fall off once it lands on the tent roof.
  • The tent should be spacious, to fit all the gear you will bring with you. Note that in winter camping, you need a lot of gear, most of which is for giving you warmth.
  • Consider a rainfly tent when winter camping. This type of shelter provides better insulation in addition to reducing condensation. It is usually 10 degrees warmer inside this tent than the outside.

Freestanding tents are made for winter camping. Avoid three season dome tents as their stitching is not strong enough and their poles do not hold firmly in the snow.
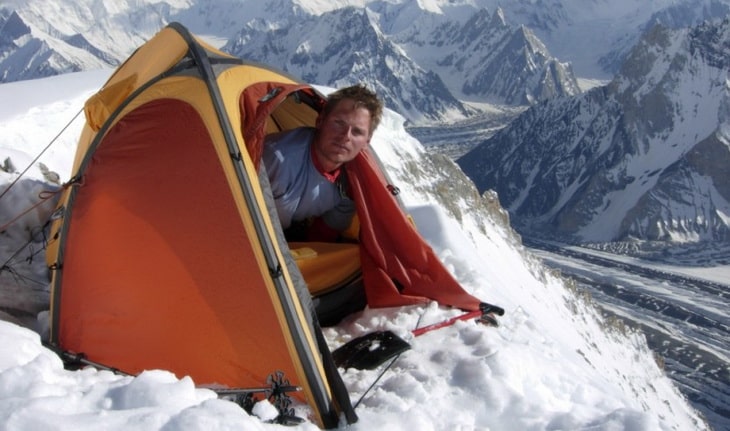
Man in a Polaris mountaineering tent

You can enhance the efficiency of the tent by adding a flooring, such as space blanket, and seal it off by covering its edges.

Types of Winter Shelters

4-Season Tents/ Mountaineering

When camping in winter, 4-season tents are better compared to 3-season as they are easy and quick to set up in the harsh winter conditions. However, they are heavier, although they offer better protection compared to the three season tents.
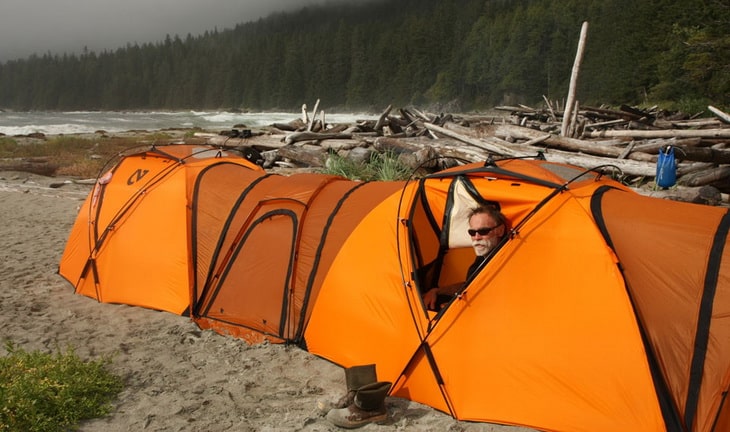
Man in a Mountain Hardwear Tangent

These tents have the following features:

  • They are dome shaped and provide extra-strong poles.
  • They have extra guy lines which increase their stability in case the wind intensity is too high.
  • To improve the warmth and their strength, these tents apply solid fabric, instead of using mesh.
  • They have double doors to ease access even in inclement weather.
  • They have large vestibules to offer you more space for cooking and storing wet gear.

These tents come either as single or double walled with each type offering its own benefits as we are going to see in the comparison below.

Single Walled Double Walled
Quick setup Takes time to set up
Lightweight Heavy weight
Cooler compared to double walled They are warmer compared to single walled
They are more expensive than double walled They are cheaper than single walled
Potentially more condensation They are well ventilated hence lesser condensation

Bivouac Sacks

If you are planning on a very lightweight backpacking trip, the bivy sacks are the best replacement for tents. A bivy is breathable overbag for your sleeping bag, and you, therefore, don’t have space to store your other gear. For this reason, you will be compelled to come with a cover to put over your gear.
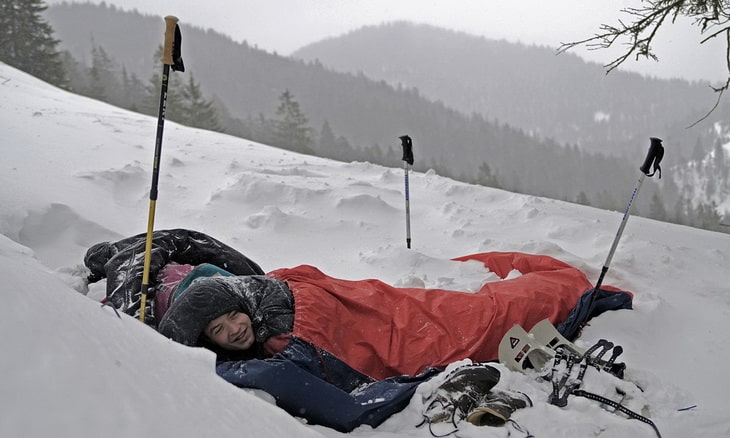
Person in a Bivouac Sacks during daytime

Bivy packs are preferred for winter camping because they keep you and your sleeping bag in addition to adding a 10 more degrees of warmth to your bag as you sleep. Some bivy tents come with poles so that you can secure it in your sleeping area.

Snow caves, Igloos, Trenches, and Quinzhees

Most experienced winter campers prefer trenches, igloos, quinzhees, and snow caves for sleeping and especially if they are planning on hiking in the same area for multiple nights. Although these are hard work to construct, they are safer and warmer compared to setting up tents.
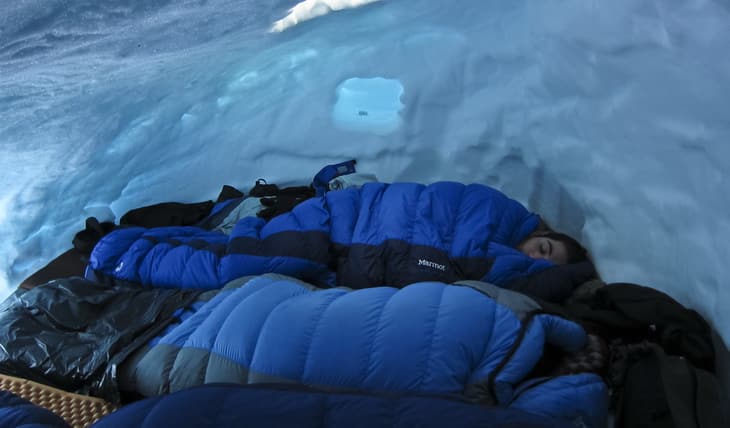
Snow Cave for Five Persons

For quicker building, consider cooperating with your hiking mates. It takes at least three hours for two people to complete an igloo, quinzhee or snow cave. Trenches, on the other hand, are easier to make and can take lesser time.

When building either of these, you need to have the following tips in mind:

  • Survey the place to make sure it is not avalanched prone. The area should be level and has a lot of snow.
  • The base of the igloo/cave should be at least 2-3 inches thick.
  • Make the igloo hollow in a dome shape such that you can sit up comfortably.
  • Create an upward facing tunnel so that cold air can always stay on the lower side.
  • Make the cave large enough to provide shelter for everyone in the group instead of building his/her own cave. (It saves time and also feels safer to share a sleeping room with others).
  • Remember to smoothen the roof so that snow doesn’t drip on your sleeping bags as you sleep.
  • Use tarpaulin on the floor.
  • Make snow benches as they will make cold air stay under the benches as you stay.
  • Have an exit plan in case the snow cave collapses. Since snow is too heavy and needs a lot of support, avoid making the cave too large.
  • When building your snow shelter, make sure you create a ventilation hole in the roof to avoid suffocation.

Once you are done choosing the right camping tent, you need to add more items on your checklist. Ensure you have the following items on your list:

  • Whisk broom– this is effective for sweeping off the snow from your clothing and boots before getting inside the tent.
  • The ground sheet or space blanket for insulating the floor of the tent.
  • Stakes are also essential and especially if you are camping in a windy area.
  • Additional poles and splints.

Picking the Right Campsite

Before settling on any camping site, there are a few things that you need to have in mind. These include:

  • Ensure you familiarize yourself with the areas, camping rules, and regulations.
  • Avoid setting your camp on a lowly area as they tend to accumulate a lot of colds.
  • Open areas and ridge tops are not safe for setting your camp as the wind could be too harsh in these areas to the extent of blowing off your shelter.
  • Survey the area to avoid camping in an avalanche prone areas, or an area where tree branches are loosely hanging.
  • Check for streams and lake availability or will you be required to melt ice t get water.
  • Try to find a sunny spot where the sun will rise as it will help you warm faster.
  • Look for a place that offers maximum privacy from other winter campers.
  • Ensure you can in a place where there are landmarks to help you find the site in the dark or during a snowstorm.
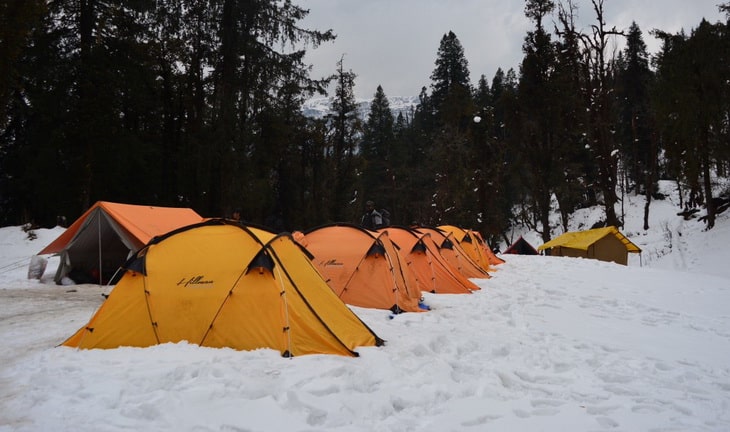
Group of tents in Kedarkantha in winter season

Once you are confident that you have picked a perfect camping site, it is time to build and erect your tent. Follow the following tips for a successful camp setting:

  • Start with clearing the area where you will set your tent and kitchen.
  • The tent door should be at 90 degrees with the prevailing winds.
  • Stake out your tent.
  • On the windward side of your tent, create snowballs by mounding snow. You should have someone to help you by holding the tent, to prevent it from falling as you create snowballs.
  • To allow easier removing of your boots, you will need to dig up the entrance of the tent. Then make dig up the fireplace pit, at least 6 feet diameter to accommodate at least four people. The hole should be 2 feet deep and surround it with a wall of snow, which should be at least four feet to ensure maximum wind protection.

Winter Camping Sleeping Preparation

When sleeping outdoors is a bit cold compared to sleeping in a cozy bed, it is worse when you are camping during winter. You need to take extra precaution when it comes to preparing for sleep.

Even after taking all the necessary precautions to ensure your tent is warm, you will need an additional measure to enhance warmth while sleeping.

Determine what kind of a sleeper you are

There are either cold or warm or cold sleepers. Which one are you? If you are not sure, you can easily determine by analyzing your daily sleeping habits.
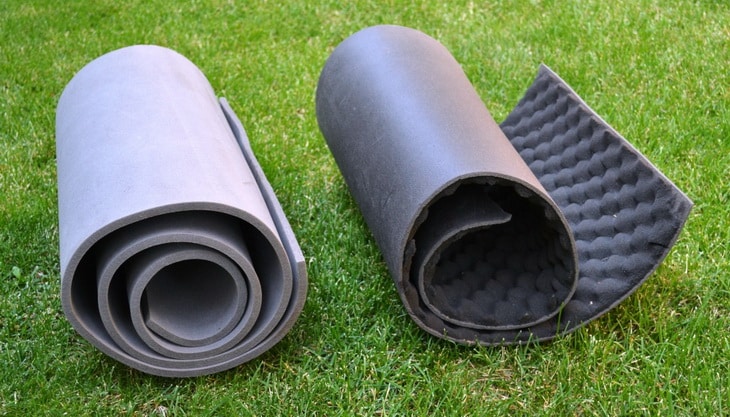
Sleeping pads on the grass

The answers to the following questions will be an excellent guide in helping you understand:

  • Do you use your down comforter all throughout May?
  • Do you wear warm and long sleeved fleece during warm weather when your friends and doing the opposite?

You alone can answer these questions, and their responses will be helpful in determining the type of gear you should bring when winter camping.

Choose the right sleeping bag

While shopping for camping sleeping bags, ensure you buy a sleeping bag that matches the temperatures of the place you are going hiking. Each sleeping bag comes with a rating, which should guide you when making your selection. Depending on your destination, you can choose either a car camping bag or a backpacking bag.

Car camping sleeping bags are wider than backpacking sleeping bags, hence offers more roll-around room, but they are less efficient regarding heat retaining. If you are car camping on cold seasons, you need to add more clothing for warmth. Backpacking bags are lightweight, warmer and closer fit. They are mummy shaped and filled with goose or duck down, which enables them to compress easily compared to those filled with synthetic fiber.
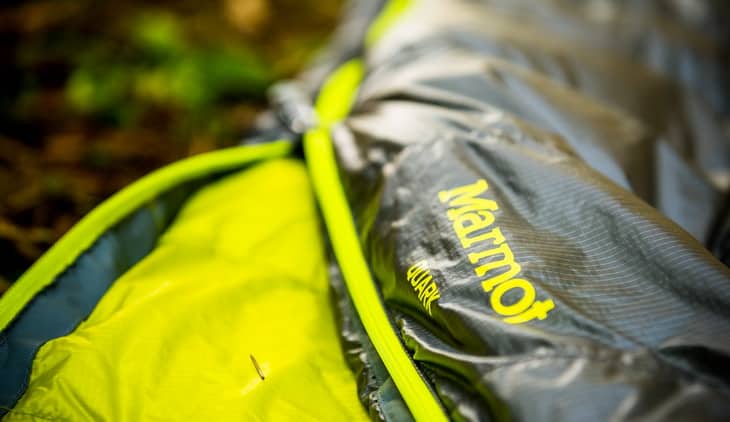
Marmot Quark Sleeping Bag

Also when choosing a sleeping bag, it is important to ensure that you have picked the right size. Choosing the wrong size will not serve you efficiently as expected, in case it is too small, some of your body parts will be hanging out leading to those parts catching a cold. A sleeping bag too large will leave a lot of free space, hence burdening your body with a lot of space to warm. In case you had already purchased a large sleeping bag, you can fill up the free spaces with a bottle of hot water or clothes.

Enhance the efficiency of your sleeping bag by using sleeping pads. Choose the sleeping pad depending on the camping circumstance such as backpacking or car camping. For car camping, weight is never an issue, and so you can carry a thick sleeping pad for maximum comfort. Since backpacking requires lightweight luggage, you will need to use a light sleeping pad with a closed-cell pad being a good choice. You can use yoga mats to provide double insulation for your sleeping bag. This is an excellent idea, especially if you are on a budget.

More Tips on How Keeping your Tent Warm

To further increase warmth in your tent, you will require doing the following:

  • Ensure you brush off all the snow from your boots and clothes before getting inside the tent. You can further manage the moisture in your tent by tightening the tent’s guylines and ensure they are tightly sealed off. Provide a taut pitch as it prevents the fly from touching the inside of the tent and consequently keeping the interior well ventilated and dry. Sweeping all piles of snow powder near the tent baseline and the entrance minimizes condensation inside the tent.
  • Ensure you are properly dressed when going to bed. Cover your legs with warm woolen socks and put a hat on your head. Wearing gloves is also important as neglecting your hands can lead to accumulating a lot of colds which will tamper with your sleep. Ensure all the clothes you wear are clean and loosely fitting. Dirty clothing will clog air circulation while tight ones will restrict air flow, making it hard to stay warm. In case you get too hot at night, you can always strip off one or two layers. (It is better than having to shiver all night because you avoided wearing a lot of clothes)
  • Keep wet clothing and especially socks separate from the dry ones. Always ensure you have a different pair of socks strictly for sleeping purposes. You need to realize that even a little dampness will interfere with your body’s ability to stay warm. To fill extra spaces on your sleeping bags, be sure to use only dry clothing.
  • Build up body heat before going to sleep by performing a few jumping jacks.
  • To stay warm when sleeping, try sleeping with polar boots and a hat.
  • Try sleeping with your head outside the sleeping bag to prevent moisture from accumulating inside the sleeping bag.
  • You can place a bottle full of warm water in the free space of your sleeping bag.
  • You might not feel thirsty when hiking during the winter season, but it is necessary to stay hydrated. You can choose to drink either warm or cold water, hot coffee or chocolate. The latter is very useful for the provision of calories necessary for your hiking adventure.
  • In case you feel like urinating, go for it as your body is holding a lot of fluid and will need to release some. It will be better to go to sleep with your bladder empty as when it is full; your body does a lot of work to help keep warm. In case you don’t enjoy going out severally at night, you can keep a bottle tightly sealed inside the tent, this way you will avoid several trips and at the same time keep your bladder empty.
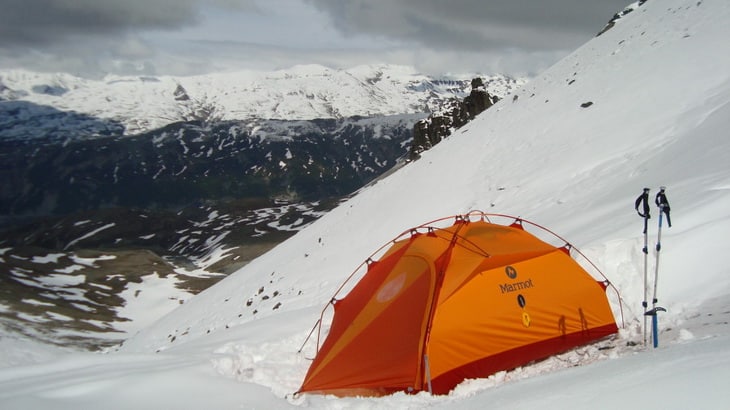
Winter Camping in Marmot Tent

Winter Camping Kitchen

Using a backpacking stove is another great way you can keep your tent warm during camping. Liquid stoves are most preferred as compared to canisters. In addition to ensuring that your stove is in a working before leaving home, it is always advisable to carry an extra stove just in case. The additional stove also speeds up the cooking process for a group. You can also use a heat exchanger and a windscreen to improve the cooking condition during winter camping.
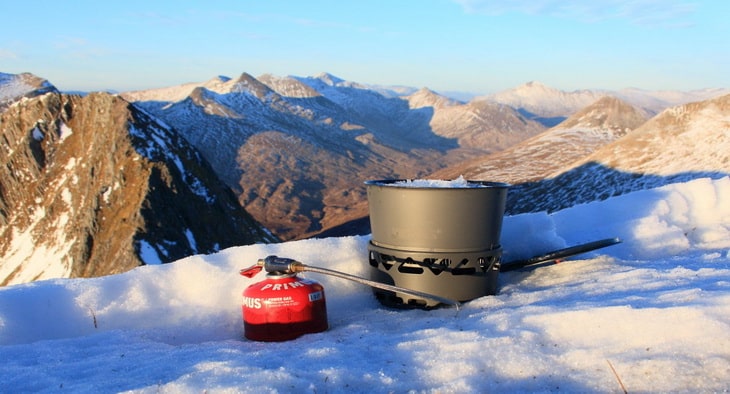
Melting snow for a brew with the Prime Tech stove and heat exchanger pot

Make sure your cooking area is sheltered and if possible, create a three feet deep trench, to protect from the wind. Creating a desirable kitchen during winter is simple as all you need is your shovel to build a storage cabinet, seats, and the cooking area.

Why is it Necessary to keep your Tent Warm When Camping?

As much as hiking and camping in winter can be fun, there are a lot of concerns associated with the cold weather. It is because of these concerns that you need to have a special preparation for backpacking during winter as well as learn how to stay warm in a tent when camping.
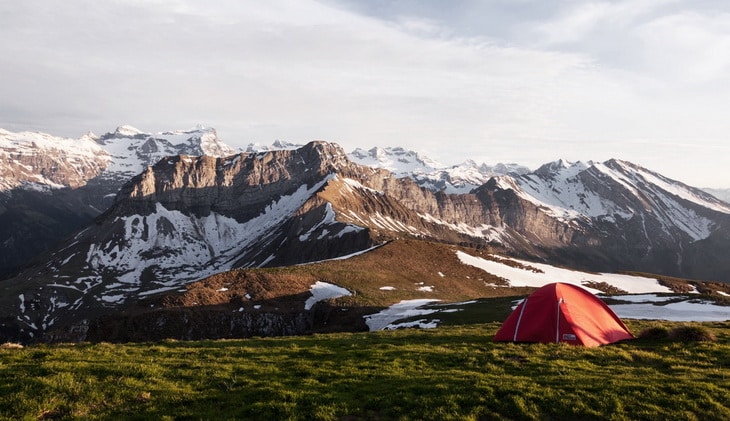
White and Green Icy Mountain Lighted by Sun Rays Near Red Dome Tent

These concerns include the following:

Frostbite which is associated with freezing of the freezing of the body tissues and especially the nose, fingers, toes, and the face. You can tell you are suffering from frostbite if you possess the following symptoms;

  • Shivering
  • Loss of touch sensitivity
  • Numbness
  • Tingling that feels like burning
  • Redding of the skin and then turning to white and purple

Hypothermia is even more dangerous as one can be hypothermic, even without realizing it. This condition is caused when you are exposed to too much cold. The following signs are related to this condition;

  • Lethargy
  • Shivering
  • Slurred speech and non-communication

The condition can be prevented by eating and drinking warm food stuff, staying dry, and making sure you feed properly. In case it is too advanced, try holding a bottle of hot water to keep you warm.

Dehydration is also possible when camping in cold weather. The fact that you may not get thirsty when hiking in cold weather puts your kidneys, heart and, the brain at risk. It is advisable to drink water even if it means taking it when warm, so help your body stay hydrated all the time. The following signs can determine dehydration;

  • Change in urine color
  • Dizziness
  • Dry mouth
  • Muscle cramps
  • Weakness
  • Confusion
  • Increased heart rate

Wrapping It Up

Hiking in winter can be fun, but it requires extra precaution and preparation. During this time, you will spend most of your day at your campsite, and that is why you need to keep your tent warm throughout your expedition.

By ensuring you have the right gear and that you take all the necessary precautions discussed in this article, you will enjoy your winter adventure just like you would have if you went camping during summer. The most important thing that you should always have in mind when winter camping is staying dry.
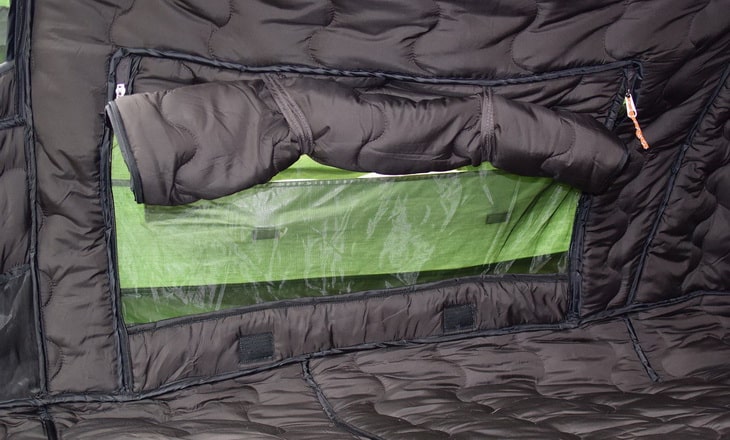
Inside of a thermal insulated tent

Now that you know how to stay warm during your camping nights, we hope that you will feel free to share your thoughts on this topic with the rest of our readers by leaving a comment in the comments section below.

How to Photograph Stars: Capturing the Cosmos

0

Since the birth of man, there has been constant speculation pertaining to the constellations that reign over us from the skies. As our minds grew, and our technology advanced, we have been able to ascertain a better understanding of what we can see above us. Once lights in the night sky, holes in the floor of heaven, are now known as stars. Suns from other galaxies. It has always been in our nature to want a better look. This article will act as your need to know guide on how to photograph stars, so that you can add to the better understanding of our place in the universe and learn how to better capture the cosmos.

Those of you who have already tried to take photographs of the stars will already know how there are many factors that can cause your shots to come out less than perfect. From the settings of your camera, the gear that you use may not be the best for the task at hand, or it could even be the lighting (even at night, the light can still get you, so you have to take special care to accommodate for the light).

This brief guide will take you through all you need to know before you take to the stars, and capture your cosmos. From the basics of the shoot, to an advanced look into the editing of the stills – or the streams, as you will soon see.

Photo of a Constellation

So, let us start the expedition, and research how to map our trail as we go – hanging loosely in the never ending void that is our universe at large.

Pre-Planning the Scenery

A lot goes into bringing out the best of the stars in the technology we use, so you must make sure that you have found the right spot to photograph the right patch of sky. Planning and scouting around for the best places to keep your tripod sturdily holding your camera, and a place in the sky that the camera should be gazing to.
Take note of the surrounding areas, making sure not to take your shots too close to areas affected by heavy light pollution. The best places to be for Astrophotography are out in the wild, open spaces, with dark stars hanging above them.

New Moon is working its magic tonight

Calculating the phase of the moon, will also be a massive help when it comes to light exposure. The lighter the moon, the better the photograph. So it is recommended that you plan your shoot for the closest day you can make it to the New Moon. A week before, or after, still works.

Basic Setup: the Gear that will be Needed, and to what Specification they need to be

No matter how you approach capturing images of the stars, there are a few items that are universally required to do it correctly. The minimum of photography equipment needed includes, but are not limited to;

  • A Tripod
  • A Camera
  • A Wide-Angle Lens

These three items are a must have for any stargazer turned to star-photographer, and many people would scoff at the need for their inclusion – or even just reminding people that a camera is needed – in this guide.

Sony Slt-A58 camera

But we found it necessary to mention, especially since we are about to delve into the specifications of each piece of equipment.


Tripod

 You will be in need of a sturdy, and reliable tripod to achieve the best stability for your shoot. 

As the camera will be positioned in such an angle for the long-exposure shots required, the tripod must be dependable as well as gyroscopically sound.

 It is important to try and branch away from the common carbon-fiber made tripods, and inch closer to the aluminium side. 

The added weight of the metal provides a nice rigid stance for your camera to mount on.


Camera

In this case, no just any old camera will do.The camera that will aid you capturing the images that you want during a shoot should be one with Manual Mode Functionality that can also shoot in RAW format.  It has been vastly debated, and concluded, that the full frame camera trumps all others when image quality is in question.Having the manual mode function that shoots in RAW format helps to work with long exposure times.


Wide-angle Lens

The use of a wide-angle helps with the progression of this project drastically. 

As you are shooting a whole lot of sky, you will need a lens that will allow the shot.

 A lens that shoots between 12-30mm is recommended for a shoot of this magnitude. To help capture everything you want to capture.

Owning these basic components, married with the specifications provided, will give you all you need for a successful night of photography. There can always be room for improvement with little additions of your own style and needs, but don’t forget to use a sturdy metallic tripod, a full frame camera, and a wide-angle lens, as the foundation of the equipment you use.

Setting your Camera Accordingly

Unfortunately, unless you have the world’s most accurate telescope lens, you cannot just point and shoot toward the stars, hoping that all will turn out well. That is not how to take pictures of stars. The settings of your digital camera need to be succinct and able to handle the task at hand.

Close-up photo of exposure settings on a camera

There are many variables to consider, so choosing the correct performance for the job is necessary to maximize results.

Here is a list of our recommended camera settings that should give you the best photographs of stars, and the night’s sky:

  • Aperture value – You do not want anything that goes above f/4. Keeping the aperture value, low, helps expose your lens to most amount of light for the least amount of time. The real sweet spot for night sky shots is at f/2.8.
  • Focus – A good amount of focus to use during a night shoot can depend on the camera that you are using, but a general rule of thumb would be to mark your focus down as infinity.
  • Focal length – When using a full frame camera, the best focal length to operate with for astrophotography would be 14-24mm. If you are on crop sensor camera (though we do not recommend that as much as a full frame), then the 10-20mm will do you well.
  • Exposure time – Many photographers have many different ways of dealing with the problem of star streams, and in keeping your pictures looking sharp. The most common technique is the 600 rule, but this is again only a rule of thumb and is best used as a guideline as tinkering will be required.
    To achieve this, some math is involved. You need to take the number 600 and divide it by your Focal Length. By how large you have set your focal length, the smaller the exposure time will be because of this rule, so keep the size of lens into consideration. The wider the better.
  • ISO setting – The sensitivity of your camera’s sensor of light should range at ISO2500-6400 to best combat the natural lights of the night’s sky.
  • Shoot in B mode – Whilst in bulb mode, you can control the length of the exposure shot by determining the shutter speed. Merely apply B mode to your camera, and hold down the shutter button for how long you want the shot to last.

Simplified version

Aperture f/2.8 – f/4
Focus As much as you wish
Focal Length F-F = 14-24mm, C-S = 10-20mm
Exposure Time  Apply rule of 600 (divide your Focal Length by 600)
ISO Setting ISO2500-6400
Shooting mode Shoot in bulb mode

Suitable Environments

We spoke a lot about the lighting in your images and how it is best to control them in your ISO settings and focal length. But the lighting of your surroundings, of course, need to be taken into consideration as well.

The light that surrounds you at ground level (i.e. light pollution), and that of the moon’s shade, try and accommodate for these different light sources and alter the ISO accordingly.

Milky Way & Star Photography

The environments that yield the best results when it comes to astrophotography are that of vast open spaces, far from the dreary glow of the light pollution a city or a well populated area exudes into the atmosphere.

Shooting Long Exposure Pictures

 Now that you have turned all of your settings appropriately for this task of shooting at night, you can begin the shooting process. By using long exposure photography (a shutter speed with a long duration) you can capture the stars forever digitally, as they zoom past us. Different effects of the imagery – like star trails or whisps of cloud – can be added to the long exposure process by altering the shutter speed, aperture, and ISO speed.

Amazing star trails in Australia

That requires some trial and area alterations from the information that we have previously recommended.

Editing: Changing your Stars

Not every photograph comes out the way you want it to; bursting at the seams with perfection, with the right white/dark balance shining through, showing your cosmos through your lens effortlessly.

Night sky above Grand Canyon

Editing and post-production of your night time photography session, is the make or break of the final images. Having gone out and shot a beautiful canvas for you to work upon, you need to apply the right final flourishes in order to achieve a fuller image. The same can be said about most modern photography. The real skill in achieving the final image, lies on the edit room floor in tatters and incremental modifications.

Cleaning up your Images

As most of the process of astrophotography is bathed in its lighting, so is the editing process. Learning aspects from both the Adobe Lightroom editing station and a basic use of photoshop, will help bring those stars furthest away from us, the closest and as sharp as the others.

Adobe’s Lightroom program is the perfect place to minimize unwanted noise from your images. All of those red, blue, and even the far too bright white pixels that are produced as a result of a high ISO, can be taken away through Lightroom using its Noise Reduction function.

photo of milky-way at night

What Lightroom can also offer you is a free space to have fun with the editing of your images lighting, so you can see all the differences available to you and proceed from there. Playing around with the temperature and hue tint sliders make sure for some incredible results out of even the most mundane of long exposure shots.

With the uses of Lightroom having been offered, you can take your images to the much more commonly used and simple to grasp additions that Photoshop has in store.

Editing these images to your preference may take some time, so remember to keep it light and fun. Play around with the settings in Photoshop and Lightroom until you stumble on something that feels and looks right.

Mapping Your Way

Make that you are aware of what you are mapping in the skies as you go about your photography. Either for your own sense of direction, to help you tag and catalogue your pictures, or even just to learn more about astrology through cartophotography.

Sky Map on a smartphone
The downloading of a simple star map to your phone will easily do the job when it comes to guiding you through the galaxy.

Shoot for the moon. Even if you miss, you’ll land among the stars

Through this brief introduction into how to photograph the stars, we have looked into the gear needed for the job, certain settings that are required of your equipment, and the editing process that will help you create the most out of your images.

Picture of Milky-Way and Andormeda at night

Hopefully, this article will have given you a boost in confidence that will help you attempt astrophotography and hone it into another skill to add to a growing portfolio of techniques. From experimenting with shutter speeds to better create star trails in your images, to playing around with the lighting effects so much that the Milky Way has never looked so bright, the joy of being able to capture the cosmos is now a skill that you retain.

How to Tie Knots: Your Guide to Knotcrafting

0
Image showing a blue-rope-tiedTo take on the learning of a new skill is an art in of itself. It’s always fun to challenge yourself with something new and outside of your comfort zone. Particularly if that skill is something that can be attributed easily to your style of life. Actively outdoors: why not look into how to tie knots?

Learning to tie knots well, can sound like quite an odd skill set to want to improve upon, but having a firm grounding in knotcraft can be quite beneficial to a person’s everyday life. Tying your shoelaces is an everyday occurrence, some of us tie pieces of string around our forefingers to later help spark memories, and we all have had the experience of adding a tie to our formal attire. Why not expand on these miniature habits with their much older siblings?

Rope tied on a boat deck

Understanding the basics of knotcraft is especially a major advantage for anyone who enjoys taking camping trips, hiking, rock climbing (though one would hope that you already have a grounding on the subject), or any other outdoors activity. In this brief guide we are going to look into how to tie knots from a list of essential techniques, guaranteed to be of use to those in search of a foundation in knot tying.

A Brief Guide to the Art of Knotcraft

To make a taut story loose, we are going to look into the most tried and tested knots available and assess their highest practical use for hiking trails and/or camping trips. So we will need durable, dependable knots that quickly fasten as well as loosen, and untie with ease. Knots that keep up with you, maintain when needed, and release on command.

The accompanying collection of knot ties have been curated on exactly this premise: ease and dependability for the user. No pushing you to breaking point by asking you to perform the seamlessly charming yet complicated Double Globe Knot, or the Zepplin Bend, ever reliable in that it will leave you stumped from the word go. No, simplicity and practicality are all to be expected here.

Bunch of Assorted Colored Woven Rope

Be you a hiker who wishes to apply knot tying to your trails, a novice climber just starting to brace the heights, or a sailor out to brace the sea – or even if you are just interested in knowing – here is a brief guide as you will need.

Learning the Ropes: the Basics

Before looking into the practice of tying knots efficiently, we must first become accustomed with the different parts of the apparatus used. Yes, the rope or line. Learning the language of knotting will help vastly when the time comes to attempt to tie one, as if we will know what everything is we will know where we need it positioned.

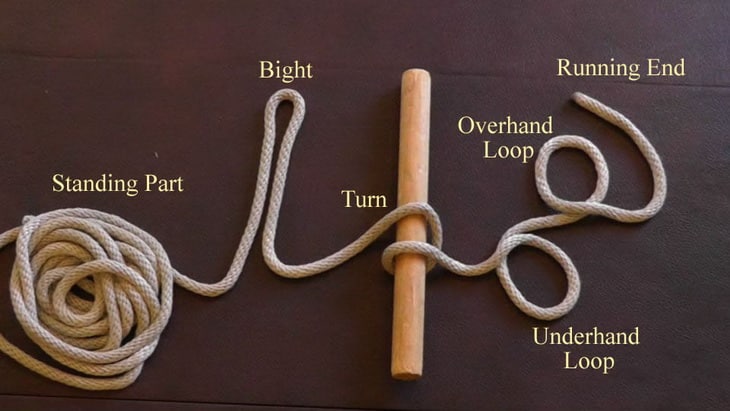
The two main parts in any knot tie are the Standing End and the Running End of the rope. As most of you can guess, the standing end is the part of the rope that stays taut and immovable whilst the running end weaves its way around it, creating the basis of the knot. When the running end has finished doing its job, you are to pull both ends firmly and securely, and then what you’re left with is a knot.

Grey Braided Rope on Wooden Plank

Another thing that should be kept in consider when taking up the art of knot craft is the type of line you wish to use whilst learning. All of us started with our shoelaces for one of the simplest, and important, knots that we use daily, but the types of knots that we are going to look into demand more of a commitment to the craft that materials like laces cannot offer.

The use of a nylon based rope or paracord is highly recommended in the learning of knotting, as it is highly durable, flexible, provides grip and slack easily when needed, and has many other uses. As paracord is thin, it is easier to tie knots into. The more you progress, the more nimble and competent your fingers will become. To the point where tackling thicker ropes will take the same amount of effort. We do also recommend to never tie ropes made from two different materials in bend knots, when it is needed to carry heavy loads. The stronger of the two will win out making the weaker useless and prone to snapping.

Advanced Rope Terminology: Picking up the Slack

Here is a more detailed look at the terms used for the ropes parts and the knots they make, to aid you in the rest of this article as they will be referenced heavily.

  • Lay – Different strands of material twisted together to make the twist in the rope.
  • Bight – A slight bend in the rope, that does not cross over itself.
  • Overhand Loop – A loop in the rope that places the running end over the standing end.
  • Underhand Loop – A loop in the rope that places the running end under the standing end.
  • Turn – The turn is when the running end of the rope is wrapped around an object, and then exits the opposite direction of the standing end.
  • Round Turn – A round turn is where the running end wraps around the object again to point in the same direction as the standing end.
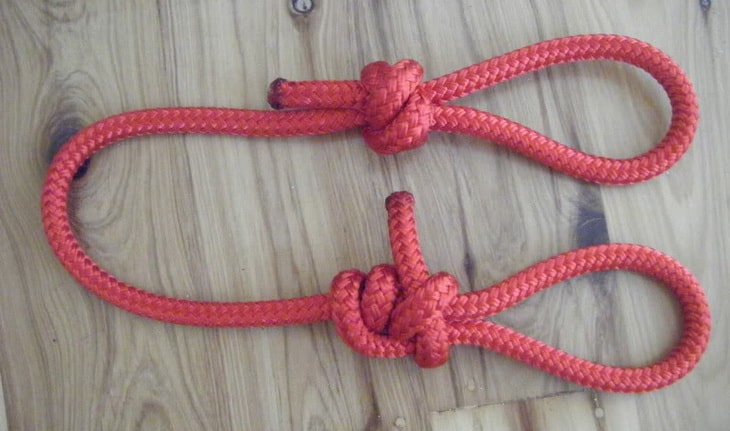
  • Pig-Tails – Tip of the running end left excess after tying the knot.

Rope Terms Labeled

The Knot, The Whole Knot, and Nothing but the Knot

Ahead of our step by step guide in knotting, it is always useful to know what kind of knot is what in the sections to come.

the Anchor Hitch (or Bend) to tie your rope off at one end

Here is a little guide that may prove helpful, for an overall understanding of knots and what is not a knot:

Type Explanation of knot Application of the technique
Knot Tying securely fastened notches using a singular piece of material (commonly rope). A simple knot for simple tasks, such as notches for measurements and in offering a better grip to you for various activities that involve you needing to pull something.
Bend Interweaving two pieces of rope together using a knot. To elongate any length of rope by lashing it to another firmly, would serve you greatly in any situation.
Hitch The fastening of a rope to a solitary object. Being able to tie your rope around a solitary object grants you purchase on the terrain. Make use of the line any way you see fit.
Loop Using a knot to attach a rope to itself, creating a loop in the aftermath. Used for tying down tarps with use of pegs, an also be used as a harness for around your waist, when tightened correctly.
Overhand Taking the loop knot and passing a separate length of rope through the hole, then tying it off to the loop’s standing end. Strengthens a loop knot and makes it harder to loosen. As a regular loop knot can buckle under too heavy a load, adding an overhand knot can ease the strain.
Half-Hitch An addition to the overhand. By weaving the loose end of the rope through the loop, you tighten and better the overall knot. Half-hitches can also be used to strengthen the regular hitch knot. Handy for creating a sturdy line, pulley systems for winches, etc.
Slipped Less a type of knot, but more a modification simply added to any above technique, helping free any knot. Helps even the tautest of ropes come loose in your hands with one easy pinch of the end of the rope. Saves time and effort when packing away.
Shortening A knot that is used to shorten a longer rope. Shortening a rope that is already too long can help in the packing of your line, tightening the slack of any rope in use.

Now that we have the basics covered, we start to delve into the art of knotcraft and start learning some basic knot tying techniques. From all trails and trades.

Essential Knots that you should know

Let us familiarize ourselves with the type of knots we will be learning about in this article, their practicality in the field (or on the trail), and how to attach and fasten them correctly. To begin with, we will start with knots and continue through to hitches by way of a few loops and bends:

Bowline

The Bowline (pronounced bow-linn) is a fairly simple loop knot, and when tied correctly, it proves an extremely useful addition to any knotter’s repertoire.

Bowline loop knot

The knot made its name by securing the line that keeps the weather leech of a square sail on a boat from buckling backwards. Deriving from the words “bow line“.

Best way to tie a Bowline is to:

  1. Take the end of your rope and make a small loop, keeping the base pinched between your thumb and index finger
  2. Feed the running end through the loop from underneath and pull it toward the standing end
  3. Turn the running end round the standing and bring back to the loop and feed it through again, over to under.
  4. Keep hold of both ends and tighten carefully, maintaining the knots overall integrity, until it is secure.

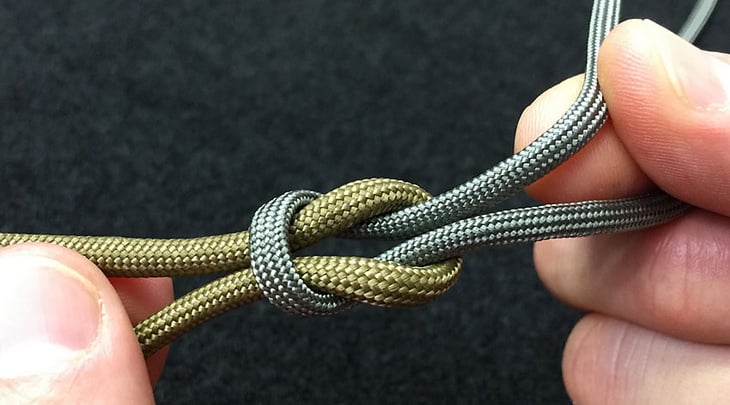
Square Knot

We have all learnt this knot before. Well, the first half of it at least. The Square Knot starts with the turn that we all use in the beginning of tying our shoelaces.

Connecting the two laces in this way offers a solid foundation to work on top of, when tightened and secured. This binding knot is categorized as a Bend as it joins two separate lines together.

Man Tying a Square Knot

Though it is not as strong as other bend knots, it is great for starters and can always be strengthened by way of an extra half-knot.

Best way to tie a Square Knot is to:

  1. Take the two rope ends that you wish to tie together and place them parallel to each other, running the tips in opposite directions
  2. Use a turn – right over left – and then secure the half-knot you have made
  3. Using the ends, perform another turn – left over right this time – and tighten to create the Square Knot.

Prusik Knot

 A hitch that is used to attach a loop to an already established line. Commonly referred to as a Friction Hitch, as it latches onto a rope tightly whilst it is carrying weight, then, when the weight is taken away, it becomes slack and free to slide along the line.

Image of a Prusik Knot

The Prusik Knot was named after Dr. Karl Prusik, an Austrian mountaineer who allegedly invented the hitch.

Best way to tie a Prusik Knot is to:

  1. Take a smaller line – preferably a piece of cord – that has already been tied off into a loop
  2. Place the loop under the rope you are attaching it to
  3. Pass the knotted end of the loop around the rope a total of three times, making sure that each of the turns line neatly parallel to each other before tightening the Prusik.

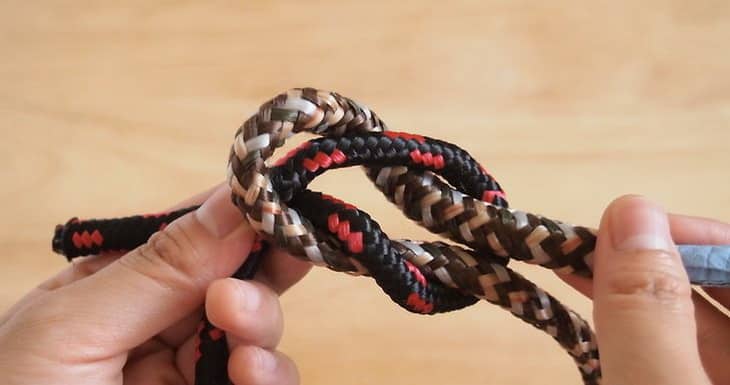
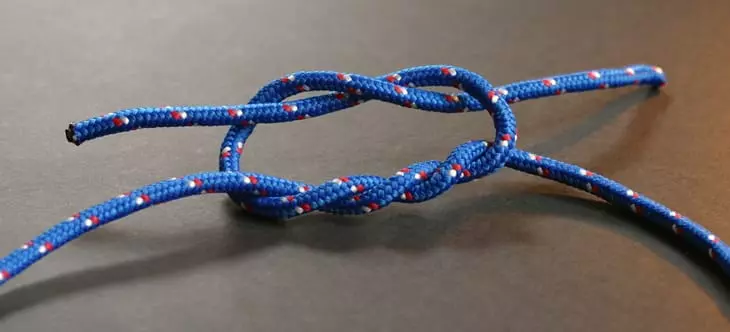
Thief Knot

A simpler version of the Square Knot, that is faster to produce. This knot earned its name by according to old sea tales, they were used by sailors to tie up their personal bags. Thieves would burgle the items and retie the bags with Square Knots.

Image of a Thief Knot

Revealing to the sailors that their possessions had been tampered with.

Best way to tie a Thief Knot is to:

  1. Take the two rope ends that you wish to tie together and place them parallel to each other, running the tips in opposite directions
  2. Make a bight in one of the ropes and bring the tip of the rope back to the standing end
  3. Work the running end of the other rope through the loop that you have just made and bring it around the standing end
  4. Pull it back through the other ropes loop and tighten, making a Theif Knot

Surgeons Knot

Seemingly developed by physicians  during the Second World War in a bid to find an effective, efficient way to tie off blood vessels, the Surgeon’s Knot came into the collective global understanding. Used in the same way a Square Knot is used – to connect two separate lines together.

Photo of a Surgeons Knot

This knot is fast and faster acting.

Best way to tie a Surgeon’s Knot is to:

  1. Take the two rope ends that you wish to tie together and place them parallel to each other, running the tips in opposite directions
  2. Lash the two rope ends together by performing up to three half knot bends
  3. Then, take the two pig-tails and overhand loop from the right over the left
  4. Then underhand loop and pull through
  5. Tighten both rope ends to make a Surgeon’s Knot

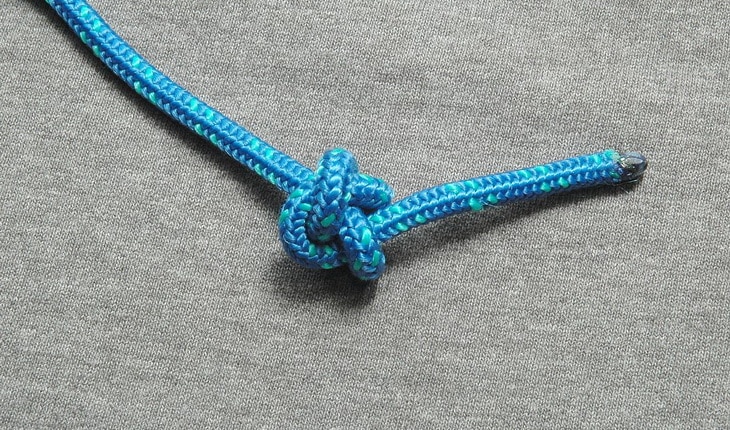
Stopper Knot

A knotter’s best defense to the loose end. Does what it says in the name: it is a stopper knot. Making a notch at the end of your rope, stopping the running end from running off. There are different versions of the Stopper, we will look at the Ashley Stopper Knot as it serves our purpose of a simple essential knot.

Image of a Stopper Knot

This knot was developed and perfected in 1910 by American author, and sailor, Clifford Warren Ashley.

Best way to tie a Stopper Knot is to:

  1. Make an overhand loop and pass the rope end through it twice
  2. Tighten the knot and pull it all down to the end of rope to make the Stopper Knot

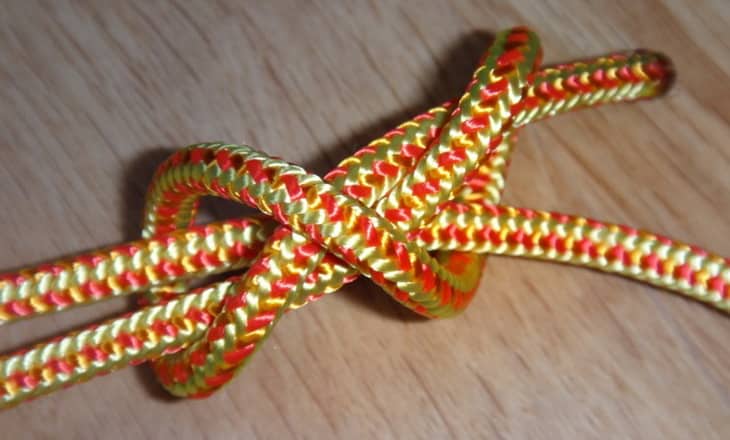
Water Knot

Also known as a Cove Knot. The earliest references to this knot date back to the 1400’s.

Photo of a Water Knot

This knot is a strong, and resilient one and can be enhanced easily with the aid of more a couple more overhand tucks.

Best way to tie a Water Knot is to:

  1. Take the two rope ends that you wish to tie together and place them parallel to each other, running the tips in opposite directions
  2. Make them parallel to one another and turn a large overhand loop into the middle
  3. Take both rope ends and start to make four turns into loop each
  4. Tighten by pulling both standing ends of the ropes to make the Water Knot

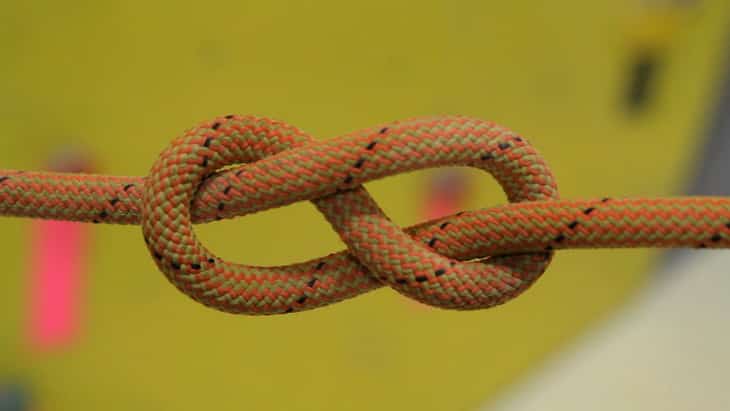
Figure 8 Knot

Considered as one the strongest types of knots, when tied correctly. The Figure Eight follow through, provides a secure loop, with a solid grip, that can be formed at the end of a rope.

Image showing Figure 8 Knot

It can be used instead of a Stopper Knot if you wanted to shake up your craft a little bit.

Best way to tie a Figure 8 Loop is to:

  1. Pull a bight in your rope toward its end
  2. And make an overhand loop toward the standing end
  3. Then make an underhand loop under the standing end
  4. Bring the running end through the loop you first made.

Sheet Bend

A valuable bend knot for your repertoire, as it works to connect two separate lines of rope regardless of rope size and materials.

Image of double sheet bend

Though we would not trust it with a lot of weight, but adding the aid of a double knot just to safe and secure will make any knot more effective.

Best way to tie a Sheet Bend is to:

  1. Make a bight from one rope end and pinch it back to the line to form a loop
  2. Pull the running end of the second rope through the loop you have made
  3. Turn it around the loop’s pinch, and pull under its entrance to the loop

Ashley Bend

Another knot developed and perfected by our long lost friend, Clifford Ashley. Used as most bends, to connect two lines temporarily. This bend can fall to jamming if not tied correctly, and sometimes even then.

Image showing Ashley Bend

Careful when using this knot, and practice it often for best results for it.

Best way to tie a Strop Bend is to:

  1. In both ropes that you are attaching together, you need to make a bight in each and interlock them
  2. Overhand loops over their respective standing ends and bring to the loop in the center of both ropes
  3. Pull the ropes through from under the loop and tighten by pulling the rope ends away from their standing ends

Clove Hitch

One of the simplest knots to master, that offers endless possibilities to you as a knotter.

Photo of Slipped Clove Hitch

Forming the foundation of many knots, the Clove Hitch still a good binding knot in its own right.

Best way to tie a Clove Hitch is to:

  1. Turn the running end over the object you wish to tie your rope to
  2. Continue it over the standing end and around the object again, on the other side
  3. Pull the rope end through the turn you have just made
  4. And tighten to make the Clove Hitch

Rolling Hitch

A simple friction knot that can be used to attach a line to another rope, or to any object with a strong line to it. With friction knots, it is all about the weight being carried. When the weight is attached to the rope using the knot, it is difficult to move around the standing end of the opposite line.

Image of Rolling Hitch

When the weight is taken away from the equation, the friction knot becomes looser and offers more slack, allowing it to slide freely across the standing line.

Best way to tie a Rolling Hitch is to:

  1. Take the running end of one rope and overhand loop it over the standing end of another rope
  2. Bring the running end under the standing end to make a loop around the standing, then tighten to make a Half-Hitch
  3. Bring the running end under the standing, aging and through the stem of the first loop
  4. Make a total round turn and tighten slightly
  5. Bring the running end under the standing one last time and loop it through itself and tighten securely.

Timber Hitch

Effectively, this knot is a temporary acting noose knot. It provides ample use when tied around tree stumps, poles, etc.

Image showing a Timber Hitch

It is advised that the thicker the object that this knot needs to be tied around, the more twists are needed to strengthen the knots grip.

Best way to tie a Timber Hitch is to:

  1. Make a turn around the object you wish to tie your rope to using the running end of the rope
  2. Bring back round to the standing end and make an underhand loop under it
  3. Then perform an overhand loop over itself and start making twists around the running end
  4. Make three twists, then tighter the knot into the Timber Hitch.

Cow Hitch

Often known as the Lanyard Hitch, this knot is generally used to attach a rope line to a ring, or a hoop. Much like those on your daypack.

Picture showing a Cow Hitch

Though it is not the strongest hitch, it is a great knot on a temporary basis.

Best way to tie a Cow Hitch is to:

  1. Pull the running end through the loop you wish to tie your rope to, and bring it back down to the standing end
  2. Use an overhand loop over the standing end and bring the running end back to the loop from the opposite side
  3. Perform an underhand loop and pull the running end up, and then under itself
  4. Tighten to create the Cow Hitch.

Two Half-Hitch

Essentially a double knotted Half-Hitch knot, that is tighter and more secure in its fastening. Adding the extra turn to the Half-Hitch offers a more secure knot, and a better grip on the item in need of a rope.

Close up of completed Two Half Hitch Knot

This also a quick and easy knot to learn, with many different uses.

Best way to tie a Two Half-Hitch is to:

  1. Make two overhand loops around an object
  2. Bring the running end back to face the standing end
  3. Overhand loop the running end and then bring it under the standing to make the first Half-Hitch knot
  4. Pull it tightly and then repeat the loop to make the second Half-Hitch to complete the Two Half-Hitch

Slip Knot

Among one of the easiest knots to tie, perfect for a beginner’s gateway into knottery. A Slip Knot is one of the simplest loops available to make. Its name has changed a bit since it’s invent, as it is more a slip noose than a standard knot.

Picture showing Slip Knot

But the Slip Knot has always remained in this form.

Best way to tie a Slip Knot is to:

  1. Make an underhand loop and pinch it tight toward the end of the rope
  2. Prepare a bight with the rope end and tuck it into the tight loop
  3. To release, pull the end of the rope

Sheepshank

The Sheepshank is a fairly simple shortening knot to tie and is extremely valuable to a knotters repertoire as it is so easy to come loose when you have no longer use for it.

Sheepshank loop of two ropes

So easy to loosen in fact, that the second you take away it’s carry load, the knot falls apart.

Best way to tie a Sheepshank is to:

  1. Take the standing end of the rope and spin three small overhand loops, that lay close to one another but do not overlap
  2. Next, pinch the sides of the middle loop and pull them through the loops on the side
  3. Tighten the standing end then the middle loops running ends

Loop Knot

A common use of the Loop Knot is to shorten the likes of a damaged rope, though it’s most common use is for towing automobiles.

Image showing a Loop Knot

The Loop Knot takes the weakest section out of play fr the standing end by tying it off in into the loop.

Best way to tie a Loop Knot is to:

  1. Make a bight in the standing end of the rope and pinch it together
  2. Turn an overhand loop in the new running end back over itself to make a loop
  3. Bring the running end through the loop with an underhand pass through and pull down to tighten

The best positioning for the damaged part of the rope is to be at the very tip of the night made, so that it ends up outside of the loop and the lines standing end complete.

How to Store your Rope properly

After you have put your rope under the pressures of all the knots aforementioned, it is rather important that you take care of the line for better later use. Making sure that all the tangles made have  been untangled and any unnecessary knots have been set loose, you will need to keep the rope in a state that allows easy access and that keeps both ends tidy. Because, after all,  a rope does not come all that cheap.

Coil of hemp rope

We recommend coiling your rope. This allows easy access, no tangles, and it is by far the best way to store the rope. Here is how it is done:

  1. Take an end of rope in your hand and start to loop the rest of it onto itself
  2. Continue looping and coiling the rope into your hand until you reach the other end
  3. Leave a good sized length of rope at the end to use, whilst you pinch the rest of the coiled-up rope to add length to it
  4. Take the free running end perform a minimum of two round turns around the middle of the bunched up rope and tighten
  5. Pull the end of the rope through the loop on either side of the rope and securely tighten

Before coiling the rope, make sure that it is dry regardless of material. As moisture build up will lead to a severe deconstruction of the rope.

Final thoughts

Hopefully the knots that we have provided in this brief guide to how to tie knots have been beneficial to you and have provided you with a thirst to learn more. Some of these essential knots are simple, others are a little tricky, so take your time with each one and make you have followed the steps provided.

Keep practicing and learning, and you will be able to maintain this skill. Use it on your next camping trip to better peg down your tent, lashing all your gear to your daypack, to climb more securely, or even just to show off to your friends and family.

Close Up Photo of White Rope on Brown Wood

LNT Principles: Preserving and Conserving the Beauty in Nature

0
Autmn in Colorado

If you are always out in nature, either camping, hiking or backpacking, you may be aware of LNT Principles. The Leave No Trace Principles are steps to help you leave the area in which you are utilizing as sustainable as possible. There are 7 main principles in which you can adhere to in order to leave nature the way you found it as much as you can.

These 7 principles involve many smaller principles within them. They basically lead you to being as clean and efficient as possible in the area you are camping in. Various principles exist in planning ahead, how to travel on a trail, taking care of trash, and more. Within these principles you will learn how to be as kind to the earth as you can.

Two hikers and a mountain landscape

Below, you will learn the 7 principles regarding Leave No Trace, as well as some other helpful tips to consider while you are backpacking through a trail, or camping. Being as mindful as possible of the earth in which you live, is the perfect mindset to have when you are enjoying nature for either short or long periods of time.

Features to Consider

Below are some things you should think about when you are enjoying nature and want to leave it as pristine as possible.

  • Everyone can use the Leave No Trace Principles, both back country areas and front country areas. If you are using back country areas, you are probably camping over night and then hiking or backpacking. If you are using the front country, generally you are driving to the area, like a state park, plus you are probably car camping and encountering many day visitors.
  • Think about what you need before your trip and think of how you can reduce the impact you will have while you are camping.
  • Be clean and tidy. Do not leave trash around. Before you leave, you can pack your food into bags and try to reduce as much waste as possible.
  • Never touch or disturb the animals in nature. Also, never take anything from nature. Everything is there for a reason and will be used by the earth.
  • If you plan to build a fire, do so by building it very small and making sure the fire is completely out before leaving the area.
  • Research the rules and regulations of the area you are visiting. Many places have rules that are specific to that area, so it is definitely wise to be knowledgeable.

Golden Hour View on the Mountain

Now, let us learn what the 7 Leave No Trace Principles are, and what they entail.

Learning More About LNT Principles

So, what are the 7 Leave No Trace Principles? No matter where you are or what type of outdoor activity you are doing, it is helpful to the planet to be mindful of the area where you are and to leave as little proof behind that you were there. This keeps the environment and wildlife thriving.

Plan Ahead and Be Prepared

When you are planning an outdoor adventure, you will want to research the rules and regulations of the area in which you plan to camp or hike. During this time, you will want to research the weather and any types of hazards that may obstruct you. Plan for emergencies as well by bringing a first aid kit. Try to plan your trip to avoid times of high use in the area, and try to visit the area in smaller groups. If you have a large group, try to break them off into smaller ones so that each group can use a smaller area.

photo showing a Compass On Map

When you are cooking, try to repackage any food so that you do not have to dispose of it as waste, as you will want to minimize as much trash as possible. Another thing when you are planning ahead is to bring along a compass and a map so that you can stay on the trail and not have to use marking paint or flagging, which can be harmful to the environment.

Travel and Camp on Durable Surfaces

When you are camping, you will want to find a durable surface in which to do so. Find yourself a good trail or campsite that is at least 200 feet from water. You will want to use a trail or site that is already existent, as it will damage the earth if you make your own new one.

Picture showing a campsite

Try to keep your site as small as possible and away from any plant life. You will also want to stay away from areas that are under new impact of damage so that the area can start to grow back to normal as soon as it can.

Dispose of Waste Properly

Be sure to keep all waste together in one area and when you leave your campsite, look around for any trash, food or any other items that need to be disposed of properly. You will want to bring along your own trash bag or receptacle in order to keep everything together. For disposing of human waste, dig a hole up to 8 inches deep, and 200 feet from water. Fill the hole with the human waste and cover it and disguise the ground around it. You can dispose of any toilet paper or feminine hygiene items within your trash receptacle.

Cat Hole for human waste

When you are washing your body or any of the dishes you used to cook with, use soap that is earth friendly, and wash yourself or the items at least 200 feet from water so the soap does not impact the stream or lake. With the dirty water, you should scatter it around the area, and not dump it in one spot.

Leave What You Find

Leaving what you find means not touching anything that could otherwise be damaged or disturbed by your doing so. You are always free to take a look at anything, especially in nature. But you must not remove any plants, rocks, or any living or inanimate objects that are in the area. Leave everything just as you originally found it, and avoid digging or building anything in that part of the forest. Of course you can always dig if you are disposing of human waste. But you should not dig for any other reason.

Landscape of mountains and lake

One thing many people do not think about is introducing a new species into a natural area. You can do so simply by walking. Your shoes will carry what is called a “non native species”, introducing it into a new area. It is recommended that you clean your shoes when you are going into an area that is different from the one you were in.

Minimize Campfire Impacts

Campfires can be dangerous and will definitely leave a big impact when you are out in the country. If you plan on creating a campfire, you should do so around some type of fire ring, or fire pan. Make as small of a fire as you can, to leave less of a negative impact on the earth, and use sticks that are already on the ground to create said fire.

Wood Fire Camping on Forest

When you are done with the fire, be sure it is out completely. Never leave a fire by itself. Be as safe as possible while still being mindful of the impact on the earth. Be sure you have burned everything down to ash and then collect the ashes and when they are cooled down, you can scatter them around a large area. This is the best way to leave less of an impact.

Respect Wildlife

When you encounter a wildlife animal, you should only observe it. You can take photos or video if you wish to do so. Never approach wildlife or track them on your hike, as they will think you are dangerous and possibly attack you. If you find yourself near animals during their mating time, or if they are nesting, or even if it’s just winter time, you should avoid them completely. Also, keep on moving if they are with their young, as they are more likely to attack.

antlers in the forest

Never feed the animals or leave scraps behind as this is damaging to their health and can expose them to a wide variety of dangers, such as altering their brains. Keep your food or scraps packaged in your gear or dispose of them with other waste.

During this time, you should be very careful if you decide to bring your own pet along, especially a dog. You must keep your pet under control, because they risk being attacked by wildlife if they cannot control themselves.

Be Considerate of Other Visitors

When you see other hikers, backpackers, campers, or any other human, be respectful and mindful of these steps. You should always yield to other people who are on the same trail as you and try to reduce the noise level as much as possible.

If you come across many people, you should always step aside to the downhill area and let them pass. Say hello to them, quietly of course, so that you do not disturb wildlife. You can also speak to them about any obstructions or things you saw in the direction they are passing you in. Having up to date information on a trail is always helpful.

Two adults in the forest

One more thing is that if you plan to camp or even take a break, do so off the trail and away from others. This allows hikers to move the trail better and you are not disturbing the flow of anything.

Taking The 10 Essentials

This is not a principle, but rather a list of items to have on you when you are going on hikes, or backpacking, or camping, even if it is just for the day. The 10 Essentials is a list made in the 1930s by a group of adventurers from Seattle called The Mountaineers.

Woman holding a map in her hands

See below the items you should have in case of an emergency.

  • Maps: Using a map and compass or a GPS system will help you find where you are if you are lost and have no idea how to get to where you are going. You can even use an altimeter that can tell you the elevation by using a sensor of the barometer and air pressure.
  • Sun Protection: You should take along sunglasses that block all UV rays and light which can harm your skin and can cause cataracts. Using sunscreen keeps your skin from taking too much damage outdoors. Use this, every few hours and take along some lip balm for your lips.
  • Insulation: Bring along an extra layer of clothing in case the weather is inclement. The extra clothing should should match what season it is. Be sure you will stay warm in very cold climates by bringing long Johns and insulating clothing
  • Illumination: Many people like to wear headlamps because they are worn on the head and allow the user to be hands free. If you cannot take along a headlamp, try bringing a flashlight or a lantern with you in case of an emergency.
  • First Aid: When out in the forest, you should always have a first aid kit. This should have treatments for many things, including bandages, tape ointments, pain medications, gloves, and anything else you think you may need.
  • Fire: In order to start a fire, you could bring along some matches or a type of fire starter that will help you create a fire so you can stay warm, dry clothing, or cook food.
  • Repair Kit and Tools: If you need to make kindling, prepare food or fix some type of gear, having a multi tool or a knife can be helpful. Even bringing scissors can be useful. Bring along some duct tape or even a repair kit so you will not be caught off guard.
  • Nutrition: Always have a day’s worth of food on you, so that if you get in a pinch, you will have enough food to get by for a night. Try to take things that do not need to be cooked, like granola, trail mix, or jerky.
  • Water: Hydration is very important and you do not want to be without it. Your gear might have a water reservoir or you can bring along a bottle or two with you. You should also know how to filter or purify water if you need to drink it from a river or stream.
  • Shelter: Having emergency shelter can mean staying safe in bad weather. You can bring along a tarp or a blanket, or a pop tent, in order to stay out of a thunderstorm or wind.

What Do Other Nature Lovers Have to Say?

Those who really love nature try to adhere to the principles above. They say that preserving our earth is important and by cleaning up after ourselves and being safe, and not disturbing wildlife will only help our land thrive and grow. Using these principles ensure that you have a great time while the land stays as pristine as you can leave it.

big bear grizzly on a tree

While some of these principles may involve a lot, they are definitely worth it to keep our earth alive and beautiful for the next generation. By simply observing the wildlife, you are ensuring that their species stay alive and healthy for the future of their breed. It is important to leave a positive impact on our planet because we already have experienced so much damage to our earth.

Pros and Cons

There are more good things than bad about leaving no trace when you are enjoying nature. Trying to keep the earth as you left it for others to enjoy and for wildlife to thrive is always a good thing.

Brown Squirrel

However, if you are not mindful, then you could leave damage to the area behind.

Pros

  • You are leaving the world as clean as you found it. This ensures that the earth is not disturbed much and wildlife are not affected.
  • The area stays clean because these principles teach you how to dispose of waste properly, including human waste.
  • These principles show you not only how to treat the wildlife and the earth, but other hikers or campers as well, yielding to them and exchanging information if needed.

Cons

  • Some hikers or campers are not as prepared as they should be.
  • Not all trash and waste is properly picked up, even though the principles teach that.
  • Not all people are informed on the rule, regulations, and how to treat the earth they are enjoying.
  • Interacting with wildlife can be dangerous for you and the animal. Stay away and only observe and move on.
  • Not adhering to the principles can damage the earth and harm the wildlife, which further destroys our planet. Be mindful and safe.

How Fast Do Bears Run: Dealing With Bear Encounters

0
Brown bear getting ready to attack

There is something that most outdoor enthusiasts, especially hikers and campers do not wish to come across – a bear in the wood. Humans are no match for this wild animal, and when provoked, it can inflict so much pain using its claws, teeth, and entire body. Sometimes, bear attacks are fatal. Before you can decide to run, you need to ask yourself; how fast do bears run? Of course, it will be an atrocious idea to even think about outrunning a bear. Contrary to the myths out there, these creatures are faster than humans.

The bear is an omnivore, meaning that it will add anything to its diet and humans are not an exception. Although they don’t hunt humans for food, they’ll definitely attack when threatened or provoked. Those likely to encounter bears in the wilderness are hunters, bikers, campers, and hikers.

bear at zoo looking straight at the camera

Statistics revealed that attacks by bears are not common, which is logical since they only take place when bears and humans cross paths. The table below represents the statistics of the number of deaths that have occurred after humans have encountered with bears in North America.

YEAR BROWN BEAR BLACK BEAR
2005 3 3
2006 1 1
2007 1 2
2008 2 1
2009 0 2
2010 2 1
2011 2 2
2012 1 0

This article will offer a guide to how you can avoid bear encounters, and what to do when you come across a bear. Additionally, we will examine how fast bears are and whether or not you can outrun them.

HOW FAST ARE BEARS

The speed of a bear on land varies from one species to the other. The black bears are often the fastest, followed by grizzlies who run a speed of approximately thirty miles per hour. On the other hand, human clock in about 28 miles per hour. So, even as you ask how fast are bears, it is imperative to remember that they are faster than humans. Bears run pretty fast. Do not even think about running from them.

If anything, if a bear is after you, defend yourself through other means but don’t attempt to run. The way these animals think is that if you run, you are a meal. Running away from them makes them aware of the fact that you are afraid and not dangerous to them.

Black Bear Standing on Wood Log Inside Enclosed Area

Bears express dominance among each other by direct stares. When they meet, bears stand up to determine who amongst them is taller, and look into each other to determine which one is fiercer. This act helps in determining the bear that will keep the territory while others depart. If you happen to do the same – stand tall and stare at the bear without provoking it – it will likely think you are too tall and dangerous to mess with.

However, what is important is to remember that if the bear attacks, you will not be able to outrun it as its speed is higher compared to that of an average human. If it attacks, you need to defend yourself. Fight back, climb a tree, or the bear will harm you.

SITUATIONS TO AVOID

When you are in the wilderness, there are some situations you would want to avoid so as to prevent bear attacks. It’s important to be keen, so as to avoid these kinds of situations.

Bears addicted to human food and garbage

Once the bears get used to meals consumed by humans, they get drawn to places that are occupied by humans. This can include the camp sites which are located far away from the urban centers.

Polar bear foraging at garbage dump while food-deprived on land during the ice-free season.

In addition to that, poor garbage management in the back country can expose campsites to regular bear attacks.

Bears with young cubs stuck on tree branches

If this is the case, the mother bear will not exit the vicinity, but will do all its best to defend its cubs. Keep away from bear cubs as their mothers may attack without hesitation if they think you are within that zone.

Three adorable Black Bear cubs look gingerly at photographer

Also, you need to be prepared with a bear spray each time you are out in the wilderness.

Bears with cubs that take part in a direct charge

Just like the cub stuck on a tree, cubs participating in a bluff charge could create a dangerous situation as you’ll be dealing with numerous animals.

Mama bear with cubs

While this situation hardly occurs, it allows the bears to guard their site in the most effective manner.

Bears defending their kill site

These animals can be violent when they are protecting their kill site. Be careful to identify possible signs of these sites.

Male bear begins attack on mother and cub.

Look for signs like the accumulation of raven among other scavenging animals and birds.

Predatory encounters

While the predatory encounters hardly occur, such situations can be quite dangerous. Since you are the prey, you need to be prepared for an attack that is just about to happen.

Male-Brown-Bear Walking

The bear can make advancements towards you, getting closer, before deciding whether or not to attack.

WHAT TO DO WHEN YOU ENCOUNTER A BEAR

Every time you camp in a country filled with bears, you need to be prepared for the reality of encountering one of these animals. The pointers in this guide will help minimize the possibility of coming across a bear. Even so, you still have to be ready when the bears resurface suddenly.

Whenever you are in the wilderness, always ensure you use your binoculars to assess your environment and to determine whether there are any signs of bears in your area. In a more forested area, remember to create noises so the bears can recognize that humans are around. Also, keep an inventory of all the trees you can climb, just in case the unexpected happens.

Grizzly bear cub and a couple of trees

Just remember, grizzlies are good at climbing short trees, and the black bears are swift climbers. To be safe, you need to look for a tree that will make it possible for you to be approximately 33 feet (10m) above surface of the ground. Do not forget that these animals can run at about 30 mph (50 km/h). You will require time to climb the tree, so do your calculations of distance and speed.

SITUATIONS YOU MAY FACE

The bear hasn’t sensed your presence

Do not make your presence known if the bear hasn’t seen you yet. Where possible, retreat without creating noises and give it plenty of space. If possible, retreat and leave the path for the bear. However, if you have to continue, back off some distance, and give it some time to leave the area.

Bear attacks certainly generate headlines and create fear, but if you are confronted by a black or grizzly bear, don't panic, run, or try to climb a tree.

To avoid problems, you can also make a wide detour quickly and quietly.

The bear has detected your presence

The goal at this point is to behave in a manner that will make it possible for the animal to recognize that you are human and that you’re not a threat. Speak gently and calmly, so it knows your intentions are not to create havoc. When they recognize that you are a human, they will often give ground.

It is likely that this is the adolescent bear running amok in the campground, destroying anything in it's path.

If possible, make sure you move away carefully and slowly, keeping watch that the bear doesn’t attack.

The bear has identified your presence and its intention is to attack

If the bear has spotted your presence and is exhibiting signs of violence, it’s imperative to try as much as possible to remain composed and weigh the different options you have. Hopefully, there is some distance between yourself and the bear.

Bear-has identified a man presence and its intention is to attack

The following are life-saving tips you need to have in mind:

  • Evaluate the circumstances – Check to see if you are facing a grizzly or a black bear. Are the cubs involved? Can you see the trees you can climb nearby? Is there enough time for you to climb the tree?
  • Never make a mistake of running – You can never outrun the bear so don’t even think about it. Despite people saying otherwise, both the grizzly and black bears are able to outpace humans in any terrain, whether uphill or downhill. People may advise you to run down the hill when a grizzly is chasing you. Don’t try it! This is only a myth.
  • Try a slow retreat – Move slowly and attempt to create a distance between the bear and yourself. Talk in a calm manner so the bear can recognize you are a human and back up slowly. Make sure your backpack on your back as this could offer some protection. Do not make eye contact but be on the watch as you attempt to retreat.
  • If a tree is available, climb it – If there’s sufficient time, make sure you climb the tall trees near you. Do not forget that the black species are agile climbers and the grizzlies can climb short distances. You should climb at least 33 feet or 10 meters high to minimize the likelihood of the bear pulling you back down. Although some species are able to climb trees, the idea is that they won’t feel threatened and will therefore not chase after you.
  • If the bear attempts to charge, make sure you back away – These animals often bluff charge before they can attack. This act is meant to allow their enemies to back down. This evolved as a technique for avoiding encounters with enemies, and it offers you the chance to back away.
  • Use your pepper spray – The use of pepper spray is the last resort. This is only useful when used at close range (five to fifteen feet). The wind will minimize this range even further, blowing the spray back to you. If the bear is within this range, point the spray at the eyes and discharge its content. Hopefully, this will disorient it to give you an opportunity to escape or even deter the bear from attacking. After you have the canister of bear spray, you need to discard it. While the spray can prevent attacks, the pepper smell can also attract bears.
  • If the black bear (or any other is stalking you) makes contact – If you are attacked by a black bear or any other for that matter, try your best and fight back. Use everything there is at your disposal to scare them off. Black bears are usually a bit more timid compared to grizzlies, so there’s a high chance they will feel scared and leave the scene. Also, if the bear is stalking or you’re in a predatory situation, then fighting back is the only chance you have. This can also happen to any attack during the night. If you are ambushed by a wild animal, and it’s late to escape, use anything around you as a weapon to scare them away.
  • When grizzly attacks – If the grizzly makes contact, or if the animal is stalking you, make sure you fight back with everything at your disposal. Generally, playing dead during the daytime grizzly encounter often minimizes their intensity of the attack and will probably leave. A good number of attacks from grizzlies are defensive in nature. Therefore, by playing dead, the bear will know that you are not a threat. Always remember to have your backpack on as this will offer additional protection. When on the ground, lie on your side. Bend your legs towards your chest and insert your head in between your legs. Lock your legs between your arms and hold tight. Alternatively, you may lie on your stomach with your backpack on and cover your neck with your hands to protect it. However, playing dead is always a last resort. It’s advisable to stay on your feet to allow you to divert or dodge an attack.
  • Once the attack is complete, remain patient. Do not be in a hurry to leave as this could alert the bear. First, try to determine if the animal is still within the vicinity. If it has moved on, make your way towards help as fast as possible. A detailed explanation is given below.

WHAT TO DO WHEN THE ATTACK IS OVER

When the attack is over, do not get up as soon as the bear is believed to have left, tempting as this may seem.

grizzly-bear in the forest

Here’s what you need to do:

  • Continue laying down and evaluate your surroundings
  • Listen carefully for any sounds that indicate the presence of the bear

Once you are confident that the bear has left:

  • Get up and move towards the opposite direction from that which the bear used to leave the scene. Do not risk another attack.
  • Warn everyone else within the areas, of a bear presence in the area
  • Alert the relevant authorities and seek medical attention

AVOIDING BEARS IN THE BACK YARD

Much focus has been placed on how you can avoid attacks in the wilderness and little has been on how to do the same in your backyard. If you are living in a bear country, the likelihood of coming across a bear is high. Therefore, it’s important to have some ideas of how you will handle bears in your back yard. When it comes to controlling and preventing attacks by bears in the back yard, here’s what you need to know.

Keeping the animals wild is the responsibility of every person

Bears can be attracted to yards and town sites by various attractant. As a resident, it’s your responsibility to minimize the probability of bears being attracted to your neighborhood by assuming an active role in getting rid of a variety of human and natural enticements. Nonetheless, it’s not illegal to leave the bird feeders or to do things that could attract wild animals to your area.

Little Birds eating in a Bird Feeder

At the same time, anyone who keeps bird feeders out of season, likely endangers the lives of everyone in the community. A bear that is attracted to the feeder may end up attacking someone. If there’s anyone within your residency, not considering the community’s safety, try talking to them. If you are uncomfortable talking to them, go ahead and leave them a note.

Garbage disposal

Be careful not to store any garbage outside your home or inside your truck. Pickup truck toppers are usually not bear proof.

Home Garbage Disposals in Front of Houses

You need to remember that food smells attract bears to some locations.

Compost heaps

Many people dwelling in the mountain are also ecologically minded, and the compost pits are usually a critical aspect of waste management. At the same time, you need to know what to put in the compost heaps.

Composting the Kitchen Waste

Avoid putting meat by-products like dairy products, bones, fish, egg shells, or fruits in the compost. You can add some lime to your heap so as to speed up the decomposition process and minimize the smell.

Bird feeders

In many places, the bird feeders have played a significant role in attracting grizzlies into the residential areas. There’s no good reason for having bird feeders out in the summer as there are so many natural foods available during that period.

Birds eating from a bird feeder

If your intention is to have these feeders, be sure to wait until November before you can start to fill them with seeds. Do not forget to take the feeders down during the spring. Also, be careful not to store your feeder outside.

Barbeque

Having a summer barbecue on the patio is one of the most exciting things. The smell of juicy steak can diffuse into the air, attracting more than just the neighbors. These smells can also attract bears to your deck after you’ve gone to bed. Once you are done with your feast, make sure you clean your grill. Burn the food off your grill to ensure there are no traces of meat.

Outdoor Barbecue with Friends

Also, when storing the barbecue grill, be certain to cover it using a plastic bag to minimize the smell coming from it. Keeping the doors of your patio closed when cooking also minimizes the smell of food.

PLANTS THAT ATTRACT BEARS

Before buying a tree or shrub for your landscaping project, be certain you are not purchasing a tree that will attract bears your yard. The table below shows a list of plants that can attract bears. If possible, try to avoid these fruits, plants, and herbs.

Grass and Grass-like plants Fruits and berries Herbs and others
SedgesTrisetum

Brome, Northern Awnless

Tufted Hair Grass

Bearberry, CommonBearberry, Alpine

Bearberry, Dwarf

Bearberry, Tall

Bog Cranberry

Blueberry

Cherry, Pin

Cherry, Choke

Cowberry

Current, Wild

Cranberry, Low-bush

Elderberry

Dogwood, Red-osier

Grouseberry, Wild

Gooseberry, Wild

Strawberry, Wild

Raspberry, Wild

Sorrel, MountainCow Parsnip

Sorrel, Mountain

Vetch, Wild

Vetchling, Pea Vin

WRAPPING IT UP!

When in a survival situation, you need to have some ideas of how to handle bears when they are within the vicinity or when they want to attack. Bears can be dangerous and sometimes fatal, so you need to be careful when dealing with them. Make sure you follow the survival tips given in this guide to avoid finding yourself in a hard situation with a grizzly.

The most important way to avoid encounters with bears in the wilderness is to be aware of the surroundings and practice the right Leave-No-Trace ethics. However, if you happen to encounter one, this article has offered some helpful pointers on how you should act. You should also know how to differentiate a black bear and a grizzly bear since this is also an important factor in utilizing some of the survival skills. For instance, black bears are agile climbers whereas the grizzlies only climb short distances.

You also need to remember that the coloring of the coat, is not always the best way to identify different species of bear. Grizzlies are usually aggressive as opposed to black bear and have a unique hump on their shoulders. If it is a brown bear, lay down; if it’s a black bear, fight back. This is an essential survival tip for dealing with bears. What’s more important, do not attempt to outrun a bear since they are much faster than humans.

Brown Bear in Body of Water during Daytime

DIY Backpacking Tent: How to Build a Tent on Your Own

0
A person lying on the back and taking a moutains landscape picture

Every year the tent market, both online and in store, is flooded by a variety of new tents. Manufacturers come out with a wide range of new models to entice buyers in. The new models released may occasionally have one up on the previous model, but usually the tweaks and changes in the different varieties of tents released mean next to nothing. The public tends to turn straight to these mass-produced structures for their outdoor tenting needs.

But, you don’t have to. Tents have been around for far longer than manufacturing facilities and are surprisingly easy to make when you know how. That’s why we’ve written this article to explain how you can make a DIY backpacking tent.

Image of a DIY ski-poled tent

For avid backpackers, hikers, and campers, knowing how to make your own tent has many benefits. For one thing, being able to make your own tent means that you will be able to make it with whatever specifications suit you. That means you can determine the style and size of your tent – important factors for those who often go on trips with family and friends. Heading out into the wilderness is always an exciting adventure and you need to love your tent.

By making your own you can choose the color and you will be surprised at the amount of affinity you feel for the work of your own hands once you are done. Making a tent is not only cheaper than purchasing one, but it also provides you with a great deal of personal satisfaction.

There are many factors to consider when you are about to make your own movable shelter. We’ll take a quick look at those first.

Factors to Consider Before Starting to Make Your Tent

The main thing that you need to understand is that no shelter will be perfect in every situation. There will be a certain tent that is suited to hot and humid conditions, and another that copes well in the snow. Some will be made to give you maximum viewer vantage points of your surrounding landscapes and others will be created to specialize in keeping you safe from bugs.

Person Inside Tent Watching Shore Line View during Sunset

The climates, environments and intended users will all change what type of tent is best for you to create. So, before you even start making one, consider, what will you tent be used for most often?

Once you’ve ascertained what your tent is going to be used for, it’s time to think about what that means. You need to consider the following questions:

  • What warmth level/insulation level does my tent fabric and flooring need to provide?
  • Do I need mosquito protection?
  • How long am I willing to spend setting up and packing down my tent?
  • What weight is suitable for my tent’s transportation?
  • How much space does there need to be within my tent?
  • Do I value the comfort highly, when out in the wild?

Now that you’ve answered those questions you have a pretty good idea of the requirements that the tent you create needs to satisfy. We like to lay this all out at the start as it makes the rest of the tent creation process a lot easier if you know what your priorities are.

tents in a camping area

Our only recommendation, in terms of your choices in this area, is that you keep it simple. If something is unnecessary, don’t add it! Tents don’t have to be a complex structure. You don’t need the kitchen sink when you’re going out camping or backpacking – so don’t pack it. Simplifying your tent creation will do three things for you:

  1. It will make your tent lighter and therefore easier to transport
  2. It will probably mean you tent costs less to create
  3. It will save you time and problems during the construction phase

There are many other benefits of simplifying your outdoor experience (think “getting back to nature”) but the above is a very practical set of three that we think everyone can agree with.

Since we’ve covered the main points to consider about your personal tenting needs, now let’s get on to the type of tents that you could choose to make.

Which Tent Is Best for You?

There are several different tent types that you could create for yourself. The main purpose of a tent is to give you somewhere to sleep (usually). We’ve chosen three types that do that while still filling very different user niches. Below is a quick summary of their make-up, and their pros and cons. Pick the tent that’s best for you!

The Dome Tent

A popular choice for its roominess and stability, the dome tent has been in use for many years. It is the type you are most likely to see coming from commercial manufacturers. Although very stable, this tent takes quite a while to set up. It also comes with lots of piece and poles. You get the joints, the awnings, the elastic, dangly fold away poles and more.

Acadia Dome Tent DIY Glamping

Of course, this adds quite a bit of weight to the overall transport of the tent. Not to mention that all the material and poles required can mean this is one of the more expensive options to create.

Pros:

  • Comfortable
  • Spacious
  • Stable
Cons:

  • Heavy
  • Complex setup
  • Expensive

The A-Frame Tent

When you consider that all you need from a tent, is some warmth and shelter, the classic A-Frame tent is a fantastic option. This tent is a lot less heavy than the dome tent and consists of merely a V-shaped roof, with a floor. It is, for those who are good with geometry, shaped like a triangular prism. It takes very little time to set up and is substantially lighter than a dome tent.

Homemade A-Frame Tent

For its creation, all you’ll need is good quality tarpaulin material, tent pegs, strong rope and a plastic smelter or some other form of strong stitching material. The downside is that this tent cannot be pitched just anywhere – you will need to find two trees or other landmarks that rope can be tied to between which to camp out.

Pros:

  • Lightweight
  • Easy to setup
  • Inexpensive to create
Cons:

  • Cannot be set up just anywhere
  • Basic/non-luxurious
  • Not spacious

The Traditional Tipi

We’ve all seen Tipi tents in movies growing up. There’s a reason this tent structured was so popular with people for so many generations – it’s because they’re easy to make in the first place and then easy to set up when in use They are also very stable and incredibly spacious (you can usually stand up in the center of one).

Native American Tepee Tent

The only place where these tents fall short is in transportation. Unless you’re able to get some very strong fold-able elastic poles, transporting the main poles that make up this structure could be difficult. Nevertheless, they are a very real choice for a backpacking tent.

Pros:

  • Spacious
  • Easy to setup
  • Stable
Cons:

  • Hard to transport
  • Heavy

Those are our best tent options for those who want to create their own tent. It’s important to weigh up which pros and cons of each tent mean the most given your intended use for your tent. If we had to recommend a style it would probably be the A-Frame tent because it’s easy to create and relatively inexpensive. This is however not a great choice if you’re going out in cold or wet conditions.

So, choose your preferred tent style based on the reality of the climate and environment that you’re going out into. For example, dome tents are great if you intend to stay in one place for a long time.

But don’t only consider where you’ll be taking your tent, also consider the materials and skills you have at your disposal to create a tent with. We’ll cover off the basics of creating each of the tent types below. Make sure you have everything you need and are physically able to create the tent type that you choose. Some are harder than others.

Now, without further ado, let’s get into how to make your own tent from home.

How to Make Your Own Tent

How to Make a Dome Tent

As previously mentioned, these tents are difficult to create. Your best option might be to just buy a pre-made one from a manufacturer (as this often works out cheaper than creating your own). However, if you’re in the mood for a weekend DIY project and want to impress people, then a dome tent makes a fabulous project. The most cost effective creation method is probably making a geodesic dome out of PVC. You will need to:

  1. Use a program like SketchUp to model your dome. There are plenty of free designs online that you can download and use instead of building your own model. When browsing design, choices remember that the higher the V rating (e.g. 3V versus 20V) the smoother your dome surface will be.
  2. Calculate the length of all the different poles you will need and decide on pole material. This can be anything from plastic through to the metal. Since we’re thinking about backpacking tents we recommend that you go with a very lightweight material – even if that does come at a higher price tag.
  3. Order appropriately long poles (or cut them yourself) and order the right sized hubs (the connection points the poles slot in to).
  4. Create a dome cover out of lightweight, waterproof and durable material (usually people choose a tarpaulin like material at this stage).
  5. Make a bag out of leftover tarpaulin or other material to transport your tent from one place to another.

Hey, we did warn you that this is the most difficult and expensive tent option to make – not to mention heavy to lug around as a backpacker. It is not impossible, though, and has been done by many people around the globe. Google is your friend if you’re planning on undertaking the creation of a dome tent.

Man working on a homemade dome tent

They look magnificent when setup and provide a spacious, comfortable in-tent environment.

How to Make an A-Frame Tent

The A-Frame tent is a lot simpler to create. In fact, our instructions are more about how to set it up than how to create it. You will need to sew together a bag and place in it:

  • 2 x large tarpaulins (one with eyelets along its sides)
  • Approximately 10m of strong rope
  • 7 tent pegs

Yes, that’s all! To set up this tent simply string a rope between two trees and place the middle of your tarpaulin over it. Then take fasten the outer two corners of each side to the ground using tent pegs through the eyelets – this should create a triangular type shape. Fasten the middle eyelets of each tarp to the ground as well for some extra security. Now lay your second tarpaulin on the ground under your roofing tarp. And Ta Da!!! You’re done!

A Frame like tarp with doors

Tip: If you curve the edges of your flooring tarp up, then you’re less likely to get the rain inside your tent. It’s important when doing this that you only start your flooring tarp a decent way into your roofing space so rain doesn’t fall into your ‘bucket’. Be sure to make a hole in your flooring tarp for drainage just in case.

How to Make a Tipi Tent

A Tipi tent is perfect for setting up in areas where you know there will be a lot of long sticks/logs readily available. All you will need to carry with you when going out to prepare a Tipi is a strong piece of rope and a correctly shaped piece of canvas. You will need to cut a tipi pattern out of a lightweight, durable and waterproof piece of material (generally canvas or tarpaulin).

The exact shape can easily be found with a quick Google search, but it can be well described as a basic semi-circle half as wide as it is long. Refer to a diagram online to see where to cut a few notches into this shape.

When you get to your camping area with your Tipi sheet, simply go searching for logs of similar lengths. The longer your logs the bigger your Tipi can be. Once you’ve found your logs and a dry spot to set up camp most of the hard work is done! From there, simply:

  1. Dig three holes in the ground in a triangular arrangement.
  2. Set three logs up with one end of each in each of the holes and the other ends leaning against each other in a pyramid shape. Tie a piece of string around the top where the logs touch.
  3. Once your main three logs are balances place another log leaning in between each of the main logs. You will have 6 logs in total when you’re finished.
  4. Take down one of the logs and tie your tent canvas around its top. Then replace it up, so your tent canvas is hanging off, down the side of your structure.
  5. Draw your semi-circle tent canvas around your Tipi structure to complete your tent. You will probably need bits of rope to tie it together with depending on the canvas pattern you chose.

Those are the basic steps to setting up a Tipi tent. These tents are very traditional and provide a space that can be big enough to stand up in if your logs are long enough. They are not usually very long, though, so in terms of horizontal sleeping arrangement – if you’re very tall and enjoy sprawling straight out when sleeping then this may not be the right tent for you.

These tents are great if you are going to a place with many long logs and intend to sleep a lot of people in one tent. They can be spacious and are rather fun to set up. Plus, with only canvas and rope to buy, they’re very cheap!

6 Tipi tents at one place

Now you know how to make a tent in three different styles. Choose yours and get started, the sooner you start, the sooner you’ll have a brand-new tent to sleep in next time you head out! There is however one other option though that we’ll mention just briefly:

Admire the Stars

Do remember that it may not always be necessary to take a tent with you when camping or backpacking! Honestly, if it’s going to be a clear on-rainy night and the stars are out, why not just chuck a tarpaulin on the ground and lay down on it? Some of life’s best moments are those we share when connected to nature in an intimate way.

So, ditch the tent if you can! A good sleeping bag will keep you warm in most temperatures and a tarpaulin (or even a sleeping pad) will keep the ground chill out.

Milky Way at night

So, next time you’re planning a trip into the great outdoors, we recommend you seriously consider whether you need that tent or not. Keeping a tarpaulin and some rope handy is never a bad idea – worst comes to worst you can set up a basic A-Frame tent if the weather does turn sour. What’s the nature without a little adventure, aye?

DIY Is Fun and Practical

Hopefully by now you’ve got a clear understanding of the type of tent you’d like to make. Creating your own shelter will be a very rewarding experience for you and as with any DIY project you are sure to learn some useful life skills along the way. You can purchase the materials needed at most of your local hardware stores, though it’s also possible to get some cheaper canvas material online. You’ll save money making your own tent and if you take care with the details it will be there to house you for many years to come.

White and Blue Sky Viewed Inside the Green and Black Tent

How to Fold a Tent: Doing it the Right Way!

0

While pitching a camping tent is quite easy, folding it after usage can be somewhat tricky. Despicably folded outdoors tents are the most-loved breeding arena for molds. Additionally, a badly packed outdoors tent can create wrinkles which may bring about extreme damage to the material used in making the tent.

Once you have unloaded a tent, it is extremely hard to get everything back in its backpack. That is where the question of “how to fold a tent” comes in. You need to know the proper ways to fold a tent so that it can go into its bag easily without much stress.

How to Fold a Tent

While there are many tents types, in this article, we will try and examine several tips on the most proficient way to pack away some of them in view of the most frequently utilized ones.

Why You Need to Know the Proper Way to Fold a Tent

Tents are not extremely cheap, and if you need something that you can set up faster and make you pretty much comfortable even on just a night camping, you will certainly need to put resources into something that is perfect in order to give you adequate comfort and protection. While many battles with just setting up a tent, the majority are not aware that figuring out how to properly fold it can be absolutely necessary.

To keep away from incidentally detaching the materials, or folding it superfluously, knowing how to fold the tent can, and also makes it less demanding to convey particularly when hiking or trekking. A badly folded tent can feel bulkier and heavier, due to the unequal weight distribution. While this may not appear to mean much amid the first 10mins of conveying, you will see the changes after walking with it in the first hour.

camping tent near a lake

Camping is adventurous and fun. What is there that is not lovable when you are observing nature? Camping events are likewise an awesome approach to have a reasonable nature encounter. You need to maximize the fun by folding and moving your camping tent to your campsite. When you consider going on moderate outings, you surely would prefer not to burn through cash on purchasing outdoors tents or gear.

If you already are in possession of a tent, you will need to take it along with you to your campsite, if you are planning on camping in that area. The most effortless way to do as such is to pack and move your tent. You can effortlessly pack away and move your tent to your campground. In the next segment of the article, we will disclose to you the proper way to fold a tent for easy movement. Though there are diverse types of tents, we are going to explain how to fold each of them.

Breaking Down Your Tent After Use

When packing your tent after use, the most critical factor to take note is that it should be is dry and free from any form of debris. If your tent is wet, at the campsite you may pack it up and store it for a while, but within the period of 24 hours, it should be thoroughly dried. You can hang it some place to dry or place it somewhere in your home to dry. When the tent is totally dry, lay it flat on the floor with the base on the lower ground. Take the sack and lay the tent out on either side. This will fill in as a manual to let you know to what extent the folds of your camping tent ought to be.

Two adults packing a tent

Family tents can be packed anyhow, however, it is simpler to overlap it in thirds or quarters contingent upon the stuff pack’s length. Overlap your fly and place it longwise on the tent. Pack the tent on that in order for you to have the fly within the tent’s fold. Put the tent poles in their bag, drop the stake pack into the pole bag and place the entire thing over the folded tent. Move it up firmly, beginning with the tent poles. Roll gradually, drawing the air from the tent. Done appropriately the entire tent ought to drop inside your bag.

Materials Needed for folding a Tent

Listed below are the rundown of materials required for folding a tent:

  • Pincers: for breaking the tent
  • Cardboard Box: for tent packing
  • Plastic Pouches: for packing the backups
  • Foam: for inward padding of the cardboard box
  • Bubble Wraps: for protecting each part
  • Packing Peanuts: for inward padding of the cardboard box
  • Duct Tape: for closing the box
  • Ropes: for tying things

Colourful artistic image of two coils of climbing rope.

Folding a Camping/Backpacking Tent

  • Step one: Clean before Folding. Before you begin to fold outdoors tent, evacuate things in the tent and then utilize a sodden cloth to wipe the inner parts of the tent. Make sure you take off all food crumbs and debris that can welcome molds to develop. After you have finished wiping the inner parts of your tent, wipe out the outside also. You have to dry the tent before folding it. Do not try to fold the tent when it is sodded or wet. Keep in mind that damp regions are most-loved reproducing arena of molds so as to ensure that your tent is totally dry before you fold it.
  • Step two: Remove the Stakes. Once your tent is dry and clean, take off the pins or stakes that hold the tent to the floor. Put the pins and stakes in a little sack or package them together with a bit of little rope or twine and keep them in your rucksack. Do not put the pins and stakes inside the pack holding your tent to the ground. Keep in mind that pins and stakes are sharp tools so they can create holes in your tent materials.
  • Step three: Remove the Tent Poles. To take off the poles, just haul them out from the circles of your tent and overlay them appropriately. If the poles of your tent are divided or have distinctive segments that matches each other to make long poles, evacuate the fitted areas and keep them in the pole sack.
  • Step four: Shake the Tent. After taking off the tent poles, get the tent and give it a decent shake to evacuate every debris sticking to it.
  • Step five: Pull the Tent Flat on the Ground Place the tent on the campground and draw it till it lays level. Check the base side of your tent and ensure that it is totally dry. If the base of the tent is still moist, utilize a dry cloth to wipe the dampness, then dry the tent for no less than 20mins.
  • Step six: Fold the Tent. When you try to fold a tent, lift the exterior part of the tent toward the center, ensuring that the tent folds are in line with each other. You have to overlay the tent longwise. When folding, ensure that the entryway remains on top of the overlap. Subsequent to folding the tent longwise, make sure you pat the folded tent part in order to discharge the air trapped in it.
  • Step seven: Roll and Store. Subsequent to discharging the air trapped in the tent, carefully roll the tent beginning from the end extremely far from the entryway and then work up your way. After that, tie the tent recently rolled up with twine, and then put it in your tent sack.

Man holding tent poles

Folding A Cabin Tent

Cabin tents usually come in many shapes and sizes. Traditional ones utilize heavyweight canvas and unbending aluminum shafts to make an expansive living room. The traditional tents have just one large space together with standing room and the choice for a cooking stove. The majority of the present day style have a few rooms, nylon outsides, and collapsible tent poles.

The traditional ones are designed to withstand intense winds, snow, and moisture. The modern outlines are substantially lighter compared to traditional ones. It is pretty much easy to dismantle a cabin tent. The issue now is setting up a tent and fitting it again into the tent bag.

modern-leather-tent-With-Screened-Porch-swing-design

A cabin tent is substantially greater compared to the regular ones, and can definitely fit around ten individuals, perhaps more. The capacity sack that accompanies the tents are intended to be space proficient, and it will be an exceptionally cozy fit. There is not really any space for blunders when stuffing a tent back in. Here are the steps to follow when folding or packing away a cabin tent:

  • Step one: Keep in mind to wipe both the inward and external materials of the cabin tent with a cleaning cloth before you begin dismantling the tent so as to dispose of any moisture or dirt.
  • Step two: ​Evacuate the tent stakes and poles.
  • Step three: ​Lay flat the tent on a level ground so as to form either a square or a rectangle, contingent upon your tent’s style.
  • Step four: ​Fold the cabin tent into half, and cover up any batching and lumping as much as could be expected, so that the tent may lay flat on the ground.
  • Step five: ​Fold the tent in a similar heading into the half once more, so as to form a longwise rectangle. Cover up any wrinkles and bumps as much as could be expected.
  • Step six: You should check out the length of the tent’s storage sack. The breadth of your already folded tent ought to be less in size than storage sack’s length. In the event that it still more, fold the tent again in a similar direction, covering the lines as much as could be expected.
  • Step seven: Begin at the thin end, firmly roll up the tent and push it in the tent’s storage sack and that’s all!

Folding A Dome Type Tent

Going outdoors with friends and families in the backwoods, on the shoreline or in your backyard are great ways to appreciate the game. While folding a dome type tent is quite simple, you will have to figure out how to make each fold and also how to store them after the folding process. Similarly, as with the same with fabric, it is very imperative to stick to the producer’s directions.

Two adults folding a dome tent

Here are the steps to follow when folding a dome type tent:

  • Step one: Flysheet must be folded. The covering sheet of a tent is always known as flysheet. Begin the process by evacuating the tent’s shafts and afterward overlap it the lengthwise. The main reason behind this is to enable the ropes on the flysheet to wind up folded inward and not outward. You should fold both the flysheet’s ends, thereby, making them very compactible and folding them inward towards the middle as much as could reasonably be expected. After you have concluded the process, fold it over yet again. And then carefully and firmly move up the flysheet and afterward tie it up.
  • Step two: Roll up the flysheet. Start at the top part of the flysheet, particularly the lightest segment, which is possibly also the area that is in the middle part of the rooftop. Roll it up very well and after that tie it up. The more tightly the flysheet is rolled, the less demanding it will be definitely to put it inside the backpack.
  • Step three: Fold the main tent. Begin by laying out the tent’s main body in a similar way as when it is raised. Ensure that all tent’s zippers are done, for the entryway as well as for the windows and some other zip that may also be there.
  • Step four: Set the roof portion. Use the inside rooftop mounts, for example, tubes and clips for the support rods. To keep the shade from being excessively bundled up, draw the shade in order for it to lie flat. Give careful consideration to the entryway, and ensure that it is flat. There will be overabundance material, but don’t stress over it, you simply need to lay it on the back entryway parcel. In the event that your tent has no vestibule, you need to be working in a roundabout heading, drawing each side firmly and winding up with the front end. It will surely help if your camping tent is still safe while doing this process.
  • Step five: Fold the vestibule. If your camping tent has no vestibule, you can overlook this process and continue with the next. Fold the vestibule in order for it to lay over the tent’s main body, ensuring that the top segment will lie on top of the tent.
  • Step six: Fold the tent: Fold every side towards the middle part of the tent, and then fold it in half again in order for you to wind up with a fourth of the tent’s real size.
  • Step seven: Assemble everything.

Begin to pile everything on the front segment of the tent. The ideal approach in doing this is to lay down the flysheet to start with, and then the tent poles, pegs and after that every other segment. The main trick here is to include one thing in, roll it once, add another thing and roll once more. Just continue doing this process until parts are securely tucked inside it. Roll the tent’s end and tie it safely. Ensure that you roll up the tent firmly and safely. Maintain a strategic distance from irrelevant wrinkles as this can take into consideration additional air rooms which will definitely make it impossible to be placed inside the bag

Storing Your Tent After Folding and Packing

Before storing your camping tent after folding, there are a few approaches to take in order to ensure that you receive the most in return. Ensure that you open up the tent and carefully wipe it off. This may appear like a disturbance – particularly in case you’re drained and worn down after an outdoor trip – but if you store a dirty tent, damp and mold will settle in, bringing about hostile scents and this tends to ruin it permanently.

If you know that your tent was on moisty campground, try to give it a chance to dry before taking off. If that is impossible for you, remove it from the pack when you return home and spread it out on a level surface or place it on a hanger in order for it to dry out very well. Ensure that you don’t abandon your tent beside a fire source as it can destroy the material and most likely set the tent ablaze.

man drying his tent of condensation or moisture

Additionally, abandoning it in direct sunlight can bring about unsalvageable damage. Locate a cool, dry place to keep your tent because it will help you to maintain a strategic distance from damp and mildew in your tent. Spread the tent on the level ground as standing it on end can make the tent poles to penetrate the thin material used in making the tent.

As specified above, before storing your tent, it ought to be 100% aired and dry. If you park off while it is still soggy, damp and mold will develop on the canvas and thereby leaving it with a bad smell – in addition, to the mold can likewise destroy the waterproof covering on the tent’s skin.

After folding and packing, try to always keep your camping tent in a cool, dry place, that does not get to be too warm as a result of the sun. A cupboard shelf in the house would be much better compared to the garden shed. While your tent is kept, ensure it is stuffed freely in order to give the air a chance to flow and keep a stale odor from erupting.

Concluding Thoughts on This Topic

We believe this article has propelled you to fold or pack away your tent for your next outdoor trip. Just in case you still have any questions or doubts as regards to folding your tent, we are always available to assist you.

A man pitching a tent

How to Pitch a Tent: Pitch the Perfect Tent

0

Pitching up a tent can seem to be an overwhelming task. There is a considerable measure of material, pegs, poles and issues to negotiate on.

While there are campers who have their own method of pitching sharpened down to a bore, there are also some who discover this is an issue which can bring about anxiety, anguish, contentions, and even separations. If there is anything to carefully learn about before going outdoors, it is definitely how to pitch a tent.

How to Pitch a Tent

Aside from the fact that it is less humiliating to battle with the tent’s fabric in your own privacy, it is a formula for an awful start to the occasion to discover there is an important part lacking on the first day of your camping trip. It is much better to have a go at everything out before embarking on your trip. To help you plan for your outdoors, we have prepared some guidelines on how you can efficiently and effectively pitch the perfect tent, even if you are a novice in pitching tents.

Important Things to Consider and Do Before Pitching a Tent

There are a couple of bits and pieces you need to do before actually embarking on pitching a tent:

  1. Check your tent before setting out: Before setting out for your camping trip, ensure that you check out your tent and that all things are already in place. You would not want to put the tent up only to discover that there is a nasty worn out part in there. You need to also carefully check new tents again, just to be erring on the side of caution. Put your camping tent up in your backyard or even a close-by field so as to ensure that all are in place. Here is the reason checking your tent prior to camping is so vital.
  2. Be aware of every single local regulations and guidelines: Make your camping event on lands where it is permitted by the local regulations and ensure that you are aware of any restrictions. Many national and state parks have broad rules laid out on their sites. Always follow every rule and regulations, without leaving anyone untouched and pack out everything you pack in. Failure to follow the camping rules, ruins the experience for campers who come after you
  3. Ensure you have a consumable water source: Before putting down your backpack and starting to unload your tent, ensure that you know the location where your source of water is, regardless of whether it is a stream, well or lake. Set up your tent nearby, but not very near your water source. This will definitely make it effortless to fetch some water when you begin to cook or if you are in need a cup of water amidst the night, but always ensure that you don’t pollute the water source coincidentally
  4. Thorough inspection of campground: This one sounds obvious, however, even seasoned backwoods adventurers commit errors with this. Simply because a territory looks good and nice and like an awesome place to camp, many perils can destroy a splendidly nice tent site. Grass is the conspicuous first decision for a material to set up your camp tent on, however, ensure that no stones or rocks are concealed in the leaves. Likewise, be careful about low areas in the grass. In the event that the climate gets ugly, these low spots can be filled with water and doused through the ground of your tent. Mosses, leaves, and wood chips are also great alternatives if grass can’t be gotten. Once more, be careful about rocks and other dangers that can stow away just underneath the surface and can place holes in the ground of your tent.
  5. Consider where will you make your daily business: When picking a campground, it is essential to consider every area of life in camp — and that incorporates heading off to the restroom. Ensure that you locate a reasonable area, no less than 200 feet far from the closest water source. This will keep the source of water clean and drinkable.
  6. Consider the wind: After locating a good pitching area, check the wind bearing and conjecture. Always set up the foot of your camping tent in the wind area. This is its most streamlined position and will limit commotion from wind fluttering. On the off chance that the wind changes amidst the night, even if it sucks, stand up and rearrange your tent. This will surely help decrease the danger of the tent tearing in breezy condition.
  7. Do not do the pitching alone: Unless you are on camping alone, get somebody to help you set the tent in order. This is especially essential in the event that you have a vast tent, as attempting to do everything without anyone else will either take you a lot of time or, more probable, end in contemptible disappointment. Even when it comes to two-man tents, if there is another person there to give you a helping hand, acknowledge their help and you will be kicking back and unwinding much quicker.

three tents in the picture and moutains in the background

The Ideal Spot to Pitch a Tent

Setting up a tent can be an amazingly difficult and exhausting undertaking for amateur campers. It can be much more exhausting to have to redo the task after a fizzled endeavor. Pitching a tent is the suitable location—where you set up your tent will significantly affect the safety and comfort of your campground. Make your outdoor trip a smooth one and prevent any shocking set-up difficulties by following these tips so as to discover the perfect camping spot.

Pick flat ground

The most essential thing to search for when finding an ideal campground is flat ground since it could mean the contrast between a great night’s rest and awakening to nightmarish environment. You will probably get a comfortable night’s rest in places strewn with pine needles, grass, sand or soil, rather than covered with roots and rocks. Established campsites will definitely keep up level and safe locales to set up your tent, in many cases with streams or glades as a grand setting.

The Best Place To Pitch A Tent

When you locate a comfortable and large spot, sufficiently substantial for your tent, utilize a small rake or comparable tool to brush off any sticks, tree branches or stones that may jab you while you rest. If you don’t have a rake, you can make use of your foot to clean your campsite of flotsam and jetsam. Before pitching your tent, survey the state of the ground by laying down your mattress or sleeping bag over the spot and confirming the level of comfortability.

Stay away from the Hills

Abstain from setting up camp anyplace on a hill, if conceivable. Regardless of whether you are on the top, base or center of a hill, these areas tend to pose a risk to your well being. Freshman campers may erroneously believe that it is a smart thought to set up camp in a valley at the base of a hill due to the fantastic security from the sun and wind effect. However, on the off chance that it rains, you may find yourself drenched up in a puddle of water or more terrible in a dangerous blaze surge.

Two people camping in the forest

Sometimes there may not be flat ground and you may need to settle for somewhat inclining ground. Ensure that you set your head on the uphill and with your feet facing downhill. In the event that you lie down, sideways, along the slant, you will unavoidably move to the other side of the tent, squeezing yourself into the material of the tent wall, making the tendency for getting moist from due to condensation.

Consider sun and wind exposure

Always search for a spot within close range to a shady area. A tent situated in direct sun will get to be sauna-like. There are some tents can be destroyed or endure untimely aging by the harmful rays of the sun, so make sure you check for tent care directions before wandering out into the wild.

Three womans and three tents in the forest

Likewise, as mentioned earlier, Search for a campground with a typical windbreak. Regardless of where you are camping, make an attempt to position your camping tent so the entryway is facing far from the wind for appropriate security against solid blasts. It will be extremely hard to get a great night’s sleep if your tent is fluttering in the wind throughout the night.

In addition, in case you are situated confronting into the wind, your camping tent will feel definitely colder as a result of the poor insulation.

Camping in the forest

Forested territories are famous destinations for outdoors. Most developed tent grounds will be flat and intended for tents. Boondocks locales will require somewhat more thought. Many developed locales will have harder pressed soils and will require strong stakes to ensure that the tent is grounded. Forested areas have assorted qualities of soil sorts.

A man camping in the Igor-Cibulsky-Pine-Forest

Some soils are difficult to infiltrate with stakes and some other soils are loamy and won’t retain stakes well. These issues of soils appear more in backwoods settings. Make sure you do some research on forested areas, soil types so as to ensure that you have the proper stake.

Camping in the Snow

When you are camping in the snow, if you notice that there is crisp, deep snow, abstain from choosing a campground close to trees, weighed down with substantial snow loads, which may fall in windbreak or amid hotter daytime temperatures. Furthermore, in the hilly landscape, stay away from the slopes and bowls that are inclined to torrential slide.

Two woman cooking in the snow

When you locate a proper spot, utilize your skis or snowshoes to trample the ground in order to create a strong, firm surface. Winter climate conditions may differ from one place to another, however, it is always more secure to buy a winter or 4-season tent for proper security against high winds and snow in uncovered tent locales. If you are planning on camping in deep snow, getting a snow stake will be very important.

Guidelines for Pitching a Tent

Camping is an amazing event in the late spring. Dwelling in a camping tent for a couple days is an awesome opportunity to unwind and get more in contact with nature. While it is a mostly fun event, getting the camping tent itself at the same time can be a real task, particularly in case you are not used to the intricate details of outdoors yet.

Although it might appear to be extreme at the beginning, most camp tents are made in view of the simplicity of-installation. While pitching a tent is generally really direct, there is significantly more required guides in making an effective campground. After choosing the perfect spot, here are the appropriate steps to follow in pitching a tent:

Step one: Unload your tent supplies

Once you have found the perfect spot to pitch the tent, it is the ideal time to unload your supplies. It is a smart thought to pack the entire parts at once. Setting up your tent will be faster on the off chance that you do not need to unload everything each one in turn.

A mother and a child setting up a tent

Keep all parts settled in a single spot so that you can keep a record of everything. Since the rundown of supplies relies on the particular tent type you’re utilizing, here are a couple of various tent kinds that you can consider:

  • A-Frame tents: These tents are the most common and typical kind of camping tent for personal usage. They are definitely the simplest to erect and generally accompany extra items such as a weather tarp and rainfly.
  • Tunnel tents: These tents are not quite the same as the A-Frame tents since they are organized by two long posts that both project the tent’s wind. This makes a more extensive inside with more head space. But, they are not almost as steady with regards to wind.
  • Dome tents: These tents are typically the biggest, and usually held for bigger gatherings in camping. In spite of the fact that they are pretty much bigger, they are generally simple to pitch.

Step two: Set out a ground fabric

No matter the extent to which you clear the campsite, there may possibly be twigs and some other form of debris that could most likely damage your camping tent or make the surface generally awkward.

A fabric on the ground

A ground fabric should be sufficiently huge to cover the room of the greater part of your camping tent. The included pad of a ground fabric will prompt to a comfier rest.

Step three: Embed the poles of the tent through the frame

On the off chance that you have gotten all your tent sections out, slide the bolster poles through the tent’s body. Lay out the tent frame. Along that line, you can ensure that you are inserting the poles into the appropriate slots.

Two persons embeding tent poles

This is apparently the most tedious part of tent arrangement, yet it is very direct. With regards to a “tunnel tent”, ensure that the tent poles are parallel with each other.

Step four: Raise the tent

In case the bolster poles have joints, all you have to do is to make them to be rigid. The support poles will have a pre-set edge to them for the tent’s body. Raise the tent up by elevating parts of the tent’s body.

Two persons setting up a tent in the forest

The support poles should hold firm the frame in order. If not, secure the loose pole parts or broaden them as required.

Step five: Hammer in the tent pegs

Utilizing a hammer or a close-by stone, get the spikes that accompany your tent and sledge them into the campground. This will balance out the tent and ensure that it does not shake.

Close-up of Outdoor Steel Hammer Camping Tent

If you do not have tent pegs for reasons unknown, you can enhance by utilizing strong sticks and forcing them into the soil.

Step six: Set up the rainfly

It is imperative to remember that tents all alone are generally not water resistant. This is the place the rainfly shows up. A rainfly is an extra piece you place over the top of the tent. There ought to be a thing along the path of locks on the tent’s roof to put the rainfly set up.

Couple setting up a tent and putting on the rainfly

Regardless of the possibility that you’re almost certain there will be no rainfall, it does not hurt to install it in any case. It will definitely ensure that your whole tent gear stays close-by, and set you up for unanticipated rainfall.

Step seven: Move your backpack into the pitched tent

Once you have already set up the tent, you can equip and design the inside. Since there isn’t generally much room in a tent, you ought to choose which things are okay to retain outside, and also the things that should be retained inside. Mattress or sleeping bags are a conspicuous gear that should be in your tent. You can retain hard-cased storage and crates outside the tent.

Coleman OCTAGON 98 TENT

In the event that there is a danger of bears in the region you are camping, it is highly suggested that you keep your food packs out of the pitched tent. And if a bear comes around, you won’t want him scavenging into your camping tent since he got the aroma of granola.

Wrapping it Up

When you are choosing a spot for your camping tent, you have to glance around. Having a tent pitched up in the daylight amid the day can do a considerable measure to keep it warm when you get into it. It may not appear to be much, but rather it can have any kind of effect. Another thing to pay special attention to are tree branches above you. Snow generally adds weight to branches and old tree branches have a possibility of breaking. Ensure that your camping area looks safe before embarking on setting up a tent.

As you may have seen, setting up a tent will likely take a longer time. This implies that you need to give yourself much time to properly complete it. And since it will surely get darker than normal, you should begin early. Winter Camping isn’t that difficult, the thing is that it is just unforgiving when you commit an error. Pitching your tent is the same. Ensuring that you have a lot of time and that you do the pitching in the right way will give an awesome head-start on your camping adventure.

Man setting up a tent

How to Repair Leather Hiking Boots: You Don’t Have to Buy a New Pair Yet

0

You went to the expense of purchasing a great pair of hiking boots. You spent hours working them in and paid with the pain of a few blisters on those first treks, but now they fit like gloves. You have just discovered they are damaged, but you do not want to buy a new pair. Most of the boot is just fine. So let’s have a look at how to repair leather hiking boots so that you don’t have to throw them away and spend more money on new ones.

Just what will be required to make an adequate leather boot repair will depend on just where the damage has occurred. We will go over a few repairs you can consider. Whether you wish to carry out the repair yourself or find a professional to carry out the job, will be up to you. However, you will have an understanding of what is involved.

Hiking boots in the forest

Appraise the state of your boots honestly to consider what actually needs repairing. You may as well do everything possible at once. Remember a “Stitch in time saves nine,” so even if it looks like it will need repairing in the near future, make the repair before anything gets worse.

Reasons to repair your leather boots

  • Leather boots are expensive to replace
  • The boots so well worn in they fit like a glove and you can’t bear the thought of parting with them
  • The leather is still in reasonable shape and is worth repairing
  • Leather comes from what was a living animal and deserves to be treated with respect and not thrown away lightly

Inspect the boot to see where it has been damaged. Check the other boot as well. In some instances of wear the other boot might need repairing at the same time, even if the wear and tear is not so obvious.

Close-up of hiking boots

Take this opportunity to remove and check your laces for wear and tear. Replace them if there is any sign of damage as you don’t want to be caught out in the back country in miserable weather having to search your pack for spare laces. (Note to self – always pack spare laces)

Most common needed repairs:

  • Sole repair
  • Sole replacement
  • Leather upper across the toe
  • Stitching is broken
  • Inner lining at the heel

Why Leather is a Special Material

Leather is a very special material that usually comes as a by-product of the meat industry. Leather usually used for hiking boots comes from specially chosen bovine hides from specific parts of the animal. It has many qualities that have not been duplicated, although scientists making synthetics are constantly trying.

The best boots uppers are made from a single cut piece of leather that is shaped and blocked in such a way that the only seam required is down the back of your leg. The fact there is only one line of stitching means that there is only line of tiny holes that water can easily penetrate. Any line of stitching is a weak point that might allow water in.

Chippewa Apache “GQ” boots

But as yet nothing beats leather for durability, flexibility, comfort and good looks in many situations for hiking. Synthetic boots may breathe better and be cooler in hot temperatures, but I know of none that will outlast a good pair of leather boots. Which makes caring for and repairing a good pair of comfortable leather boots, even more worthwhile.

They are also relatively waterproof and keeping up maintenance with good quality creams and oils keeps them that way. One downside though if they do get a good soaking like crossing a river they are heavy weight until they dry out.

Loving Your Boots

Sometimes the leather of the boot is fine it just needs a little tender loving care (TLC).

Cleaning leather boots

Because leather is actually in many ways still a living product it needs to be cleaned regularly and conditioned with oils and waxes to keep it supple and waterproofed.

The outline for leather care is clean, dry, then condition – rather like we should look after our own skin. You will need:

  • A leather cleaner like saddle soap or glycerin soap
  • A sponge or toweling cloth
  • A leather conditioner – oil, cream or lotion. I have included instructions if you would like to make your own

The process is simple and you should do this regularly:

  1. Clean your boots thoroughly to remove old dirt and grime. Follow the instructions given, but a general rule to use water sparingly so wring out your cloth before lathering the soap, clean the leather in a circular motion then wipe it off.
  2. Allow the boots to dry completely in a warm shaded area, not direct sunshine or close to a heater as this can crack the leather. I also like to pack old newspaper to help keep the boot shape and aid drying.
  3. When all is thoroughly dry, condition the leather with a product you prefer or make your own
  4. Replace the laces and store in a dry place.

Make your own Leather Care Beeswax Lotion

This lotion is very simple to make and will care for your leather hiking boot and other suitable leather products very well. The ingredients are simple – natural beeswax and a good oil of your choice. Many oils are suitable.

Homemade Beeswax Lotion

I’ve used vegetable oils like olive and linseed, mineral oils and neatsfoot, which is animal based. If you use vegetable based oils you could use it to polish wood and even help your own hands from chapping in the cold outdoors.

Gather together:

  • Beeswax
  • Oil of choice
  • A clean, empty jar or container with a lid

Method:

  1. Take about an ounce of beeswax and cut into small pieces and place in the jar
  2. Add about ½ cup of oil
  3. Warm gently in a microwave or a double boiler over a low heat. Stir to melt the wax
  4. Never let the oil boil or it will damage properties of the oil and wax
  5. (If it was for furniture you could also add a few drops of essential oil like lavender or lemon for a fresh fragrance)
  6. The actual amounts required may vary according the oil. Once it has cooled down, if you find it too liquid add more beeswax. If it is too solid, add more oil and record the quantities for the next time you make it

Running Repairs on a Hike

A broken boot in the middle of nowhere can lead to disaster, so always carry an emergency kit that will at least help you hold the boot together until you get to safety. I think it wise to always carry a strong duct tape for many different uses while hiking and you can use it to make emergency repairs to your boots.

damaged-hiking-boots

It will even wrap all around your boot if the sole starts to come off at the toe.

Repairing a Leather Hiking Boot Sole

Where the molded sole attaches to the leather. After a rough season hiking you may find the upper molding of the sole where it should be bonded to the leather has broken away slightly.

man repairing a boot sole

This has allowed dirt and grit and other debris to lodge between the sole and the leather.

You will need:

  • Leather cleaner, saddle soap
  • Urethane sealer
  • Sharp knife or object to remove debris
  • Skewer or strong toothpick to replace the glue in the opening
  • Leather conditioner

Carrying out the sole repair:

  1. To begin the repair first give your boots a good clean with a saddle soap or leather cleaner to remove all the dust, grime and dirt from the boots in general.
  2. With a pointed knife or some sharp object carefully dig out all the debris in the narrow gap
  3. Allow the boot to dry completely
  4. Fill the space around the molded sole with urethane filler
  5. Paint the urethane over both sole and leather about ½ “ covering the leather
  6. Leave to dry completely
  7. Restore with leather wax and waterproof treatment

The sole itself is damaged. If the sole has had a rough season, but still has plenty of grip you might just repair a few nicks and cuts with some urethane.

Replacing a Whole Sole of a Leather Hiking Boot

If you have looked after the leather upper of your hiking boots so well you may find that the sole of the boots is wearing down and not providing enough grip while you are walking, especially over rocks and slippery surfaces. You may want to replace the entire sole.

Salomon 4D II GTX Hiking Boots sole

To do this properly, you may need access to electric sanders and other equipment which may only a professional cobbler may have but I will explain the process anyway.

To repair a flat soled boot you will need:

  • A sharp Stanley knife/cutter
  • Replacement soles for the size of your boot
  • Adhesive glue that is strong and flexible
  • Hammer
  • Place to secure the boot while working on it
  • A fixed electric sander

How to do it:

  1. First, carefully cut away the entire old sole from each boot. Take care not to damage the upper but it won’t matter if some old sole remains of the boot.
  2. Grind away what is left of the old sole of the boot, to make the surface flat and ready for the new sole
  3. Rough up the new sole with sand paper to give the adhesive better chance of gripping
  4. Prepare the new sole with adhesive and the boot upper. Make sure the whole surface of both is covered in a thin even layer
  5. Wait until the adhesive is ready – usually when non tacky to touch
  6. Hold the boot upper firmly and place the new sole in place. Line everything up before touching as it cannot be moved once there is contact
  7. Hammer the sole completely to make sure there is firm contact all over
  8. Wait some hours for the adhesive to consolidate
  9. Grind the edge of the new sole to fit the edge of the upper. A grinder makes a much neater job than a knife, but if a knife is all you have you can use it.

You can follow a similar process with a separate sole and heel replacement. Remember, if you are adding height to the sole you also have to add some height to the heel. Just make sure you mark the sole first where and how it should line up to fit the arch and toe area.

Close-up photo of a hiking botts

When it comes to repairing a molded sole, the process is more difficult because of the way the molded sides adhere to the boot. There are specialized repair companies that can do this and I would recommend you search for one in your area. However, if you really do want to try yourself you will need to order the exact size and style for your boot. The process will be similar to above, but more complicated to remove the side molding and prepare the boot to attach the new sole.

Repairing a Leather Hiking Boot Upper

Because the boot is constantly flexing and extending as you walk, one area that may need replacing is the area just below the lacing where the base of your toes bends.

Damaged hiking boot

The constant wrinkling can break through the leather.

You will need:

  • Supple leather of the same color as your boot – or maybe not if you want to make a statement
  • Fine grade sand paper
  • A good leather glue
  • Leather cleaner that will clean and remove oils
  • Leather nourisher for after the repair

Carrying out the Upper Repair:

  1. Remove the laces from your boot
  2. Clean the boots all over taking extra care around the area where the repair needs to be made
  3. Dry the boots thoroughly
  4. Optional, but I would pack the boots with old newspaper to force the surface wrinkles to be as flat as possible so the adhesive has a better chance of bonding.
  5. Cut a wide strip of leather that will go from one side across the top to the other and shape to fit the edges exactly
  6. Sand over the area on the boot where the repair has to stick
  7. Apply the adhesive to both the boot and the repair leather making sure all the surface is covered with an even thin layer
  8. When both are non tacky to touch place the repair over the boot and press firmly all over. Do this for some minutes to ensure the bond is close
  9. Wait some hours to ensure a good bond has formed
  10. Cover the whole boot with some form of nourishing substance. You can buy a product or make your own
  11. Replace the laces and wear as new!

Stitching Repairs

When it comes to stitching repairs this might take more professional help depending on where the breaks are. If you decide to repair the boots yourself you will need some sort of needles made specifically for piercing leather. Where possible use the holes that have already been made for the damaged thread. Remember holes are where water can penetrate.

A Speedy Stitcher sewing awl is a handy tool to have when you have to repair any leather or canvas. The shape of the awl helps you push the needle through and you can thread the lower thread easily through. There are instructions with the awl rather me trying to explain exactly how to use it here.

Brian stitching in a zip in a boot

Always use a quality waxed thread. Waxed thread runs through the leather easier and it will also be waterproof and preserved against deterioration. If you have just taken hours to repair your boots you don’t want to have to repeat the process again because of inferior quality thread.

If the broken stitching is on an outside of the boot, it may just be better to use a good adhesive to stick the loose leather down. If you try to sew through the boot you will be exposing the inner layers to the possibility of getting wet.

Inner Lining Heel Repair

This repair requires some sewing skills and may not be super successful, but is worth a try to keep your favorite boots going for longer.

A person repairing the Inner Liner of a shoe

You will need:

  • A suitable tough, but comfortable fabric
  • Flexible material adhesive
  • Sharp scissors
  • Sewing machine with overlock or zigzag stitch

How to do it:

  1. If the foam packing has gone you might b able to replace some and glue it in place. Feet are sensitive, so it has to feel smooth and not thick in the heel area or you will just get blisters where you didn’t get blisters before.
  2. When it comes to the fabric choose something with a relatively smooth surface and that is tough enough to stand constant abrasion from your heel as you walk. A drill like denim might work or a similar synthetic mix.
  3. Cut a rectangle of fabric that will extend around the sides to about your ankle – no further or the extra layer may give you blisters on your ankle, and will go from the sole to the top of your boot inner.
  4. Overlock or zigzag the edge and top of the fabric. Do not fold this edge as again any extra layer will likely cause blisters.
  5. Remove the sole from the boot, if you haven’t already
  6. Fit the extra lining in and estimate how much of the fabric has to turn around the heel at the bottom if when the lining is fitted about ½” to the sole. You want to remove any bunching or wrinkles so you need to “V” shaped nicks about ½” into the lower edge fabric all the away around the heel area. This allows the fabric to fit with doubling up.
  7. Glue the fabric lining in place. Stitch around the top if you can, otherwise it will most likely pull off over time as you push your foot in.
  8. Replace the sole.

Enjoy your Hiking in Confidence

So there you have a few ideas for repairing your leather hiking boots. The best advice I can give is keep on top maintenance and care for your boots from day one. Leather really is worth looking after and should last as long as your whole life. It is usually the other materials that wear out first, the soles, the stitching, and the lining.

A pair of dirty hiking boots

How to Scare a Bear: Can it Actually Be Scared?

0

Do you know how to scare a bear? Majority of bear technicians have been trying out various strategies on how to keep nuisance bears from assaulting campgrounds and picnic areas. Bears are among the nature’s most gallant animals, and seeing one of them in the wild would definitely be an extraordinary ordeal.

Get excessively close, however, and your experience with a bear can be much more alarming than amazing. Luckily, in spite of people’s continued infringement into bear nations, attacks of bears on people are uncommon, and fatalities are even less common.

Brown Grizzly Bear on Black Metal Fence

However, bears are huge, powerful creatures, and any kind of meeting between humans and bears can most likely turn deadly in case you’re ill-equipped. But in this article, we have prepared some vital tips to help you scare off bears anytime you come in contact with one.

Terrible Cases for Bear Encounters

The following rundown includes the most pessimistic scenario situations for bear experiences.

Bear preparing to attack

These are situations that majority of mountain bikers and hikers might want to avoid:

  1. Bears that have turned out to be addicted to human food and garbage: When bears get to be distinctly accustomed to garbage and human food, they get to be attracted to regions of human occupation. This may incorporate backwoods campgrounds a long way from urban areas. An account of poor backwoods garbage administration by backpackers can include boondocks campgrounds to regular raids of bears.
  2. Bears with first year’s offspring which go up a tree: When it comes to this circumstance, the female bear may not leave the region, yet rather will guard the offspring. The bear may attack faster in the event that you are around its comfort region. Be prepared with your shower, and be ready to climb a tree if needs be.
  3. Bears that have second year’s offspring that may venture in a bluff charge: Once more, this can be an extremely unsafe circumstance as you are currently dealing with more than one bear. While this is extremely uncommon, it would definitely enable the family to secure a kill site more viably.
  4. Bears safeguarding a kill site: Bears are quite aggressive while securing a kill site. Figure out how to look for indications of kill sites, for example, vast aggregations of ravens and other birds or creatures.
  5. Predatory Encounters: While this situation is an uncommon one and generally alludes to savage attacks by wild bears, this can be a very serious experience. Since you are being hunted as prey by the bear, you should be ready for a fast approaching attack. The bear may likely circle you, gradually moving in closer and nearer until it chooses whether to attack you or not.

Reason Why Bears Lose Their Fear of People

Bears have acute hearing and eyesight. Their smelling senses are seven times far greater than that of a bloodhound. They have a sharp ability to notice pet food, refuse, grill flame broils and feathered creature feeders. And once they find a source of food, they always keep the location in mind.

Bears are usually careful when it comes to people, however, if a bear detects food without escaping, he may definitely return for more. Every time this situation occurs, he can turn out to be less frightful and this addiction can prompt to issues. Clashes can uplift during hyperphagia, a sustaining frenzy during late fall and summer in which bears beef up for hibernation and gaining up to 3-4 pounds and devouring 20,000 calories each day.

A man photographing a brown bear, Ursus arctos.

Bears, who don’t have the fear of human are usually referred to as “nuisance bears.” These are usually subadult males, i.e. young bears who have recently separated themselves from their moms are still figuring out how to get foods—and also moms with offspring. In many states, the nuisance bears are usually slaughtered or caught and moved to a far distance with the expectation that they won’t return. Yet, more often than not, this result wouldn’t have been important if people had not made food quite easy to discover in the yard or junk dumpster.

Types of Bears

Here are the major types of bears you should know before going outdoors in an area occupied by bears:

Black Bear

There is about 900,000 of these ones in North America and grownups run in size from about 100lbs sows to huge 500lbs hogs. The name “black bear” is really somewhat misleading; they can possibly be anything from brown to black to white and even a rosy cinnamon.

A black bear pulls a fish from a stream.

The ideal way to disclose to them aside from the greatly perilous brown bear kind is in their build and size. A black bear kind is not only smaller but rather slighter and has a slimmer build and longer ears. You can viably scare off most black bear kinds

Brown Bear

This kind of bear is also called Grizzly or Kodiak bears depending exclusively on geology, brown bears mostly do have a tendency to be brown in nature, however that fur can seem blonde as well. While black bear kinds exist crosswise over the vast majority of the Canada and US, just 200,000 brown bears meander through Wyoming, Idaho, Alaska, Montana, Western Canada and Washington.

Kamchatka brown bear

You will know it is a black bear since it will be colossal and recognized by a conspicuous mound on its back, and the way that it will be absolutely unafraid of you. In the event that you notice the presence of a brown bear, the ideal step to take is to run away from it.

Polar Bear

You should know how this bear specie looks like. In case you are doing lot of outdoor activities in the area where they abide, then you are most likely effectively mindful of their conduct and precautionary measures you should take.

Polar-bear-standing-on-shore-ice

You shouldn’t roam a polar bear domain without a firearm.

Scaring a Bear Away

Do you recall the first occasion when you ever come in contact with a bear in the wood? Were you terrified? And if you have never come in contact with one before, would you be frightened if you did? Bears are a similar way. They are born having the fear of people in their nature. Almost every one of them appear to stay haunting anxious of human, notwithstanding when they are enormous, predominant males.

However, in the event that they routinely spend time around humans, they gradually get more well-situated to humans. However, this is how most bears get themselves into issues. Once they are pretty much comfortable around people, they get more attracted and enticing to people’s abundant and high-calorie food.

Also, this is the reason why It is quite essential to scare off bears when they approach humans or are in developed regions. Bears learn faster when people fear them, and much faster when they get access to food out of the experience. Therefore, how would you scare off bear? Yell as noisily as conceivable at it (people do say “get away bear!” or “leave bear!”). Of course, it doesn’t actually make a difference with regards to what you say, yet in the event that you’re shouting something to that effect at a bear, you probably would not joke about this.

Alaska brown bear

And this is the main thing. You don’t have to joke about it! You could yell as much as you like, however, if the bear that you are yelling to doesn’t think you are really serious about it, it will likely overlook you.

Bears are really good at reading the body language of the human. Bold people shouting at a bear, usually brings about the bear leaving faster than when fearful people are shouting. So, to scare off a bear, you need to shout, in your loudest conceivable voice, “Leave BEAR!” and continue repeating it till it eventually takes off. Utilize your voice forcefully and be frantic at the bear, and would not joke about this. Disregard the car alerts, pots, and skillet, applauding, shrieks, or any other things. These don’t work effectively. You need to shout at the bear as if you are the boss and you want it to leave that area, and it surely will.

Brown Bear Sitting on the Ground

It is highly advised that people should not chase off bears without proper training because attempting such can be severely dangerous. However, running only a couple steps or walking toward a bear while you are already shouting at it, can be very helpful in case you are watchful and are certain that the bear has a route to escape.

Prevention of Bear Problems

Like life matters, the ideal approach to manage a bear issue is to prevent a bear issue. It’s important to know that bears are not only in need of your food basket, they are pulled into stuff like antiperspirant, grimy dishes or even enclosed energy bars as well.

Polar Bear in Body of Water

Put totally anything that have a nice smell in a bear canister or bag and place that no less than 100 feet outside the camp. Do not clean fish or make other convincing scents close where you are planning on resting. Listed below are the things you can use to prevent the problems of bears.

  1. Bear Canisters: These arrive in an assortment of sizes, shapes, and purposes. You will discover “bear lockers” in sorted out campgrounds that have a tendency of having problem bears and progressively, their littler, more convenient cousins are needed for people hiking through bear nation. Basically an extensive, exceptionally intense, plastic food compartment, bear canisters came to fruition due to people’s inability to properly hand bear bags, so now, there is the chance to drag these things about. The main idea about bear canister is to put your food stuffs in it during the evening, then place it 100 feet and above outside of the campsite. That, therefore, provides the bears with something to handle throughout the night. Extra points for still setting or hanging one where a bear cannot have access to, but do not put it someplace that it will be knocked off a bluff or into streaming water, where you will lose it. However, based on actual fact, there are some bears in some mountainous areas that have successfully gotten how to open the bear canister.
  2. Bear Bags: The main idea is to balance two bags loaded with your delicious food from a narrow tree branch both excessively tall for a bear, making it impossible to reach and excessively thin for a bear, making it impossible to move on out. You can get the food by pushing one sack up with a long stick until the entire thing falls into your hands. The trouble is, people are not smart enough and bears are too smart. The bears have figured out how to climb trees, then drop onto bear sacks from above or to discover and cut bolster ropes. More often than not, the majority of campers, hang bear packs too low and too near a pleasant, climbable tree branch or in a generally defenseless position.
  3. Bear Bells: You can likewise experience bears while you are just climbing along, tending to your very own concerns. That is just in case you are in effect calm, though. Joining bags to your bear bags (the jingle chimes pulled off from a Christmas tree work fine and dandy) or talking among a gathering of campers will caution bears of your arrival and definitely scare them off from your area.
  4. Bear Dogs: The aroma and sound of a dog or many dogs is as viable a bear hindrance as any that can ever exist. Always keep your dog on-chain while climbing in bear nation and tie it up around evening time, however never abandon a tied-up dog.
  5. Fire: An open air fire, keeps most creatures away, however, tending it throughout the night can keep you from resting and in ranges where there is a huge amount of bear/camper interaction, the bears may never again be afraid of fire.
  6. Fleeing: This is the greatest win to come out victorious in any battle works similarly well in this one. In any case, instead of running, just walk like you would not joke about this. Fleeing from wild animals can trigger them to hunt down prey. No dinner or fish or any measure of ego merits getting devoured over.
  7. An Anti-Bear Armory: Indeed, even the most mindful of campers will usually get themselves up close with a ravenous or inquisitive bear, especially in ranges where they habitually collaborate with people and think of us as a source of food subsequently. In the event that that happens, you will need to scare off the bear.
  8. Propaganda: Most animals are instinctively afraid of humans, as they should be. You should be that reason. Confront your full tallness, open your jacket or coat so you seem bigger, move in a deliberate, considered way, and lift up your hands noticeable all around while yelling menacingly.
  9. Flare Pistol: If you have a bear issue, it is good to maintain a strategic distance from that bear issue. A flare gun can be aimed roughly and can travel close to hundred yards, empowering you to frighten away a bear at a range with a noisy blast and bright blaze, yet most likely won’t harm the bear. Simply be careful terminating ignitable rounds into the forested areas if there is a high danger of fire outbreak. This is likely illicit practically anyplace, take note of that.
  10. Bear Mace: Here is a thing about bear mace. It only has an effective scope of 15 feet or somewhere in the vicinity and has been well-known to scare off bear.
  11. A Big Stick: Bashing a bear at its head with a huge stick is a very powerful deterrent. There is something in a huge stick comprehended by creatures on a primal stance, a great deal more so than with an amusing bit of orange plastic or a senseless human hopping all over and yelling.

WRAPPING IT UP

Being attacked by a bear whether brown, black or whatever, would go pretty gravely for you. But, that is a greatly impossible event. Be mindful, keep them from getting access to your food stuffs, make some sound as you walk through their domain, take your dog alongside and you won’t have any issues. In the event that you come in contact with a bear, watch it from a range and, in the event that it moves near you or your campground, you’ll likely have the capacity to scare it off.

They are also part of nature, don’t bother or mischief them and you will be able to continue laying alert in your tents throughout the night, thinking every small sound you hear is a bear moving toward your tent, for quite a while to come. If you can’t frighten the bear off, and the bear gets to be distinctly aggressive, you should battle back.

Two european-brown-bears playing

Don’t attempt to run, as bears are considerably speedier than people and it might inspire a savage reaction from the bear. Utilize any things accessible, for example, sticks or rocks, to strike of scare off the bear in order to mount the best defense.