Home Blog Page 34

How to Wash Down Sleeping Bag: Useful Cleaning Tips and Methods

0
Black and white washing machines

Everyone wants their sleeping bags to last for many years to come. But, if you don’t know how to care for and clean your bag properly, then it can be a bit of an issue. To take care of your bag you need to keep it clean and follow some few easy steps.

It is important to know how to wash down sleeping bag using different methods and tools. Using these, easy cleaning tips, you can take care of your bag and make sure that it stays with you for a long time.

How to Wash Down Sleeping Bag

A Few Important Tips Before Washing Your Bag

No matter what type your bag is, keeping it dry and clean during camping, will keep it in good condition.

A man drying his sleeping bag on a tent

It will insulate more efficiently and remain durable. For synthetic bags, you can follow a few more other tips. For example:

  1. Clean clothes: Wearing clean clothes when you are going to sleep, is recommended to keep your sleeping bag clean. We know that after a day of hiking you are exhausted and changing clothes isn’t what you really want to do. But, you can try to wear clean socks and underwear, and clean your face and keep the dirt off by using a sunscreen that you will wash off before sleep. If the weather is warm, then you can change into a clean shirt and underwear. If you get into the sleeping bag with all the dirt on you, it will affect the insulation of your sleeping bag.
  2. Sleeping bag liner: Another good option to keep your bag clean is to use a liner. They are made of cotton, polyester, silk or wool, and are light in weight. They act as a separating screen between your skin and the sleeping bag, and keep the dirt off of your bag. Additionally, they add 5 to 10 degrees Fahrenheit to the bags temperature rating. You can wash the liner at the end of your trip and you can take it to another trip.
  3. Ground protection: In case that you have to sleep on the ground, you need to put a pad under your sleeping bag to protect it from the ground. Even if the bag is waterproof it will need protection against sharp sticks and conifer terrains.
  4. Treat it with care: Treat your bag gently and don’t jump around while you are in it. If you want to wrap around the bag while sitting near the fire, you should bring an older synthetic bag. Nobody wants to see holes due to sparks, on their brand new bag.
  5. Use zippers gently: Zippers can be a bit tricky sometimes, so, if you want to zip up your bag easily, practice it at home. Use the zipper gently so that you don’t yank it or snag it. If the zipper is two ways, then it may be frustrating for you, be patient so that you don’t cause a fabric tear.
  6. Airing out the bag: Never leave your bag in the sunlight for very long because the UV rays can be harmful to the fabric. If the bag is wet, then wait for the moisture to air out. When you get home from a camping trip, airing out the bag is recommended. And, if someone wants to borrow your sleeping bag, then make sure that they understand how its zippers work and ask them to use it with care.

Things you also need to know

Before we explain how to wash your sleeping bag, you need to know things that you should not do:

  • Don’t use fabric softener any kind of bleach or its alternative products on your sleeping bag
  • Don’t dry clean your sleeping bag. Dry cleaning solvents are used that can remove the natural oils that are necessary for down bags to retain its loft.
  • Don’t wash your sleeping bag in the machine with an agitator as it can damage the seam

Taking care of your sleeping bag

In order to keep your bag in shape you need to check it once in a while to make sure that seams, zippers and cords are working.

Familly Summer Camping Trip

Check the insulation to see if it’s equally spread. Washing and drying can alleviate it sometimes.

DWR Restoration

As the bag gets older its original DWR (durable water repellent) finish wears off. There are a lot of products available that can help you with the restoring of DWR.

DWR Restoration Products

This restoration of water repellent finish will also help to keep the bag cleaner.

Broken zippers and tears

In case that there is a small hole or a fabric tear on your sleeping bag when you’re out camping, here are a few options for you to deal with it:

  • Use the needle and thread in your repair kit and sew the hole with your hands. After you get home, you can unstitch it and get it done with a sewing machine properly.
  • The other option is to cut a patch from your gear repair kit and put it over the hole using a glue. The downside of this is that if you try to peel it off later it can tear the fabric because of the stickiness.
  • A bandage can also be used to cover the hole from the first aid kit.

Close-up picture of a sleeping bag zipper's

If the hole or the tear is bigger, you might consider getting it repaired by a professional.

Types of insulation

The washing of a sleeping bag depends a lot on either its synthetic or down so you need to know about the types.

Synthetic Insulation

Synthetic dozing sacks are far warmer than down synthetic packs when wet in view of the synthetic bag’s capacity to maintain the loft.

They dry rather rapidly as well, that is the reason a great many people incline toward them regardless of the possibility that they cost somewhat more. Synthetic materials will keep you warm, notwithstanding, when wet, so on the off chance that you are heading off to a timberland or a stormy place, then synthetic bag may be a superior choice for you.

A man in the North Face HyperCat 20, which is crafted with a durable and lightweight synthetic insulation

Despite the fact that the odds of your sleeping pack getting wet are low on the grounds that on the off chance that you are conveying a waterproof rucksack then it unravels your issue. It’s actually that synthetic sacks perform well when they are wet, however, no wet pack can be agreeable to rest in. In the event that you rest in a wet pack you are most likely not going to get a decent night’s rest comfortable.

Down insulation

Down sleeping bags are light weight and give more warmth, they are more compressed and keeps going just about 2-4 times longer than synthetic sleeping packs. The drawback of down protected packs is that they cost progressively and when wet, they lose hang, which implies that if the resting sack is wet then it won’t keep you warm. Additionally down sleeping packs will set aside a more drawn out opportunity to dry.

Group of people in sleeping bags taking a picture

There are top notch packs accessible that offer more protection for certain weight that implies, if the weight is short of what it can give better warmth and accomplish a similar space. Something else that you have to consider is that on the off chance that you need to take a warm resting sack with you then it will likewise add weight to your backpack. The warmer sleeping bag implies that you’ll be conveying the additional weight and likely be excessively hot in the evenings as well.

Storing and stuffing of the sleeping bag

When you are on the move you carry your sleeping bag in your bag pack in a storage pack. If you keep it compactly in the storage pack and try to follow some simple tips it will help with keeping it clean. Here are some tips on using the storage bag:

When you put the sleeping bag in the storage pack start inserting the foot first with the zipper partially closed and then firmly do the rest of it, this will discharge the air from the top of bag and that will in turn put even pressure on the stitching.

In case your sleeping bag has a waterproof shell you should turn the bag inside out before putting it in the storage pack. This is recommended because the outer shell can trap the air by acting as a balloon and that can be a frustrating experience for you.

sleeping bags stuffed in sacks

Your storage bag should be larger so that you can easily put your sleeping bag in it and it can be compressed more in your backpack to save space. Compression storage bags help to save the space in the backpack. Built in straps are also used to compress it more. But you need to be careful because keeping the bag compressed for longer duration can damage the loft. Waterproof storage bags are a great option in case there are chances of rain. It will protect the bag if you are not carrying it in your backpack.

Another option is to wrap your backpack with a plastic sheet so that it remains dry because wet down bag doesn’t work efficiently and won’t keep you warm. Although synthetic bag works fine even when wet. If you want your bag to have a longer life span, then you need to store it with proper care. After a trip you should get you sleeping out and let it air out and ensure that it’s completely dry.

Cleaning a sleeping bag

Your cleaning of the sleeping bag will depend on whether it’s synthetic or down. Down bags usually are more difficult to clean because they demand more attention and time. Therefore, most of the campers take it to the professionals for the cleaning, but using these tips you can do it yourself.

Spot Cleaning

Spot cleaning is your first option of cleaning your bag without causing any damage. If your bag is not very old then in most cases it just needs spot cleaning, not a full cleaning.

Cleaning sleeping bag with a toothbrush

For spot cleaning, you need to make a paste of non-detergent soap and water and with the help of a toothbrush, you can carefully clean the shell. Pay more attention to the hood and collar of the sleeping bag where skin and hair oils get stuck often. To wash the bag without getting inside wet you can hold the shell or liner away from the insulation. Avoid the full cleaning as long as you can because it can be the cause of wear and tear.

Washing the sleeping bag

In case that your sleeping bag is darkened with dirt and losing loft then you have to give it a full cleaning. The first thing you need to do is to read the manufacturer’s instructions and the precautions. They are usually written on a tag that is attached to the bag somewhere. You must follow those instructions.

A sleeping bag in a washing machine

A lot of people choose to get their bag laundered by a professional. But if you want to clean it yourself, then you should know that the drying alone will take hours. Also, you need to make sure that the soap you are using is a non-detergent and is made to wash synthetic or down filled things.

How to wash a sleeping bag by using hands

To wash down a sleeping bag with hands can be a little tiring but if you do it right then it lessens the chances of wear and tear.

wash-down-a-sleeping-bag-with-hands

Here is what you need to do to wash the bag using hands:

  • Step 1: First, add the appropriate soap for a synthetic or down bag in a tub filled with warm or cold water. And try not to put too much soap in the tub because it will make it harder to rinse it out later.
  • Step 2: Now put the bag in the tub and gently rub the soap throughout the bag. Work a little more on the areas that are heavily soiled. Let the bag soak in the water for 1 or 2 hours.
  • Step 3: Let the water drain and press out all the remaining water from the sleeping bag.
  • Step 4: To rinse the sleeping bag you need to fill the tub again with warm or cold water and then try to get out as much soap as you can from the bag. Allow the bag to soak for 15 minutes and then drain the water. Rinse it until you get all the soap out of it.
  • Step 5: Get as much water out as you can and then with the help of your hands gather it in your arms and carry it in the dryer for drying. This will help you prevent any ripping and straining the seams.
  • Step 6: If you have a big enough dryer that can fit a sleeping bag then use it. Otherwise, you have to take it to a Laundromat.
  • Step 7: In case that you don’t want to carry the wet bag to a Laundromat the, you can lay the bag on a clean surface in sunlight to let it dry. In this scenario, you will need to break down clumps of insulation by yourself.

How to wash down a sleeping bag with a washing machine

Almost all the sleeping bags can be machine washed. They are usually cleaned up in front loader of the washing machine.

Sleeping bag in washing machine

In some cases, the front loader of the machine isn’t big enough to clean and tumble your sleeping bag thoroughly so keep that in mind.

  • Step 1: In this case, put warm or cold water in the machine and add the soap.
  • Step 2: Try not to add too much soap to avoid over-sudsing.
  • Step 3: To keep the balance of the spin of the machine you can try adding other damp articles such as T-shirts and towels.
  • Step 4: After its cleaned make sure you get all the soap out.
  • Step 5: Rinse it twice with clean water and run it through a soap free wash and rinse process.

Drying the bag

Put the dryer setting on low heat and keep checking it time to time because if it’s too hot it can damage the fabric and its synthetic fill so you need to be careful.

In the case of a down bag when it is almost dry, try adding two or more tennis balls in the dryer or a pair of sneakers. This will help with the restoration of the loft by breaking any clumps of down while it spins.

Sleeping bag drying on the clothesline

And in the end, make sure it’s completely dry before you put it in the storage bag. To be sure you can leave it out for a night or try hanging it up by toe loops.

What Have We Learned?

You should now be able to wash down your bag without any problems. You need to carefully read each and every piece of information mentioned in the article, the washing method depends on the type of your sleeping bag. Down filled sleeping bags are a bit difficult to wash down on your own, but it can be done without causing any damage if you do it right.

Girl in a sleeping bag

Hyvent vs Gore Tex: Which One is the Best Outdoor Fabric?

0
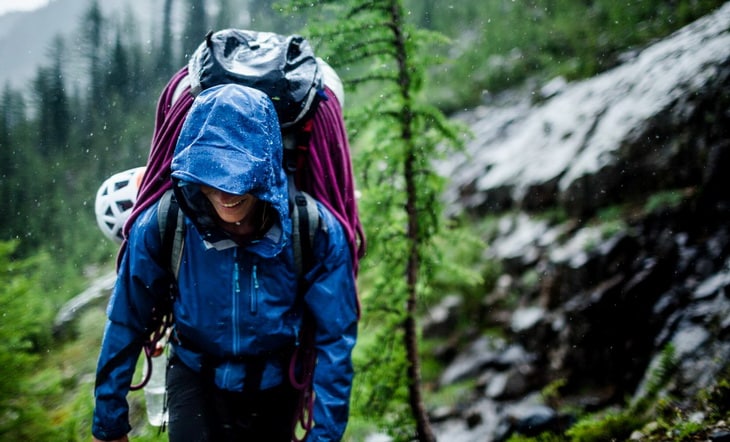
Woman hiking in the forest on a rainy day

To survive the extreme temperatures and conditions in the wilderness, you need a high-performing outdoor jacket or footwear that can protect you from rain, snow, humidity, and wind, among other elements. The garment should also be highly rated in providing the unmatched water repellent, comfort, durability, waterproofness, and breathability.

For many years from the 70s, we have known the Gore Tex fabrics as the most breathable and waterproof outdoor apparels before the market got saturated with similar products that basically mimicked the Gore Tex’s geometric structure. Hyvent from The North Face is one of the proprietary technologies that offer a tough competition to Gore Tex. To help you buy the best, we have compiled this award-worthy Hyvent vs Gore Tex review for you.

Given the dynamics of outdoor features as embedded in a plethora of jackets, footwear and gloves, it can be stressful to pick the best product on the market. When comparing the Hyvent and the Gore Tex, others may be lured by the affordable prices of the Hyvent waterproof-breathable materials over the expensive Gore Tex garments. Unfortunately, the price alone does not give a material evidence that a certain outdoor garment is the best. The features play a pivotal role in this regard.

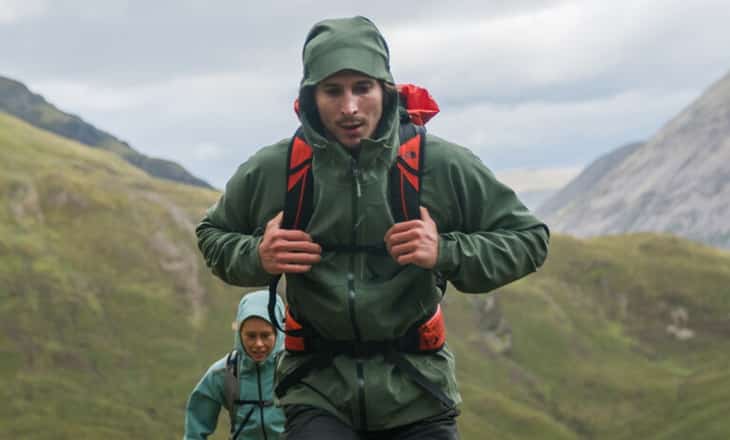
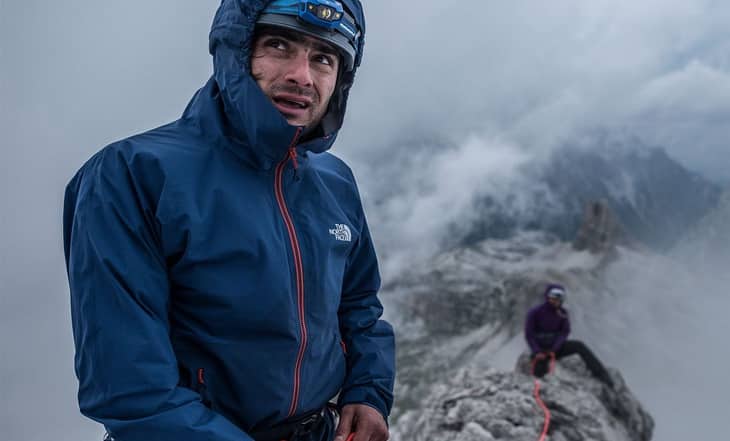
Hiker wearing The North Face jacket

The Gore Tex and the Hyvent have most of the properties common, although presented in varied ratings. Gore Tex has always been a pathfinder of breathable and waterproof outdoor garments, whereas the later proprietary technologies have traversed on its tracks. Hyvent is, however, a competitive outdoor fabric provided at a compromise of functionality for a fraction of the price. To be able to choose the best fabric, you have to be well rounded about the features that influence the performance of these fabrics. Some are unfolded below.

Features influencing the performance of Gore Tex and Hyvent fabrics

There could be numerous features in this regard. However, waterproof, breathability, comfort, and DWR (durable water repellent) take a center stage. We will discuss these features below:

Breathability

Breathability is one of the indispensable features, without which, our outdoor comfort may be miserable. As human beings, especially during our energy-demanding outdoor tasks, we tend to sweat. Without a breathable fabric, the sweat may be turned into a liquid that could wet our skins after hiking, climbing or backpacking. A breathable fabric will be able to let the sweat to escape through the tiny pores.

It was Gore Tex that was renowned for its unparalleled and great breathability features before Hyvent and other products came on-board. However, it had emerged that the more breathable, it had been, the more penetrating the water molecules were. It was later coated with polyurethane to repel more water while making the fabric more breathable.

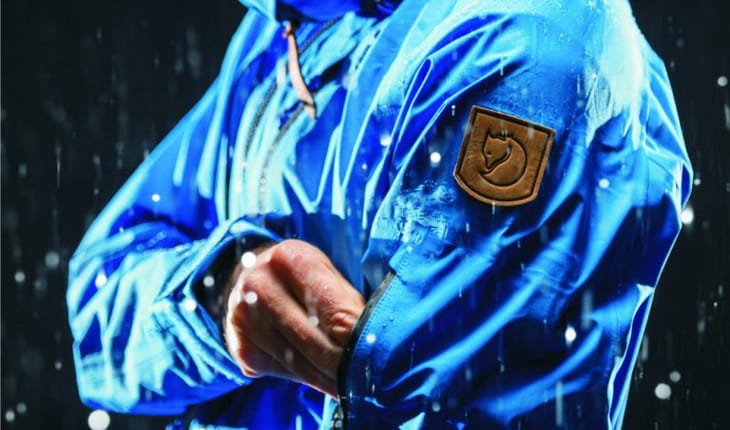
Close-up photo of a waterproof jacket

Hyvent is also known for its breathability and waterproof as it is coated with the polyurethane too. However, Gore Tex emerges as the winner with its advanced membrane in addition to the PU coating. Also keep in mind that the more you care for your jacket, the more breathable it becomes. Some contaminants such as stains and oils can hinder the pores’ ability to let moisture escape. Also remember that there’s no permanent coating; so an old coating may affect breathability and waterproof.

DWR (Durable Water Repellent)

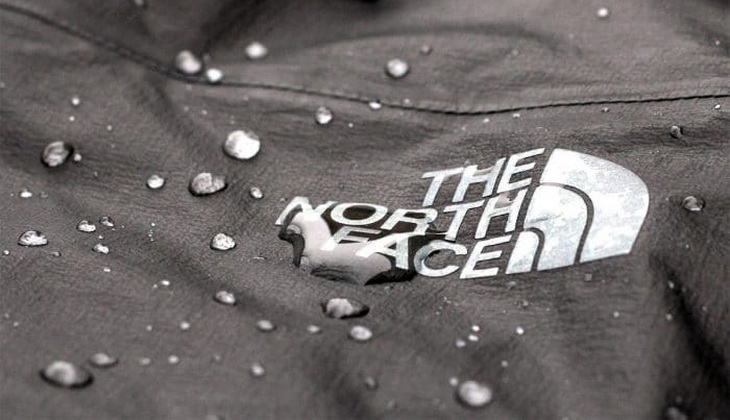
One of the reasons that you stay dry in the wilderness is the presence of the DWR on your jackets. This coating is basically applied on the outer surface of the fabrics to increase the surface tension so that more water molecules can be repelled. When it rains, water will just bead off and roll on the garment. Both the Gore Tex and the Hyvent feature this DWR coating.

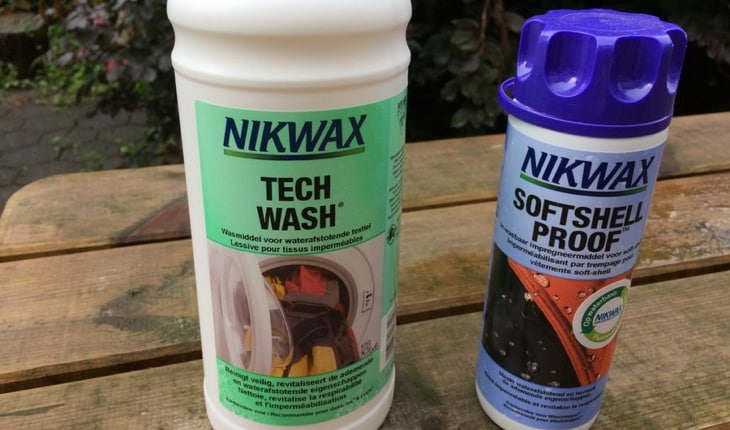
Nikwax TX Direct Products

But the DWR coating fades away after frequent uses or if the garments are not well cared for. The indication to that could be the appearance of the garment as if it is wet, or when it feels heavy due to the absorption of water. That will be a negative impact on the performance of your jacket. Fortunately, we have some products such as the Nikwax TX Direct and the McNett ReviveX that revive the water repellent coating. You have to clean the garment and then reapply the coating to boost its performance.

Waterproof

There is a distinction between the DWR and the waterproof feature. A garment may run out of the water repellent coating but still remain waterproof on its inner membrane. Gore Tex is highly waterproof than the Hyvent is. Remember that the North Face’s Hyvent mimics the features of the Gore Tex, and it is predominantly coated with the polyurethane as compared to the polytetraflouroethylene embedded in Gore Tex fabrics.

Close-up photo of GoreTex material

The outer coating of DWR may deteriorate in Gore Tex garment and still the jacket will remain waterproof. The jacket may absorb water, but your skin will be shielded against the penetration of water. With the garments that are predominantly PU coated, if it deteriorates, the garment may leak. But Hyvent technology has lately advanced whereby the fabrics are available in various flavors, some of which incorporate advanced waterproof properties. The Gore Tex is also available in many flavors.

Durability

Both fabrics, Hyvent and Gore Tex, are significantly durable. Because Gore Tex is available in many layers of fabrics, it is more durable than the Hyvent garments. But note that there are some influential factors attributable to the durability of the fabrics. If not cared for, either Gore Tex or the Hyvent may deteriorate prematurely. It is thus important that you care for your jackets.

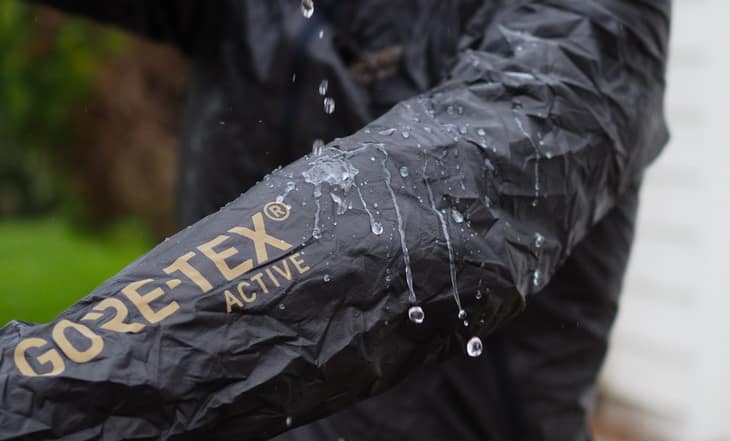
Gore Bike Wear ONE GORE-TEX Active Bike Jacket

With these features that influence the performance of these waterproof-breathable garments, you will be able to narrow down your search among other products. Remember: there is the eVent and the Pantagonia as some of the waterproof outdoor apparels. They have competitive features, some of which can outperform the Hyvent or the Gore Tex, although the Gore Tex remains the giant among all.

The Hyvent and the Gore Tex are further available in different flavors.

Man wearing the north face jacket on top of the mountains

Starting with the Hyvent, we’ve discussed the 3 models of the fabrics made of it:

3 Types of Hyvent fabrics

  • HyVent → repels water and protects the garment against the abrasion. It is the original proprietary technology that features a PU layer. The 2 and 3-layer jackets by The North Face have been made using this technology to make them water repellant. Also the mittens, footwear and the hand gloves incorporate this technology. In most cases, products made of original Hyvent technology are affordable.
  • HyVent Alpha → it is predominantly found in the Summit Series garment and make use of microporous and lamination technology. This technology can be equated to the performance of the Gore Tex membrane. It is actually a membrane not a coating that’s why it was incorporated into the Summit Series as the top of the range of the products of The North Face. The Summit Series is regarded as the advanced apparel of top notch quality among others to survive the extreme temperatures.
  • HyVent 2.5L → this is one of the durable layers of Hyvent, coated with polyurethane layer. It is interchangeably called the Hyvent DT (Dry Touch). The North Face Venture Jacket was the first apparel to showcase the performance of this technology. It comes with underarm vents for maximum ventilation to enhance breathability of the jacket.

The Gore Tex also a range of fabrics that differ with features.

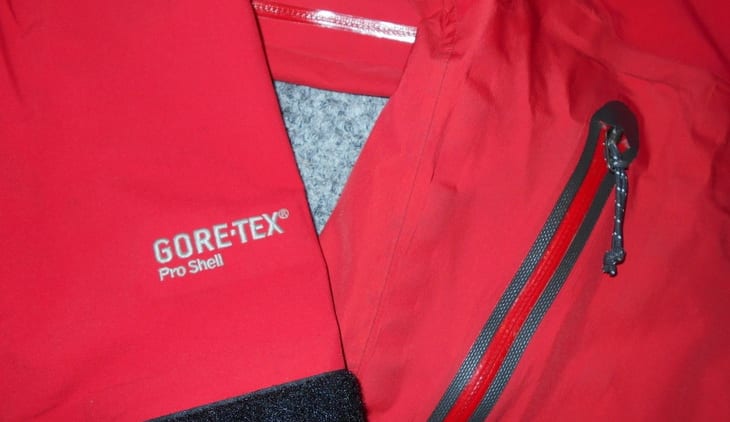
Mountain Hardwear Gore-Tex Pro Shell

Let’s unfold them below:

5 different types of Gore Tex fabrics

  • Performance shell → Performance shell is interchangeably called Gore Tex as it is the original version. It is the less expensive fabric found predominantly in the 2 layer construction and also in footwear. But it is not that breathable to a higher extent.
  • Proshell → This fabric is found in 3-layer constructions as a top notch laminate material for mountaineering and alpine climbing. It consists of more micro-pores per a centimeter, and, as thus, turns to be more breathable than the original Gore Tex. Proshell are also known as the XCR. In footwear, Proshell is solely as the XCR.
  • Paclite → Paclite is incorporated in 2.5-layer constructions. It is coated with polyurethane and turns out to be the lightest materials that also command a top notch waterproof quality. Its breathability is also up to standard.
  • Dryloft → dryloft is known for its higher breathability. It is a membrane not a coating. But its water resistance is not that on par more especially for Down-designed sleeping bags.
  • Softshell → the Gore Tex softshell is efficiently 100% than other hardshells. It also feels very soft and comfortable compared to hardshells.

It should be evident enough from the different types of fabrics given above for Hyvent and Gore Tex that Gore Tex takes the lead. It has more advanced features that will surely spice up your outdoor adventure. Keep in mind that it is basically an optimal membrane designed for breathability and waterproof. In actual sense, Gore Tex is a synthetic product that was primarily manufactured to mimic the geometric structure of the natural Down insulator. Now other synthetic insulators are manufactured to give it a tough competition.

The membrane of the Gore Tex garments is made from polytetraflouroethylene, which is the main ingredient found in Teflon. On its own, the membrane can be susceptible to the deterioration due to oils and other stains. It is undoubtedly breathable.

But, waterproof quality has been a disappointment until it was paired with the polyurethane coating to enhance the quality. The PU coating reduces the breathability of the fabric, but still remains competitive enough. One needs a garment that is both breathable and waterproof, and that’s what Gore Tex has achieved. Today’s outdoor apparels make use of a Gore Tex synthetic insulator, as the alternative to the Down.

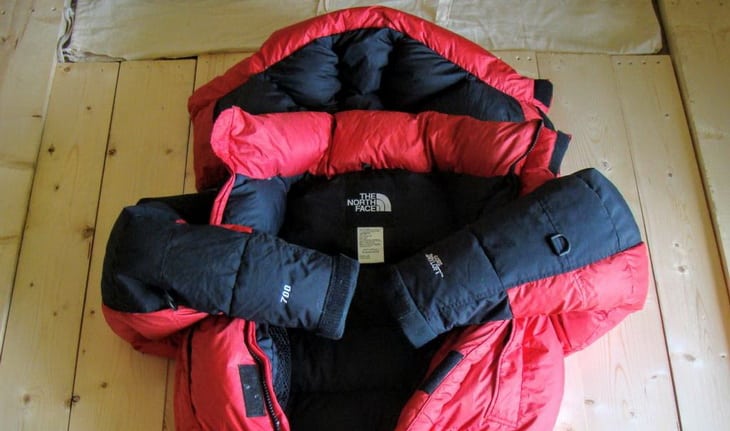
North Face Himalayan Suit

Hyvent, on the other hand, is basically a polyurethane coating laminated to a synthetic fabric to allow moisture to move from high concentration to low. The coating makes the Hyvent breathable and waterproof, but not as much as the Gore Tex membrane does to it. This makes it more affordable as compared to other products because of its compromise of functionality. Had it had a membrane as well, it would probably be costly as well, and that could be a hindrance to low-spenders.

The Hyvent DWR coating is not a problem until you leave it unattended. Because the quality of the coating might fade as time goes on, it is advisable that you continue restoring it using industry-specific products. But, if the jacket is leaking, restoring it will just be a waste of time. Instead, you will have to purchase a new jacket.

The Gore Tex and the Hyvent may differ with the complexity of their features. But, they were made based on the same principle. All have tiny pores on their surfaces to restrict the penetration of the water molecules, but allow the escape of sweat, thus enhancing breathability. They strive to make you dry and cool no matter how intensive the outdoor activity is. And, regardless of the identity of the waterproof fabric identity, washing and caring are paramount.

How to wash Hyvent and Gore Tex fabrics?

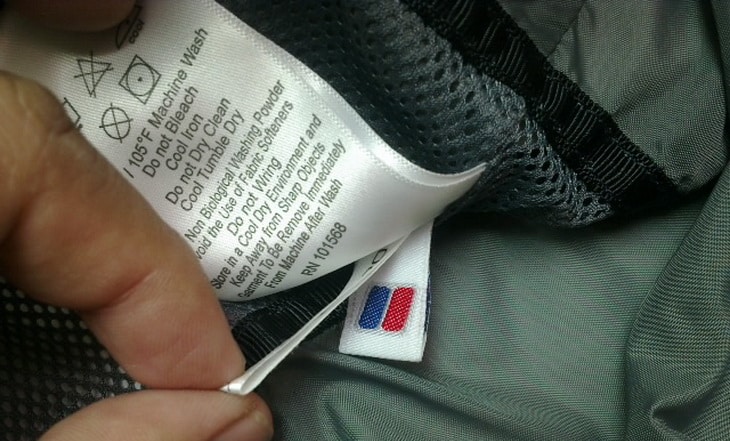
There isn’t much of a difference between washing the Hyvent and the Gore Tex fabrics. The same principle of respecting water resistant coating applies more especially when considering the exclusions of hot water and any other heat. The best thing among all is to check the garment’s tag for recommendations about washing and caring for the garment.

Label of The North FaceTNF Berghaus Craghoppers Goretex Gore-Tex Hyvent

You should note the following when washing these outdoor proprietary technologies:

  • No soaps that contain fabric softeners
  • No harmful detergents and any other chemicals as they may harm the polyurethane coating
  • Preferably no machine wash unless if set on a gentle cycle.
  • Preferably tumble dry on a low setting to prevent the deterioration of the PU coating due to heat
  • Do not wash the fabric too frequently because the water repellent feature fades in quality. The fabric, too, loses its grip on quality after numerous uses.
  • If a Gore Tex is coupled with the Down, avoid hot water because they could impact negatively on its warmth and comfort.
  • All zippers and the Velcro enclosures should be closed prior to washing your fabric.

When should You preferably use Hyvent or the Gore Tex?

These outdoor fabric materials may be similar to some of the core features, but may be ideal for a wide variety of environmental settings. For instance, the Hyvent may be ideal and suitable for mild outdoor weather conditions due to its inferior breathability and waterproof features. It is coated with the hydrophilic coating on the outside. Only selected higher priced versions have the waterproof membrane.

If you’re going to undertake an intensive outdoor activity, Gore Tex emerges as the winner here because of its high performance breathability. This means that no matter how much you sweat, you sweat will be evaporated. The micro pores of the fabric are smaller to hinder the penetration of water molecules, but big enough to allow for the evaporation of sweat.

Gore-Bike-Wear-One-Gore-Tex-Active-jacket-5

The harsh and inclement temperatures are no match to the Gore Tex fabrics. Most of these fabrics, as discussed above, are available in a variety of layers, which then give you a plenty of options to choose from. Hyvent also has some layers that basically mimic what the Gore Tex embeds, but still inferior in quality.

Which fabric should You purchase?

There might be no perfect solution to this answer. However, knowing the difference in features as emphasized above should put you in a better position to decide now. The decision is primarily preference based because people have different tastes of spending outdoor adventures. If, for instance, you adore hiking in extreme temperatures for a long time, we would love to recommend the Gore Tex for you.

Preferably go for the Gore Tex that is mated with the Down insulator for a greater warmth and comfort. If you plan to hike in mild temperatures, the Hyvent could be ideal for you. And if you want to spend less, Hyvent is an ideal solution for you. Unlike the Gore Tex, it is coated with a polyurethane material to repel water. Some layers do have membranes the same way that Gore has. But still Gore wins the competition.

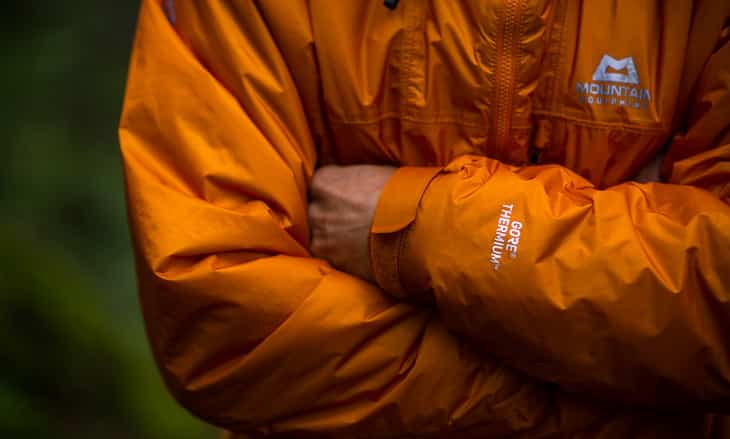
Man wearing Mountain Gore Thermium jacket

In terms of caring about the fabric, Gore Tex seems to be more demanding to care for. Hyvent may be ideal for those who are not fond of washing their outdoor apparels with complicated settings.

Final thoughts on This Topic

Gore Tex and the Hyvent are some of the most well-known breathable-waterproof outdoor fabric materials. Gore Tex remains the commander in chief, among other fabric materials of the same caliber. This justifies the popularity of this product in many clothes. For example, The North Face has launched the Hyvent, but has some of its clothes incorporating the Gore Tex due to its unsurpassed properties.

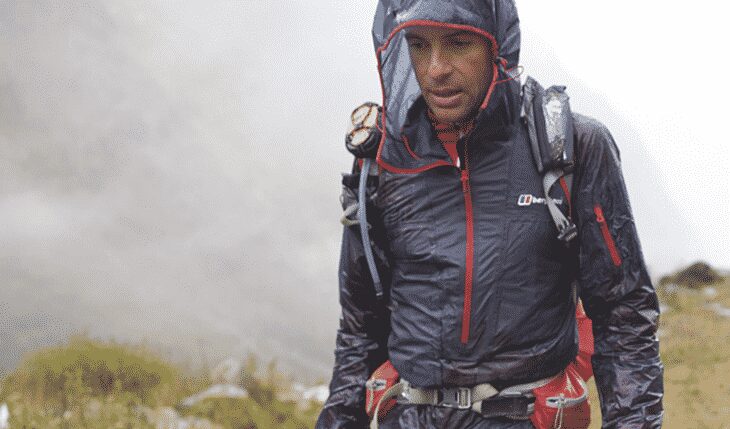
man-walking-with-jacket

Internal vs External Frame Backpack: The Key Differences

0
Close up picture of Teton-Scout-3400

A backpack is an indispensable tool of all the outdoor enthusiasts. It helps one pack all the essentials that would be needed in order to have a breathtaking wilderness adventure. But purchasing a wrong backpack could be frustrating and painful to your back. For some decades ago, external frame backpacks have dominated the industry until the emergence of internal frame backpack.

That being said, you have to select carefully between these two packs. In this internal vs external frame backpack guide, we will help you make an informed decision. Essentially, there’s no backpack that can be deemed as the best among these two variances. It all depends on the type of gear to pack, your destination, the duration of your outdoor adventure and a personal taste. It is important to understand all these factors as they will help you choose the right backpack for you.

A man with a backpack looking at the landscape

Firstly, let’s discuss the differences between these outdoor tools starting with the internal frame backpack.

An internal frame backpack

As the name says, an internal frame backpack has a frame internally that helps provide support and rigidity to the bag. These backpacks have recently dominated the market and are prevalently found in many outdoor gear stores. They have replaced the once-popular external frame backpacks as the popular tools for camping, hiking and backpacking activities. However, the external backpacks still have an indispensable value that make them preferred by other outdoor enthusiasts.

The other characteristic of internal frame backpacks is their mobility when put on your back. They can conform to your curvaceous shape because the internal aluminum frames can be molded to conform to any shape. Essentially, there are no external frames to restrict that shape. So with the internal frame backpacks, you will be able to move to any place or climb to any height while strapping them around your shoulders because of their mobility.

Backpackers on a river trail

In terms of the weight, internal backpacks exert much of the weight on the body. There is no weight distribution to the internal frames, but the body. If you are carrying a heavy gear, it will be heavy on your back because of this failure to distribute weight to the pack as does the external frame counterparts. This backpack is particularly designed for lighter gear. It could hurt your back if over-packed beyond its capacity.

Most of the internal frame backpacks may not have enough external pockets for additional storage as does their counterparts. They might have one or two internal compartments for storage. Any attempt to strap your essentials on the bag could obstruct your access to other essentials stored inside. So, if you have the sleeping bag or sleeping pad, you have to make sure that they all fit inside.

Backpackers on a forest trail

When packing these backpacks, you have to avoid placing sharp objects against your back. They could cause soreness and blisters on your back. If you are including the sleeping bag or clothes in the bag, rather put them first against your back before packing other objects.

The other interesting factor about the internal frame backpacks is that the shoulder and waist straps are adjustable. So it’s easy to adjust to any size of the torso or the wait. Anyone can actually carry your backpack by adjusting the straps accordingly. These straps enable the bag to move with you to any desired place in the wilderness.

An external frame backpack

As the name implies, the bag has external frames. These frames could be made of a composite material or an aluminum metal upon which the bag has been strapped. Such bags have always been the preference of outdoor enthusiasts for many years due to their supportive frames before the predominance of the internal frames nowadays. However, that reduction of prevalence doesn’t mean the bags are now rendered useless or worthless. There are actually intriguing benefits about these backpacks.

The obvious benefit is the weight distribution to the frames of the bags. As a result, people can conveniently carry heavy luggage to any place because the frames provide an ample support. Your back will be shielded from any injuries that could result from overweight luggage. This is something that the internal frame backpacks do not have. But carrying the external frames for a long time can also be a drawback.

Hikers with external frame backpacks

The additional storage that is embedded in external frame backpacks is another advantage to take into account. You can attach your gear on the backpack without obstructing access to the inside of the bag. This is achieved by strapping gear onto the frames. Usually, external frame backpacks come with many pockets for ease of storage and access of your valuables. This is also something not provided by the counterparts.

When coming to breathability, external frame backpacks emerge victorious. The frames make it possible for an adequate circulation of air between the bag and your back. As thus, your clothes will not get damp due to over-sweating during the hot days in the wilderness. The frames are keeping the pack away from the torso.

Close image of the The Vargo Ti-Arc Backpack

Let’s now compare the core features of these backpacks to enlighten you about the best option of your choosing. We will take into account the comfort, weight, portability, affordability, breathability and other features.

The core features of internal and external frame backpack

Comfort

Among these backpacks, it’s not easy to determine that which one is more comfortable when given their competitive features. Looking at how each pack attaches to your body, the internal frame backpack becomes victorious. It is easy to adjust the bag and fasten it around the waist and on the shoulders. However, carrying loads of weight with these backpacks may lead to the discomfort. In contrast, the external frame backpack wins here with regard to carrying loads of luggage in it.

Happy hiker with an external frame backpack

The downside of internal frame backpacks with comfortability is that the more they rub against your back it is the more body heat is yielded and more sweat produced. That’s an absolute discomfort of having this bag. Apart from this shortcoming, these bags are comfortable to wear.

The external frame backpacks, on the other hand, are comfortable when carrying loads of luggage because the frame positions the bag from the torso. However, their shoulder straps are not as adjustable as their counterparts. As a result, it is uncomfortable to wear them. As already indicated, it isn’t easy to declare the other bag as being more comfortable than the other.

Weight

In terms of weight, the external frame backpacks are heavy and bulky. But their beneficial properties of being solid and rigid shouldn’t be overlooked. They can be heavy and bulky, but excel in carrying heavy gear. So which one is the best? It’s your call to make. Their inconvenience can be apparent when hiking for many weeks in the wilderness because the frames, not the bag, rub against the body. Nonetheless, with weight distribution it is good.

Man with a Teton Explorer 4000 backpack

Internal frame backpacks, on the other side, bring the weight closer to the body. However, they have a poor weight distribution. As a result, your body might end up succumbing to injuries due to heavy loads on your back. The internal frames are not capable of balancing heavy loads. These backpacks are primarily designed to hold portable outdoor gear. You can thus travel to as many places as possible with a portable weight.

Affordability

In case you come across an external frame backpack in your local gear store, please do not hesitate to purchase that because they are now scarce and affordable. These affordable prices could be attributed to the current trends of internal frame backpacks. The internal frame counterparts are relatively expensive.

Teton Sports Escape 4300 Ultralight Internal Frame Backpack near a tent

To wrap up affordability, the external frame backpacks are for the budget-tight outdoor enthusiasts. If you want to spend less, then go for them. But given the features of the internal frame backpack as well, it is a good value for money to consider, although relatively expensive.

Breathability

As we hike in the wilderness, climbing summits, traversing on steep surfaces, we may be susceptible to too much sweat, especially on our back where the backpack rubs against. Because the internal frame backpack rubs against the back frequently, it is void of this feature of breathability. The result of it will be wet clothes at the back.

An external frame backpack is aligned far away from the torso. As a result, it creates ample air circulation and ventilation, and therefore reduces the amount of sweat against our back. The back positions weight in an upright position and, thus, transfer it evenly to the lower body. So there will not be a localized tension that rubs against the back to create more sweat.

Kelty external frame pack

So, if you want more breathability between your back and the backpack, you want to consider the external frame backpack. But this doesn’t mean the internal frame backpacks are worthless. They are still good and you can solve this breathability by constantly lifting it up to let air circulate.

Framing

This is the main difference between these two backpacks. The internal frame backpacks have pre-bent frames, usually aluminum metals, that are inserted into vertical pockets to provide rigidity and support. These frames are bent to conform to the shape of your back. With the external frame backpacks, the frames are visible from the outside in the form of an H shape.

Woman showing the landscape at the camera

They provide rigidity and support from the outside, and can be used to strap other outdoor gear on the pack. The frame helps position the pack away from the body so that huge loads can be supported.

Other features

The other difference is seen in the alignment of the external pockets for additional storage requirements. External frame backpacks usually have many of the pockets whereby you can stuff your valuables and access them with ease during your hiking journey. The internal frame counterparts do not have as many storage pockets as do the external frame models.

All other features are similar to an extent of not being able to declare that which is the best. For instance, durability can be embraced by all the packs regardless of being internal or external frame backpack. It actually depends on the manufacturer that which materials were used in constructing the backpack.

teton-scout-3400 backpack and a landscape in the background

The internal backpack wins competition when coming to the shoulder and waist straps. These straps keep the pack fixed to the body comfortably. They are adjustable, so they can be worn by any person.

On the other hand, the external frame backpacks are not easy to adjust. It therefore makes it challenging for anyone to use your backpack if they are too big or too small compared to your torso. When buying the internal frame backpacks you do not have to worry about the size, but only the capacity.

So which is the best for your wilderness travel?

This is a challenging question to answer, but we will give recommendations either way. If you’re going out for a weekend excursion, we recommend having the external frame backpack. That’s enough time to survive the immobility of the pack. You can pack any gear into the bag without suffering from any load injuries. Furthermore, it will be suitable to have this backpack in very hot conditions because it will let enough air flow between your back and its surface.

If you plan on having an extra gear to be strapped onto the bag, we recommend having the external frame backpack for its ability to old additional gear without obstructing access to the inside of the bag. These bags are usually fitted with extra pockets on the outside. It becomes easy to have your sleeping bag or pad attached.

Group of hikers in the forest

The budget can also be a decision-maker in this regard. The external frame backpacks are cheaper compared to the internal frame backpacks. But they are seldom found in abundance in local gear stores. This is because they are no longer used prevalently since the dominance of the internal frame bags.

Internal frame backpacks, on the other hand, are very mobile. So they can be carried for longer distances and you can spend many days in the wilderness with the bag attached to your back. However, you have to be vigilant about the amount of weight you exert onto the pack. These backpacks perform poorly in weight distribution compared to their counterparts. The advantage of having them is mobility.

Hiker stiiting down and watching the landscape

If you are going to hike during very hot temperatures, it may be a bad choice to have the internal frame backpacks due to the lack of enough ventilation on your back. Your clothes may end up being wet with sweat as a result of the bag rubbing against your back. This implies that you should check the temperature forecast of your desired destination before choosing the right bag.

The internal backpack will not offer you an additional storage bag because they cannot attach with ease any additional gear. Any attempt to attach extra tools on the bag may limit your access to the bag. You will then have to unpack every time you need something. This is the downside of these backpacks. They are also relatively expensive compared to their counterparts. So if you’re running out of budget, these bags could be a strain to your bank balance.

Ruckbug External Frame Backpack

Our final say is that, it depends on the location of your travel, amount of gear to pack and the temperature setting that you will hike in. These backpacks have different uses that may be appealing to different users.

The table below shows the differences in a nutshell between these two backpacks:

INTERNAL FRAME BACKPACKS EXTERNAL FRAME BACKPACKS
Frames aligned inside to provide support Frames exposed outside to provide more rigidity and support
Weight of gear exerted directly to the body Weight distribution done evenly onto the frames
Expensive in the range $200 to $300 Inexpensive less than $200
Mobile and can conform to the shape of your back Immobile due to the design of the frames
Adjustable shoulder straps to fit anyone The shoulder straps are not easy to adjust
No enough air circulation because the pack rubs against your back Enough air circulation because the frames keep the pack away from your back
Not easy to attach external gear Allows for the attachment of external gear without limiting access
Portable to travel hundreds of miles Not portable to travel for hundreds of miles due to the frames

Final Thoughts On This Topic

The choice between the internal and the external frame backpacks is not an easy task given their plethora of capabilities. It’s hard to say that one is the best compared to the other. What we are sure of is the physical structure, but their functionalities tell a different story. As emphasized, the choice may be informed by the type of gear to carry, the type of the excursion to take, or even the duration of your outdoor adventure.

Bergen External Pack Frame Mod outside in the forest

Given these differences, you should be in a better position that which pack is more ideal for your travelling needs. Internal frame backpacks are predominantly used today by many enthusiasts due to the comfort and mobility they provide. The external backpacks were only prevalent for many decades ago, but still have a significant role to play.

Sleeping in a Tent: Do’s and Don’ts of Getting a Good Night’s Sleep

0
A tent outside in the nature during night time

Hiking and camping provide us with a great opportunity to throw away all the modern comforts we have been enjoying in this modern world and an opportunity to get closer to the mother nature.

No, we’re not talking about giving up the comfort you’re used to and freshness after a good night’s sleep. If you have the right gear for sleeping in a tent, you can sleep like a baby just as you would sleep at home in your comfy bed, plus enjoy the fresh air and the starry night sky.

Young couple taking a picture in a tent

So, in order to help you out in having a good night’s sleep when the sun sets down and you are ready to hit the sack inside your tent, we have made an article that includes sleeping tips for campers. You will find out things like, what you need to take with you, what to wear to bed when camping, and all the Do’s and Don’ts when it comes to making sure you don’t wake up in the morning feeling like you slept on a rock the whole night. First, let’s see what kind of equipment is essential when it comes to sleeping in the great outdoors.

Equipment for sleeping outdoors

Even if you’re backpacking, hiking or camping, you can extend your chances that you will have a solid, tight sleep in the outdoors. How, you wonder? Well, for starters having the right equipment and gear for sleeping outdoors will help you a lot in achieving your “a good night’s sleep under the stars” goal. Today, we’re bringing you sleeping tips for campers, hikers and all “nature” lovers. Enjoy!

Sleeping Bag

Choosing a sleeping bag is one of the most essential parts when we’re talking about sleeping in a tent. You can’t go camping without one. You can choose a sleeping bag that perfectly suits your needs, style preferences and temperature rating (according to your chosen camping destination).

Teton Sports Fahrenheit Sleeping Bags in a tent

Here are some sleeping bag types you might consider:

  • Camping bags for cars – These bags are usually cut wider which will get you more room to roll-around (perfect for people who are heavy sleepers). It provides a great comfortable space and you won’t feel claustrophobic for sure. After we mentioned benefits of car camping bags, it would be fair to mention its disadvantages such as that they are less efficient to retain human body heat. If you plan to spend the night outside where the nights are chilly, you better think twice before you opt for a car camping sleeping bag. If you still don’t want to give up on this idea there are some rectangular shaped sleeping bags that can be “boosted” with blankets and quilts for cooler nights quite easily.
  • Backpacking sleeping bags – These are usually mummies style shaped bags that will “hug” your body perfectly. They are a somewhat warmer fit for colder places and are usually much lighter (in weight) than other sleeping bags as they are designed with backpacking in mind. Many mummy-shaped sleeping bags come with goose and/or duck down system which makes them easier to compress (to fit in a backpack) than sleeping bags made out of the synthetic materials.

If you are looking for a sleeping bag that can easily fit in your backpack and doesn’t weigh a “ton”, you might find our Best Lightweight Sleeping bags article quite useful. We are pretty sure that you’ll find some useful tips in order to have your body dry and warm during long, cold (or hot) nights in the wilderness.

Sleeping pad

When it comes to sleeping pad there are 3 types:

  1. Closed-cell foam sleeping pads
  2. Self-inflating sleeping pads
  3. Air sleeping pads

If you plan to go car camping then weight is not an issue for you so feel free to carry a thicker sleeping pad or even a mattress that fits inside your tent in order to get more comfort. But when backpacking, the weight of the sleeping bag itself is crucial, therefore choose a lightweight, airy sleeping pad or maybe a closed-cell pad. Consider these two as your best option if you plan to walk a lot.

sleeping bag on a sleeping pad in a tent outdoor

For more information on sleeping pads you can also look at our suggestions in our previously published article – “Best Backpacking Sleeping Pads”.  Here you will find lots of useful information, sleeping pads comparisons, prices and a complete buying guide.

Pillows

You cannot go out sleeping in the wilderness without your pillow, can you? You can simply bring the pillow you use at home with you or, if you’re not addicted to your cozy pillow and you can sleep almost on anything, opt for a small inflatable pillow made out of the special foam materials.

A pillow on a wooden table

Later, you can store it for your next camping trip or use it at home, they’re pretty comfy. We haven’t published anything related to pillows yet, but we will, soon, we promise!

Ear plugs and eye mask

Both ear plugs and eye-mask can be specifically helpful when it comes to camping. Eye-mask is a helpful part of the gear if you plan to camp in northern places (famous bright northern lights). Ear plugs will save you from all the sounds that come from the wilderness and snoring of your tent mates.

Black Eye Mask for Sleeping

Some campers can’t go camping without having these two accessories close to them.

Sleeping tips for campers – here’s what you need to do!

By setting up a camp before darkness falls (that includes your sleeping bag and your tent) you will have more time to enjoy the evening and relax instead of rushing to set up everything. When you’re tight on schedule it can be stressful, therefore, try to avoid that by starting setting up your camp earlier while the sun is high in the sky. This altogether, adds to a good night’s sleep, trust us. Besides that, we’re bringing you a few more tips in order to get ready for your outdoor bed:

Choosing the most suitable tent

We won’t tell you how to choose a tent since we already published different research pieces where we talked about the ways of choosing the right tent for your needs, one of them being the Best 4-season Tents guide, but we simply have to stress the importance of choosing the most proper tent, as well as the site where you will place your tent.

Backpacking tent on top of the mountains

Make sure that the ground is cleared of pine cones, pointy rocks and wooden sticks.

Keep your light near

Most campers who are camping for the first time are often surprised at how dark the nights can be. It is essential to carry a headlamp (if you plan on car camping) or at least a small flashlight (for those who plan on hiking and walking to their camping site). Make sure it is always near you as you never know what can wake you up in the middle of the night and you might not see anything.

Fishing Light 60 LED Camping Lantern

You don’t want to find yourself in that situation, right? We believe you, we wouldn’t want it either! Another great tip we can provide is to have a small LED lantern hung under your roof of your tent or inside your tent in general. If you plan on using an LED lantern, set it up as soon as you set your tent so that you can clearly see when preparing for bed. We have seen some tents with LED lights built-in for moderate light and they are pretty great and useful.

Store all the food outside

This rule is well known to the experienced campers, but if you’re camping for the first we have to stress the importance that every park has their own rules when it comes to food storage.

Research the park you attend to visit and follow the rules, otherwise, you will be kicked out. It can happen that you find yourself out in the open, alone, in the dark just because you were too sloppy to follow the park’s rules. You might even pay a fine for storing food wrongly.

campers having breakfast

Be careful not to be clumsy when throwing food wrappers in the trash, if you see that something fell off on the ground, don’t be careless and pick it up. Some camping sites are visited by the bears so if you cooked something or baked something in the open change your clothes because of the food odors your clothes may have absorbed.

Do the usual routine

If you brush your teeth just before going to bed, let this routine be the final thing you’ll do before entering your tent and sleeping bag. Everything you do the same at home do it here, in a camp.

girl_in_a_sleeping-bag-

This way you will not disturb your routine and when you lay down you will have a feeling that you did everything correctly and feel comfortable. Just like parents do with their children, following the routine is needed, even here in the open.

Go peeing twice

If you’re kind of a guy who visits the toilet during the night, we suggest doing this little ritual in order to prevent your midnight trips. It can be annoying to exit and enter the tent and a sleeping bag in the middle of the night, that’s why some campers, especially female campers think that peeing twenty to thirty minutes before they decide to go to bed and the second time right before they enter their tent and sleeping bag.

Three hikers near tents

In case your bladder isn’t used to this and you can’t avoid midnight trips, prepare all the things you need in front of your tent. For example, place your camp shoes right near your door and a towel (or other piece of cloth) right in front of the tent’s door that will serve as a shoe-cleaning doormat (in case you might need it). And keep in mind where you placed your flashlight.

Thirstiness

This one is pretty obvious – if you know you usually get thirsty during night, keep a bottle with fluids near your head or close to your sleeping bag.

Healthy Young Man Drinking Water from the bottle outdoors.

Just don’t drink too many fluids as you will have to empty your bladder more often during the night (read our instructions below).

What to wear to bed when camping

We heard many people asking what should they wear to bed when camping so we prepared two tips for all of you in doubt:

  1. Don’t wear too many clothes: Overdressing before you hop into your sleeping bag is also another rookie mistake. Wearing too much clothing will reduce the bag’s main feature – to efficiently snug and hold your body heat inside the bag. If you think you’re going to be cold, use a clothing made out of drape materials such a jacket and place it on the sleeping bag, like a blanket, for an extra insulation layer. You can also take a comforter as an additional layer if you plan on car camping.
  2. Wear only dry clothing: If your clothes are sweaty, wet or dirty change it. You wouldn’t go to bed in dirty and sweaty clothes at home, right? Experienced campers advise that you opt for clean and dry socks, long underwear and a T-shirt.

Hiker in a Teton_MP-272 tent

How to ignore all those noises?

Although it is really enjoyable and nice to hear crickets and an owl, sometimes it can prevent you from sleeping and disturb your sleep through the entire night. Mostly novice campers think this is fun to stay awake all night listening to the beautiful sound of nature, but experienced campers know that the sound of critters sound bigger than he is, at night.

A woman lying in a tent

If you forgot to bring your earplugs, then simply relax your body. If you stored your food properly you don’t have to bother about animals entering the tent for some leftovers. If you’re nearby a rushing stream its sound can be like a lullaby so just peace your mind and body and let the sound of a stream take you to your dreams.

Tips for staying warm through the cold nights

On warm, dry, summer nights you probably won’t even think about zipping your tent or a sleeping bag, but during cold, wet nights you will.

Two adults sleeping in a tent

This is why we prepared some advice in order to stay cozy and warm through the entire night:

  • Snacks before bed – This time having snacks before going to bed is not forbidden, it’s welcomed. This is probably the only time you won’t have to think about nutrition and that you might get a few pounds if not being careful what you eat late. The more caloric meal the warmer your body will be. The process of your body to digest the food you have eaten will keep you warm internally. It will make the heat your body will need to sleep cozy and comfortably.
  • Warm beverage – We all know that drinking a non-alcoholic warm beverage before going to bed will help you fall asleep easier, so before you hop in your sack have a cocoa or a tea.
  • Exercising – A bit of exercising before going to “bed” is welcomed too. But not too much. You don’t want to get sweaty and wet. A couple of quick sit-ups while sitting in your sleeping bag will do. This is also an easy way to warm your sleeping bag and your body fast.
  • Warm clothing – Wearing warm long underwear when it’s cold outside is everything when in this situation. Just remember not to overdress like we mentioned above. Wear some clean, dry, warm socks and a comfy shirt. In case your sleeping bag doesn’t cover your neck and you feel chills, then opt for a neck gaiter. Same applies for the hat too. If you feel the breeze or that your head is cold, pull a knit hat and put it on your head. The head is the body part where the body heat loses fastest.
  • Zipp the hood – If your sleeping bag has a hood, zip it around your head, this will add additional warmth to your head, even if you are wearing a knitted hat.
  • Leave the opening open – In case it is really cold outside, leave the opening on your hood open so that the air from your mouth and nose can get out and not become wet. When something is wet, it loses the temperature and freezes faster.
  • Additional stuffing – If you see that your sleeping bag doesn’t provide enough heat and is too loose around your body, take some extra clothes from your backpack and stuff it in the places where you feel the area is most empty.
  • Warm yourself with a warm bottle – Having a warm bottle close to your body will generate its heat to your body and keep you warm. In order to warm your body faster put it between your legs as this is where the femoral arteries are.

So, what have we learned?

If this is the first time you plan on sleeping in the outdoors in a tent, then we’re sure these tips above will help you, but if you are an experienced camper we are sure you will find an additional tip that might come in handy and worth to try next time you feel chills in your body.

We hope we managed to provide some useful tips on how to safely, warm and comfortably sleep in your sleeping bag outside your home and your comfy bed. In case you, found out that there are some things (processes) that work better than those we included above, feel free to let us know in the comments section below and we’ll try our best to include it in our article.

AR Sleeping system

DIY Tent Footprint: Saving Money and Keeping Your Tent Dry

0
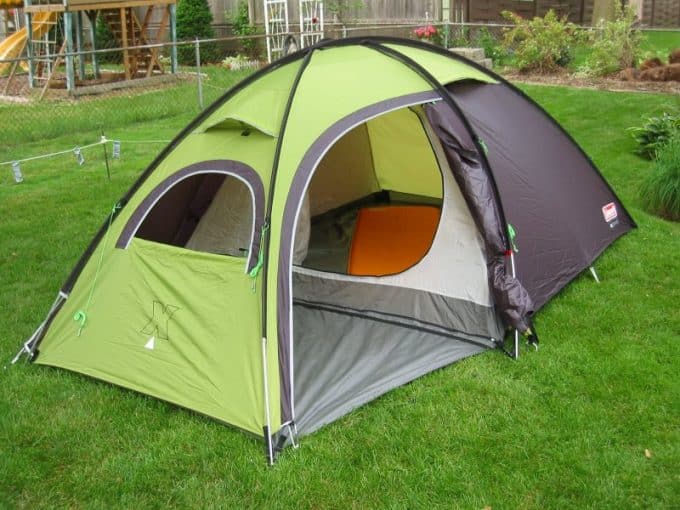
DIY Tent Footprint

Nowadays tents can be rather expensive, with a backpacking tent costing you several hundreds of dollars.  And since you are generally out in the wilderness while camping, that new tent may have a run in with some rocks, branches or other material that might not play nicely with your new tent.

Sometimes, you will take out an insurance policy known as a footprint for your tent. Most all the major camping companies are willing to sell you one that matches the size, shape, and color of your tent.

The thing is that that small piece of material can be quite pricey. Luckily, there are some ways to craft a DIY tent footprint of your own, for a lot less money.

girl-make-tent-footprint

If you are looking to go down this route, you’ll want to at least spend a touch of time thinking about savings.  Most likely you will be able to save some money based on materials, but also consider the time that you will be putting into making this.

While neither option that we put forth is really time-consuming if you already feel that you don’t have any free time you may find it worth purchasing a ready made piece.  Of course, some of you will be drawn to making your own just for the reason of making it.  At that point, there is no real regard if you end up spending as much, or possibly even more, on materials as you would have on the company’s offering.

Why use a footprint?

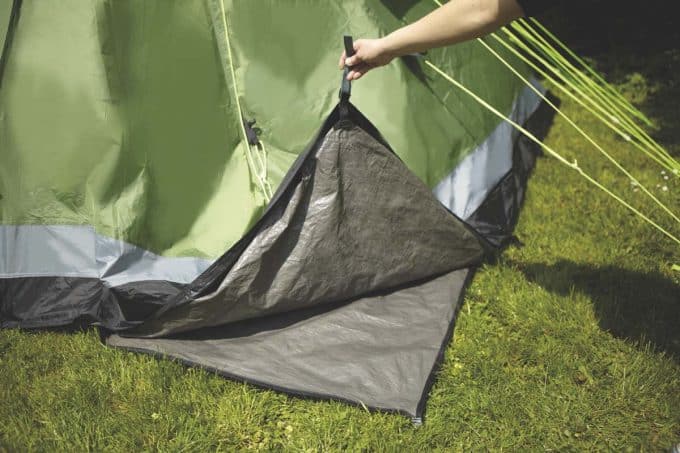
The main reason is for the protection of the floor of the tent.  If, as always seems to be the case, a sharp rock where to grow under your tent in the middle of the night, it would first have to go through your footprint.  Since this is a separate piece of material, it is much easier to swap out the footprint than the floor of the tent or more likely the entire tent.

tent-footprint-and-tarp

Additionally, the footprint gives you another layer that can help keep moisture from the ground working its way through the floor of your tent.  And some people will tell you that even though it may be thin it is one more layer of insulation between you and the cold ground at night to keep you a smidge warmer.

What materials to use?

When you have decided that you will be crafting your own solution, the first thing to consider is what material you should use.  Since this is a layer of defense, you will want something that is strong and durable.  It would be good if the material would stop some amount of water coming through the bottom of your tent as well.

Before you run off to get a steel plate, consider that you also need to move this item with your tent.  Your particular camping style will come into play with this last one.

tent-footprint-material

While the material should be portable, a heavier choice that doesn’t fold down quite as easily, would be an all right pick for car camping. But, if you are going backpacking, you’ll need to choose something that is lightweight and probably fold down to fit in the bag with your tent.

Now, there are any number of materials that can fit the needed qualities. You’ll have to poke around and see what you can acquire or have about that will fit the budget you are looking to put into this project. An easily acquired option is using a heavy duty tarp.

This will cover everything you need and can be found in most hardware stores.  If you are in your hardware store another option might be a painter’s drop cloth. The thin plastic ones might not last as long, but they will be cheaper to replace. A canvas one will definitely add more weight, but should last you a good long time.

plastic tent footprint

Some people head to the garden section and use weed cloth to craft a barrier for camping.  This could work, but it may be hard to find a piece wide enough for your tent.  This means you’ll be putting some more effort into the project.

Tyvek is a choice that many DIY’s go for, it is lightweight and still rather durable.  The main downside to going this route is that it can be expensive.  There are plenty more options if you use your imagination, even the floor of an old tent could work.

Method 1: Quick and Easy

If you suddenly find yourself setting out on a camping trip and realized that your footprint has been lost or is destroyed, fear not.  You don’t need to place an order and cancel your trip  Follow these 3 simple steps to a tent footprint. It might not be the most beautiful or elegant solution, but it will get the job done.

man-put-tent-and-footprint

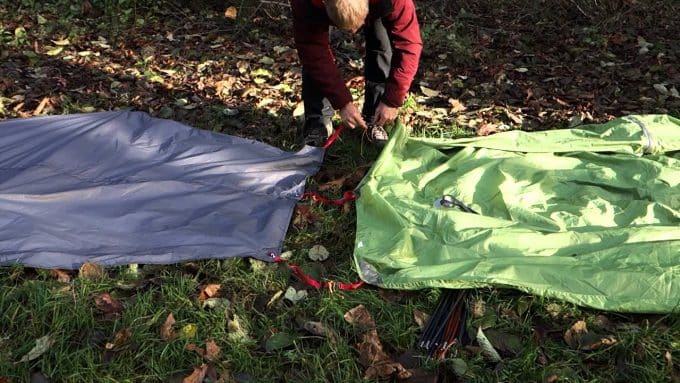
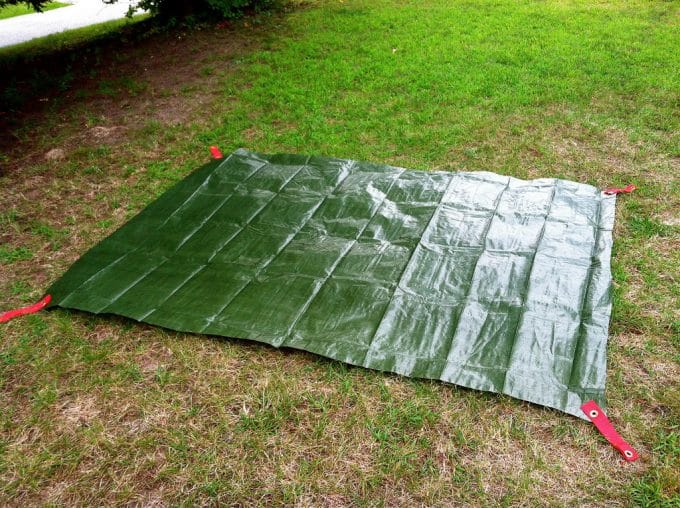
Acquire a medium to heavy duty tarp.  Try a hardware store or a garden supply store.  You might even already have one laying around a garage or shop. When setting up your tent, put this on the ground first.  Set your tent up on top of it.

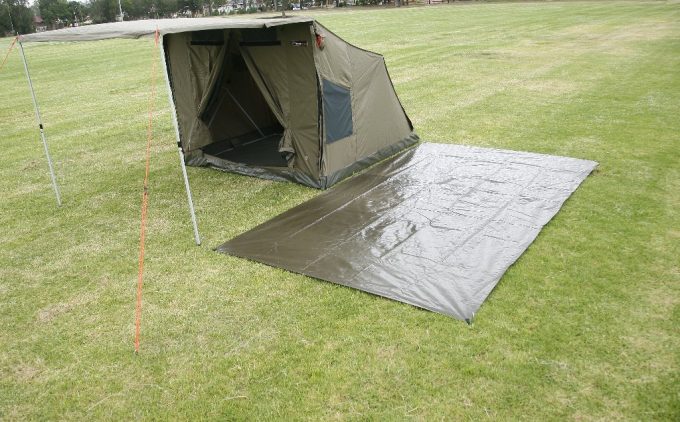
Tuck the sides under your tent.  Some people may even choose to leave a little bit untucked by the door of the tent to give you a “front porch”.  Your main concern is to not have a lot sticking out to catch any rain that may fall overnight.  If that happens, you might have crafted a lake to camp on.

There are some people that feel this is enough of a solution and never go with any other option.  It will work with any tent (so long as your tarp is big enough). You don’t need to worry about any special suppliers. On the downside, it can be a heavier option, and it wouldn’t collapse down much beyond the size that you picked up when you were in the store.

tent-with-a-footprint

Also, you will have possibly a very large item to fold up each time that you want to take the tent down and move it.  Hopefully, you’ll have some help to get it packed up.

How big should it be?

If you want to craft something a little bit more purpose made than just a sheet of material under your tent, you’ll have a few more questions to ask.  Just how big should this thing be?  There are at least two schools of thought on this subject, but if you spend enough time looking you can undoubtedly find a few more opinions.

One group would tell you that a footprint should match the size of the tent exactly.  This will keep the entire floor of your tent covered and protected.  They will tell you that going any smaller will wear out the edges of your tent.  The other group will say that you should make your ground cloth a few inches smaller than the actual tent size.

The argument here is that the edges don’t really come in contact with the ground.  Also, this keeps you from tripping over the ground cloth when moving around the tent.

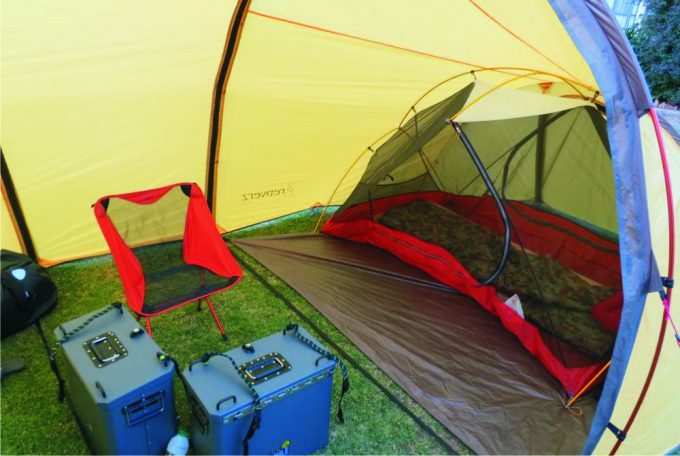
footprint-inside-tent

You’ll see that both of these groups don’t think that you should have your ground covering larger than the tent itself.  Extra material will end up catching water between the footprint and the tent.  Even if you have a good waterproof tent floor you’ll end up colder when doing this and the bottom of the tent will stay wet, with is not the way that you want to pack it up.

Regardless of if you feel that your ground cloth should meet the edges exactly or be a touch smaller you have options for shape when making yours.  Many tents that are on the market today have the rainfly expand out over a door to form a vestibule area.

tents rainfly vestibule area

This makes a great space to take off your boots and even store them while you are in your tent.  If you are crafting your own footprint for your tent you can decide whether or not you would like to add a ground cover to this area as well.

Method 2: More Crafting

This method will call for more time and energy to be put forth. In the long run, you’ll have a footprint that is more crafted for your particular tent and you can decorate it any way you see fit.

You’ll need to secure a few supplies before you start off.  You’ll need:

  • Your chosen flooring material (Tyvek is recommended)
  • A grommet set
  • Contact Cement

A few tools will be rather useful as well.

  • A tape measure
  • Scissors
  • Hammer
  • Something to flatten edges, like a rolling pin

You’ll want to start off with some measurements. First get good measurements of your tent and make some determinations if you would like your footprint to be the same size or somewhat smaller. It may help you to draw these measurements out on paper so you get a good feel for what you are doing.

drawing-measurements-on-paper

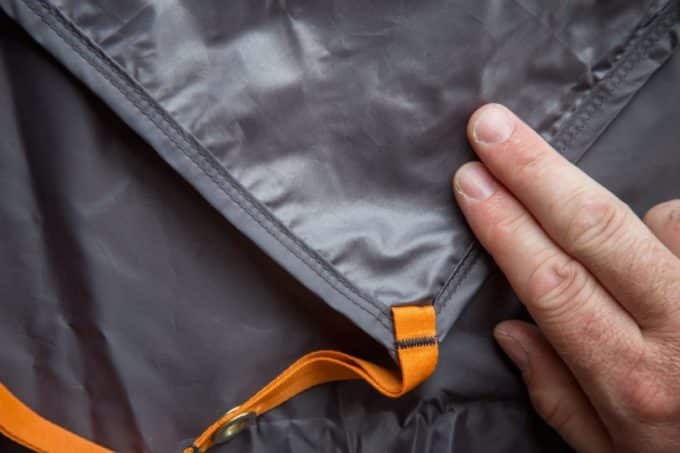
Whatever dimensions, you chose to go with, add about 3 inches on all sides for the edges. Lastly, you’ll want to mark both the line for the size of your footprint as well as the line that you will be cutting.

Now you’ll be preparing the edges and corners. First, go to each corner. Instead of leaving them as a square, you’ll want to trim them to a triangular space, that will fold into itself more easily.  Once all your corners are cut, it will be time to fold the edges over.

Use some of the contact cement and fold at the line you have left. Use your rolling pin to flatten out these edges so you aren’t left with creases or air pockets.  You will want to let your project dry completely before moving on. This gives your edges, and your corners, in particular, some reinforcement.  You will be adding grommets to the corners next and an edge folded up in this manner is less likely to start a rip.

tent-footprint-corners

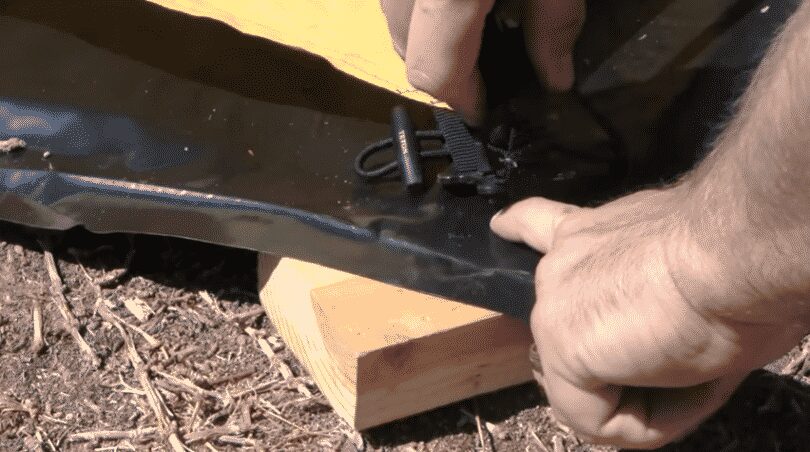
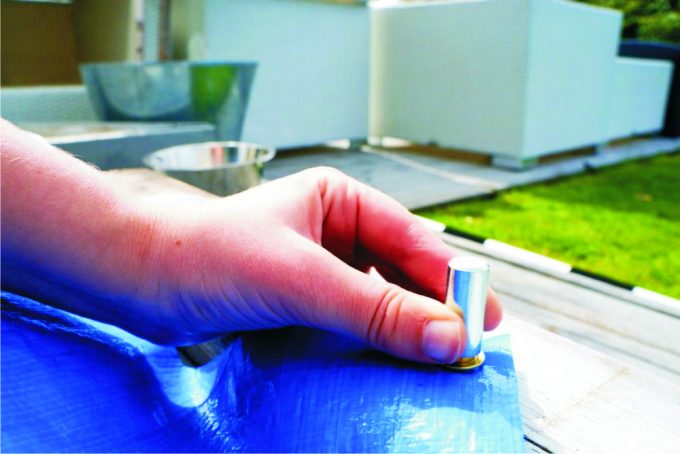
Use your grommet kit and hammer to add grommets where you would like them. The corners are natural choices, but you should look at where you normally stake the tent that you are making this for.  Well, places grommets will keep the footprint decidedly under the tent all night long.

At this point, you are done, but you can add a few extras if you like. Some people will add some cord, sized to meet the staking loops for their tent. Since this is your creation if you have an artistic side and want to adorn your footprint with some color to match your tent now would be the time.

tarp footprint grommets

Finally, you’ll want to do a fit check to make sure it covers what you want of your tent.  If all went well and you chose a thin material, you can most likely even it in the bag that the tent originally came in.

This method has the upside that you have a custom-made piece, especially for your tent.  You won’t need to worry about folding things over to conceal the extra material and you won’t need to consider if you got those extra folds flat enough so they are comfortable to lay on.  This does mean that if you use several different tents, you will need to craft one for each tent, though.

Inside or Outside

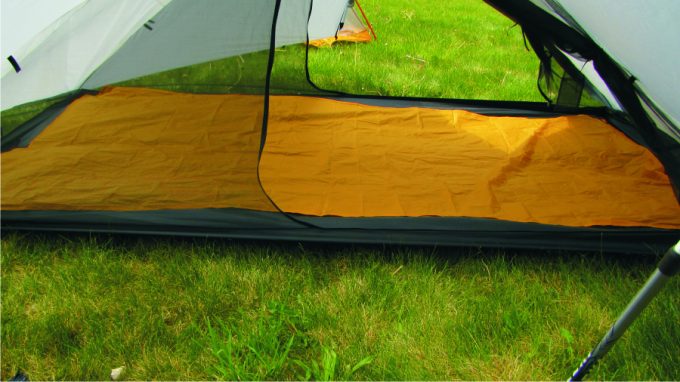
No discussion of footprints can be made without someone bringing up the debate over whether you should put a lining on the inside or the outside of your tent. The argument for it being inside, is more about the waterproof and insulating features, since inside it will not be adding any level of protection of the tent floor.

footprint inside tarp

Additionally, if your ground cloth is inside your tent you will not have to worry about any water pooling between your tent and ground cloth unless you are quite messy with your water bottle.  And inside you will be offering more protection to your inflatable sleeping pad.

You will have to make the call for yourself when you set out on your next camping excursion.  It seems that most people like to have the footprint outside. There are times on camping trips that are forecast to be cold or wet that you may want to use not only the footprint under your tent, but a survival blanket, or similar item, inside your tent to provide more comfort for you.

Final Thoughts on the Topic

At this point, you should be able to craft your own tent footprint without any issue.  You will want to consider your own camping styles and goals before you begin.  It will be critical that you determine the features that are most important to you prior to coming up with any plan.

tent-footprint-on-the-ground

If you need something durable but lightweight and folds down to not take up space while you are backpacking your best tent footprint may look rather different from someone that only camps in a campground with a parking spot at each site and leaves their tent up for a week at a time.

While a footprint can be an extremely simple thing to make, you can also put some more effort in to form a custom made piece.  This will also give you a chance to experiment.  If you have always thought, why don’t any of the tent footprints in the store have a given feature you can play around with making yours have that.

Perhaps you could show how useful your idea is for companies, and they will start folding that into the next generation of ground covers that they make.

footprint-near-tent

One of the beauties of crafting your own ground covering is that you will end up feeling more comfortable to use it for just about anything while camping.  It might get pulled out to be a place to sit down for lunch.  Perhaps it will find itself being a makeshift rain covering when a storm blows over and you want to try to keep you and your gear dry.

Since you made the piece, you will be able to use it with the confidence that should it rip, tear or otherwise come apart you won’t be forced to head to the store and see if they have the right one in stock.  Once you get home, you’ll be able to easily craft a replacement.  You might even be able to use a bit of extra material and some more contact cement to just repair the current one depending on what happened to it.

Boot Sole Repair: How to Reattach a Boot Sole

0
Boot Sole Repair

We all have that favorite pair of boots that fit comfortably and work well, but unfortunately, they are old and worn out. You take note that the sole is coming apart from the boot. What can you do?

Surely, you want to repair them! Never fear, there are many things you can do when it comes to boot sole repair, as well as with other boot related repairs. You just have to find the way that works best for you!

Boots can take a real beating, especially if worn on a day to day basis. It is only natural that, at some point, the soles will start to come loose and you will want to repair it. Maybe you can quite afford a new pair of boots, or love your boots so much that you cannot bear to let them go just yet.

damaged-shoe-and-glue

If you do not want toss the boots, you will search for a way to get them fixed. Surely, you can take them to a repairman in the local area. You can also buy glues to fix the soles. But, which way is best? How do the glues work?

You will find out that and more in the rest of the article as we discuss how you can reattach boot soles in various fashions. So do not toss those boots out yet! We can fix them and save you some cash, or some sadness of having to give up your comfortable boots! Keep reading below for reviews on various fashions in which your boots can be rescued!

damaged-boots

First up, we will discuss some of the things you should consider when it comes to repairing them. From there, you will learn more about repairing and see what other people have to say about different products. Let us not waste any more of your time, and dive right in!

Things to Consider

There are several things you can do to get your boots repaired. Consider some options below that will get your boot soles fixed or replaced.

Local Cobbler

You can take your boots to a local cobbler, or shoe repair person, that will restore your boots to working condition again. To find a cobbler, you can simply ask those you know, or you can do a search in the phone book or online to find one near you. The cost will vary, but you will not have to repair them yourself and risk more damage.

Restoration Programs

Some boot companies have restoration programs wherein you send your boots to them and they have restoration techniques where they can completely repair your boot to be like new again.

repaired-boots

The cost will vary on what type of restoration you need, and will vary by company, but it is a good idea because the company that made them can repair them.

Glues

Glues are probably the cheapest way to repair a pair of boots. While less costly, it can get messy some boots may need you to do the gluing treatment a couple of times in order to seal the boot. While directions vary, this is a process you can do yourself at home and wear your boots out again in a day or so.

Boot Sole Replacement

In some cases, if the boot’s sole is too damaged, you may need a complete replacement. You can often search online for a matching sole and have it delivered. Sometimes you can go to a shoe store and find them.

boot-soles

This all depends on where you can find a new sole that fits your budget. You will have to replace the sole yourself unless you go to a cobbler, like mentioned above.

Here’s How You Can Do It

So you have a pair of boots that are in need of a sole repair. Now you need to figure out which route you will take to get those boots fixed. You will have to think about how much you can afford in order to fix the boots, as fixing them can get pricey at times.

There are advantages and disadvantages when it comes to which technique is used when getting boot soles repaired. Let us discuss in further detail which ways work better than others, and why.

repair-damaged-boot

A local cobbler can be a great source of help when it comes to getting your boot soles fixed. They have the experience and proper tools to get the job done correctly. The price can range from $50 to $100 on average depending on what else needs to be done to repair the boots. The thing about going to a cobbler is that if you are taking a child’s boots there, they can outgrow them soon, so the price may not be worth it.

If you want to use a cobbler for repairing your boot soles, you may not get them back the same day. You will need a back up pair of boots if you are using them for work purposes, especially.

When it comes to restoration programs, your boots must be of the brand that has the restoration program in order to get them repaired. For instance, if your boots are Timberland brand and you want them repaired by Red Wing or Chippewa Boots, you will have to find another way to get them fixed. Red Wing only repairs Red Wing shoes, and the same goes for Chippewa.

boots-needs-to-be-repaired

However, these companies feature great restoration processes and have options like adding new laces, or cleaning and polishing the boots! These programs can range in price, upwards of $100, so price may be a factor here.

Glues are a cheap and somewhat effective way to repair your boot soles. These glues can be found in many large chain stores or at shoe stores and malls. These glues generally cost under $15 and involve you cleaning the boots properly before applying the glue. You will usually have to wait 24 hours before you can wear the boots again.

The thing about glues is that it can get messy and if you do not cover the area properly, the boot sole can come apart again, requiring you to use more glue. In the end, while inexpensive, it may cause more hassle.

shoe-repair-with-glue

Boot sole replacement usually happens when the original boot sole is completely destroyed to the point where it cannot be fixed. You can buy a matching boot sole from the store or online. Or you can have a cobbler or restoration program put on a new boot sole. The price of new boot soles will range widely, from cheap to expensive, costing as little as $8 and as much as $50 or more.

Below is a table of information to look at to decide which process you will use in getting your boot soles repaired.

Boot Sole Repair Information Cobbler Restoration Program Glues Boot Sole Replacement
Price Range $50 to $100 on average $75 to $100 and up $15 or less on average $8 to $50 on average
Length of Time to Restore Hours or Days Days One Day Hours
Ease of Process Easy Easy Messy Somewhat easy
Mess Factor None None Some None
Useful For All Boot Brands Yes No Yes Yes
Length of Time Until Boots are Returned Days Days or Week None. This is Do It Yourself. None. This is Do It Yourself.

What Causes Boot Soles to Come Apart?

The older the pair of boots gets, or the cheaper quality of the boots, will mean that you have caused some wear and tear on the boots. If the quality of the boots is cheap, then they will fall apart before a pair of boots that are made with quality. If the boots are getting old, then day to day wear can cause soles to start coming apart.

Wearing the boots in bad weather, like rain and snow will definitely cause the wear and tear to make the soles start to detach. The weather will make the soles loosen, where water can get in and begin the separation process

What Do Others Have To Say?

Of course, those who have had their boot soles repaired have a favorite method of doing so. For some, they prefer a cobbler, others are more of the Do It Yourself type of people. Either way, as long as the boots get fixed, you can still wear them!

shoe-cobblers

As for cobblers, people do enjoy using them because they are giving their money to a local repair shop, where they know a person is there that is experienced, and has the proper tools and materials to get the job done right. Once a place has done great work, they should continue to get your business through the years.

This helps in a small way to keep your local economy going. The only drawback is that this can get expensive for some, but you will have your boots back in no time.

Using restoration programs can be highly useful if the company that made your boots has a program to do so. You will send the boots in and let the company know what type of restoration is needed. These programs also offer extras, like new laces, or polishing the boots, among other extra services.

People enjoy using these services because they like the idea of having their boot soles or other parts of the boot repaired by the company that made them. That way, they can ensure the boots are fixed with the correct type of sole, etc.

services-to-repair-boots

The thing about this method is that it can take a while to get your boots back this way instead of doing it yourself, or going to a cobbler. Plus, it can get pricey, depending on the type of restoration you need.

People like using the glues because it is a cheap and fast way to repair boots. The glues are easy to find at local stores, and you can do the process yourself and wear the boots again about a day later. This process can get messy, and sometimes the boots will need to be glued again because the sole will come back apart.

You must follow the process exactly, making sure you clean the area before applying the glue. Even then, you might see the boots coming apart again.

Some users realized that there was no way to fix the boot sole because it is too far damaged. In this case, users decided to replace the entire boot sole. This method is moderately priced, and the soles can be found in shoe stores or online at varying prices.

glue-repairing-shoes

Once you get the boot sole, you can then attach it yourself to the boot, or go to a cobbler who has the necessary tools to attach the sole properly, without issue. The issue with this method is that you have to find the right sole to fit your boots.

Pros and Cons

As with any method, there are going to be good things and bad things about each one. User experiences are always different, and preferred methods will vary by person. Let us talk about the pros and cons of each method, which will hopefully help you decide with which process is the best for you and your budget.

Cobbler

The best part about using a cobbler is that you are supporting a local business by a person who knows the trade well and has the proper tools and the proper materials to fix your boot with quality work. While this can be expensive for some, many people love going to a cobbler, and have often given repeat business throughout the years.

Cobbler

They have made selling, repairing and replacing boots and their parts their livelihood and therefore have the knowledge, care and skill to do the job right. If you prefer quality over quick and cheap, then using a cobbler is the best way to go!

Restoration Programs

If you are someone who has purchased boots that have a restoration program, then you could always go the route of sending the boots into the company to repair. Some companies, like Red Wing and Chippewa, have these programs, so that those who purchased those boots can have the company that made them, repair them.

Some people prefer this way because they have the peace of mind that the company will use the right size and product on the style of boot that they own. While restoration packages can get pricey, you can find basic services for repair that fit your budget.

restoration program for boots

This process can take a while before your boots get returned, as they have to go through a mailing service to be returned and sent in. These companies also include extra services like the aforementioned additional laces or polishing of the boots, which people enjoy as it makes their boots even more like new.

Glues

Most people agree that using glues to repair boots can be a messy process. While cheap in price, which users like, the process might have to be done over as your boots’ soles can start coming apart again. While you can use your boots as soon as 24 hours, you might have to keep an eye on them in case they do fall apart again.

glue-for-shoes

Even if you do the entire process correctly, the glue is known to become detached on occasion. Also, before applying the product, you have to clean the area that is getting repaired.

Boot Sole Replacement

The good thing about a boot sole replacement is that you are getting a whole new sole for your boots. But, this also means that your old sole was beyond repair. The problem with this is ensuring you find the correct size and shape of the sole for your boots either at a shoe store or online.

Boot Sole Replace

You will then have to wait for it to be delivered, so you probably will not wear your boots in the meantime. Then, when it does arrive, you will have to either attach it yourself or go to a cobbler who has the tools to do the job correctly.

Wrapping it up

There was much to learn about repairing boot soles. There are many methods in which to do so, and each cost a different price depending on the method, where you go and what you need done to the boots. Either way, ensuring you have a correctly fixed, or new, sole will ensure your boots continue to work correctly for you and that your feet are comfortable while you wear the boots for work or pleasure purposes.

Boot Repair

Now that you are armed with all of the information, you can now get those favorite pair of boots hiding in your closet repaired! Or those work boots, that are falling apart, can finally be properly repaired and worn at work again, without worry that your whole boot will fall apart!

DIY Bear Canister: Keeping Your Food Safe

0

You can’t really rely on the safety of food if you keep it in a nylon bag and hang it on a tree all night. If you have never misplaced your food by hanging it on a tree, it’s simply because you are fortunate, regardless of the way you do it.

The idea of hanging food in trees is the customary technique for keeping food safe while camping in the boondocks. The better option is a DIY bear canister—a compact, solid-sided food locker.

Bear Canister

Its main intention is to make food and some other scented items like trash and toiletries thoroughly secure against bears, rodents, raccoons and different critters that are intensely pulled into human food. Read on to have a clear insight about bear canister.

The Definition of Bear Canister and their Importance

Bear canister is known as a bear-proof container often used to store all kinds of food and scenting, bear-attracting things in your bag. Generally, homemade bear canisters are produced using sturdy plastic, although some lightweight and a great deal costlier carbon fiber models are additionally accessible. They are stiff, massive, heavy, and always detested by hikers.

homemade bear canisters produced using sturdy plastic

However, bear canisters are additionally compulsory in numerous ranges, thus in lieu of gambling a substantive fine and placing bears at risk of being put down, hikers persevere through the disturbance of bear canisters in their backpacks.

Bears have the capacity to sniff out human food with great effectiveness. A hunting dog’s nose is furnished with around 230 million olfactory cells. That is 40 times that of human’s own. It is assessed that a bear’s nose is similarly as touchy as a hound. In camping’s early days, campers usually sleep beside their food.

Bears, in the end, developed sufficiently striking to approach campgrounds and take those backpacks while likewise frightening the living hell out of campers. Folks tried hanging food bags high over tree branches, binds off the rope to the trunks. Bears made sense of that, as well, snapping the line by using their claws.

Bear-Shaking-Tree

The counterbalance technique came into existence in the 1970s: two bags of nearly similar weight and mass entwined and hanged on a tree branch at least 20 feet off the ground no less than 10 feet from the tree trunk. It is a tedious undertaking that is once in a while easy.

How would you recover it? Tie a circle on one pack, and utilize a long stick to hitch it and draw both packs down. Some folks entwine a long strand of angling line to one sack; angling line dangles imperceptibly to the ground and enables a man to spin in the stash with the use of the hand.

how-to-make-bear-canister

Where allowed, counterbalancing is the food stockpiling strategy of the decision if no other choice is accessible. Bears—savvy, clever and, with regards to human food, persistent—have discovered approaches to overcome even a brilliant counterbalance. Grown-ups, for instance, will convey fledglings on thin appendages to bite the rope or snap the tree branch.

Making a Homemade Bear Canister

If you decide to make a bear canister yourself instead of buying one, this segment is for you. The Bear canister available on the market has a price range of 50 to 80 bucks for a decent sized one. These bear canisters are typically made to have the capacity to withstand the devastating blow of a bear. They are designed to be swung from a rope around 30-40 feet up in a tree.

Bear-Canister-how-to-make

This feature keeps bears away from getting their paws near your food for any occasion. You can make a good homemade bear canister for less than ten dollars.

Step 1

Before you begin anything, the first approach is to assemble the materials and tools required for the making process. The materials that will be needed for the processes are the following: One leak-tight construction container with one leak tight curve on top, 2 key chain rings, 2 bicycle inward tubes or straps,1 tube of 100 percent silicone washroom calk, 1 vinyl slice or hand pulled message to bypass bears and 50 or more feet of light rope.

Most Home Depot will have every one of the materials required for this making process aside from internal tubes. Don’t hesitate to utilize something else instead of internal tubes for the straps or converse with a neighborhood bicycle shop to get damaged or used tubes. The main gears you will require are one knife or razor blade, one calk weapon and a hammer.

Step 2

The next step is to apply the silicone calk to the top edge of the pail. This is to assist in securing the edge to the leak tight curve on top. This will likewise help in keeping the canister impermeable to secure scents. The edge top will be forever connected to the pail after it is used without the silicone, making it be a bit overkill.

silicone calk

When you have placed a little bead on the edge of the pail, put the leak tight chain ring on the head of the pail without smirching the silicon off of the edge. After the ring is set up, press down the ring to cinch it on the edge. Begin in just a spot on the chain ring and press down on the two focal points to apply attachment to the pail. If this does not work, try to use a mallet.

Step 3

After applying the ring to the pail, the time has come to create straps that will enable it to be fastened to a backpack. These can be produced using any material. You can make use of bicycle inward tubes. Slice the valve away from both tube and then connect the key rings to the little openings that the knob mounts in on the pail. This enables you to have a spot to twist the end of the inward tube to make a strap to attach to a hiking backpack.

bear canister straps

The next thing is to cut two openings in every side of the internal tube to make a circle for a cross strap so as to thread through the other inward tube. Attach the ends once after you have already finish threading it through the other inward tube.

Step 4

Now the homemade bear canister is developed but to really shield your food from bears, you need to consider this final step. This step can be done either by removing a decal utilizing the vinyl cutter or just indicating it by hand using a marker, compose something that obviously designates “BEARS KEEP OUT”.

BEARS KEEP OUT canister

By doing this is the only solution for the bears to really know that your food items are not for them. You can now sling this great canister up in a tree. By utilizing the 50ft of rope, you can hang the newly built canister from the handgrip around thirty feet up and four feet from the tree trunk.

Homemade Bear Canister Basics

Before going into the more technical strategies for managing bear canisters, it is most likely the best to explore the basics.

man-holding-bear-canister

Regardless of the possibility that you have utilized a bear canister before and you are pretty much familiar with bear canister decorum, it would not hurt to explore this information and ensure that you are doing all that you can to guarantee a comfortable and bear-free period.

  • Bear canisters are not just for food. Simply anything that goes on your skin such as sunscreen, cleanser, medication, repellant and so on presumably has a place in your bear canister.
  • Store your canister no less than 100 ft or 30 m from your campground.
  • In case you are entering someplace that a bear canister is required and asking, “Do I actually need one?” Yes, you really require one.
  • Close and bolt your bear canister
  • Try not to put your bear canister closer to ledges, cliffs, water sources, or anyplace that a bear might have the capacity to thump it off or into.
  • Try not to append anything to your canister such as ropes, shoe laces, carabiners and so forth that would enable a bear to steal it away by using its teeth.
  • Your bear canister shouldn’t be utilized as a buoyancy gadget particularly not when endeavoring to get away from an engaged bear.

Bear Canisters Tips

Here you can find several basic tips about packing, utilizing and keeping a bear canisters.

Packing a Bear-proof Canister

  • All scented things: Food, garbage and toiletries must fit in the canister anytime you abandon it, all through the whole outing.
  • Choose your food astutely: Heavy, high-calorie choices are ideal.
  • Plan every feast: Avoid conveying too much or little food.
  • Repackage cumbersome boxes and expanded bundling: Put all toiletries and food into re-sealable sacks. Bear safe canister with food packs.
  • Ensure that everything fits: Before setting out on your outing, ensure that all your food, toiletries, trash and scented things will fit into the bear canister on the first evening.
  • Convey the first day’s sustenance outside of the canister: The food must stay with you at all circumstances since it is not kept in a canister.
  • Reduce toiletries: All bug spray, toothpaste, sunscreen, and so forth need to be put into the little reusable canister

Packing a Bear-proof Canister

Utilizing a Bear Resistant Canister

  • Make sure that the canister cover is protected. Bear Resistant Canister joined to a pack
  • Convey the canister in the rucksack or whip it to the outside part.
  • Nylon conveying cases are accessible for a few canisters.
  • Place mirror tape on the canister to help with finding the canister during the dark period
  • Inscribe your name and contact data on the canister if it got lost.

your name and contact data on the canister

Keeping a Bear Resistant Canister

  • Bear-proof canister is kept on the ground.
  • Keep the canister no less than 100 feet from the camp field and 100 feet from the cooking zone.
  • Keep the canister on the plain ground in a territory where it won’t be clearly unmistakable to a bear passing by.
  • Hanging canisters is not advisable. Bears in this area that can get the canister out of a hanger will have the capacity to carry it by utilizing the rope attached to it. The canister’s shape alone makes it quite hard to convey away.
  • Do not keep canisters in the conveying case or connected to your knapsack overnight because bears may take away your bag along with the canister.
  • Do not keep canisters in or close to water. Canisters don’t float and are not watertight.

Utilizing a Bear Resistant Canister

Food Choices for bear canister

In areas where you utilize the bear canisters, it is quite advisable that you should only be conveying refrigerated dried food for warm meals because your plate and cook set may not enter into the canisters. So what you need to do is to utilize the cook-set to warm water and not food.

Moreover, the refrigerated dried food should be in their dishes so there would be no additional compartment to do a reversal in the canister.

Food Choices for bear canister

From what have been discussed so far about needing to put all the scenting items into a bear canister, it kind of bodes well that cooking and eating gear and perhaps fuel are needed to be inside a canister. However, it really appears to appear like you would actually require more canister room and a specially built cook-set to go inside.

Do you restrain yourself to just warming water in the cook-set? Do you just eat out of dispensable containers? If not in bear canister do you simply abandon the washed cook-set and consuming container in the same territory as the canister, or the place you cook or straight back to the resting area?

All in All

We hope that you found this post useful. The canister can effortlessly be finished in thirty minutes, not taking into consideration the painting and embellishing.

bear-canister-pacific-crest-trail-john-muir-trail

Despite the fact that it is smaller compared to the commercially produced bear canisters, it will surely hold an astounding amount of hamburger jerky, cocoa powder, oatmeal for your northerner and granola bars.

DIY Backpacking Cart: How to Build Your Own Backpacking Cart to Take the Weight off Your Back

0

Going backpacking or hiking can clear the mind and leave you feeling rejuvenated when you return to normal life. But if you’re backpacking for a few days or weeks at a time, the weight of carrying your belongings on your back can take its toll quickly. Injuries from carrying too much weight can make it harder to escape to the woods.

Older and younger hikers also struggle more to carry a heavy backpack. If you struggle to carry enough clothing, food, and water for an extended backpacking or hiking trip, find an easier way to carry the weight. Our solution? Build your own backpacking cart!

What are They?

Building a backpacking cart will allow you to hit the trails without back breaking pain. It’s a multi-purpose tool to carry all of your gear, from tents and sleeping bags, extra clothes and hiking boots, to food and water.

backpacking cart

A backpacking cart will allow you to extend your distance by making it easier to carry more food and water. This is an especially great tool for youth or smaller adults who struggle to carry a lot.

How do They Work?

Hiking and backpacking carts use wheels to make it easy to pull your gear through the woods and over trails. All of the weight of your gear is balanced over the wheels instead of your arms so that there is no strain on your body which means you can carry more than you would pack in a backpack. Wheels have been used to carry things for centuries, making it a great technology for carrying your supplies on a trek.

man carry Backpacking Cart

The wheels also make it easy to maneuver your cart on the narrowest trails, or over any terrain, especially if you use tough wheels like mountain bike tires. Without the strain of a lot of weight in your backpack, a backpacking cart also prevents your gear from falling apart in the middle of the backcountry.

Are They Worth it?

Save money on an expensive backpacking cart by building your own! With the help of a backpacking or hiking cart you’ll be able to carry more gear than you can transport on your back, roll heavy loads easily through any terrain, and go further without any strain to your body while carrying enough supplies to hike for longer distances and days at a time.

four-packwheel-hikers-single-wheeled-hiking-cart-

We’ll walk you through the steps of a DIY project to build your very own hiking cart which can also double as a bicycle trailer for outdoor activities and running weekend errands. Follow our simple steps below to purchase the appropriate materials and build your hiking cart for your next backpacking adventure.

How to Build Your DIY Hiking Cart

What You’ll Need

  • 4 pieces of L-channel aluminum metal
  • Clamps
  • Center punch
  • Drill
  • 2 rubber tires
  • ½ inch thick metal tubing
  • Thick plywood
  • Bungee cords

Directions

Start by using the four pieces of L-channel aluminum metal to build your hiking cart frame. Use clamps to hold together two pieces of aluminum at a time to create the corners of the frame. Use a center punch to keep the drill bit from wandering as you start drilling through both pieces of metal.

L-channel aluminum metal

Once you’ve successfully drilled a hole through both pieces of aluminum, use a screw to hold the two pieces together. Repeat on the other three corners so that you have a complete square or rectangular frame.

Once your frame is built, attach two tires with a 1-2 ft. diameter and 1 inch thick rubber wheel. Mountain bike tires will work best if you’ll be using your hiking cart on rough terrain.

Use ½ inch thick metal tubing to build your trailer hitch/cart handle. (*Note: The metal tubing will supply a multi-functional tool. You can attach it to a bike trailer hitch to pull your cart behind you or use it as a handle for your backpacking cart if you’ll be transporting it yourself.)

hick metal tubing to build your trailer cart handle

Once the trailer frame is complete, attach the thick plywood over the square metal frame we built first. This will be the place for you to store all of your hiking gear. Attach your gear to the frame so that it doesn’t fall off when you’re ready to start pulling your hiking cart on your first hike or backpacking excursion. We suggest using bungee cords to secure your gear but you can opt for something else like rope to tie your gear to the cart.

Load up your cart and hit the trails! You can either pull your cart behind you or attach it to a bike trailer hitch if you’ll be biking between campsites or transporting outdoor materials for a weekend project.

Key Takeaways from Our DIY Backpacking Cart Project

With your own backpacking cart taking all the weight off your back when you head out on a trek for a few days, you can escape to clear your mind and go on a relaxing adventure without a heavy backpack weighing you down the whole way. No matter your age, size, or fitness level, a hiking cart is easy to pull and maneuver over the trails by putting all the weight over the wheels instead of on your arms.

old-man-with-backpacking-cart

Use this multi-purpose tool to carry more gear, water, and food with no extra weight to extend your trip for several more days and cover longer distances.

It will also store your tent, sleeping bags, cooking equipment, and anything else you might need for a backpacking or hiking trip. Save money by building your own backpacking cart instead of purchasing one from an expensive outdoor company. We’ll walk you through the materials you’ll need and every step to build a hiking cart that will easily roll over any terrain and store all of your gear without fear of a backpack falling apart in the backwoods under the strain of too much weight.
 

Best Hiking Dogs: Life Savers With Paws

0

Whether you are new, or a really experienced hiker – having one of the best hiking dogs with you, can turn your hiking adventures into an amazing experience and you will most probably become very impatient about the next time you plan to go. These types of hikes create a bond between you and your dog, which means a true friendship can be built and you will most probably end up having a truly loyal and trustworthy friend.

Certain dog breeds will truly enjoy hiking with you and get their paws wet whenever it is needed, but of course, there are certain dog breeds you should not take with you due to their vulnerability and weaknesses. Once you get into hiking with your dog, it will probably become that one friend who is always up for a piece of the action and can’t wait to start – dogs love spending their time with their owners and hiking is an amazing way to do so.

A Weimaraner dog on the beach

However, it is very important that you know your pet’s physical boundaries. Keeping him/her safe is very important and knowing whether he/she is ready for the long hiking or not.

What are the best trails to go hiking with your dog?

Even though most of the trails allow the dogs to come along, that does not mean all of them are good for your dog. Many of the obstacles humans don’t find difficult at all, can be crucial and very dangerous for the dog. Rocky trail beds, cliffs, boulder fields, stream crossings, and snow are all important features to consider before taking your dog with you.

Hiker and a siberian husky dog

Try out some easy trails before going for the hardest, see how your dog does at the stream crossing, snow, balancing on the bridges, dodging the big boulders and more and only then you can decide whether you should give it a try and go for a longer hiking adventure or not.

A couple of important things to know before you decide to take your dog to hike with you!

Plan your hiking accordingly

  • Many national parks do not allow the dogs to share the trail, it is important that you know where your dog is allowed to go and where it might become a problem.
  • The most populated trails will require you to keep your dog on a leash – make sure your leash is not more than 6 feet long, so it is comfortable for you and for your dog and does not interrupt others while hiking.
  • Teach your dog to behave before you start hiking with him/her in public places, the last thing you want is to get your dog annoyed by something and have him/her go crazy at people.
  • It is advised that you pick a less populated hiking trail at first and teach your dog about the manners required for the hiking.
  • Always be prepared for the worst – keep yourself informed about what to do in case something happens to your dog while you are hiking, get to know about the first aid you can provide for the dog and always be ready to give your best to help your best friend.

Photo of a Border Collie resting

Packing and getting ready to hike

First aid and the safety of your dog

Now that you are taking another precious life on your hiking adventures, you will want to make sure that your dog is safe and free of injuries – in the case of any injuries, you are advised to have a first aid kit for your pet.

Dog First Aid Kit

The first aid kit for your pet usually contains the following items: Dog toenail clippers, Bandage scissors, Tweezers, Topical antibiotic ointments such as Bacitracin, Canine eyewash, Calamine lotion (for itchy bug bites), Stop bleeding powder, Baking soda (for bee stings), Vaseline, Imodium A-D, Dressings and bandages, Enteric-coated aspirin or Bufferin, Pepto-Bismol, Gauze roll, Muzzle, Adhesive tape, nonstick pads and Gauze pads (4 inches square).

Sleeping

Sleeping gear is important for you because you want to keep yourself dry and warm, while sleeping without any interruptions at all – your dog requires the same thing, otherwise, he/she might crawl into your sleeping bag and touch you with his/her wet dirty paws (no one wants that).

Very cute sleeping bag for a dog to stay warm and comfy

There are various products made for your dog that you can buy and have him/her sleep comfortably without interrupting you and your dreams, buy a sleeping bag for your dog and you will surely see how thankful your dog can be.

Clothing equipment

Indoor breeds and dogs who have a thin coat will surely feel the cold just as much as you do when you forget to take a jacket with you. Breeds which are known to have thin coat are advised to have an outer layer and preserve the body temperature in wet and cold weather conditions. Try finding a coat for your dog which will keep his/her underside covered and protected from the cold ground or even snow.

Ruffwear dog wearing a warm winter accesories

Just like us, dogs can feel the cold and pain in their paws, that means buying boots for your dog is well advised and it might prevent certain injuries as well as keep your best friends paws very warm.

There are few more equipment pieces you could bring with you:

  • Cooling collars for the hot days
  • Dog harnesses for climbing or more technical trails
  • GPS beacons and leashes
  • Creams that help breed that doesn’t need boots to stay comfortable in the snow.

Food and water

When packing your own food and water supplies, don’t forget that your dear dog will need his/her own food and water supply as well. Dogs need a lot of water to maintain the hiking speed and keep themselves motivated enough to actually do it.

There are various dog packs, which are featuring a nifty built-in hydration system for watering your dog. Hydration is crucial and you should never underestimate your dog’s hydration needs.

hydration system for watering your dog

When it comes to food, it is advised for you to visit a vet and see how much food would be enough for your dog depending on the hiking length and conditions. Some dogs require nearly twice food when hiking, because while doing so, they also spend calories and train their bodies.

These would be the best dogs you can pick for hiking

Not all of the dogs can hike and do well at it, dogs such as Yorkshire Terrier, Cavalier King Charles spaniel, Shih Tzu, Pomeranian or anything alike will struggle and might even get in danger of life if taken on a hiking adventure out there. These dogs are not meant to be in the cold and bad weather conditions, they cannot run for a long time and they will be tired way faster than the dogs listed below, so please – leave your little cute dogs in their homes and do not risk their lives just because you think it might be fun.

Bernese Mountain Dogs

If you are one of those people who love hiking in the winter and cold weather conditions, the BMD will surely get along with you without any issues at all. Surefooted, obedient, big, strong and very happy to help – these are all the traits of a dog who will do amazingly well when it comes to hiking.

Bernese Mountain Dog in Snow

Bernese Mountain Dogs are awesome, but the bad part might appear when the sun arrives, these dogs struggle in warm/hot climates and it is not advised for you to take them on a long hiking adventure.

Siberian Husky

The name of this dog breed speaks its own story, doesn’t it? This breed will do amazingly well in cold weather conditions and will carry his/her own food and water without any issues at all. A little bit harder to train but surely worth a try, these dogs are very loyal, helpful and intelligent if treated well.

Siberian Husky Dog and a Hiker

They also struggle in warm/hot weather conditions, just like Bernese Mountain dogs.

Australian Shepherd

If you want a dog who is always full of energy and ready for action, then Australian Shepherd will claim your heart.

Australian Shepherd Dog

Agile and sure footed, this breed will do well in nearly all of the possible weather conditions, very helpful and friendly, this breed will stay with you forever if you train him/her well enough to hike with you.

Labrador Retriever

One of the most favorite dog breeds for hiking out there. Hard working, strong, trainable, and extremely smart, this breed will do well enough in cold and hot weather conditions, as long as it does not get too extreme.

Labrador Retriever dog want to play

This breed can carry from 7 up to 10 pounds of gear without any issues at all.

Vizsla

Stubborn and independent at first, this breed is actually amazing for the hiking lovers. After this dog accepts you as his/her owner, he/she will be your guardian angel forever.

Brown Vizsla dog looking to a person

Good for hiking, but requires a lot of attention and caution due to its curiosity.

German Shorthaired Pointer

This dog never gets tired apparently, very friendly, helpful, surefooted, strong and intelligent – once trained well enough, this breed will do just as amazing as Labrador Retriever or Australian Shepherd.

German Shorthaired Pointer puppy looking at the camera

In a case of emergency, this dog can also serve as a guard against certain situations that might occur.

Dalmatian

It is a lie that Dalmatian’s cannot be trained, they can and they can be amazing if it is done properly.

Close-up picture of a Dalmatian dog

This breed has boundless supplies of energy and is a good guard against the wildlife which might turn against you.

Rhodesian Ridgeback

Back in the past, Rhodesian Ridgeback dogs were trained to hunt lions, yes you read that right – lions! This breed has it all, loyalty, strength, size and a lot of motivation if trained well.

Rhodesian Ridgeback dog trying to pass the river

If you want to feel safe and have a real protector next to you as you hike the long trails, then this breed will become your best friend in no time!

Doberman Pinscher

A little bit harder to train than the Rhodesian Ridgeback, also a little bit more aggressive if not trained well. This breed is amazing if trained well enough to actually go hiking, very loyal, obedient and devoted.

doberman-pinscher dog named Ollie

It is advised to hike with this dog in less populated areas.

Weimaraner

Very similar to German Shorthaired Pointer, just a little bit less protective and more of a watchdog. This breed will follow you entire day and make sure that he/she is never tired when on the move.

Weimaraner dog in the forest

Loyal, friendly, easily trained and a really good friend before anything else.

Border Collie

No breed out there is as active as a Border Collie, very loyal to their owners and extremely intelligent – this breed never gets tired and will always want to go for more. Ever heard of a dog who can collect firewood for you?

Border Collie running in the water

Well, this dog can if you teach him/her how to.

A few more tips for those who can’t wait to go hiking with their dog!

One of the founders of the 300-member Nova Trail Dogs Hiking Club in Alexandria, Virginia – Amy Devine says these are five rules you should respect if you plan to go hiking with your dog:

  1. Your dog has to be leashed when there are other people around such as bikers, hikers, steep or slippery terrain.
  2. When your dog poops, make sure you always pick it up and throw it in the trash once done with hiking.
  3. Bring a brush and a towel for your dog, just so you can dry him/her out and make sure he/she does not ruin your tent with his/her dirty paws.
  4. Always get a blanket for your dog in case of cold weather conditions, no one deserves to freeze.
  5. Keep a track of dogs at night.
A well-mannered dog can be a great trail mate

There are a few things to take care of:

  • Always keep your dog in sight and under your command
  • You don’t want to take two dogs with you if having one dog is already an issue.
  • Encountering a loose dog can cause a problem, try avoiding contact with these and keep your dog on a leash meanwhile – just for the safety.
  • Do not let your dog beg for the food from other hikers, always make sure that your dog is not hungry and it should be fine.

Dog for hiking with a pack

Wrapping it up

Dogs really are our best friends if we treat them nicely and with care, they do not deserve any less than that because they will always do how we teach them to do. It is up to us how loyal, obedient and lovely will our dog be. It is up to us to determine whether we can afford to take a dog on a hiking adventure or not.
Do not risk the life of your dog just because you think it might be cool to take him or her on hiking, first, make sure that your dog is actually capable of doing so and that he or she won’t suffer and struggle while hiking with you.
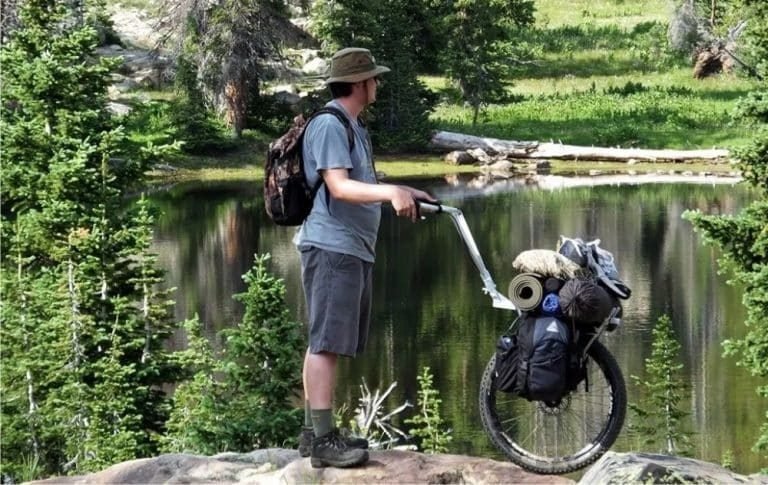
Labrador Retriever in his shelter

So, do you plan to go hiking with your dog? Let us know how well you and your dog are prepared for the activity by posting in our comment section.

What to Do if Bitten by Rattlesnake: How to Make Sure You Get to Have More Hiking Adventures

0
photo of a venomous snak

The question of “what to do if bitten by rattlesnake” is really common among climbers and hikers. The majority of those who goes on hiking trip really have no clue about what they can do if bitten by snakes.

But we are glad to give you all the information you would want to know! Much of the time, hikers don’t usually get the chance to be very close with snakes. It is a typical conviction that snakes are actually more anxious than people.

close-up photo of a rattlesnake

However, the fact is that snakes don’t actually escape when they see people, they can be both defensive and aggressive when threatened in their domain. Read on to know what rattlesnakes are, and what to do if bitten by one.

The Nature Of Rattlesnakes

Rattlesnakes fall among the category of the most lethal venomous snakes abiding in the US. They are responsible for the greater part of the snake bites in North America because of their impulse to hold fast and caution threat (whether animal or person) to step back by rattling their tails.

The time limit it takes for a man to die if by any means bitten by a rattlesnake, relies on his body size, time and weight between bite and cure. The majority of people make a full recuperation from snake bites. Most individuals bitten by rattlesnakes have accidentally matched with them; so be cautious!

el-salvador rattlesnake in a tree

Rattlesnake bites can be harmful, but are not often fatal to people. With appropriate therapeutic treatment, including antidote, bites are always not severe. Most rattlesnake bites have hemotoxic components which destroy tissue and influence the circulatory system by crushing platelets, skin tissues and creating inner discharging.

Rattlesnake venom likewise contains neurotoxic elements which immobilize the sensory system, influencing the victim’s breathing, in some cases ceasing it. The majority of rattlesnakes, have venom made basically out of hemotoxic properties. Mojave rattler and baby rattlesnakes are the exceptions; they possess venom which has more neurotoxic properties compared to hemotoxic and which makes them more perilous.

The coral snake, sea snake and cobra group of snakes likewise have venom with predominant neurotoxic attributes. Latest statistics have shown that more rattler bite victims are demonstrating side effects of neurotoxic venom compared to earlier years. This prompts the question “Is rattler venom ending up noticeably more neurotoxic?” Research is being carried on to know the reason why more neurotoxic system exists in casualties.

a rattlesnake moving

Their venom is very intense. The venom of the majority of rattlesnake species is made principally of hemotoxins.  Some rattler venom contains neurotoxins. Speckled, Mojave, tiger rattlesnakes are cases of rattlers where either the whole species or certain populaces inside the species create neurotoxins. Neurotoxins act speedier than hemotoxins and affect the nervous system.

Prevention of Rattlesnake Bite

One great approach to prevent rattlesnake bite is to abstain from trekking regions that are known to be snake region, particularly during the evening. You have to remember that snakes are really dynamic in darkness. So it is likewise a smart thought to choose walking along open trails and to keep away from loose rocks and bushes.

Many rattlesnake bites can be prevented because most of them are not aggressive toward people unless they sense peril. Thus, evasion of snakes ordinarily prevents a bite, so individuals should not attempt to deal with, catch or undermine any snake. Statistical reviews propose that around 40% of all rattlesnake bites in the US happen mostly in people that are addicted to alcohol drinks.

Beware rattlesnake sign

If someone’s work environment involves regions known to be natural surroundings of snakes, wearing defensive boots, thick jeans, and wearing gloves may decrease the chances of rattlesnake bites; or if nothing else, it might diminish the bite injury and the measure of venom dispersed. We have elaborated some prevention measures you can use to prevent rattlesnake bites, so read on!

Wear long jeans and boots

You need to wear long jeans and boot when hiking so as to help block rattler venom. Never go shoeless or put on slippers when walking in territories where you can’t plainly observe where you are setting your feet.

a hiker walking in their boots in an urban environment

Wearing climbing boots and long jeans offer an additional layer of protection from exigencies with a rattler.

Stay on trails

You need to always remain on trails when climbing, far from tall weeds and underbrush. Snakes can rest in any place that is not easily seen and enables them to avoid predators, keep away from extraordinary temperatures and hunt down prey.

People hiking on trails

Since trails have a tendency of having less concealing spots for snakes, they give a level of insurance for you. The brush gives security for snakes. Remain on trails to maintain a strategic distance from potentially disturbing a rattler in its hiding place.

Touch not even if it seems dead

Don’t ever try to disturb or touch a snake, even if it seems dead. Snakes utilize their concealed position to strike and murder their prey unsuspecting.

DOR snakes often look a little bug-eyed

Try not to botch their evident stillness as a safe chance to explore. Indeed, even freshly murdered snakes may still have the strength to bite.

Look for hidden snake before picking up stones or rocks

Since rattlers are usually very much disguised and sit tight discreetly for prey, they can be hard to see. Heaps of logs or rocks, patches of thick bushes, and spreads of tall grasses are only a few of the spots where snakes may look for the safe house.

Hiker looking at the landscape

Carefully examine rocks or logs before lifting them up or taking a seat to avoid inadvertently disturbing a rattler.

Never hike alone

Never hike alone, especially in remote regions. Always have somebody with you who can help you out in times of crises. Having a hiking accomplice is vital to help in an emergency, particularly in a circumstance where you or your accomplice is bitten by a rattler.

Group og hikers climbing Mt-Aspiring

If possible, have your climbing accomplice to take the photograph of the rattlesnake for easy identification in order to help with treatment.

Instruct kids about snakes

Always instruct kids to regard snakes and to allow them to remain unbothered. Inquisitive kids who touch or disturb snakes are much of the time bitten.

a-brave-boy-touches-a-snake

Instruct them often to give snakes the privilege of the way so as to avert snake bites.

Symptoms of Rattlesnake Bites

The symptoms of rattlesnake bites depend on the kind of toxin(s) discharged into the puncture wound or bite, and to some extent, on the level of toxin available in the tissue. The sorts of symptoms created can be classified into four categories:

  1. Cardiotoxins:This kind of toxin act on heart tissue
  2. Cytotoxins: This kind of toxin act on tissue at snakebite site or on tissue that specifically retains the toxin
  3. Neurotoxins: This kind of toxin act on sensory system tissue
  4. Hemotoxins: This kind of toxin act on the blood coagulation framework and may cause internal bleeding.

A few toxins may bring about more than one of these symptoms.

Rattlesnake on the grass

On account of the numerous symptoms that can happen with venomous rattlesnake bites, the potential symptoms and signs to search for are listed below:

  • A pair of cut imprints at the injury
  • Swelling and redness around the bite
  • Intense pain at the snakebite site
  • Vomiting and Nausea
  • Labored breathing (in outrageous cases, breathing may cease)
  • Disturbed vision
  • Increased sweating and salivation
  • Shivering or numbness around the face as well as appendages

Symptoms from these snake toxins are fairly variable and may happen rapidly or they might be deferred for a considerable length of time, contingent upon the type of toxin and the sum retained. However, little kids are more helpless against snake bites due to the fact that the relative bigger measure of toxin retained in connection with their smaller body size, can make the effect of the toxin more intense.

Identifying the snake helps emergency medical professionals to both envision the potential side effects, and it takes into consideration more quick and suitable treatment of the venomous rattlesnake bite.  A definite depiction of the snake, a photo of the snake, or even the corpse of the snake, will help distinguish the kind of snake and the kind of toxin.

rattlesnake on the ground

Much time shouldn’t be squandered, however, in moving the patient to a proper health care center and don’t place others at risk of getting bitten by rattlesnakes.

First Aid Treatment of Snakebite

It is very important to know the right step to be taken when you or your accomplice has been bitten by a rattlesnake, and also to know what can be done to avoid a snakebite. Common sense and logic are the two primary things that should be incorporated in understanding how to treat rattlesnake bite. So read on to know what to do and the steps to be taken.

  • Step 1. Diagnose the snake bite: To start with, you should know how to diagnose rattlesnake bite. It is significant to know whether it is really a snakebite or not. If you witnessed what happened, then you can be certain about it and after that move to the next guideline. But if you did not witness what happened, you should search for indications of the two teeth bite mark. Some other snakebite signs include swelling and direct to extreme torment in the bite region. You should likewise search for skin staining, which will show venom and the jerking skin on the region. The victim could likewise experience the ill effects of various symptoms such as spewing, queasiness, discombobulation, slurred discourse, sweating and variation from the norm of mental condition. On the off chance that the symptoms and signs are available, then it can be concluded that it is actually a snake bite and you need to continue.
  • Step 2. Get help immediately: This is the next and a very vital step to take after successfully diagnosing the snake bite. You need to get help immediately either by calling people around or dialing the contact of the closest health center around to bring an ambulance.
  • Step 3. The victim should be kept very still and calm: The next step is to make the victim stay very still and calm. It will even be much better if you can immobilize the victim. Make sure you don’t allow the move and it is ideal to utilize a splint in the snakebite area. Likewise, ensure that the bitten body part is situated lower than the chest of the victim. Put a tightening band or a gauze around 2-4 inches over the snakebite area, and likewise under it, if conceivable. Ensure that the swathe is not very firmly inserted through. The main purpose of the bandage is to keep the venom from heading out to the circulatory system and the lymphatic system.
  • Step 4. Identify the snake: It would likewise be better if you can identify the snake. Observe the snake’s size, pattern, color and some other subtle details of the snake.
  • Step 5. Clean the snakebite or wound: This Is another stage in treating snakebite. You need to Clean the injury or snake bite region with water and soap.
  • Step 6. Take the victim to the closest health center or clinic: The next step is to take the victim to the closest clinic with immediate effect. The victim needs to be checked persistently to keep an eye out for some other symptoms and signs. If necessary, you may need to do CPR.
  • Step 7. Try not to panic! This is really a golden rule. Try as much as possible to make the victim and every other individual in the team not to panic. And lastly, keep on checking the victim for changes in the snakebite or injured area.

rattle-snake on the rocks

What you should not do

We have already taken you through what to do in treating snake bite, but there are also some things you should avoid when treating snake bites.

We are going to take you through them one after the other.

  • Avoid strenuous physical activity: Don’t allow the victim to take part in strenuous physical activity. If possible, lift and carry the victim to safety. You can likewise have them climb out gradually, without their backpack so they are not over-burdened.
  • Don’t use a tourniquet: Restricting shallow blood stream keeps the venom from circulating, which you need to prevent. Concentrated venom will quickly annihilate cells. Enabling it to spread will weaken the toxin and diminish tissue harm.
  • Don’t use a cool pack: Cold decreases healthy flow to the tainted area. Likewise, a few specialists believe that snake venom expands weakness to frostbite.
  • Don’t use a suction device: Eliminating the venom by using a suction device was once standard method, yet is never again considered to be a safe treatment. The suction device does not evacuate a substantial measure of poison and can harm delicate tissue.
  • The victim must not eat or drink anything: Make sure you don’t let the snake bitten victim to drink or consume anything, including drug and liquor unless affirmed by medical experts.
  • Don’t cut over the snakebite marks and try oral suction: This is because of snake curve fangs, the pocket of venom won’t be the place expected and will likely have effectively spread. Also, majority of snake bites are viewed as “dry,” in the situation where no toxin was discharged into the snake bite victim. This may likewise enhance the danger of infection in the range by having an open injury.

Hiker drinking water

Medical Treatment of Rattlesnake Bite

Mostly, the venom is not really transferred in a snakebite, also there is likewise a major possibility that the snake isn’t a noxious kind. It is likewise imperative to know that regardless of the possibility that the snake is not noxious, medical treatment in hospitals is still important because the injury would still require some treatment and tetanus immunization are also required to be administered to the victim (contingent upon the number periods you had the tetanus vaccine). Many are astounded to discover that you can be infected with tetanus from a rattlesnake bite.

An  antivenom is needed if the snake species has been diagnosed to be venomous and the venom had been infused. It is critical to remember however that not all medical centers may have promptly available antivenom. Getting first aid treatment can actually save the snakebite victim, particularly if it is needed to buy some time between the period when the snake bites the victim and the time the victim gets to the hospital.

Government Hospital in Delhi

There are some species of rattlers within Canada and the United State, envenomation by which all will be secured by this convention. Those rattlesnakes, which are indigenous to Central America, Mexico and South America, whose extents don’t cover into the US, will be shrouded in isolated conventions. Fatalities in current circumstances are rare. The venom can create a wide range of clinical symptoms, including local tissue pulverization, cardiovascular fall, coagulopathy, and with a few neuromuscular symptoms and neurotoxic.

A tightening band should be set up proximal to the snakebite area. If available, leave in place, but if not, use a Penrose deplete as though for venipuncture. This prevents venom absorption. Try not to take it away until the patient has gotten to the medical center and is already getting the antivenom.

Ensure that no less than 20 ampules of Crotalidae Polyvalent Antivenom (CPA) are on the ground. This neutralizer has the important portions to kill the venoms of every single United State and Canadian poisonous snakes.