Home Blog Page 35

DIY Hiking Backpack: Crafting Your Own Essential Gear

0
A backpack on the grass, a dog and mountains in the background

Hiking can be loads of fun and at a basic level, you don’t need anything more than that legs and feet that you grew.  But in practice, you will quickly find that some other pieces of equipment make for a better experience. Some, like a good pair of hiking boots, will help you out by adding to your comfort and protect you. Others can make things easier, like a pack to carry water and snacks.

Let’s take a look at packs a little closer. There is a huge range of them out there, from the tiny that carry a little bit of water and a food bar to massive expedition packs that meant to live out of for weeks, at a time.  But none of them are truly made for you until you craft your own DIY hiking backpack.

Two Backpacks For Hiking on the Ground

But why would you want to make your own backpack?  If you look at other packs there are a lot of cool features, but you rarely find one pack that has all the features you want, in the colors you would select and is fitted just right for you.  As such you have to pick from the available options.  When you craft your own you can make a pouch bigger or smaller, move it as needed and pick a color scheme that you really want.

Skills and Tools Needed

The first thing that you’ll want to consider is ‘do you have the skills to craft your own homemade backpack.  You will want to have some experience sewing.  Since you’ll want this to be able to carry some weight and be able to withstand some knocking around the forest.  You don’t want it to come apart halfway through your hike.  While you could craft a pack by hand stitching it might go quicker if you also have a sewing machine.

measuring devices for sweing

While some design background would be helpful, but since for the most part backpacks follow the same basic patterns you can base your plan off of others that you have or like.  You’ll also want to make sure you have some measuring devices to ensure that any pockets or pouches that you want to add will hold whatever gear you are hoping to take with you.  Accurate measurements will also help ensure that you make a pack that fits you well.

Consider Your Design

The first thing you should do is find a pack that you like most of the features of.  This will give you a baseline to work from.  You can always design from the ground up, but that approach will take a lot more time.  Starting with a design that has been proven will move the process along quite a bit.

Once you have that springboard you’ll want to consider what changes you would like to make.  Does the pack need to be larger, smaller?  If you are looking to add pouches or pockets where would they be easy to access and what are you going to put in them.  Additionally, do you want to add more padding?

Backpacks on the ground

Now that you have an idea of the size and shape, consider how you will hold this pack.  Do you want to have just shoulder straps?  Do you feel better with a sternum strap keeping those shoulder straps from slipping down?  Will you be carrying enough weight that you would feel better with a hip strap as well?  And once you have an idea of these answers you’ll want to think about how much padding.  If you are going with the DIY ultralight pack you might go with minimal padding to drop the weight even more, but if you are looking for a long-range hiking pack you might want additional padding on the straps and even on the back.

Material Consideration

The material that you end up picking to craft your pack from will have a huge impact on not only how it carries your gear, but also how it feels, looks and survives the wilds.  You will want to take some time to consider all aspects of this choice very carefully.

While there are a lot of cool designs and color options in normal fabric, it might not be the best choice for a pack as it has no waterproof ability and is not highly sturdy.  Materials like canvas can normally be found in a number of different colors, can be waterproofed and will stand up to some wear and tear.  Their downside is that they can be heavy, so a pack made entirely from that would add a good bit of extra weight.

A backpack belt for DIY backpack

Once again, you should take a look at the pack that inspired you.  What is that pack or any of the other packs that you like the look of made from?  While you might not find that type of material in your local fabric store, look for something like Xpac, a little bit of searching online will yield some suppliers that are able to provide all manner of materials.

Remember though, since you are making your own, you have the freedom to mix and match as you see fit.  As long as you will be happy with the way things look together, you can select one material for the back and bottom, something else for the straps and as many options as you want for the body of the pack.

How to Sew a Backpack

It is always good to work off some type of plan, especially for your first attempt.  However, if you are going to work from the picture you sketched or from the thought that is swirling around in your mind’s eye there are a few pointers to be had. You’ll want to start by figuring out the pieces that you need and cut them out of your desired material. If you have no pattern to guide you cut them slightly larger than you need to give some overlapping space where you’ll stitch them together. As everything is cut out lay out all of your pieces to ensure that you have everything that you’ll need ready.

Now that it is time to begin assembling there are two main ways to go about the process.  The first is to start from one point on the pack, say the bottom, and start by adding pieces to it.  This will cause the pack to grow from the ground up.  You’ll see progress looking more and more like a pack as you add additional pieces on.  The downside is that some of the parts might be a little hard to add on in this method.

Sewing machine close-up

The second way to go about this is to build subassemblies.  In this approach, you’ll construct sections of the pack and then put them all together.  For example, you might form the bottom panel, then make each side panel with pockets and the front and the back then sew everything together.  This way will be a bit more abstract when you start off, but as pieces go together like a puzzle it will suddenly look like a pack.  This approach will definitely be the simpler when it comes to adding in the straps and belts that you want your pack to have.

The Result

With some effort, you can craft a pack that will have the features you desire and things placed exactly where you want them.  Will your first crack at this process result in a pack for which people will chase you down the trail and offer to buy right off your back? No!  But if you enjoy the process, you can make a business out of it.  The founders of such companies as Osprey, Kelty, and Gregory all started off by making their own packs.

Group of People Man and Women Staying Along with Large Bags with Climbing Gear Attached such as Helmet Camping Mat Walking Poles Ice Axe

Even if you don’t launch a career in making packs or make a pack anyone else thinks is amazing, the real question is are you happy with the outcome.  If you think it is comfortable, easy to use and does what you need, then the project has been a success.  If so, congratulations, if not, even in failure you can learn quite a bit, like why pack manufacturers do things in certain ways.  And hey, if you don’t like the one you made there is a wide market out there for packs.

Tips and Tricks

As with everything, having a few pointers to help you get started can aid in bypassing some mistakes along the way.

Practice Sewing and Go Slowly

You don’t have a Ctrl+Z option to undo mistakes on a sewing machine.  You can pull out the stitching and try it again, but every time you make a pass you are punching holes in your fabric.  This is going to slowly make the fabric weaker and less water resistant.

Close-up picture of a sewing machine needle

You’ll want to practice on some of the extra material first so you know how the machine you are using reacts when you put this type of material through.

Purchase Extra Materials

In any project, you should look at getting a little bit more material than you strictly need.  Some places call this management reserve or just your fudge factor.  It is good to have if you need to slightly change dimensions, redesign a piece or if you totally screw up on something.

A woman holding a material in her hands

While there is a range of how much extra you should have on hand, in general having 25% more material than you think you will need should be a good ballpark figure to start you out with.

Plans Make Things Simpler

Working off a plan helps you see how things will go together.  You can craft your own set of plans, but if you do so spend some time looking at other packs and think about how each of your pieces will connect and hold together.

materials for DIY backpack

There are ready made plans available on the internet (some ready-made kits if you feel better starting there).

Minimize Your Sewing

First off, sewing takes the time to accomplish, but where ever you need to connect two pieces of fabric that have been cut you’ll have a weaker point than leaving the fabric intact.  These are also places that can get caught and pull apart or just let water in through the stitching.

Sewing a backpack with a machine

When looking at your plan try to see what you can do to have the least amount of sewing in your creation.

If Something is Off, Stop

Sometimes you just get that gut feeling, you know that something doesn’t seem quite right.  If you get that feeling while working on your pack go ahead and stop.  Take the time to double-check what you are doing and if it is what you should be doing.  This is another point that having some plans or a drawing really comes in handy.  The quicker you notice an error the easier it will be to address it.

Measure Fabric to Create Backpack Body

You don’t want to think something is wrong and ignore it, only to realize that when the pack is complete something is off.

Final Thoughts

Is making your own hiking backpack a way to save money on an important piece of gear? Maybe, you may be able to get all the pieces for less than what you would pay for the finished pack, but you’ll need to take into account the amount of time that you would take to make it.  Is it a way to get a one of a kind customized pack?  Absolutely!

Making your own pack gives you the creative input to place the pouches, pockets, and straps where you want them and size them according to what you think should go in them.  You’ll be able to control the look, feel and quality of the piece. This doesn’t mean that it will be an easy afternoon project.  However, if you know how to sew and have some experience crafting things, this shouldn’t be a difficult project to accomplish.  As a plus, you probably have a few packs that you can take a look at for inspiration and design ideas.

Man with a DIY backpack watching the landscape

Lastly, we would love to hear from you.  Have you ever made your own hiking pack?  Do you have some extra tips or design tricks that you feel others should know?  Let us see them in the comment section below.

Hiking with Cats: How to Backpack with Your Furry Friend

0

It is common knowledge that dogs are easier to train because it is in their nature to please a master; while cats are more independent and difficult to control.

Even though many people would find it embarrassing to take a cat backpacking and put it on a leash – it is still possible. In this article we are going to show you a guide on how to turn hiking with cats into a pleasant and enjoyable experience.

A man hiking with cats

If you have got a cat and you want to bring her with you, then make sure to keep on reading!

Choose a Destination and Prepare a Plan

Before you set on a journey with your feline friend, make sure to perform a research beforehand on the area you plan to visit. You should be aware of the wildlife and potential dangers your cat might run into. Yes, cats are usually very hardy and can adapt to various environments, but that mostly depends on the breed. Some of the cat breeds are known as sensitive and cannot withstand high or freezing temperatures. The long-coated cats would not do well in a desert-like area without any shade while the short-coated cats would not do well in freezing temperatures, high in the mountains. That is why, before you go, make sure that:

  • Your cat is physically able to withstand the whole journey.
  • You are familiar with the area you plan to visit.
  • You perform a research and plan everything beforehand.
  • You bring everything you need for both you and your pet.
  • Consider the weather.
  • Stay safe.

If you are sure that your cat is healthy and physically able to endure the whole trip, then you need to make sure to bring the whole gear and other hiking necessities with you.

close-up photo of a hiking cat

This time you are not traveling alone, so there are very important things to consider.

How to Prepare Your Cat for Traveling

Not every cat is suited for the life outdoors, but even if that is the case you need to properly train your cat. That might seem like an impossible task for you, but with patience and strong will you can do it. This means that before you even start buying hiking essentials, you will have to teach your cat to obey your commands and walk on a leash.

  • Make sure to start early with training, the younger the cat the easier it will be for you to teach her important things. However, if you have not started on time, then you might face some difficulties with an adult cat who won’t cooperate.
  • Teach your cat to be on a leash. You do not see every day a cat being walked around on a leash, but in the wilderness it is essential to keep your cat close. As you know, cats are very curious creatures and they would easily get lost in the forest or even worse – run away. If they are used to come and go as they please at home, that must not be tolerated at the campsite. Leash trains your cat via positive reinforcement: give her treats and rewards when she keeps a harness and leash on without struggling. But do not force your cat to wear it because you will never teach her to like it.
  • Teach your cat to use a carrier as a safe space. Instead of associating a carrier with a punishment, your cat should have been trained to like the carrier and use it as a place where she rests away from any noise. Since you will be keeping your cat in a carrier a lot (during the car traveling, etc.), she needs to get used to it.
  • Make sure to microchip and ID your cat before you go. If the worst happens and your cat gets lost or stolen, the microchip might help you to identify her and find her sooner. The collar with a contact info is a great idea as well, but the microchip is a safer solution.
  • In order to prepare your cat for the big journey, you should make her used to it by taking her on short trips Put her in a carrier as often as possible, and show her that it is not a big deal and that she is safe as long as she is with you.
  • Since you are not going alone anymore, make a separate gear list for your feline friend. You should create a checklist for everything your cat might need, from food to medicine.
  • You should understand your cat and the signs she gives you. As an owner, you should be able to tell when your cat is acting weird, when she is hungry, thirsty or needs to use a bathroom. It might be crucial to be able to read these signs in the wilderness – if your kitty gets hurt, you would need to help her immediately.
  • Train your cat to come when you call her. This is very important because if she gets lost, or she wanders around, she must come when you call her. It is recommended to never put your cat off leash at the campsite, but if you do, it will come in handy for you not to chase the cat around. If you start training her since she is a kitten with positive reinforcement, you might succeed.
  • Make sure to make and bring with yourself, your cat’s photograph. If she gets lost, you can keep it on your phone or as a real photo and show it around in case she gets lost.
  • Many wild plants are toxic for your cat, so make sure to keep an eye on her in case she eats something weird.

Teach your cat to be on a leash

The Most Important Gear

After you have decided on the destination and made sure that your cat is all good and ready to go with you, it is time to pack. Here are some of the most important gear necessities that you must not forget:

Hydration

Hydration is important not only for you, but your feline pet as well. You need to bring as much potable water as you can. This is very crucial if you decide to hike somewhere where the temperatures are scorching and where you will sweat a lot. Do not rely on rivers and streams, even for your cat, because they might not be safe to drink.

Dublin Dog Nomad Travel Bowl

You can go for a collapsible water bowl that would make drinking easier for your cat and do not forget, cats are susceptible to waterborne diseases as much as people. Even if you decide to hike in the cold weather, you will need to keep hydrated.

Nutrition

Make sure to bring more food than you usually feed your cat at home because both of you will be burning more calories than usual. Since you will be bringing tasty snacks with calories to keep you refueled, bring some snacks for your cat as well. It is better to have enough food than to be hungry and collapse.

a little cat eating

As for the type of food, bring the same type you feed your cat at home because if you switch the type or brand, she might refuse to eat or get her stomach sick. An adult cat needs at least 250-300 calories per day to maintain her health and weight; but keep in mind that she will need even more while hiking.

Navigation

Navigation will be of more use to you than your kitty, but you will have to rely on maps, compass or GPS in order to travel safely. A compass is always a safer choice because it does not need batteries and it is lightweight.

a compass on top of map on the table

This is very important if you are visiting that campsite for the first time ever.

First Aid Kit

Your cat needs a First Aid Kit as much as you. Some of the most important supplies include: adhesive tapes, gauze rolls, hydrogen peroxide, ice packs, scissors, tweezers, gloves, gauze pads, blanket, towels, antiseptic wipes and many more. The kit should also contain a small guide on how to use these supplies, but it is up to you to get informed and familiar with them beforehand.

A-Fist-Aid-Kit for cats

Besides the first aid kit, you should also make sure that your cat has undergone all her heartworm, flea, tick and vaccination treatments. Since she will be in direct contact with wildlife, she might get injured very fast.

As for the medicine, if your kitty suffers from motion sickness make sure to consult your vet, but never give any medicine on your own.

Sun Protection

Believe it or not, but cats can get sunburned just like humans do. If your cat has a light-colored fur, purchase a sunscreen that is approved by the pet organizations and that will protect your cat’s skin.

Cat with Beach Umbrella

Just like you will be wearing an SPF sunscreen on your face and sunglasses, your cat’s ears and other parts of the body can get sunburned.

A litter box and poop bags

Before you go make sure to find out whether the place you are planning to visit is a pet friendly and whether you will have to clean after your pet. Perhaps it is forbidden to bury your pet’s waste so you will have to purchase poop bags and then dispose of them later on. On the other hand, you can purchase disposable litter boxes, if your cat prefers them more.

Feng shui your cat's litter box area for a home that looks fresh

Do not forget that many cats contain parasites in their feces that can be very dangerous for the environment, so make sure to get rid of them properly and according to the area’s laws.

A harness and leash

Purchase a proper harness and leash that are suitable for your cat’s built. You can also add reflective LED lights to them so your cat can be visible in the dark. Nowadays, many pet stores sell amazing reflective leashes that can be bought for a reasonable price.

A cat with a leash in the nature

They can come in handy, and you will feel more relaxed for being able to spot your cat during the night.

Clothes

You will need to buy proper clothes for your cat. That might include a warm sweater if your cat is short-coated and you are hiking in the winter; and a waterproof raincoat in case a storm or rain surprise you.

A hiking cat on a woman's shoulder

If your cat does not need warm clothes, then a proper waterproof raincoat with insulation should be a must. It can get chilly in the nights, and a proper coat might protect her from getting sick.

A transporter or carrier

It is impossible to go on a trip with your cat without bringing a transporter. That should not be a place where she is sent and punished, but a safe place where she can rest and be safe during the car traveling.

A cat in a carrier

Your cat might want to go into a carrier at the campsite if she wants to sleep and that is why you should provide her with a place of her own.

Toys and blankets

In order for your kitty to feel comfortable, bring her favorite toys and blanket with you.

A cat in a blanket

She will feel like a part of the home is with her and she won’t feel anxious.

A Cat Backpack

Many cat owners go for pet backpacks that allow them to carry their cats on their backs. These pet backpacks are stable, secure and provide ventilation and warmth. However, before you buy this type of a cat carrier, you should be aware of your cat’s temperament. If she is not a pet who would handle being “trapped” inside a huge backpack, then you might consider creating a DIY cat platform instead.

A Cat with a Backpack

This platform cannot be purchased, but you can make it by yourself – put a PVC made canvas on top of your backpack and secure it with straps. Your cat can ride on it without being scared of a confined space.

What to Do at the Campsite

We have discussed what to do before you go on a journey and what to do while traveling with your cat, but here are some tips for the campsite.

  • Make sure to keep your kitty in a carrier or on a leash, especially if your cat is not trained to come when you call her. You know your cat’s temper – if her curiosity always gets the better of her then make sure to keep an eye on her. Cats are predators and they easily get distracted by everything – but they also get into trouble because of that.
  • Do not tie your cat and then leave her unattended. This is cruel and very dangerous. If you are not ready to take care of your pet and keep an eye on her all the time, then do not bring her with yourself in the first place. If you leave your cat tied up and an animal attacks her, she will most likely die or get severely injured. It is better to keep her in a carrier for a period of time if you have to leave her unsupervised.
  • Keep your cat away from the campfire. As we already said, cats are curious. Well, their curiosity might prompt them to get close to the fire and play with it, even if they are on a leash. In order to prevent that keep your cat close to you and do not allow her to get too close to the fire. The same applies to tools such as knives, keep them away from your cat.
  • Try to maintain the usual schedule. Feed your feline friend at the usual time and play with her when you usually do. It is not easy to do this when you are hiking all they long, but make sure to create breaks to feed your cat and give her water. Set an alarm and you are ready to go!

A cat with a leash sitting on a tree

Final Thoughts

To sum up, we have covered the most important info regarding hiking with cats. Feline pets are very different from dogs and you should be aware of your cat’s temperament and challenges that come when training her. It might be even harder if you have not started leash training your cat from an early age, but it is never too late to at least try. Make sure to research the area and campsite you plan to visit beforehand.

Get yourself familiar with the first aid kit, toxic plants, dangerous animals and insects that might lure around and the weather. After the initial research you can start purchasing gear essentials and buy everything you and your kitty might need. That includes food, potable water, a harness and leash, proper clothes, a transporter and many more. Make sure to always keep an eye on your cat since the wilderness can be a great temptation for any cat and their curious nature.

A cat on a boat

After you have covered everything that you need to buy and prepare, do not forget to have fun with your furry friend! Thanks for reading and if you have any questions, do not hesitate to ask them in the comment section below.

How to Ford a River: Great Tips Every Backpacker Should Know

0

Backpacking is awesome. But time and again, there are those instances that make you question why you went hiking in the first place. Fording is one of these times. You are happily trekking up or down a trail, and suddenly, you are standing in front of a river that you have to cross if you want to keep hiking.

You have read up so much on fording, but when faced with the actual situation, you start doubting if you can really do it. Do not fret. This is your moment to shine. You know you can do it well and make it on the other side without so much water on your body.

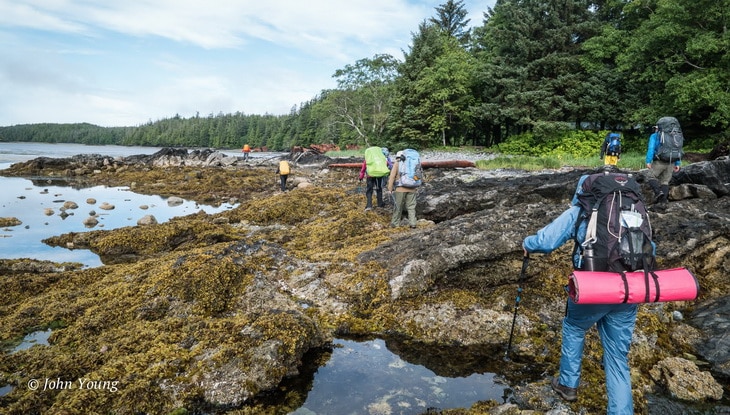
Nootka Island Trail Backpack

Today, we are here to take you through all you need to know about fording a river. Is it scary sometimes? Of course, it is. But you are a backpacker and the fact that you are already on the trail, means that you cannot back down when faced with a challenge. Keep reading to get the information that will equip you with all the skills you will need when it comes to crossing any river in your lifetime.

Determinants of a good crossing point

Not every shallow spot on a river is ideal for a crossing. You will need to assess a few options and tick a few boxes before you settle on a particular area.

Swiftness and depth

Are the waters flowing too fast and at high levels, even reaching above your knees? If you answered yes to this, then do not cross under any circumstances. This is a very hazardous point because you can easily get carried downstream by the strong currents. Consider scouting for better areas, or coming back the subsequent day to assess if the water levels have gone down.

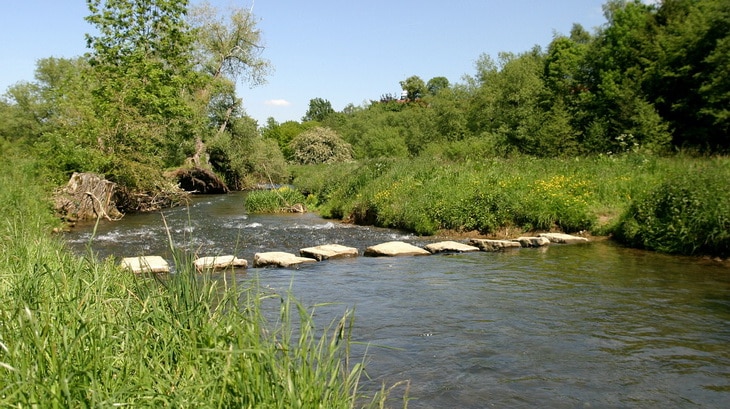
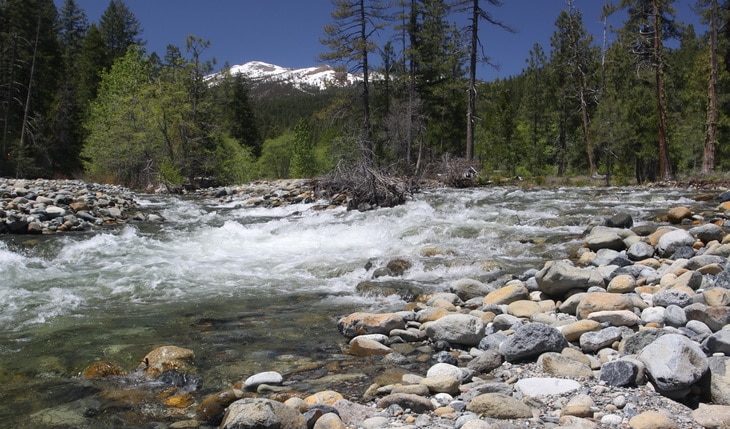
crossing rocks on a river

It’s even simpler crossing snow-fed rivers promptly in the morning before the day progresses and it gets warmer making the currents rise.

Width

Always go for a spot that is not extensively broad. It should be extensive enough and shallow with feasible entry and exit points.

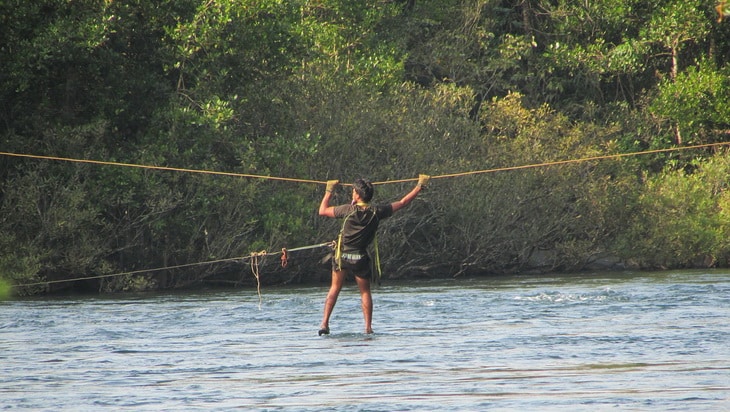
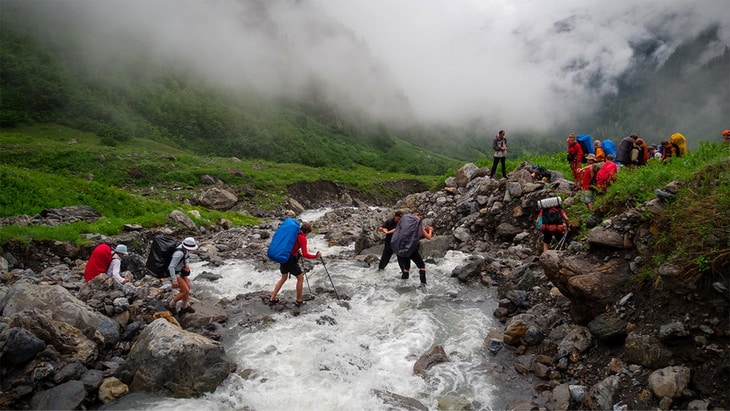
A man crossing Kali river

We advise that you avoid crossing at high banks and narrow points. This is where the current is is really the toughest you can face.

Run-out

In case you think that crossing at a point will be problematic, try finding out wherever the river is headed. Just in case you slip and fall while on it.

summer-rocks-near a river

Do not cross if the river leads to rapids and waterfalls as they are potential hazards.

Riverbed character

Establish whether the riverbed houses any holes and snags before you cross. The riverbeds are uneven in nature, therefore, be very cautious with each different one.

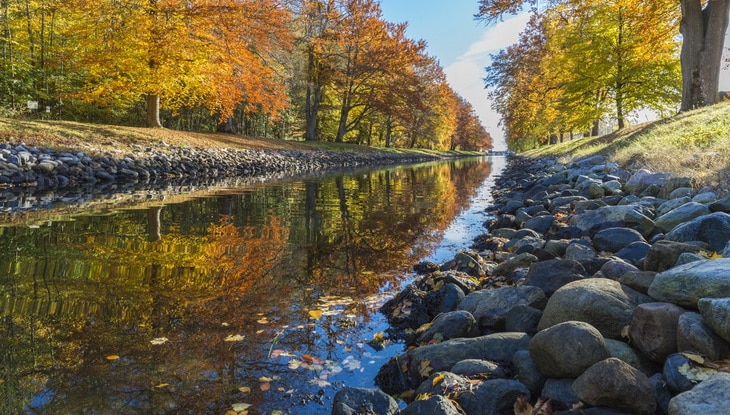
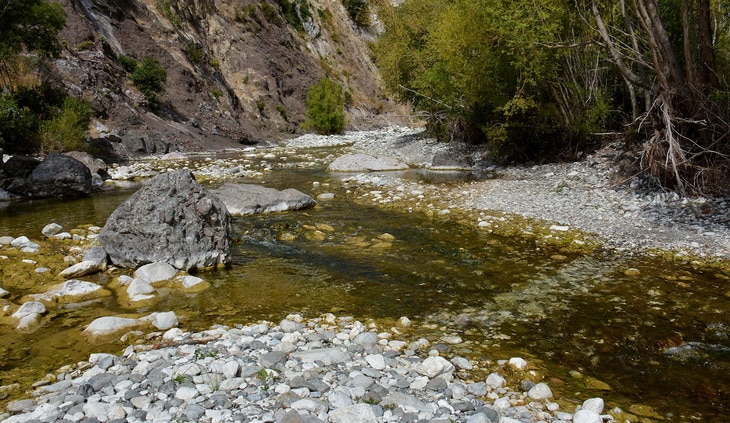
Clear Body of Water Between Yellow and Green Leaved Trees

In case the water in the bed is murky and laden with debris, consider looking for another crossing point or just bide give it time.

Exercise patience

After a thorough assessment of the river and you are still not comfortable with the conditions, we recommend that you sit back for a day or two waiting to see if the situation will get any better.

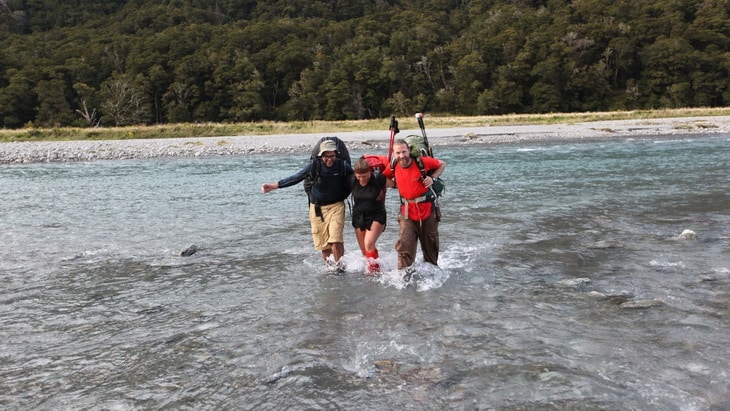
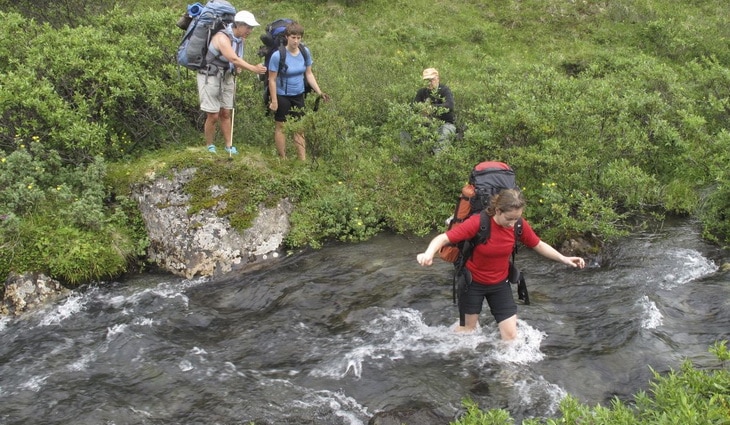
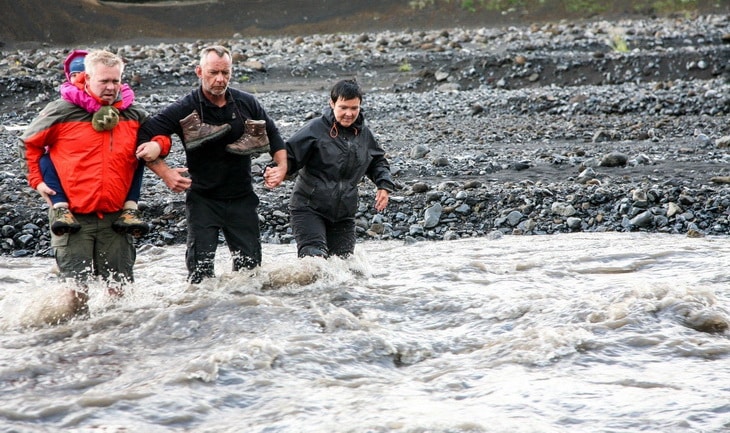
Three adults crossing a river

Do not rush to cross when all the factors are working against that. Your safety is much more important.

Crossing techniques

There are different methods you can consider when trying to cross a river. Go for the one that works best with your prevailing situation.

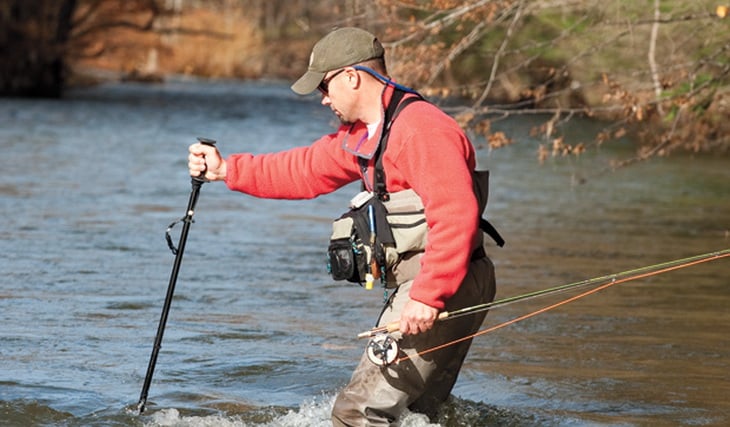
The tripod method

In this approach, you use your two feet and one long pole to form a tripod for greater stability. Start by entering the river upstream and hold on to your pole with all your hands for extra balance. Bend the knees and lean faintly forward into the oncoming water. Do this while ensuring that you bend at the knees, with your pole being right in front of you. Start shuffling diagonally the river and cross at a minor angle heading downstream and not straight across. You should be moving along the current and not against it.

Crossing a river with the tripod method

Use your stick to test the depths of the water. You should take your time because you don’t know what objects lie underneath. One mistake and you find yourself toppling over and drowning.

The quadpod method

This is considered a similar way to the tripod method. The only difference is that instead of using two feet and one pole, you use two poles. This gives you maximum stability and makes your crossing incredibly easy because now you have that balance.

two adults fording s river

Just follow the same technique as the tripod technique, and you will be just fine.

Crossings in a Group

Have you decided to go hike in a group?

a group fording-river

There are a few options you can consider following

  1. Each member crossing alone: This is an ideal method because as one of you tries to go at it alone, the rest of you position yourselves downstream. In case they fall, the rest of you are in a better position to give the support which should be in the form of an extended hiking pole, sturdy stick or a pole.We recommend that the most knowledgeable member of the group goes first. This is important so that they can easily figure out the safest route.
  2. The group crossing together:If neither one of you wants to start off alone, you can always cross as a group. You will engage the mutual support method for this to be successful. You should all hold onto one another’s shoulder straps or waist belt for maximum support. Enter the river in one single line, angling slightly downstream with the most resilient or heaviest one anchoring all of you at the upstream end. Alternatively, if you are about three members, you can try locking arms while facing in and just shuffle across. This will form a tripod that will give you that additional stability. You can also use a sturdy rope if you have one. Tie one end to a tree and send your strongest party across the river to tie off the other end. Now you can just clip into crossing with your last member bringing the rope.

Logs

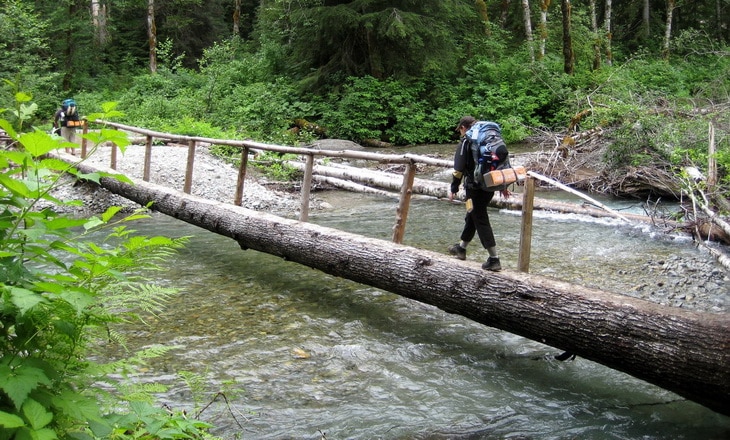
It’s so important that your feet are kept. In addition, just try to locate a tree that might have fallen across a river. Go for the ones with bark on it since it will give your feet more traction than an aged tree that lacks a bark.

crossing a river with logs method

As you cross, face the direction of the upstream and sidestep. Take caution not to gaze at a fixed point instead you have to retain your eyes moving to stop any upcoming Vertigo. If you have a backpack on, you will have some trouble because the weight might keep pulling you down, and the tree branches might keep snagging your straps.

Boulder hopping

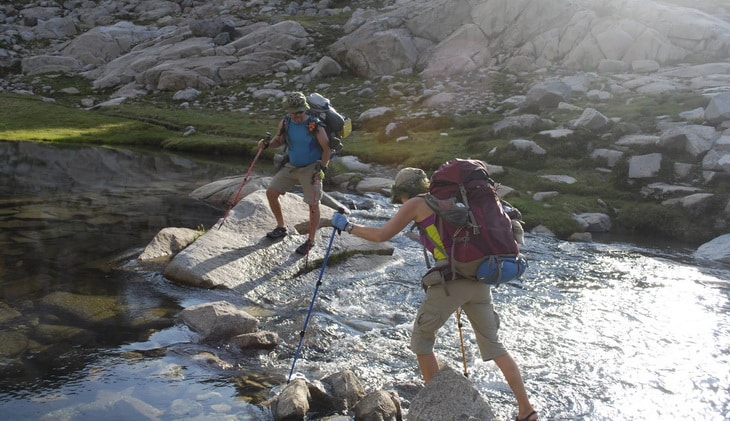
You can choose to cross while boulder hopping or maybe just rock jumping. This is a more traditional method than the log one because it’s very difficult to find a collapsed tree that crosses out the whole river. However, to successfully use boulders, you have to have a good balance and a fast reaction to loose rocks. Having a heavy backpack will make this quite tasking for you. Always try to maintain three points of contact the whole time, for better stability. You can also carry your trekking poles to help you maintain that balance.

A woman crossing a river

We, however, caution against this method because many of these rocks have been laying underwater for so long hence forming a slime layer that can easily make you slip and drown.

Safety tips you will need to know

Let’s get real. When crossing a river, getting water in your boots is the least of your concerns. The temperature levels and the water levels are what makes the whole situation a bit dangerous. If the water levels are too high, you risk drowning just by trying to cross over to the other side. Freezing temperatures can also be detrimental to your health, and the last thing you need is getting sick while you are out there.

You should know that fording is not considered the same as swimming. Especially when the water levels are above your thighs, you should not even try cross at that point. You might have heard or seen other hikers crossing rivers, even with the water coming up to their chest. Do not be that hiker. The best thing at this point would be to turn around and find a better crossing point.

However, all is not lost. There are a couple of things you need to know that will help you mitigate some of these risks and help you cross over safely to the other side.

Footwear

Keep in mind that there are underwater rocks that are super wet and slippery and just one slip can have you going downstream in no time. When crossing, you won’t be able to see these rocks.

If you carry crocs or sandals for fording, this may not be the right footwear as it doesn’t provide you with enough traction. You should only use sandals when wading across very shallow waters. They can easily be separated from your feet in strong currents leaving you susceptible to so many hazards.

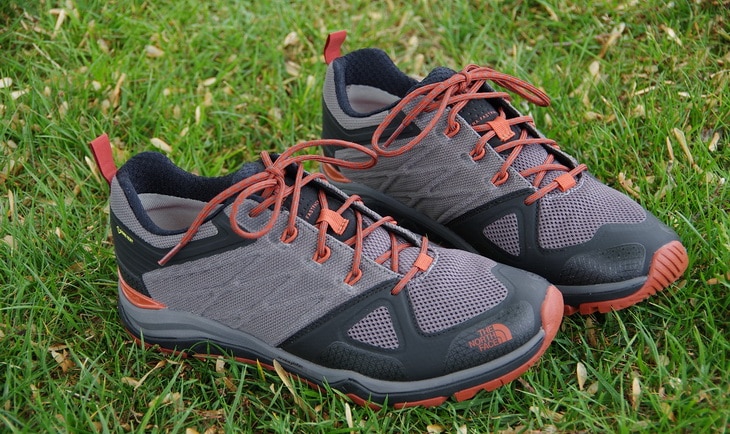
The North Face Ultra Fastpack

Consider protecting your feet with better options such as trail shoes, regular boots or invest in a pair of special-purpose water shoes. This prevents you from cutting your feet on broken glass, submerged logs, metal bits or rocks that might be underwater.

Scouting

Most of the time when you come across a river, you definitely look for a blazed line and assume this is the perfect area to ford through. Wrong! You should know that the volume of water going downstream is never constant.  Depending on temperature levels, general weather conditions, and new hazards not present when the blazed line was laid out, the crossing points differ each time.

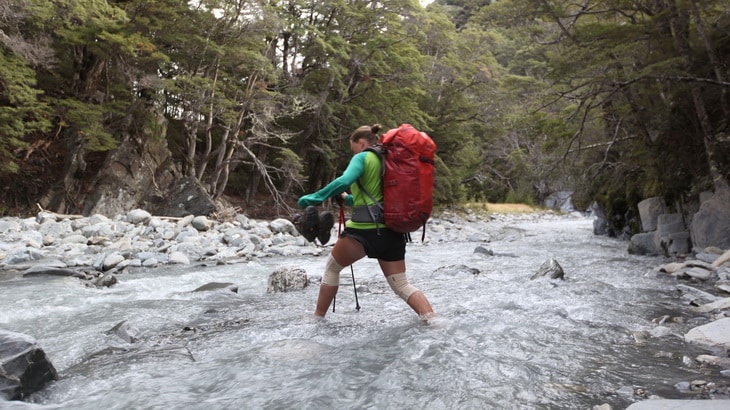
Nicky Crossing Timaru River, trying to keep boots dry

Take your time to scout for a suitable location that will make a crossing point. What was considered a good point one time is not necessarily a safe one for you. This is because river conditions are very dynamic.

Always face upstream

Whenever you are crossing the fast water, ensure that you are always facing upstream. Lean on your walking stick against the current and then shuffle your feet sideways, all the while leaning slightly downstream.

A woman crossing the river

You should always maintain two contact points with the riverbed. Your feet and the stick help you retain that solid base.

Strainers

These are pieces of trees, wood, branches under water or those hanging over the banks and they are the worst objects that you can consider crossing with. This is because in case you slip; the current will push you underwater, which will ultimately push you further downward the stream. Don’t let shallow waters fool you into thinking they are a safe bet.

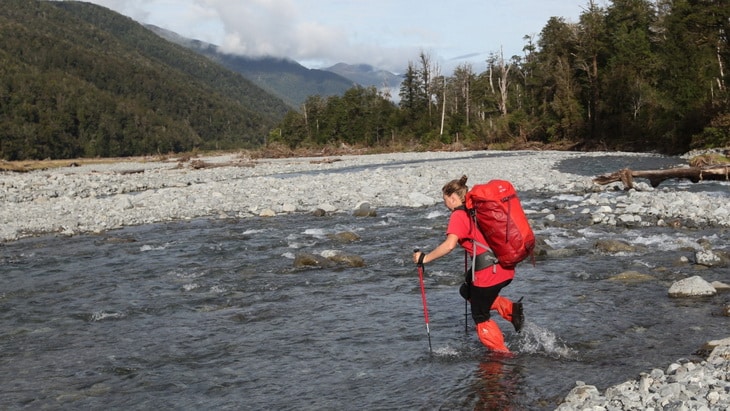
Taken while hiking the length of New Zealand

We have come across stories of hikers who were swept into a strainer and ended up drowning in 6 inches of water that they considered shallow.

Release your pack

Accidents happen all the time. When fording, you may lose your footing and find yourself getting pushed downstream. This is why it’s important that you release your hip belt and any sternum straps so that you can jettison in case this happens.

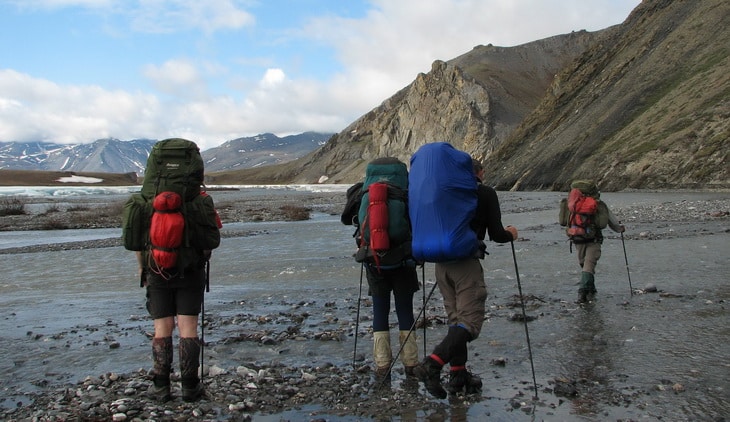
Beginning a ford where the Aichilik is not so dangerous.

When you’ve lost your footing, your pack fills with water which makes it very hard for you to move. Let’s say you have a 50 liter pack. With water weighing about 2lbs per liter, it will be practically impossible to lift the pack when you are fighting to stay afloat.

Chokepoints

You have checked around for strainers and are sure there are none at your designated crossing point. You don’t just cross. Not yet. Study the current and try to establish how fast it’s moving. The current is strongest where the river banks start to narrow down. Avoid such points at all costs because you can drown here easily.

Hiker needs to cross the river in front of her

Try to locate an island that could be in the middle of the stream. This is a good crossing point because the island splits the current and makes it weaker and slower. Fording at this stage is quite manageable.

Walking poles and stick

When hiking, you use walking poles and sticks sometimes to help you maneuver trails easily.do not ditch them just yet. They will come in handy as you cross the river by giving you extra balance and preventing you from toppling over. Go for wider branches when you need to break the current. Just plant the branch firmly on the ground and stand behind it.

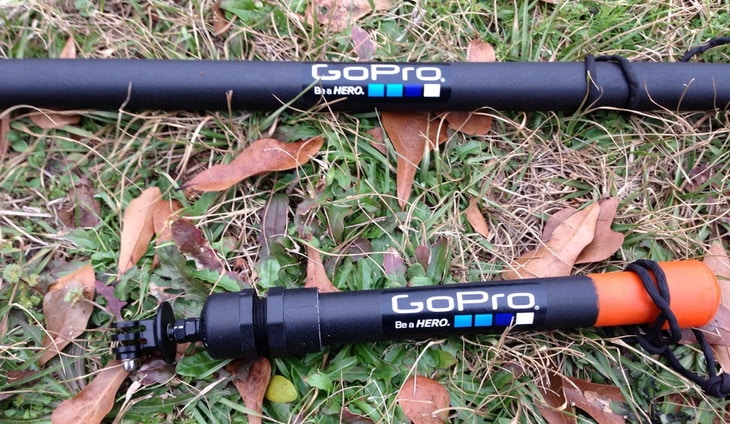
GoPro Poles

A stout wooden shoulder height pole works best because you can use it to form a stable tripod with your legs. This gives you extra since you will now be moving with two solid points of contact. Ensure that the stick is on the upstream side so that it can hold the current.

Floatation device

When crossing rivers that are more than knee deep, we advise on wearing floatation devices that will help keep you afloat even if you slip.

Person Wearing Personal Flotation Devices (PFD)

Invest in a lightweight one that packs small, and that won’t be too much trouble carrying.

Shorts

We recommend that you ditch those long pants and wear shorts instead. This is because the pants have more drag than shorts and will take more time to dry after they get wet.

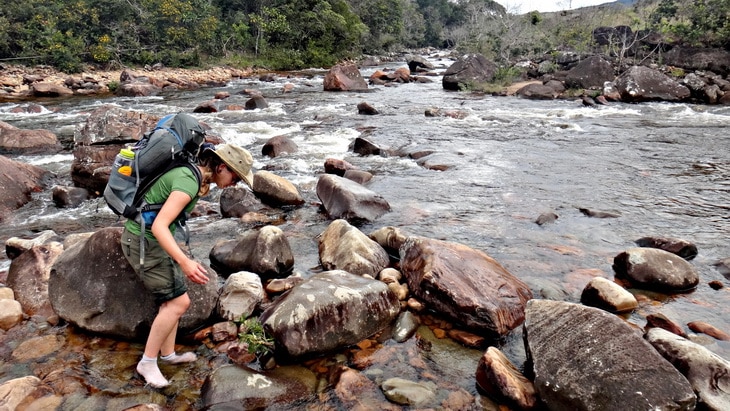
The second river crossing, el Río Kukenán.

Get out of your pants just before you cross and put on nylon shorts. You can even cross in your underwear and have the pants back on after you are through.

Rocks and waves

If you are keen enough, you will notice rocks sticking out of the water. A much closer look will show you that the water that is flowing behind these rocks moves slower than the water flowing on either side. The current at such points is weaker, and this makes it a good crossing point. Alternatively, the rocks provide an excellent resting place in case you had already started crossing, but the current got stronger.

River near mountains

Additionally, do not cross in the whitewater part of a standing wave. The rocks that form these waves are usually underwater and cannot be easily seen. Always cross beyond the wave and take extra caution because they sometimes appear in deeper sections of the river, which are risk hazards.

Eddies

An eddy is an area of water formed by rocks that are located near the river banks. You will see this only by looking at the side of the river that is closest to you, and that’s also near the far bank.

eddy is an area of water formed by rocks that are located near the river banks.

The water in an eddy flows upstream, in a slow manner. This also happens on the inside curve of a river. Whenever you spot eddies, know that they form a good crossing point because they are out of the current.

Cross as a group

Hiking is more fun when you are with other people. Fording is much easier when you are a group of individuals. You can make it safe to cross, by one person standing directly behind another. The person upstream will break the current therefore helping those behind him wade through easily.

Crossing a river in group

There are also minimal chances of two people toppling over and drowning. If you are three, even better. You can make a triangle which is a more stable form for crossing.

Worst case scenario

There are two instances that no one is prepared for when fording. Either you fall in the water, or your companion does. Well, if you slip while trying to cross and find yourself being swept away by the current, you need to regain your composure and worry about getting out safe and not if your bag and other items are wet or not. We advise that you either release your backpack quickly and let it go or hold it tightly against your chest to keep you afloat, like a makeshift floating jacket.

The last thing you want, is on your back because it will keep dragging you down since it’s heavy, making it easier for you to drown. Releasing your bag, rids of that additional weight and enables you to swim safely to the shore. Using either of the methods is a decision you need to make very fast. You need to consider the river levels and the terrain.

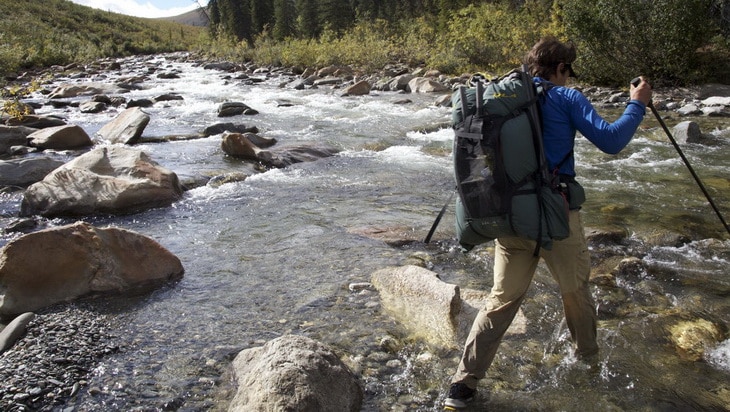
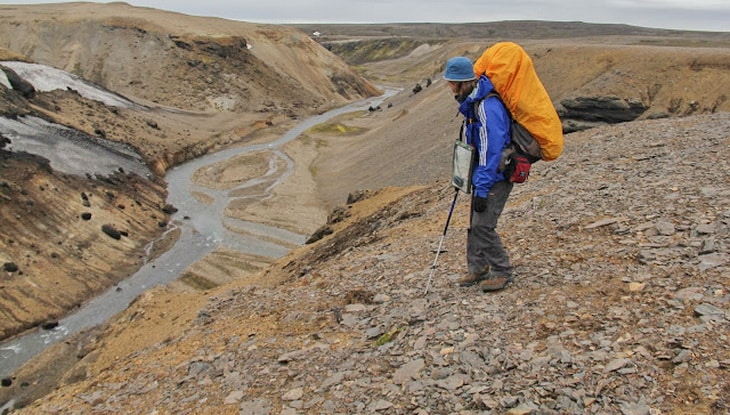
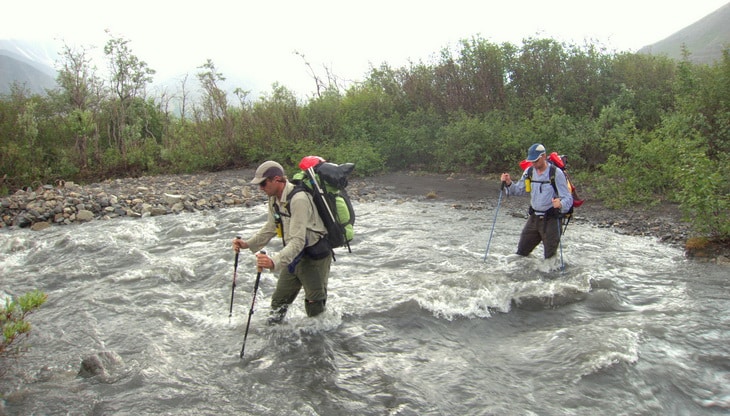
While fording this small but swift creek in Alaska, trekking poles provided two extra points of contact, and a way to test water depth.

Is your goal to swim or just keep floating? If you choose the latter, position yourself in a way that you will be floating on your back, and your feet should be facing downstream. This will protect your head against any collisions that may occur since your feet will take the fall. If you opt for swimming and you get to the shore, your primary goal should be to get warm.

You can do some jumping jacks or pushups for this. Change into dry clothes if you still have your backpack with you. Alternatively, if you released it, just build a fire. It will not only keep you warm but will also dry out your clothing.

What if your hiking companion falls in the water?

You need to know what to do when this happens. The most important thing is that you don’t panic when this happen. We recommend that you secure yourself first before trying to save someone else so that you prevent the risk of being pulled into the river as well. If he falls in close to the shore, just use your trekking pole or stick to reach out to him. Alternatively, you can quickly make a flotation device like a rolled up sleeping pad that you can further secure with a piece of webbing. Toss this to him so that he can use it to float to the shore.

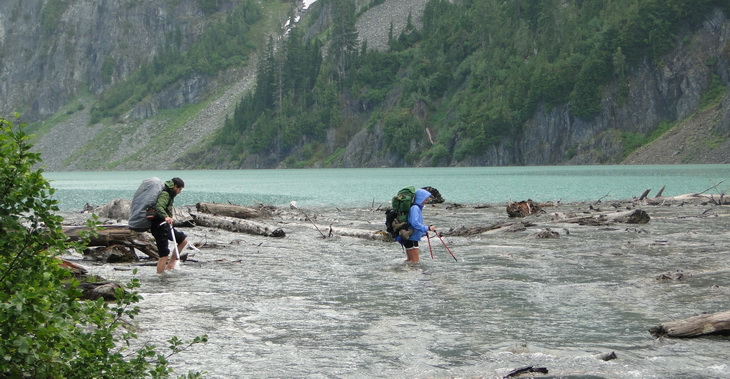
Fording the outlet of Blanca Lake, headwater North Fork Skykomish River.

Only get into the water if you can’t utilize the above options. Keep in mind that by going in, you risk of becoming the second victim who is not in an ideal situation, especially if it’s just the two of you.


Best Knots for Hammock: A Useful Guide About Knots for Hammock Camping

0
hammock camping near a beach

One thing we surely agree with is that hammock camping is quite a fascinating and mind-blowing activity, until you flip over or it slides because of the poorly secured knots. Hammocks, especially those suspended high enough, can subject you to injuries whereby you may fall, if not tightly secured. Although there is no standardization of how the best knots for hammock should be made, there are some effective tips on how to master that.

Hammocks are the best tools for all the outdoor hobbyists because their benefits outweigh those of the camping tents. So, knowing your way around these essential relaxation tools is of paramount importance because the proper setup prevents the safety risks. You need to know how to set them up, tie the best knots, and hang them on a tree.

Brown Hammock Between 2 Brown Trees Beside Body of Water during Daytime

To prevent the imminent risks of hammocks falling off the trees or hurting you, we have provided a comprehensive guide on how to set up a hammock. The guide emphasizes the best knots for the hammock that how to emerge victorious in your quest to set up a hammock. Anyone can excel in setting up the hammock.

Where to set up the hammock?

Firstly, you have to figure out where you are going to set up your hammock. Fortunately, it can be used almost anywhere provided there are anchor points. Some hang them between poles or trees. Unlike the selective and restrictive tents, hammocks are can be set up almost anywhere provided their supporting structures are sturdy enough and well-spaced at least 5 meters. With this in mind, check out the trees if they are not dead or about to die. Dead trees could pose danger to you should the strong winds occur because they might break and fall on you.

You must anticipate such dangers when using the hammock. You can suspend hammocks on a number of supporting structures, including using one tree only by using the spreading bars.  The rope has to be fastened tightly on each end to support your weight or that one of your partner even though it is not encouraging for two people to use the hammocks at a time. When setting up your hammock on trees, ensure that they are spaced between 4 to 5 meters apart. The ropes are often included in your package.

All you need, are the means to fasten them, such as the straps, carabiners and hooks. Beware of the terrain over which you set your tool on because, if you set it up over rocky surfaces and then it happens that you fall accidentally, you may get injured so prevent that.

Person chilling in a hammock

Other considerations include hanging the hammock to at most your height level and its base should be at chair level. Hanging it too high might subject you to the dangers of losing balance and then getting injured.

How to set up the hammock

Once you have found the strong trees on which you will set up the hammock, it’s now time to get the work done by first securing the straps whereon you will tie the rope. Even the carabiner can be used to attach the rope to the straps. Or even better, the loops can come to your rescue with an easy setup.

You can get the tarp just to stay ready should it rain. The hammock can be suspended under the tarp while still hanging on the preferred positions on the trees. The tarp will also protect you against the strong winds.

For a video tutorial on how to setup hammock, we recommend watching this video https://www.youtube.com/watch?v=R-A265qrsuA. It will show you the easiest way visually than a verbal way of directing you.

Hanging the hammock

Hanging the hammock is the main task at hand. Here you need the best knots that can secure it to the supporting trees so it doesn’t slide down when sleeping on it. There are static and adjustable knots that you can choose from. Usually, the static knots are ideal for heavy loads whereas the adjustable ones are for the lighter loads.

And for the record, there are many types of knots that you can customize your hammock with. We have only mentioned a few yet the best among them. Sometimes it’s all about trial and error when making the knots. For instance, you can use a specific knot and then put the heavy gear on the hammock to see if it can withstand that with the knot tied.

A man tying a hammock

Our first one on how to hang up a hammock is the Backpacker Hitch, which you can tie by wrapping the rope around the tree multiple times and then create some loops to tie in tightly. It will fasten the hammock and prevent it from sliding. here is also the Bowline, which you have to wrap its working around the tree more than twice. Further instructions and some knots are given below:

Bowline Knot

Bowline knot is one of the popular hammock knots. It was used by the sailors in attaching the sail to the front of their boats. The knot is quite versatile and can be used in many applications. So using it on your hammock gives you the guarantee that you are safe. Its loop is more secure and can be adjusted to any desired size and is not affected by tension. And this loop can be secured with ease on a tree.

Instructions:

  • Create a loop near the end of your hammock rope
  • Insert the longer end of the rope through the loop
  • Then pass that longer end around the start of the rope from right to left
  • Insert it down into the new loop and fasten it

Bowline knot is one of the popular hammock knots.

Becket Hitch

Becket Hitch is also a great knot to tighten your hammock on a tree. It’s been in existence for a long time to an extent that local users in South America just refer to it as the “hammock knot”. It is also a great way to connect the suspension to the anchor pole. No experience whatsoever in mastering this knot. Even a beginner can easily secure the hammock using it.

Becket Hitch Knot

For better results with the Becket Hitch, you can tie it with the webbing or the hammock rope depending on the configurations of your hammock. Keep in mind that the rope can also damage the tree, unless you do not care about that tree and do not intend to revisit it. The webbing strap, on the other hand, protects the tree and secures the hammock well.

Two half pitch

It is also a great knot to secure your hammock to the anchor point. It is often used to secure clothesline, secure tools and hang the hammock to poles or trees. See the instructions below on how to tighten the hammock using this knot.

Instructions:

  • Create a loop around the anchor point and then wrap the shorter end of the hammock rope around the longer end.
  • Then pass the end of the rope through the loop and pull it to make a hitch
  • Repeat the loop underneath the first half to make another half hitch
  • Then secure it

Two half pitch knot

Water knot

Water knot is also a great way to secure your hammock. Hang the hammock using the slings wrapped around the tree at least twice, then subsequently tie with the water knot. It is easy to adjust this knot and it fastens the hammock well to prevent it from sliding.

Ideally, there are plenty of knots that one can customize. For the inexperienced is the fear of falling off the hammock because of poor knots. For some video tips on how to tie a hammock to a tree, watch this https://www.youtube.com/watch?v=6013xBV4Ghg to get a glimpse on how to secure your hammock.

Water-knot-webbing-tight

As we’ve already mentioned, there is no standardization on how one should form the perfect knots. Most of the knots are what others have tried many times using trial and error techniques. The idea is not to secure the knot to an extent that it may be difficult to remove your hammock after camping. We want quick release knots.

And there are hammock hanging techniques as well that can be helpful to you. You can hang it using the Swiss Style whereby you can rock back and forth using the two anchor points on a tree. The other technique is hanging it with the spread bar that allows you to turn and rotate at an angle of 360 degrees using only one anchor point.

Hammock versus tent camping

Hammock may be a new way to camp light and conveniently. With the tents, you are restricted from pitching it on rougher surfaces unless you have quality sleeping pads to make up for that.  If it rains, water can run into the tent if not featuring water repellent coatings. So with hammocks suspended high above the ground you are safe from rainwater on the ground as well as snowy surfaces. It is also light and convenient to set up.

Sleeping in a tent is not as comfortable as sleeping in a hammock. Moreover, setting up the tents is a hassle and they’re heavy and bulky and relatively expensive. Minimalist hikers may find the hammock viable to meet their needs. Other benefits of the hammock include the following:

  • Protects you against the outdoor elements better than the tent is because of its suspension
  • It is lightweight, inexpensive and portable to travel with.
  • Easier to set up as long as you found two trees or as long as you have a spreader bar or other anchor points
  • Hammock camping is spotless. No one will notice your campsite because no anchor points on the ground.
  • Provides enough ventilation and relaxation than the tent can.

It seems we have plenty of benefits of hammock camping. However, consider its downsides as well. For instance, two people in a hammock can mean danger. It is only recommended for a solo user. If you are hiking with your partner, you have to purchase an extra hammock. Then three trees would be fine to also secure it next to yours.

Man resting in a hammock

And when storing items, the hammock may not be a good tool. You have to attach the rain tarp over it so that you can protect yourself from the downpour. For additional storage, you have to bring an extra backpack to hang it on the tree as well.

Safety Tips for Hammock Camping

Although we value hammock’s convenience over camping tents, it is also subjected to safety risks. You can get injured if not vigilantly setting it up. Some of the safety tips include the following:

  • The suspension must be sturdy. The cord and the webbing, usually come with the breaking strength or working load prescribed. On average, the lowest is 700 lbs.
  • The trees or the anchor points must also be strong. The trees with diameters of over 6 inches are the preferred ones to withstand your weight. All the trees should preferably be of the same width. Moreover, beware of the old branches of the trees as they may all in times of strong winds to hurt you.
  • Use the best knots when securing the hammock. Knots can add value in reducing the strength of the webbing and the cord.
  • Do not lie diagonally on the hammock. Rather lie across it.

As for care instructions, you can follow the manufacturer’s instructions because the fabrics of these hammocks do differ.

Woman relaxing in a hammock

In winter times, you can bring the specific sleeping pad and use with the hammock. For summer camping, hammock needs no additional gear.

Final Thoughts

We have come to the end of our review of the best knots needed for a hammock. We have highlighted how to setup and tie the hammock on a tree, and have also discussed the safety tips. You should be ready to purchase it for your next trip. Hammocks are growing in popularity due to their convenience and comfort in camping than tents do.

Close-up photo of a hammock knot

If you have any thoughts or experience you want to share with our readers, feel free to leave a comment in the comments section below. Thanks for reading!

How to Layer for Winter: Keep Warm During the Coldest Hikes

0
Winter layering

Avoiding hypothermia and frostbite is important irrespective of the type of winter activity you are planning to take part in. Hiking and camping during the cold season often require layers of clothing if one is to endure the cold weather. Everyone adapts layers in different forms, and some of the methods or products used will vary depending on the place you are visiting as well as personal preferences. You might discover that you prefer to wear more layers of thinner clothing or fewer layers of heavy clothing. All these will vary depending on what you are comfortable with.

Irrespective of these personal preferences, the purpose and concept are the same: retain warmth in the most efficient way possible. This is the basic of layering. As long as the attire or the gear you select can serve this function, then you are on the right track.

THE FOUNDATION OF LAYERED CLOTHING

The rule of thumb when it comes to winter hiking is to ensure one remains dry and warm throughout. To achieve this, it’s necessary to select high-quality gear and wear clothing that is designed for extreme outdoor conditions. Appropriate attire for the winter is always multi-layered to ensure no frost can pass through and reach the body.

How to Layer for Winter

There, a single layer, no matter how thick it may be, is never enough. Even so, do not rush to restock your wardrobe by adding dozens of layers – this doesn’t help. The optimum number of layers you would require is three: the base, mid, and the outer layer.

The base layer is the most important because this part is next to the skin. The main task of this layer is to regulate temperature and eliminate any moisture when active and sweating. This layer is often made from two types of materials: synthetic and wool.

If you go with woolen attire for the base layer, you need to know that merino wool is preferable as it absorbs the odor as well as moisture. Additionally, this material offers higher warmth while being light and soft. For that reason, woolen material as the base layer is the right choice for those who love hiking for long in the coldest of weathers.

You can also decide to go with a synthetic clothing, especially when you are looking to save money. This material can absorb moisture and keep you while remaining breathable. Nonetheless, you should be prepared for the unpleasant smell: after a long day of intense and long hiking, the synthetic underwear may produce an unpleasant smell.

Winter layering - hiking

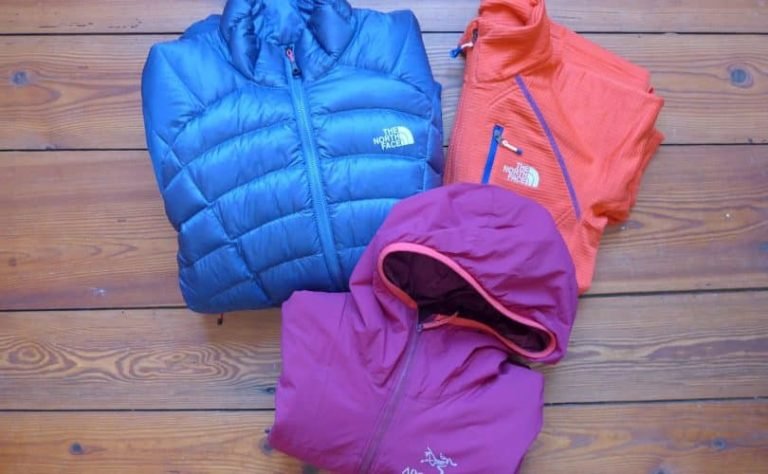
The second layer, also called the mid-layer, preserves warmth. This includes ant attire that you wear between the first and outer layers. The best option for the mid-layer is any garment made of wool or fleece. A thin down jacket is also an excellent option. If the outside temperature is too low, or if you will be spending your night outdoors, it’s advisable to put on the second layer.

The final layer is also known as the shell or the outer layer. This layer is used to offer protection against moisture, the wind, and snow. That is why the main garments for the outer layer are waterproof pants and jackets which are designed from high-quality materials like the eVent or GOTE-TEX. If you look for a cheaper alternative, then pick materials with a polyurethane coating as this is affordable, yet quality.

Apart from the clothing, it’s imperative to pay attention to other accessories and footwear. The most suitable footwear is that which makes hiking in winter easy and comfortable. In addition to that, insulated and waterproof boots will protect your feet from getting wet and cold.

Winter hiking boots

Pertaining to additional accessories, you may include a hat that is made from wool, windproof and waterproof gloves, extra pairs of wool and synthetic socks, and goggles to protect your eyes in sunny and windy conditions.

WHY LAYERING WORKS

Multiple light layers function together like a symphony to ensure you remain dry and warm, while making it possible for you to hike and trek without a problem. Layers work simply because the body warms the air between them. This keeps you warm, as opposed to using a single large layer. By layering, you give yourself the versatility you need on the day when the unexpected weather catches you unawares.

The art of layering occurs when you figure out the right combination of garments to match the conditions. You know it is an art when you can hike smoothly without having to cut the process short because your bones are freezing to death. How you layer will depend on your personal threshold of what the “cold” is.

Winter hiking

Each of the layers highlighted above serves a specific role. Depending on how windy, wet, or cold it is or depending on how warm you feel, you can utilize various combinations to handle just about anything the cold throws at you. Do not hesitate to experiment.

STAY DRY

To remain warm and dry, consider the following:

  • Secure your hood – If the wind is whipping your hat, even when it’s well cinched over your head, put your goggle band over them it to prevent it from being blown away.
  • Stagger zippers – Avoid stacking the zippers around your chin and neck. Otherwise, you could have a few rubbing you wrong. Instead, consider combining the crew neck base layer with a zip-T layer of insulation, then topping them using the neck gaiter.
  • Foil fog – If the goggles steam over, there are chances that it’s too hot. Manage your body temperature, unzip your clothes, and keep the anti-fog wipes in a handy pocket.
  • Pack a face mask – This needs to be windproof and well-ventilated to prevent wet-out and condensation.
  • Put on good–fitting gloves – It’s important that the gloves you wear fit you well. If you have to operate your phone, make sure your gloves are touchscreen compatible, so you don’t have to remove them in the cold.
  • Zip up pockets – It’s imperative that your pockets have zippers as these might be filled with spindrift when it is blowing hard.
  • Gaiter up – These will keep out the snow and prevent the crampons from cutting your pants.

Winter hiking

ON THE MOVE POINTERS

  • Keep food handy – Tear off the corners of the energy bar wrappers before you can head out, then put them in warm pockets, so you don’t go through the work of fumbling with seals while on the move. This step is also essential as it prevents you from taking your gloves off to unwrap your energy bar. Store some candy in your pocket for a quick energy boost.
  • Huddle up when conversing with your partners – This process keeps you warm and ensures you sound better
  • Learn and agree on sign language beforehand – For instance, holding your hiking poles out to the sides implies “All Good.”
  • Take an emergency bivvy – These products offer better weather protection during a whiteout and storm while in the outdoors.
  • Pack like a parachuter – Put everything in your backpack in reverse order. This is because you will probably not need some items until later on during the day. For instance, a tent goes first as this will only be needed in the evening. The puffy jacket you will need for every rest stop should go on top.

Winter hiking on sunset

THE LAYERING PROCESS

Layer Zero

When layering, make sure you don’t forget this layer. This layer is arguably the most essential as it covers your valuable parts. Underwear is a must when you are planning to hike in the cold.

Men – If you don’t put on boxer briefs along with a wind stopping fabric in front, then you are in trouble. There are a variety of layer zero garments in the market. Do your research and find one that would suit you. Women, while the wind stopping garment isn’t as essential for you as is the case with men, it can never hurt to put on one. It’s important that underwear such as the bras can block whatever wind you come into contact with.

Hiking underwear for winter

In addition to that, moisture wicking fabric is necessary when hiking. During the summer, sweat dissipates easily since you are wearing a few layers. However, during the winter, this is quite rare. When planning to hike in the cold, you need to spend on some winter undergarments which move moisture like an aqueduct to your next layers of clothing.

The Base Layer

The base layer is the next most significant layer after the skivvies. This part of layering touches most of your skin. When layering for the winter, the base has one job; to pull the moisture away from the skin to dissipate it through other layers. This process helps in preventing frostbite.

The base layer needs to be tight, not very tight, but snug. A good base layer should move with you. This serves three main functions:

  • Less chafing and better moisture transport
  • Less material to bunch up under the other layers
  • Facilitates a fast movement

Note: Do not wear cotton as your base layer is you want to stay warm. This material takes forever to dry and does not stretch with the skin when moving. Therefore, a cotton base can hinder your fastest movements. When picking the fabric for the base layer, wool and synthetic are the only preferable options.

Winter base layer

PROS:

  • Wool – Offers better insulation when wet, it’s very thin, and does not retain stink.
  • Synthetic – This fabric is cheaper, more durable, less itchy, and dries quicker.

CONS:

  • Wool – Takes a longer time to dry, is less durable, and quite expensive.
  • Synthetic – Retains much stink and will not keep you dry for a long time.

If you are on a tight budget, a synthetic base would be the right option to go with. These materials can be found for half the price of wool. This means you can purchase more than one. You will also find out that base layers often come in different weights. A thin layer which allows for efficient movement of moisture will give you more versatility. Other layers offer warmth.

The Mid Layer

This layer exists to capture the warm air generated by the body between the base and the outer layer. These are simple the layers you put on over the base and under the jacket. You will find numerous products on the market claiming to be perfect “mid-layer.” From wool to fleece, to synthetic to even cotton.

Winter insulation mid layer

What you need to remember is that mid-layers ought to be lofty and breathable, so they don’t trap the moisture along with the heat. For this purpose, you can utilize anything from a long sleeve T-shirt to an expensive Merino wool. You can also utilize short sleeve, vest, etc. The possibilities for mid-layers are endless. The base layer should not be as tight as the base as you will still require a full range of motion.

The Outer Layer

Also called the shell, this layer protects you from the wind, snow, and rain. These range from the pricey mountaineering jackets to the simple windproof jackets. A good number of these jackets allow at least some sweat to escape. Virtually, all jackets are treated with the DWR finish to keep off the moisture.

Winter hiking jacket

The outer layer is a significant piece during an inclement weather because if the water and the wind are allowed to get into your inner layers, you start to feel cold. Moreover, without the right ventilation, it will be difficult for perspiration to evaporate forcing it to condense inside your shell. You also need to consider the fit. The shell layer needs to be roomy enough so it can fit easily over the other layers and to enable movement.

OTHER AREAS THAT NEED TO BE COVERED

Head

You lose about ten percent of the body heat from the scalp. While this may appear small, your ears, neck, and head are more sensitive to temperature than other parts of the body. To protect these sensitive areas of your body, you should have a hat that functions properly.

Winter hiking hats

Most outdoor companies sell hats which are made from different materials. The winter caps are snug and made from wool and fleece.

Hands

When keeping your hand warm, it’s important to remember that they also need to be flexible. That way, you’ll be in a position to use them efficiently. The same rules of layering are applicable when you want to keep your hands warm. The base layer is ideal for cold weather conditions.

Depending on the level of coldness, you can determine the amount of layers you would choose to put on. The insulating/middle layer may consist of a fleece mitten or glove, or a thicker down. Doing so will ensure that your arms remain as warm as possible, even in freezing temperatures. Always remember that the more the layers, the more your fingers will be warm and comfortable to move.

Winter gloves

You can also decide to forgo the mid-layer if you will not be facing freezing temperatures during your trip. The most significant layer is the outer layer. Again, you’ll require a cover or glove that is windproof and waterproof as well.

Your hands are very susceptible to cold temperatures and frostbite. If they are exposed to wetness, it’s challenging to warm them. Therefore, make sure your hand is well-layered, so they don’t freeze and become useless.

Feet

Just like your arms, the feet are also prone to frostbite whenever you are hiking in the winter, and when the feet got cold, then your entire body will probably be cold. You will need your garments to be breathable and keep out the snow or rain as well. You can begin with your socks. You will require a firm foundation, with wool socks or a thin layer of fleece. This ensures that your feet retain as much heat as possible.

Winter hiking boots - Vasque

After the base layer, you’ll need some waterproof hiking boots. Breathable and waterproof boots are ideal for keeping out excess moisture in case you come into contact with a wet ground. Most of these shoes are well insulated, so you don’t have to worry about your feet getting cold.

IN CONCLUSION

Hiking and camping during the winter can provide some of the most unforgettable memories. Everything is attractive, peaceful, and pure white in most cases. When it comes to outdoor exploration, you need to remember that there’s no bad weather, only poor clothing.

This aspect couldn’t be any truer in the world of outdoor exploration. As long as you have the knowledge and information about hiking and camping in the winter, you will have some of the best experiences of your life. You’ll be able to see amazing places and incredible sceneries. Be prepared and layer yourself according to the conditions you’ll be facing. In addition to the three layers, you should never forget layer zero as this is quite important particularly for men.

Winter camping

So, did you find this piece informative? If you enjoyed reading this article and have some questions, feel free to post them in the section below. We will be more than willing to answer all questions you may have.

Best Hiking Shoe Brands: Which Brand Works Best For You?

0

If you love to hike, you know that a great pair of hiking shoes is exactly what you need to make the most of your experience. You must make sure your feet are comfortable because hiking can take a toll on your body after a while. Some brands are definitely better than others, so we will discuss the best hiking shoe brands so you have options when you begin looking for your next great pair of hiking shoes.

Hiking shoes are either high top or low cut and have mid soles that can flex a little. You can find them in various weights. Everyone wants their hiking shoes to have style, but they must also be functional. You will want to make sure the soles are comfortable for your feet, and that they have enough tread.

Do you want ultra light shoes? Are you looking for hiking boots just for day hikes? These are things you will have to ask yourself when it comes to ensuring that you get what you need out of hiking shoes.

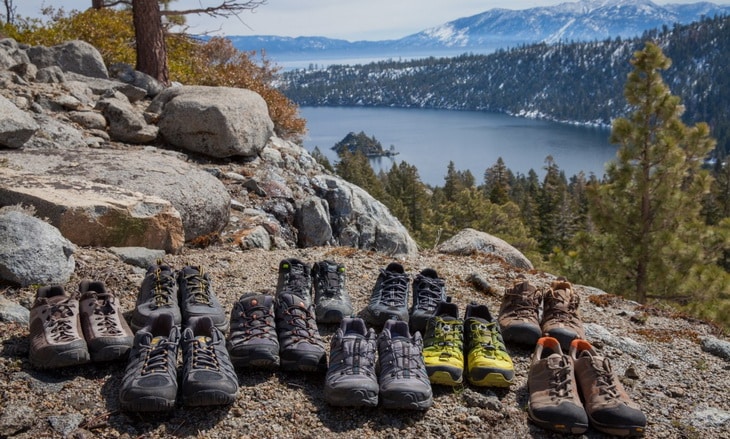
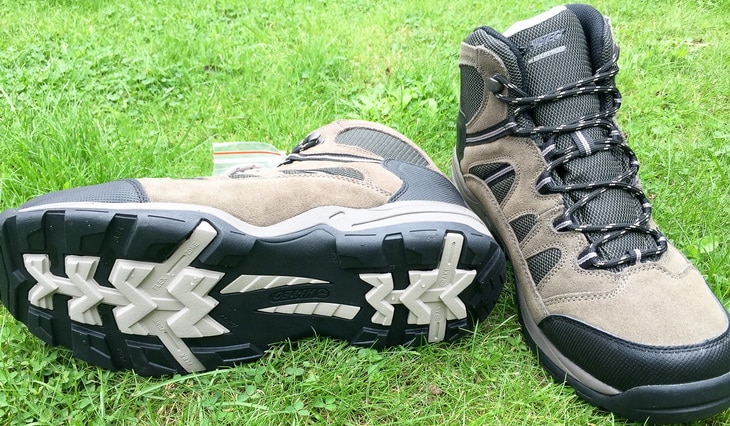
A lot of pair of hiking boots and a landscape in the background

Continue on below to learn more about the features you should keep and eye out for, and a review of the top hiking shoe brands to help you choose your next pair of functional, comfortable hiking shoes.

Features to Consider

See below for the important features to keep in mind when searching for a pair of hiking shoes.

Types

There are a few types of hiking boots, and you should consider what type of hiking you are going to do before you purchase any shoes for outdoor activity.

Regular hiking shoes are generally high cut and offer support and comfortable soles for long bouts of hiking. Even backpackers use regular hiking shoes for their longer backpacking trips. Usually, they are made to have some ability to breathe.

Day Hiking shoes are mid to high top length and are meant for hiking for the day, or for short term backpacking adventures. These flex better than regular hiking shoes, and they do not take long to break in and get comfortable. They are only good for a day because they do not contain a lot of inner support, and are not as durable as regular hiking shoes.

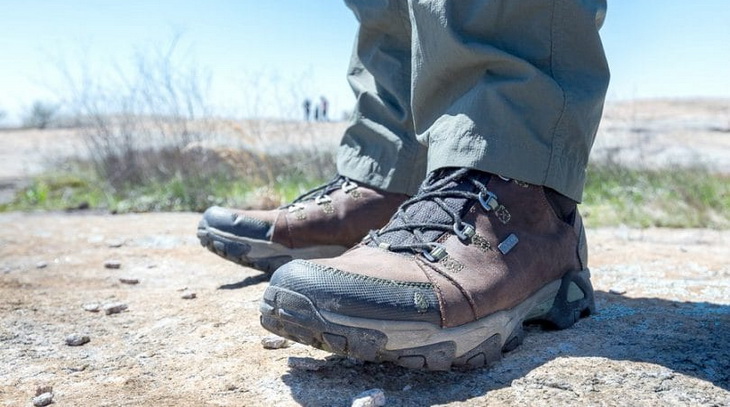
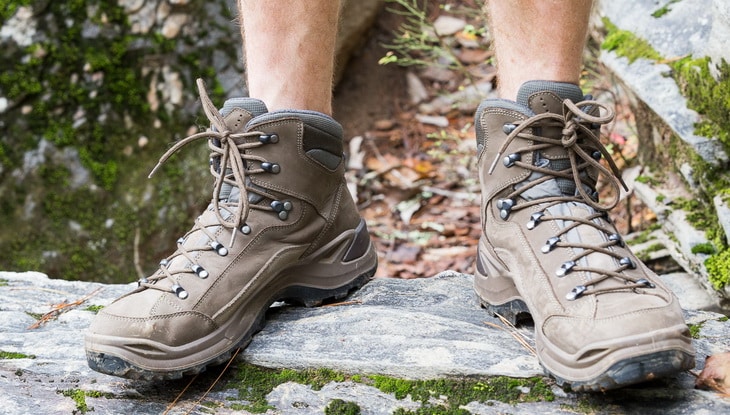
A man wearing regular hiking boots

Backpacking shoes can be worn by hikers that are carrying more weight, or are hiking for a few days at a time. These shoes are high cut and have more ankle support. Not only that, they do offer more durability and support overall, and can be worn off the beaten path.

Components

Several components exist that make hiking shoes durable and supportive. Here are some of the top components that should be taken into account. The materials that are used have a full effect on the durability, weight, and other factors of the hiking shoe.

Leather

Your new hiking shoes should be made of one of three types of leather. These are as follows:

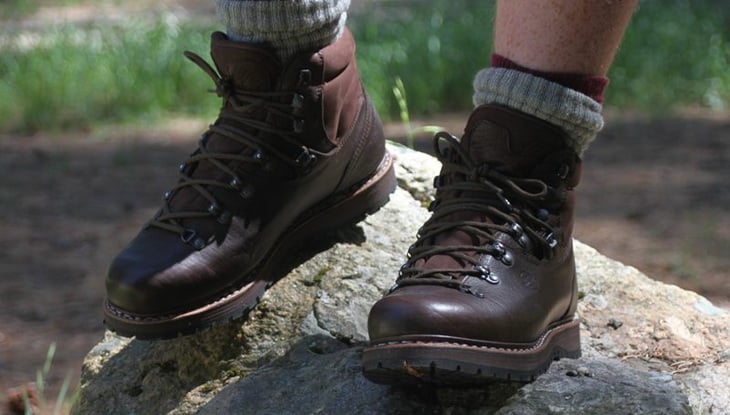
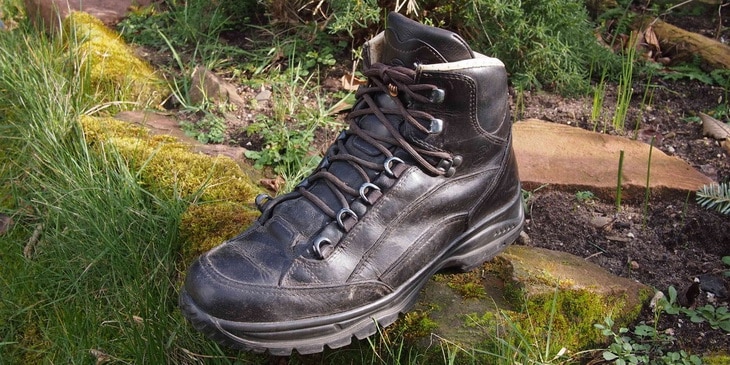
Full Grain Leather: This is the best type of leather to get because it is the most durable and resistant to water and scratches. While it is heavier than other leathers, and it does not breathe as well, these are great for an extended hiking trek.

Man Wearing Hanwag Tashi Boots

Keep in mind that you must break in these shoes before you actually go hiking.

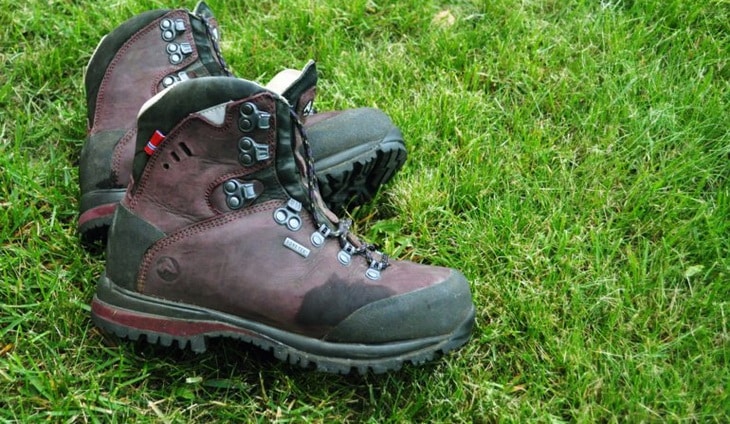
Split Grain Leather: This type of leather is lighter in weight and is made with either all nylon or a nylon meshing, which keeps it light and helps with the shoe being able to breathe.

A pair of Split Grain Leather hiking boots

It is lower in cost, but it is not as water or scratch resistant.

Nubuck Leather: This is a full grain leather, but, it is buffed in order to give it a look of suede material. The great thing about this is that it is like the full grain leather listed above. It is resistant to water and scratches. It is flexible and highly durable. It is made of synthetic materials, such as polyester and nylon.

A pair of Nubuck Leather Boots

While they are light and dry fast, they can wear quickly and needs a little time to get broken in. Nubuck leather does cost less and dries faster, too.

Soles

The mid sole is the cushion and shock absorption part of the shoe. You will want a stiff feeling that will not wear your feet out. For the most part, the mid soles are made with either polyurethane or ethylene vinyl acetate (or EVA) with polyurethane.

  • EVA is lighter, cheaper and offers more cushion.
  • Polyurethane itself is more firm and strong, and is best used in hiking shoes that are good for long periods of hiking.
  • The outsoles are made of rubber and can contain carbon. Having tough outsoles keeps your shoes strong, but are not that good off the trail.
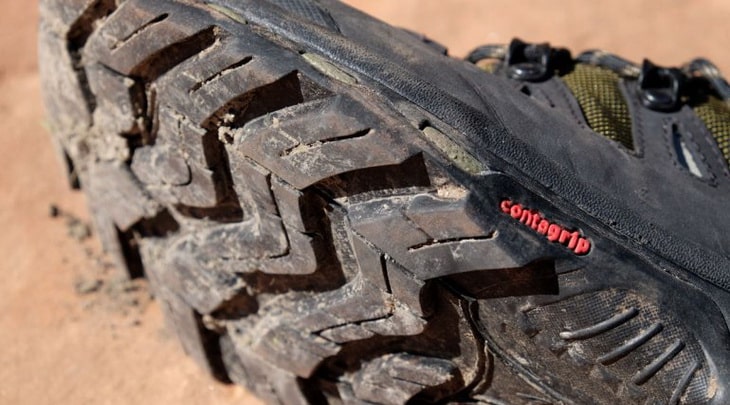
  • Lug patterns on the outsoles give you traction, especially if they are side wide apart. Plus, they get rid of the mud.
  • Heel brakes are the areas from the arch of your foot and the front of your foot, which keeps you from sliding, especially in steep areas.

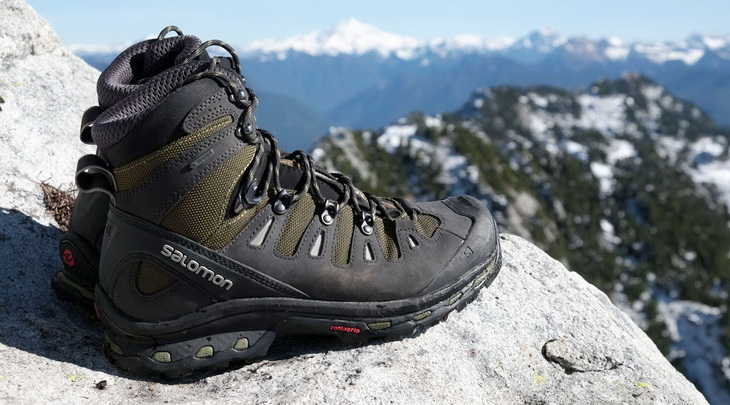
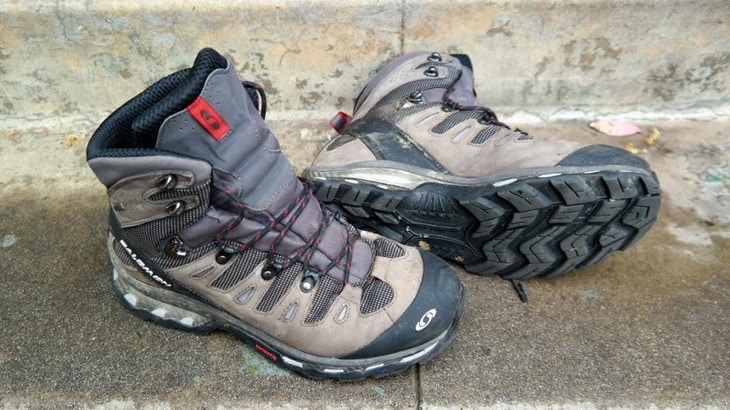
Salomon breaks from the mold and does their own outsole design work

Crampons

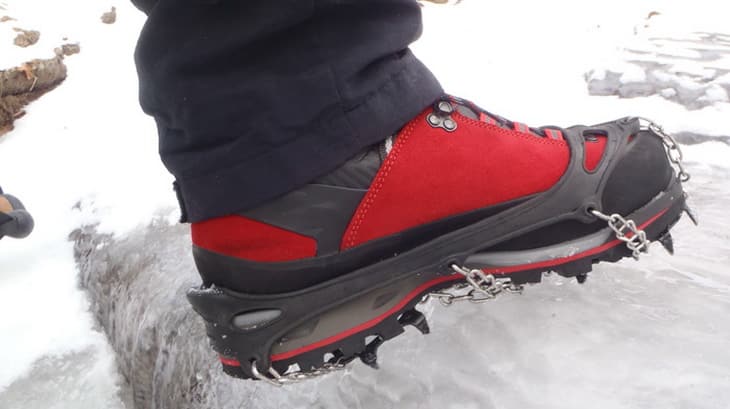
If you are hiking during the winter, you should consider using crampons. You can find many hiking shoes that can use crampons as a part of hiking.

Lowa-Mountain-Expert-with-Hillsound-Trail-Crampon-on-ice

These keep you gripped and stable while you are out in the snow.

Fit

You want to make sure your hiking shoes fit and are comfortable for a long day, or several days of hiking. Thus, there are a few things to keep in mind to keep your fitting perfect on a long hike.

  • Knowing which size you wear is the most important. You can have your feet measured not just for length, but for arch, width, foot volume, etc.
  • If you normally wear Orthotics, you will need to wear them while hiking, so bring them with you for sizing purposes.
  • Wear socks that you normally wear to try on hiking shoes, as this will give you the best feel of the shoes.
  • Walk around in the shoes when you are trying them on. If the store has stairs, try the shoes out on them or any incline to get an idea how the shoes feel.
  • If you are going to make a purchase online, you are better off going with a brand that you are more familiar with.
  • One last important thing is to break in your shoes before going on a hike. Otherwise, you could end up with sore feet, blisters, and cramped toes. Give the shoes time to adjust to you.

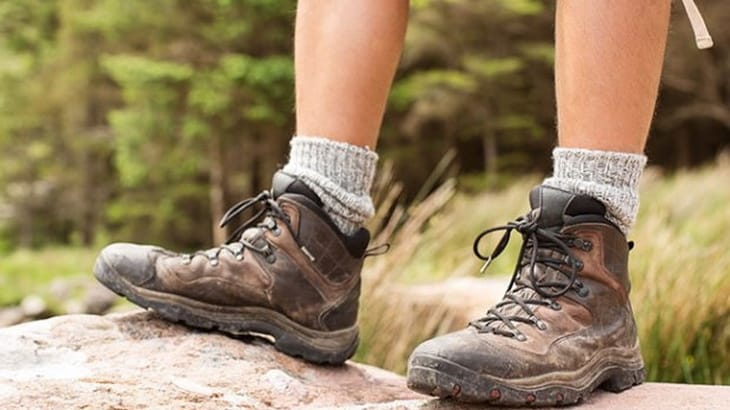
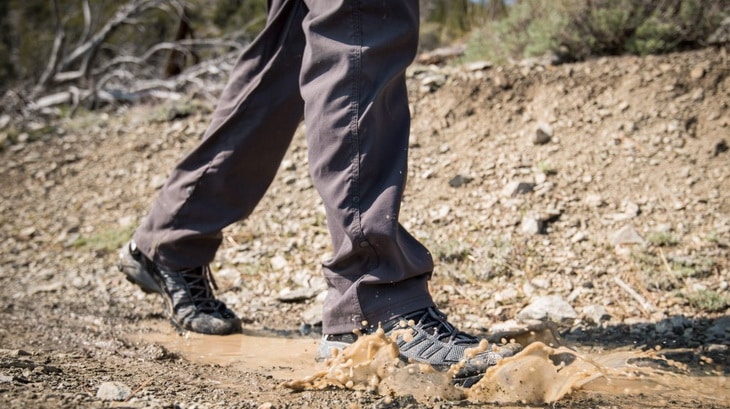
Close up photo of a man's legs wearing hiking boots

Other Features

Here are some other things you can take into consideration when shopping for a new pair of hiking shoes, in store or online.

  • Waterproof shoes are made with membranes like Gore Tex that will keep you dry in wet weather. However, this makes the shoes less able to breathe and can make your feet sweat.
  • Vegan friendly hiking apparel is available if you look hard enough. This means it is made without any animal ingredients, such as real leather.
  • Insulated hiking shoes can be found if you are looking to tread through a little snow during the winter months. This keeps your feet warm and allows you to hike through some beautiful winter scenery.

Hanwag-Canyon-Langzeittest Boot

A Review of the Top Hiking Shoe Brands

Now, we can review some of the top brands that make hiking shoes, so you can get an idea of what you like when it comes to brands.

Timberland

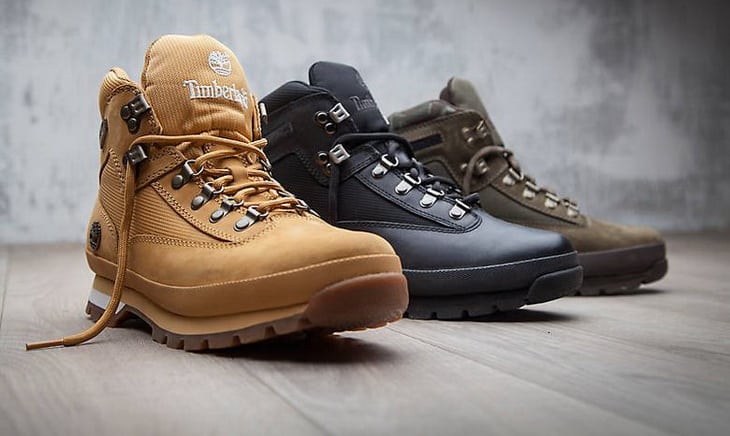
This brand has been around for a while and is widely popular. Their hiking footwear is known to stay dry in wet weather and are incredibly stylish. Some of them are made of EVA foam and they do not hold onto smells or moisture!

For example, the Timberland White Ledge Waterproof shoe is made of full grain leather that is waterproof, and it is resistant to scratches, plus it is highly comfortable!

Timberland hiking boots on the floor

Reasonably priced, you will not be disappointed in this shoe, or this brand!

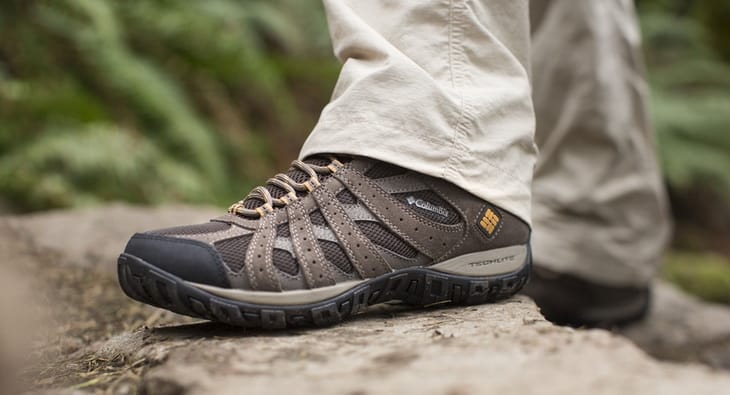
Columbia

Columbia is known for their outdoor gear, and they know what they are doing! That is why this brand is easy to trust, plus they are so innovative! Not only that, but their gear is reasonably priced and made from high quality materials. Their Women’s Newton Ridge Plus Hiking shoe is waterproof, made of full grain leather, and is even resistant to stains! Highly durable, this shoe is great for harsh terrain!

Man Wearing Columbia-Redmond-Leather-Hiking-Boots

Their, Men’s products, are just as reliable. Do not be worried that you will spend too much.

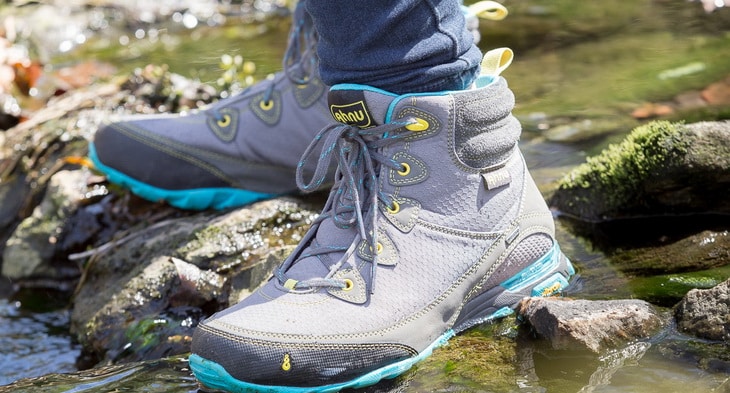
Ahnu

Ahnu is not a super well known brand like Columbia, but they do offer reasonably priced gear that will grab your attention. Their, Women’s Sugar Pine Hiking shoe, is sturdy for harsh terrain and is still light in weight, and waterproof. It includes a secure lace up vamp that keeps your shoes tight to your feet. Ahnu makes colorful gear that will pop out and make you look stylish!

Woman Wearing Ahnu Sugarpine Women's Hiking Boot

They also have self cleaning lugs and keep your feet, guarded against rocks and other sharp objects in the wild.

Merrell

Merrell makes their hiking gear with such great quality materials, that it is easy to see why they stand out among others. They make shoes that are for any type of hiking and other outdoor sports. They add in a sole with rubber that helps with grip and strength. Their hiking shoes have no issue breathing, and many of their products have an odor control, so you never have to worry about a smell. Some of their shoes are a little higher in price that some, but for the quality, you really can not beat it!

A pair of Merrell Moab Ventilator hiking boots

Their, Men’s Moab Ventilator Mid Hiking shoe, has many of the listed attributes above and gives extra support at the ankles, which is great for long hikes.

KEEN

This brand is known for making great hiking shoes that are dense in the sole and waterproof. Their, Women’s Targhee II Waterproof hiking shoes, are comfortable and supportive, and made for short or long hikes. This shoe has many lugs for stability and traction, as well as styles! The prices for KEEN’s boots are mid level, but not very cheap.

Keen's Durand boots provide solid water protection

KEEN makes shoes that are perfectly matched with whatever outdoor activity you are engaging in!

Hi-Tec

Hi-Tec is known for making hiking shoes that are not only waterproof but have the ability to breathe well from their mesh material and they make some really stylish looking products! For example, the Hi-Tech Men’s Bandera Mid WP Hiking shoe is not only good looking, but includes padded insoles, is waterproof, and highly durable. The mesh material is made of nylon and gives the much needed air circulation within the shoe, no matter the weather.

Hi-Tech Men’s Bandera Mid WP hiking boots on the grass

Another great thing is that Hi-Tec makes very affordable shoes, and you will have no qualms with their prices!

Salomon

Salomon makes hiking shoes that are made from waterproof leather materials and are light in weight, plus highly flexible. The 3D chassis is comfortable and supports your feet without a problem, plus it is stable and lets you flex your feet. The lining is made of Gore Tex material that is waterproof. Salomon really does make great products and they are quite innovative when it comes to creating new gear for your feet to enjoy outdoors.

A man hiking in lightweight Terrex Swift

Their prices can be a little steep, costing hundreds of dollars, but if you are looking for something stylish, unique, and long lasting, then a Salomon shoe might be great for your feet!

Lowa

Lowa is known for their hiking apparel, especially their hiking shoes. The only downside is that some of their hiking shoes can be pricey, going into the hundreds of dollars. But maybe you will change your mind when you see the Lowa Men’s Renegade GTX Hiking shoe. It is made for hiking, but can also be great for backpacking and other outdoor fun. The mid sole technology that is used cuts down on the weight of the shoe. Also, it is very durable, stable, and provides extra cushion in the sole.

Man Wearing Lowa Men’s Renegade GTX Hiking

The outsole is made tough to take on harsh terrain and rough activity. Another great thing is that Lowa makes some of their hiking shoes with such technology that there is less weight on your toes!

What Do Other Hikers Say?

Overall, hikers love these brands and have used them for their hiking needs for long periods of time. Users love that they can find a hiking shoe that fits their needs from any of the above brands. Overall, they were looking at price, comfort, soles, and other materials that make up the shoes. Hikers are definitely pleased at all of the great choices they have to choose from.

Some hikers say that certain shoes do not last as long as others, and this may be from the stitching or other materials in which they are made. This is why you should make sure you are getting a quality product.

Pros and Cons

Below are some of the pros and cons about these brands, in general. You will have to make up your own mind on what will work for you, as not all user experiences are the same.

Pros

These brands offer many positives about their hiking shoes. They generally have great mid soles, outsoles, and are compatible with crampons. These brands offer a variety of hiking shoes that will fit your needs, specifically. You can also find hiking shoes with crampon compatibility, as well as a hiking shoe that can fit your budget!

Close-up photo of Arc'teryx Bora2

Keep an eye out for quality materials, as this allows your shoes to live a long life.

Cons

Many users say these brands are great, but some of their hiking shoes do not breathe well, or they are made of materials that are not high quality, so the shoes might wear quickly, or the stitching may start falling out. Some users say hiking shoes are expensive, as well. This is why it is important to do research before you buy a new pair because some hiking apparel can cost in the hundreds of dollars.

Salomon Ultra 109 GTX, which has a Gore-Tex waterproof liner.

Be sure that the shoes are made of good materials, because a good pair of boots is going to cost a little more, in many cases.

Concluding Thoughts on Hiking Shoes

Hiking shoes are definitely an important part of hiking, because without them, your feet will not be comfortable, and will ache by the end of your hike. Nobody wants blisters or sore feet after a long day! Now that you know the important components, and some of the top brands out there, you can find some hiking shoes that will fit your needs!

Suede leather is durable and reasonably light

What type of hiking shoes do you own? What makes them so great? We want to hear from our readers! Please leave a comment below and share your thoughts on hiking shoes! As always, thanks for reading!

Best Hiking Books: Be Inspired

0

If you are looking for skills, knowledge, or inspiration for hiking adventures there are plenty of good books to inspire you. I have delved into some libraries to find some of the best hiking books to get you started.

Some of them are about the knowledge that will stand you in good stead when you are facing challenges in the back country while others are memoirs or experiences about hiking in different parts of the world to inspire and encourage you.

Man reading book on cliff in beautiful nature scenery

One good thing about hiking is that is it relatively simply done anywhere, especially when you are considering day hikes or short breaks. A collection of books about hiking will allow you to read about hikes and trails even when the weather is unkind or life’s responsibilities stop you from heading for the hills. “Every thousand mile journey begins with one small step” but before that there is always dreaming of a thousand possibilities.

“How to” Guides for Hiking

So let’s start with reviews for books that give general information about hiking and longer trips in the back country. They also contain valuable information about emergency medical situations and how to minimize risk and deal with situations as they arise.

The Ultimate Hiker’s Gear Guide by Andrew Skurka

Publisher – National Geographic

Year – 2012

This is a great guide and reference book for anyone just starting hiking out, but others with more experience will also find useful information about new skills and choosing suitable gear. Gear of course is always being updated with innovations and new designs so you should also make use of current reviews and information readily available on the internet.

Skurka himself is an extremely experienced hiker, as his publisher National Geographic will attest to. They describe him as one of “one of the best traveled and fastest hikers on the planet.” Further kudos were given by Outside magazine when they chose him as “Adventurer of the Year and by Backpacker magazine who denoted him their “Person of the Year.” Skurka’s knowledge, when it comes to experience and skills required for what is needed for a successful hike, are second to none.

The Ultimate Hiker's Gear Guide by Andrew Skurka Pages - 224

This book will set out what gear is best to pack, how to pack it, what clothing to wear, and how to care for your health – physical and mental. He also gives advice on shelter requirements, sleep systems, camp craft, and how to hike for efficiency and safety, keeping a light weight but not missing important elements.

Other reviewers found it to be an easy and fast read but even as experienced guides, they found useful tips regarding gear and maintenance. It is not a book on map reading or using back country skills, but there are other books that cover those subjects.

The Backpacker’s Handbook by Chris Townsend

Publisher – International Marine

Year – 2011

This is another general guide that will help you sort out the important things before you waste time and money on gear that you may not need or is substandard. Townsend’s hiking book is a practical guide the covers how to choose suitable gear from backpacks down to personal footwear.

The Backpacker's Handbook

It also covers essential back country techniques for map reading, compass work and other wilderness survival skills. He covers details like GPS purchase and use, making the most of your mobile phone and other electronic devices, but also giving advice so that you are not relying on them.

Bushcraft 101: A Field Guide to the Art of Wilderness Survival by Dave Canterbury

Publisher – Adams Media

Year – 2014

This book is more about survival than hiking, however, some of the skills are very relevant to ensure you have a safe journey and will also help in emergency situations that you haven’t bargained for. Better to be over prepared with knowledge and safe than sadly lacking and in danger.

The author refers to the 5 “C”s of Surviving – cutting tools, containers, combustion devices and cordages. When you feel comfortable with your environment and what is available to you, any hike will be undertaken with confidence.

close up photo of a knife

He covers choosing a great kit, knowledge on how to make tools, primitive skills like fire making, tying knots, gathering and cooking food, shelter, so that the art of bush craft becomes common sense. Nature will be a friend rather than a foe.

Other reviewers loved all the practical advice and recommended even a novice would find useful information and inspiration. It could potentially save money from buying unnecessary equipment too.

Field Guide to Wilderness Medicine by Paul S. Auerbach

Publisher – Expert Consult

Year – 2013

This Field Guide to Wilderness Medicine is based on Dr. Auerbach’s successful full text, Wilderness Medicine. This is the type of resource that helps to think smart and fast in any number of unusual emergency situations that one might find oneself or others in while back country hiking.

This is an advanced technical text and it is certainly aimed at professionally trained hikers, however, anyone heading into the back country should have more than a passing knowledge of survival in extreme situations.

Field Guide to Wilderness Medicine

This guide lays out requirements for essential emergency aid supplies, medicines and survival kits and techniques. It covers details of clinical presentations for injuries and possible treatments in emergency situations. It also contains line drawings and some color plates detailing poisonous plants, fungi, insects, spiders, snakes for full identification and also how any poisoning manifests on your skin.

The format is simple and easy to follow under headings such as “Signs and Symptoms” followed by suggesting treatments in step by step explanations, bulleted layouts and easy to access text boxes. Online access also has further guidance with files for downloading as well as leads to expert consultants.

Shallow Focus Photography of Yellow and White Flowers during Daytime

There are chapters concerning feet issues and care, improvisation of materials, high altitude medicine, humanitarian relief and disaster medicine for different cultural situations. It also covers other outback adventures like kayaking and other adventure sports.

Be Inspired – Hike all over the World

Fifty Places to Hike Before You Die: Outdoor Experts Share the World’s Greatest Destinations by Chris Santella

Publisher – Stewart, Tabori and Chang

Year – 2010

This is the type of coffee table book that will get you out of your living room regularly, either by dreaming or planning hikes for real. Fifty Places to Hike Before You Die is part of the Fifty Places series and combines experience from many experienced expert expedition leaders like Chris Santella and others. Some trails and hikes are leisurely strolls such along Italy’s Amalfi coast where you can stop for a coffee and a chat while others require true grit and determination like Tibet’s multi week Kangshung Valley Trek or Bhutan’s Lunana Snowman Trek.

2 Person Hiking on Top of a Hill during Daytime

There is something for everyone in more than a few of the book’s fifty chapters. This book imparts some feeling for the cultures each hike passes through, like the Nakesando Trail in Japan or the hiking through the highlands of Rwanda to see mountain gorillas. Other readers have completed some of the hikes and found their experience matches that laid out in the book which backs up its authenticity. Whether you choose to do some of the hikes as part of an organized group or on your own will be up to you, however, this book will give you good ideas where to start and how to proceed.

Travelled Far: A Collection of Hiking Adventures by Mr Keith Foskett

Publisher – CreateSpace

Year – 2017

This book is based on Foskett’s award winning blog about his experiences and observations from hiking all over the world. He follows a less conventional lifestyle where his focus is the outdoors and thru-hiking. This has led to adventures along the Spanish El Camino de Santiago, the Appalachian, and the Pacific Crest trails in the United States of America.

He imbues his stories with local tales, history, knowledge of nature and subtle humor as he takes down more than the garden path into anything from quiet country strolls in his native English South Downs to wilderness expeditions in New Mexico. As he follows his unconventional chosen path of wandering, he shares his dreams and passions in a clear positive narrative.

Man Walking on Cliff during Daytime

Reading this book will inspire you to not only make special journeys into the wilderness but also into yourself. Two other books have been shortlisted for ‘Book of the Year’ by The Great Outdoors magazine and his blog was winner by popular vote of the ‘Blog of the Year’ by the Go Outdoors group.

Inca Trail, Cusco & Machu Picchu by Alexander Der Stewart

Publisher – Trailblazer Publications

Year – 2013

This is a definitive guide for those wanting to explore Machu Picchu as well as other hikes in the Inca region of Peru. It includes valuable current information for the area, including detailed hiking maps that indicate walking times, gradients, interesting places to explore as well as town maps. There are also accommodation guides and advice concerning how to get around.

Machu Picchu Landscape

The Inca trails were “lost” in the South American jungle until Hiram Bingham came across Machu Picchu a century ago. Now the most famous ruin built by the Inca civilizations is possibly the most renowned in South America with many iconic photos taken of the ancient city perching on a steep sided mountain top in Peru.  The ultimate way to reach the city is as the Inca did by foot along the Inca Trail.

Camino de Santiago – Practical Preparation and Background by Gerald Kelly

Publisher – CreateSpace

Year – 2012

If  Coehlo’s The Pilgrimage has intrigued you enough to consider walking the Camino de Santiago this is more the “How to” book. It is written by Kelly, an experienced hiker and maker of pilgrimages so his advice will give you the confidence to set well prepared for the journey.

Each section is easily bookmarked covering aspects in simple style such as what to pack, which equipment is needed, and what clothing and footwear to wear. Another section covers health and safety en route and what facilities to expect and how to access them in Spain.

Hiker on top of the moutnains watching a beautiful landscape

Because the route is now so popular, this book will set out what to expect along the trail, what the accommodation is like, what foods you can expect and the assistance you might get from locals along the way.

This book also explains some history of the route and the area and how the Camino de Santiago has regained popularity with pilgrims and hikers to the point where thousands of people hike it every year.

Hiking can Become a Personal Journey

A Walk in the Woods: Rediscovering America on the Appalachian Trail By Bill Bryson

Publisher – Anchor

Year – 2006

The Appalachian Trail in the United States of America covers from Georgia to Maine, including some of the most spectacular terrain that the United States has to offer featuring awe inspiring mountains, vast forests and pristine lakes. It has inspired many to follow its meandering path and Bryson’s personal style adds another dimension to the many books written about the Appalachian Trial.

Like his other extremely successful books, Bryson mixes fact, with entertainment in a uniquely interesting way so that you learn and laugh, often at the same time. History and ecology are far from boring statistics and you feel you already know how exhilarating it must be to walk the trail.

Man Walking on Forest

Bryson is no fitness fanatic when he starts the trial with a slightly jaded old college buddy Katz, intending to complete the 2,700 mile journey together. They start one day in Georgia and head north towards Maine. Along the way they meet characters, learn about the trail’s history and form a memoir in the storytelling. What better way to see his native country after 20 years in the Unites Kingdom.

One reviewer describes Bryson as “very witty… but he’s also very knowledgeable”. You can be assured he researches thoroughly which makes this book as much a guide as well as an entertaining read. If you never actually walk the Appalachian Trail (AT as it is affectionately called) you will have spent a good few hours being well entertained and learnt a lot about the US outdoors.

Grandma Gatewood’s Walk: The Inspiring Story of the Woman Who Saved the Appalachian Trail by Ben Montgomery

Publisher – Chicago Review Press

Year – 2014

While this is another book on the Appalachian Trail, the subject and view are completely different. Grandma Gatewood, as she was known, was the first woman to walk to entire length of the trail and the first person to walk it twice, then three times. Her achievements meant she became something of a celebrity with consequent television appearances and articles in Sports Illustrated.

Hikers on Appalachian Trail

Along with this fame, came the focus on the Appalachian Trail itself with the result that public services paid attention to her criticisms and reports on dilapidated sections of the trail and repairs were made. What was rapidly becoming a lost track, regained interest and Grandma Gatewood is credited with its current revival as a famed hiking trail.

As a story, it will inspire you to dream and make goals at any stage or age of your life.

Wild: From Lost to Found on the Pacific Crest Trail by Cheryl Strayed

Publisher – Vintage Books

Year – 2013

Wild: From Lost to Found on the Pacific Crest Trail is more than a hiking book. It also records the events and feelings of Strayed, the author as walks and heals her life along the Pacific Crest Trail. Her personal life has disintegrated through grief after the death of her mother and she embarks on the trail alone, unprepared and with nothing but determination to make it.

One might think of this as a “How Not To” book but succeed anyway. This is more about how journeys and hikes can do more than show you beautiful scenery and give you a sense of accomplishment. Spending time with nature and learning from the kindness of people along the, will do more than stimulate your senses, they have the power to heal your soul.

Pacific Crest Trail View

The Pacific Crest Trail stretches along the western side of the United States of America from Washington State, through Oregon to southern California. The complete trail is over 1,100 miles in length. I wouldn’t recommend one follows a Strayed’s method, however, it is a book to enjoy for her triumph over inner adversity and will inspire many to enjoy the outdoors.

Most other reviewers enjoyed Strayed’s candor and writing style while a few found her to be too much of a drama queen who bought much of her pain on herself.

The Pilgrimage by Paulo Coelho

Publisher – HarperOne

Year – 2008

This is not a “How to”, hiking book either, by any stretch of the imagination, but for me and others it is a book that inspires journeys throughout the world. And each journey and hike, is a personal odyssey with its own fears and trials to be overcome.

The story is set along the real Camino de Santiago which the following book I list will give details about. The Pilgrim is written as Coehlo’s experience as he walks on his personal pilgrimage along the trial. The narrative veers from actual physical to the ethereal along his journey which some readers may enjoy, others will dislike, but it will always be intriguing.

El camino de Santiago

Coehlo manages to show how the ordinary reveals the extraordinary in the simple life of ordinary people. How we can all step outside our comfort zones and surprise ourselves with achievements we only thought possible in others.

Be Inspired, Dream, Plan, Do

That is a small selection of the books available to you so that you can be inspired, daydream, make a plan and go do it. There are many actual guide books readily available for individual trails, for particular areas and for different countries in the world. Pick any of the latter and follow your dreams to the end of which ever trial you choose.

woman reading by lake

Feel free to add any of your favorite books in the comments section below or make a review for others.

Best Hiking Apps: Explore the Outdoors with the Best Apps

0
Hiker_martphone_on the top of the mountains

The air in the morning is damp with a scent of wild lilac and sweet grass. The sun in slightly up the horizon concealed behind a batch of gray clouds. Songbirds are chirping with joy as they hop from one tree to the other. As you move towards the tent of your hiking partner, it suddenly begins to dawn on you what it is you had been missing about hitting the trail: Not having to check your gadget for emails and update, no morning traffic, no bad morning coffee from the local dispenser.

At that moment, you remember you’re getting what you’ve been yearning all the while – the morning fresh air Mother Nature can provide. Now, you are here, crunching through small twigs, branches, and tree bark in the clear, cold air of the mountainous terrain. You haven’t taken a bath nor brushed your teeth for a while, and the cleanliness of your apparel is quite questionable.

Aerial View of Green Mountain

But all these seem not to bother you at all. For a moment you are happy, but then you realize you’ve been day dreaming again! If this is the kind of scenario you’ve always longed to experience, why not begin the year planning your next outdoor adventure? This guide has just the right solution as regards to the best hiking apps to assist you to navigate those places that beckon to you every time you have some leisure time to spend.

Some days in the past, the average hiker didn’t require a smartphone to have an amazing outdoor experience since everyone was doing fine without them. However, in the modern world, a smartphone is an absolute necessity, especially for the outdoor enthusiasts as some of them come with unique apps designed for the hikers. These apps are quite impressive, and their pack features are fun and informative.

Person Holding Silver Iphone 6 Taking Photo

In the past, you’ve been probably tinkering around with different apps that do almost everything from finding the trails you haven’t explored to connecting you to like-minded hikers for treks and discussions. A lot of apps have been designed to allow you to record your hike as well as add photos and descriptions. Some will feature high-resolution maps which are readable even on your handheld gadgets, and these can be downloaded and read offline. Some of these apps can be available free-of-charge while others may cost a fee to download.

A word of warning

Although most of these apps are useful during outdoor escapades, leaving them on while hiking will most likely drain the battery in your phone. Therefore, it’s best to turn them on when you need to use the applications, but remember to turn the apps off when they are not in use. This will help in prolonging the life of your smartphone’s battery.

Apart from that, it’s not advisable to base your knowledge on gadgets that are as fragile as smartphones. There is so much that could go wrong with these devices even when you are indoors, in a safe environment, away from the natural elements. Here are some examples of what may happen with smartphones when you are exploring the world outside:

  • Humidity may break or interfere with the performance of your gadget
  • The battery could die
  • Your screen could shatter after dropping in a rock creating a web on the screen
  • The smartphone could slide from your pocket into a ravine, or it may drop without your realization
  • You could lose your signal
  • The data network may fail to work
  • The gadget could be exposed to moisture of you happen to go through a stream and don’t remember to remove it from your pocket

The above are just but a few issue you may experience with your smartphone. Nonetheless, if you’re prepared with an extra battery, keep it in a secure pocket, and put the phone in a protective case, you will probably get the best from it. Additionally, you may decide to take some backup options with you, such as a GPS gadget, just in case your smartphone fails and cannot access the GPS software.

Hand held outdoor GPS and a hiking map of a mountain range.

The main idea is to know your survival skills, but it’s even more advantageous to have the best apps for hiking installed on your smartphone. These additional features will complete your survival gear giving instant access to useful information. Most of these apps have been designed by experienced survivalists who have experience in outdoor expeditions and know of the quests to keep you safe wherever you go.

SOME OF THE BEST APPS AVAILABLE

The world of outdoor app is evolving rapidly. Today, there are numerous apps you could use for your hiking adventures, but the best ones are reviewed in this article. Some of the best applications include:

BACKGROUND NAVIGATOR FOR ANDROID

This app is worth every cent, so don’t let its price tag put you off. It is one thing to locate a hiking trail, but it’s a different thing to learn how to navigate such a trail in a safe and exciting manner. This is what you exactly get with the Background Navigator. Once you begin using this app, you’ll start to wonder how you even survived without it.

At its most basic, this app offers free topological maps that are vital for navigating trails which haven’t been blazed yet. These maps are obtained from various databases. Additionally, the topo maps are available for various regions around the world. Another significant aspect is the ability to utilize GPS without cell service; therefore, you will never get lost unless the battery of your device dies.

3d map on a gps app on smartphone

This application comes with a free twenty-one-day trial giving you the opportunity to test and determine whether you like your region’s maps. The Background Navigator is a powerful app, and one may argue that there aren’t any other free alternatives that can outdo its strength.

THE U.S. ARMY SURVIVAL GUIDE

This app isn’t the typical Boy Scout handbook. The book is an excellent companion during your backpacking adventure and offers helpful tips on how you can survive while outdoors. The first segment of the FM 21-76 guide addresses the main psychology behind your survival needs in hostile environments.

One of the rules of fear is: fear is important as it makes you cautious and keeps you alive. Fear also makes you mindful and resourceful in life. The right level of fear is necessary. If left unchecked, fear will get you killed. The designers of this app have done an excellent job in taking the introduction to outdoor survival to a level which makes an individual to reflect on their emotional and physical state.

SAS-survival-guide-app

This is important if a person is to remain alive while in the outdoors. With that in mind, this handbook covers everything you need to know including:

  • Poisonous plants
  • Basic survival medicine
  • Firecraft
  • Environmental factors during survival
  • Food procurement, etc.

No person, skilled or unskilled should go into the wilderness without this handbook. This application makes it easier for you to navigate, is free, and doesn’t require any internet connection once it has been downloaded.

ALLTRAILS

With fifty thousand trail guides in Canada and the United States alone, it’s not impossible to figure out why this app has over 1.5 million users. Utilizing this application is a simple way to discover trails close to you, whether you are in need of a bone-rattling or moderate hike, or looking for a spot for fly fishing. You can develop your trail with GPS tracking, text, and photos, and share them with friends or save them for use later.

Screenshot of AllTrails app

If you are more than willing to splash out a few dollars for the yearly membership, you can get the pro version of this app. It takes advantage of the partnership from the National Geographic Maps and offers you the ability to edit and print maps. In addition to that, some events allow those participating to track and complete their progress in actual time as they scale the Kilimanjaro, Matterhorn, Everest, and Mount McKinley. A good example of this event is the World Elevation Challenge.

SMART COMPASS APP

Every person who loves to explore the outdoors with only a backpack on their back needs to have orientation basics. If you are a backpacker, you should know how to read a map and utilize a compass to find your direction despite the surrounding environment. It’s always advisable to have a physical compass to act as a backup, although the Smart Compass App comes with so many features that the physical compass lacks. The largest advantage of this app is that it has an amplified reality display that allows you to overlap the smart compass on the environment around you.

Another fantastic feature of this application is the fact that you can obtain it for free. In addition to that, there are other amazing features:

  • GPS speedometer (this feature is also available in PRO version)
  • Absolute north (this is also available in PRO version)
  • Instructions to help you calibrate the sensors of your phone
  • Environmental view using the camera phone
  • The possibility to send GPS data, such as your current position or your destination via email or SMS

This application is one of the easiest and most efficient survival app available out there. It can be used as a regular compass, but you’ll not need to read it all the time. Another advantage of the Smart Compass is the ability to carry it with you everywhere you go.

SMART COMPASS APP

You can forget your physical compass, but the Smart Compass will always be on your smartphone.

BUG OUT BAG CHECKLIST

If you are a novice when it comes to outdoor survival and you intend to embark on your first bug out project, it may be quite overwhelming to get everything loaded. You need a lot of items in various categories, and you have to put them all in a single backpack. Although making a bug out bag is more of a packing problem, there are numerous things you’ll need to figure out: what food to carry and the suitable quantity, how best to save water in an efficient manner, or what kind of clothes to take with you.

The following are features offered by the bug out back checklist app:

  • An excellent checklist where all items are described, making it possible for you to select the right one
  • A calendar and reminder which make it possible for you to set the alarm for when it’s time to recheck your bag. This is because, during an outdoor expedition, some items have to be replaced regularly since it’s difficult to remember almost everything. This checklist app can take care of these issues
  • This app presents the possibility of creating an inventory and keeping track of the items you already have
  • It’s also possible to add items and develop new lists. Additionally, you can remove them from the list you already created. It’ editable, which is an essential aspect when it comes to creating a list of what is needed.

BUG OUT BAG CHECKLIST

The Bug Out Bag Checklist is an excellent survival app any hiker or camper needs to have on their smartphones as the application prepares you for the best outdoor experience.

VIEWRANGER GPS – MAPS & TRAILS

Being in a position to take out your gadget and select a nearby location based on the time of the year is very critical when it comes to an outdoor expedition. When was the last time you researched the different hiking trails around you? Being in a position to locate these trails in one spot wasn’t possible a few years ago unless you utilized an experienced trail guide. Today, the Viewranger GPS makes this possible.

VIEWRANGER GPS – MAPS & TRAILS APP

With this app, background information is incorporated on every trail, complete with topography. This is also compatible with the Android Wear for people planning to partake in a less-than-a-day hike.

MAP MY HIKE GPS HIKING

While some GPS help the hiker find the various locations in the areas close to them, the Map my Hike GPS places less emphasis on the aspects of hiking and compliments what has already been developed by adding coverage on a physical workout which comes with hiking. This application functions more like a pedometer, but includes a bonus that makes it possible for you to log the specific areas that you hiked.

This record workout aspect is excellent for the particular locations which you regularly visit which may never mean anything to other people as it matters to you. Each workout’s detail is superb as well with tracking which reflects both distance and duration, as well as elevation. Measurement of pacing may be a little much, but you could come up with some ways to make it useful.

Map-my-hike-app-

Apart from the details and recordings, you can sign into your profile and make some updates of events, with a log of routine averages (mostly weekly) and all-time total values that pertain to calories burned, distance, duration, and workouts. Also, there is a nutritional tab that includes different foods and your daily goals. This app includes parity with Android Wear; therefore, if you are an early adopter of the wearable tech, the Map my Hike GPS Hiking app has so much to offer.

WRAP UP

The hiking apps are a growing trend, and all hikers and campers need to have the ones that fit their needs. Before you go on a hiking escapade, make sure you do enough research. Read the reviews and comments people have made regarding specific applications, so you can be aware of what exactly you will be expecting from those particular apps.

Also, even when you have the best apps on your smartphone, make sure you know how to use them, and ensure you have the basic survival knowledge. Your phone may break, or its battery might die, but whatever you already know cannot be erased.

Hiking apps are some great features you need to consider, although you can’t entirely rely on them. Always remember to carry an actual equivalent of the app such as the map or compass. These two should never miss from your backpack even when you decide to download the latest version of any app. Being prepared for any emergency situation implies knowing your environment and utilizing anything you have even without using your gadget.

Recording-hike-with-an-app-

So, did you find this guide helpful? Do you have any apps for hiking installed on your smartphone? Please let us know which apps have been beneficial to you. Do not forget to leave your views and suggestion on our comment section.

Best Hikes in the World: A Guide for Beginners and Experienced Hikers

0
Mountains Under Cloudy Sky during Daytime

Hiking is a strenuous exercise that is equally breathtakingly rewarding since you get to explore scenery and spectacular wilderness views as well as lose weight if you’re overweight. The nature has blessed us with plenty of hiking destinations some of which have been frequented by enthusiasts, while others are less frequented perhaps due to intolerable weather conditions or slippery terrains.

This, therefore, calls for an informed hiker who can carefully choose the best hikes in the world with all factors in mind. Don’t worry if you are a newbie to this exciting and adventurous outdoor activity because we’ve got you covered in this guide below.

beautiful alpine landscape

To start with, it can be mentally exhausting for the inexperienced in hiking to choose the best hikes. As thus, we will start by discussing the types of hiking as well as the tips on how to find the best locations that are best for you. There can be plenty of locations but not all are the best locations for you. For example, you might find out that a certain country has exotic and breathtaking scenery that is great for alpine hiking but then country’s safety is not on par. You wouldn’t like to hike in a destination that jeopardizes your safety no matter how amazing it is.

How to find out which hikes and locations are best for you

It’s of paramount importance to first know that which types of hikes and locations are best for you. Let’s first give you an overview of the types of hikes that you can look up to.

Snowshoeing (winter hiking)

With this type of hiking, you get to hike in the snow during winter times in the wilderness. You should visit the places that are frequented by this nature’s ice. However, you have to be well-prepared to buy sufficient winter clothing such as snow boots, jackets and clothes that are well-insulated. Moreover, your snow shoes should have a better traction to prevent slippery when you hike in the snow.

Person Wearing a Blue and White Jacket and Brown Backpack Standing on Mountains

Snow gives you an opportunity to explore many off-trail routes because it covers almost all the obstacles such as rocks and thorn trees so you can traverse freely. But you still have to be cautious of your safety. As long as you are fully prepared with your hiking gear dedicated for snow hiking, you can then proceed.

Day Hiking

Day hiking can be a great experience even for newbies in hiking. You can spot your desired destination and, depending on the number of days to hike, bring a camping tent at night and other needed accessories to make your trip enjoyable. With day hiking, you can explore as many interesting landmarks as possible and also take photographs using advanced cameras such as the GoPro camera models.

You also have to be fully prepared for the fluctuations of wilderness temperatures when hiking to avoid temperature-associated deficiencies such hypothermia and hyperthermia. Make sure that you take versatile clothes or take extra clothes, but avoid backpacks especially if you have opted for alpine or subalpine climbing. Temperatures can be adverse if not well anticipated. What we mean is that, take heavy and light clothes and shoes so that you can be prepared for the inclement or hot weather conditions.

backpacker on the top of the mountains

The camping tents and other ancillary tools are also indispensable for day hiking. If, for instance, you plan to explore nature for more than a week or months, you need to pitch a mobile at night to rest before you resume your adventurous activity the next morning. This means your backpack should be spacious enough to store food and your changing clothes, to mention a few needed items.

Overnight hiking

Some aspirant hikers may regard this type of hiking as a blessing because it negates the use of a camping tent at night. You can hike through the night, but then it is equally demanding. It’s demanding due to the infamously harsh temperatures in the wilderness predominantly in the night. That said, you need enough insulation to undertake overnight hiking.

Furthermore, you need enough lighting to see your trails. A headlamp or a torch can be your best friends in overnight hiking. But if there’s a full moon, then your problems are solved because no headlamp may be necessary unless you are desired path is going to be in the forest amid large shadowed trees.

White and Green Icy Mountain Lighted by Sun Rays Near Red Dome Tent

Furthermore, be mindful of your security in overnight hiking unless you are in a group because dangerous animals can be bad news for your adventure in the night. They often go hunting at night. That’s one of the setbacks of overnight exploration of nature.

Backcountry hiking

This is more about the locations that you want to hike at. You might come across well-groomed or off-trail paths and you need to be prepared for all of them. The solution is the quality, functional and durable hiking boots and convertible hiking pants.

Backpacking in the Eastern Sierra Nevadas

All other tools such as the ultralight tent and other accessories are still must-haves for backcountry hiking.

Weight loss hiking

Hiking has been found to be a weight loss intensive exercise wherein hikers can potentially lose thousands of calories depending on the number of days and the types of terrains you traverse on. Alpine hiking, in particular, can be very effective in burning fats from our body. After a few days of hiking, you might have lost massive calories to keep your body in shape.

Hiking the Overload Trail on Blackcomb

Hiking for weight loss can be done alternatively for repeated short trips whereby you eliminate the need to camp in the wilderness. You can spot the nearest mountains in your locations and climb it in a bid to lose weight.

All that you need are light clothes and sport shoes or hiking boots because off-trails can be treacherous for lighter sport-shoes. Also versatile clothing is important because weather conditions may fluctuate.

Romantic hiking

It’s self-explanatory that two people can engage in this type of hiking. The couple can find the best location with exotic landmarks to explore. You can accomplish this in daylight or overnight. But it would be preferable if you do it in a daylight, so that you can take beautiful photographs to reminisce the moments later on to spark the romance.

couple watching a beautiful mountain landscape

Now that we have gone through the types of hiking that you can opt for, let’s now bring you the best locations that can be amazing to you.

Hiking locations that are best for you

We have included a few locations across the world that have been frequented by seasonal hikers. We believe that they can be the best locations for you. Our advice is that, you must prioritize your security and your health when choosing a specific location to travel on.

  • Security: This can be minimized if you travel in groups. A solo hiker may be susceptible to security concerns. For example, isolated forests can be too dangerous more especially those without well-groomed trails. As thus, we encourage you to consider only the safest locations that are most traversed by other hikers. You should go to your library or local bookstore or search google to search the backgrounds of your targeted location before you embark on it.
  • Your health: Knowing your health status before hiking is of paramount importance too, because a deteriorating health cannot withstand high altitudes. Moreover, a deteriorating health may not be able to carry a hiking gear for long distances or survive the fluctuating harsh temperatures. That being mentioned, if you are unsure about your health, choose the simple locations, perhaps a few miles from your home.
  • The distance to travel: For each hiking location, especially the renowned locations, there are approximated miles. Inexperienced hikers, for example, may find it exhausting to travel for long miles. The same applies with unfit hikers, they may find it challenging to climb high mountains for long distances.

Tour Du Mont Blanc

Location: France, Switzerland and Italy

Length: 104 miles

Best time: Summer

Tour Du Mont Blanc is such a great choice if you want the longest hiking experience. It extends to three countries, France, Switzerland and Italy. You can take about 2 weeks in this long-distance hiking adventure while coming across beautiful and exotic glaciers, great valleys. You will also get a chance to capture a beautiful 15 781 ft mountain on your travel.

Hiking on Tour Du Mont Blanc

As you travel on this hiking path, you will be stopping villages to grab something to eat or find accommodation in their guest houses as you rest before the next morning. Alternatively, you can bring a tent, well if that’s relatively cheaper than hiring in guest houses. The trip exposes to varying cultural food between these three countries. If you are quick enough, you can complete this hiking journey in less than 2 weeks including climbing the Mont Blanc.

Laugavegurinn/Fimmvorduhals Pass

Location: Iceland

Length: 50 miles

Best time: Summer, preferably between June and September

This 50-mile trail is also a great choice for you to explore stunningly and breathtakingly beautiful views and waterfalls as well as mind-blowing glaciers. As you proceed with your journey, you might descend into Thorsmork valley. It can take you up to 4 days traveling on this trail wherein you can start from the Landmannalaugar hut in the north and then end in the Thorsmork park in the south. A 200 ft high Skogafoss waterfall is also worth exploring.

The Laugavegurinn Trail in Iceland

As you hike on this trail you will come across volcanic landscapes and volcanic rocks as well as spectacular Rhyolite peaks colored in copper. There are huts for you to rest during your travel, but you need to book beforehand as this is a popular hiking trail and those huts might be full. But to err on the side of caution, you can bring your ultralight tent.

Mount Everest Base Camp Trek

Location: Nepal

Length: 40 miles

Best time: Spring (March to May) and Summer (September to November)

Ready to explore the highest mountain in the world? Then the trek to the Everest Base Camp is a must-have for you. The area is known for its great scenery and incredible guest houses along your way. This negates the need for camping tents unless if you find the guesthouses expensive compared to your self-catering tents.

Mount Everest Base Camp Trek

It can take you about 2 weeks to complete this hiking trail. The trek passes through Khumbu region and extends to Namche Bazaar to give you that first-hand experience of the local culture. From there, it leads to the 13074 ft Pangboche where you can capture the beautiful Buddhist monastery just before you climb the 11000 summit. This could be a great strenuous exercise to lose calories fast.

Kilimanjaro

Location: Tanzania

Length: 35 miles

Best time: January/February/September

Prepared to spend a week exploring Africa’s most renowned mountain? It is 19340 ft high and dubbed the Africa’s highest mountain. Many seasonal hikers have frequented this highest peak. It has plenty of climbing routes to make your alpine climbing a cinch.

Aerial view of Mount Kilimanjaro

If you are a newbie do not worry because there is a guided tour so that you do not get lost in this large area.

Te Araroa Trail

Location: New Zealand

Length: 1894 miles

Best time: October to April

You are probably scared after seeing that you will travel for 1894 miles. Trust me that it is quite a rewarding hiking trail for you to explore the NZ’s incredible landscapes, coastal sands, national parks, alpine ridges, volcanoes areas. It is a frequented thru-hike by many enthusiasts who are determined to travel almost the entire New Zealand. The journey starts at Cape Regina adjacent to the North Island tip and extends to Bluff next to the South Island.

Cape Regina adjacent to the North Island

Be prepared to spend 3 months traveling on 160 tracks. You will be coming across the Queen Charlotte tracks on the South Island and the river valleys at Whanganui National Park situated in the North Island. The Tongariro volcano slopes will also be worth exploring as you trek through Auckland metropolis. This journey is equally rewarding for newbies in hiking as the Te Araroa Trust has put in place experienced guiders and volunteers to help you achieve your goals.

Kings Peak

Location: Utah

Length: 28.8 miles

Best time: September

It is best to undertake this journey in September when snow has melted unless you prefer snowshoeing. For only 28.8 miles, you will be exploring the Kings Peak in Utah by passing through the Henrys Fork, Gunsight Pass and the Anderson Pass. Lakes and ponds will be a blessing to your eyes. The waterfall to the Anderson Pass is one of the great views of this trail.

A wooden plank on top of Kings

The High Uintas Wilderness is also at reach to view its beautiful peaks, alpine ridges and valleys. Furthermore, you might trek about 2 hours to the summit of Kings Peak from the Salt Lake City. Just be prepared and wear quality and durable hiking boots because this journey is known for its sedimentary rocks on your way to climbing the Utah’s highest peak of 13528 feet high. Meanwhile the Henrys Fork Campground might be the initial trial for you as it has an elevating trail. If you have a tent you can pitch at the Dollar Lake to rest at night.

Franconia Ridge Loop/Traverse

Location: New Hampshire

Length: 9 miles

Best time: Fall and Autumn

Newbies can start with this short hiking trail on the Franconia Ridge in New Hampshire. It has beautiful and miniaturized flowers to view where you can take priceless selfies to show your friends. You will also have a chance to hike in 3480 ft alpine tundra from Fenway Park.

Franconia Ridge Traverse Loop

Be prepared for the White Mountain weather conditions as you travel between the Mount Lafayette, Mount Lincoln and Little Haystack.

Overland Track

Location: Tasmania (Australia)

Length: 50 miles

Best time: October 1 to May 31

To hike on this 50 mile trail, you need to make reservations first because it is part of Tasmanian Wilderness World Heritage Area. This area is well-known for its Tasmanian devil (largest marsupial in the world), platypus, wombat and its diverse wildlife. It can be a great place for hikers who are in fond of the Australias diverse landscapes that include the highland mountains, rain forest, and the eucalyptus groves. This trail extends into the Cradle Mountain’s Lake St. Clair National Park. It is short but worth taking because it offers more spectacular views than some 200 mile trails.

group of hikers on Overland Track trail

The Tasmanian Parks and Wildlife Services manage this Overland Track. You can spend 6 days exploring the trail’s breathtaking views and climbing the Tasmania’s highest peak, Mount Ossa, at 5305 ft.

Pacific Crest Trail

Location: California, Washington and Oregon

Length: 2650 miles

Best time: April to October

This is one of the longest hiking trails you will ever encounter. You really have to prepare yourself for this thru-hiking adventure that traverse from north to south regions of the United States. The spectacular Pacific mountain is never to be missed in this journey. Hikers are advised to hike from April to October in order to avoid the snow fall in Sierra’s spring and the Cascades fall. This trail runs across the Sierra and the Cascade ranges. It is, however, not an easy attempt to complete this journey when given its weather conditions.

Crossing the Mojave, The Pacific Crest Trail

On your way to the finish line, you will be exploring 7 national parks, state parks and national forests. You will also tap on the Mojave desert, 13153 ft Forester Pass found between the Kings Canyon and Sequoia national parks. Your journey will extend to the Yosemite’s Tuolumne Meadows through into the volcanoes of the Cascades from Lassen Volcanic National Park. The finish line can be the British Columbia’s E.C Manning Provincial Park.

Grand Canyon Hike

Location: Arizona, United States

Length: 44 miles

Best time: March to May or September to November

Within a week you can complete this hike exploring the nature’s scenery. Only 4 to 6 days either between March and May, or between September and November during summer times.

Hike the Grand Canyon

Additional tips for hikers

For any type of hiking you have to buy enough backpacking gear, camping tents, and cooking tools. There are many local stores or online stores where you can order your essentials before time. As you shop around, keep the following questions in mind:

  • How many days of hiking
  • How many miles
  • The type of terrain to hike on
  • The frequent weather conditions
  • The seasonal changes
  • How many people to hike with

It is advisable to team up with other people if you are going to hike in isolated areas. Accidents do happen along the way where you might slip into dangerous pits, and your only rescue is a second person. The second person can also help you minimize the heavy hiking gear and in all preparations such as pitching the tent. It would be much better if you travel with your partner.

Everest Base Camp Trek

To avoid getting lost, buy a tour guide of the desired destination and acquaint yourself with it before embarking on your journey. Take cognizance of the landmarks along the way, so that if you do not meet them, it can be a signal that you got lost.

It is also recommended that you let know your family about the you’ve planned to take so that they can be on a hunt if you do not come back accidentally. To minimize any confusion, the compass or the GPS can be good essentials to use in finding your track.

Wrapping it up!

Hiking can be overwhelmingly amazing when you hike in the right locations at the right time with adequate preparations. We have mentioned a few of the popular hiking locations in the world for you to include in your to-do list. These locations were chosen based on their popularity among many hikers across the world. The types of hikes have also been highlighted to widen your choices so that you can choose the suitable ones for yourself.

Laugavegurinn/Fimmvorduhals Pass

Do you have any recommendations about the hiking location in the world? Please share with us in the comment section below. If you have any questions you can also leave them below and we will attend to them.
The Best Hikes in America: Seeing the Beauty Across the Country

0
Angels Landing View

Hiking is one of the most popular forms of exercising because it takes you out of your house and into the beauty of nature by simply putting on some good hiking boots. Across America, there are thousands of trails, big and small, that are often not far away from where you live.

Getting in touch with nature is a huge benefit of hiking, as well as the health benefits, and often, it makes hikers want to search out the other trails to change up their routine and to see what other beauty exists out there.

Mount WIttenberg Loop View

The best hikes in America are the ones that may be challenging, but also give you the beauty of this country, which makes the trip worth it. Here, we will discuss the best hikes in the US and discuss the beauty that you will see as you get in some great exercise.

Northeast United States

Jay Peak Long Trail in Jay, Vermont

This trail is the oldest long distance trail in the country and ranges from the Canadian border to Massachusetts, with the best area to hike being known as the Jay Peak Long Trail. This 3.5 mile trail can take about 4 hours in which to hike and has a vertical rise of 1680 degrees. Located in the northern area of the Green Mountains, this trail is for beginners and advanced hikers.

Mountains Jay Peak View

Here, you will see not only the mountains, but the MIssisquoi River that flows to Lake Champlain, St. Lawrence Seaway, and more rivers.

Appalachian Trail in Monson, Maine

The Appalachian Trail flows through 14 states, including Virginia, Maryland, New Jersey, New York, New Hampshire and Maine. The state of Maine holds 281 miles of the Appalachian Trail. Some of the hiking on this trail can be treacherous, where hikers must go slowly and hold on to trees and roots in order to make headway. Maine also holds part of the trail called the Hundred mile Wilderness, which is the most secluded part of this trail.

Mount Katahdin in Maine

Here, there are dozens of streams and rivers, as well as foliage and animals to see. It is not recommended to hike during undesirable weather. Also, the trail is for more advanced hikers, especially those who like a challenge.

Cascade Mountain in Keene, New York

Located in Adirondack Park, Cascade Mountain is one of the 46 Adirondack High Peaks, coming in at number 36. On Cascade Mountain, there are several waterfalls that flow into Cascade Lake. Known as the most accessible of the High Peaks, it is also the one most people choose to climb. It is one of the only mountains in the High Peaks where you can see the summit from the trail head. While hiking, you will go upwards 2.2 miles of gorgeous scenery and breathtaking views.

Peak Bagging Cascade Mountain

Bring your camera to take snapshots of Saddleback, Gothics and Armstrong Mountains, as well as Big Slide Mountain in the foreground of the three aforementioned ones.

Metacomet Monadnock Trail in Holyoke, Massachusetts

This 114 mile trail travels from Massachusetts to the bottom of New Hampshire. On the trail you will see the Metacomet Ridge and many geologic, scenic, and historic fascinations. There are waterfalls, summits, swamps, rivers, farms, historic areas and more on this trail, which will leave you in awe. Don’t forget to look for the summits of Mounts Monadnock, Tom and Holyoke!

Suhnset in Mounts Monadnock

If you hike the northern area of this beautiful place, you can see metamorphic rock that is over 400 million years old.

Northwest United States

Alpine Lakes Wilderness in King County, Washington

The wilderness in this area makes hiking a challenge because of the ridges and crags, but that just makes it more fun! Once you see the granite walls and glacial valleys, along with over 700 lakes, you will find yourself wanting to explore the entire land! The formation is said to be millions of years old and was caused from lithosphere fragments forming along with volcanic activity! Trees are everywhere and you will see various kinds like Pacific Silver Fir, Grand Fir, Western Hemlock and Mountain Hemlock.

Alpine Lakes Wilderness in King County

Keep an eye out for the Western spotted frog, golden eagle, bald eagle and other animals that live in the area.

Wild Sky Wilderness in Skykomish, Washington

Located in the Cascade Range, the Wild Sky Wilderness is over 100k acres and includes the North Fork Skykomish River and Beckler River and is located next to the Henry Jackson Wilderness.

This area is full of forests and foliage, so the fall time will be a perfect time to go to see the colors changing, all right in the middle of the Baker Snoqualmie National Forest. With an elevation of over 5,500 feet, you can get a full view of Glacier Park and Mt. Rainier.

Wild Sky Wilderness in Skykomish

You can also check out the permanent ice that all over peaks like Merchant, Spire and Gunn. While hiking, you can also admire the hemlock, western cedar trees, and more!

Spring Basin Wilderness in Fossil, Oregon

The Spring Basin Wilderness lies right next to the Wild and Scenic John Day River, and contains many cliffs, canyons and colorful features throughout. While hiking you may stumble upon a deer, bobcat, eagle or falcon. If you are a bird watcher, keep an eye out for blue birds and meadow larks. With over 6,300 acres, there is a lot to see and do! There are many wildflowers that bloom here as well as medusahead rye grass and cheat grass.

John Day River during daytime

If you plan a camping trip here, you can also ride horses and hunt as well as other outdoor activities. Do not miss out on the fossils on your hike!

Salmo Priest Wilderness in Priest Lake, Idaho

This 41,000 plus acre wilderness sits inside the Selkirk Mountains and is part of both the Colville National Forest and the Kaniksu National Forest. The eastern side is easier to hike than the other sides, especially the western portion, which is full of steep ridges and dangerous areas.

Salmo Priest Wilderness in Priest Lake

Many endangered species live in this area like gray wolves and grizzly bears. The most common animals you will see here are deer, lynx, moose and cougars.

Southeast United States

Beacon Heights in Linville, North Carolina

Beacon Heights is a great hiking area and is really a bunch of peaks that lie between Beacon Valley and Arena Valley. Sitting in the Quartermain Mountains, the elevation goes up to 7,70 feet. Other mountains in the area that you can see include Mount Feather, Finger Mountain, Pyramid Mountain and Mount Benninghoff. The Blue Ridge Parkway can be seen on days with great weather.

Mile High Swinging Bridge

Don’t forget to check out Grandfather Mountain and MacRae Peak for some great views. Following this trail leads to the Tanawha Trail that eventually connects to the Atlantic Ocean!

Cape Henry Trail in Virginia Beach, Virginia

This trail is on the shore of Virginia on the Atlantic Ocean right on Virginia Beach. From this trail, you can see Cape Charles and the Chesapeake Bay, both astounding. Be sure to check out the Cape Henry Lighthouse while you are there as well as the Norfolk Southern Railway.

Charming Historic Cape Charles

If you wish to see the entire shoreline, simply head on down to Shore Drive, not far from the trail. At 6 miles long, you will not be disappointed in the amount of wildlife, especially birds.

Torreya Challenge Loop in Bristol, Florida

The Torreya State Park is 12k acres and is a state park that is named for the Torreya tree with grows in the river bluffs down in Florida. This is also a national landmark as well as a historic site. The Torreya Challenge Loop is located near the Apalachicola River, which is the northwestern area of the state, where the limestone bluffs are located. The area is also full of swamps, ravines, bluffs and pine lands.

A colorful sunset along the Apalachicola River at Torreya State Park

This place is great for beginners because the area is not that harsh is mostly flat land. The loop is 7 miles and is available all year long.

Blue Spring Loop in Wing, Alabama

The beautiful thing about Blue Spring Loop is that there is a spring located in the middle of the area that flows quickly and is amazing to see. Located in Blue Spring State Park, many people not only come here to hike, but to swim, camp, fish and more. This is also very close to St. John’s River, in which the spring flows into. Bring your camera because there is a lot of wildlife to see!

Blue Spring Loop in Wing, Alabama

Check out the limpkins, red shouldered hawks, wood storks, vultures, and yellow crowned night heron while you hike with your friends! At 6.1 miles, this trail with many streams, ponds and vegetation is great for hikers at any level.

Southwest United States

Williams Lake Trail in Ski Valley, New Mexico

Located in the Sangre de Cristo Mountains, you can get to Williams Lake from the trail and enjoy a hike around the area. This near the trail head by the Taos Ski Valley. This glacial area is beautifully snow capped and is over 11k feet in the air. Once you are done with Williams Lake Trail, head on over to Wheeler Peak and discover more!

Williams Lake Trail in Ski Valley

This is also one of more visited trails in the valley, especially due to the emerald pine trees and the lake and is meant for hikers of any level of experience.

Snowmass Wilderness in Aspen, Colorado

Situated in the Elk Mountains in the center of Colorado, this near 200k acre wilderness sits in two national forests; the Gunnison and White River. From this area, you will see peaks such as the Snowmass Mountain and the Maroon Bells. Snowmass Mountain sits nearly 15k feet high and features Hagerman Peak, which is right near the wilderness. This area is extremely popular and you will no doubt find many other hikers enjoying the area.

Snowmass Wilderness in Aspen

One fun fact about this area is that it is the most photographed mountain areas in the state of Colorado.

Mount WIttenberg Loop in Olema, California

This trail is perfect for hiking and is located on Mount Wittenberg, which rises to an elevation of 1,407 feet. Here, you will find peaceful meadows and conifers all over, and the massive Pacific Ocean! From the summit, you can get spectacular views of everything. In total, the trail is 5 miles long and full of tall trees that are all throughout the area. While you’re there, you can also check out Meadow Trail, which roughly the same hike and just as pretty as the rest of Point Reyes National Park’s 70k acres.

Point Reyes National Seashore

Keep in mind this trail can get steep, so it may not be best for beginners.

Angels Landing in Hurricane, Utah

Located in a very remote area of Zion National Park, the hike to the summit can be harsh, but the views make it worth the trip. There are several cliffs and drop offs.

This trail is meant for those who are daring when it comes to hiking. This rock formation is nearly 1,500 feet tall and once you reach the top, you get a memorable view of Zion Canyon.

Angels Landing Trail

The trail is 2.4 miles long and goes through the Virgin River, where you will also find sandy areas and it becomes more steep.

Hiking Safety

A few important rules before going hiking

  • Never hike alone in case of emergency. Anything can happen, so keep a cell phone and a radio transmitter so that you can be rescued if anything occurs.
  • Always make sure you have enough water, as well as those in your hiking group. You can become dehydrated quickly while hiking and it is important to take water breaks. Pack some snacks in your backpack, too, in case you are out longer than anticipated.
  • Wear the required gear, such as hiking boots, a backpack filled with necessities, and sun glasses. Be sure to use sun screen to avoid sunburn and wear clothing that will be conducive to hiking
  • Always tell people where you are going and when you are expected to be back, so they can know if they need to call the authorities.
  • Keep your backpack filled with other items like a first aid kit and batteries. Having a flashlight or a headlamp can be extremely useful as well.
  • Weather can change in a heartbeat. Check the weather before you go hiking so you know what to expect. Avoid steep or dangerous areas when the weather is bad.
  • Have fun, but do not rush. Pace yourself so you do not tire out quicker. Take plenty of breaks in the shade to cool off.

Wrapping it up

Not only will you get in some great exercise and become stronger, but you will enjoy looking at the beautiful scenery in some of the best hikes in the United States! These places have lots of historical, geological and interesting aspects about them and they are not to be missed! Grab your boots and go!

Zion National Park

We hope that you found our article useful and that, if you have any questions or feel like sharing some of your experience with us, you will leave a comment in the comments section below