Home Blog Page 36

Camping Alone: A Guide to Braving the Great Outdoors on Your Own

0
Orange Camping Tent Near Body of Water during Daytime

Camping is usually thought of as a group or family activity. When you think about camping, you probably picture people sitting together around a campfire, roasting marshmallows for s’mores and telling their scariest ghost stories. But camping can also be a solitary activity, and one that you might enjoy far more than you think.

Solo camping comes with a lot of perks. You won’t have to rely on anyone else, which means you can focus on yourself, enjoy the silence of nature, live in the present moment, and recharge before returning to the hustle and bustle of daily life.

Camping alone might sound scary or dangerous – and it’s often portrayed that way – but it isn’t! Women, especially, are warned not to go camping alone, but so long as you go prepared and make yourself aware of potential risks, there is no reason to believe that camping by yourself is unsafe in any way.

adventure in the wilderness

The best way to enjoy your first solo camping trip is to start cautiously and build your confidence from there. While the saying that there is safety in numbers exists for a reason, there is also safety in preparedness. Camping alone isn’t for everyone, but if you love to camp and you’re curious about going it alone, try it at least once.

For novice campers, we will walk you through essential items you should always carry with you, some solo camping tips, risks to be aware of and how to avoid them, and ultimately convince you of the many reasons you should give camping alone a try!

Tips for Solo Campers

Going camping alone might sound intimidating if you’ve never done it before, but anyone can have the confidence to go alone. Solo camping means you won’t have anyone else to rely on, but this can be a liberating feeling and teach you a lot about yourself. You’ll be able to enjoy the silence of nature, stay present, reflect, reconnect with yourself, and recharge your body and mind before returning to normal life. Camping by yourself also offers you the opportunity to focus on improving your skills like starting a fire, pitching a tent, and cooking hot food outside.

If you’re going camping by yourself for the first time, there are a lot of tips that can help you feel well prepared. Novice campers should always camp near the parking lot and other camper sites so you aren’t too isolated if something goes wrong.
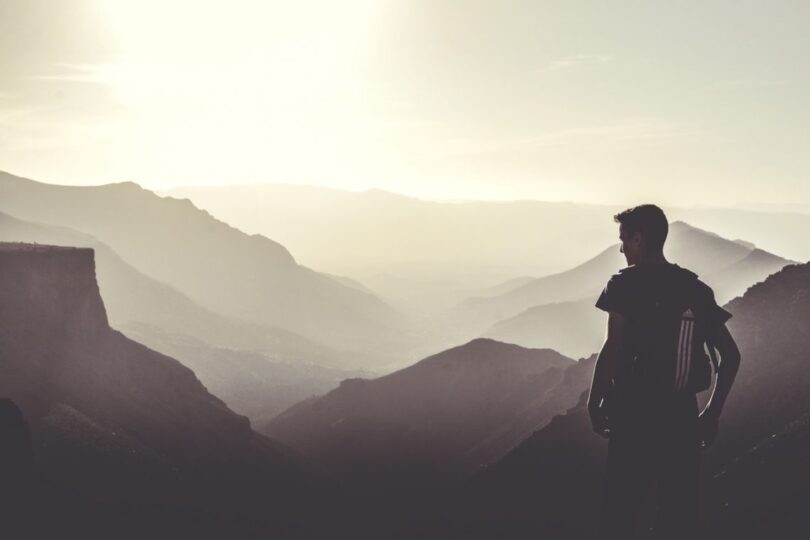
Man Wearing Black Tops at the Top of the Mountain

Always be mindful of the fact that you have to carry all of your gear by yourself so carry as small a pack as possible by taking only what you need for clothing, food, and cooking supplies. You can also lighten your load by packing a small, uncomplicated tent or even just a hammock depending on the season and location. It’s also helpful and reassuring to choose a location you’re familiar with for your first time solo camping.

Leave an itinerary behind with friends or family so someone knows where you will be and when you’re expected to return. That way you don’t have to worry about being rescued if you find yourself in an emergency situation.
picture of a man planning a hiking experiencex

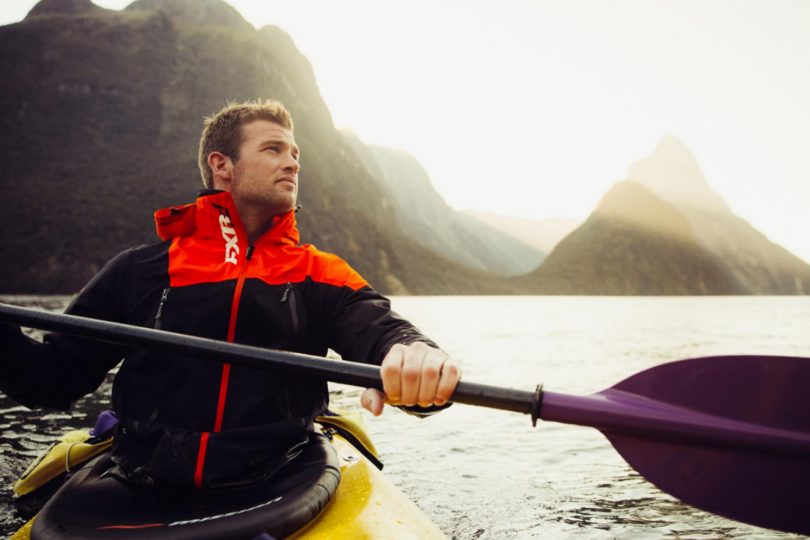
Camping alone usually sounds scary or dangerous to people who have never tried it, especially for women. But by following a few simple safety and preparation tips there is no reason to fear solo camping. Just keep in mind that you’ll have a lot of free time to yourself so bring a book or journal, and try relaxing activities like hiking or kayaking by yourself. And it’s ok to make friends if there are other campers nearby and you’re feeling a little lonely!

Essential Items for Camping by Yourself

Whether you’ll be camping by yourself or with someone else, there a few essential items every camper should take to be prepared and stay safe. However, these items are even more crucial for solo campers who need to be ready to handle any emergency situation or unexpected weather conditions on their own. If you’re planning a solo camping trip, make sure these items are on your list:

Navigation

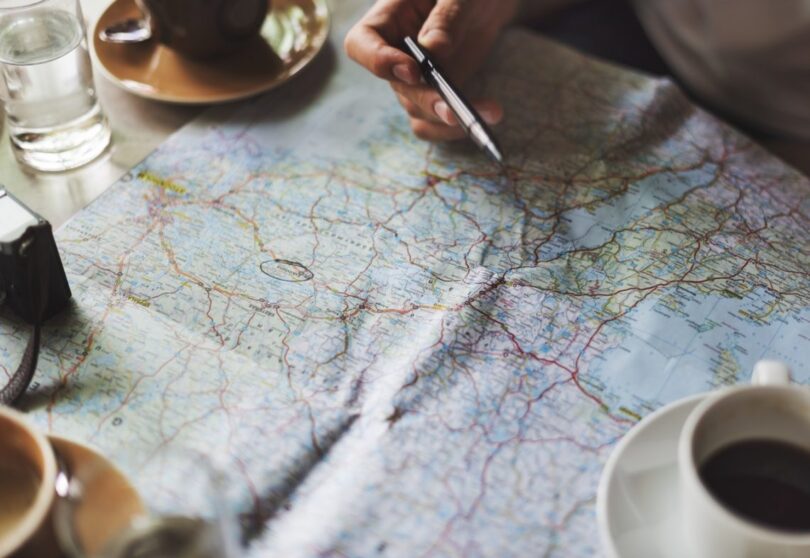
You should always have navigation tools available to help you find your way through the unfamiliar outdoor territory, especially if you happen to get lost which can happen to even the most experienced campers. To help navigate trails and campsites, always carry a map, compass, and GPS, and make sure you know how to use these items before you head outdoors.

picture of a compass sitting on a book

Sun Protection

Sun protection is important on every camping trip and in every type of weather. Just because it’s cold or cloudy outside doesn’t mean you aren’t exposed to the sun so protect your skin with sunscreen, sunglasses, a hat, and long sleeves and pants.

Silver Aviator Sunglasses on Top of Wooden Surface

Insulation

This is essential for winter camping, but can also be useful year-round. Even summer nights can bring cool weather depending on your location so check the weather before you go and pack clothes and sleeping bags with the proper insulation for your specific needs.

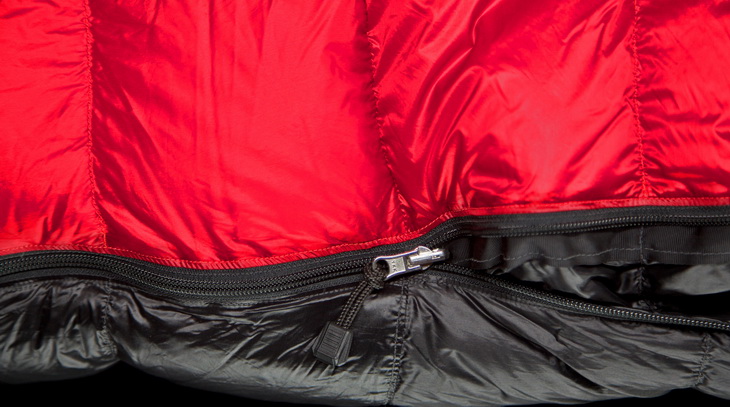
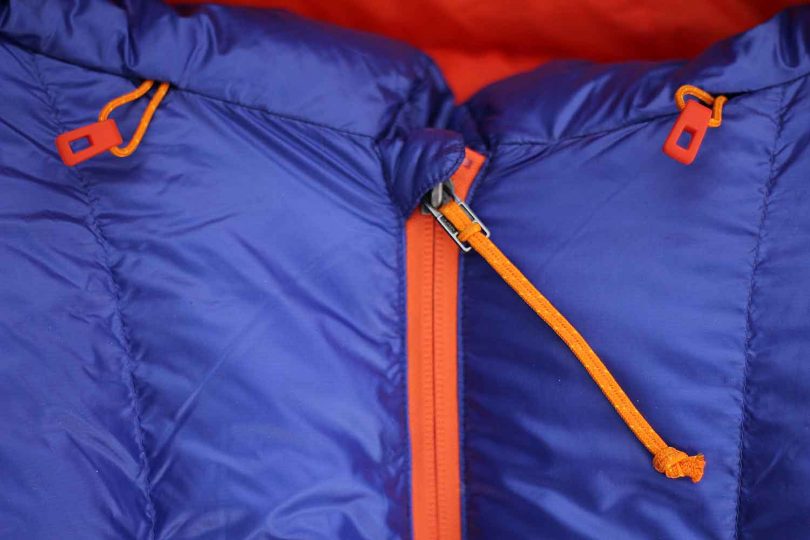
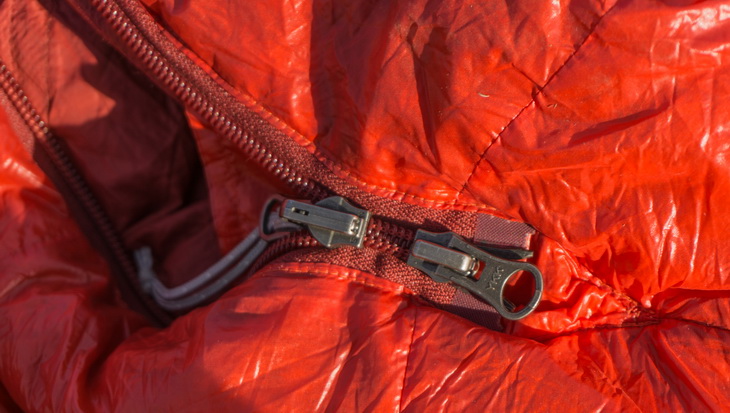
Patagonia Sleeping Bag

First Aid Kit

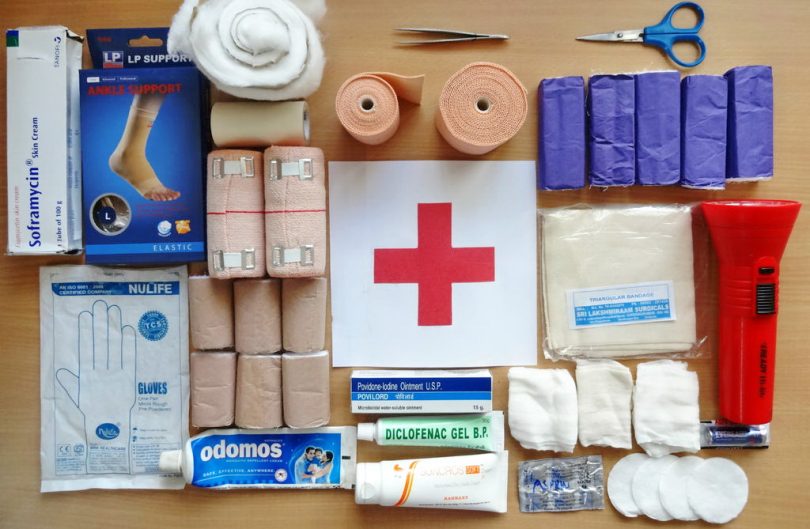
A first aid kit might seem like an unnecessary item or added weight, but they can come in handy when you least expect it. Even experienced hikers and campers can twist an ankle on unfamiliar terrain or have an allergic reaction to something they’re unaware of. Always be prepared with a basic first aid kit for camping trips, but especially when you’ll be camping alone.

Gear List Backpacking First Aid Kit

Fire Supplies

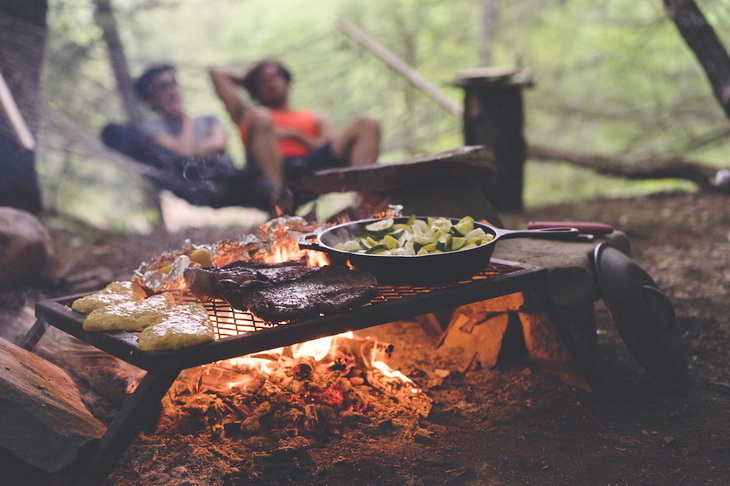
Starting a fire outdoors isn’t easy, especially if you don’t have the right supplies with you. At the very least pack or find some fire starter and carry matches so you can cook yourself a hot dinner and stay warm at night.

picture of a man with a fire-starter in his hands

Repair Kit/Tools

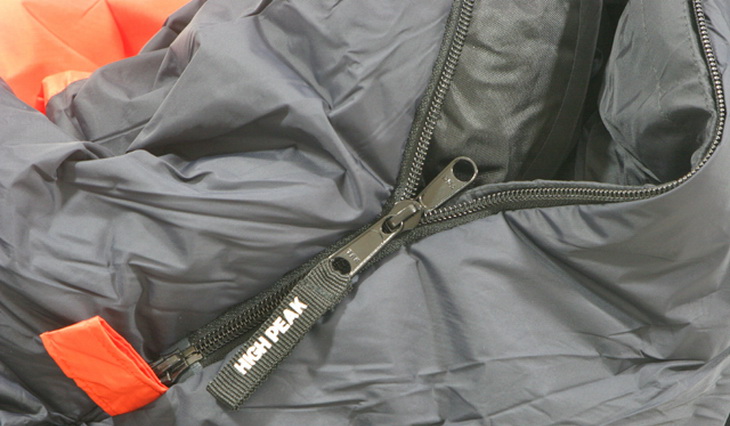
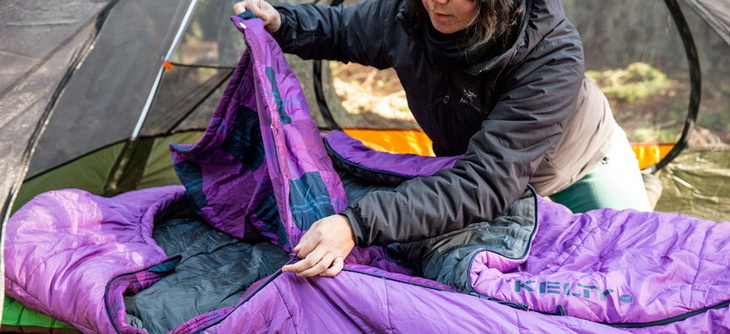
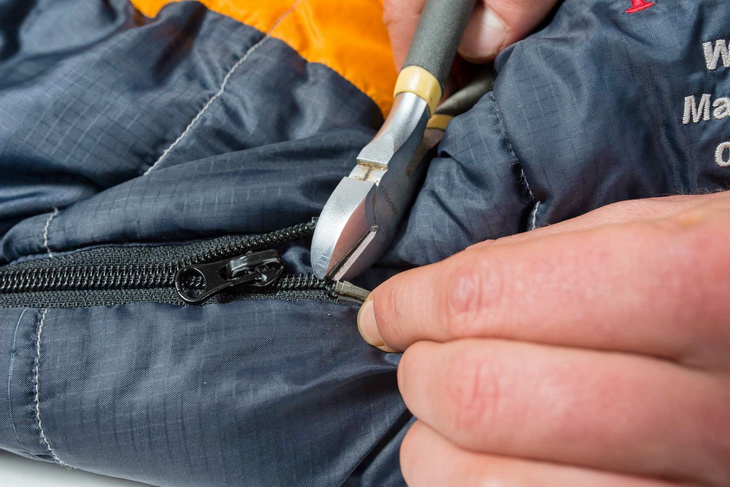
Most camping and hiking equipment comes with repair items so make sure to always carry them with you. Tent and sleeping bag repair items can come in handy and make a major difference in keeping you safe and warm if you tear something accidentally. Carry some basic lightweight tools as well like a multi-tool to help with setting up your camp or any other unexpected scenarios that might arise.

Victorinox Climber tool for hiking

Food

A hot meal at the end of a day of hiking and camping is always ideal, but never forget to carry emergency non-perishable items in case you can’t start a fire due to rain or other natural elements. Emergency food will also come in handy if you find yourself lost or stranded and waiting for help to arrive.

Ultralight Backpacking Meal Plan

Extra Water

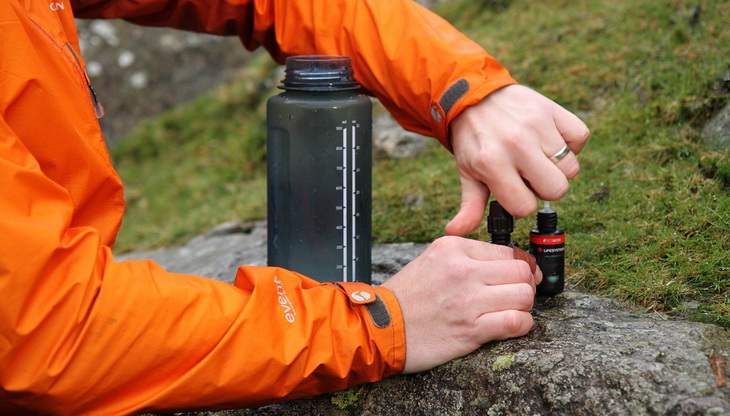
 Nobody can survive without water so always carry extra drinking water or a method for purifying water you collect from a lake or river. You can purchase water purification tablets, rehydration salts, steri pens, or filtered water bottles for cleansing water that might not be safe to drink.

how to purifying water you collect from a lake or river.

Local Emergency Numbers

Never go camping alone without a list of emergency numbers to call in case something happens to you or someone else. These numbers should include an emergency number like 911 and numbers for the local park ranger.

Picture of a national park ranger

Solo Camper Concerns

In general, there is no reason to fear solo camping. Fear of camping alone is often spread through the media and scary movies, but there is no reason to fall prey to the negative and false information. By being aware of the realistic potential concerns that might arise while camping alone, you can prepare yourself for any situation and eliminate all fear of going camping by yourself.

Here are a few things to be aware of and prepare for before you try solo camping:

  • Nature is home to all animals, including predators – Be aware of the potential predators in the area you’ll be going camping and do some basic research on how handle any interactions with these animals. For example, know how to hang your food at night if you’re camping in areas where bears are a native predator.
  • If you know you are allergic to certain pollens or plants that grow in the area you’ll be camping, pack any essential items you need to manage your allergies. This might include a daily allergy pill, inhaler, or Benadryl in case of an allergic reaction.
  • Your phone might not get reception – It’s a good idea to carry a cell phone on your camping trip in case you need to call someone in an emergency. However, be aware that your phone might not get reception in remote areas and be prepared to handle emergency situations on your own until you can call for help.
  • Illness and injury are the primary concerns for solo camping – Always carry a basic first aid kit to handle any injuries or illnesses you experience while camping alone. Be able to handle common injuries yourself like wrapping a twisted ankle, bandaging a cut or wound, and carry helpful over-the-counter medicines like a pain reliever and something to help with an upset stomach if you start to feel ill.

bear canister for animal-proofing campsite

Reducing the Risk

Now that you understand the potential risks of camping by yourself, you can reduce the risk of something going wrong by being properly prepared. The primary concerns for camping should always be shelter, first aid, and food and water. Make sure you know how to set up your tent before you go, apply basic first aid, carry plenty of non-perishable food in case of emergency, and extra water or a water sterilization tool.

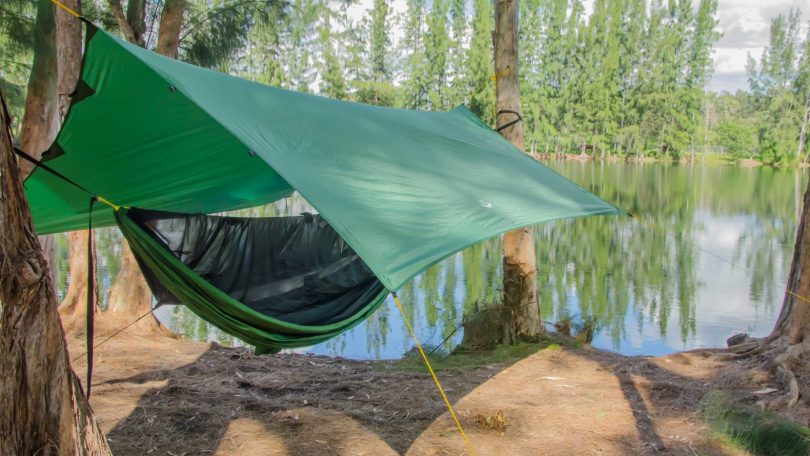
Apex Camping Shelter & Hammock Camping Tarp

You can also reduce some risks by knowing how to hang your food out of reach of predators when you go to bed at night, being aware of any allergies you have and how to manage them, and avoiding eating any plants unless you are really an expert on what is safe.

The final major risk reducer you should be prepared with is dressing appropriately. Always check the weather before you go and be prepared for the worst. Also keep in mind that bright gear and clothes will make you easier to spot if something happens. You don’t want to pack anything unnecessary, but certain times of year bring new risks like camping in the winter. Make sure you pack enough warm clothes with the proper insulation to keep you warm and safe.

Female hiker takes a break and enjoys mountain views, Moskenesøy, Lofoten Islands, Norway

Reasons to Camp Alone

Beyond preparing you for how to safely plan a solo camping trip, we want to convince you of the many wonderful reasons to go camping alone. Camping is usually considered a group activity, but it doesn’t have to be. Many people enjoy the solitude of escaping to the outdoors alone to seek peace and quiet and focus on themselves for a few days. If you decide to give solo camping a try, you’ll be able to escape from the hustle and bustle of everyday life and enjoy some time to yourself.

The Solo Camping Expedition

Camping alone forces you to learn and understand your personal limitations and strengths. When you realize that you’re capable of carrying your own gear, setting up your own shelter for the night, and cooking yourself a hot meal over a campfire in the middle of nature, it gives you an empowering feeling to realize how many things you can do on your own.

Enjoy the time away to develop independence and self-reliance, skills that are useful way beyond just a few days alone in the wilderness. And best of all, you won’t have to share your s’mores with anyone!

Concluding thoughts on this topic

Hopefully by now we’ve convinced you of the many reasons to give solo camping a try, and helped prepare you for how to do it safely. Spending time alone can be intimidating when you only have yourself to rely on and provide entertainment, but it’s a liberating feeling when you finally realize that not only can you do it, but you also enjoy it.

Just remember to start cautiously by camping in areas you’re familiar with and preparing yourself ahead of time. With knowledge of the essential items you’ll need, risks to be aware of and how to avoid them, and specific tips for camping alone, there’s nothing left to fear.

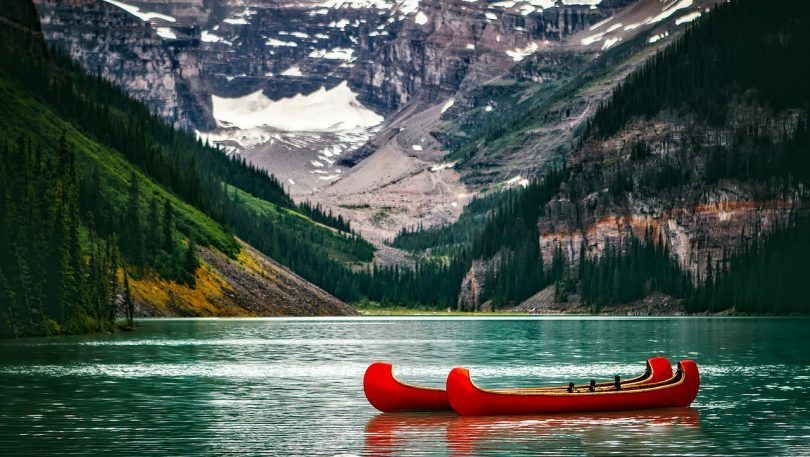
picture of a beautiful landscape

Are you ready to give solo camping a try? Tell us about your experiences in the comments!

Desert Survival Kit: Staying Prepared in the Middle of Nowhere

0
Green Tree Surrounded by Weathered Bush on Brown Soil Under White and Blue Sky during Daytime

You can never be too safe when it comes to surviving anywhere, especially in the desert. Having a desert survival kit is a great way to ensure survival, as it includes many items that you would need in case you need them. Whether you are backpacking, hiking, or even camping in the desert, having a survival kit with you can sometimes mean the difference between life and death.

Desert Gear can also be used to protect yourself while out in the middle of the desert with no sun protection, or when the weather gets unfavorable. When you are trying to enjoy nature, you need to protect your body and be as prepared as possible.

Too much sun exposure can cause cancer and other health issues later in life that are not worth taking the risk for. As outdoor enthusiasts, we know that being safe and protected is the most important factor of enjoying nature while exercising and making memories.

Small Desert Survival Kit

In this article, we are going to discuss desert survival kits and desert gear as it pertains to emergency situations and helping you in a crisis. No matter what activity you are enjoying in the desert, you need to have some items on you in case you do find yourself in an emergency situation. There is a lot to learn, so let us dive right in!

Features to Consider

When you are looking into a desert survival kit, you should know that this needs extra preparation because of the climate in which you are in. Below are some of the features to consider when you are getting your own survival kit together for your desert exploring.

The Planning Stage

When you are planning a desert journey, you need to know where you are starting and where you are going to end up. Learn the pathway and study the areas that you will go through so you can be prepared. Not only will you plan what you take, but you need to plan how long you will be gone.

Be sure to tell family or friends where you are going and exactly what you plans are so they know if and when to worry and send help. Have your cell phone charged and with you in case you need to make a call and do have cellular service.

Man Sitting on Rock Near Body of Water and Holding a Map

Shelter

Your kit should have some type of shelter in it. This can be a tarp, or even a blanket that will keep the elements away and keep you safe. You can also bring along a small tent if you are backpacking or hiking through the desert. There are other materials you need, such as duct tape or a small sewing kit to keep your shelter together if need be. Each situation will vary when it comes to shelter, so you should be prepared for anything.

A photo at Desert Tower Tent Camping

Fire Building

When it comes to building a fire, you should bring along matches, flint, or a lighter to start a fire if you find yourself in need to get warm or cook food, or even signal for help.

You may need to find nearby items to start a fire, or bring along items of your own. Having lighter fluid is helpful as well. Bring along a blade knife so that you can cut up pieces for your fire.

clouse-up photo of a flint

Navigation

Your kit should include some type of navigation, such as a compass, in case your cell phone has no service. Bringing along a compass and a map will help you find where you are and get back on track. Be sure you know how to read the maps and use them properly, or you may risk going the wrong way.

a close-up photo of a compass

Medical Treatment

Of course your kit is going to need items in case there is a medical issue that arises. You need to have bandages, medical tape, ointments, and pain medication. Bring along some alcohol wipes and other small items so that you have a good emergency medical kit together.

clouse-up picture of bandages

Signals

Various signaling devices exist, so it is up to you to choose what you prefer. These can include items like pen flares, whistles, and signal mirrors. These items get people’s attention so that help can be sent your way. These items are small and can fit right in your pocket or pack with no issue.

picture of a whistle on the table

Food and Water

Bring along some snack items that can serve as an energy boost when you find yourself in need of sustenance. You may find yourself in a situation where you need water, and you can get yourself water by using purifier tablets or drops, as well as several other ways to clean your water. If you do not clean it, you can end up seriously ill.

picture of a person holding a bottle of water

Desert Gear

Having some gear to protect you in the desert can be crucial. These areas get cold at night and there is little to block any elements except to use gear like space blankets and ponchos to stay safe. You can also bring along rain gear if that works for you. You also should bring along a flashlight so you can see better at night, and possibly signal for help with it.

group of people in the nature with a flashlight during the night time

A Desert Survival Kit Review

When you are planning a trip into the desert, you need to make sure you are as prepared as possible. If you ever find that you have gotten yourself lost, hurt, or need help in any way, just follow some of the rules below and you will be fine.

What To Do In An Emergency How This Helps You Survive


Be Prepared For The Situation

Be prepared before you leave for your trip to the desert. Carry along your kit in your gear and learn some survival skills before you go out to the desert.Having bandages, flares, a tarp, and a space blanket makes a huge difference if you must spend unexpected time in the desert and you find yourself in a bad situation.
 Do NOT Panic Panicking does nothing but make things worse. When you find yourself lost or hurt, you need to remain calm and think of how you can improve the situation you are in.
 Find Shelter or Shade Next, you need to find shade or shelter and look at the situation you are in. Do not be hasty, as you may need to build your shelter or use a blanket or tarp for protection.
  

Trace Your Steps

Think about where you have come from, and figure out where you are trying to go. Using a map and compass at this point is helpful.Knowing which direction you are heading in can make a huge difference if you have navigation items with you in the kit.
  

Conserve What You Have

At this point, you need to conserve not only water and food, but your energy. Only do what you know is necessary for your survival until help can arrive, and keep tabs on your water and food.
  

Take Inventory

Look at everything you have, including water, food and your gear.Obviously food and water will keep your body going, but you need to have gear that can help your survival if you are lost or hurt. Having the proper equipment can mean a huge difference.
  

Stay Where You Are

If you are lost or hurt, you need to stay exactly where you are.You can use your compass and map to help you, but if you keep randomly walking, you are only going to continue being lost. This is when you can start signaling for help with your flairs or mirrors.
  

Devise A Plan

You need to consider a plan and make it work. This can involve using your navigation skills and choosing one direction to go in.Or you can sit around and wait for help. It is your choice. As long as you are prepared, you can survive.


Think Rationally And Prepare

You need to use common sense, survival skills, and any other skills you have to survive if necessary.Try not to waste your energy, sit directly in the sun, or go without shelter at night. Prepare to execute your plan if you find yourself lost or hurt and will be waiting a while for help.

Now, we can discuss exact items you should bring along in your survival kit, so that you can be as prepared as possible on your journey through the desert. Keep in mind that it might sound like a lot of items, but when you are stuck in a bad situation, you will be very glad that you have these items to stay alive until you can be helped.

Main Groups Of Survival Needs Items To Pack In Your Kit
 Shelter Here, you can use a tarp or space blanket and build a shelter if you cannot sleep in a car or a tent. Using duct tape and some poles or sticks can help you create your own shelter space.
  

Fire Building

Bring along a lighter, matches, or even magnesium blocks to start fires. You can find tinder or bring your own.Fire can help you with cooking, cleaning your water, and sending for help. It will also keep you warm at night time.
 Navigation You need a map and compass, especially if your cell phone has no signal. Know your directions, where you are going and where you came from in order to navigate properly.
 Medical Treatment A first aid kit needs to have pain reliever, ointments, bandages, alcohol swabs and more so that you can be helped until you can get to the hospital if needed.
 Signals For this, you should bring flares, Chem lights, glow sticks, or signaling mirrors to send for help. Bringing along a whistle can help you make noise for others to hear and assist you.
 Food Bring along snacks that are good for your body and give you protein and vitamins so you can survive until help arrives
 Water Clean your water before you drink it by boiling it or using purification tablets or other purification ways to get it to a drinkable state.
 Desert Gear A space blanket, rain gear, and even sun block can help you guard off the elements when you are out in the desert.
 Other Items Bringing small items like a sewing kit, ropes, sunglasses and other items that will help you while you are on your journey.

There are many dangers out there, and that is why being prepared and safe is so important. You can get hurt while out in the desert. Below, we are going to show you a few things that can and do occur so you can be as aware as possible while in the desert, especially if you are in an emergency situation.

Dangers In The Desert Dangers Explained
 Dehydration Dehydration occurs when you are lacking water in the body. You simply cannot live without it, and you must drink clean water in order to avoid getting sick.
 Hypothermia You can get hypothermia in the desert, as it does get cold at night, and even frosts. You need proper clothing and a way to start a fire so that you do not freeze.
  

Hyperthermia

This is also known as heat stroke and can occur because the body lacks water and is going through intense heat.You can feel sick to your stomach, get dizzy and have a headache. You need to find shade and rest for a while.
  

Wildlife

Many poisonous animals exist in the desert and you should be aware of them.There are bees, snakes, spiders, scorpions and more that can harm or kill you. You need to be aware of bears, mountain lions and other big animals, too.
  

Other Injuries

Random injuries can occur while you are in the desert, such as falling, coming in contact with a cactus, or any other random events.Stay away from anything that looks suspicious and make sure your kit is stocked with items to help you.

What Do Other Users Say About Desert Survival Kits?

Hikers, backpackers, and campers agree that having a survival kit is incredibly important no matter where you are, even in the desert. Having the items within the kit can help you until emergency services or other help can arrive. In the kit you find items that can help you with navigation, staying safe against the elements, and more.

Some hikers and backpackers say that it is hard to choose what items should go within the it. You just have to know what areas to cover, and then add the needed items without putting in too much or too little. The aforementioned featured items are a great way to start when packing your own kit for survival.

Many users prefer to put together their own kit versus buying one that has many items in it. Some people prefer to use different items, or add other items, and so making their own desert survival kit is better as they can customize their options versus buying one with items they do not want or need.

Man Walking Wearing Black Backpack during Daytime

The Pros and Cons

Bringing along a survival kit while you are in the desert is important, and there are good and bad things about it. Below, we will discuss some pros and cons about survival kits and gear.

Pros

  • Helps you in case of an emergency, as it has medical items within it
  • Contains many items that are good for various reasons
  • Can be taken with you in your backpack anywhere
  • Has signals that allow you to send for help

Cons

  • It can be daunting trying to figure out what to put in it
  • Can seem bulky in your pack, especially if you take along too many items
  • Some items may not need to be used, or will expire, such as pain medication
  • Some items may be bulky within the kit

Concluding Thoughts on This Topic

Having a desert survival kit while you are on a hiking trip can be a life saver, literally. The items that you pack within it can help you if you get lost, hurt, need water, and many other functions. Bringing along the proper gear will assist you on the cold nights or in the rain.

Obviously, being prepared and safe are the two things that matter most when you are planning a hiking trip alone or with friends. Now that you know what to pack, and what to do, if you ever find yourself in an emergency situation, you know, to remain calm, and make a plan and get treatment or help as soon as you can. Having your kit with you, will definitely help!

Desert Hiker Self Overview

What items do you have in your desert survival kit and where do you hike with it? Have you ever needed to use the emergency items within it? Tell us your store in the comments section below and let your voice be heard! Thanks for reading!

Why is Hiking Such a Complete Lower Body Workout: All You Need to Know

0
Man Standing on Top of the Mountain

Hiking is a recreational activity that allows us to walk because we want to, not because we have to. The process of hiking is often more important than the destination itself. The reason why we hike varies from person to person. It is a great way to research the nature and it certainly lets you connect with the nature.

Hiking could bring you to the most beautiful places on the planet and put on your path amazing plants and animals. Beaches, deserts, jungles, forests, hills and mountains, there are no limits. Hiking doesn’t require high technological gear. A pair of hiking boots and some basic hiking gear would be enough for you to start with basic daily hiking trips.

Person Sitting on Gray Rocks Under Clear Blue Sky

The technique of walking is something you have known since childhood and there isn’t much more that you are required to learn before starting. In time it will allow you to deepen your knowledge of the nature and improve your hiking technique. In the easiest form, hiking will represent a small lower body exercise.

But in extreme conditions you will need a greater knowledge and techniques, even though it is “just walking”. Therefore, you need to know why is hiking such a complete lower body workout.

Hiking has been known as an activity that enhances your mood and gets your body in better shape. It is a great body exercise that will in great measure increase your lower body shape. Other than this, it is pleasant that you are able to adjust the speed that you are hiking with and the length of your hiking trip. A lot of people choose hiking as part of their fitness routine.

Person Standing in the Cliff of the Mountain during Golden Hour

Although, hiking, is not classified as a sport because there is no competition in it, it sure does have a lot of benefits for your body. Hiking however, is not a meaningless wandering around a forest, but conquering a certain destination while enjoying the process on some level. Of course, getting down the hill is also part of the process which is not as easy as it seems. It is activating a whole group of muscles in your lower body.

And if you decide to use trekking poles, it is also beneficial for part of the upper body as well. It is a way of life that is helping us keep in shape and lead healthier and more fulfilled lives. Being a hiker also means getting to know the beauties of the planet by enjoying the wonderful sights and making new friends. In a way, it represents an active way of relaxation that despite the great effort fills you with strength and personal satisfaction.

group of hikers at sunset

Lately, hiking has become more popular than ever. For a group of people, it represents a way of strengthening the lower body muscles and increasing the mobility of the ankles.

Lower body muscles engaged with hiking

Although hiking has a lot of perks for your body, the greatest benefit from it has your lower body. It improves your balance by engaging and strengthening your lower body muscles, therefore creating a positive impact for the whole body. Nevertheless, as with every other activity, you should also start slow with hiking. Start with a local hike that will let you know how strong and prepared your muscles are for the planned hiking trip and work your way up.

Man in Blue Jacket Walking on Brown Field during Daytime

If you feel like you are in need of a greater physical preparation, start with hiking on flat surfaces and work up to uneven terrains and hills. If after months or maybe even years of hiking you feel like you have reached your top shape, try adding some weights to your workout. This would significantly increase the intensity of your hiking and it will also cause you to burn more calories.

And if the weather doesn’t allow, or you don’t have enough time at your disposal, make short power walks on an inclination terrain or carry a backpack while hiking. This will help you not lose your shape and keep your fitness level!

Glutes

It is a commonly known fact that hikers have great glutes. It is the perfect exercise for people who have little or no glutes. However, nicely formed ones don’t come without instructions. In order to tighten them up by hiking, you need to add some weight to your workout. This means that it is recommended that you put some more weight into your backpack that will make your body take its “ideal” shape.

However, if you are just a hiker who is looking for the effects hiking has on your body; it is recommended that you read the entire article so that you get an idea what this activity does to your body. Hiking is a cardio activity that if practiced regularly replaces every lower body workout. It mainly targets your legs and glutes and it could replace a whole workout routine.

exercising your glutes with hiking

When it comes to exercising your glutes with hiking, there are also variations that depend on the terrain you are hiking on. If you are hiking on a flat surface, keep in mind that this is only a cardio exercise that doesn’t cause much pressure to your glutes. Hiking on an inclined surface, such as a local hill, however, is considered as a glute exercise. This exact type of hiking is replacing your training of these muscles and is helping you shape your lower body.

Quadriceps

Long hikes take some preparation. Besides the gear that you are going to prepare few days ahead, your body will need weeks for doing so. Even though, hiking doesn’t require you, climbing high mountains, a long walk on the hill is not an easy task. Most hikers are aware that the climbing up the hill will be hard.

However, they forget that the hiking doesn’t end there. You will need to get off the hill by hiking as well. Here comes the soreness. Quads are the muscles that are usually engaged in this process. If you don’t have strong quads, you might experience some soreness the next day.

Exercise Gives Explosive Power for Hiking Uphill

Even though it is not a big deal, it is recommended that you prepare yourself for avoiding this. For doing so, you will need to do some downhill lunges that will get your quads in shape in just a few weeks. If you are not a fan on small workouts, maybe try some shorter hikes before embarking on a long hiking adventure.

Calves

Even though calves are more frequently connected with mountaineering than hiking, it all depends on the weight of the load you are carrying. If by any chance you are carrying a heavy load on your back, your calves will get engaged a lot, even though the inclination of the hill is small. For this reason, the need for strong calves as well as strong ankles goes for hiking as well.

picture showing hiking-boots

If you are in doubts whether your calves are ready for the hiking trip you are planning, there are some tests you can do that will allow you to assess their strength and flexibility. For doing the test you are going to need a small block that you should step on. Your toes should be on the block, while your heels are in the air. The entire weight of your body should be supported by the front of your foot.

After this, drop your heel down as much as you can until you feel like your calves are stretched. You should be able to do at least 3 sets of 20 reps. In order to see if one calf is more strong than the other perform these stretches separately on each leg. If you notice that one calf is weaker than the other, pay attention to this and perform some extra exercises.

two hikers taking a short break

If you want to get your calves in top shape, you could do this exercise with a heavy load on your back. However, keep in mind not to train your muscles too tight since you will cause an opposite reaction.

Hamstrings

Hamstrings are the obvious engaged muscle group while hiking. However, stronger hamstrings would also allow you to carry a heavier load with ease. The heavier your backpack is the stronger hamstrings you are going to need. The terrain also plays a great role in engaging your hamstrings. There are some terrains that cause fatigue of this group of muscles whiles others not at all.

For this reason it is recommended that you make a good research on the type of terrain you are going to walk on and check if you are up to the challenge. If the hiking trail is softer, the weight of the heel will cause your heels to sink in the trail. This in return, causes pressure to your hamstrings.

If you feel like you are not ready for the long hike coming ahead of you, make sure you prepare your hamstrings with some basic exercises few weeks before the hike. If you have any doubts in your abilities, pay more attention to your every step since weak hamstrings cause injuries because of unstable stepping. The perfect ways to train these muscles is by walking on your toes as often as possible or simply do some chair walks.

kids-hiking-with-parents

Chair walks are when you are sitting on a desk chair and you are walking around the room. When doing so, be careful not to move your whole legs, but engage only your feet below the ankles. This will strengthen your hamstrings and will get you in shape for the hike in no time!

Lower back

If you haven’t exercised for a long time, but you are planning a hiking trip, the lower back is the main muscle group you should be worried about. When carrying a heavy load, or a light load on long destinations, it causes pressure on your lower back. This could create pain while you are moving, or it could make your back sore the next day. In extreme situations, it might even cause you an injury.

happy woman on the-top-of-mountains

For this reason, your lower back should be in top shape for hiking. In winter months, many hikers are taking a break from their hiking trips and in the spring, when the temperatures drop, they are continuing where they left off. However, this is the main reason why injuries occur. In order to avoid this, you must first strengthen your muscles by performing some exercises or taking small hikes.

For strengthening your lower back it is recommended that you make small day hikes with a heavy load, in order for your lower back to get used to the weight. Or you could do some squats with your backpack on your back. Even though this exercise targets mainly the hamstrings, it is beneficial for the lower back as well.

group of hikers in canary-islands

For lowering the chances of an injury or muscle soreness while hiking with a heavy backpack, it is also recommended that you do some abdominal exercises. This will strengthen your core which will influence your entire posture; therefore, your lower back will be under lower pressure.

Thighs

The outer thighs are greatly engaged when walking downhill. Even though this pressure could be avoided, most people are leaning backwards when walking downhill, which causes pressure on your outer thighs. However, this is also the safer position that allows the hiker to walk slower on the declined surface. If your thigh muscles are weak, the increased pressure could cause injuries to your hips.

Needless to say, you should also prepare your thighs if you are planning a big hiking trip. For doing so, you will need two types of exercises that will engage your inner as well as outer thighs.

couple-walking-downhill

The inner thighs are engaged when you go off the trail. Even though we are planning to hike to our destination by following a predetermined trail, this is not always the case. If the trail is somehow deranged or you prefer to take a shortcut, you could go sideways in order to get to your destination on time.

By doing so, you will pass many rocks, mud and uneven terrains. Nature is unpredictable! However, our bodies are very predictable and it is known that your inner thighs will be engaged with every side movement you make.

If you want to strengthen your thighs before a long hiking adventure you are planning, do some side hops. Side hops are done by placing two towels on a distance wide enough so that when you spread your legs, you won’t be able to reach them. After doing so, hop from the one towel towards the other by spreading one leg first and the other should follow. Do 3 sets with as many reps as you can.

woman hopping with kids

The hopping is not recommended to be done with weighs because it might cause damage to your ankles and knees. If you prefer exercising with a backpack on your back and simulating real hiking conditions, set the towels at a reaching distance. Then try moving one leg towards the towel and squat instead of hopping. This is called side squat, which is much safer when weights are included.

Replacing your lower body workout with hiking

As you can notice, hiking engages and it is keeping in shape all of the muscles on the lower body. For this reason, people who have the possibility to go on daily hiking trips should take advantage of this opportunity and maybe consider exchanging the gym with simple hiking. This is extremely beneficial for the body, especially in the warmer months since your lower body muscles will get stronger and your body will intake a lot more oxygen than your training sessions at the gym.

And for those of you who are asking themselves if you would be able to get mass and definition of your lower body through hiking, this article answers that question for you. It is important to notice that for more muscle definition, you should carry a heavier load on your back while hiking. Even though this might not feel as pleasant, it will get you some great results that you will begin to notice after just a few weeks of hiking.

Person in Black Backpack Walking

Also keep in mind that gaining muscle definition also comes from eating. However, the main part of muscle definition is reducing your body fat, and hiking is more than good for doing so. It is a cardio exercise that allows you to cause a progressive overload to your body and increase your muscle mass. If after hiking for a few months you feel like you need to strengthen some muscle group more than it already is, you could always add some weight exercises.

Final thoughts on this topic

Some people consider hiking as a starting point of many sports and activities in the nature. It is a daily activity and hiking through different weather conditions and terrain is quite the challenge, for your body as well as the soul.

However, we all enjoy it because it is a great lower body exercise that allows you to escape the crown and stress that are present in our daily lives. Regardless of whether you are hiking with a group, or you are hiking solo, hiking experiences are unforgettable and they enrich your life!

People Sitting on Green Grass

If you have something to add on the hiking subject and how it has helped you get in shape, share with us in the comment section bellow!

Homemade First Aid Kit: Making One Yourself

0
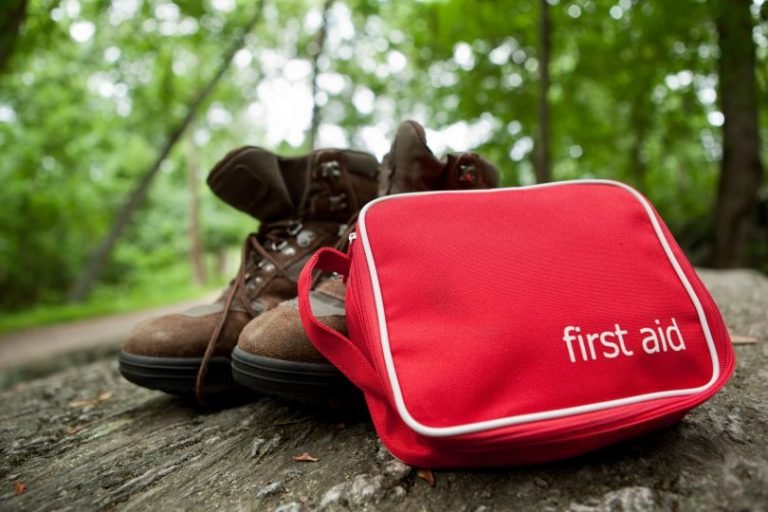
First Aid Kit and a Pair of Shoes

Do you hike with an emergency treatment kit? And if you take one along, have you taken stock of it recently? In case you are going outdoors, you need to always take along a homemade first aid kit or that you can make utilizing this content as a guide.

Figuring out how to utilize the things in a first aid kit is as imperative as having them, so you need to subject yourself to trainings before handling those items. This content is intentionally broad so as to keep in mind anything.

picture of a travel first aid kid

There are a lot of pre-packaged emergency kit out there, but, in this article, we are going to discuss some important gear that should go in many kits for most kinds of hikes. Remember that the lengthier the hiking trip, or the more the group, the more safety kit you should take along. Read on to know how you can create a great first aid kit for your hiking trip.

Why Do You Need to Carry a First Aid Kit?

A first aid kit is simply a collection of provisions, equipment and tools that are utilized in a first aid. These kits can either be purchased all set up together pre-arranged or made by hand, with every part purchased separately. Some early first aid kits incorporated items that help to expel the snake venom from snake bites and even merbromine, which is no longer utilized again because of its mercury content. Fortunately, first aid kits are significantly simpler nowadays and can have an extensive variety of equipment that can enable a common person to treat somebody in need.

First aid kits are a vital gear that every home should have. First aid kits are vital so you can treat wounds or ailments that occur at home or on the hike. From the minor injuries to the more intense one, a first aid kit can help diminish the danger of infection or the seriousness of the injury. It may serve as an advantage to you and your family members to be properly trained in order to know how to use every one of the provisions in a first aid treatment kit.

People Walking on Dirt Path in Forest at Daytime

Another great place to have a first aid treatment kit is the point at which you go outdoors with your family and friends. You can keep it in your car so if something bad occurs when you are in the outdoors, you can begin treating the issue with immediate effect.

First aid kits incorporate an assortment of things that will help in treating cuts, wounds, scrapes, including burns, sprains and supplies for various common ailments. In the event that you make your own first aid treatment kit yourself, ensure that you place it in a place that is quite easy to get so that anybody can get to the kit if any injury occurs. Likewise, ensure that the first aid kit is simple for everybody to open so when a crisis happens, it is not about the whereabouts of the kit but rather that it can be utilized for the circumstance.

Old Rexalt first aid kit

First aid kits are vital for each family regardless of the age of who abides in the home. Ailments’ can occur at anywhere and at any point in time. When you have a first aid treatment kit in your care, you will guarantee the well being of everybody.

First aid treatment can lessen contaminations from open injuries and wounds. It can likewise diminish the rigor of an injury. You can’t always shield your family and friends or hiking groups from getting hurt, but rather, you can treat them with a first aid kit when any of them get injured.

What to put in a first aid kit

Here is a checklist of items that are required to be in a first aid treatment kit:

  1. First aid books: just like any piece of gear you ever possess, if you do not know how to utilize the items in your first kit, they get to be useless. The disparity here is, improper use of the things on this checklist could, either directly or indirectly lead to death. Make use of the first aid book, read it, learn it, and practice it routinely.
  2. Wraps: Various sizes for little cuts, rankles, and so forth.
  3. 4-inch closure strips: This is used for closing large injuries. 4-inch strips are pretty much effective compared to butterfly closures.
  4. 4-inch by 4-inch sterile dressing cushions: This is used to apply weight to an injury and stop the bleeding
  5. Non-adherent sterile dressing: This or Second Skin is used to cover rankles, gashes or burns.
  6. Gauze rolls: This is used to hold injuring dressing in place.
  7. Little roll of 1-inch sticky tape: This is also used to hold injury dressings in place.
  8. Multi-use apparatus or a knife: This should include scissors, knife. A blade and scalpel are likewise helpful for first aid treatment.
  9. Tweezers or forceps: This is used for evacuating ticks, splinters and expelling trash from injuries.
  10. Scissors: These are trauma scissors which possess a blunt end to safeguard the injured person. It can be utilized for removing dress from the wound, cutting treatment tape, and so on.
  11. Thermometer: The digital type is typically more exact, yet batteries do deteriorate.
  12. Moldable splint: This includes lightweight froth-covered aluminum, for example, a SAM brace.
  13. Irrigation syringe (35 cc): This is usually used to flush and clean injuries.
  14. Suction syringe (65 cc): This is used to clear the mouth of liquids when giving CPR (cardiac resuscitation)
  15. Safety pins: This can help expel splinters, affix arm sling, or make an opening in a plastic pack for ad-libbed injury irrigation.
  16. Cotton-tip swabs: This is used for evacuating foreign articles from eye, or putting anti-microbial balm.
  17. Resealable plastic bags: This has numerous uses, such as icing a swollen joint or making injury irrigation system.
  18. Coban, ACE or other rubber-treated gauze: This can be utilized as external wrap on braces, injury dressings or bolster for joint wounds. Be mindful so as not to wrap too firmly.
  19. Germ-free towlettes: This is used for cleaning little injuries.
  20. Purifying pads with lidocaine: This is used for cleaning wounds and it Incorporates a topical analgesic for scraped spots, stings, and so on.
  21. Topical anti-microbial balm: This can be applied to wounds. Normal Vaseline can likewise be utilized in dressing an injury.
  22. Moleskin: This is used to prevent rankles. Slice and put a part on your foot, when you find an injured area Duct tape additionally works for this reason.
  23. Povidone Iodine USP 10%, 1 oz.: This is used for anticipating contamination. Packaged PVD iodine 10% solvent should be reduced in concentration to a proportion of 1 percent or less than that so as to flush injuries.
  24. Aloe Vera gel: This can be found in packets or little bottles for alleviation of small burns.
  25. Pain relievers such as Ibuprofen and aspirin: This provides alleviation for minor pains and aches, diminishes fever, lessens irritation of sprains and other wounds.
  26. Antihistamines: This is used for alleviation of pollen allergies, or to decrease reaction to stings and bites.
  27. Immodium 2 mg tablets or capsules: This is used to reduce intestinal infections through the relief from general diarrhea.
  28. Antiacid tablets or Pepto Bismol: This can be used for the alleviation from abdominal upset, general diarrhea.
  29. hydrocortisone cream USP 1%: This is used to relieve skin infections from bites, stings, poison oak or hypersensitive reactions.
  30. Latex or Nitrile gloves: This helps to protect against blood-borne maladies and disease.
  31. CPR micro-shield cover: This is a smaller flexible hindrance with a restricted valve for safe breathing, which shields the user from blood, regurgitation or spit.
  32. Oral rehydration salts: These include packet of glucose and electrolyte salt for treatment of lack of hydration, warmth weariness, or loss of liquids from spewing or diarrhea.
  33. Space blanket/bag: This is a lightweight exigency shelter, which is used for treating hypothermia casualties.
  34. Paper and pencil: This can be used for recording therapeutic data, for example, body temperature, heartbeat, symptoms time and date, wounds, drug prescriptions, and so forth. Most first aid kits incorporate accident report forms.

picture of a first-aid kit

Guidelines for Stocking Your Kit

Here are the steps to follow when stocking your first aid kit:

Step one

Include a variety of bandages/wraps. One of the fundamentals when treating minor cuts and scratches, is an assortment of sizes and sorts of bandaging or wrapping materials.

Having numerous choices from which to pick will simplify your first aid treatment effort. Put every one of your bandages in a cleaned-up, zip-close sack clearly named in indelible marker. Include:

  • 25 glue swathes of different sizes
  • Five 3″ by 3″ and five 4″ by 4″ dressing pads
  • Two 5″ x 9″ sterile dressings
  • A roll of cloth, sticky tape
  • A 3″ wide and a 4″ wide roller gauze
  • Two triangular gauzes

Man Wrapping a Knee With an ACE Bandage

Step two

Include basic medical devices. Be prepared for culling splinters, cutting wraps, and other medical aid exercises without rummaging through the garbage drawer. Put these inside a marked zip-close sack too. And include the following:

  • Little, sharp scissors
  • Tweezers
  • Two sets of non-latex gloves
  • Cotton balls and swabs
  • Non-mercury oral thermometer
  • CPR breathing obstruction veil
  • Instant chilly pack
  • Medical aid direction booklet
  • Purifying wipes
  • Hand sanitizer
  • Zip-close plastic sacks

Close Up View of Scissors

Step three

Consider including extra tools too. In the event that you have a large kit, consider including superfluous, but valuable medical instruments in an extra, marked sack. These may include:

  • Eye protection
  • Aluminum finger splint
  • Prepackaged space cover
  • Duct tape
  • Sewing needle
  • Petroleum jam
  • Safety pins
  • Turkey baster

clouse-up photo of a safety pin on the table

Step four

Make a different section for medications and drugs. Keep these plainly stamped, and from swathes and apparatuses. Ensure to check expiration dates consistently. You should have the capacity to discover first aid kit sized bags of a large portion of the following:

  • Aloe Vera gel
  • Calamine moisturizer
  • Laxatives
  • Antidiarrheal solution
  • Antacids
  • Antihistamines
  • Hydrocortisone cream
  • Pain relieves
  • Cough/ cold medicine

Aloe vera gel on wood spoon, with aloe leaves, black rocks

Step five

Customize your first aid kit with family medications. Include little dosages of physician recommended prescriptions for every individual from your family, particularly in travel/car kits, in little, plainly stamped containers with guidelines for each.

Monitor professionally prescribed medication lapse dates. In the event that someone in your family has serious hypersensitivities and a solution for an epi-pen, reserve one in the home pack with guidelines, so a guest could give help in a crisis. Even also for home first aid kits, keeping a little load of customized therapeutic supplies — a honey bee sting kit, for instance — can prove to be valuable if your medicine bureau supply happens to be exhausted.

Bee Sting Extractor Kit

First Aid Kit Location and Maintenance

First aid kits have the ability to save lives. Having an emergency treatment kit is the initial step to being set up for a therapeutic crisis, but it is just by keeping your kit properly maintained and appropriately loaded that you can enjoy genuine feelings of serenity. Here are tips for proper maintenance and location of your first aid kit:

Pick a good container

Will you be keeping your first aid kit in a car, backpack or home? Is this something you should move with, and convey to places? How strong does your first aid kit should be? How exhaustive? Weight, shape, size and goal are exceedingly essential components to consider at this juncture.

You can purchase pre-filled medical aid kits, and you can likewise purchase empty emergency treatment kit container. However, you more likely than not already have an impeccably decent first aid kit holder in your home.

One great option is a substantial, translucent, water-safe, flexible or rigid plastic container with either a latch-top lid or a zipper closure. This enables the material to be pretty much visible for ease of identification. For a bigger medical aid kit with more things inside, a rucksack or little duffel pack can work well.

First Aid Kit Tool Box With Emergency Flashlight Torch

Lunch boxes are additionally another great option. However, if it is spacious, effortlessly available, versatile, and in any event fairly waterproof, it can make a good first aid container.

Make your first aid kit safely accessible

At the point when your kid is crying about a “blooper” on her knee, you won’t want the situation whereby your homemade kit is placed on the back of a wardrobe or lost since it isn’t being returned back to the normal spot after each usage.

Maintain a clearly-defined, predictable spot for your emergency treatment kit, on an accessible/visible linen closet rack, for example, and make sure you tell everybody in your home of its whereabouts. Tell little kids where the pack is placed, however, put it where they can’t get to it.

Man Working with a Home First Aid Kit

Educate your family about the first aid kit

Ensure everybody in your home or going hiking with you, who is mature enough to comprehend the functions of a first aid treatment kit, knows where it is placed and when to recover it. For younger kids who shouldn’t yet attempt to utilize the things in the first aid kit, show them where it is placed, so they could tell a guest, relative, sister, and so forth. Yet, put the first aid kit in an area where little kids cannot get to it, for example, on a high cupboard or shelf.

As you and your family explore the outdoors this summer it is important to be prepared for any injuries that may occur

For adults or older children, let them know when to recover the kit and how to utilize the different things in it. Utilize a direction booklet to teach them and ensure that you put a booklet in the first aid kit for reference.

Keep your first aid kit updated

So, the first aid items have been gotten and sorted out. The container has already been picked and stocked. And you’re ready to treat a medical crisis to the best of your capacity. In any case, the work does not stop at that point. Just as a pet or plant, your first aid kit needs consistent consideration and updates. Medicines lapse, and it serves nobody if everything you have in your first aid kit has turned bad when you require it.

Make sure you always check for terminating medicine. At times, container seals fizzle, and spillage among your provisions is terrible. It unloads and repack your whole kit once at regular intervals to take stock and supplant whatever is important.

Make a First Aid Kit

Some may think that it is valuable to make a checklist and safeguard it along with their first aid kit at all circumstances. This can monitor what you do and don’t have, the amount you have, and when certain prescriptions are expected to lapse.

Make an agenda to incorporate with the kit

Stock your first aid treatment kit and record each item on a paper sheet. You can keep it also in the first aid kit. Record sums (10 small bandages, for instance) and termination dates (for prescriptions or salves) next to the recorded things on the checklist you incorporate into your kit. You will want any person who recovers the kit to instantly recognize what it incorporates and does exclude, and that the items are prepared to be used.

Checklist of Paul Kirtley's Wilderness First Aid Kit

Wrapping It Up

Alas, it is no shabby attempt to get ready for a medical emergency. Regardless of whether you purchase a pre-made first aid kit, construct one yourself or get one that you improvise, it will probably cost you some money. However, if things ever turn bad and you have to utilize your first aid kit, each penny will have definitely been well spent. A readied future is an advantageous venture.

Under the most fortunate conditions, your first aid kits will gather dust and dirt where you keep it. Your hope is for it to stay unused. Crises are never fun, particularly when there is a sick or injured person involved. And any moment you have to utilize a first aid kit is an awful moment.

For all other serious wounds that need something more than just a first aid treatment kit to heal up, call your specialist quickly to avoid any lasting mischief. If you are in the business of life saving, for example, a lifeguard, it is always a smart thought to ensure that you own a first aid kit in addition to any other solution to render help with the circumstance.

First aid kit can help with small wounds, but can definitely be the vital gear to saving the life of someone. The best precautionary measure is wellbeing, and the ideal way to remain safe is to stay ready always.

First Aid Kit on a rock

Did we miss anything? What are the items you stock in your backpacking DIY first aid kits? Let us know by leaving a comment below.

How to Hang a Bear Bag: The Most Efficient Ways to Do It

0
Ursack Minor Bear Bag on the Ground

Hiking takes us to different environments. Some quite easy to trek while others are hard and leave our feet sore. What all these environments have in common is the presence of animals. One way or another, as we hike, we encounter different kinds of animals that we need to protect ourselves from. More important than protecting our other belongings, is keeping our food safe. And this is precisely why we need to know how to hang a bear bag.

How else are we to survive on a trail without any food? Hunger has dire effects on our bodies- you can faint due to general body weakness or worse, have to cut your trek short simply because you can’t go any further. You need to hang your bag away from the ground since it contains all your essential items, to keep them away from animals.

Bear Bag System on the Ground

What exactly is a bear bag

A bear bag is a type of bag that you can store your food and other supplies to keep them away from bears and other animals like raccoons, rabbits, and foxes, that will definitely be attracted to the scent. You can opt to keep the food in your backpack, but when going for long hikes, you need more food which would not otherwise fit in your canister. The bag needs to be made out of protective material to prevent it from getting torn easily, and to keep bugs and birds from getting into your food. It should also be strong enough to hold all your items well.

Usually, hikers go for a waterproof drawstring bag with a strap at the bottom. The straps make it easy for you to hang the bag upside down on a tree and even if it rains, the droplets will not soak the bag. Not having a bear bag should not worry, you ever for a moment. You can improvise and use a heavy duty shopping bag instead. As long as it’s waterproof and sturdy, it should do just fine.

In some states, having a bear bag is a requirement of the law. This only means that the area is swamped with wild animals that will go to any lengths just to get to your food. It’s not called a bear bag to signify that you can only use the bag to keep bears at bay. Absolutely not! Even when you are not hiking across the bear territory, you should always have your bag with you. Keep in mind that there are other animals besides the bears in every trail.

bear bag system

What to put in your bear bag

Anything scented that you have with you has to go in your bear bag. This is just not limited to food. Items such as perfumes, body creams, toothpaste, and soaps should be kept in the bag. It is a known fact that animals have a strong sense of smell, and therefore they will be hot on your trail the minute they spot the scent.

Other items such as utensils and cooking pots can be left in the cooking area. As long as they are clean and have no food in them, you have no reason to worry. Hanging the bag helps lessen the prospects of a wild animal snatching it and running away with it. That is why you are advised to hang the bag using a rope on tall trees.

toothpaste on a toothbrush

However, you should not hang your bag on your campsite. It should be a little further down the trail where animals won’t sense the scents and come straight to your campsite. This could pose a threat to your safety, and the last thing you want is to be battling wild animals at night.

How about the Bear- Muda triangle?

You might have come across this term severally and wondered exactly what it was. Well, in simple terms, it’s used to explain how you should set up your camping site to keep bears away.

Your sleeping area should be at least 200 meters from the tree with your bear bag. This tree should also be 200 feet from your cooking area, which should, in turn, lie 200 feet from your sleeping area. If you envision this, it creates a triangle.

Every hiker should be aware of this triangle, and whenever you are out there camping after a long day on the trail, the only thing on your mind should maintain this setting. It’s a tiny price to pay for a good night’s sleep without always worrying about a bear attack.

Even in the case where the bear senses the food, it will only go towards the direction of the tree which leaves your sleeping area out of sight.

bear-muda-triangle-bear-bag

Is it easy hanging the bear bag?

It’s not exactly easy to hang a bear bag. We know you might be wondering just hard it can get. Let’s get practical for a minute. You are in a new territory, most probably a campsite and you have your bear bag with you, laden with food. You need to get it as high as you can from the ground such that animals will have a hard time trying to get to it.

The only tree around is surrounded by poison ivy or nettle, which you are allergic to. If it’s not that, then it’s the tree’s height; it’s so tall that you cannot possibly manage to get a rope up there. Either that or you have a very poor aim and getting the rope to hang on the tree seems rather impossible.

And it gets worse. When you finally manage to get the rope on the tree, it keeps getting tangled in the branches. Trying to untangle the rope only gets you hit on the head several times and you start getting frustrated.

You have not gotten angry at nature like when trying to do all that but its pitch dark. If you are a hiker, you know how most times it gets dark before you are at your campsite. And you have to hang your bag, come what may.

bear bagging from the bridge

Those are some of the scenarios you may encounter when trying to hang your bear bag. So you should know it’s not as easy as people say it is, especially if it’s your first time. However, you get used to it with time and even without knowing it, you find yourself being able to hang one even with your eyes closed. It only requires that you keep practicing every chance you get.

Different ways you can hang your bear bag

There are always different ways to kill a rat. Think about hanging a bear bag as trying to kill a rat. There cannot possibly be only one way to do it. In fact, there are five methods you need to learn.

It’s very crucial that you get familiar with all the techniques so that when faced with the task, you will know what to do, depending on the situation at hand. Each of the methods we will discuss, has its advantages and disadvantages. At the end of the day, it’s entirely up to you to make the decision on which to go with.

Before we start, there are a few things you should note. You should always keep your bag at least 10 feet from the tree trunk and about 15 feet from the ground. Bear in mind that bears can climb trees and therefore, they can just grab the bag if not hung far enough.

If you are lucky enough, you might stumble on a park where bear poles are provided. These poles are Y-shaped on one end to make it easier for you to hang your food away from the ground, on nearby trees.

The rule of thumb is to always hang your bear bags on branches that are high off the ground, around 15 feet, with nothing beneath them. The branches should also be less than 4 inches in diameter, be 6 feet away from the tree trunk, and be sturdy enough to hold your bags. However, they should not be strong enough to support a bear’s weight.

 bear lines to raise your food bag overhead

Pacific Crest Trail (Pct.) method

This is one of the most popular methods used by most hikers. The best part about it is there is no need for ropes to hang your bear bag. And that’s not all. It’s the only method that gives you quick access to the items you will regularly need like toiletries. This is achieved by placing such items in a smaller bag and clipping the bag on the loop. When in need, you will just pull down the rope, and your small bag will come down as the bear bag goes up. This technique also works well in deciduous forests which have overhanging branches.

One of its major flaws is that you will need to have a good throwing hand to have the bag sitting comfortably on the tree, which should be extra higher than average trees. You also need to be swift so that you can be able to tie the knot while you have the bag swinging in the air.

If your bag is a little heavy, tying the clove hitch around the toggle won’t be easy for you. As you might have guessed, this hardly works in forests without overhanging branches.

For this method, you will only need a rope, about 40 feet long, a carabiner and a stick, which should be 1 inch thick and 7 inches long. You can use an aluminum tent stake instead of the stick because the former is known to slide of the knot much faster.

Steps:

Start by throwing your rope over a tree branch which is around 20 feet above the ground and attach your carabiner on one end of the rope. You should then attach your bag to the carabiner.

Put the other end of your rope through the carabiner and use it to hoist your bag high in the air

Keep holding your bag in the air as you tie your stick to the end of the rope using a clove hitch

Release your rope at this point. The stick should go up, bringing the bag down. On meeting, the stick will hold the carabiner and subsequently prevent your bear bag from coming down any further

When you need to use your bag, just pull on the dangling end of the rope, which should lower the stick and enable you to retrieve your bag.

Hanging-A-Bear-Bag with the PCT Method

The simplest method

When you need a simpler way which doesn’t sound as technical, you can go for this one. However, it’s not recommended in environments with bears because they will only chew on the rope and cut it, accessing your food.

You can use the method in other hiking sites, which only have other animals such as foxes. The best part? You will only need a 25-foot rope.

Steps:

Throw one end of your rope over a branch which should be about 15 feet above the ground. Choose trees with nothing below the branch, strong enough to hold your bear bag, but not sturdy enough to support a bear’s weight.

You can now hang your bag by tying it to one end of your rope.

After pulling the rope to lift the bag as high as you can, tie the other end to the trunk of the tree. Your bag should lie 6 feet away from the trunk.

To get your bag, simply untie the end of the rope tied to the tree trunk and release the rope gradually to prevent your bag from crashing to the ground.

BearBagCeremony at SenecaLake

The counterbalance method

This is also commonly referred to as the double rope method. It comes in handy when you have a lot of food and other items with you, such that they can only fit in two separate bags.

The tricky bit is that you may have problems pulling this off on your own. You will also need more rope than usual because the height of the tree needs to be much more than the usual. Getting your bag from the tree proves to be quite a task as well.

For this to work, you need 40 foot rope, a long sturdy stick and 2 carabiners.

Steps:

Toss your rope around the branch of a tree which is 20 feet from the ground, and 10 feet from the tree trunk. The tree should have nothing beneath the branches. Ensure both ends of your rope touch the ground.

You will have divided your food into two bags, each of equal weight. Tie one bag to one end of the rope and hoist it up by pulling on the other end of the rope. A companion can come in handy at this point, to hold the rope so that the bag stays suspended.

Now tie the other bag as high as you can, to the remaining end of your rope. Use the extra rope to create a loop which will come in handy when retrieving your bag.

Let go of both ends of the rope and use your stick to push the second bear bag up such that both bags are now hanging at the same level, around 15 feet high.

Whenever you need your bag, just use your stick to tug at the loop and bring it down. This gives you one of the bags and subsequently lowers the remaining bag.

Double Rope Method/Counterbalance Method to hang a bear bag

The Marrison haul method

The only difference between this approach and the simple way we have discussed is the use of two carabiners, for the former. The carabiners are secured to the tree by both ends of your rope.it definitely makes it easier to retrieve your bag.

However, just like in the simple method, a beat can chew through the rope. You should avoid using this method if you are camping in bear territories.

You only need a long rope, about 50 feet and 2 carabiners for this hanging technique.

Steps:

Toss one end of your rope over a branch of a tree. The branch should lie 15 feet away from the ground, and your rope should hang about 6 feet from the tree trunk.

Know how to make a ‘trucker’s hitch knot’? You will need to make one using the other end of your rope, 6 feet on the ground.

Attach one carabiner to the knot made and run the other end of your rope through the carabiner.

Attach the second carabiner in the knot and tie your food to the carabiner.

Take the first end of your rope and tie it to a nearby tree and the other end of the rope to the same tree.

If you need to access your bear bag, you will only need to untie and lower rope side B gradually

The Marrison haul method to hang a brear bag

The Two-tree method

Most hikers like this technique because it doesn’t need you to throw the rope that high. It’s also much easier finding suitable trees as compared to other methods. However, you will need to toss your rope twice, which calls for a longer rope, approximately 50 feet and only 1 carabiner.

Steps:

Start by finding trees at least 20 feet away from each other. The branches should lie 15 feet away from the ground.

Toss one end of your rope over one branch and tie the end to the tree trunk. Do the same for the remaining end of your rope. Throw it over the second branch

Attach your bear bag to the rope between both trees using your carabiner. You should pull on the losing end of your rope to fully hoist your bag between the trees.

Tie this end to the second tree trunk. If you need to get your bag, just untie one end of your rope. It should lower your bag to the ground.

A Man Bearbagging with The Two tree method

What happens if you’re on a treeless area?

Just how do you handle camping in an area with no trees in sight and yet you have tons of food with you? If you suspect the area you will be hiking on has no trees, pack bear-proof plastic containers beforehand. You can leave these containers with your food on the ground, and not even bears will be able to get to it.

Always remember to store your food away from your sleeping areas, whether you will hang the bags on the trees or use containers.

Other ways you can keep bears at bay besides hanging your bags away from your campsite is choosing to camp on uninteresting sites to bears. Moreover, you should clean all your utensils immediately after cooking to prevent the aroma from lingering and attracting bears. This goes hand in hand with keeping your camping site as clean as possible, at all times.

camping on a treeless area

Wrapping It Up

If you were wondering how exactly to go about bear bags when hiking, we hope this post has answered all of your questions. Hiking is an outdoor experience that you should enjoy to the maximum without worrying about bear attacks or losing your food to the wild animals.

If you are keen enough and keep practicing, you will become excellent at building the various bear hangs. It’s not exactly rocket science. Strive to make the right food choices when hiking, to keep any animals at bay. You also should never forget to hang your food bag or assume that you are in a bear-free zone. Always bear in mind that other animals are roaming around that are just as dangerous.

AntiGravityGear UL Deluxe Bear Bag System

Feel free to comment and tell us what you thought about our post. Is it everything you hoped to hear? If we have not addressed an issue you think is pertinent to bear bags, kindly let us know. Finally, do not forget to share this with as many people as you can.

How to Start a Campfire: Be Able to Breathe Life to Your Basecamp

0
Wood Fire Camping on Forest

Staying overnight in the wilderness is something that requires us to find a way of procuring ourselves with warmth, light, and opportunities to prepare some food. Prehistoric people have been troubled for thousands of years until they figured out how to start a campfire.

This, essentially, was a skill which moved the ancient human community towards a further development of culture and civilization. Today, people no longer depend on bonfires, but camping in the back country limits our technological readiness close to that of the cavemen, calling for a well lit, effective and overall safe campfire.

Just like the prehistoric people, those who stay in the outdoors at night like to gather around the fire and spend the whole evening around that source of warmth and light. Properly placing the campfire is the first thing you need to think about. Some campsites have reserved areas for lighting fires, some don’t.

group of people around a campfire

But if you’re not going to a campsite, but instead to a locale rarely occupied and used by humans, it is needed to know where exactly to light a fire without any risks. Once you go to a campsite, ask the local ranger or the camp staff about whether you can start a fire, whether there are some specially designated areas and fireplaces, and check which ways of fueling the campfire are allowed.

Things to Keep an Eye on Before Starting the Fire

To start a campfire in a campsite without any supporting infrastructure, one needs to find an area of bare dirt which is at least 20 feet wide. Look for spots with signs of recent campfires, if someone burned a campfire several days ago, why not just use that same place? It is likely well prepared and without any flammable materials remaining from the previous campfires, though it requires basic checks.

Look for any plants that could be growing nearby. Also, look around and above to see if there are any trees with branches close to it. Other safety precautions are also needed, especially if you don’t find enough barren land.

  • Bring a bucket of water or two. Hold it at a safe distance from water, but close to someone’s reach so one can react quickly in case the fire goes out of control.
  • A shovel. It is needed to dig out some dirt when the fire appears to be excessive. It would also be useful for putting out the fire.
  • Sand (optional) would be good if the area is already sandy or exposed to sand from nearby dunes or beaches. It is not appropriate to use the sand when in an area where it is not naturally present.
  • Never use fire extinguishers or any other equipment which would release artificial compounds.

Child drowns in bucket of water

Weather

This is the last thing you need to check before making any campfire decisions. While we know rain, snow and overall wet conditions will prevent us from lighting a fire, the wind is much more of a risk. If it is likely to wind in the area where you’re going to stay, maybe it is better not to start any campfires unless it has a vast area of barren land or sand. Winds can blow the fires much more efficiently than we think, and if you’re inexperienced, there will be a high risk of causing a forest fire or burning the tent and the equipment.

picture of a weather vane

Tinder and Kindling

While firewood is the core fuel for your campfire, tinder and kindling are materials used to make enough heat and make any firewood catch fire. Tinder is something very light, fluffy, dry, and flammable. It can be grass, weed, oak leaves, tree bark, some species of mushrooms. That is what is best for use in campsites. The paper  should be avoided, especially newspaper and other printed materials you’d discard since it contains lead and other highly harmful materials.

Any products containing petroleum, such as some kinds of lighter cubes should be avoided too. On the contrary, environmentally-friendly lighter cubes that contain no gasoline, plastic and other petroleum-based materials would be ideal.

Person Curving Wood

Kindling is what tinder needs to ignite, should it burn enough time to make the firewood catch the fire. Kindling is usually dried out wood of any kind, dry tree bark, cedar bark, small twigs. These need to provide for at least several minutes of flame, which is usually enough for most firewood to start burning.

Firewood

Unlike tinder and kindling, which in many cases can be picked up on the campsite freely, firewood is what you usually need to bring with yourself. Before going to a campfire or wilderness, check if there are any rules and regulations regarding firewood.

In most places, you will not be allowed to cut local trees or branches, in and around campsites that would lead to a quick deforestation. You won’t be able to use dead trees or branches either, even if there are some next to where you’re lighting the fire. Deadwood plays an important role in the biological regeneration of our forests. Some places, however, would allow limited use of local dead wood in certain periods and even then you would be limited to the amount of wood allowed by the rangers.

Man in White Polo Shirt Carrying on His Right Firewood Sticks

Firewood regulations may be federal, state, local, as well as internal campsite “house rules”. These regulations define the possibility of bringing wood from the outside, amounts, and types of allowed firewood as well as where to place a fire bed. Some locations, such as national and state parks usually don’t allow firewood to be brought from outside of it.

Brought firewood can contain non-native and invasive species of plants, insects, and microscopic organisms. Most such parks would sell you their own local firewood stockpiled through a controlled process of forest exploitation. The good news is that in most cases, firewood is sold at amarket or below-market prices.

The best is if the campsite, park or forest you chose offers some way of contacting or provide firewood information on their website. This way you will only learn what you need to know quickly and be sure you would not breach any regulations unintentionally. Many campfires sell their own wood, kindling, and tinder, which is environmentally friendly and  cut to sizes ideal for maintaining a campfire.

Piled Fire Wood

For reasons of keeping their biodiversity safe from invasive species, some states prohibit bringing firewood from other states. Some others do allow bringing bundled and stamped USDA certified clean wood.

Building the Fire

Now you have a good location, and all three types of fuel: tinder, kindling, and firewood. Before you commence with building the campfire, make sure the place is cleared of any flammable debris such as leaves, paper, dried grass. If there are ashes, charcoal and any other traces of previous fires. The clean floor will allow better air flow, which is essential for proper campfire combustion.

Dig a shallow hole in the place where you want to put the fuel. The hole needs not to be too deep, and it should be large enough to keep the fuel pieces together. Put the excess dirt close to the hole, you will need it in the case of emergency and as an additional aid for putting it out.

This way you created a fire bed. The role of it is to protect ultralight materials you use as tinder from winding out, while the kindling and firewood will not fall aside, keeping all pieces of the fuel together.

digging a shallow hole

Tinder needs to be handled with a great care. Avoid using very lightweight materials which can be moved by the air flow, not only that of wind, but also from movies of your hand when building the fire. You can squeeze tinder in your hand to make it into heavier balls.

Dried grass is ideal as tinder, it is intertwined, highly flammable and fluffy allowing a plenty of air to get through. It is also fully environmentally friendly and can be found in many campsites, especially during summer. The best alternative to dried grass is environmentally-friendly kinds of starter cubes.

Tinder always goes first. Make sure you put enough of it. Kindling goes over the tinder, and proper orientation of kindling materials, especially if it is in long pieces such as wooden sticks or bark – is essential for letting the firewood catch on. Tinder usually burns out after some 10-15 seconds in most cases, so you need to make sure kindling is dry and has a good ventilation.

Tinder always goes first when you want to start a campfire

Try to build a pyramid-like structure around the tinder bed. Do not align pieces of kindling towards the same direction, for catching fire quickly a good ventilation is of major importance.  A properly set kindling will certainly catch on fire and keep burning for several minutes, which is enough for most kinds of firewood to start burning.

In the beginning, it is not good to put many pieces of firewood.

Campfire Building Styles

A campfire can have various purposes. Depending on whether you need a lasting fire, a fire for cooking or a multi-purpose campfire, you can choose from four styles of arranging the kindling and firewood around the tinder bed.

The teepee Fire

Teepee is the most common arrangement of kindling wood. Its shape resembles the conical tents of Native Americans, hence the name. The teepee is built in two phases. The first phase is making the cone of kindling around the tinder bed and lighting it. The second phase is placing the pieces of firewood in the same arrangement one or two minutes after setting the kindling on fire. Teepee catches on fire quickly and is ideal for cooking.

The teepee Fire

Cross Fire

Instead of making a conical structure of kindling over the tinder bed, you just lie the kindling over the tinder in a crisscross arrangement horizontally. Once it catches on fire, add the firewood gradually. This style may require a bit more space than a teepee fire meant for starting long lasting fires.

The crisscross layers of kindling are what makes the log cabin fire burn steadily and hot

Lean-To Fire

Stick a couple of kindling sticks into the ground at a certain degree over the tinder bed. Put several smaller pieces of kindling directly on the tinder, so you can form a tent-looking structure and start the fire. As the fire catches on, add more pieces of kindling and later firewood. This style is ideal for those who have never built campfires before, as there is little risk of dying out. This style is also good for cooking.

Lean-To Fire Campfire

Log Cabin Fire

The Log Cabin arrangement is the secret behind those large and bright, elegant campfires around which people don’t have to perform much legwork to keep these as such. The core of such a fire is a teepee or crossfire type of kindling arrangement (the teepee is highly preferred) over the tinder.

Around that structure, you need to make a log cabin like structure. Put two logs on either side of the structure, aligning in the same direction. The third log would connect the two log ends that are on the same side – the one which is upwind. The downwind side remains open.

Now build a cube-like structure, putting sets of several parallel aligned pieces of firewood, and put several such sets one over another. The number of pieces on every “floor” or set should not exceed five. Add smaller pieces with every new floor.       Make some space between each piece of wood to allow better air flow. This style requires plenty of firewood in the beginning, but once started it will give a good brightness and warmth for a long time without adding much new wood.

Log Cabin Fire Campfire

Making Sure the Fire Will Catch On

The certainty that your campfire will catch on without much hassle, depends on  materials used. All materials need to burn enough time should the next material catch on. The critical connection is that between the kindling and the firewood. Some types of wood don’t catch fire easily and should be rather used for keeping an already lit campfire.

Some of the best woods for starting a fire include ash, beech, birch,  hornbeam, hazel, and yew. Woods that are better kept at a later stage when the campfire is lit and it is just needed to keep as such is oak, apple, plum, acacia, and cedar.

Avoid plane and spruce, these burn very well, but cast a plenty of sparks, which is perhaps the last thing you want to see in your base camp. Check with the campsite staff or rangers which woods would be most suitable for you to pack. The best is to bring two kinds of wood – one that burns quickly and catches on easily and the other one that burns slowly.

hornbeam wood for campfire

Coal can be used in most areas, but for many reasons, it is better to stay away from it. Coal produces more pollution, releases  poisonous compounds such as carbon monoxide or sulfur for the same amount of energy burnt than wood, it is dirty and often smells bad. Some people consider quality coal more convenient for keeping the fire burn longer. Most types of coal produce more ash and other debris when burnt out.

Never use any liquid fuels to aid in starting the fire. Gasoline, alcohol, kerosene, various oils and other liquid products which come with a “Flammable” warning sign are not meant to help people starting fires. The flaming power of the most of such substances is much greater than that of tinder and kindling, so once started, a fire aided by these would be hard to control. Also, mind that most flammable liquid products are not environmentally-friendly, while some are poisonous and dangerous.

Bonfire on Grey Sand Near Trees

Never use materials that you’d discarded or wasted, such as packaging of food. Plastics, rubber, bags and similar. Even if the discarded food packaging looks just like any cardboard box, it may still contain some materials which are meant to preserve or keep the contents but  can be harmful or dangerous when exposed to open flame.

Ignition

To ignite a campfire or any other outdoor bonfire, you can use safety matches of any kind, but look for those extra long ones which increase the likelihood the tinder and kindling would catch the fire on.  A long neck lighter is a great alternative. The best ignition device so far is a flex neck lighter you can pour into the tinder bed and light until it catches the fire on safely.

Extra Long Matches

Fire Dies Out

If it happens that your fire dies out for whatever reason, don’t rush to stuffing it with tinder and kindling materials. Patiently allow it to chill a bit. Even if the fire appears to be dead, it might be still alive. Some types of wood don’t burn in flame, instead, they just glow slowly until the heat burns it down. Acacia is one such example, but many other things people mistakenly use as initial firewood or kindling has slow burning properties like that.

On the occasion your campfire is dying out, you should rather start a new one at least several yards away from it. Dig a new fire hole and use new tinder, kindling, and wood. Do not use any unburnt fuel from the fire to start a new one. Use it only when the new fire has caught on the firewood.

Selective Focus Photo of Fire during Night Time

If the fire that died out doesn’t seem to have much useful burning material, spill the water over it to make sure it will not catch on when you don’t need it and clean the debris.

The Bottom Line

Starting a fire requires a certain level of skill and knowledge, in particular, knowledge of flammable materials, their use and safety. But don’t be afraid, people have been starting bonfires and campfires since prehistory.  The techniques and technology used to start a campfire described above do help a lot. If you know how to light a barbecue fire you will probably have no problems starting a bonfire.

Take care of proper selection of kindling and firewood. If some of the wood mentioned in this article is not available in your area or is forbidden to use in the campsite you’re going to visit, consult with local staff or administration about the best alternatives offered. In any case, by respecting the recommendations from this article, starting a campfire will be a breeze and you will stay safe from wildfires and other hazards.

5 Person Doing Campfire in Center on Jungle

If you found our article useful and interesting, feel free to share it with your friends on social media. Also, if you have your own thoughts on this topic, leave a comment in the comments section, where you can also ask questions if you have any, and we will be more than glad to answer you as soon as possible.

Sleeping Bag Zipper Repair: You Can Fix it Without Despair

0
Zipper and Draft FlapZippers! You have just walked for 3 days in the back country and laid out your sleeping bag, opened the zipper and it has pulled apart. It’s cold and the last thing you want is a miserable night with an open sleeping bag. All is not lost. Let’s take a look at how you can go about making a sleeping bag zipper repair that will work. However, we do hope you have made some preparation and packed some useful tools to help…

This wonderful invention that is part of everyday equipment in our lives that turns quickly into massive problems when it fails to work properly. We take zippers so much for granted now, but a hundred years ago, they were just beginning to be worked into the designs of our life. When zippers fail, we suddenly realize how difficult life would be without them.

close-up sleeping-bag

Actually, before we tackle your sleeping bag zipper problem, let’s take a look at zippers and their functions in general. Maybe by learning more now, you can avoid the scenario I just hypothesized above.

A Little History of Zippers

Like many simple tools and adaptations and designs that make huge differences to our lives, when you look closely at them, you wonder why it took so long for them to be invented.

A prototype zipper was exhibited at the 1893 Chicago World Fair but no one really took a shine to the idea, sticking to buttons for a while longer. It wasn’t until a Swedish immigrant to the U.S.A. Gideon Sundback, started to develop the idea further in 1913 that the zipper started to take the shape we know of today.

He worked on the design for 4 years in New Jersey at the Universal Fastener Company, finally patenting the “Separable Fastener” in 1917. It needed precision manufacturing to enable the design to be made on a commercial scale.

close-up photo of a zipper

What is even more surprising is that once the zipper was designed and made over a century ago, the basic design has not changed very much. It is still essentially still two rows of tiny protruding teeth attached to two strips of flat webbing that link together and unmesh with the help of a moving up and down the teeth by human hands. The different specifications and materials for these teeth and sliders do make for various different attributes and recommended uses, but the actual zipper design is still basic.

What Makes a Zipper?

There are few actual parts to a zipper, but let’s put labels on them so we can describe any differences and how they function.

TAPE

This is the flat band of woven fabric webbing that the meshing “teeth” are attached to. It is usually made of durable synthetic like polyester, but it can be other synthetic fibers, vinyl or cotton.

Tape Top and Bottom Tape Extensions are the top and bottom fabric parts of the zipper that extends beyond the top and bottom of the chain.

Tape Width refers the fabric width on both sides of the closed zipper chain. Likewise a Single Tape width refers to a single side.

Popular Sleeping Bag Zipper

ELEMENTS

Also known as “teeth”, are the small protrusions made from metal or plastic that attach to one side of two tapes. Each element/tooth has a hook and hollow. The way these elements/teeth enmesh or link with by each hook and hollow, forms an open or closed zipper. When they are closed together they are called a “chain”.

Top Stop are the two metal or plastic clamps that prevent the slider running off the end of the chain.

Chain Width refers to the gauge width of the chain #3, #5, #7, #8 and #10, where the larger number is the wider chain. #15 gauge is also available but only in molded plastic.

Insertion Pin and Retainer/Pin Box where one side of the elements has the insertion pin, the other side the box into which the pin slots to align the teeth prior to closing with the slider

With-Big-Teeth-Metal-Zipper

SLIDER

Each side of the zipper chain slots through each side of the slider so that running the slider in one direction closes the zipper chain, moving the other direction opens the zipper. The slider has a “head” where the chain is open, and “bottom” or where it is closed.

The Puller or Pull Tab is  part of the part of the slider that you actually hold to pull the slider up and down the chain
So there you have it – a zipper is simply a fabric tape, elements and a slider! Seems quite simple put like that. Why didn’t I think of it?

There are of course a few important variables that differentiate the best use for different types of zipper and what makes a quality zipper as opposed to a nasty unreliable one that might let you down when you least want it to.

zipper of a backpack

What are Zippers used for?

Zippers are used to close and open the two pieces of fabric to make it easier to get in and out of clothes, sleeping bags and such like. They are used close bags, suitcase, tents, as well adjusting the sizes of these things. Close pockets, sweat shirt neck openings, cuffs,, jeans.

photo of a tent zipper

Each side of the zipper chain is sewn in opposing sides of the garment or item to be closed. There are different methods for sewing different zippers and for further information research sewing techniques.

Styles of Zippers

  1. Closed-end zipper – one end of the zipper is closed by a metal “stopper” at the bottom so the slider can run to open and close the zipper from one end only. There also small stoppers at the head so the slider doesn’t run off the chain. This is normal for jeans, skirts and sweatshirt neck openings.
  2. Zipper with double sliders (arranged in head to head relation) – this zipper has two zippers so that when the two zippers are closed the sliders meet in the middle (or somewhere along the zipper). This is used for suitcases and bags.
  3. Zipper with double sliders (arranged in bottom to bottom relation) – this zipper is configured so that when the two zippers are closed the sliders are at both ends.
  4. Open-end zipper – this has a “pin” on one side of the chain and “retaining box” and slider on the other so the pin is inserted through the slider into a retaining box before zipping closed. This used for jackets or sleeping bags that open out to blankets.
  5. Two way separator from the top – incorporates two sliders with an open end zipper so one zipper can close the top, while the other can either remain closed or open from the bottom. This is used for long jackets or where unzipping from the bottom allows better access to pockets without opening the zipper from the top. It is also useful for sleeping bags where the bottom can be opened for venting, and also for tents.

Antique brass 9 inch zippers

Styles of Sliders and Pullers

  1. Non-lock slider – this slider just opens and closes freely, the puller usually hangs loose. There are various versions of these in different sizes, depending on the requirements. “Invisible zippers” have small ones with tear shaped pullers.
  2. Automatic lock slider – this slider has a locking mechanism that will hold the slider under normal pressure wherever you stop it manually
  3. Semi- auto lock slider – This has a system that
  4. Pin lock slider – this slider usually has a small pin that is locked in place manually when the slider handle is pushed down
  5. Reversible slider – the tab on the slider can be moved from one side of the zip to the other so the zipper can easily be closed from either inside or outside
  6. Double pull slider – has two tabs, on inside and outside of the zipper so the zipper can be closed easily from both inside or outside

European style fashion backpack colorful coil nylon zippers with auto - lock slider plated coated

Types of zippers

  1. Classic zippers are the metal type found in jeans and other articles requiring short, tough zips that can withstand tough wear and washing. The teeth are molded as individual metal pieces clamped onto the edge of the tape at regular intervals. The metal can be brass, nickel or aluminum made from flat wire.
  2. Plastic molded zippers are identical style zippers to metal. Whereas metal can be painted colors the paint often flakes off, whereas plastic can be made in any color for fashion or camouflage reasons. The material used is usually polycetal resin, but other thermoplastic polymers and polyethylene can be utilized. Plastic zippers are best for situations where the zipper may be exposed regularly to salt water.
  3. One new innovation is a coil zipper made with a coil of plastic spirals, usually polyester along the edge of the tape. This is now the most popular zipper for its strength and longevity. The coils form the interlocking teeth and these coil zippers are used for many closures from apparel to luggage to sporting goods.
  4. There are also reverse coil zippers where the coils are on the inner but the slider is still on the outer. This configuration is usually used for water resistant and waterproof zippers that form closures for a semi dry and dry diving suits. A PVC coating covers the stitching to help keep the diver dry.
  5. Invisible or concealed zippers also hide the teeth behind the tape so it cannot be seen once sewn into the garment. Usually fine coil zippers, they come in many colors to match the garment colors as best as possible. It is common for women’s skirts and dresses and sometimes the tape is over a lighter, woven fabric. They are also becoming popular for military and emergency services as they can give the appearance of a formal button down shirt but are quickly opened and closed.
  6. Sliders are usually made of metal for all zippers, but there are some that are better in some circumstances like dive bags that are often exposed to salt water.

plastic_molded_zipper_16in_separating_on_the_table

Zip Maintenance

Keeping zippers running well before problems happen is the best form of repair. Definitely try these if your zipper slider, shows any sign of sticking.

Zippers can be lubricated by a number of substances:

  • Running a graphite pencil along the teeth
  • Dipping a cotton bud in petroleum jelly or olive oil and running that up the teeth
  • Spraying with silicon along the teeth
  • Rubbing a candle or soap along the teeth

Just don’t overdo the oils so that it doesn’t stain the sleeping bag fabric.

Dipping a cotton bud in petroleum jelly or olive oil and running that up the teeth

You can also keep an eye on the slider and because they are metal they can be squeezed gently to keep them firm and running true along the chain.

How do you go about making a zipper repair?

First, make a full assessment of the damage to the zipper.

  • Are any teeth damaged or missing? In this case you are most likely looking at having to replace the whole zipper.
  • Is the slider still running, but the zipper keeps pulling apart? If this is happening because of wear to the elements/teeth which will no longer hold together in a chain, you will most likely have to replace the whole zipper.
  • Do the teeth appear to be Ok, but the slider is worn or the puller broken? In this case you may just be able to repair the puller or replace the slider.
  • Has the stopper at either end pulled apart or fallen off? You will most likely be able to do a running repair with a new metal stopper or even with thread.
  • Are the pin and box are destroyed for some reason? The zipper is very difficult to repair.

patagonia sleeping bag

Option One – Replace the Whole Zipper

How easy this is will depend on the design of your sleeping bag. More expensive down sleeping bags will have quite complicated systems to ensure that as little air as possible is able to escape through sewn seams and zippers. You might want to consider contacting the manufacturer to see what advice or repair services they offer. If you have confidence in a repair business in your area you could get a quote there as well to decide if a repair is worth it.

The two-way zippers are heavy duty

The other option is to make the replacement yourself. You will need to remove the broken zippers and lay it out flat to measure exactly before ordering a new zipper. Measurements for zippers are taken along the length of the chain from bottom to top, not the extending tape fabric. Use the descriptions in this article to know exactly what style of zipper you need. Quality zippers are available online.

As you are carefully removing the zipper note how you will have to replace it with reverse order for the sewing techniques. Actual details cannot be easily taught through an article so we are assuming you have competent sewing skills.

a camper carefully using their sleeping bag zipper

Option Two – Replace the Slider

Check what gauge size the zipper is and what style the slider is. You may not be able to get an exact style, but it will need to be the same gauge for that style of zipper – most likely coil for a quality sleeping bag.

Replacement sliders are often available at sewing or haberdashery stores and they are supplied with a slider and new metal stoppers if you need them.

Remove bottom slider by cutting just above the pin at the bottom. (If pin is missing slider will come off)

Replacing a slider on a Pin and Box Ended Zipper

  1. Remove the top stop from the zipper on the side that has the box, gently with some pliers. Put it aside as you will replace it.
  2. Remove the broken slider if it is still on the zipper. You may need to take the other top stopper off in this case, depending on which side the old slider is on. Or cut it off with wire cutters.
  3. Replace the slider on the side of the chain that has the box. Run it to the bottom.
  4. Thread the pin through the box and gently close the zipper to check it runs fine.
  5. Replace the stops at the top.

Take new zipper slider and guide zipper teeth into the top grooves of the slider, pushing them through to the bottom.

Replacing a Slider on a Closed End Zipper

  1. To replace a slider, you need to have the zipper closed. So, protect any closed section as much as possible from opening further, until you can carry out the repair or you will have take a lot of time to close the zipper manually from the bottom.
  2. Remove the stoppers from the top.
  3. Place the new slider carefully with the “mouth” opening over the teeth and push it down gently. This can be a bit fiddly, so take your time and try not to allow the chain to separate very much.
  4. As you push down it will unzip from the top.
  5. Replace the top stops
  6. Or you could try to access it from the bottom, which may mean opening some seams.
  7. Then you have to open the bottom zipper chain and slide each side into the slider to link it out of the mouth.
  8. Replace the block at the bottom.
  9. Open the chain links and run the slider back up to the top to close the zipper.

Mountain Hardwear Spark 28

Using a Slider Repair Kit

There are a number of instant repair kits available for zippers and I recommend you carry one with you at all times. Even if they are not a long term solution for gear that gets a lot of use they may just be enough to keep you warm over the nights and get you back home where you can make further considerations.

Some of these zipper repair sliders just snap in place without removing any stoppers. Others have adjustable screws that you can use to lock the slider in place as well. This would a good option for a sleeping bag. Follow the instructions for each individual style.

Black-Metal-Lock-font-b-Zipper-b-font-Slider-For-Nylon-Spiral-font

Final Thoughts On This Topic

We hope that this article has given you some ideas about how to care for your zippers and what to do if you strike zipper problems with your sleeping bag. Remember “a stitch in time, saves nine,” so take some time lubricate and care for your gear. If you do need to to make a sleeping bag zipper repair in the back country be prepared with tools and/or a kit.

Now that you are more familiar with how zippers work and how to maintain them, and even repair if needed, we hope that you will never again experience a cold night in the outdoors due to a sleeping bag zipper malfunction.

close-up picture of a sleeping bag

If you found our article to be useful and interesting to read, please feel free to share it on social media. Also, if you think that we missed out on an important advice that should be in this article, let us know by leaving a comment in the comments section below. Happy camping folks!

Ultralight Backpacking Gear List: Keeping it Light!

0
backpacker in the middle of the landscapeBackpacking is an outdoor activity that has become popular among the masses with many people seeking to explore the back country and discover new things while at it. While it’s a fact that the current generation is much glued to their laptops and cellular phones, some of them have defied the norm and resorted to activities such as backpacking. And if you are one of these people seeking to explore the outdoors, it’s important to have an ultralight backpacking gear list so you can travel light without having to worry about your load becoming a hurdle while on the trail.

Backpacking as an outdoor activity involves carrying a backpack with other essential tools and equipment since these kinds of ventures involve more than just a day. The set of tools and equipment you would carry for your trip, involve the basics such as shelter, food, clothing, and water specifically selected for backpacking.

When exploring the back country, it’s advisable to select gear that is lightweight, tough, dependable, and easy to carry. The market is filled with various brands that tout these claims and some items have been proved to be worthwhile as a result of their excellent quality. These tools and equipment have been tested in actual outdoor situations and have shown to be quite dependable.

picture of two people backpacking together

However, when planning your backpacking venture, it’s important to have an idea of what items you’ll need and what aspects you’ll have to consider to make your selection successful.

SELECTING YOUR GEAR

When you’re planning to embark on a backpacking mission and have no idea of what criteria to use for selecting your gear, you’ll need to put some essential factors in mind. These aspects will assist you to understand what is important and what you’ll need when heading out on your camping or hiking trip.

It’s important to be confident about your plans by ensuring that you are well-prepared for anything that may happen when you’re in the back country, but you don’t need to over pack as this can make the trip quite difficult. Therefore, make sure you pay attention as you prepare to go.

picture of a backpaker watching the landscape

What’s the weather?

Before you can embark on a backpacking tour, the first thing you’ll need to know is the weather condition of the place you intend to tour. Make sure you check with the weather house to confirm what the temperatures are and whether or not they are expected to change. For instance, if you’re moving up the mountains, you’ll need to know what the temperatures are below and above the sea level so you can know what to expect.

Weekend-backpacking-trip-in-the-Engadine-after-the-first-early-season-snow

It’s also important to know whether it’s going to snow or rain as this will give you an idea of what gear to carry.

What’s the terrain?

Before heading into the back country, you’ll need to know about the terrain of that area so you can know what to expect. This is important as you’ll know what shoes or boots you need. Also, you may need the hiking poles to help you traverse the terrain, especially when going uphill. Knowing about the terrain will make a great difference in what you wear and what you’ll pack for your outdoor tour.

backpacker taking a short break

What’s the amount of time you’ll spend outdoors?

After finding out about the weather and the terrain, you’ll need to make sure you have an idea of the duration of time you’ll spend in the back country. You will need to carry plenty of gear to match the number of days you intend to spend outdoors. You’ll also need to carry spare gear for the extra days you intend to spend outside.

Hike-the-beautiful-45-mile-Rae-Lakes-Loop-and-experience-true-High-Sierra-Wilderness

If you’re not sure how long you’ll stay in the back country, you may end up short of gear you will need to survive outside. This will definitely make your days and night uncomfortable unless you can discover ways to clean out your attire and find more food. Otherwise, you’ll need to ensure you are well-prepared in terms of gear and food, so you are not caught off-course.

ESSENTIAL BACKPACKING GEARS

When preparing your lightweight backpacking gear list, you’ll need first to consider equipment and tools that are essential for your outdoor survival. The list provided below outlines some of the items which you’ll need to put into consideration when heading into the back country. When planning a backpacking trip, it’s important to select items that are long-lasting since these kinds of trips require durable equipment as most of them can be quite expensive.

Tent

Tents are an excellent addition to your lightweight backpacking gear list as they would make it possible for you to spend an extended period in the outdoors. Tents can also serve as the base camp when you’re exploring the nearby environments.

These products usually vary in sizes, but the ones designed for two people will be suitable for personal hikes since you can use the extra space to store your stuff while others serve as a footrest and pillows. Modern backpacking tents are waterproof and lightweight, and some even provide fireproof materials.

person in a hoodie sitting next to a red tent and brushing teeth in a landscape

Rain cover

This equipment is not only designed to protect your stuff against the rain, but it can also be utilized in wrapping your items around when crossing a river. Rain covers can be used on various equipment such as the tents to protect it against moisture. You can also use the rain cover as a makeshift umbrella if needed. This equipment is made of plastic with rubber lining which is effective in trapping the heat inside when you wrap it around you.

Battlepack Rain Covers

Sleeping bag

At the beginning, sleeping bags were effective for outdoor expeditions, but weighed more and were cumbersome to carry during a backpacking tour. Today, these items weigh less and can easily be compressed to manageable sizes with the assistance of straps and compression bags.

photo of a woman in a sleeping bag on the top of the mountains

The best bags provide an insulated hood, a full body zipper, and a down collar to guard the user against drafts.

A water filtration system

A new addition to your lightweight backpacking gear list would be a portable water filtration system. This item resembles an over-sized straw that contains charcoal, along with other minerals. Some models are fitted with a miniature pump while there are models that can act as straws which you can use to directly sip water from open sources such as streams and ponds.

A Man Using Water-Filter-System-Katadyn

Some innovative individuals have come up with filtration systems that can use the sun’s heat to evaporate the water in the container and then condense in a lid that can be put in a cup for drinking.

Headlamp

Most backpacking trips will require a dependable headlamp that will go along in assisting you to navigate in the dark and help you find items at night or even cook in the dark.

Nowadays, headlamps are equipped with the LED lighting systems which are long-lasting and utilize the least amount of power to operate. These headlights usually use rechargeable batteries along with adjustable head strap which is able to wrap around the arm, chest, or head, depending on the position you believe is ideal for you.

picture of a headlamp on the table

Bag

The backpack is one of the most quintessential equipment as a bag makes it possible for you to carry all your items you would need for the backpacking trip. The best choice of bags are those made of mesh and synthetic materials as these kinds of bags are flexible and strong enough to carry heavier load compared to bags made from other materials.

Backpackers on a mountain road

There are also various types of backpacks available on the market. There are the top load bags which are ideal for extended trips and the day-packs which use zippers with different external pockets for tools and gears; and the external frame packs which are used for heavy duty mountaineering.

Stove

One item you don’t need to forget when you are on a backpacking trip is the camping stove. Make sure you find a foldable, light container, which can easily fit into your pack. Most backpacking stove models run on different fuels while a few still utilize propane or butane as the source of fuel.

Etekcity compact backpacking stove

However, if traveling to your hiking destination by plane, you need to remember that some airlines do not allow the stove canisters aboard. Therefore, make sure you are able to find out about the federal aviation regulation before you can take the canister with you.

Hammock

The good thing about hammocks is that these items can be used to replace your sleeping bags and tents during the day trips or even at night. The hammocks can be tied between poles or trees to provide a relaxing feeling. If there are no trees around, you can Jerry-rig the hammocks on the rock walls using kern mantel ropes, climbing pins, and carabineers.

DD - XL - Frontline Hammock - Olive Green

The hammocks are used extensively by natural wall climbers during the overnight trips. There are also specialized items that are designed to offer weather protection.

Jungle knife

A jungle knife is something that needs to be included into your lightweight backpacking gear list, especially when you are on an exploratory hike, or when trekking in an area filled with wild animals.

Parang Jungle Knife

Knives are also important in life and death situations in cases of emergency surgery or amputation.

Trekking poles

These items are optional when planning your hiking, although they can be an excellent addition to your gear list. Other than helping climbers maneuver through the terrain, hiking poles can also be used to fend off wild animals. They can also act as weapons for self-defense when you get attacked in the wilderness.

picture of a backpaker holding trekking poles

Kern mantel rope

Your backpacking gear set is incomplete without a good-sized kern mantel rope. You may opt to carry along the ropes of different lengths and sizes, for numerous different aspects. These are an excellent addition as the ropes can be used for hanging your clothes after you’ve washed them.

Modern climbing ropes tend to have a kernmantle design since the outer “jacket” of the rope offers resistance to abrasion

However, their main purpose is to act as the belaying ropes just in case you’ll need to rescue a partner stuck in a ravine. Apart from that, the kern mantel ropes can act as the emergency guy lines as well as bag straps when the need arises. For medical emergencies, they can be used as tourniquets, and as the ties for fractures and splints.

LIGHTWEIGHT BACKPACKING GEAR LIST

When packing light, it’s also imperative to note that there’s no perfect gear. There are times you’ll need to make some compromises. It’s greatly a balance between comfort when walking and comfort when in the camp, and the cost of the items you are willing to acquire. Some items would be seemingly good to have on your tour, but their weight is unjustifiable in climbing in walking many miles and climbing thousands of feet.

Also, you’ll need to remember that gear that is suitable for one person may be unsuitable for the other. Therefore, when choosing your equipment, make sure you combine the advice of the veteran hiker and your own personal experiences to make the right choice. Do not over-think. Select what you believe is ideal for your case.

SF backpacks on the grass

When in the back country, you’ll want to be dry and warm enough, so you can remain as comfortable as possible. To achieve this, it’s important to have a reasonably light pack as this will make your trip more fun, and it will exert less stress on your body, particularly the ankles and knees.

It’s reasonable to keep the weight of your base pack (your pack with everything in it except fuel, water, and food) under twenty pounds. An even better target would be fifteen pounds of less. When thinking about weight reduction, you need to think about the weight of your shelter, sleeping bag, and tent.

BACKPACK

When planning a backpacking tour, you’ll probably need a backpack with the capacity to accommodate your entire gear. A pack with about 3000 to 4000 cu in is suitable for the long weekends while those with 4400+ cu are ideal for the extended treks. You may have to experiment so as to find out which one is perfect for your case.

picture of two backpacks ready for adventure

SLEEPING SYSTEM

Sleeping pad – There are sleeping pads that are ideal for an extended trip to the back country. Weighing approximately 15 ounces, the Thermarest Prolite Plus is suitable and guarantees a good night’s sleep. This item is self-inflating and has a thickness of about 1.5 inches.

There are also models that are ideal for the younger hikers who prefer less padding and closed foam pad. The market is filled with items that are thick and lightweight, weighing close to nine ounces, so you don’t have to worry about increasing the weight of your pack. There are conventional models with extra spaces to store items underneath the feet. Whatever your options may be, make sure you choose a model that best fits your backpacking needs.

Sleeping Bag – Choose a bag that can easily be cinched up or opened like a quilt. The 20-degree version with DownTek weighs twenty ounces is ideal for lightweight backpacking. Other aspects you could consider are:

  • 3 season sleeping bag – A light 20-degree bag should be suitable most of the time
  • Winter sleeping bag – If you own a single bag such as the 20-degree bag mentioned above, you may add its warmth by utilizing a bivy sack and wearing different cloth layers to bed. If you are able to afford it, you may opt to invest in a winter bag.

The Gore-Tex Bivy Bag or 3 or 4-season Tent – If it snows during the night, you may need to knock the weather off using the 3-season tent. However, if you go for winter hikes frequently, it’s advisable to invest in the bomb-proof 4-season tent.

Sleeping Pads for Bikepacking, Ultralight Sleeping Mats

COOKING

  • Stove fuel – the butane/propane canister or the white gas (if you’ll be melting the snow to get water, make sure you carry more fuel).
  • Lightweight Trail Stove – You can opt for the white gas such as butane/propane or the whisperlite
  • Lexan spoon
  • One medium pot with a lid and a pot handle

Lexan Spoon By Coghlans on the table

FOOD

The preferences for backpacking food may vary. However, here are a few suggestions to choose from.

Breakfast

  • Tea, coffee
  • Hot chocolate
  • Instant Hot Cider
  • Instant Cream of Wheat
  • Instant Oatmeal
  • Granola
  • Malt O’Meal (with brown sugar)
  • Dried fruits (raisins, apples)
  • Nature Valley Granola Bars

Lunch

  • Bagels
  • Cookies
  • Crackers
  • Hard Cheese
  • Gorp (seeds, nuts, dried fruits)
  • String Cheese

Dinner

  • Freeze-dried meals (cookable in their foil container)
  • Instant soup (Cream of Chicken and Lipton’s Chicken Noodle)
  • Mountain House Freeze-dried desserts, including strawberries and peaches
  • Mountain House (All Natural); Beef Stroganoff, Chicken Polynesian, Chicken and Noodles
  • Mountain House: Spaghetti, Chili Mac, Pasta Primavera, Lasagna

Dinner Spices

  • Garlic powder
  • Pepper (black or red)
  • Onion powder
  • Pre-mixed ground herbs

Non-cook Nourishment – Ideal for Snacks

  • Kudos, Tiger’s Milk Bars, Chewing Gum, Licorice sticks, Bear Valley Meal Packs, Gatorade, PowerBars (Berry), Chocolate and candy, Bagels, English muffins, Dried fish and meat, Nuts, Giant Pretzels, Dried fruit (pears, bananas, raisins, peaches, apples), Raw vegetables and fruits, Pop Tarts, String cheese (individually wrapped), Crackers, Fig/Peach/Apple Newtons

Optional items

  • Candle lantern
  • If you are traveling light, you may opt for a lightweight tarp of covering the rain or snow
  • A chair kit, for use when in the campsite
  • Miniature playing cards for your back country relaxation

An easy backpacking meal idea -Scrambled eggs with sun dried peppers and spinach.

GEAR FOR SPRING AND FALL

The base layer:

  • No cotton should be utilized for the base layer
  • Midweight thermal underwear top and bottom

Other essentials:

  • Waterproof mittens or over gloves
  • Midweight mittens or fleece gloves

Optional spring and fall equipment:

  • Avalanche beacon
  • Snow shovel
  • Ice Ax
  • Snowshoes and poles with touring baskets

Another round of side-by-side testing and beacon comparisons.

GEAR LIST FOR THE SUMMER

Optional:

  • Sun hat with neck shroud
  • Synthetic T-shirt (such as CoolMax)
  • Light shorts for swimming
  • Light water shoes such as Nike water shoes, Speedo Surfwalker

men wearing a hiking sun hat

GEAR LIST FOR THE WINTER

Boots – Apart from the substantial leather boots which are suitable for the winter, you can consider wearing the plastic boots and the Sorel insulated shoes as alternative options.

Base layers

  • For the base, no cotton should be used for the base layer
  • You can also go for a mid-weight or the expedition-weight thermal underwear

Other essential equipment:

  • Waterproof mittens or gloves
  • Expedition-weight or mid-weight Insulated fleece mittens or gloves

Optional:

  • Insulated boots, down sweater, snow shovel, hand warmers, avalanche beacon, insulated water-bottle blanket, ice axe for trips in the ice or snow

picture of Insulated boots

WRAPPING IT UP

Irrespective of what the plans are for your backpacking trip, it’s always important to ensure that all the gear you need has been selected. Whatever you decide to go with can make a great difference between a stressful and a fun tour in the back country. If you are not sure of what items to pick, this guide offers a list of some of the lightweight equipment you would need to survive in the outdoors. These are just some products you can incorporate into your lightweight backpacking gear list.

While reviews and suggestions could help, it may require some personal trials before settling on a suitable gear for the back country expedition. Also, remember there could be other equipment that is not included in this article (such as the two-way radio and a portable medical kit) that could be significant to your survival in the outdoors.

You also need to remember that clothing and other gear are highly subjective. Irrespective of what your choice is, you could be making some alterations while on the trail. Make sure you try out whatever is on your gear list before you can decide to hit the trail.

Also, remember that there’s no suitable or best gear for every person. The right equipment for you will be the gear that works best for your hiking style. Make sure you do your homework and create a list of what you need, then give an expert in hiking to go through the list. You could be surprised at what they may suggest for you.

picture of a backpacker watching the beatiful landscape

So did you find this guide helpful? What equipment would you most likely have in your lightweight backpacking gear list? Please let us know by posting your views in our comment section below.

Workouts for Hiking: Exercise that Make You Hike Longer, Further and Faster

0
hiker with her dog on top of mountains

Preparing for your hiking trip by performing workouts for hiking is vital to its success and enjoyment, allowing you to blaze a hot trail longer, farther and faster (possibly to completion). This means your muscles and cardio need to be in the optimum condition before going on your trip. Not taking the time to exercise beforehand, can make your hiking trip short and unpleasant, since you can easily run into problems such as injuries or fatigue.

Hiking is an activity that people from all over the world enjoy every day. It is a workout on its own, too, and has been known to do wonders like work the muscles in the hips, lower legs and lower back; strengthen the core; relieve stress; enhance your mood; burn calories; Improve blood pressure, blood sugar and balance and minimize the chance of suffering from heart disease.

woman watching the landscape with a binocular

But to fully enjoy these benefits, you need to be in good shape. Read on as we discuss eleven of the best exercises you should do to get in shape for hiking. But before we get to them, we shall further elaborate on why you need to be in shape and which muscles you must focus on when performing your exercises for hiking.

Why you need to be in shape before going on a hike

You get some added strength when you work your hiking muscles. This is beneficial because, with added strength, you get a little more freedom to do more during your trip without worrying that you’re risking injury. This gives you peace of mind, since you know your muscles can take most of whatever the hiking trail can throw at them.

hiking at the sunset

Another additional benefit of the added strength is that your reaction and recovery time is improved in the process. This means that when you run into unfavorable terrain, your muscles will quickly adapt and you will be able to quickly get up and go to safety if you happen to injure yourself. What’s more, extending the exercise to cover your lower back ensures that your back muscles are ready to handle any heavy loads if you decide to throw in some backpacking into the mix, preventing the backpack from weighing and slowing you down.

If you don’t work your hiking and backpacking muscles beforehand, you will definitely work them during the hiking trip. If your muscles aren’t prepped for this, they can start to hurt, leading to soreness due to the fact that their strength and endurance isn’t up to mark. On top of the pain, you won’t be able to hike longer, farther and faster because you might get tired very quickly, run out of breath or need to take a lot of brakes.

adults running on a forest trail

So making sure that you are in shape is vital, but you can’t do this if you don’t know what muscle to work out in the first place. The next section will elaborate on this.

Hiking muscles you need to work out

When hiking you will definitely need the following muscles to be in shape for the trip: glutes, quads, calves, abdominal muscles, hip muscles and hamstrings. All these muscles play vital roles when performing various activities during your hiking trip, and are working really good, especially when going uphill. They make you more effective while hiking and make it an enjoyable experience if they are conditioned for it.

Glutes

The glutes are simply the muscles that are found in your butt. They are one of the primary muscles that are engaged the most throughout your entire hiking trip and need attention to make them ready to do their job. They make sure that your torso is well-supported, especially when you carrying a backpack or going uphill.

group of hikers going downhill

Quads

Quads are also known as the thighs in layman terms. Together with the glutes, they are also the primary muscles that are constantly engaged during hiking, responsible for keeping your knees straight and maintaining forward momentum as you hike along the trail.

two persons hill walking

Calves

These muscles, which are located at the back of your lower legs, are needed most when you run into tricky terrain on your hiking trail or when going uphill while carrying a loaded backpack. While hiking, they are constantly engaged and adapt when the demands of the terrain change.

Female backpacker on Cowlitz Divide, Mount Rainier National Park, Washington, USA

Hamstrings

Hamstrings are located at the back of your upper thigh and contribute to the flexibility of your knee. Compared to other activities, like running, hiking gives the hamstrings a much more intense workout. They also work together with the quads to keep you moving forward.

person running on the road

Abdominal Muscles

These are excellent for providing support. They are responsible for keeping the back straight as you climb uphill by preventing your back from turning, bending and twisting. This means these muscles are vital when hiking because they help prevent a host of potential back problems.

two persons climbing the hill

Hip Muscles

When performing various physical activities, your hip muscles should be loosened up and flexible enough so you can perform the activities effectively. This is especially true for hiking, since you need the hip muscles (flexors, abductors and adductors) reduce better shock absorption, reducing the risk of strain and supporting the glutes and lower back.

two adults on top of mountains

Don’t forget to add is some cardio for better endurance

Working the muscles is great, but one other thing that should not be ignored when it comes to improving your getting in shape for hiking is working in some cardio into your exercises. You need to also prepare your cardiovascular system because you don’t want your lungs to start burning in the middle of your trip because they weren’t prepared for long distances.

One thing to never forget when getting in shape for hiking, like mentioned earlier, is that hiking is its own exercise. This means that one the best ways to get in shape for hiking is, well, hiking. You can’t possibly hope to simulate all the conditions and terrain you can run into while hiking in a home environment or gym.

So it is better to get out there and start hiking your way up to much harder trails, which will increase your fitness in the process for hiking longer, farther and faster. With that bit of useful information out of the way, we have compiled the following list for you to show you how to get in shape for hiking at home or at the gym:

Lunges

Lunges are a good hiking workout that you can do almost anywhere. They are good for toning the legs to help you through those tough trails and uphill climbs. If done right, you can reduce any soreness that can affect the muscles and joints. The results of lunges are observable and can be enjoyed in a short amount of time.

To perform them, Stand and face forward (it helps if you are actually staring at something), remembering to keep your chin and back straight to properly engage your core.  From this position, take a single step forward with your right leg while bending your left leg until both knees are at a 90-degree angle. Make sure that the left knee is not touching the ground. Return to the standing position, switch feet and repeat. To make it more intense, do the lunges, while holding some dumbbells in both hands.

Woman doing hiking workout

Poor man’s Leg Curl

The poor man’s leg curl is an exercise that is good for the hamstrings and the glutes and very easy to perform. To do one rep, lie down on the floor close to an elevated bench and put your left leg, lifted as high as you can, on the bench with your knees bent. Using the left leg’s hamstrings and glutes push down on the bench in order to lift your butt off the floor. Your hips also need to be fully extended by the time your butt is lifted to perform the rep perfectly.

man doing Leg Curl exercise

Standing Calf stretches

With flexible calves, you will be able to avoid injury in tricky terrain and go through it much faster, making calf stretches an essential exercise for any hiker.  Like all stretching exercises, they make sure that the targeted muscles or joints limber up and are ready for action. You can also do them anywhere, as long as there is a wall to lean on.

Begin by standing about three feet from the wall with your right leg in front, making sure your foot is laid flat on the floor. Lean into the wall, then extend the left leg backwards until it is straight while also bending the right leg. The right heel needs to be flat on the floor. Hold this position for 30 to 60 seconds – feeling the stretch – before switching feet and repeating the sequence.

Man standing Calf stretches

Figure-4 stretch

This exercise is good for your hip muscles, making them limber enough be able to perform adequate hip rotation for greater flexibility and shock absorption. To do the figure-4 stretch, lie down on the floor with your back and bend your right knee.

Bring your right foot closer to the thigh; this will stretch and limber up the necessary muscles in the hip, especially the Piriformis (the muscles located behind the glutes). Switch feet and bring your left foot closer to the right knee instead. To make the stretches more intense you can use your hands to bring the leg you are stretching even closer to the knee.

Woman doing Figure-4 stretch exercise

Squats

Squats give your legs that much needed strength for avoiding injury and being able to support some heavy loads on your back. They are truly a great workout, targeting the knees, hamstrings, quadriceps, hips and glutes all at once. They are also a great way to tone your legs, giving you the added benefit of giving them a nice aesthetic appeal. While doing the squats, you can make them more challenging by holding a weight and resting it on your shoulders.

Start in a standing position, with both feet placed apart at shoulder width. Then lower your back, while keeping it straight, then bend your knees as much as you can and extend your arms forward to maintain balance while shifting your weight to the heels. Also, make sure that your lower body is parallel to the ground. Now, hold that position for a bit, return to the starting position and repeat.

woman doing a perfect squat

Sit ups

Sit ups target the abdominal muscles (the abs), making them stronger and able to support your body during hiking. They are also a pretty basic exercise, but they are effective and can give you a six pack or flatter tummy.

To do a single sit up, start by lying with your back against the floor and your knees bent, with feet placed flat on the ground. While in this position, some people place their hands behind their head or cross them while placing their hands on their shoulders. After getting into position, sit up, hold that position for a little bit, and then lay back down slowly on the floor.

two adults doing sit ups exercises outside on the grass

Crunches

Crunches are done specifically to increase your back strength if you are going to be placing some weight on it. They go well with sit ups by targeting your lower back, abdominal muscles and stabilizing your core. Crunches give muscles you never even knew you had are much needed workout.

To perform a crunch, start by lying on the floor with your back flat and your knees bent. Like a sit up, you can either cross your hands or place them behind your head. Using your abdominal muscles, sit up slightly (your shoulders should face the ceiling), pause for a bit, and then lower yourself back slowly. That is how you do a crunch.

woman doing crunches exercise

Band walks

Band walks target the glutes and hips, making them adept at stabilizing your core and supporting your back when carrying a heavy load. In order to do this exercise you will need a mini resistance band to provide some tension while you stand.

To begin, wrap the mini resistance band around your legs. Do a quarter squat, bending your knees half way instead of fully like you do in a squat, while placing your feet apart at hip width to make the resistance band provide enough tension. Now, walk forward to perform the band walks.

man showing a woman how to exercise with band walks

Chair walks

Chair walks are excellent for strengthening your hamstrings so that they don’t get strained easily while enjoying your hike. This is especially true if you are going to be carrying a heavy backpack while walking on soft surfaces, which can make your hamstrings tense. They also work the glutes as well.

Sit on the front half of a rolling chair or stool, making sure that your spine is as straight as possible. Now, pull yourself forward using your hamstrings over a distance of 75 feet. Make sure not to lean forward when trying to pull yourself forward. When you reach 75 feet, turn the chair around and pull yourself back to your original position. Do this at least three times to get a good workout.

man showing a chair exercise

Walking

For you to be able to go longer and farther without losing breath or taking a lot of breaks, you can do mini hikes in the form of walks. For 30 to 45 minutes every other day, you can take a walk in order to give yourself that much needed aerobic conditioning. When doing it the fourth time you can challenge yourself by walking uphill or in tricky terrain or by increasing the distance you normally cover until you can cover longer distances without breaking too much of a sweat or feeling your lungs complain.

person walking down the street

Uphill running

Building your cardio with normal running is great, but you won’t always meet a flat surface when hiking and it’s better to train yourself by taking on the actual terrain you will run into, especially when blazing a trail. Running up a hill every other day will condition your lungs and strengthen your legs for uphill climbs so that you keep going.

Uphill and Downhill Running

Wrapping it up

We have given you eleven of the best hiking workouts to get you ready for your next hiking adventure, targeting various muscles, especially in the legs, and preparing your cardiovascular system. Through our educated opinion, these exercises will get you in the shape you need to get through your hiking trip and actually enjoy it instead of worrying if you will make it to the end. The article has also explained the importance getting in shape and elaborated on the exact muscles that you need to focus on.

If you would like to leave us your feedback, then feel free; we are always delighted to hear from our valued readers. We would like to know which exercise has benefited you the most on your hiking trips from the list we have provided and if we have missed any exercise you think needs to be mentioned.

woman watching the landscape

Otherwise, please share the article with fellow hikers or would-be hikers on social media so they know the importance of getting in shape and how to do it.

Canoe Camping Gear Checklist: Things to Pack for on the Water

0
Landscape of lake Louise

Canoe camping gear checklist, is a comprehensive and amazing outdoors pack list that can be used for exploring or as a car camping list. Canoe camping can bring you closer to nature and also bring you into a quiet state, a little paradise on earth.

However, if you don’t take along the right gear (too little or excessively), it can possibly become the longest journey you ever experienced in your life. The checklist covers a wide range of trips where you will travel by a canoe.

picture of a person kayaking during daylight

On a few trips, you may need to cross a lake in order to camp at a segregated campground. On some other trips, you may have to move camp each day, as you paddle down a river or from lake to lake. In this article we are going to give you a detailed list of the basic categories of items you will need to bring on your canoe camping trip. So read on!

Things to Consider Before Packing Your Canoe Camping Gear

Moving from a place to another, in a kayak or canoe, with your outdoors gear aboard, grounding your craft and pitching camp. The allurement in canoe outdoors is to take along everything that your canoe will be able to carry. Canoe outing, as other recreational events, requires a specific amount of gear. However, the sum that is completely essential might be short of what you think.

All you actually need is a canoe, food, clothing, and shelter. When looking for gear, you have to always remember these essential categories and resist the enticement to secure gadgets of far-fetched need. It is also needful to always remember that what you take is definitely what you carry.

Picture of Apex Camping Shelter

Great gear can be costly, and if you’re not planning on doing a lot of kayak tripping, you may want to rent the essential gear. You need to be careful as regards to what you choose to take into your canoe. A lot of canoe 16′ or more will carry a large number of equipment, if you need to set aside the opportunity to move it from the kayak to camp and back. In case you are lake camping and planning on staying in a similar area, this issue is less.

However, on the off chance that you are moving from one site to another, keep in mind that you need to empty and reload all that you choose to take along, at least twice every day. If you own one or two portages, that effort duplicates. Portages are not well-known for their simplicity of docking and emptying.

picture of a beautiful landscape taken from a kayak

All things considered, the reason you are escaping your great dry, comfy vessel is the landscape has presented a snag in the docile passage of your stream or river. Or, then again that gentle passage has stopped altogether, in case you’re moving from one lake to another.

Surely you can convey a 30-pound cooler in your kayak, no issue. But the issue is if you are planning on taking it a mile and above or, over a precarious, wet, elusive, portage. Reconsider, pack wisely, maybe somewhat more lavishly than backpacking.

Make sure you pack all your equipment in your camping canoe. After that, take everything out and take it all over the block, recreating a portage. Bear in mind to take the canoe too. Then pack it again in your kayak.

And leave anything you did not have the strength or inspiration to take all over the block. Keep in mind that portages exist due to the fact that there isn’t still water from the take out spot to the put in spot. Quite often there’s a change in elevation.

Picture of two canoes while kayak camping

The trail will usually be well-voyaged meaning if it is raining, it will be sloppy and elusive. There are certainly resting points on the way. Finally, you need to carefully consider the gear you want to pack before embarking on your canoe camping trip, for this will save you from carrying irrelevant luggage in your canoe. Read on to know the basic gears that are required to be in your canoe camping checklist.

Basic Categories of Gears to Include in Your Canoe Camping Checklist

This checklist is separated into different categories. On any canoe camping trip, you require a canoe and canoe equipment, safety requirements, tents, sleeping bags and mattresses, clothing, kitchen gear, backpacks and so on. With the right equipment on board, it will be a great experience. We are going to take you through these categories one after the other.

Canoe and Canoe Equipment

Canoes appropriate for tripping fall into the 4.5-5.5m (i.e. 15-18 feet range). The wider and longer the canoe is, the more weight it will have the capacity to carry securely. There are various materials, going from the customary canvas-shrouded cedar to a wide assortment of present-day synthetics, used to build canoes. Nonetheless, it is the quality of construction and design that differentiate a poor canoe from a good canoe.

Keep in mind that you will need to carry take your canoe over various portages throughout your outing, and so the balance and weight are vital. Your canoe need to be very light as it could be, some place around 20-30 kilogram; anything more than that means unnecessary work on the portages.

Picture of Canoe and Canoe Equipment

The middle upset (crossbeam) must be situated appropriately at the balance point so as to ease the ease of carriage, of the canoe. It should likewise be emphatically built since it will bear the heaviness of the kayak on the portages.

Paddles come in various sizes, shapes and materials. Individual experience will eventually figure out which you prefer most. However, one general guideline that most people find helpful is that the paddle is required to be at least the stature of your jaw. Wide paddles may draw more water, a critical component for the racer, however, will turn out to be more tiring to utilize on a long outing. Paddles are required to be utilized just for the reason for which they were made. Keep in mind that a paddle may break, so having an additional one is recommended.

Tents

A tent is a basic need because it offers protection against rain and creepy crawlies. Canoeists of nowadays utilize lightweight nylon camp tents with collapsible aluminum poles and a floor. Another basic design component in kayaking tents, is the breathability feature, permitting moisture content from your breath to get away. Safeguard against the rain, is accomplished by suspending a water-resistant “fly” all over the tent.

Given these fundamental elements, there is still a wide range of tent designs available on the market, going from basic “A” frames to composite, self-supporting arches. The decision of the design is generally a matter of individual inclination. However, it is insightful to pick a tent that might be effectively set in a small space.

A tent that is properly cared for will keep going for a long time. When loading a tent, ensure that you expel any stones or twigs, as a sharp twig can effortlessly penetrate and tear a tightly packed tent. If you need to pack a camp tent when it is in a wet state, make sure you give it a chance to dry before storing it for a long time.

Solo canoe camping

Lifejackets and Other Safety Requirements

You are in charge of equipping yourself, operating your boat securely, and guaranteeing the wellbeing of those on board with you. For canoe not more than six meters long, you need to own the following: a personal flotation gadget or lifejacket of suitable size for every individual on board; one floaty hurling line of not less than 15m long; one manual pushing gadget (e.g., paddle), an anchor with at the very least 15m of cable, chain or rope in any blend; one metal or plastic bailer (no less than 750 ml), one manual water hose and pump which can attain bilge and release over side of the canoe; a sound-flagging gadget (like a whistle); route lights that meet relevant models, if craft is worked after nightfall and before dawn or in times of confined visibility.

picture of lifejackets

Mattresses and Sleeping Bags

After an intense day of paddling, you need a good night’s rest, and require it if you expect to proceed with the following day. Almost any sleeping bag will give sufficient warmth, but its bulk and weight must be taken note of. In early fall and spring, ice can be a real plausibility around evening time, and in such climate, the construction and design of a sleeping bag are critical.

Warmth is created due to the thickness of the insulation of the bag. The perfect insulator should be light and effectively compacted to give a little, light bundle when compressed, and a thick layer when lightened up. Synthetic fibers and water fowl down are the best materials accessible at this point. Down packs more promptly and is lighter compared to synthetics, yet is extremely costly and has the additional detriment of tangling and losing the majority of its insulating features when it is wet.

Nylon, being strong and light, is a perfect cover for resting bags, however, how the internal and external shells are linked are imperative. Wherever the two layers are stitched straightforwardly together will bring about a frosty spot. To prevent this issue, the chambers that hold firm the fill are covered in better quality packs. The zipper is also another potential chilly spot and need to be supported by an insulated fold.

picture of camping pads near a sport car

Clothing

A cautious choice of dress can greatly diminish the bulk and weight you will take along. Baggy clothes allow proper ventilation and freedom of movement, and they are additionally the most comfortable clothes. Clothes with light hues are best since creepy crawlies appear to be pulled in to dark hue clothes, particularly blue.

A typical clothes may comprise of a shirt, long-sleeved shirt (for security against sunburn and bugs), a down vest or heavy wool shirt for warmth, and water-repellent, windproof external shell. These clothes would all be worn immediately for the enough warmth, and could be removed as the day turns out to be hotter.

For your lower body, some jeans (something that will dry effectively), and some shorts (or a swimming outfit) will be good. Long underwear is essential for additional warmth or also as sleep-ware on cooler evenings. A wide-brimmed cap is the perfect security against the sun.

Safeguard against the rain is vital, especially late in the period when temperatures start to drop. A raincoat, comprising of jeans and a coat, is the ideal approach to get complete security. Tragically, a waterproof suit likewise keeps sweat from getting away so make sure you try and obtain one that has great ventilation.

photo of a man in a canoe wearing windproof external shell

Stoves and Cooking Utensils

Nowadays, a lot of canoeist like to cook over little, lightweight stoves (below 1kg, with fuel), the type that hikers have been utilizing for a long time. They diminish the time spent, and the harm done, in hunting down firewood, and the inconvenience and delay required in attempting to sustain a fire on an icy, sodden morning.

A cooking stove makes it simple to prepare food for lunch, or mix some tea toward the finish of a long portage – the thing that a couple of canoeists that has no stove would consider doing. The good thing is that the stove burns with a spotless flame and won’t darken your cooking pots.

Vango Folding Gas Stove

Fuel or butane stoves are most regularly utilized by canoeists and explorers. Butane stoves, with their expendable fuel cartridges, are more advantageous to use in the mid-year, yet hard to start-up in frosty temperatures or in limited fire zones; and please keep in mind that the vacant cartridges must be packed out and discarded at your nearby perilous waste facility.

Gas stoves are good for year-round usage and require less costly fuel known as naphtha. It is a smart thought to test-run your cooking stove at home before embarking on your journey. Ensure that you follow the producer’s directions when utilizing your stove, and never utilize it inside your sleeping tent.

Black Non Stick Pan on Black Metal Charcoal Griller With Steak on Outdoor Forest With Two Persons Seating on Hammock

Cooking utensils should be simple and few. Most canoeists take along nesting cook-sets of a few pots, and a bowl, spoon and cup for each person, a small funnel or a pouring spout, scouring cushions, biodegradable cleanser, a dish material, and a plentiful provision of matches in a waterproof holder.

The Etceteras

The Etceteras, are various little gear items that you need to take along, but are pretty much easy to overlook. A first aid treatment kit is essential; at least yours need to contain gauze cushions, wraps, antiseptic, surgical tape and any individual medication that might be needed. Bug repellent, bathroom tissue, hand-soap, toothbrush, and other individual things should be on your checklist.

Strong nylon rope for the purpose of hanging food far from bears, fixing a clothesline, and various other camp tasks are likewise essential. Additional matches in a waterproof compartment and a pocket flashlight will prove to be useful. A little pocket knife is likewise a useful gear; the extensive belt-blades may look amazing, but since you won’t encounter much dangerous circumstance, they are irrelevant.

A straightforward repair kit comprising of electrical tape, a short wire piece, safety pins and a little pair of pliers will allow you to deal with most issues that may come up your gear. People utilizing fiberglass kayaks might need to incorporate an appropriate fiberglass fix kit; those utilizing canvas kayaks may wish to include waterproof glue and canvas to their repair pack.

A first aid treatment kit on the table

Backpacks

All your equipment must be conveyed on your back over each portage, unloaded, and repacked at each campground, and brought into and out of the kayak quite often. So, your decision regarding packing, and the way you pack it, can have a major effect on the simplicity and effectiveness of your canoe trip. So if you are searching for a great backpack, one that is good for canoeing, hiking, or skiing, you need to consider one of the huge internal-frame backpacks.

High-quality materials, modern design and a complex saddle framework combine to create a scope of packs that can deal with heavyweight loads are still quite easy to convey. A huge, cushioned midsection belt, linked to the inner frame, exchanges a large portion of the weight to the hips, giving more noteworthy flexibility of movement and good balance. However, each producer may incorporate a substantial assortment of different elements, any of these backpacks will carry out the task.

Lady paddling the kayak in the rough sea at sunset.

You need to pack so that the essential things, for example, rain gear and snacks, are in close reach. Imperative things, for example, the first aid treatment kit, should be in a constant location and must be known to all individuals from the gathering.

Backpacks, in an assortment of colors, make it simple to sort out your outfit so that each item might be found in a rush. In the event that you set aside the time to build up a packing system that functions admirably for you, and use it always, the amount of time used in loading and unloading can be significantly diminished.

Food

The travelers of yesterday relied upon such easy fare such as flour, salt pork and beans; later, there was the season of canned products which left heaps of corroded tin jars at each campground. Today, bottles and cars are restricted in the Park Interior, yet the option of appropriate food for canoe outings is really more noteworthy than whenever before.

When arranging a menu for a canoe trip, there are various factors that need to be considered. Due to the expanded physical movement, appetites have a tendency of growing; so, the food you consume needs to be highly nutritious, and in adequate amount to fulfill the more covetous individuals from your gathering. Since you will take along all your food stuffs for the whole canoe trip, it should be non-perishable and light weighted.

Simplicity of preparation and flavor are additionally essential factors to take note. After a hard day of paddling the canoe, you will anticipate a top notch dinner that can be set up with less effort such as egg, bacon, ham, bread, oatmeal, tacos, spaghetti, beef stew and so on.

Chianti beef stew recipe

Drinking Water

Two kinds of disease-causing bacteria might be found in an untreated water. These are: giardia (otherwise called “beaver fever”) and cryptosporidium (otherwise called “crypto”). These bacteria can result into intestinal sickness if not expelled from water.

So you need to include a chemical disinfectant, such as chlorine, in your gear checklist.  This chemical disinfectant should be added to your water after the filtration process in order to properly execute any infectious viruses and bacteria that might be present in the water.

Collecting water from a flowing source and preparing the water for treatment with Lifesystems chlorine drops

Concluding Thoughts On This Topic

Planning an overnight canoe trip can really be much fun. A properly arranged trip includes research, discussion, and packing. Making sure that you are well packed before setting off for your canoe camping trip is important. Nothing is more baffling than reaching your campsite only to know that you have left behind a vital gear required on the trip.

That is the reason why a canoe camping gear checklist can be the contrast between being completely prepared or leaving behind something that is critical to your trip. Although we would consider this checklist to be complete, but you can still make adjustments, based on your inclinations with exceptional consideration regarding the weather condition you will encounter on your trip, the kind waters that are being travelled, and also the length of your canoe trip.

Familly trip with a canoe on Moraine lake

Would you love to share some experience on your last canoe camping trip? If yes, we would love to hear from you! You can leave us a comment below.