Home Blog Page 41

Cold Weather Camping Tips: Planning the Perfect Winter Camping Trip

0
Plan your winter camping trip

Winter is coming sooner rather than later, and for those of us that love the outdoors it means one of the best times of the year. Winter Camping. Going on a winter camping trip can give you some of the best views, the most serene landscapes, the best fishing, and some of the least crowded trails and camping grounds of the year. While winter camping can be one of the greatest joys in life, there are certain pit falls that come with going on a winter camping trip.

Depending on which area of the world you are in there are many different things you must consider before you begin your camping adventure. Between choosing the proper equipment, preparing for the potential winter storms, and making sure that you have all the information possible, preparing for a winter camping trip can be overwhelming. The good news is that we will go over some various cold weather camping tips that will help keep you and your group safe and happy on your trip.

Before The Trip

Before you even starting purchasing the equipment you will need to keep yourself safe on your trip, you must evaluate where you are going, what you will be doing, and a myriad of other safety precautions.

Don't go alone

It is imperative that before you start your journey you have a definitive plan in place.

  • While the serenity of camping during winter can be truly breathtaking, it is important that you do not go out on your own. Winter can be the most dangerous month of the year for camping, and without a partner or group to go with you, you can find yourself in a very bad situation with little to no help very quickly.
  • Plan when you are going carefully. Check what the weather will be like during different parts of winter for whatever location you have chosen. The last thing you want is to get to your destination and be stuck in the middle of a terrible storm. The NWS has detailed weather reports you can use to determine what you should expect.
  • Check for potential avalanche areas. If you plan on going on a ski expedition you will need to make sure that you are aware of any potential avalanche areas at your destination. If you find yourself going to a location with a high avalanche potential, you and your group should get formal avalanche safety training.
  • Make a detailed plan. Make sure that everyone in the group is on the same page with an extremely detailed excursion plan. You should know where you will be making camp, where your destinations are, and the nearest emergency services are to where you will be. More important make sure that someone who is not in the group knows exactly where you will be going and how long you will be gone for.
  • Make a checklist and check it twice. Create a list of all the equipment you will be needing to bring with you. Make sure to add extra food and dry clothing just in case you get lost or weather turns for the worse. Also bring some cash for any unexpected emergencies that may occur.
  • Do some research on the area you are going. Reading up on people who have been where you are going can give you valuable insight on what you should expect from your trip.

Clothing and Gear

There is nothing more important when you are camping in the cold than the proper clothing. The biggest rule of winter is camping is to stay warm and dry at all times. Clothing should be able to wick away any moisture and rain, dry quickly, and be both warm and breathable. The general rule of thumb is to have three layers at all times when you are camping during winter.

The Base Layer

You base layer is basically just your under garments. Since this is the closest layer to your skin, you want to make sure that the clothing you chose for this layer is going to be able to wick away perspiration from your skin to the outer layers. For this layer you want to avoid cotton and aim for synthetic and merino wool clothing.

winter base layer

These materials dry extremely quickly, which will help you spend little to no time in wet clothing. Depending on the climate, it is common for winter campers to wear two base layers for optimal heating.

The Middle Layer

This layer is primarily used for retaining body heat, and overall warmth. Consider purchasing microfleece for this layer, as that material will provide the highest amount of heat retention. Whatever you go with, you want to make sure that this layer is providing the best heat.

The Outer Layer

The outer layer is also known as the “shell”. This layer is meant to be waterproof, windproof, and ideally breathable. Either Laminates or polyurethane-coated fabrics will work best for this layer, however laminates are considered the superior option.  A lot of people do not consider this, but try to keep your outer layer fireproof as well, the last thing you want is a stray ember catching on your shell. This layer will be protecting you the most from the elements themselves, so do not skimp on the outer layer!

While your layers of clothing are important, you need to also make sure that you have the proper accessories to finish out your winter clothing.

Boots

While camping typically requires nothing more than a good pair of hiking boots, for winter camping you want to make sure you have a pair of boots that are both waterproof and sufficiently insulated.

winter boots in action

If you plan on going skiing or snowboarding during your camping trip, you want to make sure that whatever boots you purchase have the proper bindings for your board and skis.

Socks

Socks should be warn in two layers at all times, and make sure that you have extra socks on you at all times. No one wants to have wet feet while you are tromping through the snow. Another good idea is to purchase high quality gaiters that can be used to keep the inside of your boots as dry as possible.

Hats

Consider purchasing a balaclava along with a good beanie to keep your head as warm as possible. Most of the heat in your body will be transferred through your head, so make sure that your head is properly covered.

Gloves

Gloves should have proper coverage and also allow for finger mobility. While you want to insure your hands are as warm as possible, you want to still have mobility in all your extremities.

winter gloves camping

Mittens can be used on top of whatever gloves you decide to wear, just attach some sort of Para chord or rope from the mittens to your clothing so you can remove them quickly without losing them.

Eyewear

If you are a glasses wearer, then it is a good idea to get the proper eyewear to protect yourself from the elements as well as making sure that you will be able to see at all times. A good idea is to bring a pair of high quality prescription goggles and also a second pair of glasses in case something happens! Make sure that any goggles you get also have tinting to help prevent snow blindness.

winter eyewear on rocks

When it comes to something as important as your eyesight, do not take any chances. Even if you do not wear glasses, a good pair of goggles will help to protect from the harsh cold winds of winter camping.

Once you have your clothing and accessories sorted out you want to make sure that you have the proper equipment to get through your journey safely. The proper equipment can make the difference between an easy journey and a journey that is fraught with problems.

Tent

Finding the right tent can be troubling, but the right tent will make a massive difference to you when you call it a night at your campgrounds. Surprisingly the smaller the tent the better! When you have a smaller tent you can heat up the inside easier than if you had a larger tent. With a smaller tent your body heat can sometimes bump the temperature inside the tent 20-25°.

You want to make sure that your tent is rated for the temperatures you will be traveling in.

winter camping tent

While a tri-season tent may be ok for some climates, a specialized winter tent may be ideal for the climate you will camping in. If you expect a large amount of snow, or extremely low temperatures, the proper tent will make all the difference.

Sleeping Bag & Ground Pad

Next to your tent your sleeping bag and ground pad will be the two most important pieces of gear in order to keep you warm through the night. When shopping for a sleeping bag, check the temperature ratings for each sleeping bag, and make sure that you use a bag that is rated at least 10° colder than the coldest temperatures you are expecting to encounter on your trip.

If you get too warm you can always remove clothing, but having a low rated sleeping bag will ensure that you are 100% warm at night.

winter sleeping bag in the tent

The other part of your sleeping arrangement is a ground pad or sleeping pad. Two layers on the bottom are worth one on the top, so making sure that you have a proper sleeping pad can make a cold night a warm night with little effort. We highly recommend using two pads to make sure you get the best heat retention.

A foam pad and a self-inflating pad will give you the best coverage, and make sure that if the inflate pad gets punctured you will still have some ground protection.

Backpack

A good backpack can really help with your exhaustion level while you are hiking to your camping grounds, but if you have too small of a pack you will not be able to pack all the equipment you will need.

Man with winter backpack

Depending on how long you plan on being out, you may want to consider getting a lightweight deluxe sized backpack to make sure that you can carry all of your gear. The more pockets and storage the better!

Lights, Camera, Batteries

Winter is known for having the longest and harshest nights of every season, so you want to make sure that you have the proper lighting to keep you safe for the long nights. Purchasing a good LED headlamp will give the illumination you need during the winter nights. Make sure that you have enough batteries for all of your lighting equipment and for whatever camera you chose to bring to capture your journey.

Communication

When you are traveling in the back countries of winter, you will often find yourself with little to no cell phone coverage. Make sure that your group has a way to communicate to each other and the outside world at all times. Satellite phones and high powered two way radios can be used to keep your group in contact with the world at all times.

Specialty Equipment

If you are planning on skiing, snowboarding, or fishing on your camping trip make sure that you bring all the appropriate winter gear that can get the job done well.

Man on winter hiking

Also make sure that if you are going to be bringing specialty equipment that you have the necessary straps on whatever backpack you purchase to carry the equipment. You do not want to be hiking through the woods and have to hold onto a fishing pole the entire time.

Tips and Tricks

Bringing the best gear and clothing can only go so far, and you and your group will need to make sure that you have all the knowledge possible to make it through your journey safely. With a few tips and tricks, you can find yourself getting around in your winter wonderland with no problems what so ever.

Getting your Bearings

If you are going to a location that has the potential for high amounts of sleet or snow, you may find yourself in danger of having your trails covered up. If this happens you want to make sure that you have all the possible routes in the area mapped out. Because of this you want to be certain that every single member of your group has the most up to date map of the area.

gps device in the hand

If you are using a GPS device, you want to have multiple routes to and from your camp site preprogrammed in. Anyone who finds themselves camping in a very mountainous region may want to pick up an altimeter to help determine exactly where you are.

Avalanche Safety

Campers who find themselves going on a camping trip in the mountains will want to make sure that they have all the avalanche safety equipment and training.

  • Avalanche Transceiver: If you plan on traveling in any form of avalanche country you absolutely must have one of these for each member of your group. Learn how to use them, and keep it on you at all times.
  • Snow Shovel: Everyone should have a snow shovel in their pack. While they are essential if any sort of avalanche happens, they will also be essential in the daily routine while you are camping in winter.
  • Personal Locator Beacon: Whenever camping in a high avalanche possibility location, you want to make sure that you have a PLB on you at all times. If you activate the locator, the device will send out a signal to alert rescue teams of your exact location.

Create A Winter Camping Checklist

Before you even step a foot outside, you and your group should sit down, have a meeting and put together a checklist for all the gear and necessities you will need to bring with you. Everyone should be on the same page at all times, and everyone should have a copy of the checklist with them before they start packing.

winter camping checklist items

The last thing you want is to forget something that is important for your trip because the person who was supposed to bring it forgot.

Check Your Pack Twice

Once you have gone over your checklist, it is a good idea to lay all of your equipment out and go over it multiple times before you start packing. When you pack aim equally distribute the heavier objects with the smaller objects like blankets and clothes so they have a lower chance of shifting while you move around.

Winter camping can be one of the greatest adventures of your life, but without the proper preparation it can turn south on you quicker than you can imagine. If you follow the tips outlined in this article you will find yourself getting through the serene winter wonderland with no trouble what so ever. A final tip, whatever you do make sure to enjoy every moment you spend in the beautiful country!
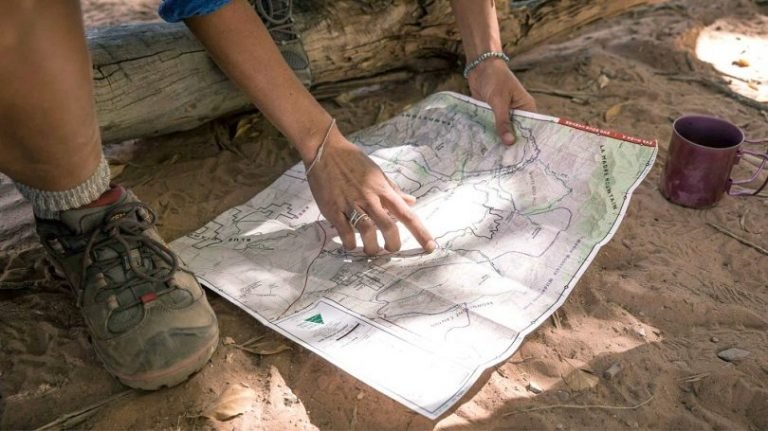
 

Map Reading: Stay Safe in the Outdoors

0
map reading basics

Regardless of the nature of your outdoor activity or adventure, a good map of the area you are traversing will come in very handy. We’ve all seen a map at some point in our lives, even if it was on a TV show or movie, and no matter the complexity, map reading will become a very natural and easy activity for you once you know the basics.

Every map holds a narrative of positions, locations, destinations, distances and routes. With maps, you can easily locate your position relative to other positions and you can determine the best routes to your desired destination. Technology is now advanced and we have things like Google maps on smartphones, but it will do you a world of good to know how to read a map. There is so much that can go wrong with technology and it has limitations, such as requiring power and internet access to be functional, so it is not wise to place all your eggs in that basket.

With a map and its sister tool, the compass in your hands, you are already equipped with the two must have gear for your backpacking and outdoor adventures. No matter how crazy technology gets, it might never be able to completely replace a good old fashioned map and a magnetized compass.

The science of reading maps is pretty straightforward. Those little details you find on typical maps might seem a little confusing but with just the right guidance and demonstrations, you will have all the answers you need in no time.

Map Types

Before you do anything, you must first understand that there are various types of maps available and each is suitable for its own purposes and has its own peculiarities. There are road maps, tourist maps, topographic maps, and sectionals. For simplicity’s sake, we’re only going to talk about topographic maps, as these will be the most helpful for you while hiking.

Topographic maps are maps that feature a lot of information about the geography of a particular area. Unlike the traditional flat and two dimensional road maps that only feature points of interest and routes, the topographic maps will help you orientate yourself with the landscape by conveying all the information you need about the physical reliefs of that area.

map types showing National park and city

There is detail about relief through contour lines. With the information on topographic maps, you have a better understanding of the general landscape and terrain, you know where bodies of water are located, forest cover and a bunch of other stuff that is very important to hikers and backpackers and adventurers. The topographic maps or topo map as it is sometimes called is your best bet for any kind of outdoor expedition.

These are some of the things you are sure to find on your average map:

  • Coordinates
  • Scale
  • Symbols
  • Latitude and longitude
  • Contour lines
  • Legend

Coordinates

You should already know by the positions of north, east, west and south on a Cartesian compass. If you draw a cross sign, north is pointing upwards, and east is pointing to the right, west to the left and south downwards. Most maps are drawn with their tops pointing to the north. This is the typical orientation of maps.

map with coordinates

A lot of the maps will have a little symbol, sometimes a compass rose on the top left corner. But for those without this indication, you can just assume north to be at the top. So you can determine where your other cardinal points are on the map once you can figure out where north is.

Scale

Naturally, actual distances on the ground cannot be replicated exactly on a piece of paper. Therefore every map requires a scale which scales down very long distances into shorter ones on paper. The maps scale shows you the ratio of actual distance to the distance depicted on your map. If you see a ratio such as 1:1000, this means that a unit on your map equals 1000 units on the ground, depending on whether you use centimeters or inches. These units can be in miles, kilometers or whatever unit of distance measurement.

For your convenience you should pick out a map with a specific type of scale depending on the nature of your expedition.

map with scale

If you are going to be walking, a map with a scale of 1:25,000 is suitable.

How to Use Scale to Determine Actual Distances:

Just as an example, if you have a map with a scale of 1: 25,000 and a distance from point A to point B on your map is equal to 6 inches. Then the actual distance on the ground will be 6 x 25,000 which amounts to 150,000 miles or kilometers, depending on your unit of measurement.

Latitude and Longitude

Latitude and longitudes aren’t the most important feature of a map for the user who is just moving from point A to point B in a city. But for those that are sailing the ocean, flying the skies and traveling great distances that typically don’t have all the markers you would find in a road map, latitude and longitude are very essential.

Latitude is the distance between the equator and the north or the equator and the south. This distance s measured in degrees. Longitude is the distance east of the Greenwich meridian or west of the Greenwich meridian. Also measured in degrees. The latitude is indicated on the side of your map with numbers and the longitude is indicated at the top and bottom.

map with latitude and longitude

The degrees that represent the latitude and longitude are each divided into 60 minutes. Each minute is the equivalent of 60 nautical miles which amounts to about 69 miles or 111km on the ground.

The point at which the latitude and longitude lines intersect at your location is your reference point.

Contour Lines

It is important you know how to read contour lines. Contour lines show you how high or low a point is on a map. Each line describes a height above sea level and with this information, you can point out mountains and valleys and plateaus. Contour lines that are close to each other indicate a steep gradient and those that are further apart indicate a flatter gradient. Not very many topographic maps have these, but if you’re willing to shell out a bit of extra money, they can come in handy.

Legend

Most maps or at least the good ones all have a legend. Legends are a key of symbols that tell you what every symbol used on the map refers to. This helps you understand how the map represents data and this is crucial to understanding the map.

map with legend on the right

Because maps are a scaled down version of actual topography and landscape, these symbols are integral to the usefulness of maps. Shapes and colors are both used as symbols to represent various things. There is an incredibly long list of symbols that can be used, some universal and some specific with peculiar variations so you can easily refer to the legend on your map to tell you what every symbol on that map refers to.

How to Get from Point A to Point B with Your Map

Now that you know what you need to know concerning the features and representations of maps, how do you use all that information to get from one point to another? How do you travel from your location to your destination? Using maps to navigate distances can be broken down into 4 major steps and these are:

  • Determining your location
  • Finding your desired destination
  • Using the map
  • Planning your routes

Your Location

Before you make any plans on how you want to travel from one point to another, you must first determine your location on the map. If you don’t know where you are, there is no way you can know how to get to your destination. To find your location, you can use a compass. All you have to do is align the map with the directions indicated on the compass and figure out your location through the latitude and longitude.

find your position with compass

If you don’t have a compass, you can find your location relative to conspicuous landmarks and big natural geographical bodies such as rivers and mountains. For a road map, road names, street names and buildings will help you to find your location. When you determine your location on the map, mark it with a marker or something.

Your Destination

After you must have determined your location, you now have to locate your desired destination on the map. If you simply wish to go directly from one point to another, all you have to do is mark those two points and link a direct route. However if you have a bunch of places to go to, you might want to do a little more route planning such that you get to visit all your points of interest in one swoop without having to go back and forth.

Using the map

This is where you put all that you have learned about maps to good use. You make sure you use the maps scale to estimate distances and time of travel and use the maps legend to take note of all the landmarks and locations/points of interest.

Plan your routes

Now that you know where you are, you know where you want to be, and you understand the map, all that remains is to determine how best to get there. Having marked these points on the map and taken note of all the checkpoints and markers, you can begin your journey from point A to point B.

plan your routes carefully

There are various available options for the maps that you have access to depending on the nature and factors that surround the area you wish to take your journey. The USGS is a big name in the supply of topographic maps in the United States and these maps are designed to cover quadrant like areas called quadrangles. It will surprise you to know that every part of the United States is covered by these maps and they are quite easy to use and easily accessible.

Some private companies are also into the business of making enhanced versions of the regular maps with a lot more detail and constant updating. These too are very handy if you can get your hands on them. Lastly, most public areas or lands that are owned by the government such as parks, reserves and recreational spots have their own maps that cover the land within their jurisdiction, and these maps are usually handed out for free.

These maps will have most of the information you will need about their land. The only drawback here is that due to the small scale nature the maps might lack some of the little details you might be interested in.

Man trying to learn everything

It is very important that you don’t just jump into relying only on your maps for direction and navigation until you are sure you know everything there is to know. You don’t want to get lost on your fist remote hike if you are still a beginner. You have to take a lot of precautions when going out on hikes as a beginner.

Try to go places that have a lot of markers such as rivers, mountains and parks, and preferably areas that aren’t so remote where you can easily run into people who can help you out when you feel like you are a little lost.

As you begin to get the hang of map reading you can then begin to navigate more remote areas on your own. If you are a complete beginner, it is wise to have an instructor with you and build your navigation skills under supervision at your own pace instead of lunging into the more advanced stuff which you may not be able to handle. You can also explore different terrains with a friend as two heads are definitely better than one and you can both help each other out when you get confused. Plus you’ll have way more fun together.

How to Use a Compass: Become a Pro with These 7 Easy Steps

0
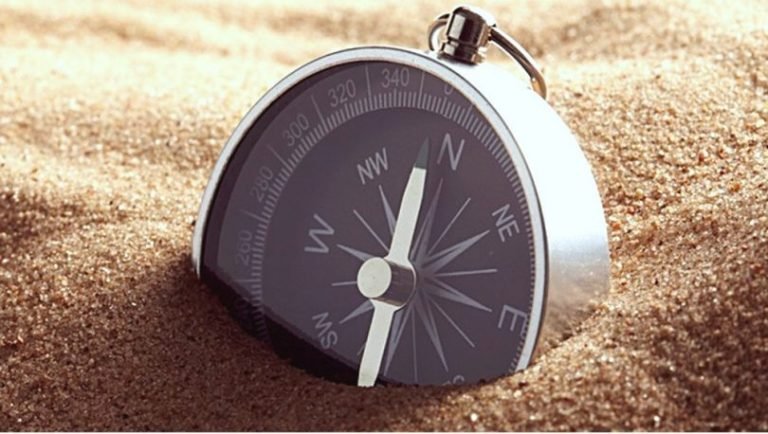
Compass in the sand

Modern technology has given us the GPS to help us stay on track in unfamiliar surroundings.

However, you may one day be in an area without cell phone reception or without your GPS, and will need basic navigation skills to get you back to familiar surroundings. Learning how to use a compass is a great outdoor skill.

What Can I Do with A Compass?

  • Most hikers will venture off marked trails at some stage, and then you need to know how to navigate using a compass and map.
  • If you know how to use a compass and a map, you can accurately plot your way in even the most inhospitable wilderness.
  • In an emergency, a tiny thumb compass such as those commonly attached to EDC-gear will provide a bearing and enable you to find a general direction in which to travel.
  • You can find out which direction the wind is coming from, by turning until the wind is blowing straight into your face. Now use the compass to determine which way you are facing – that is the direction where the wind is blowing from.

What Can A Compass Not Do?

In wilderness survival, going into the unknown without a good orienteering compass and a topographical map is a very bad idea. It is not possible to see your latitude and longitude by just looking at a compass, but you can triangulate your position given a map, compass and a little time. Unlike a GPS, a compass only points out direction, it does not provide a location.

Compass is not like a GPS

For example, you cannot just choose a random direction, hike a few miles into the woods, and then try to use your compass to find your way back to where you started. However, if you followed a particular compass heading (e.g. 25 degrees for 1 mile), you can turn around and then follow a heading of 205 degrees for 1 mile to get back to where you started from; the terrain and natural drift could push you slightly off your course.

We have put together some easy steps to get you started on how to use a compass, and then we will progress to learn how to use a compass and a map for navigation in the outdoors. We will discuss a basic orienteering field compass, also called a “baseplate compass” which is the standard tool for outdoor enthusiasts.

Compass Basics

All orienteering compasses have a magnetized needle, marked in red or a bright orange with or without fluorescent markings, set into a compass housing and mounted on a baseplate.

Basic compass in the hand

Some models have additional features for advanced navigation and specific uses, which we won’t cover in this article.

  • The base plate is made of clear, hardened see-through plastic and is marked with scales and orienteering lines which you will use in map navigation. You will learn to match these lines in parallel with grid lines on a map to accurately align the compass with map north.
  • The compass housing is a clear, hardened circular plastic housing for the compass needle, mounted or embedded on the baseplate. Various markings, including Meridian or declination markings, can be seen inside the housing.
  • A freely moving magnetized needle, bright red or orange. It is fixed to a central pivot and floats in a liquid so it can freely rotate. The red end points toward magnetic north.
  • A rotating dial, also called a bezel or graduation ring, surrounds the casing which contains the magnetic needle but is not a fixed part to the housing, which allows it to be rotated easily. The bezel is marked with the 360° of a circle. The bezel is a “degree dial” and can be rotated around 360 degrees.
  • A direction-of-travel arrow – clearly marked, sometimes with a fluorescent material. This arrow will indicate the direction in which you need to go after taking your bearing.
  • The orienteering arrow is a non-magnetic arrow marked on the floor on the inside of the compass housing. It rotates with the housing when you turn the degree dial (bezel) and is used to align your compass on a map.
  • Index line or bearing marker, which is either a fixed black line within the bezel or an arrow on the base plate. This mark is used when you take a compass bearing.

You Will Need:

  • A good, recent topographical map. Use a laminated pouch to protect the map in the outdoors.
  • A baseplate compass.
  • Knowledge of the declination of the area where you will be navigating. Although this information can be found on maps, the real declination frequently changes. Always use information that is no more than a year old. Use the declination tool provided with the compass to compensate for declination before you start navigating in any area.
  • Pencil or map marker to mark triangulation or direction lines (optional).

Step 1 – Understand The “North’s”.

There are three ‘norths,’ and for all practical purposes of navigation, you can ignore the first one which is Geographic North – the North Pole.

The second north is Grid North or Map North. You are probably well acquainted with the lines that run across all maps (grid references) – and all maps are standardized with north marked the top of every map. Try to picture a spinning globe on a stand in your geography class, with all those ‘north-to-south’ (longitude) and ‘east-to-west’ (latitude) lines. Map North is the exact meeting point for all longitudinal lines at the North Pole.

understand the compass north

TIP: Map or Grid North is often referred to as True North. For navigational purposes, this is an acceptable phrase and can usually be taken at face value.

The third north is Magnetic North. Because of tiny variations in the magnetic field, the magnetic arrow in your compass does not point to Map (True) North; it points to Magnetic North. Picture that spinning globe on its stand in your geography class again: The North Pole is not right in the middle and on top. Instead, that free-standing globe is tilted and shows the North Pole off-center, at roughly eleven degrees from the axis.

Magnetic north refers to that difference in the tilt of the earth’s magnetic field which varies depending on where you are. In some places in the world, there can be a difference of up to 20 degrees between Map or Grid North, and Magnetic North. The difference may seem trivial, but traveling just one degree off the mark for one mile will push you nearly 100 feet off track. You could completely miss your mark and end up totally lost in the wilderness.

Step 2 – Deal with Magnetic Declination

If one mile can take you 100 feet off your true course, just imagine how far off you will be after ten miles. It is critical to compensate for this difference by correcting for the magnetic shift (declination).  Declination is a ‘setting’ on your compass which you do once as a reset function in preparation before you start navigating in a specific area.  It is not common to have to do this ‘on the fly’ in the field.

Declination is the number by which Map North and True North differs on your compass. In the US, a line of zero declination runs roughly down the Mississippi River through Alabama, Illinois, and Wisconsin.

magnetic declination explained

If you are to the east of that line, declination orients West. This means that Magnetic North will be a few degrees west of True North. In an area with an east declination, you have to subtract the correct dumber of degrees.

If you are to the west of that line, Magnetic North will be east of True North. In an area with West declination, you have to add the appropriate number of degrees.

You can find the declination of the area you will be traveling to easily on a map, and will need this information to prepare your compass for navigation. Keep in mind, however, that inclination changes regularly and that you should not use the information from a map older than a year when you compensate for any area.

Step 3 – Holding The Compass

The magnetic compass needle is influenced by any metal objects nearby. To get an accurate reading, remove metal objects like keys, a keychain, flashlight or camera from your person and stand well away from tables, chairs and other objects that contain medal.

holding the compass in the hand

When you consult a map in the later steps, you will be placing the compass on your map on top of a level surface, but if you take a reading while you travel, hold the compass in your open palm in a level, flat position. Keep the compass as level as you can. If you tilt it, the magnetic needle will make contact with the casing and will not move freely, giving you an incorrect reading.

The direction-of-travel arrow must point straight away from you. Hold your palm in front of your chest, about halfway between your waist and face.

Step 4 – Finding Your Bearing (Azimuth)

Look down at the compass. Find out which direction you face by looking at the magnetic needle. It will move on its own and swing to one side or another. If it does not swing at all, you are facing directly north. Test this by turning to the side and check if the needle holds true.

Next, turn the degree dial in the appropriate direction until the orienteering arrow in the housing lines up exactly with the point of the magnetic needle (arrow). This is called “putting it in the box” and you will see why when the two markers overlap precisely! Both of these markers (the needle and the degree dial arrow) will now be pointing north.

finding your bearing with compass

Next, look at the direction-of-travel arrow. The travel arrow shows the direction you are facing. If the travel arrow points somewhere between N (North) and E (East), you are facing Northeast.  Find the exact degree at the spot where the travel arrow intersects with the degree dial (bezel). If it crosses at 22, you are facing 22 degrees Northeast.

By simply turning your body, compass held steady, use the N-E-S-W markings to get a good idea of your position relative to landscape features such as mountain ranges in the distance or unusually large trees nearby. This may be all you need from your compass.   When you need to find your way from one particular place to another, you need to use the same technique to find the bearing to that remote place. The direction you are going is called your heading.

Step 5 – Triangulate Your Position

Look around and choose the first of three prominent landmarks that you can also find on your map. Point the travel arrow in the direction of the first mark to move the magnetic needle to the north (unless the mark is directly north of you).

Turn the bezel (degree dial) until the orienteering arrow lines and the magnetic needle are in the box (lines up perfectly). Once they are aligned, check the figure on the bezel directly on the direction-of-travel arrow. That number is a ‘degree’ – your bearing.

triangulate your position with compass and map

Note the landmark on your map. Spread the map on a level surface and put the compass on the map with the orienteering arrow pointing to true north. Move the compass until the edge passes through both the landmark you have marked down on the map and your supposed position. The orienteering arrow is still pointing north. Draw the first of three lines along the compass’ edge and through your approximate position. Find two more landmarks and repeat the procedure.

You should end with three lines forming a triangle with the 3 lines intersecting at your approximate position on the map. The more accurate the bearings, the more precise the triangulation.

Step 6 – Get from Point A To Point B

You will need a good topographical map, your compass, and a flat surface away from any metal objects (including metal legs). Find out where you are on the map (your point A) and locate the spot where you want to go to (your point B). If necessary, first do a triangulation according to step 5.

Put the compass near your current position on the map. With the edge of the compass serving as a ruler, line up points A and B by placing the compass edge to create a straight line between your current map position and the point where you need to go.

The orienteering arrow must point to map north, and the travel arrow must point in the direction you want to go (towards point B on the map).

get from point a to point b

Next, line up the meridian lines in parallel with the north-south grid lines on the map by turning the bezel. Put it in the box:  Turn the bezel (degree dial) until the “N” on the bezel and the orienteering arrow both point to grid (map) north. Note the new bearing as indicated on the bezel in degrees.

Now that you have the exact compass setting, you can lift the compass off the map. Point the direction-of-travel arrow you to your destination. Turn your body until the magnetic needle, and orienteering needles overlap, and you’ll be on course toward the destination on the map.

TIP: Unless you want to walk due north, follow the direction-of-travel arrow, not the compass needle. The travel arrow does exactly what it says – it indicates the direction you want to travel in!

Step 7 – Walk Along The Bearing, Keeping Your Heading

Look along the direction of the travel arrow and focus on a highly visible and immovable point in the middle distance to use as a guide. Start walking towards your mark, in the direction indicated by the traveling arrow. Keep the magnetic needle and orienteering needles “in the box” (precisely aligned). Once you reach your mark, use the compass to find another mark and keep following the direction-of-travel arrow.

TIP: Be careful not to accidentally turn the degree dial from the proper position when you take another bearing.

Great Tips for Beginners

  • If bad weather moves in, immediately find your position on the map before you lose the ability to pick out markers. If you don’t know where you started from, you won’t be able to get out.
  • Don’t keep your eyes on the compass as you walk. Rather pick a marker a short distance in front of you and walk normally towards it.
  • Trust your compass. If you are using it correctly, it will point you in the correct direction. Our innate sense of direction can play tricks in harsh or unknown surroundings.
  • Verify your progress from time to time by reversing the compass and taking a bearing back to your first marker. Don’t reset the compass; rather turn the compass until the travel arrow points directly at you instead of away from you. Alternatively, do a simple calculation: first, add 180 degrees to your current bearing (e.g. you are facing 241 degrees. Add 180 to get 421). If the result is more than 360 degrees, then subtract 360 (421 minus 360). The answer (in this case 61) is the opposite direction.

Navigating In Poor Visibility

If you cannot see any distinct objects to use as a beacon, mark your starting spot with a highly visible marker such as a rucksack. Walk along the compass bearing, regularly checking to see that you can still see the marker and stop when it becomes difficult to distinguish. Stop and verify your bearing.

Navigating In Poor Visibility

If you are still on the correct bearing, place the second marker at this spot. Fetch the first marker, return with it to the second marker and repeat the procedure. If you are traveling with other hikers, use another member of the party in a similar way.

Practice Your New Skill

Don’t venture into the outdoors without at least practicing using your compass and a map of an area you know well. Do your first navigation in familiar surroundings, incidentally checking your compass to make sure it hasn’t taken a heavy knock and is still working correctly.

You will learn to trust your instruments and your skills. If you need it in an emergency, you will be more confident and have fewer things to worry about.

Paracord Bracelet Instructions: Style Meets Practicality

0
paracord bracelet many uses

If you’re a crafty kind of person who loves getting creative with pottery, embroidery, woodwork or jewelry design, you’d want to add making a paracord bracelet to your partisan repertoire. A paracord bracelet is a survival tool disguised as a fashionable bracelet.

Getting hands-on to make one is effortlessly simple. No workshops to attend or expensive equipment to buy. In fact, there’s a wide variety of paracord bracelet instructions online for you to get started. However, what are the functions of a paracord bracelet other than letting its wearer make a unique fashion statement?

Uses of A Paracord Bracelet

As its name implies, a paracord bracelet is made of paracord (parachute cord), a lightweight nylon which US paratroopers used as suspension lines since World War II. It was then that they discovered that the versatile and hardy cord can be useful and practical in many day-to-day activities.

quick fix for rips and tears

When weaved into a bracelet, a paracord bracelet goes beyond just letting you look stylish in the great outdoors. It’s actually quite the multipurpose tool for the handyman in the wild, with a myriad of emergency uses you may not have even thought of.

Quick fix for rips and tears

A thin thread of paracord from your survival bracelet can prove to be very useful and timely for patching up rips and tears in the backpack or tent in the wild. Bringing along your own needle for an outdoor expedition may not be so bizarre after all.

Mark a trail

To avoid getting lost in the woods, use the paracord from your survival bracelet to tie twigs around visible spots in the woods to mark your path.

Fish for food

After all that physical exertion in the wild, it’s time to replenish the protein.  Unweave your paracord bracelet and attach a hook and bait for a makeshift fishing tool.

Great for hanging stuff

We never know who will decide to visit the campsite in the dead of the night. Wherever there is food, wandering rodents or even bears may be attracted to your campsite at night. So hanging your food in a tightly secured bag on higher ground could be a good strategy to prevent unwanted visitors in the wild.

paracord for hanging stuff

String your paracord across two trees above the ground of considerable height and hang your bagful of food supplies on it. This makeshift line can also double up as a laundry line for your wet clothes and socks.

Build a quick shelter

The skies could decide to open and release an unexpected shower, especially if you’re in the tropics. Unravel the survival bracelet and lash together some leafy branches to keep yourself and hiking gear dry. You may also stretch a paracord between two trees and throw a tarp or poncho over it for some shelter.

Makeshift tow rope

During an emergency situation, such as when you need sturdy ropes to get yourself or someone else out of danger, you can easily unravel a paracord bracelet and turn it into a much-needed lifeline.

makeshift tow rope

Or if your jeep breaks down in the middle of nowhere, you can tow it to a place where you can get help.

Replace a broken zip puller

We all know how tough it is when the zip pullers of our backpacks or outdoor jackets give way. Loop a small piece of paracord into where the zip puller should be for your zips to work easily again!

First aid

Nicks, scrapes, bumps and gashes are common in the great outdoors. The paracord from your survival bracelet can be made into a tourniquet to stop any bleeding. Nobody carries a pile of duct tape in the great outdoors. Should you want to make a splint for support, look out for sticks, branches or rigid bark and then unravel a paracord bracelet to securely fasten. To use a paracord as a sling for an injured arm, simply tie both ends of the paracord and loop it over your neck.

Floss

You can’t imagine what else a thin sliver from your paracord bracelet could do. If you forgot to bring along your floss for your outdoor escapade, a tiny piece of paracord could help you remove those remnants of food (which are really what gives rise to nasty toothaches) and stave off bad breath.

Shoelaces

It’s inevitable that those shoelaces decided to call it a day when you’re having the adventure of a lifetime.

shoelaces from paracrod bracelets

Unravel your paracord bracelet and thread it through your hiking boots’ eyelets. For smaller shoe eyelets, simply remove the inner core strands which are usually thin enough to thread through. Of course you’ve to remember to burn and melt the ends a little to prevent them from fraying.

Belts and drawstrings

While the rugged outdoors may not be the best place for a fashion parade, you may sometimes lose a belt or discover that the elastic band of the infrequently-worn hiking pants has become a little too loose for your liking. Loop the paracord from your survival bracelet around your waist and it makes the most durable thing for holding up your pants.

Therapeutic paracrod bracelets

While the paracord bracelet could be an essential item for the outdoors, it also can bring health benefits for the wearer. Paracord bracelets embedded with electromagnetic frequently technology to ease inflammation of the wrists are a relatively new invention in the world of survivalist paracord bracelets.

therapeutic paracrod bracelets on the table

When these specially-made paracord bracelets come into contact with the body, they stimulate the sympathetic nervous system which increases blood circulation and oxygen intake while reducing inflammation of the joints.

While therapy paracord bracelets can be cool, nothing is as unique as investing your time and creativity into making a stylish one. So check out these survival bracelets instructions to make one for yourself or your loved ones.

Things you need to make a paracord bracelet

Frankly, the few things you need to start making your first paracord bracelet are easily found on Amazon and even in your house. The survival bracelet instructions here are for a one-color, two-strand core bracelet using the simple cobra stitch so that an absolute beginner will be able to get the hang of it.

  • Paracord or a hardy type of cord of about 1/8” thick. In this example, we’re using 10 ft of paracord for a wrist size of 7 inches.
  • Side-release buckle made of plastic or metal. Most people prefer a plastic buckle over a metal one as the former is lighter and comes in a huge variety of colors to match your paracord.
  • Scissors
  • Cigarette lighter or torch lighter
  • Something heavy to hold down the paracord bracelet when you’re making the knots. It can be a couple of very thick books stacked on top of one another.

Step 1: Measure your wrist size

To estimate the length of paracord you’ll need, wrap it around your wrist and take note of where the ends meet. Then measure the paracord length with a ruler.

Note the measurement as this is your wrist size. The actual length of paracord needed is 1 foot of cord for every inch of paracord bracelet length. Hence, if your wrist size is 7 inches, you’d likely need 7 ft of paracord.

measure your wrist size

Tip: never only use the exact length of paracord that matches with your wrist size. Always remember to use a slightly longer paracord so that it’s easier for you to work with. For example, 10 ft of paracord is good for making a survival bracelet that fits a 7 inches wrist.

Step 2: Loop paracord through buckle

Hold two ends of the paracord together to find its center. Push the center of the paracord through the buckle and now there’s a loop. Put two loose ends of the paracord through the loop and pull to adjust tightness to fasten it to the buckle.

Step 3: Measure the length of paracord you need

Unclasp the buckle. Insert the two ends of the paracord through the other part of the buckle (the part with prongs). Slide it up until your wrist size. Allow one inch more for a more comfortable fit when the bracelet is completed.

Step 4: Start making knots

Cobra stitch (also known as Solomon bar or Portuguese sinnet) is a very easy-to-make knot commonly used for paracord bracelets.

Start making knots

This is how to complete one cobra stitch:

  • Bring the left-side cord under the center strands, forming a loop.
  • Bring the right-side cord under the left-side cord and over the center strands through the loop of the left-side cord. This is considered a half-knot.
  • Tighten up the half-knot so that it sits just next to the buckle before proceeding to make the right-side half-knot.
  • Bring the right-side cord under the center strands, forming a loop.
  • Then bring the left-side cord under the right-side cord and over the center strands through the loop you’ve just made. This is one completed knot.
  • Adjust the cords on both sides to the same tightness (but not too tightly).
  • You’ll have to continue forming the knots following the instructions above.
  • Should you realize you’ve done it wrongly along the way, you’ll just have to undo the last knot and do it again.

Step 5: Adjust tightness of knots evenly

Keep on knotting through to the two ends of the buckle. Always remember to evenly adjust tension/tightness on both the left and right sides of the knots so that they’re of the same sizes as you go along. Otherwise, you’ll probably end up with a twisted bracelet or one with awkward ‘bumps’ here and there.

Tip: stick the buckle under several thick, heavy books. This makes it more convenient for you to evenly adjust the tightness of every knot.

Step 6: Completion

Snip off the loose ends of the paracord near the last knot. To make sure that your paracord bracelet doesn’t become undone on its own, it’s necessary to seal the ends. Use a cigarette lighter to lightly melt the exposed ends. Then quickly press the semi-melted ends into the surrounding cord so that it attaches and seals itself. As the semi-melted ends of the paracord can be very hot, make sure that you don’t burn or hurt yourself when sealing your bracelet.

paracord bracelet completition

Tip: use a metal spoon, hammer, soldering tool or other types of tools around the house that can help you safely and firmly press down the semi-melted ends of the paracord without the fear of getting scalded.

The above instructions are for a two-strand cord, mono-toned paracord bracelet.

Here’s an easy-to-follow video on how to make your first mono-toned paracord bracelet:

With the simple cobra stitch, there’s a myriad of wonderful patterns you can create for your paracord bracelet. Crank up your creativity with paracords of two different colors using the cobra stitch:

A king cobra stitch (also known as double Portuguese sinnet or double Solomon bar) is a promise of something even more gorgeous. King cobra stitches are actually another layer of cobra stitches on top of the first set of knots. This means that your eventual paracord bracelet can be a unique creation like no other. Check out how to make a king cobra paracord bracelet here:

More Sophisticated Knotting Patterns

If you’re hungry for more sophisticated knotting patterns other than the tried and tested cobra stitch, these more advanced knotting patterns will keep you entertained.

Crown sinnet (box knot): uses paracord of two or four different colors for a colorful effect.

Caterpillar sinnet: also known as chain sinnet which makes relatively small knots. They’re great for people who doesn’t like the bulk of some knotting patterns.

Saw tooth: this produces a saw tooth pattern that will look great using two contrasting colors.

With the availability of glow-in-the-dark paracord perfect for night runners or hikers, the sky’s the limit for stylish, one-of-a-kind paracord bracelets.

Even though we’re not Indian Jones or Lara Crofts who always get into tricky situations in wild, obscure locations, we never know when having a paracord bracelet could be a godsend. Go on, make your very own paracord bracelets today!


Paracord Keychain: Lots of Cord in a Tiny Package

0
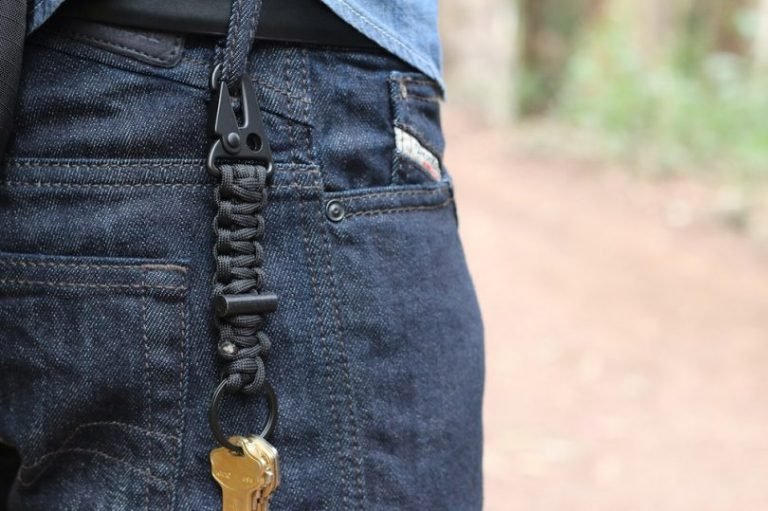
Man with bomber paracord keychain

Most of us have heard of paracord bracelets before. Not only are they a fashion statement that ensures you look more outdoorsy, but they may be the thing that could save your life. A twist on the original bracelet is the the creation of a paracord keychain. This is something simple that you can take with you wherever you go and makes a great gift for others.

Giving you all the safety and versatility that a paracord bracelet does without having to wear it on your wrist all the time is the added value in choosing a keychain instead.

For every inch your keychain measures, it is said to equal about one foot of actual paracord if you were to take it apart. If you find yourself in a bind and need some repairing or tying then unraveling this bracelet is just what you need.

Aside from the practical functionality, these keychains are cool to have and are super easy to make. You don’t need to spend $10 or more on a keychain that you can easily make for yourself. In fact, you could buy 50 feet of paracord for around $10-$15 and make more than 25 keychains!

Follow the steps below and find out just how easy it is to create a multi-functional keychain made of paracord. With a little time and effort, you are capable of making an amazing, great-looking, multi-functional outdoor tool. Let’s get started!

Decisions To Make First

This is often the hardest part of making the keychain. The first step is to choose what color, length, and design you want for your keychain. There are hundreds of different colors and designs that paracord string comes in. They also come in varying lengths. Although the lengths may not matter if you are only making one keychain, but keep in mind that each inch of a paracord bracelet is about a foot of the actual string so be sure you buy it at least 5 feet to be safe.

paracord keycahin in the hand

Colors and designs vary and some thought could go into this process. Are you looking for a keychain that stands out? Then you may consider a bright color. Do you want this keychain to blend in with you and your surroundings? Then choosing a more neutral black, brown, gray, or tan color might be best.

Gender can be taken into consideration as well. I don’t think your burly military veteran dad wants a pink and purple keychain! Again, color has to effect on the functions of the keychain, but you still have the choice to customize.

Items Needed:

  • Paracord (color & length may vary)
  • Clothing Measuring Tape (optional)
  • Keyring
  • Sharp Scissors
  • Lighter

Making A Paracord Keychain In Eight Steps

Step One: Measuring

Measure the paracord according to your sizing pleasure. If you would like, taking your clothing measuring tape, measure how long you might like the keychain to be. Remember, for every foot of paracord you measure, it is almost equal to how many inches your keychain will be. I recommend erring on the side of too long instead of not long enough.

You can always shorten it as we get to the final stages. Cut your desired length from the spool of paracord and set the rest of the pile out of the way.

measuring and material for making

Once you have your paracord measured out in front of you, take both cut ends and use the lighter to burn them. The heat will melt the material and make it hard so it will not unravel during the creation process or while you are carrying it. Be cautious with this step and DO NOT burn yourself. If you are not over the age of 16, I would recommend asking an adult to help you with this step.

Step Two: Attach Your Keyring

For the next step, line up the two ends of your length of paracord so they are equal. Run one end of your paracord through the key ring and place the keyring at the center point in your strings. You should have two equal length strands on either side of the keyring.

Step Three: Where To Start

This is where it may get confusing. You are actually going to be ending your knots at the keychain, not starting there. By turning the strings so that the keyring is at the bottom you will work your way up the two strands a few inches. Some people suggest three fingers, others suggest five. It really depends on how long you want your keychain to be. The distance from where you start knotting to the keyring at the bottom will be the length of your keychain.

starting to make paracord keycahin

Next, I would find the halfway point of these two strands, which will actually make them into four. The two that are closest to your keyring are going to be the base strands and will not move. You will then begin weaving and knotting the two outside strands around those two inner base strands.

Step Four: What To Look For

Now we are ready to start the actual weaving to knotting. What I will be describing is a standard Cobra Knot or Cobra Weave Pattern. This is the most basic and most popular style. There are many other knot types that you can try and those videos will be shown near the bottom of the article if you are up for the challenge!

The Cobra Weave starts at the point where your two strands turn into four when folded again. You should see 4 separate strands. Two are in the middle and have a direct connection to the keyring and the others are free-flowing on the outsides of the two inner strands.

Step Five: Starting Your Knots

Making the first knot is key to ensuring a clean-looking and strong keychain. We want the weave to be smooth and free of errors or twists. Your starting position should be looking at four strands of paracord. The longer strands need to be behind the shorter strands on either side.

starting your knots

To begin, make a loop on the left side of the two center strands. This loop should have the loose end crossing over in front of the two middle strands and the loose end will be on the right side now. Taking the right string (not the loose end of the left string), we will make a loop that goes around the strand we brought over from the left and then going behind the two center base strands.

From that right side loop we made, we will take the loose end of that and it will then be used to thread from behind and under the left side loop, up and through it to create the first knot.

You should end up with the left loop string going over and through the right looped string and the right looped string going behind and through the left looped string.  This is your first knot and it will be looser than you want, trust me. Pull it as tightly as you can and get ready to make the second knot.

Step Six: Knotting The Rest of Your Keychain

Let’s continue making our knots or weaves through the rest of the keychain!

Beginning with the opposite of what we started with, we take the strand on the right side and cross it over to the left side on the top of the two middle strands and leaving a loop over on the right side. We will then take our left piece over the piece we brought from the right, behind the two middle strands, and up, underneath, and through the loop that remains on the right side. Finish this knot by pulling both strands tightly!

knotting the rest of your keychain

It will seem now that you strands have switched roles. You have accomplished your second knot! You will continue this pattern starting with the opposite side that you ended on.

For the next knot then, you will start with the strand on the left using the same looping over the top of the two middle strands, while the right strand is pulled over the left strand we just crossed, behind the two middle strands, and then up, underneath, and through the loop on the left. Follow this same pattern until you are close to the end of your bracelet.

Note: The two middle base strands of the string should never move. You are simply weaving and knotting the two left and right strand through one another and using the middle two strings as the base of your bracelet.

Step Seven: The Final Knots

As you near the end of your bracelet, you may be running lower on the two outer strands or getting close the keyring, this show that you have almost completed your final product!

You should try to knot and weave all the way until you are as close as you can get without making another knot to your keyring. This will help eliminate any looseness and make sure you have as much paracord on it as possible, should you need to unravel it. Once you have done your last knot and you cannot possibly fit another, give your last knot another good tug to make sure it’s as tight at is can be.

Step Eight: The Last Touches

Finally, taking the loose ends on either side of the bracelet you will use your scissors and cut those off close to the bracelet. I would cut it 3-5 centimeters from the bracelet leaving a very small piece of loose string. Do that on both sides and now you need your lighter.

last steps of making

Note: if you are under the age of 16 or do not feel comfortable using a lighter PLEASE ask an adult for assistance. Do NOT burn yourself or anything other than the bracelet.

You will use the lighter to burn, melt, and harden the end you have just cut off. Once you have singed the ends, wait about 5-7 seconds until they are melted and, using caution, press them into the bracelet so they will mold and almost become one with the rest of the bracelet. This will remove any excess, make the keychain smooth, and will keep it from unraveling after all of your hard work!


Other Uses, Techniques, and Types of Paracord

Congratulations, you have your finished paracord keychain! Now it is free to swing from your keys or attach to a bag or backpack and should never come undone.

As I mentioned earlier, there are numerous ways you can knot and weave a keychain to change how it looks. Each type of knot works just as well as the next functionality-wise, but they do give the design of the keychain a different and unique style. Below are a few videos demonstrating various weave types that you may want to give a go if you are feeling like a paracord keychain master now!

The weave we have just completed is called the Cobra Weave.

This is the standard and most popular type of weaving pattern for paracord keychains and the like. Below is a list of patterns for paracord bracelets, but these can be easily implemented to create yet another awesome paracord keychain.

Bracelet and Keychain Patterns

Another type of weave is a Trilobite Weave. Here is a link of a tutorial on YouTube how to do a Trilobite Paracord Pattern.

For another braid-like style the Fishtail Paracord Pattern is yet another bracelet and keychain type that can be used. Both the Trilobite and Fishtail patterns are similar to the Cobra in that they are wide and relatively thin. The thinness of the bracelet or keychain is usually find but you don’t always want something that is as wide as a smartwatch on your hand or swinging from your keys. Taking a look at each style before you try to create it will give you a better idea of what the final product will look like.

The Corkscrew Paracord Pattern can be found here. This is more of a rounded shape and not at wide as the Cobra and some of the other types such as the Trilobite or Fishtail.

This might actually make a much nicer keychain because it doesn’t have as much thickness and bulk.

The same is true with the Snake Knot Paracord Pattern in that it’s not as wide or bulky but instead more compact and round.

I think it’s obvious now that paracord can be used for so much more than just a keychain. Keep in mind that the paracord isn’t always just used as a fashion statement, but could be the difference between life and death in some cases. This super strong cord can aid you in any number of situations you may find yourself in when on an adventure. They can clearly be made into keychains and the ever-popular bracelets, but what else can they be made into? There are many types of special knots and different uses for paracord that will help in survival situations.

Above is a Quick-Release Paracord Bracelet that allows you to unravel it quickly with one swift pull in the event of an emergency with a special knot and weave pattern called the Blaze Bar Weave.

This can easily be made into a keychain with allows for even more versatility. Instead of having to take it off of your wrist to use it, it’s readily available wherever it may be dangling!

There are also many types of Paracord Lanyards you can create using paracord that will hold things, carry things, or come apart in a time of need as well.

This adds yet another dimension to paracord creativity. Using a smaller version of a lanyard pattern could leave you with yet another super cool keychain with some added flair and strength.

And yet another amazing use for paracord comes in the form of wrapping. Using some of the same simple weaving techniques, you can also learn to wrap and weave paracord around some of your favorite survival tools. Flashlights, hatchets, and even knives.

Above is a tutorial on a Paracord Knife Handle Weave Technique.

Tie It All Together

As you can see, paracord is a survival must. It’s also a no-brainer because it’s beyond just one simple use. Use it to create a splint, tie up your food at night, string up supplies that don’t fit nicely into a pack, as a fashion accessory, and much more.

Paracord is strong, durable, and is specifically built to withstand some immense pressure and pulling. It’s no wonder that many outdoorsmen and women always have some spare paracord with them. Another added bonus is that it’s easy to carry.

paracord_keychain with keys

You can carry the whole spool if you want but there are so many ways we have learned that make it more convenient and almost unnoticeable to carry with you. On your wrist, around your knife, or around your neck, or on your keys the paracord is there when you need it most. Give a simple paracord keychain a try by following the steps above and even trying to teach a fellow outdoor enthusiast. It’s fun to make, great brain stimulation, and produces a priceless piece of equipment.


Paracord Knots: The Foundation to Excellent Weaving

0
diy paracord knots

Learning how to make different paracord knots is the first step before embarking on your paracord projects. Once you are familiar with the procedures of making these knots, you can then start to weave various interesting paracord designs for your paracord accessories like bracelets, key chains, pet collars and more.

Paracord is an excellent outdoor material that is cheap, resistant and multifunctional. Its applications are only limited by your imagination and weaving skills. Apart from using paracord to make the various paracord accessories mentioned above, you can also use it to pack more feet of cord which might be useful to you on your camping trips.

Most paracord weaves and knots are designed to unravel quickly. While it is a fact that the more expensive cords like the bungee cord are stronger and serve different purposes, they are way heavier to carry compared to the lightweight and versatile paracord.

Making paracord weaves

Some of the most common knots and weaves will be discussed here and a brief step-by-step will be made available on how to make these knots and weaves. But before we get into the nitty-gritty of these knots, a brief look at some of the common mistakes that beginners make and which you should do your best to avoid.

Common Mistakes

Because you are just starting off in this endeavor, it is only natural that you make certain mistakes since you haven’t had a lot of practice. It is therefore helpful to be aware of the mistakes that you will most likely make and be prepared for them beforehand.

making paracord knot

These are some of them.

  1. Too much melting: one of the common things to do in paracord knotting is using a lighter to melt the ends of the cord after completing a weave in order to kind of seal the ends. But a lot of people use too much heat and end up setting the whole paracord on fire. As you learn, you will become better at melting the ends but for your initial projects, make use of a butane lighter and be very careful.
  2. Improper measurements: a lot of beginners also have problems getting the right length of cord to be used. If you are not careful with measurements, you will end up having too much cord or too little cord and neither of this is ideal. It is perhaps more frustrating when you don’t have enough cord to finish up than it is when you have excels but with time, you will start to get the exact amount you need.
  3. Finishing up properly: a lot of people start the process properly and with the right knot but when they are done with the weaving, they get lazy and end up with the wrong type of knot. If you use a regular overhand knot to terminate your paracord works, it is not guaranteed to last long and it doesn’t look so great either.
  4. Stingy with the paracord: try not to be stingy with the amount of paracord you purchase. If you are very serious about learning all of the knots and patterns, you need to stock up on enough paracord.

After all it is cheaper to purchase the cord in bulk than it is to buy in pieces and with the right amount, there is less pressure as you have enough cord to practice with over and over again.

With these common mistakes at the back of your mind you can now proceed to start your learning process.

Procedures:

  1. Put the two open ends of your cord together and run your fingers through the length of the cord. This process divides the cord into two equal halves.
  2. Bend the left open side of the cord to the left and bend the right cord to the right with the middle run of the length still in place.
  3. Tae the left cord and drape it behind the main center part of the cord and take the right cord and bring it under the left cord that has now extended to the right and then bring it back over the center and into the loop on the left. Then pull and tighten. This is basically the cobra knot.
  4. You now take the cord on the right and o opposite side under and then take the left cord and go over the center and into the loop on the right. Continue alternating sides and repeating this procedure until you are almost all the way down and you eventually finish up with another knot at the bottom.

King Cobra Knot

This knot is actually very similar to the regular cobra knot with the same weaving but with the king cobra, you simply weave another cobra on an already weaved cobra.

king cobra knot

So this is like a dual cobra knot. You can choose to use different colors to get a better looking result.

The Lanyard Knot

The lanyard knot is a tad more complex and it requires that you pay attention to more details. All of the extra work will pay off at the end as you will have a beautiful and sturdier design at the end. There’s a useful video to follow here:

Procedure:

  1. Bend your cord in half and loop the closed ends on your two middle fingers.
  2. Make a loop with the right cord and lay it over and across the left hand side loop. Make sure your loop is crossed on the left so that the open end at the other side of the loop is across your finger and not your palm.
  3. Take the other strand and go underneath the strand that extends from the loop. After going underneath, you are going to feed it through the loop by going over it and under the middle cord and then over the end of the loop.
  4. If you do this correctly you will end up with a figure 8 like structure with a diamond in the center.
  5. Now you take the strands on the left and the right and bring them around and through the diamond shaped opening at the center. Start with the left strand, bring it around in a counterclockwise manner and go underneath everything and back up through the diamond opening at the center.
  6. Do the same thing with the strand at the right, bring it over and underneath everything and back up the diamond shape at the center.
  7. Now you start to pull on the cord to tighten it. Don’t worry if it gets a little messy. After tightening, everything will fall into place. The resulting knot is a well-rounded and cinched up knot. Cut off excesses at the end and melt it with your lighter.

Snake knot

To do this knot, you need two strands of paracord of different colors. You will have to fuse them together and before we get into the actual knotting process, let’s first show you how to fuse two paracord strands together.

snake knot

Some people just take two paracord strings and melt the two ends and put them together to fuse them directly and this works for the most part but the bond can easily break and foil all your hard work during your paracord project. Another great method that takes a little more time but is more effective will be shown to you now and it is guaranteed not to give you any problems.

First of all you need 2 pieces of paracord, scissors, a lighter, a needle and thread. Insert the thread into the needle and knot the loose ends shut. Then proceed to remove the inner threads of one of the paracord strings.

After this you then melt the ends of the other paracord string to form a dome like structure which you will proceed to insert into the open end of the other paracord string. After this you will use the needle and thread to stitch around the point where the two cords are now intersecting and there you have it, a much stronger fuse. Now you can proceed to making the snake knot. If you’re having trouble following the procedure mentioned below, you can use this video to help you along:

Procedure:

  1. Follow the procedure of fusing elaborated above and fuse two cords together
  2. At the point of fusion, make a small loop and take your left strand and make a loop around the right side by passing it over the right cord and behind.
  3. Now take the right cord and take it behind and over and put it through the loop on the right hand side and pull it through. Pull the cords at both ends and leave a little loop at the top end.
  4. Then you can start weaving down from the knot and continue down. Loosen slightly one side of the knot to create a second loop.
  5. Take the cord that went inside the new loop and bring it behind the other cord and back over and feed into the loop. Pull it tight.
  6. Turn it to the other side and do the exact same thing. Loosen one of the loops, take the cord that goes into the loop back, over and inside the new loop. Tighten up and do this until you get to the end.

Paracord Trilobite Knot

This knot lays the foundation for a kind of three sectioned weave. The easy-to-follow video can be found here:

Procedure:

  1. Get two strings of cord with different colors and find their middle points.
  2. Hang them both at their middle points on a clip or a nail on a wall.
  3. Pull two same colors to one side and the two other color to the other side and start knotting a few inches down.
  4. Take the outermost cord on the right and pass it over the two cords at the middle.
  5. Hold it in place and take the outermost cord on the left and pass it beneath the two at the center and over the loop at the right.
  6. Pull that same cord behind the same loop and over. Do the same with the cord at the left then pull that left cord again beneath the two at the center and out through the loop on the right.
  7. Pass the cord at the right over the two at the center and in through the loop on the left.
  8. Again pass the cord on the right under and out through the right loop and the left cord over and in through the left loop.
  9. Pass the left cord again beneath the two at the center and out through the loop on the left and right cord over the two at the center and in again through the loop on the left.
  10. You will continue this process again and again until you have the weave at the desired length.

The knots described above are just a handful compared to the very many different kinds available. You can easily do more research into other kinds of knots but these are the most useful and most common. It is always fun learning to tie these knots and you can do it with friends as a fun activity.

knots made from paracord

Also the items which you can make with these skills are very useful. For a beginner you should start off with the simple cobra knot and then make your way up into more complex and advanced designs. It might take some getting used to but once you get the hang of it, it will become second nature to you.

How to Make Paracord Bracelet: Weaving Your Way to Safety

0
Mad max bracelet worn

This article will take you through the step-by-step process of how to make paracord bracelet. You can make your own bracelet with or without the side release buckle depending on what you fancy. The paracord bracelet makes for a very interesting piece of accessory that you can easily wear on your wrists.

It is inexpensive and you can wear several feet of cord weaved into an interesting design at all times. You can even extend the length and use it as a collar for your pets.

A lot of people run into different problems when attempting to make their own bracelets. For most people, it seems the knotting process is too complicated and they tend to get lost. For some, it’s just a matter of not knowing the right materials to use and simple tricks to follow.

Whatever category you do fall under, this article is here to help. Whether you are a beginner and this is your first time, you have done this before and you are just curious about the other methods out there, or you simply need a reminder on the process, you will definitely find useful information here.

making paracord bracelet

You can make your paracord bracelet with buckle and you can choose to make your paracord bracelet without buckle, depending on the style you fancy. This article will give you a run down on the processes and materials involved in making the two.

First of all let’s list out all the materials you will be needing to get started. These items are very easy to get your hands on and you should have little or no difficulty getting quality ones.

  • Paracord
  • Clips or buckle
  • Scissors
  • Lighter
  • Measuring tape

Apart from the paracord and buckle, the other three items on the list above are things you can get anywhere.

how to make a paracord bracelet

An excellent source of paracord would be Amazon or any sporting goods store, as they stock a vast array of paracord with different colors. You can also get your buckles from craft stores or outdoor sporting stores as well.

Getting Started

After you must have gathered all the materials you need, you can now get started. Follow these steps and all shall be revealed.

  1. Measurements: You need to measure your wrist, as this gives you an estimate of how much paracord you will be needing. You can easily measure your wrist with the help of the paracord itself. Just wrap the paracord around your wrist and note where the cord meets on your wrist. With the help of the measuring tape, take note of the length of cord and that gives you your wrist size.
    The general rule of thumb is that about a foot of paracord is needed per inch of your wrist size. If your wrist measures 7 inches for instance, you will need at least 7 feet of paracord to get started. Generally most people tend to just use 10 feet of paracord as this gives you plenty of extra length to work with.
  2. Making the first loops and knots: You then need to make the first loops and knots around the buckle ends. The buckle is made of two parts when open or separated. You can call them the male and the female. The male part is that part with the slot where you will be slotting or keying in the male part with the three pins attached to it.
    Locate the center of the cord by holding the two ends of the cord you have measured and cut. The other end will be the center of the loop. Take the center of the cord and pass it through the slit at the bottom of the female part of the buckle and then pull the cord ends through the loop and tighten. You have made your first knot and you have attached the female part of the buckle and the paracord. Pass the two open ends also through one of the slits on the male part of the buckle then move on to the next step.
  3. Looping the length of your wrist: After passing the open ends of the paracord through the male part of the buckle, slide it back upwards towards the attached part. The distance between the two buckle ends should be about the length of your wrist. You can make it about an inch longer so the finished bracelet is a comfortable fit. Note however that you are measuring from the end of the female part to the flat part of the male part excluding the three pins. The three pins aren’t part of the measurement because they will slot into the female part at the end of it all.
  4. Making more knots: You must have come across names such as the cobra stitch, Portuguese sinnet or Solomon bar. All these names refer to the same thing and this is the knots that you will be making. To get started on this, take the cord on the left hand side and pass it below the center strands that run between the buckle ends and take the cord on the right hand side and pass it below the left side cord, over the strands and through the loop that is now at the left hand side of the cord. When you tighten up the cords, you are on your way to forming your first knot.
    Proceed to making more knots by passing the right side of the cords under the center strands. Pass the left side of the cord beneath the right side cord and over the center strands then through the loop formed at the right hand side of the cord. Tighten up again and you have finally completed the knot. This process will be repeated in an alternating manner until you make more knots.
    You will continue making these knots until you have filled up the space between the two ends of the buckle. These knots must be uniform to make it aesthetically pleasing so make sure you apply the same tension and tightening to keep it uniform.
  5. Finishing up: The finishing stages of this process is cutting off all the excess and burning the loose ends to make sure they don’t unravel. You can make use of sharp scissors to trim off the excesses then use the lighter to melt the little protruding parts. You can press it against the rest of the bracelet to kind of attach them together as it hardens. You need to be careful when pressing the melted part against the bracelet as it is very hot. You should probably make use of a little blunt instrument like the end of a knife or screwdriver.

And now you’re done. If you follow the instructions carefully and do everything properly, you should have a beautiful paracord bracelet on your hands.

Once you get the complete hang of it all, you can make variations in the length of cord you use, and make the knots tighter or looser as you wish. You can even try a few different knots too to add some variety to your bracelets.

Making The Paracord Bracelet without Buckles

Materials: The materials you will be needing for this type of bracelet are pretty much the same with that you used for the bracelet with buckle. Only difference here is that you don’t need a buckle but you will be needing a nail-like instrument called a fid.

https://youtu.be/ohp15xlx6nw

So get your paracord, scissors, lighter, measuring tape and fids.

  1. Measurements: To avoid unnecessary complications, it is easier to just start off with 10 feet of paracord. So use your measuring tape to cut off a 10 feet cord length from your cord stash. Then put the two ends of the cord together and run your fingers through the length. This will help you locate the center point of the cord.
    Now take a measurement of the equivalent of your wrist size from that center point and mark the point. Fold it over at that point and you should have one cord coming over to the left and another cord coming over to the right. You might want to place it on a flat surface to make it easier.
    The length of your bracelet is the middle part and then your working ends extend to the left and to the right.
  2. Making knots: Take the left cord over the center so you have a small loop at the left. Take the right cord and cross it over the extended left cord, go around the back and pass it through the left loop then pull and tighten all ends.
    We now start the loop and over process from the right. Take the cord at the right and pass it over the middle. Take the left side of the cord and pass it over the extended right cord and cross it over around the back and pass it through the loop at the sides then tighten.
    You will repeat this alternate right and left loop and cross over process almost the whole way down the length you measured. When you have weaved almost all the way down, you are going to leave a tiny little loop at the bottom. You will run one of the cords through the loop at the bottom so the entire weave doesn’t fall apart.
  3. Making stoppers: The cord that you’ve been running across the top now runs through that small opening at the left or the right depending on where it is instead of running across the top. This little process stops everything from running off the end.
    After you pass the cord through the small loop at the bottom, make sure you leave a small loop at side also. The right or left cord will now cross just like it has before, go behind and then back through that loop. If you do this correctly, you will have a tight stopper.
  4. Going back to the top: This next step will require you to use the fid. The fid is a nail-like hollow metal which you will attach both ends of your cord to in order to make it easy for it to pass through very small openings. This will help you insert the two ends through the loops at the other end where you started knotting.
    The left side cord will go through the left loop on the left and the right cord will go through the right loop.
  5. Installing the stopper knot: Put the bracelet on your wrist and figure out where you want to fix the stopper knot and mark it. You want to make sure there is an allowance for you to adjust the length of the bracelet and to make it easy to put on and pull off.
    To do this stopper knot, you follow a similar procedure like we did at the beginning. Place the cord on a flat surface and bend the cord on the left to the left and the cord on the right to the right. The cord on the right will go over the top and to the left and the left is going to go underneath and to the right.
    Now the left cord will go behind and through the loop on the right and the right cord will go over the top and down the loop on the left.
  6. Finishing up: From this point all that remains is to tighten it. It will look a little messy but after tightening, everything will fall into place.
    Cut off the excess ends and burn/melt the stubs so they don’t pass back through the knot. You now have a bracelet without the buckle and what’s great about this bracelet is that it is adjustable so it can fit a bigger wrist as well.

If you follow the instructions outlined here step by step, you should have little difficulty making your own paracord bracelet. The process might seem a little tedious but you will get the hang of it all in no time.

You can watch video instructions in the YouTube videos below:

How to Waterproof Matches: Staying Dry on a Rainy Day

0
waterproof your matches guide

Fire is one of life’s most mysterious elements. It is needed in the outdoors for many purposes, but in order to get one started you need some tools, and one of the most important is the ignition tool. This is where the matches come to play.

It is an old set of ignition tools that has withstood the test of time, even through these recent generations of several inventions. So, knowing how to waterproof matches might just be a live-saving DIY skill you would acquire by reading through this post.

Why Matches?

Matches are one of the lightest fire lighters ever invented, and their use goes back centuries. They are so light because they were basically made of stiff paper or small light wood. These wooden sticks were then covered at one end with the main material that would ignite. The material used reacted to friction and caused oxidization of the material to take place, which produces a flame.

Matches Through Time

As a wilderness explorer, knowing your stuff gives you an edge over ‘disaster’ during a terrible situation in an outdoor activity. Hence, the benefit of carrying some matches with you to camping, boating, or hiking through terrible terrains, could just be that they can serve as back-up tools.

Secondly, they occupy an insignificant amount of space in your backpack. So, both the rich and the great ancestral explorers of the ages took some with them were ever they gathered or sailed, because they were just easy to carry and added almost no extra weight to their pouches or slack-backpacks.

Matches through time

As far back as the AD 580s and a few years before, there may have been the use of early match sticks, called sulphur match at the time. This became historic because after the conquest of the Northern Qi dynasty, the Chinese recorded that ‘small pinewood sticks, were sulphur impregnated’ and used to make fire. Later on, in about AD 907 they were called ‘light bring slaves’ by outdoors men and before the end of the AD 960 they became very popular, attracted commercial worth, and were called fire ‘inch-sticks’.

Today in the market place, matches come in small packets. So, they can be put in any of the side pockets of your rucksack, inside your waist bag, or just slid into your trousers or pant pockets. But the question is, would they do their job after a very rough weather condition? Probably not.

You do not want to take such a risk. If it is too sunny, the match pack may be ruined by heat, as it may fold. If it is too cold, it can get moist and be unable create a fire on a strike. But, if it gets wet, that’s it! It cannot do the job when you need it to. So, it might just be a good idea to know exactly how to protect your matches by keeping them waterproof.

How to Keep your Matches Waterproof

Honestly, you can just put your matches into a plastic bag and they will be waterproof. But, that is not a very safe way of keeping them. Because, even if the plastic bags do not break, which is a possibility, the heat from the trapped air can render the match sticks useless when you need them the most. So what do you do?

waterproof matches with turpentine

You can actually protect the match sticks individually, that way, you can go with as little as you want to suit your need or just to serve as back-up.

Use of Turpentine

Turpentine is a chemical that has a very high flash point. That is a point in temperature measurement at which the material begins to turn into vapour or begins to burn, if the conditions are favourable. This occurs mostly in the presence of oxygen. All you need to do is just follow some simple steps:

  • Step 1: Get a broad base tumbler, or a broad base beaker, for those wilderness pros who are also scientifically inclined, and place it on a table or flat surface. Now a beaker is calibrated, so it enables you keep track of how much material you are using, and it also has a spout or beak that directs fluid flow out of it. So, you can safely use your turpentine and store it or discard of it safely after use.
  • Step 2: Pour three to four large tablespoons of your turpentine into your tumbler or beaker.
  • Step 3: Hold your vessel upright, pick up your matchstick, and insert the match head into your turpentine.
  • Step 4: Allow the matches to stay immersed head-down in the Turpentine for a few minutes. This will enable the Turpentine to not just soak into the match head, but to also infuse into the stick stem of the matches.
  • Step 5: Take off the matchstick and place them on the flat sheet of paper to dry-out. All you have left to do, is to wait for the excess turpentine to evaporate from the matches. This should take about 20 minutes.

By following these few steps, you have successfully made your matches waterproof. Interestingly, turpentine does not just make your matchstick waterproof, but it drives-off all the water, if any, that may have been stuck in the matches before your activity.

Use of Nail Polish

A nail polish is a dry-fast liquid that is usually used in protecting the finger or toe nail by coating them in the liquid.

waterproof matches with nail polish

This liquid can also serve a survival purpose to make your matchsticks waterproof as you follow these simple steps:

  • Step 1: Pick up your matchsticks and insert it into the nail polish straight away. However, ensure that it stays covered in the polish for about a few seconds, and well inserted to about three millimetres beyond the match head.
  • Step 2: Withdraw your matchsticks from the polish and hold them for a few a seconds allowing them to dry. Then place them on a flat surface with the match head off the edge of the surface.
  • Step 3: Retrieve your matchsticks after a while, but ensure that the match head was set to drip unto a collecting paper. That way if anything was to drip off the match head, it would have been caught by the paper.

The matches may become coloured if the nail polish that was used had some colouring to it. But the good news is that it does not matter. It protects the matches from moisture and also from wetness.

Use of Wax

Paraffin wax is a petroleum product, which is usually an odourless, tasteless, and waxy solid. The big thing about it is that it is insoluble in water, though it can melt pretty fast when it close to a heat source. Now that makes this activity of waterproofing our matchsticks very easy to carry-out even if wax is a solid ingredient unlike the others. Another wax that is suitable for this exercise is the common candle wax.

Because it is also a petroleum product, and works almost exactly as the paraffin wax, we shall go straight to discussing how it works. In that case, perhaps the following simple steps would help us do this activity with some ease. Here:

  • Step 1: Get a candle pot or a jar for candle wax collection and place a candle stick to burn steadily in it. Or, melt some paraffin wax in it. Because there is fire involved, ensure that you practice safety.
  • Step 2: Insert the matches stick into the liquid wax and ensure that the matches head is entirely soaked and covered with the liquid wax. It is always better to allow the wax to cover the match head completely, as well as part of the match itself.
  • Step 3: Withdraw the matchstick and allow it to cool off for a few seconds.
  • Step 4: Then place the matchsticks on a flat surface that has an edge or a table top in such a way that the match head is laid slightly off the edge of the surface or the table top. Then allow the wax to harden some more.
  • Step 5: Just before the wax is completely hardened, it advisable to pick up the matches and try to form a tight grip of the wax coating at the end of the matchhead. You can do this by just pinching the end of the wax coating that is in the direction of the stick, so as to create a tight seal at that end.

This is a great way to keep your matches waterproof. It is affordable and assessable.

All you need to do is apply a tiny little patience and in less than 10 minutes you can completely waterproof an entire box of matches.

Use of Shellac

This is not a common method of matche waterproofing, but it is interestingly a very reliable method. Shellac is usually used as a brush-on colourant, a wood finish, or a food glaze. They are originally harvested as resin secretions some forest trees by a set of feminine lac bug mostly found in Asia.

use of shellac for waterproofing

But what happens is that they are processed into dry flakes and marketed around the world. Industrial processes are then applied to the flakes, especially by dissolving them with ethanol to form the popular Shellac liquid which are bottled and sold in the super markets. This is how to use it:

  • Step 1: Similar to previous methods, obtain a broad base plate or a petri ditch and then place both some match sticks and the petri ditch on a table or flat surface. You can then pour some shellac into the petri ditch.
  • Step 2: Pick up some match sticks and dip them into the shellac liquid.
  • Step 3:Withdraw the match sticks from the shellac liquid and place them on the edge of the flat surface. Or better still, on a flat surface that is slightly slanted. This is to allow the excess shellac to drip off.
  • Step 4: Place a sheet of tissue paper, or any recycled newspaper to collect the fluids that are dripping off. Allow the matches to stay hanging a few minutes.
  • Step 5: Carefully take off the match sticks from the flat surface, as some may have glued to the surface where they were allowed to dry and place them in a pack, as they are ready to use.

Those who have used the shellac method argue that although the wax and the finger nail polish methods of waterproofing your matches works well, they both degrade after a while, especially when the matches are to be stored for a long time before they are being used or after they have just been saved from a trip. But by using the Shellac method, they claim that they stay waterproof for a much longer time, especially when they are not to be used for a trip in the near future.

Use of Drinking Straws

The use of reusable straws is a fantastic way of impressing the environmental and managerial guru inside each of us. Collecting used straws and converting them into reusable waste materials saves our planet from several environmental issues and saves you from unnecessary extra expenses.

In order to do this, just follow these steps:

  • Step 1: Get a few drink straws! Preferably used straws, either you pick them directly after a meal or after the kids have played around with them. Place your match sticks beside you and also get a plier tool close-by.
  • Step 2: Rinse them off in soapy water and allow them to dry, especially if they were used by strangers, for safety reasons.
  • Step 3: When the straws are well dried, cut them into a preferred length and carefully insert your match sticks into the cut straws.
  • Step 4: Pick up the straws with the match sticks in them, and then pinch the both ends of the straw with the Pliers to seal off the cylindrical open ends of the straw.
  • Step 5: Now all you need to do is just to melt the pinched ends of the straw with a gentle fire. Your match sticks are sealed off and ready to be packed.

Now, is this not just creative and great. Well, try any method that suits you best, or the method that you can easily do and get your match sticks waterproof for your great outdoor expedition.

Conclusion

In conclusion, your matches could either be struck on the pack or on any surface. Both matches work pretty well with these methods. Boating, camping the rain, or exploring the outdoor in any harsh weather condition can sometimes be very uncomfortable especially because you may not just get your tent soaked, but your clothes too.

Also, getting a fire started can become very difficult, and even sometimes impossible. If you are carrying some waterproof matches with you at that point, however, you could make a sunny moment from the rainy day.

waterproofing mathces outdoor

Waterproof matches are also sold in street stores and online shops. But who would buy one after knowing how to waterproof matches by reading such an inspiring and simple to follow article? All you need to get one in your rucksack is as easy as described in each of the steps for the various uses. So, try out a few methods, and have a good luck in perfecting your DIY skills on the one that you prefer the most. Cheers!


Paracord Uses: How to Apply them for Survival

0

Originally called parachute cords, these cords are one of the most reliable classes of materials applied by wilderness experts all over the world for adaptability and survival. Both in living environments, and in the harsh and severe conditions of the wild.

They are usually made of finely intertwined lightweight nylon materials that are carefully knitted to produce tread harmonies, which are later-on covered with a woven nylon covering to produce the tough cords. These multipurpose cords used by both military and civilians alike for various purposes are wildly applied in numerous DIY projects. A few of the paracord uses would be discussed later in this article.

Paracord is a great material suitable for a whole lot of projects now called paracord crafts. This is because of the flexibility, durability, suppleness and reliability of the cord. In fact, in survival settings the application of paracords are unimaginable, as new ideas appear to spring up every time survivors get into a situation that requires ideas exploration and exploitation.

Bulk paracord

It is however, advisable to have a clue of how to use paracord at home before you get them into your rucksack as one part of your outdoor gear. That way, you are free to explore the uses of the cord when you would possibly need to apply it for survival.

What You Need to Know About Your Paracord

First of all, you ought to know exactly what material you are about to work with, because, having the right supply is key. If you get that wrong, all your efforts are already in shambles right from the very beginning. A good way to get that sorted, is by checking to see that all the salient things that make the real paracord unique are found in the utility cord you are about to acquire.

The unique features of a real 550 paracord may be easy to find after you have known them or refreshed your memory by reading this article. However, if you do not know about them before now, beware, they can be very tricky details that could easily ruin your choice of gear.

What to Find

Paracords are thin cords with about seven inner strands for each, that are composed of interwoven strings, covered with a top sleeve that is wrapped around the inner strings. They are actually made that way to withstand pressure and increase their break-strength. The common is for measuring their break strength is usually in pounds.

The strength of parachute cords during World War II was about 550 pounds, which is why it is called 550 paracord. Some veterans do say they that these cords are battle- and time-tested ropes. Not only because they were originally used for battles as parachute cords, but because over time, they have been used for several other purposes by soldiers and paratroopers in survival situations.

titan paracord

Paracord uses are evident of their versatility. That has made them very popular among civilian voyagers and wilderness explorers over the years as well. They have applied some basic skills and transformed the cord into parts of survival tools, such as for building traps for fishing and hunting. They have also used it in building shelters and applied as tools for climbing, repairs, medical crises ,and for general hygiene.

How to Use Paracords

Paracord uses are limitless; if it has not been done, then it just hasn’t been thought of yet. So, how to use a paracord basically depends on the need. Wilderness explorers will agree that you use what you have to get want when in the wild. But you need some basic skills in order to do so, or even to think in that direction.

A few distinguished and common examples of how paracord have been frequently used might influence your thought pattern into a path that could make you a Paracord DIY pro, or give you an eye to cherry-pick great paracord applications, or even modify some methods of application and crafts to suit your own interests.

Paracord can be used as:

Apple Bags. Paracord bags are usually airy, as they are fondly designed with large holes, knotted at the edges of their rectangles or slanted squares. They are very good to store apples or all other domestic fruits that would need enough air to stay on fresh and crispy. No matter the amount of fruit or vegetables you stuff into the bag, you can be rest assured that it will not break, and secondly you can easily monitor the fruits to use them just before they go off.

backpack strap wrap

Backpack Strap Wrap. As a wilderness explorer, you would find that sometimes you have just carried much more than is required for your trip. Probably because you got a bit indecisive, or just because you do not want to miss any important detail and then your backpack gets bulky, untidy and heavy.

Now you are not sure if your straps would last through all the hikes in your trip. Paracord backpack strap wraps can just be used to save the day. They can boost the durability of your backpack straps, if you wrap your paracord neatly around the straps. They also appear stylish to other paracord lovers.

Slim Pouches. A multipurpose slim pouch is one of the most important gear an outdoorsman would not want to miss while preparing for any adventure. It is a very important tool, and can be useful for various purposes when the need arises.

It only wise to always have atleast one. A paracord slim pouch would just be an ideal pouch to have with you at all times. In fact, not just in the wild, but wherever you are. You can protect anything from key-holders to several types of locks, stylishly in it.

Lanyard Holders. Keys and whistles and sometimes multiband tools are better reserved together. So, lanyards are typically used to protect and keep keys together. Currently, a fashionable and easy way to keep your keys together and also send a statement to your peers as a wilderness enthusiast, is by the use of a Paracord Laynard. In fact, they are also used as holders to several items now. Ranging from identity cards, to badges, and pen-knives. Interestingly, you can also add some sort of a modern tracer to keep your item traceable and even more easy to find when misplaced.

paracord as dog collar

Dog Collars. Paracord can be weaved neatly into slim collars that are suitable for dogs. The beauty of this type of collar is that the material of which it is made from are very durable, and the collars can have different colours too from the combination of varying coloured paracords. With only about 40ft of paracord you can actually make a fine but very sturdy collar.

Waist Belts. Some trousers or pants as the case may be are one of the priceless, rugged, components of the outdoorsman’s gear. So, a rugged waist belt to match their ruggedness is just what you need, especially when you are someone who hangs stuff on your belt line. Paracords are used to make such handsome but tough belts that can last beyond leather belts and serve you better then you can imagine.

Leatherman Pouches. These are typical traditional pouches that are used to keep close very valued gadgets such as pads, phones, touches, and handy equipment. Unlike the slim pouches, these Leatherman Pouches could be designed to hold items that can be ordinarily be kept in probably leather pouches to retain them close-by.

Fishing Line. This is actually amongst one of the most commonly recommended uses of paracord. Using the paracord as a fishing line, is a long time emergency trick that has now become a welcome trend for fishing enthusiasts in love with paracord.

But here, you would need some basic tools like a knife to get into the cord and extract a single string, up-to the length of thread that you need. Attach it to your hook, and then the other end to your stick in the right way, and you are ready to fish in the wild.

paracord as fishing lines

Fishing Nets. These are usually built into scoop nets with which you place the net in a river, but against the tide and just scoop it from time to time, or built into barricade nets where you position the net to cover through a stream, from side to side and down to its bottom to prevent escape of the fishes and pull the nets after a while with fishes that are stuck in them.

Snares. The durability of the rope makes paracord a fantastic tool for setting traps. It is a joy to be able to ensnare a life animal and decide what to do with it right from the catch all by yourself. The strength of the rope can keep the animals from escaping, no matter the size, so long as it is well fastened unto a solid post.

Also, since the they are not too sharp, they also do not cut off any part of the catch. You are most likely to meet them whole and alive.

Shelter Lines. Paracords are great tools for building shelters in the great outdoors. Especially in putting up the traditional tents. The cordage is just what you need to withstand any sort of weather condition. So long as your tent is strong enough and the attachments are right, you need not fear the storms of the night and day. You may never be in tent that will get cut-off and blown away if the winds go wild when you are using a paracord to hold it emplace.

paracord shelter lines

Attraction Bags. Commonly called bear bags, these could be made directly with paracord, or protected by paracord bags, i.e., when you place your original bear bags within the paracord bag, or also by merely using the paracord to hang the bag on a height, high enough to protect your bag.

Fire Bows. This is essentially a life saver if you can do it efficiently and you happen to find yourself or your team in a position where you need a fire desperately. It requires tact and experience though; you will definitely need some other tools to make this happen. These will include tools such as: a fire board, a drill and a socket cap, a bow, and of course your paracord.

The Essence of Quality

Paracord crafts are desired mostly for the strength of the material. So, in order to maximise the potentials of a real cordage, you need to know how to use paracord as a gear and how to identify a top grade, real cord. In this case, if you want to make some paracord gear by yourself, there are plenty of helpful instructions online to guide you through the process.

There are lots of commercial paracords in the market. These are not ‘the top quality’ paracords. The top quality paracords are Military Spec paracord, and they are made of inner layers of about 7 – 9 strands, and a quality outer layer of nylon material.

The strands are also made of 3 nylon yarns that stretch all the way to the end of every cord. That being the case, you will have 21 – 27 individual yarns altogether, if you totally loosen the inner part of a Mil Spec paracord. Most importantly, make sure the material is 100% nylon, that way you will not be far from the real stuff.

military spec of paracord

However, in order to be sure you are about to purchase the right stuff, here are a few ‘reliable checks’ to look out for:

  • Check the amount of the inner strands: It must be at least 7. Anything less is less than Military grade paracord.
  • Check the colour of the inner strands: A combination of colour-coded inner strands is required for tracking Mil Spec cordage, and also for the purposes of quality control.
  • Check the label properly: The ideal Mil Spec cord are properly labelled and classifications are specified. Avoid labels such as Mil Spec, Mil Grade, etc., but look out for such; ‘MIL-C-5040’.
  • Check the coupling of the inner strands: Three (3) stings make up each inner strand, and they are always twisted to enhance strength and reliability of the cordage.
  • Check the smoothness of cordage: A combination of tight, dense weave, and smooth twist are what should expect in a Military Spec paracord, because the military has a specific weave and cabling standard that is to be followed strictly.
  • Check the measure thickness: 550 cordage has the overall diameter of 5/32”.
  • Check the quality of material: A top grade Mil Spec will always be 100% nylon. Avoid anything less. Because it might just deteriorate after it has been used a few times, if it is not 100% nylon.

Finally, it is obvious that paracord uses are vast and numerous. So, all you need to do is learn how to weave the cordage into neat collections and get creative in order to satisfy your desires. The main thing is that the material is durable and reliable. Because of that quality, you are sure it can be used to fill in the gaps for several needs and also to save lives.