Home Blog Page 40

How to Tell if a Cut is Infected: Survivalists Know How

0
Treat an infected cut

When you cut yourself, the body responds by flooding that area with platelets. The function of platelets is to help your blood clot around the cut to create a protective layer and stop blood from flowing out. As an outdoor enthusiast or a survivalist, you should know how to tell if a cut is infected and to know how to treat an infected cut to prevent it from getting worse. A blood clot is made up of numerous blood cells and fibrin, a thread-like substance that is meant to hold the clot in place. If the body is functional, a scab will be formed over your cut.

The function of this scab is to protect the wound from getting infected. Without it, your blood is left exposed allowing harmful bacteria to enter the body, creating an infection and making you sick. Scabs form and later fall off to reveal a new skin and a scar tissue. You already know this since it is highly unlikely you have never had a scraped knee or a small cut before.

While the clotted blood is meant to protect your interior body against any bacteria, sometimes things do not work out as expected, and your wound becomes infected. An infection may occur as a result of being cut by an infected object or because of environmental factors such as dirt finding their way into the blood before you had the chance to wrap the cut. That is why a first aid approach to treating the cut with a disinfectant is helpful. In such a case, you can spray the wound using a disinfectant and then cover it with a bandage to prevent exposing it to the environment. This technique will help kill off bacteria and prevent entry of foreign materials into the wound.

If an infection is not treated, it can get worse with time, causing a lot of trauma to the cut and the surrounding tissue. With the untreated infection, your body will begin generating pus in the wound and surrounding areas, and possibly some blistering in extreme cases of infection.

Treat Infected cut

In such cases, you may even notice red lines that run from the wound towards the heart, which is a sign indicating septicemia.

Allowing things to reach this level is incredibly dangerous and could be fatal. If you happen to have these symptoms, treatment of the wound is beyond your capacity, and you should make an effort to see a doctor for advice and treatment.

Septicemia happens when blood contaminated from an infection begins to poison your body. While this is one of the worst things which can happen from a cut, it is not the only severe and life-threatening ailment that can result from an infected wound.

Staph infection, toxic shock, and gangrene are other possible conditions that could be a result of a cut infection gone wrong.

Therefore, you should take all the necessary measures to ensure the wound is protected. Do not ignore any pain or discomfort. Get the wound checked as soon as you begin feeling a bit concerned. Infection is not a joke. Take care of all your cuts and wounds, and if things become serious, you can always seek medical advice.

Defining An Infected Cut

If some part of your skin is injured, or there is a break on it, that is said to be a wound or a cut. Some wounds result from a surgical process while others are due to trauma such as a bite, an accident, a fight, or using a weapon such as a knife, a gun, or stone.

You can be treated for the traumatic and surgical wounds. Nonetheless, if the wound is not well maintained, or is left open for long, there is a possibility that it would become infected.

If the wound is clean, then you have a good chance of fast healing. Small cuts such as scratches can be left free of medical dressing and can heal without stitches if they are kept clean throughout.

Nevertheless, larger cuts would require medical attention and may need you to get stitches as well as a tetanus shot.

Tetanus shot

Wounds that are not cleaned easily attract germs in the form of viruses, bacteria, and fungi, leading to the occurrence of an infection. An infection may occur on the edges of the cut, in the whole wound or may even spread further inside the body.

Apart from the trauma wounds, the surgical wound can also become infected. An infected surgical cut can also be referred to as a “surgical sire infection.”

Microscopic germs are present on everyone’s skin. A wound which breaks the top layer of the skin can leave room for the germs to get in and spread underneath, causing an infection to develop. After this has occurred, it will be difficult for the skin tissues to heal.

The skin is a barrier that helps protect you against fungus, viruses, and bacteria. After the surface of the skin is broken, you are vulnerable to infections if you hesitate to take any precautionary measures.

If you are not aware of how to treat or manage an infected cut, read along, and we will tell you how.

The Basic Of Treating Infected Wounds

In a survival condition, some level of wound infection cannot be avoided. Swelling, pain, and redness around a cut, increase temperatures, and plus development on a dressing or wound indicate the presence of an infection.

To treat an infected cut:

  • Place a warm and moist compress on the infected area. When it cools, change the compress. This technique should last about thirty minutes. Compresses can be applied three to four times every day.
  • Drain the cut. Open and slowly probe the infected area with a sterile object.
  • Dress and bandage the cut
  • Take a lot of water

This treatment can be done daily until the signs of an infection have disappeared.

The Basic Of Treating Infected Wounds

In case you do not have any antibiotic and the cut is severely infected, does not reconstruct, and it’s impossible to heal, you can consider maggot therapy. Although its hazards, this technique can be helpful. Maggot therapy involves the following:

  • Exposing the wound flies and covering it after a day
  • Checking daily for maggots
  • Covering and checking the wound daily after the maggots have developed
  • Removing maggots once all the dead tissue has been cleaned out. An increase in pain and the scene of bright red blood indicate dead tissue is cleaned out and maggots have reached the healthy tissue
  • Flushing the wound repeatedly using water to remove the maggots
  • Checking the wound periodically each day to ensure maggots have been removed completely
  • Bandaging and treating the wound, allowing it to heal normally

Fungal infection

Keep the skin dry and clean, and expose the infected cut to as much light as possible. Do not make a mistake of scratching the affected area.

In the Southeast Asian conflict, military personnel utilized antifungal powders, chlorine bleach, lye soap, concentrated salt water, iodine, vinegar, and alcohol to treat their fungal infections, getting varying levels of success. With an unorthodox treatment method, use it with caution.

What Are The Signs Of An Infected Cut?

When recovering from an injury or surgery, it is imperative to keep a keen eye on the wound to avoid any possible infections. The risks of an infection are increased by medications, certain chronic conditions, poor hygiene, and psychological factors.

Signs Of An Infected Cut

Even after all the necessary precautions have been taken to prevent an infection, other factors beyond control could cause you to develop an infection.

Microorganisms such as bacteria may get into the cut, multiply, and destroy the tissues of your skin, causing systematic illness and a slow healing process. If you happen to identify these signs, seek medical advice as soon as possible to get your infected wound treated.

  1. Feelings of Malaise. This is a common non-specific symptom of localized systemic infection. Malaise is a feeling or fatigue and lack of energy that makes you sleep more than usual and unable to complete normal activities.
    While this is a feeling that is often linked to recovery from surgery, there is a huge difference between what is a sign of infection and a normal surgical recovery process. People recovering from surgery without infection feel better with time while those who have contracted an infection feel better and then suddenly begin feeling exhausted.
  2. Running a Fever. This can decrease your appetite and cause you to have headaches. Running a fever of about a hundred degrees Fahrenheit or less is following surgery.
    If temperatures go beyond this range, say 101 degrees Fahrenheit, it may be indicative of an infection. If that occurs, consult your physician immediately. Always remember that is the fever results from an open or chronic cut, antiseptic in the form of impregnated dressings that contain silver or honey can of great help.
  3. Fluid Drainage. Having some fluid drainage from a cut can be quite normal. Expect slightly yellow-colored or clear fluid to drain from a cut wound. If the fluid is green and cloudy or has a foul smell, this could indicate some sort of infection.
    You can manage a healthy wound drainage using absorbent dressings such as hydrocolloids or using a negative pressure therapy. You can contact your medical practitioners to find out what kind of supplies you will need to treat your infected wound.
  4. Increased or Continual pain. While pain is a normal thing after a cut or surgery, it should subside as the body begins to heal. Prescriptions can help, but with time, you should be able to stop using them comfortably.
    To avoid unwarranted pain, follow the wound care directions of your doctor and avoid strenuous activities. In case you continue experiencing pain, or your pain increases suddenly, it could be an indication of an infection. Try treating the infection and if that is difficult, consult your doctor for medical assistance.
  5. Swelling and Redness. Some redness at the wound site is normal, but this should subside with time. Nonetheless, if your cut or wound continues to exhibit radiating streaks called lymphangitis, this is a sign that an infection has occurred.
    Some swelling is also to be expected, but this should decrease with time. If the swelling does not subside during the initial stages of the healing process, your cut could be infected.
  6. Hot incision site. After an incision has taken place on a wound, your body sends blood cells to the site to fight the infection. In return, this may make the cut or incision to feel warm. However, if the hotness persists, it may lead to other symptoms of infection.

Tips for Treating Infected Cuts

Most small cuts heal in a few days if they are not infected. Any tiny scratch can allow viruses, bacteria, and parasites to get into your body causing serious and life-threatening infection.

Take prescribed antibiotics

Often, the first sign of an infection is pain which gets with as day goes by. Later, the infected wound becomes warm, red, and swollen, and may carry some pus in it.

  • Step 1: Carefully examine the infected cut. Look for boils or pustules that are warm, red, swollen and painful. These kinds of symptoms could indicate methicillin-resistant Staphylococcus aureus (MRSA), a skin infection which can spread to others.
  • Step 2: Measure your temperature with a thermometer. Fever, which is often an oral temperature above 101 degrees Fahrenheit indicates a serious wound infection.
  • Step 3: Drain the wound or cover the opening using a sterile bandage using your hands. Do not disinfect, pop, or drain the wound yourself as the infection could spread, and if it’s as a result of MRSA, it can be difficult to treat.
  • Step 4: Contact a health practitioner for instructions. Depending on the age, temperature, symptoms, and general health, and the location and depth of a cut, you might be advised to continue treating it at home or in a clinic
  • Step 5: Follow the instructions of the health care professional. If the wound is not deep and you don’t have a fever or symptoms of MRSA infection, you can apply antibiotic cream. You can also apply warm and wet compresses a number of times until the cut heals. Nonetheless, if you suspect a MRSA infection, you may need to undertake an incision and drainage under conditions that are sterile. For an incision and drainage, a medical practitioner will numb and clean the infected cut. To drain out the pus, they will use a sterile scalpel to cut the infected wound to create a path for the pus to flow. Once the drainage has been cleaned from the skin, a sterile dressing will be placed over the cut to protect it from any foreign objects. The doctor may also prescribe some antibiotics to get rid of the infection; however, the incision and drainage procedure is sufficient.
  • Step 6: It is advisable to take all the prescribed antibiotics according to the instructions given by the physicians. If you stop taking the medication without completing the full course, you will not be able to eliminate the bacteria, and they could become resistant to the medication, making it difficult to treat the infection.
  • Step 7: In case there are no improvements within 48 hours of antibiotic treatment, you may be required to change your medication or drain the infection once more.

Warnings – An infection on your skin can spread to your joints and bones. Individuals with certain conditions such as arthritis, diabetes, hemophilia, and sickle cell anemia are at a higher risk of contracting infection compared to people who are healthy.

Tips For Treating Infected Cuts

Additional tips – To prevent a wound or a cut from getting infected, clean the area with water and soap once you have controlled your bleeding. After that, apply a sterile dressing to keep out bacteria. If you are not able to clean the cut thoroughly, contact your physician for medical assistance.

Avoid cleaning a wound or cut with peroxide, iodine or alcohol as these could damage the delicate tissues. However, some of these options, the use of alcohol, for instance, are suitable for an outdoor situation where accessing medical help could be problematic.
Winter Backpacking: What You Need to Know Before You Go

0
Winter backpacking

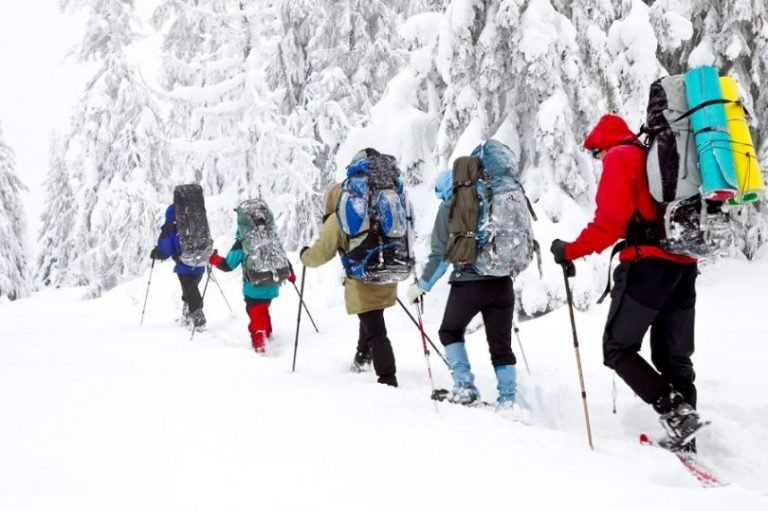
Winter is possibly one of the most beautiful times to camp and hike. The snow seems to cover everything and make it seem so clean and pure. There are very few people who will be around, so you often have the area all to yourself. It is so quiet and peaceful.

It is almost perfect if you can beat the cold. However, winter backpacking needs an entirely different skill set than summer backpacking and should be taken seriously. All of the information you need could possibly save your life, so do your research and know as much information as possible before leaving on your trip.

Before You Leave

Before you leave for the trip there are some things you need to have prepared and keep an eye on. Again, all of these tips should be considered and used. Backpacking in freezing temperatures is fun and dangerous all at the same time.

Travel with a group

As long as you are prepared and armed with knowledge, you will make memories to last a lifetime.

  • Proper clothing: Backpacking in the cold and most likely snow, requires layers of clothing to make sure that your body heat does not escape too quickly. Traditionally, you need 3 layers of clothing: base layer, middle layer, top layer.
    Base layers are your underclothes. It is suggested to avoid cotton material if possible because it does not wick away moisture like other materials. Depending on what conditions you will be experiencing, you may also want an extra layer of underclothes, such as, “long johns”.
    These are basically a semi-tight fitting set that goes underneath your pants and shirt. Middle layers of clothing are your regular clothing; pants and shirt.
    Most backpackers wear microfleece or flannel shirts. This layer also includes your jacket.
    Make sure and choose a jacket that is designed to keep in much of your warmth. Goose down jackets are a great choice, but keep them as dry as possible. They are not as effective and lose their loft when wet. The top layer of clothing is what will keep you dry and out of the wind.
    Choose products that are windproof/waterproof/and breathable.
  • Accessories and shoes: Boots will be extremely important in snowy conditions. Traditional hiking boots may not be enough for the elements you will be encountering. Winter snow boots or mountaineering boots may better serve your purpose because they are designed to keep in the heat and keep out the moisture.
    You will want to use your best accessorizing skills in the snowy wilderness. Gloves, hats, gaiters, goggles, socks, and gloves are all essential in keeping you safe.
    The temperatures will most likely be below freezing during a winter backpacking adventure and it is imperative that you protect every inch of your body from the cold.
  • Travel with a group: Winter backpacking can be dangerous. It is always best to travel with other backpackers that specialize in different areas.
    Someone that has a different skill set than you, will complement you and give you expertise on the trail.
  • Road conditions: Check trail and road conditions before you leave the house. If the trail is impassable or needs to be rerouted, you could lose valuable time on the trail.
    Knowing these conditions before you go will allow you to make adjustments before you arrive at the problem.
  • Avalanche conditions: You should always be aware of your surroundings. If you are camping in the snowy mountains you need to study avalanche prone areas and stay away from steep inclines that could pose a problem.
    There are websites that keep you updated regularly, but nothing will compare to being in the area and assessing it for yourself. Make sure someone in your group specializes in avalanche conditions.
  • Always be prepared: Anything can occur before and during your trip. Make sure and carry cash and extra food and clothes in case of an emergency.
    If you are stuck on the trail for an extra time, you will need food and clothes to help you survive. Cash is always handy for emergencies.
  • Leave the details: Probably one of the most important tips is to leave a detailed plan behind with friends or family. Map out your hike and the approximate times you will be there and how long you will staying in one place.
    This ensures that if a problem arises or you are gone too long, they will know when and where to look for you.

Winter Backpacking Gear List

Along with all of the previous tips, there is special gear designed for winter backpacking or that will serve you well on your trip. These are some of the best products on the market to help you get started.

Sled

The sleds are often used to carry the gear that is needed without putting extra pressure on your back. Sleds are fairly easy to get around and make toting your gear a breeze.

Winter backpacking sled

When deciding on the perfect product for you and your trip, consider the weight, the length and the depth of the sled. The deeper the sled the less likely it is to tip over with your gear. If the sled is too long, it may not be appropriate for thick wooded areas.

The Pelican Snow Trek 60 Gear Sled is a good example of a gear sled. There are other options on the market, but the Pelican is very well designed. It is made from durable polyethylene to make sure that it lasts. It is also 59” long and 11” deep, making it less likely to topple over while hiking. They have also made this sled versatile. It can be pulled by hand, ATV or snowmobile with ease.

Backpack

We have already discussed the extra gear that comes with winter backpacking. A regular hiking backpack may not have enough capacity. You will be most satisfied with a large capacity pack.

If you do not wish to invest in another backpack for winter hiking alone, make sure and invest in extra waterproof, durable bags to pack your gear. You will be able to cinch these down on the sled to carry multiple bags.

GoLite Pinnacle backpack

The GoLite Pinnacle backpack comes highly recommended by fellow winter backpackers. While it can be carried on the sled, it is designed to be carried on your back. Therefore, it is light, 1.7 pounds, has a capacity of 3700 cubic inches, and has great weight distribution to your hips.

Sleeping Bags/Pads/Liners

Sleeping bags, sleeping pads, and sleeping liners are all designed to work together to keep you warm. They allow as much heat as possible to stay inside the bag, rather than escaping. When shopping for a sleeping bag, you want to first decide what the coldest temperature you expect to encounter is.

The next step is to look for a bag that has a temperature rating 10-15 degrees BELOW that. For example, if you expect to encounter 15-degree temperatures while camping, you will need to find a bag that has a temperature rating of 0 degrees. That will ensure that the bag is designed to keep you from getting cold on your trip.

You will also need to search for bags that have a draft collar to keep the cold out of your bag and are insulated with down. (If you are allergic to down feathers, there are synthetic choices.) Down is the favorite choice among backpackers because of its warmth-to-weight ratio. It will keep you warm and does not weigh down your pack.

Teton 0-degree mummy sleeping bag

Sleeping pads are designed to serve two purposes; they give cushion and provide extra insulation. Most winter backpackers suggest using two sleeping pads. The first one is to go on the ground and the second on top. This provides extra protection from the ground and the cold.

The most important thing to remember is the R value. For winter camping, you will need a pad with an R-value of 5 or higher. This ensures that the heat from your body will not escape easily.

Finally, sleeping liners go over the top of your sleeping bag. This gives your bag an extra layer all around the outside to keep in your warmth. Using a sleeping bag liner can give you an extra 15 degrees of heat inside your bag. Depending on your condition and sleeping bag, this could be the difference in surviving and being warm.

Teton makes a 0-degree mummy sleeping bag that gets great reviews from customers. Buyers do verify that the bags keeps someone warm even on the coldest nights.

Klymit is the way to go for a sleeping pad. They have great reviews and are affordable. For a sleeping bag liner that is made for extra warmth, check out the line of Thermolite sleeping bag liners.

Lighting

When camping in the winter, the nights are very long and the days are short. You will need to make sure and have ample lighting to be able to function after dark. Headlamps are one of the most popular choices for lighting during camping.

FlashLight and knife

They offer a hands-free and versatile option while working around camp. The most important thing to consider is the batteries. Lithium batteries will perform best in cold conditions, but make sure your device will be able to handle them.

Lithium can overpower some devices. Also, in an effort to keep your batteries warm, you can slide them in your sleeping bag to help keep them warm. Always, always, always bring extra batteries.

There are thousands of choices for a good headlamp. Choose one that the batteries can be replaced and fits in your budget.

Communication

Communication can be the difference between a life and death situation. If a problem arises, you must be able to get in contact with someone to let them know where you are. Two-way radios are a great example of excellent communication.

Choose your two way radio

They allow all members of the group to stay in touch. Many two-way radios also allow group conversations so that more than two radios can connect at the same time.

Xouxun makes a wonderful multi-function radio. It offers multiple channels and options for every situation. This would be a perfect choice for winter camping.

Shelter

Perhaps the most important thing that you need while camping in the winter and cold is a proper shelter.

Winter backpacking shelter

There are several types of shelter that appropriate for winter backpacking excursions, but you must choose the right one for you and your group.

  • Tents: Companies have designed tents that are called “4 season” or “mountaineering” tents. These are made to withstand a variety of weather conditions, including snowy and windy conditions.
    Each company and each tent have a variety of differences and similarities. You must consider the time it will take to set up so that you can arrive at your destination in plenty of time to set up your tent. You must also make sure that it is sturdy enough to withstand the elements.
    You do not want your shelter to collapse. Tip: Do not set up a tent on loose snow. It will melt and make you uncomfortable. Pack the snow down first. It will be less likely to melt away.
  • Bivouac Sack/Bivy Sack: This is less of a shelter and more of an over bag for your sleeping bag. The sack is designed to keep your sleeping bag dry and has been said to add 10-15 degrees to the bag’s heat.
    There is nowhere to store or keep your gear, so make sure you have waterproof arrangements to keep your gear dry.
  • Snow Caves: There are several forms of a snow cave: Igloos, trenches, or caves. They are all basically the same. You can create a shelter by digging or packing snow into a shelter.
    These take skill and should not be made if someone in the group does not know what to do. If a group member is experienced in making snow shelters, these can be quite effective and warm and can be used in emergencies as well. Make sure and set aside enough time and get to camp early to make your shelter before dark.

All of these shelters are designed to keep you as safe and as warm as possible. You may find that you prefer one over the other.

Tents are a guarantee that you will have shelter and protection. Bivvy sacks are appropriate for the ultra-lite backpacker and snow shelters should only be made by experienced winter hikers.

Health Concerns/Emergencies

There are a number of possible problems that can occur in freezing temperatures. It is important to be educated and well researched in each of these problems.

Health Concerns

Know what the signs and symptoms are so that they can be caught early to avoid any situation becoming more dangerous or deadly.

  • Hypothermia is defined as a potentially dangerous drop in body temperature. Hypothermia is setting in when the body temperature drops below 95 degrees. In more extreme cases, the body temperature can drop below 82. Anytime someone is suffering from hypothermia, you should call 911.
    • This condition is quite common when out in the cold for long periods of time. The signs include: Shivering, Slurred-speech, Lethargy
    • Hypothermia is easily prevented. Drink plenty of water, make sure and eat appropriately and most importantly, stay dry and warm.
    • If the situation arises that hypothermia begins to set in, you will be able to treat mild cases while on the trail. Drink warm liquids to warm your body’s core. If your clothing is wet, change into dry ones immediately. Also, double up in a sleeping bag. It will allow the cold group member to warm up faster. In extreme cases, or when the person is not warming up, medical personnel need to be called to evacuate the hypothermic person. If your body temperature drops too low for too long, it can be fatal.
  • Frostbite occurs when body tissue, skin, freezes because of the lack of blood flow.
    • Frostbite has different levels of severity and is also caused by prolonged exposure to the wind and cold.
    • Sign of frostbite includes numbness, shivering, red color and then white and then to purple, tingling.
    • Frostbite, like hypothermia, can be avoided in most cases. Know your body and pay attention to any signs or symptoms of frostbite. Stay covered, dry and as warm as possible. Frostbite will affect the extremities first; fingers, toes, nose and ears.
    • In mild cases, there are many home remedies that can be put into motion. Place the cold part of the body against warm areas to slowly heat them up. Use warm water, not hot, to slowly heat the affected area. Do not rub or try to heat the tissue quickly. This will often do more harm than good.
    • In extreme cases, the affected area may have to be amputated. Always call medical personnel if you believe someone in the group has frostbite.
  • Dehydration is when your body loses more fluid than it takes in. This is not only a winter backpacking issue and should always be kept in mind.
    • The most common sign of dehydration is dark urine. If your urine is dark you need to begin taking in more water. If it is light or pale, you are doing a good job at balancing intake and output of fluids.
    • If dehydration continues, the person’s heart rate increases, dry mouth occurs, dizziness, muscle cramps and confusion all may happen.
    • When backpacking in the winter, be aware of how to sterilize snow and make sure your water does not freeze. Always avoid dehydration rather than treating it.

Stay Warm, Happy Trails!

Winter backpacking is considered one of the most beautiful sceneries in the world. The snow and cold make everything seem more serene and peaceful.

Stay warm and happy trail

If you are a novice, make sure and go with a group. If you are experienced, use your skills to teach someone else. Always remember to take care of one another and enjoy your experience!

Homemade Insect Repellent: Instructions For a Natural and Effective Solution

0
Homemade Insect Repellent

Summer can be such a wonderful time of year. The sun, greenery, and animals all come out to play, and so do we. We open the shutters, hang out beside bonfires, go on picnics, enjoy camping, and relax on our front deck chairs.

Unfortunately, we are not alone. Mosquitoes also love this time of year and their constant buzzing can be a real downer. Their bites are itchy and if we’re honest, just plain horrible. There’s nothing worse than being covered in bug bites and scratching yourself to sleep every night. To avoid this and enjoy our summer, we all use insect repellent.

Personally, I like to make my own mixes from home. This not only saves money (those small bottles can be expensive!) but is also friendlier to sensitive skin, reduces chemicals (especially important if you have kids) and generally smells quite nice. If you’re keen to learn how to make your own homemade insect repellent for this summer, read on.

The process of making the repellents at home is quite simple and there are a variety of different mixes you can use that all have the same effect – no bug bites. The main reason to make your own repellent is to avoid the rashes and other discomforts using nasty chemicals in commercial repellents can cause.

Make your Homemade Insect Repellent

That being said, often homemade recipes call for some pretty strong essential oils, so you’d be best applying the repellents to your shirt and trouser sleeves rather than onto your skin. This is especially important for pregnant or lactating women, children, and the elderly.

If done correctly, homemade insect repellent is a cheap affordable way to create a safe natural substance that keeps the bugs away. In addition to substance repellents, there are also environmental repellents you can use to make your home a mosquito free area. Sound like a dream?

To learn how to create your own natural insect repellent and enjoy summer this year, take a look at our recipes and tips below.

Our Best Insect Repellent Recipes

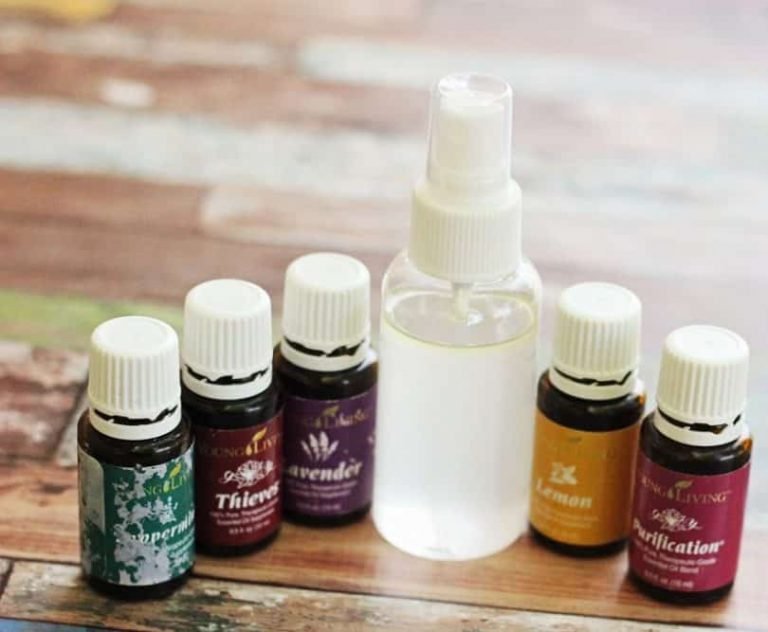
*NOTE: All of the oils mentioned below are 100% pure essential oils. Usually, these are able to be purchased from a pharmacy or health store. Their initial price tag may seem expensive, but these bottles can last for many years as you only need a little bit of each to create a great insect repellent.

Natural Insect repellent

They end up being a very cost-effective option in the long run. Plus, they smell great! It’ll feel like you’re wearing perfume or cologne instead of repellent, and who doesn’t love smelling good?

Wood And Flowers Recipe

To create this spray, mix the following liquids in a spritzer bottle with a teaspoon and apply the resulting solution sparingly:

  • 2Tbsp Vodka
  • 2Tbsp Jojoba oil
  • 55 drops Lemon eucalyptus oil (not for use on children less than 3 years old)
  • 15 drops cedarwood oil
  • 15 drops lavender oil (Lavandula angustifolia is the best choice if your pharmacy has a wide range of lavender oils)
  • 15 drops rosemary oil

This beautiful concoction is great for in home use if you’re fond of a natural smell. Spray along your tables and on the edges of your meeting areas to deter the mosquitoes from your presence. Of course, this can also be applied as a regular insect repellent onto your clothing as well.

Roses Galore

This is a wonderful solution to the mozzie problem that only requires you to apply a little bit of Rose Geranium oil to the four sleeves of your clothes and your neckline. It’ll keep the bugs away for a whole day! Do be careful only to use a little bit, though. I tried this approach on a recent trip to Fiji and it worked wonderfully.

I had fewer bug bites (and by that I mean none) than the other travelers who used commercial grade repellent. Unfortunately, as well as repelling the bugs I also repelled my boyfriend who couldn’t stand the smell.

So be sure to take a whiff of the oil before purchasing it in store. Some people love the smell of Rose Geranium oil and others aren’t big fans. If it’s to your taste, then this can make a great perfume cross insect repellent option. And it’s so simple!

Rose Geranium oil


A small bottle will last you for years as you literally only need a couple of drops each day to keep you bite free and enjoying yourself. Definitely one of my personal favorite options, the Rose oil really works!

Herb Based Spray

This is more of a tincture than a random spray, but the extra prep time may be worth it for the lovely smell and skin kindness factors of the repellent.

Ingredients:

  • Distilled water
  • Rubbing alcohol
  • 1tbsp each of dried spearmint, lemongrass, citronella and lavender
  • 2 cloves

Instructions:

  1. Boil 1 cup of water and add the dried herbs and the cloves to the cup.
  2. Stir well and then cover before leaving to cool (covering it ensures the volatile oils do not evaporate away)
  3. Pour the mixture through a sieve to strain out the herbs and cloves, then mix the watery result with the rubbing alcohol.
  4. Place tincture in a spray bottle and use as desired.

Superior Strength Repellent

To create this potent mix you’ll need:

  • 32 ounces of apple cider vinegar
  • 2tbsp each of dried sage, rosemary, lavender, thyme, and mint
  • 1 glass jar with an airtight lid

This repellent doesn’t smell the best but it sure does its job. Touted as being used by thieves during the Black plague to keep the flies and pests away, this is a heavy duty recipe. Fortunately, it doesn’t smell so bad after the mixture has dried and it is a very inexpensive repellent option.

We’d recommend this for anyone going on outdoor adventures. It requires several weeks to make, so you may want to consider making a large batch and storing it someplace safe for use when you need it.

Day 1: Mix the vinegar and dried herbs in your jar and seal it tightly.

Day 2 – Day 21: Shake the jar well once every day. (Pro tip: If you put the jar on the counter or in a spot where it’s clearly visible you’ll be more likely to remember to do this).

Day 22: Pour the mixture through a Sieve to strain out the herbs. Store the liquid product in a small bottle in your fridge or in any other cool dark place.

To use: When required, mix the repellent 50/50 with water in a spray bottle and spray onto your clothes. This provides fantastic bug protection!

The Island Solution

A study by the Malaria Research Centre in 1995 found that neem oil mixed with coconut oil can be a very effective mosquito repellent. It is important to dilute the neem oil with coconut oil instead of water because when mixed with water the neem oil denatures (reacts) and loses its repellent properties.

To use this mixture just get your hands on some pure neem oil and add a couple of drops to around four tablespoons of coconut oil, then rub it liberally over your skin – especially around your wrists and ankles.

Dilute the neem oil with coconut oil

The coconut oil is nice and hydrating on your skin, making for a lovely moisturizing repellent in dry regions of the world. In terms of effectiveness, the study previously mentioned was conducted in India and found that the neem oil + coconut oil mix provided effective protection from:

  • Anophelines (96 – 100% protection)
  • Aedes (85%)
  • Culex spp. (61 – 94%)
  • Armigeres (35%)

You don’t have to be a science buff to know that some of the worst mosquitoes in America and around the world are in the Aedes category. Both The Asian Tiger Mosquito (Aedes albotopictus) and the Yellow Fever Mosquito (Aedes aegypti) are protected against by this mixture.

The Malaria Mosquito (Anopheles gambiae) is also protected against, with a pretty high effectiveness! So if you’re looking for superior protection and safety for bush exploration and trips, this might be the right mixture for you.

Protective Jewellery

We love this option because it can last for days and doesn’t require too much effort after the initial product has been created. You’ll need a large locket with tiny holes in it (might be worth searching the local thrift store for this gem) or a piece of relatively thick but soft rope or strong wool.

Protective Jewellery

If you’ve got a locket: Rub some of the dry herbs mentioned in the recipes above vigorously between your hands to release their scent. Then place the herbs along with a couple of drops of vanilla oil into your locket. Feel free to experiment with the different herb varieties to find a smell that is pleasing to you. The locket should last about a week in effectiveness.

If you’ve got some soft rope or strong wool: Prepare any of the solutions mentioned above to double strength, that is, double the amount of herbs and oils while keeping the water levels the same.

This will give you a greater concentration of smell and ensure your jewelry deters mosquitoes for longer. Dip the thread into the mixtures you created till it is well soaked almost all the way through.

Then simply tie it onto your wrists, ankles, and neck to ward off the mozzies for a couple of days per application. Even when it’s dried out, the smell should remain and keep it effective.

Insect Repellent for Your Living Area

Okay, so now you know how to make wonderful insect repellents from home to use on yourself and your family when you’re out and about. But how can you protect your home from mosquitos and make it a fun comfortable environment without mosquitoes over summer?

The answer to home and garden insect repellent is similar to that of making insect repellent to wear on yourself – it’s all about the smell.

The herbs and oils you use in the above recipes give off certain smells that repel mozzies, so what better way of keeping them away from your house than surrounding your house with those same smells?

This is easily done by planting a variety of herbs and flowers in your garden. Some of the more potent and effective varieties are basil, lavender, thyme, mint and citronella. Growing these close to your porch can be especially useful, you may even want to chop parts of them off and place them as flower arrangements in your house!

The bonus of having these plants in your yard is that you’ll never have to go far to find materials to use in your insect repellent concoctions.

Insect Repellent For Your Living Area


Another very easy way to repel mosquitoes is the use of a fan. This method is often underrated and people don’t think much of it until they try it! As well as keeping you cool and impeding the flight of mosquitoes, fans also dissipate the carbon monoxide that you exhale – which is very attractive to the mozzies.

So next time you’re enjoying a hot day out on the porch, try to turn on a fan for some added relief and comfort.

The last way we’ll discuss that you can get rid of mosquitoes yourself is through the environment around them and your house. Have you got old bits of water nestled anywhere? Is an old tire or basin lying in the yard perhaps? These are mosquitoes breeding grounds and could lead to your backyard being swamped by flies and other undesirables all summer.

The best thing to do is get rid of any open water you have lying around in your yard. But what if you have a pond? Well, there’s a solution to that too. Guppies! These lovely little fish feed on mosquito larva so they will keep your pond mosquito free.

In addition, they’ll make your pond more interesting! They reproduce rapidly so you only need to get a couple and before you know it the pond will be filled with colorful little fish.

Now You Can Be Naturally Bug-Free This Summer

With so many bug deterrent options to choose from, including both liquid and environmental homemade repellents, it’ll be easy for you to stay bug-free this summer. All the ingredients listed in our recipes can typically be found at your local supermarket, health store and pharmacy.

Naturally Bug-Free This Summer

They are likely to end up costing a lot less than commercial insect repellents, and help you avoid all those nasty chemicals! For a simple natural option, try these recipes and environmental methods this summer.

Starting a Fire with Sticks: A Comprehensive Guide for Survivalists

0
Starting a fire with sticks

It is undeniable that making a fire in the wilderness is an indispensable survival skill. This skill is reckoned for campers, hikers, and other outdoor enthusiasts. The fire has many purposes among which lies warmth, signaling, cooking and protection from wild animals in close proximity to your resting site.

It is, therefore, important to know how to start a fire in an easy way for wilderness emergencies which may be inevitable.

Starting a fire with sticks is one of the essential tools that one should master in a quest to prepare well for the outings especially in the night.

Starting a fire

In this article, a comprehensive guide is given which assumes no prior knowledge. The guide focuses on the three most popularly used methods which include the hand drill, the fire plow, and the fire bow drill.

These methods basically rely on the science of friction. Also strongly emphasized is the safety of operating with fires. Firstly, let’s inform you about the importance of using sticks in starting a fire.

The Importance of Using Sticks in Starting Fires

There are notably many benefits of following this route of creating fire for your outdoor desires. A few most important ones are bulleted below:

  • Sticks can be made of natural materials found in the wilderness: this makes them reliable and dependable in cases where one has forgotten a matchbox or a lighter.
    It could be frustrating to find out that your camping gear has no fire source, meaning you have to go to the nearest stores for another purchase.
  • Sticks are waterproof and weatherproof: match boxes get wet and cannot be used thereafter unless you dry them provided there’s a hot sun. Sticks work well regardless of the weather conditions.
    Even if it rains, they can produce an enormous amount of friction that is basically used to start a fire.
  • They never get depleted if you are in the forest: you can use dry, sturdy wood to make these sticks. The same cannot be said with matchboxes which can be depleted before your adventure ends.
    The lighters also run out of fluid. Fire accelerants such as gasoline and paraffin also get depleted and to replenish them is costly.
  • They are eco-friendly: no noxious gasses emitted into the surrounding environment because these sticks are naturally crafted with chemical additives. You can buy sticks or simply handcraft your own by making use of a knife.
    Alternatively, you can use a rock to sharpen a stick that can be used to create a substantial friction that will eventually result with an ember to create fire.

These are the advantages over matchboxes and lighters or any other fire sources that are bound to get depleted to your dismay. It requires only a specially taught technique to be able to harness the power of sticks in creating a blazing wildfire.

Using Sticks in Starting Fires

Of foremost importance is the procurement of proper materials needed to commence with the process of making fire. Highlighted below are materials that you need to get going.

Procurement of Materials Needed in Making Wildfire Using Sticks

  • A sturdy and dry stick
  • A sturdy and dry flat wood to be used as a fire board on which you will use the stick to create friction
  • A fire bow and string
  • Dry, fine and flammable tinder such a dry grass, sawdust, wood shavings
  • Kindling
  • Logs and dry sticks to take the fire to the next level

For every method aforementioned in the introduction, different woods may be required. For instance, in a hand drill method, you need a dry wood with extremely low moisture content to make friction easily attainable whereas in a bow drill you need the wood with little moisture so it doesn’t break easily.

The stick dimensions also vary from one method to the other. The bottom line is that you need portable sticks that will not prompt you to put extremely more energy to create friction. Now that you know which materials to secure to start making fire, let’s delve into the core techniques.

Materials Needed in Making Wildfire Using Sticks

Remember that it remains your responsibility to master all these techniques as described below. You never know that which one bears quick success when you’re critically faced with an emergency.

These are self-reliant survival skills that anyone preparing upfront for an outdoor excursion should be acquainted with. A method such as a hand drill requires two people interchangeably twirling the stick otherwise one can succumb to the injuries of the hand because the enormous pressure is uncompromisingly needed.

Please note that the materials mentioned above should be staged before using the sticks to create an ember. Keep the tinder closer as well the kindling and the logs nearby. Also noteworthy is the digging of the pit wherein you are going to put the fire.

Rocks should be close as well in order to surround the fire in a bid to prevent it from burning outwards whereby it can end up causing unwanted dangerous forest fires. A fire extinguisher, a bucket of water or sand should be available nearby in cases where you need to extinguish the fire for safety.

How to Start A Fire Using Sticks

As aforementioned, a hand drill, fire plow, and fire bow drill methods are described hereunder.

A hand drill

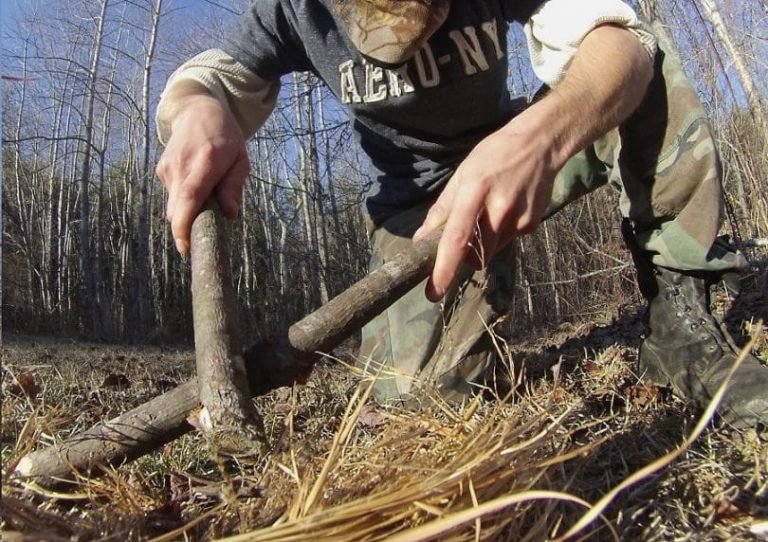
With this method, you will be mirroring the way you would drill a metal. A flat,sturdy and dry wood is needed as well as a stick that is sharpened at its tip. The other side of the stick is where your hands will be holding to rotate it vigorously. The stick should be perpendicular at an angle of 90 degrees to the fire board.

To prevent the stick moving around the fire board without a focal point, it is reckoned you create a notch where you can focus the friction on.

Then rub your hands on the stick making it rotate while drilling vigorously in the notch. A second notch is recommended for the wood to get more oxygen, which will enable fast creation of an ember.

Note that once you start there should not pause along the way. You will forfeit the amount of pressure applied before, even if you pause for a minute of few seconds. A substantial and continuous downward pressure is needed to successfully create a massive amount of friction.

As introduced earlier, this method basically requires two people to exchange the duties of twirling the stick quickly for one to rest sufficiently. It is also recommended that you wear hand gloves to avoid swelling of your hands because more pressure is mandatory if you want to be successful to start a fire with a hand drill.

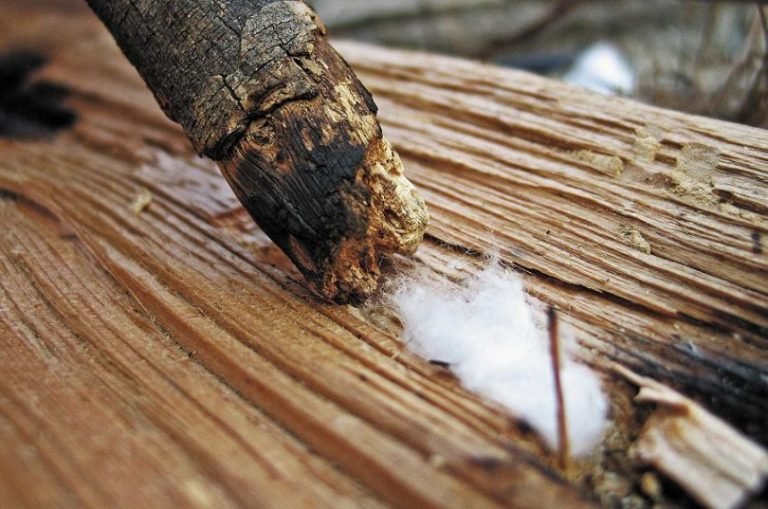
To prove that you have applied more energy and have created a massive amount of friction, a smoke will show up which will eventually come with an ember. Quickly take that ember to the tinder prepared and blow some air into it until a flame occurs.

Then subsequently put kindling to boost the fire and ultimately put larger sticks for a long-lasting roaring wildfire, but do not forget to contain it in a dug pit.

If the method fails or takes longer it might be that the downward pressure or the twirling action is insufficient. Transfer that responsibility to someone else or keep trying with much more efforts the second round. It should work just fine provided you have followed the correct procedure and have procured proper materials beforehand.

A fire bow drill

This is also the most popular method of starting a fire using sticks. The main difference with this method is that you can use a single hand, unlike in a hand drill which requires both hands. The other hand in this method can balance the stick to keep it intact in place because if it wobbles the friction point will be affected.

Unlike in a hand drill method, you need a wood with little moisture in this case. This wood should be C-shaped like a bow – that’s where the name bow-drill method comes from. To make this C-shaped it takes special skills as well.

You can use the knife you brought to achieve that in the forest, although it isn’t easy like a hand drill that basically needed a flat fire board and a straight stick. Nonetheless, the fruits of making this C-shaped bow are many for your wilderness survival.

A string is also needed which can be, for example, your shoestring or twine. Subsequently, fasten the string on either side of your C-shaped fire bow. Then use a thick stick which you will twirl using the string attached to the ends of the bow. A thick stick makes it easy to grab with that string.

While twirling, the other hand will be stabilizing the block that is put on top of the drill to keep it fixed. In most cases, that block can also cause unwanted friction. It is therefore recommended that you smear a lubricant to prevent that occurrence.

Then follow the procedure of twirling by moving the bow backward and forward the way you would do when you perform sawing. The fire drill, the stick used, will be rubbed against the fireboard and eventually an ember will be produced by the friction that has built up.

Make sure that you have tinder ready and nearby to quickly transfer the ember to it. The other steps follow as described, but before that you should have a pit set with kindling and larger sticks.

The advantage of the fire bow drill is that it takes only a single hand to achieve your purpose. You can quickly exchange your hands without the need of a second person. This helps prevent sore hands that are often witnessed in a hand drill method when you do it alone unless if gloves are used.

Fire Plow

This is our last, popular method described in this article. We are however not intending to be all-inclusive of all the methods used in starting wildfires with sticks. Many users in many cultural groups may be well-versed with many methods that we have never come across.

However, we guarantee you that the ones we have mentioned in this case are the most popular and are deemed critical survival skills that everyone should be knowledgeable of.

The fire plow also subscribes to the science of friction in producing ember. Unlike the previously described methods, this method requires a movement of the stick backward and forward to create friction.

This is achieved through the creation of a groove (sliding) on the fireboard. The stick is however not supposed to be perpendicular at an angle of 90 degrees as in the other methods. It should be at an angle of 45 degrees.

It has proven that sliding the stick vigorously and intensively for a considerably long period of time produces an ember. The more pressure applied the quicker the friction. Quickly transfer the ember produced to your preset tinder and follow steps in making a roaring fire.

As described above, it is apparent that friction plays an indispensable role in starting wildfires using sticks.

Also, in-house fires can be started using these methods. It happens that matchboxes or lighters can be depleted in households. Sticks, therefore, remain the reliable and dependable fire producing sources.

Important procedures based on the methods described above:

  • Secure proper materials such as dry sticks, flammable tinder, dry kindling and dry woods.
  • Dig a pit wherein you will prepare your fire. Set up your tinder in it wherein you will put the produced ember.
  • Use either of the methods to create an enormous amount of friction.
  • The take the ember to the nearby dry and fine tinder and then kindling
  • Add more wood to help make a blazing fire

Important Safety Tips

It is equally important that you take into serious account the safety precautionary measures of operating fires in general. Statistics have reported heartbreaking news whereby people have burned to death or shelters have been destroyed by unattended fires. That being said, you must make a point that you attend the fire at all times. Children should be kept clear of the fire pit.

Also noteworthy is the distance between the flammable shelter and materials. It is recommended you make fire at least 6 feet from your shelter. During strong winds, the sparks can ignite a fire on flammable materials and even your clothes that you are wearing.

Wild fire starting safety

It is also important that you avoid making huge fires during windy conditions. That fire can expand more especially is made in the vicinity of hanging dry leaves of trees or dry grass. Rocks are required to contain the fire within the dug pit.

If you are going to spend more than a day outdoors, make a point that you extinguish the fire before you sleep. Use the fire extinguisher or pour water on it to completely extinguish it. Sand can also help in extinguishing the fire. The same procedure of starting that fire can be repeated the following day.

Please ascertain with the governmental rules of your camping site if wildfires are allowed to avoid getting yourself into trouble. Certain places have restrictions more especially if they are nearby farms. Every method has its cons and pros, although cons are infinitesimally small if the user is extra careful.

To sum up, there are basically three popular methods that help one start fires using sticks. As long as you can master the basic techniques of executing the methods you will never go wrong. Making fires will then be an easy task.

However, you should take cognizance of risks associated with creating and operating fires in the wild, particularly where weather conditions fluctuate enormously. Otherwise, you will regret having started a fire in the first place.

Starting a fire safety

All lies in your hands to ensure your safety and that of your co-survivalists. To start a fire with sticks bears more advantages than using arguably modern ways of matchboxes and lighters.

How to Sharpen a Knife with a Stone: Keeping the Edge Sharp!

0
Sharpen a knife with a stone

When you are in a survival situation, we can all agree a knife in hand is much better than none. But there is still another thing we all need to agree on – a dull knife (even when it is the best knife in existence) will not be of any help since it wouldn’t hack, chop, slice, or cut. If you happen to find yourself in a survival situation, you will need to rely on a knife. And though you are better off with a blunt knife than no tool at all, utilizing a dull knife will be very frustrating.

If you are fortunate, you might have found it useful to bring a sharpening device with you before finding yourself stuck in the wilderness. In such a case, it will not be of much help if you do not know how to sharpen a knife with a stone. The process of honing your survival knife, pocket knife, or hunting knife’s edge is a relatively easy process. Even so, there is so much that actually goes into honing your knife. For instance, different kinds of steel and grinds require different grits and honing angles.

You will also need to know what kind of sharpener is suitable for your knife. The filed or Bushcraft knives will likely require a pocket sharpener as you will have these tools in the field.

Sharpening your knife

Having the right kind of whetstone is essential when you are out hiking or camping. Getting the best whetstone can be difficult, and this is why it’s important to know the features and tools to look out for.

If you find it hard to differentiate between a Saber and a Flat Grind, an oil stone and a water stone, an Arkansas stone and an India Stone, then keep reading and everything will be explained in detail.

Whetstone Basics

The whetstones are divided into various groups made up of stones which are naturally-occurring and manmade. These include stones such as the Arkansas Oil, Water Stones, and the Japanese Stone. There are also manmade stones such as the silicon carbide (Indian Stones) and the aluminum oxide (Crystalon).

Both the manmade and natural whetstones are classified as either oil or water stones, implying that they can be used with either oil or water as their lubricant.

Whetstone Basics

Additionally, there are other kinds of manmade whetstones like the ceramic and the diamond ones which can be used with or without lubrication. Both the manmade and natural whetstones can be found with different grits. The finer grit is less abrasive while the coarser one is more abrasive.

The main reason as to why you need to know and understand these aspects is that different knives with different kinds of blade grinds need sharpening at varying angles so as to achieve the right type of edge.

In addition to that, there are other essential terminologies about survival knife that you would find helpful. For that reason, we can begin by defining a number of terminologies.

Blade Grind 101

  • Spine: The spine is the widest cross-section of a knife blade
  • Hollow ground: This is a common grind which involves the removal of a convex hollow from both ends of the blade. A hollow ground creates a sharp edge but being very thin, its edge is vulnerable to damage compared to other grinds.
    This kind of grind is not suited for heavy cuttings or chopping of hard materials. It is utilized extensively in knives that are mass-produced.
  • Flat grind: With this grind, the blade tapers all the way from its pin to the edge on both sides of the blade. A lot of material is removed when creating this grind, making it difficult to grind.
    Thus, these kinds of grind limit their commercial use as they sacrifice the durability of edges for sharpness.
  • Saber ground: This is similar to the flat ground except that its bevel begins at the center of the blade and not the spine. The saber ground produces a lasting edge that offsets some cutting ability.
  • Chisel ground: This kind of ground is similar to that of a chisel where one side is ground while the other is flat to the spine.
    These kinds of knives tend to be sharper compared to the typical double beveled culinary knife. Knives that are chisel ground can be found in right or left handed varieties, depending on the side that is ground.
  • Convex ground: Instead of narrowing in a straight line to the edge, its taper is curved, although in a manner opposite to the hollow ground. This kind of shape keeps so much metal behind the blade making for sturdier edge and allowing for a good amount of sharpness.
    Since it is used in axes, this one can also be referred to as an axe grind. As the taper angle is constantly changing, this grind requires some skill to reproduce on the flat stone. Compared to other blades, the convex types are made from thicker stock.

It is possible for you to combine grinds or create different variations.

For instance, some blades are flat ground for most of the blade but convex towards the edge.

Blade Steel Grinding Tips

Different Rockwell’s Hardness and different blades will require different grits and different Whetstone materials when sharpening them.

For instance, knives that have soft blades such as the SK-5 and 1095 ranging from fifty to fifty-five RHC are used for heavy, large, knives with Saber Grinds. Although they sharpen quickly, they undergo the greatest damage on their edges and therefore require the highest degree of repair.

Blade SK-5

For that reason, when sharpening a blade with a Saber Grinds manufactured from sober blade steel, begin with the coarse grit and then progress using a finer grit. But remember to leave the edge rough as it will easily dull the next time it’s used.

For knives with hard blades such as the ATS-34, 154-CM, or D2 about 58-63 HRC with Hollow or Flat Grinds, begin with medium grit and continue to a fine grit.

If the knife has a Hollow Grind with thin Primary Bevel, then you may want to polish its cutting edge with an additional fine grit.

Different Kinds of Whetstones

For those who are unfamiliar with these kinds of whetstones, the Japanese Water Stones are excavated in the Japanese mountains.

These stones are made from the ancient metamorphic stone deposits which are made of minute silicate particles suspended in a matrix of clay. As a result, the fine particles these stones tend to produce when sharpening a knife remove the steel easily while polishing the surface of the blade.

On the other hand, the Arkansas Oilstones are found in Arkansas Mountains. These substances come from the ancient deposits of the Novaculite that is believed to be a stone.

Arkansas Oilstones

Novaculite produces fine particles when used for sharpening a knife and has the property of removing and polishing steel as well.

Then, there are manmade stones which are made from silicon carbide impregnated ceramic and powdered, industrial grade diamonds which do not need any kind of lubrication. However, despite the type of whetstone you decide to pick, the technique of sharpening a blade is pretty much the same.

Depending on the kind of whetstone you will be using, you may need to use some water or honing oil as a lubricant.

Then you begin by holding the knife by its handle and putting the edge against the stone at a ten to a thirty-degree angle depending on the Primary Bevel thickness, and then move the cutting edge’s length across the stone while maintaining the angle. After that, turn the blade onto its opposite side and repeat the process.

You should continue performing this action, changing sides until the desired sharpness is attained.

Nonetheless, if you are the type of person who finds it difficult to maintain a consistent angle when honing, there are different kinds of honing aids available on the market to help you make a fine edge on any knife blade.

Sharpening A Knife During A Survival Situation

Create your whetstone

Look for small coarse stones which you will find in rivers. Use a big stone to crush them into pulp. Once they are like mush, get a living wood that is as large as baseball bat handle and strip off the bark. Make the wood wet and rub the pulp around it.

Create your whetstone

The “contraption” can now act as your do-it-yourself whetstone. Draw the edge of the knife across the piece of wood until you attain your desired sharpness. For you to get the most out of the makeshift whetstone, hold the knife perpendicular to the piece of wood the whole time you are sharpening it.

Use a flat rock

If utilized the right way, a smooth, flat, smooth stone, probably a sandstone or any sedimentary rock, will easily hone your survival blade. The quality of your knife’s sharpness may not meet the levels of a blade sharpened by an actual sharpening tool, but since you are in a dire situation, it is more than enough for your needs.

These stones can easily be found in lakes, rivers, streams, ponds, and under waterfalls. The sedimentary rocks are much preferred over any other kind of stones you will find since the small abrasive particles that make up these stones enable a fast cutting process. To sharpen your blade, slide the rock along the sides of the knife until you attain the sharpness you desire.

Using your belt

Stropping is a method used in sharpening the edge of a blade by refining it and smoothening out the tiny burrs found on their edge.

Using your belt

To utilize this technique, you will need a piece of rubber or leather belt. Drag the edge of the blade back and forth on a strop while holding it at a small angle. Be keen to draw the knife away from its cutting edge, so it will not slice or cut the strop while performing this process. If you do not have a leather belt, you can also utilize a boot’s rubber sole as an alternative.

A Step by Step Guide

  • Step 1: When working with a water stone, it is important to submerge the stone in water for about forty-five minutes before you can use it.
    If the porous stone is not entirely saturated, it will dry out when sharpening it, making the blade of the knife catch, giving the edge nicks and dings. Make sure you soak the stone and the stone fixer.
  • Step 2: Put the stone on a towel that is set over a cutting board. It is imperative to keep a vessel of water nearby so you can regularly moisten the stone when sharpening the blade. The stone should be turned with its short side parallel to the counter’s edge.
  • Step 3: Place your knife’s heel on the end of the stone, holding the knife firmly but gently using both hands at a fifteen to a twenty-degree angle. Applying an even pressure, drag the knife slowly over the stone. This should be done with the blade moving towards you, down the stone’s length while moving the knife simultaneously such that the point of contact moves towards the blade’s tip.
  • Step 4: Be confident to maintain the fifteen to twenty angle as you drag the blade across the stone. Apply a firm but gentle pressure. The blade should slide smoothly across the stone as you drag or pull it.
  • Step 5: Every stroke should end with the knife’s tip touching the stone’s bottom. Lift the blade, reset heel at the stone’s tip, and repeat the process.
  • Step 6: As the process is repeated, a thin film of liquid should collect on the blade and on top of the stone. The abrasive liquid is important as it gradually takes off material from the knife’s edge, making it sharp.
  • Step 7: As you keep repeating the strokes, in the end, a tiny burr will be formed on one side of the knife. To check for this burr, place the knife on your thumb and rub it backward.
    If the burr is formed, it should stick slightly on your finger (with fine grit stones, approximately 2000 or above, you will not be able to feel this). This could take about thirty to forty strokes, and it’s an indication that you need to turn the blade to the other side for sharpening.
  • Step 8: To hone the second side, place the blade’s heel near the base of your stone, maintaining the fifteen to a twenty-degree angle as was the case with step three. Push the blade away gently from you while simultaneously dragging it across the stone to its tip.
  • Step 9: Still maintaining the angles mentioned above, the stroke should end with the blade’s tip against the rock’s top edge. Do not forget to moisten the stone between various strokes to prevent it from drying out. Repeat the strokes as many times as possible until you can develop the burr.
  • Step 10: After continued use, the stone will start to develop some groove in it, which could affect its sharpening power. A low-grit fixer can be used to fix this problem.
    Place the stone fixer flat against the stone. Push the fixer to and from, back and forth so as to grind the stone down and create a flat surface.
  • Step 11:  There should be a dedicated towel you can use for this purpose since the stone’s grit will never come out. Once the stone has dried out, you can store the stone wrapped directly using the towels.
  • Step 12: Once you are done with sharpening, hone the blade on a steel so as to its edge in alignment, and test the knife for sharpness. Some recommend the slicing of a paper in half to ascertain whether or not the blade is sharp.

However, one may argue that even a relatively dull blade can pass the paper test, yet fail at other tasks.

The right test would be to simply use your sharpened knife to prep some vegetable. Is there any resistance? Does the blade fly through the onion? Can you chop a tomato thin enough to see through it? If yes, then your knife is good to go!

Wrap Up

As you can see, sharpening a knife is a process that begins with finding the right type of whetstone with the right grit, based on the kind of steel that was used to make the blade and its Rockwell Hardness.

Finding the right stone

Nonetheless, despite the type of stone you decide to select, the key to achieving an excellent cutting edge is to ensure a constant edge bevel angle is maintained throughout the whole sharpening process. That way, you will be able to get the result you will need to survive while you are outdoor camping or hiking.

How to Make a Water Filter: You Never Know When You Will Need It!

0

Water is a chemical compound with multiple properties. In chemical terms, water is referred to as H2O, implying that a water molecule contains two hydrogen atoms with one oxygen atom between the two. Water is indispensable for survival; both humans and animals cannot exist without water. Seventy percent of the human body is made up of water. Nonetheless, despite its significance, water can still wreak havoc if not filtered and purified.

Water that is not purified contains fluoride, chlorine, parasites, dioxins, and other substances that could be harmful to your health. This article will provide a guide on how to make a water filter for your survival in the wilderness. A lot of filtration systems utilize charcoal, carbon, or a blend of substances to help minimize impurities. These systems reduce contaminants in one of these two ways.

First, some impurities are filtered mechanically, implying that they are big enough to be ensnared in the holes of the filters. There are some that attach to the filter media surface.

Natural Water filter

Eventually, the entire surface of the filter media is filled making it impossible for additional contaminants to be absorbed. Or in mechanical filtration, the holes of the filtering media become clogged with impurities such that it is impossible for water to pass through the media effectively.

While it is easy to spot the clogging of mechanical filters (since the rate of flow slows dramatically) it’s difficult to tell when the media is full and requires to be changed.

For that reason, you need to be keen on its operations so you can know when it’s time for you to change the filtering media.

Different Methods of Purification

There are three main methods of water treatment you can use for your emergency or survival needs. These are:

Distillation

This refers to a process of heating water to 100oC, trapping and cooling its water vapors, and collecting the condensed fluid. The contaminants will “accompany” the vapor and end up in a distillate. This is not a new technique as it has been used for centuries. It is imperative to note that modern distillation techniques vary.

Distillation water at home

If you want to treat your water using this method, you need to select a good or advanced equipment for a better result. However, you need to know that this technique is slow compared to other methods such as UV water treatment and reverse osmosis.

Reverse Osmosis

In reverse osmosis, the tap water flows through a semi-permeable surface which ranges from ninety to ninety-nine percent of substances originally present. Initially meant for industrial use, this practice is becoming popular in a domestic application.

Reverse Osmosis at home

In practice, water portions allow for the rejection of particles selected by the polyamide TFC membrane. Although powerful, it is sensitive to chlorine and must, therefore, be protected with carbon filters.

Under normal conditions, it has a lifespan of about five to eight years. This technique is relatively slow and needs a substantial pressure.

UV water purification

This technology is the most efficient and the most cost-effective on the market. It makes it possible for survivalists, homeowners, and business owners to get rid of biological contaminants in the water supply.

UV water purification

This technique of water treatment offers a myriad of advantages over other methods for microbiological contaminants. Additionally, the process leaves no chemicals, produces no by-products, and never changes the properties of the water.

If you have a source of untreated water (wells, lake waters, rainwater, etc.), this would be an ideal process for treating your water.

The primary objective of this technique is to get rid of harmful biological contaminants.

In any of the above techniques, it is important to change your filters on a regular basis. Activated carbon filters can be ineffective is they are poorly maintained.

Worse, they can reject the contaminants previously removed from the water.

Benefits of Water Filtration

There are so many options for drinking water – bottled, tap, alkaline, distilled, etc. For an everyday consumer, it can be quite confusing.

Benefits of Water Filtration

But do not worry – this guide is here to help you! Here are some reasons why filtered water is the right choice for consumption.

Common elements removed from filtered water:

  • Aluminum: Water that is not filtered can result in increased aluminum consumption, an element which is linked to hyperactivity and Alzheimer’s disease
  • Arsenic: Water can contain high levels of arsenic, a strong carcinogen which is associated with an increased risk of cancer
  • Disinfection Byproducts: The DBPs are hazardous substances which result from the disinfection of water with chlorine. These elements are also known to be carcinogenic
  • Fluoride: While this is a component that is commonly linked to improvement in oral health, fluoride can cause a myriad of health complications such as cellular damaging and weakening of the immune system

Do It Yourself Filtering Systems

Paper Towels, Cotton Fabric, and Coffee Filters

All these materials can be used to separate debris from the water. Always remember that it may require various phases to rid the water of debris and contaminants completely, and not all particles are captured in the process.

However, this is a basic technique for filtering water before boiling it. At the minimum, you might make the liquid less cloudy. A coffee filter can be placed upside over any container of your choice.

Coffee Filters Water Filter

Using an O-ring or a rubber band, seal the filter to a container. Pour the water over the filter slowly and carefully. The same may be done with a fabric or paper towel.

Avoid using dyed or colored materials and use white fabric only. For safety reasons, you will need to boil the water once the filtration is over.

Coffee filter and Banana Peel

If there are banana peels within your disposal, you can grind them and put the cut up peels in your coffee filter.

Coffee filter and Banana Peel Water Filter

Place the coffee filter on top of a container and put water into the vessel. The peels will accumulate bacteria and slightly flavor the water. It is still recommended to boil the water after it has been filtered.

The Tree Bark Filter

While some Do-it-yourself filters call for the utilization of the 2-liter plastic bottle for emergency situations, you may not have a bottle at your disposal.

Thankfully, if you carried a blade with you, you can remove the bark of different plants, all of which should have flexible exteriors which you can use to make your homemade water filter.

The Tree Bark Filter

Examples of pliable tree bark options are cedar, basswood, pine, birch, and elm. In this case, you will need to get a piece that is big enough to allow you to make a cone shaped object when the edges are brought together.

Using a piece of string, or roots, or whatever object you can get, tie the cone to prevent it from opening. You will still need activated carbon for your filtration, but you may plug the inside with sand, grass, and gravel to quickly form a rudimentary filter.

Types of Water Filters

In situations of survival, it can be challenging to find drinking water, let alone water that is clean for consumption.

Thankfully, if you have an idea of how to make the water clean, you can convert a potentially toxic fluid into one you can consume safely for your survival.

The Simple Sand Water Filter

There are numerous techniques for water filtration, all of which can be effective if done the right way.

The more techniques you know for water filtration using locally available materials, the better off you are for any survival or emergency situation.

The Simple Sand Water Filter

The following steps are essential when it comes to making a simple sand water filter to help you survive while you are out hiking or camping.

  • Step 1. To begin with, you will require a container. If you can get a large empty container, it would be a great equipment to use. Punch five to ten holes in the container’s bottom.
    A huge plastic bottle can also be used. Cut off the bottle’s end in an even manner. If you do not have a container at your disposal, you can use any material nature can provide. If you happen to find a birch tree, create a cone from its bark. Your improvised cone needs to have a tiny hole in its bottom. Make sure the cone is well tied up to prevent it from opening up.
  • Step 2. You need to prevent sand from getting out of the container. Find some materials to put at the bottom. These may include:
    • Cotton material
    • A grass mesh (non-poisonous)
    • Some pebbles
  • Step 3. Add a gravel layer. The purpose of this layer is to add strength to the filter material and prevent the filtered water from mixing with sand
  • Step 4. Fill the cone or bottle with sand
  • Step 5. Collect the water. Pour the collected water through your filter. Tap the water in a different container at the bottom of the filter. The water coming out of the filter should be clear. If not, you will need to pass it through the filter once more and repeat the process until you get the results you desire.
  • Step 6. Boil your filtered water, so you can get rid of bacteria and other microorganisms.

The Bio Filter

Similar to the bottle filter, the bio-filter has some layers of materials and components which the liquid is put through to allow for separation of water from its contaminants.

However, just like the bottle or cone filter, this method will not rid the water of every single pathogen.

The Bio Filter

It can isolate a majority of the pathogens so you may drink your water, but the body may have the responsibility of fighting off other pathogens that did not get filtered out.

This is a risk you need to be aware of and you will need to follow this technique with a different treatment method such as boiling.

The ingredients for this type of filter include the following:

  • Fiberglass screen
  • Five-Gallon Food Grade Buckets – 4 for every filtration stage and 1 for storing the filtered water.
  • Plastic cups
  • Hole saw
  • O-rings or rubber bands (Alternative: glue for a secure hold)
  • Plastic fitting with tubing – This will be used to release water from bio, filter after it goes through three phases of filtration
  • Plastic plumbing fittings – This will be utilized between the stages of filter and for control of the water flow
  • Gravel for the first filtration stage – This will be used to separate big debris pieces such as tadpoles, insects, twigs, and leaves
  • Sand for second filtration stage – This will be used to filter out smaller components which the gravel failed to capture. From here, water will flow to the third material layer
  • Activated charcoal (activated carbon) – The charcoal will be used to get rid of bacteria and chemical, but not all. Air flows through the charcoal forcing the charcoal pores to open. These openings will absorb the chemical and some bacteria in a bonding process. The microporosity of charcoal, after it has been activated, is a surface area larger than five-hundred square meters.

Instructions:

  • Step 1. Stretch the fiberglass over fittings which will be placed inside the plastic buckets. Use rubber bands or O-rings to seal and safeguard the screen. If you need a secure fit, you can use an adhesive.
  • Step 2. In the middle of 2 of the gallon buckets, make a hole that is equal to your threaded fitting diameter. In the third bucket, cut another hole above the base on the bucket’s side.
  • Step 3. Join the buckets with plumbing fittings to ensure that the side of the fitting is up at all times. Use the O-rings to make a seal between fittings.
  • Step 4. Join the fitting to a third bucket, including the flexible plastic tubing on the side hole
  • Step 5. Using two bucket lids, make a hole in each, slightly bigger than the fitting. The loose fitting will enable the buckets to be stackable
  • Step 6. You can make the screen of fiberglass more durable with a few plastic cups. You may drill holes through the sides of the cups, placing a cup over every screened fitting and attach them into position
  • Step 7. Hose out the whole system using the garden hose to get rid of debris and dust
  • Step 8. Fill 3 buckets, one with sand, the other with charcoal, and the last with gravel until they are each 75 percent full. The order from the bottom to the stop should be charcoal, sand, and gravel respectively. Place a lid on the bucket containing gravel
  • Step 9. The aeration process allows you to add air into bio-filter. This process is achieved by passing water through the bucket several times. This technique can also be accomplished using pitchers.

XYLEM Plant Filter

The good thing about making filter system is the ability to design any equipment using the locally available material. For instance, it is possible to make a filter using a few supplies and a tree branch.

A pine branch would be an ideal example since this plant contains sap which contains xylem. The xylem will filter the dirt and absorb some substances. Additionally, this substance will filter some bacteria.

This kind of filter is notably effective being rudimentary in nature. This technique has been found to be ninety-nine percent in getting rid of the bacteria in the water.

On the downside, it is not an excellent filter as it is unable to get rid of hepatitis or rotavirus, and this is why the process of filtration is followed with a boil. For this technique, you will require the following:

  • A pine branch
  • A 2-liter bottle
  • A hose clamp
  • A container for storing the filtered water

Using a knife, peel off the branch’s bark, and if you have a piece of sandpaper, use it to smoothen the sides of the xylem.

This filter can be utilized more than once, as long as you prevent the stick from drying out. Once you have peeled the branch, be certain it can fit into the bottle’s neck.

If the fit is tight, use a knife to carve some edges of the stick so it can fit into the bottle with ease. Cut the base of the bottle using a blade.

Place about 3 inches of pine branch in the bottleneck. At this point, you can turn the bottle upside down so you can reveal the open base you made. Slowly fill the bottle with water.

The water will be filtered as it flows through the stick and the sap will get rid of the dirt and bacteria in the water.

How to Waterproof Boots: Getting Rid of the Unpleasant Sensation of Wet Feet

0
waterproof your boots at home

Have you ever found yourself in the unpleasant situation of having to go through the whole day with wet feet? The truth is that even a couple of minutes of this could be particularly unpleasant, let alone a few hours. This is most certainly a recipe for a guaranteed ruined day. Unfortunately enough, we would all have to deal with water as well as moisture when we’re out camping in the woods. Damp soil, rain or traversing rivers or other bodies of water will do that. This is why if you know how to waterproof boots, you’d be definitely better off.

Perhaps you might want to take a look at some of the waterproof boots available in quite a lot of stores. Of course, this is going to cost you to invest a certain amount for specialized foot wear which could be quite considerable, especially if you are going for a branded model.

waterproofing your boots tools

You may not have such a great need for professional waterproof boots if they can’t fit in your budget. However, there are plenty of other options for you to consider. Below, you will find out the most common ways to get your boots waterproofed. We’ve made sure that we’ve encompassed everything that you need to know in a summarized yet detailed manner. So, without any further ado, let’s go ahead and take a look.

Waterproofing Extends The Life of Your Boots

A good pair of boots that are suitable for hiking can be very expensive, and no one wants to shell out more money to replace them. What makes them so pricey is not only the material they’re made out of, but also the job they fulfill.

They’re designed to withstand a lot of punishment, so they’re built to be durable. However, if you don’t take care of them properly, they will start to give out on you. So not only are you waterproofing your boots to promote comfort, but you’re also extending the life of your boots.

boot life exteding

Water and natural salt are known to cause major damage to boots over time, especially if you don’t clean them right away. If your boots are made from leather, they will start to dry out and crack, and that can make your boots look very unsightly.

Over time, these cracks will get larger, and the integrity of your boots will start to suffer. By waterproofing your boots, you’ll keep the leather soft and supple, and they’ll continue to do their job (as well as look good) for many years to come.

Methods of Waterproofing Your Boots

There are three particularly effective ways of getting your boots waterproofed. They include:

  • Waxes, pastes and creams
  • Waterproofing spray
  • A special DIY method which is temporary but particularly effective

Of course, there might be other ways which are going to get your boots waterproofed. However, in our experience, we’ve found out that those are not only the only ones which are worth paying attention to but only the ones which are the most effective. So, let’s go ahead and take a closer look at each one of the methods.

Using waterproofing waxes, pastes and creams

While this is by far the most convenient, quickest and easiest way to get your boots thoroughly waterproofed, you would need to reapply the solutions every few weeks in order to get your feet dry.

using waterproofing waxes pastes and creams

It is hard to determine which particular product will work best so you might want to consult with the shop assistant or someone who’s done this before.

Using waxes, creams and paste:

  1. The first thing that you have to take care of is to get rid of all the mud and the dirt from your boots. This is particularly important. You can get a tube of cream for cleaning footwear in order to do this. You can also add water and dish washing liquid to clean them. Even though it may seem like a formality, this step is particularly important. By cleaning your shoes first, you are going to ensure that the designated solution works perfectly and is applied to as much of your boots’ surface as possible. Scrub the boots using a soft brush and ensure that you thoroughly rinse them after scrubbing.
  2. Now, when you are done cleaning, you should use a cloth or your hand and generously apply the solution (wax, cream or paste) to the shoe, ensuring that you do so using a circular motion. Make sure that you don’t forget the seams.
  3. Once you have applied the solution, get rid of the excess if there is some by using a clean cloth.
  4. Let your shoes dry for a night and you are good to go the next day.

Because this process requires some time, it’s a good idea to do this a few days before your planned camping trip so that you’re prepared for whatever elements may come your way.

Using waterproofing sprays

You should know that these are a good solution and a quick fix to resort to if you don’t feel like putting in a lot of effort. They are also a great time-saver. It’s as easy as it gets – you just need to spray your boots and you’re pretty much done with it.

using waterproofing sprays

Just as it is with the cream, you should make sure that you reapply the spray every couple of weeks in order to properly maintain the dryness of the shoe. You can use a spray which is based on silicone or oil if you have a sporting tight-grained leather boots, or an acrylic co-polymer if you have a nu-buck leather or suede boots.

How to use these sprays:

  1. The first thing that you need to do, once again, is to remove the mud as well as all other dirt from the boots. You can use any kind of footwear cleaning cream as well as water and soap.
  2. Once you are through with the first step, you are ready to spray them considerably. Hold the flacon 6 inches away from your boots. Start spraying and make sure that you apply at least a few thin coats. When you are through with that, apply one thick coat of the spray.
  3. Once you are done with the spraying it is important that you let the boots dry throughout the night.

Now, another thing that you need to take into account when using waterproofing sprays is that you should pay attention to the instructions.

Make sure to go through them thoroughly and see if the solution requires you to go over it a second time. If it does, you need to apply that second coat once the first one has dried.

The Desperate DIY solution

As promised, we are going to provide you with a desperate, yet particularly effective DIY solution which is going to help you considerably. If you are in a hurry and you have no time to apply spray or paste and yet you need to get your boots waterproofed, you can try to take advantage of the following quick-fixes.

Of course, keep in mind that these methods are usually fit for working boots and not for regular day-to-day shoes. However, you should also make sure that you give them a good scrub before you actually apply the legitimate waterproofing solution.

diy proofing your boots

So, without any further ado, here is how to get your boots waterproof if you have no time to waste and you have no other handy materials.

  1. Use transmission oil. Sure, this might sound a bit odd and rather out of the box but it works. Transmission oil is going to effectively repel the water. Grab some of it and smear it throughout the entire exposed surface of the boots before you start working. Of course, you always run the risk of your boots turning red.
  2. Use Vaseline cream. This is another convenient solution if you desperately need to waterproof your boots. You need to rub it on the boots as if you are rubbing waterproofing cream. Of course, you shouldn’t expect the results to last for long but they should get you through the day at the very least.
  3. Use clear coat enamel spray. Once again, this is just a temporary solution and it’s likely to crack easily. However, if you have a can of this, you might as well take advantage of it if you’re already camping and don’t have your waterproofing tools with you. Having this on hand is better than not being prepared.

As you can see, there are quite a few different ways besides the conventional ones that you can take advantage of. All in all, learning how to waterproof your boots will spare you quite a lot of discomfort while you’re camping.

Reproofing

Now, as we mentioned above, these solutions are only good for a certain amount of time. With this in mind, reproofing your boots is something that should also be considered. The last thing that you want is to get used to the sweet sensation of having your feet perfectly protected and constantly dry, and then to start feeling the tremendously unsettling burden that is wet feet.

Regular cleaning and proper reproofing isn’t only going to ensure their ability to repel water, it’s also going to prolong the overall life span of the boots.

Now, when it comes to reproofing, you need to account for a few different factors. The first one to consider is how often you actually wear the boots. You may not have to reproof them every single time you plan to go out.

reproofing your boots

However, making sure that this is a regular process is going to ensure that your toes remain as dry as possible. What is more, the way in which you reproof your boots is also determined by the material of their construction. So, with this in mind, let’s take a look at the different materials and how to reproof them.

  1. Boots made out of full grain leather. Of course, you have to clean the boots in order to have a proper result. After that you need to apply a small quantity of dubbing wax to a clean piece of cloth and start rubbing it over the leather. Repeat as much as it’s necessary and let it dry for about an hour. Make sure that you do not apply direct heat in order to prevent the boots leather from cracking.
  2. Suede and Nu-Buck leather boots.Clean those up properly as this is necessary to apply the reproofing solution. Choose the solution once you are through with the cleaning. You can choose between waxes, pastes, creams and sprays. If you use a spray, make sure that you apply it evenly throughout the area of the entire boot. Make sure that you leave it to dry after that and don’t go ahead and apply direct heat to prevent inflicting damage to the boot.
  3. Fabric boots. These can actually be rather hard to clean but you need to put in the effort in order to have the boots properly cleaned and to prolong their life span. Begin by cleaning the boots, as always, and choose an aerosol re-proofer or a spray. Some people would usually prefer spray as it’s a bit more concentrated. Unlike leather and suede boots, fabrics ones can actually be re-proofed while they are dry or wet, so that’s one thing that you don’t have to worry about.

As you can see, there are quite a lot of things that you might want to take into consideration if you want to learn how to waterproof boots. This is capable of helping you a lot in the endeavor and it makes your boots comfy and dry throughout your entire workday.

So, instead of investing a significant amount of money for waterproof boots, you can take advantage of the aforementioned methods and get it done yourself. This is going to spend you both money and inconvenience. You don’t have to suffer through the nightmare that is having wet feet ever again!

Wild Survival Tips: How to Start a Fire

0
fire starting tips

Fire starting techniques are essential for survival in the great outdoors. This is because you never know the kind of situation you may find yourself in. If you do not know how to start a fire, it might just be a very bad day in some situations. It is also important to know different ways with which you can start your fire, so you can always be prepared. In this post, we will discuss some traditional ways of starting a fire.

Knowing how to build a fire provides you with many benefits, such as heat, light, water purification, craft making, cooking and many more. Because fire is invaluable, it is important that you have the skills at your fingertips. That can only be possible when you do a few DIY practices behind your home, or in an open space before you go into the wild.

Here, practice makes perfect.

fire starting items

Let us now start by discussing how to create a fire that will stay ablaze. This is very important because you would not want your hard-earned fire to be blown off into thin air for nothing. Keeping your fire lit will help you save on energy and fuel for the future.

Materials Suitable for Tinder and Kindling

Materials suitable for tinder and kindling should just materials that can do the job and that are readily available to the outdoors man. Let us simply examine them individually in order have a full grasp of what you should consider when searching for materials.

Suitable Tinder Materials

Tinder should catch fire easily from just a few sparks of your ignition, should stay lit until it is being transferred to the fireplace.

suitable tinder materials

You can use any of the listed materials below, depending on their availability as to where you are making your fire. These include:

  • birch bark
  • charcloth
  • dead dry plants and grasses
  • dry leaves
  • dry needles from coniferous trees
  • lint
  • moss
  • paper
  • pine pitch
  • wax
  • wood shavings

Remember, you can however, transform any thick log, dry pieces of bark, or sticks into smaller pieces and use them as tinder. So long as you can easily transfer the fire from the lighter unto your kindling.

Suitable Kindling Materials

The main use of kindling is to help your small flame burn until you’ve added more substantial material.It should be a bit bigger than tinder, with a surface-to- volume ratio of about 1/7” to 1/2″ in diameter, and must be a material that ignites easily. Kindling is ideally meant to light the principal fueling fire-woods, so it should be able to produce a concentrated flame and sustained heat.

suitable kindling materials

Suitable kindler materials would include;

  • cardboard
  • dry twigs
  • fuzz sticks (with attached shavings)
  • large pieces of wood cut into small pieces, and
  • wood pieces.

Fire Starting Techniques

The whole idea of knowing how to start a fire is to be able to do it when you do not have any modern day fire starters such as matches or lighters available to you. So having known what sort of materials are best for your tinder and kindling, it is time to explore the various techniques that can be utilized in the wild when a fire desperately needed.

fire starting techniques

Some methods of fire starting that are proven to be successful, even on bad weather and terrible days will now be discussed.

Hand Drill Method

This a famous DIY fire starting technique. It is actually as primitive as it usually claimed to be, because the method requires only some tact, with great skill and strength. But you need to keep your tinder close by because it takes some amount of energy to get a spark, and once you do, you wouldn’t want to let it fade off before you get a spark going. What you will need to do is this:

  1. Gather your tinder to form some kind of a nest.
  2. Get a piece of wood to place on the floor or a flat surface to be used as your base. This will be your fire board on which you will be drilling to create the necessary friction.
  3. Create a small v-shaped notch at the center of your fire board. Usually with the use of your pocket knife or any sharp object that you can find.
  4. Make the notch wide enough and deep enough to hold the stick you will use as your spindle.
  5. Get a small piece of wood, ‘tree bark’ preferably and place it under the notch. This will be used to collect the glowing cinders you are most likely to produce when you create friction with your fire board and the stick-spindle.
  6. Pick your stick-spindle and put it inside the notch at the center of your fire-board.
  7. Push the stick-spindle back and forth, towards the base of the notch. Make sure you are holding the stick-spindle between your palms as you roll it back and forth.
  8. Roll the stick-spindle faster as much as you can. Push your hands forth and back in opposite directions at all times until the friction creates the required heat to create a cinder.
  9. Once a cinder is formed, relocate the glowing cinders unto your piece of bark. Remember you ought to have placed this small piece of back close to the notch as instructed above.
  10. Now take the bark containing the glowing cinders and place it onto the nest of tinder. As soon as you have placed the cinders onto tinder, you should immediately begin to gently blow the tinder nest and watch as the cinders ignite the tinder.
  11. As flickers begin to glow and grow, you should also begin to add more fuel in order to increase the flame into a blaze.

Although the method may take some time, it is a sure method.

Above is a helpful video detailing the process of the hand drill method.

Bow and Drill Method

This is another twist and friction method of generating a flame. However, it does save your hands through the use of building a bow to do the job fro you instead.

  1. Gather your tinder and make a nest of tinder from basically dry plant material you can find.
  2. Locate a heavy log, or a piece of rock if you can find one. This will be used as a socket and will actually be putting pressure on your stick-spindle.
  3. Now identify a piece of wood that can be bendable. A long flexible wood, say about an arm’s length that can curve and form a bow under a bit of pressure.
  4. Get a string that can go from end to end of your bow. Paracord rope works well, if you have it. If that is not available, you can just use your shoe lace or a strip of raw hide. The idea is to get a cord that that is made of abrasive materials and that can withstand high amount of friction.
  5. Link the paracord rope unto one end of your bow wood and make it very tight. You can actually make some groove at the ends of the bow wood in order to increase the bond as you tie the rope unto the bow wood, if you do not already have notches emplaced on your bow.
  6. Find a piece of wood with a flat surface that can be used as your base. This is going to be your fire board.
  7. Using a pen knife, or other sharp objects that can be used to cut into a wood and then make a v-shaped notch on the center of your fire board.
  8. Build a nest of tinder around this v-shaped notch you have made. The aim is to have the nest of tinder very close to the stick-spindle. So that as soon as the friction can create the required heat, your tinder can form cinders.
  9. Locate the middle of the bow and loop your cord once around your stick-spindle.
  10. Carve one end of the stick-spindle into a point to create some control of the friction in the socket. The spindle can last longer if you avoid cutting it off once a char is started on that end.
  11. In the v-shaped notch, place one end of the spindle. Then create pressure on the top of the stick-spindle using the socket.
  12. Now do the sawing! At this stage, you should begin to move the bow back and forth as quick as you can, as though you are using a saw to cut wood. The loop will cause the stick-spindle to spin, as you move the bow. That will then generate some heat where the friction is highest, which is where the spindle meets the fire board.
  13. As the heat increases, movement should also increase until you begin to see some formation of cinder at the base.
  14. Relocate your cinder from the fire board unto your tinder using a small piece of tree bark, and drop the cinder on your nest of tinder. In this case however, if the cinder generated is enough to keep the glow for a few minutes, you can just slide the cinder off the fire board directly unto the nest of tinder you have gathered.
  15. Then gently blow your nest of tinder to increase the glow into flame, and gradually add some more pieces of tinder, then kindler, then logs.

Here is a helpful video detailing this process:

Lens and Refraction Method

Refracted rays travel in a fascinating pattern and with some higher energy. That is the main trick harnessed in this method. Lenses are then used to concentrate these excited high energy rays and transfer the heat from them to your tinder or kindling.

So, to create fire with a lens in the outdoor, you need the sun, and some kind of lens. This can be a magnifying glass, a binocular lens, or an eye glass, so long as it can focus the sunlight on a particular spot.

  1. Place your lens in such a way that you are sure the rays are focused on a particular spot, preferably in an angle. Keep angling your lens until you have a small, bright spot over your kindling.
  2. Once you have identified your angle, gather your tinder in a spot to form a nest. The refracted rays from your lens should then be directed and focused on your tinder for a while. It should start to burn eventually. Keep adding more tinder and kindling before you start adding larger pieces of wood and flammable material

Because this method relies so heavily on the use of the sun, you do have a time limit for getting a fire started.

Above is a useful video to help you perfect this method.

Balloon Method

This method is a funny one, perhaps because you may not be thinking that a balloon can be an important outdoor gear.

  1. The balloon method works quite simply too. Just fill the balloon with water, and tie off the end.
  2. Try to make the balloon as spherical as possible, and not too big, so that you can get the best possible focal point from undistorted refracted rays.
  3. Try to find a sharp circle of light, by squeezing the balloon until you locate one.
  4. Once you have located your sharp circle of light, place it directly above your tinder in less than three inches away from it, and then watch as the focused light ray burns your tinder to create some fire.

Here’s a short video showing you how to hold the balloon:

Flint and Steel Method

The method uses steel and a piece of flint as its main items.

  1. Pick a rock and a char cloth, and then place it right between your foreigner and your thumb. Hang the edge of it, say about two or three inches off your thumb, and then properly place the char between the flint and your thumb.
  2. Pick up your steel striker if you have one, or just a pen knife and strike several times against the flint. If you hit it right at one strike, you will immediately see sparks jumping off and landing on the char cloth and that will cause a glow.
  3. Put the char cloth into the nest tinder and blow gently until you start a flame. Just blow the glow to grow into a flow of flames.

Batteries and Steel Wool Method

You would need steel wool and at least one battery.

batteries and steel wool method

The steel wool should be less than an inch wide and about half a yard.

  1. Get a 9-volt or more battery to get the best result, although any battery will do.
  2. Just hold the battery in one hand and the steel wool in the other hand. Hold the wall material against the positive and negative charges of the battery.
  3. Watch the wool glow and then burn.
  4. To get it to burn better, gently blow on it.
  5. Next, you quickly drop the burning wool into your already gathered nest of tinder and the fire should blaze.

Can and Chocolate Method

In this method, you would need a chocolate bar and a can. But you would also the need some sun rays. So, you must a jolly, lucky fellow to be able to do this activity.

Can and Chocolate Method

The bottom of the can needs to shine like a mirror. So, you would need a polish to make that happen. That is where your chocolate bar would come in useful. The oil in the chocolate bar acts as polish and will make the can shine into a perfect reflective surface.

If you have eaten up all your chocolate bars, you can actually use a toothpaste.

  1. Polish the base of your can until it shines to satisfaction. What you will then see, is some kind of a parabolic mirror. That is a good reflective surface. However, most importantly, it can form a single focal point with the rays of the sun when placed at an angle.
  2. The sunlight will hit the reflective surface and should be carefully focused on your tinder. After a few seconds, flames should appear.

Clear Ice Method

This a very fascinating method, because you get to start a fire using frozen water. What you need to do is this:

  1. Find an ice block of about 2 inches thick to work as a lens.
  2. In order for the ice to work as a lens, you may have to alter it to have the same features as a lens. So, carve the ice-block into shape and make the middle of the ice narrower in thickness than the edges. You can use a knife to get it done properly.
  3. Once you are done, place the ice-lens at an angle that allows you to focus the rays of the sun passing through the ice-lens onto your nest of tinder. Watch your tinder glow, and then you can blow gently until the glow to grows into a flow of flames.

Here is a helpful video detailing the process:

Now You Know How

Fire making techniques are very useful, and not that difficult to do.

clear ice method starting a fire

So, instead of struggling with building a fire from scratch, you can use any of these simple methods to keep you warm, cook your fire, or provide some much needed light. Most importantly, it would be ideal to try one or more of these methods at home before setting-off for the wild, just to be on the safe side. Practice makes perfect, as they say.

Camping Safety: Tips for Injury-Free Wilderness Adventures

0
Bear and camping safety

There is nothing like escaping into the great outdoors for a fun, relaxing trip away from the bustle of daily life.  However, enjoying yourself may come at a cost if illnesses or injuries become part of your adventure.

That’s why it is important to consider the following camping safety tips, not just for your time at the campground, but to properly prepare and pack for your trip before you even leave the house.  Doing so can ensure a safe and healthy trip, so you can spend your time enjoying yourself rather than tending to wounds or rushing to the emergency room.

Preparing for Your Trip

Whether packing for a two-week vacation or just a weekend at your favorite camping spot, you have to prepare and pack correctly, to be prepared for any occurrence.

Get Vaccinated: Illnesses such as meningitis or whooping cough may not seem like an issue when camping, but you never know what diseases other people you meet during your trip may be carrying.

First get vaccinated

That’s why it is important for your first step to be up to date on your vaccinations, so you don’t bring any unexpected, and potentially fatal, souvenirs home with you.  This goes for all members of your party, including spouses and children, and even your pets.

Packing for the Weather: When packing clothing, be sure to check out the weather report for the area you’ll be camping in so you can pack clothing appropriately.  But don’t just pack according to the report, because weather can change at any time.

If the report calls for sunny days and clear nights, pack some pants and sweaters along with your t-shirts and shorts in case it cools off, or unexpected rain showers move into the area.

This goes for bedding as well.  Having a few extra blankets won’t take up that much room, but it’s better to have them and not use them than to freeze during an unexpectedly cool night.

Fans and heaters are also a good option if you have the room and access to electricity; just be careful where you place them, and be sure there is enough ventilation to reduce any risk of carbon monoxide poisoning.

Packing Food and Water: Water is a necessity, especially in high temperatures where you’ll be sweating excessively and need constant hydration.  Many areas do not have clean drinking water, so be sure to pack enough for all members of your party during the entire trip, and check to see if there is a store nearby to purchase more, just in case you begin to run low.

camping packing food and water

When packing food, be sure any meat is packed carefully so it will not come in contact with any other food items.  Contamination could mean discarding an entire cooler of food, leaving you with nothing.  Using sealable containers is the best choice, so there will not be any chance of meat juices leaking into other items.  Also, if there is cooked meat and raw meat, keep them separate as well, to reduce the risk of food-related illnesses.

Prepare a Safety Kit: Should injuries happen on your trip, you don’t want to be left unprepared.  That’s why a safety kit should be prepared in full before you leave.  The kit itself should be a sturdy, waterproof container, and include:

  • Bandages-rolled, plastic, triangular, butterfly, large and small
  • Sterile compresses
  • Adhesive tape
  • Splints
  • Gauze pads
  • Antiseptic sprays or wipes
  • Cotton swabs
  • Scissors
  • Tweezers and nail clippers
  • Safety pins
  • Thermometer
  • Creams – Antibiotic, burn, poison ivy
  • Sunscreen and after sun lotions
  • Peroxide
  • Hot/cold packs
  • Bug spray
  • Razor blades
  • Pain and sinus medications
  • Antacids
  • Eye drops
  • Snake bite kit (if poisonous snakes are in the area)
  • Ipecac (to induce vomiting if poisonous or harmful items are ingested)
  • Latex Gloves (and a non-latex type, in case of a latex allergy)
  • Road flares
  • Any personal medications normally taken, prescription or otherwise

Not only should you carry these items, but you should know how to use them all.  It is also a good idea to take courses in both CPR and First Aid, so you can be prepared for any type of injury or situation.

Portable camping safety kit

Check your safety kit often, as some of the items in this list do have expiry dates, and may need to be replaced before your camping trip begins.  And be sure to replace anything used, so your kit is always fully stocked.

Inform Others of Your Plans: Before you leave, make sure others are aware of your destination, and how long you’ll be gone.  This could be a family member or a friend, whichever you prefer.

This way, if something happens and you are left stranded in the woods with no cell service, someone will be expecting you home and will be concerned if you don’t show up.  Do not post your plans on social media, though.  Telling the world you’ll be away for even a few days could invite break-ins and theft, so keep your plans off of Facebook and Twitter.

After Your Reach Your Destination

Whether camping in the wild or at a busy public park, be sure to follow these tips to ensure your trip will be filled with laughter and fun, rather than pain and injury.

Setting up Your Site: When setting up your tent, be sure to do so away from the fire pit area so there will be little chance of sparks landing on the material and starting a fire.  Campers are less at risk, but if a canopy is opened, it could also catch on fire, so plan your site accordingly.

camping and setting up your site

Food Storage: For those using a cooler, hopefully you’ve followed the advice on packing your food items listed above.  If so, there is only the risk of spoilage to worry about, so be sure to keep your food cold by replacing the ice that has melted each day, especially if in hotter temperatures.

An insulated cooler is the best choice, because it will hold its temperature longer, as long as it is not opened unnecessarily throughout the day.  There are even plug-in coolers available, but if you’re not at an electrical site, these will be of no use.

After cooking meals, be sure to pack up all extra food properly and safely, and store it in the cooler.  Do not leave food laying around your site, because this could attract unwanted animals, from small, harmless ones like squirrels to large, dangerous bears.

Also, do not keep food in your tent, for the same reason.  If possible, store your cooler and other non-refrigerated items in the trunk of your car, to reduce the likelihood of unwanted animal attention.

bear in the tent

Sun Protection: Be sure to use sunscreen at all times when camping, even if it is overcast.  Harmful UV rays can still reach you through the clouds and cause burns you may not realize you are getting.  If you are swimming, apply it about half an hour before entering the water, and reapply it often.  Sunglasses and hats are also a good idea to protect your eyes on bright days.

Critter Protection: Bugs can carry diseases, and a single bite could bring with it an unwanted illness along with itchy discomfort.  That’s why you should protect yourself from mosquitos, ticks, and other unwelcome pests by using bug spray throughout your trip.

Larger critters can also be harmful, though there is no spray for small animals.  If snakes, squirrels or birds are nearby, do not try to touch them or interact with them.  For smaller mammals and birds, you could carefully shoo them away from a distance.

critter protection on camping

Snakes or other potentially poisonous animals should be avoided, and if you find you are too close to one, back away slowly, and leave them be.  They probably won’t stick around if there are people nearby.

Having fun: Camping trips include all kinds of outdoor activities, including hiking, bicycling, swimming, and many others.  If these activities are going to be part of your trip, be sure to prepare for them by bringing the appropriate gear.

This includes helmets and padding for knees and elbows when biking, proper footwear for hiking and walking, life jackets when boating, and swim rings and water wings for swimming.

Be sure all of the members of your party can handle the terrain for the hiking and biking trips, and don’t force anyone to go farther than they can handle.  Keep in mind that little children will tire out, and the further you are from your site when they stop walking, the longer you will be required to carry them.

When swimming, don’t go alone, and supervise any inexperienced swimmers closely.  Bring snacks and lots of water for these adventures, but don’t eat right before swimming to reduce the risk of cramps.

For some quiet time, bring a few toys and coloring books to keep the kids occupied in the site, especially if you have littler ones who need naps.  Blowing bubbles is also a great way to entertain kids for hours.

Getting Lost: No matter what activity they are engaged in, be sure to watch your children closely when camping, and explain to them the risks of getting lost if they wander away into the woods, so they are aware of the dangers of wandering off alone.  Of course, not only children can get lost.

getting lost in the wild

Many adults head out for a hike and can’t find their way home.  That’s why it is important to always tell someone in your party where you are heading, in case you don’t return.  Carry a map if possible, as well as a GPS locater and a compass.  Even having a whistle can help you to get rescued, and it is small enough that it is easy to carry in a pocket or on a rope around your neck.

Staying Cool: No matter what you’re doing, it is important to stay cool and hydrated, especially on hot days.  Drink lots of water to replenish what you are losing, and reduce the risk of heat stroke.

If playing games, with grown-ups or children, try to do so in a shady area, and be sure to sit down and rest if you feel yourself overheating.  Don’t go for long hikes or bike rides if the temperature is especially high.

Cooking Safety: Some rules for cooking when camping are the same as those at home.  Be sure to prepare food on a clean surface. Wash your hands thoroughly before and after handling any food items.

camping cooking safety tips

Cook meat to a safe temperature before eating, and carry a meat thermometer to be sure this is done correctly.  Don’t mix raw foods with cooked foods, especially meat, so there is no contamination that could lead to food poisoning or other food-related illnesses.  After eating, store any leftovers away promptly.

If cooking over the fire, be sure to use sturdy metal utensils with safety handles, and wear a fire-retardant cooking mitt or glove to keep from getting burned.  Don’t cook over high flames.  Have somebody keep any children and pets away from the fire when you’re cooking, because you may be too focused on what you are doing to watch them at the same time.

If using a stove or grill, be sure to store the fuel canisters properly in an upright position.  Don’t place them too near a fire pit, and don’t try to change any canisters near an open flame or if the stove is already hot.

Make sure you are in a well-ventilated area when using these items, and never try to use one in a camper or tent, because of the threat of carbon monoxide, as well as a risk of fire.  When not in use, turn it off and remove the fuel container, so there will be no chance of injury or explosion.

Fire Safety: At the end of the day, there is nothing more relaxing than sitting around a fire, chatting with your family and friends, or just enjoying the quiet.  But in order to fully relax, you need to be sure your fire will stay where it belongs.

Making camping fire pit

If there is no proper fire pit provided, and you must make your own, be sure to do so in an open area, away from any tents, trees or other flammable items.  Place a ring of large stones to enclose your fire.

Keep a bucket of water, sand, or a fire extinguisher nearby just in case it gets out of control.  Do not leave it unattended for any reason, and be sure to extinguish it completely before leaving your site or heading off to bed.  Also, be aware that in dry seasons, there is a higher risk of forest fires, so check for any bans in the area before even lighting the match.

Cool Camping Ideas: Guarantee the Ultimate Camping Experience

0
cool camping activities

Going out camping with a group of friends and family can be so much fun. There are a lot of fun things to do, and being in a group presents an excellent opportunity for bonding and playing together.

When you are in the outdoors, you feel much more relaxed than you normally would be because you are now disconnected from the regular day-to-day hustle and bustle of the city. You have a lot more quiet space and a lot more time on your hands for leisure activities. This can be a great opportunity to implement some cool camping ideas.

What’s cool about camping is that you get to experience a life without power, electricity, showers and all of the luxuries that you are accustomed to, and if you do it right, it’s an excellent opportunity for you and your group to jump headfirst into nature and hopefully learn some new skills.

There are a ton of activities you can all engage in that will ensure that you have a pleasurable trip. This article cannot do justice to every single fun camping idea out there, but it will highlight some of the very best ideas that you and your group can easily adopt and have the best time together.

camping activities near the campfire

The kinds of activities you can engage in will almost always be dependent on the terrain you are camping in. If your camp site is close to a body of water, for instance, there are certain water-related activities you can try out. There are also activities you can try out around a camp fire, on a plain field, and activities you can enjoy in the comfort of your tent.

Activities Around Water

If you are camping around a body of water such as a lake or river, there are a couple of fun ideas to be had, some of them exhilarating and others quite relaxing. These activities are fresh and very much enjoyable. The best and most engaging ones will be highlighted below.

Water zorbing

This is one of the more elaborate water activities you can engage in as it requires that you have a specific kind of gear to make it happen. The zorb, as it is called, is very similar to the ‘hamster ball’ and it is made of flexible plastic that fully encapsulates the individual thus allowing him or her float and navigate on water.

water zorbing on camping

The most recent ones are double-sectioned in their structure with a ball inside another ball and a layer of air between them. This makes for excellent shock absorption. With a few of these balls, you and your company can engage in races and different kinds of water tournaments. You can also decide to just use it for rest and relaxation on water if you wish.

Skipping Rocks

This is another fun idea to be had when there is water around you. Quite simply, it involves finding rocks and pebbles of the right size and weight and throwing them at the water in a way that it keeps bouncing off its surface. You can try this in different ways and see how well you do.

Learn skipping rocks

It sounds very easy but it does take some getting used to and it can be quite fun. It is great because all you need is a body of water and a bunch of rocks. Find rocks that are flat, even, and fit in your hands well. If you pick a rock that is too heavy, it will sink right through the surface and one that is too light will be difficult to throw very far.

Place the rock between your middle finger and your thumb, and use your index finger for guidance. Use a side arm throw and flick your wrist while launching the stone. With a little practice, you’ll figure out the best way to launch the stones and you will get more hops or bounces off the water. Any activity no matter how mundane can be made more exciting by adding a little competition.

So you and your company can do this together and see who does best. You might not know this but there is actually a world record for stone-skipping set by Russell Byars in 2007 at 51 skips. See how close to that you can get.

Swimming and Diving activities

This is an obvious choice for you if you have water around you. Swimming has always been a fun activity that everybody loves and you can swim around, relax in the water, have a race, or play a bit of water volleyball. Diving is also very exciting and there are so many ways you can make this happen. If you are lucky enough to have an elevated area with a clear line of sight to the water, you can make your dives from there.

If there are trees with very strong branches, you can install a make shift swing with which you can launch yourself into the water. Proper care and precaution must however be taken when diving. Make sure the water is deep enough and it doesn’t have any rocks in it that a diver can hit his head on.

Fishing

Fishing is actually an activity that can stand on its own but it also makes for an excellent avenue for fun and bonding during camping trips. This is great particularly because you get to cook whatever you catch and this can be your dinner. There is always that bit of excitement attached to catching your own meal.

fishing on camping

There are a couple of other stuff you can do near water such as:

  • Building sand castles
  • Kayaking
  • Tubing
  • Snorkeling and water skiing.

Also if you are not camping close to water bodies, you can still have some fun with water and water related activities such as

  • Balloon fights
  • Squirt gun fights
  • Make shift pools with inflatable wading pools.

Sport Related Activities

Most of all the regular sporting activities that you are already familiar with can make for fun ideas in camp. They help you to get up and move your body which can be very good exercise. There are so many physical activities you can have fun with, some of which require a lot of movement and others not so much.

You pick whichever suits your style and carry on. There are a few activities you can participate in such as:

  • Football
  • Bike riding
  • Geocaching
  • Horseshoe
  • Frisbee throwing
  • Baseball
  • Spelunking
  • Rock and tree climbing

A good number of these activities you are already aware of but we will be shedding more light on geocaching and spelunking which you might not have heard of before now.

Geocaching

Not very many people have heard of geocaching, but it’s a lot simpler than you think. If you’re equipped with a device that has GPS, that’s all you really need. It’s sort of like a treasure hunt, only there isn’t going to be a chest of gold buried somewhere.

geocaching activities on camping

Instead, you’ll likely find a plastic container with an assortment of items and a tiny book of dates, people’s names, and items that they’ve added and taken over the years. It’s like a time capsule that everyone gets to partake in.

There are plenty of websites dedicated to geocaching, as well as plenty of national parks and camping sites that cater to the activity. Simply search for the area you’re going to be in and record the coordinates of any geocache spot that is close to your camping area. Then fire up your GPS, and start hunting! Not all of these geocache spots are the easiest to find, so keep your eyes peeled on your search.

Spelunking

Spelunking is basically cave exploration or caving as it is called today. Caves are always an exciting place to see with their mazy passages, chambers, crevices and water falls. There is a lot to see in caves and just like any other form of exploration such as scuba diving and rock climbing, spelunking is an adventurous activity that you and your group can engage in together.

spelunking on camping

So if you have caves that are known to be safe around your camping area and preferably in the company of a cave expert, you can indulge yourself in this fun activity.

There are some other sport like activities that you can indulge in especially if you have a lot of people around. Some of them are

  • Hide and seek
  • Capture the flag
  • Tag

Activities in The Tent

If you are more into indoor activities and you don’t want to be in the open all the time, there are also a couple of fun ideas for rest and relaxation in the tent. These activities don’t require you to move around and you can all just be in the comfort of your tent. This is especially useful when it’s raining outside or it’s too late at night to be in the open. Some examples are:

  • Reading books aloud to each other
  • Playing card and board games
  • Arts and crafts
  • Watching movies on handheld devices
  • Outdoor activities at night

Just because the sun goes down doesn’t mean that the fun has to end.

activities inside the tent

There are plenty of activities you can do at night, if the weather is conducive enough. You can take advantage of the darkness and the thrills that come with it:

  • Stare at the stars and find constellations
  • Use your campfire and hands to make shadow puppets
  • Go for night walks (with flashlights, of course)
  • Play a game of charades
  • Play games with glow-in-the-dark toys

You have to be very careful when engaging in activities at night though. Don’t go out wandering alone in the woods when it’s dark and don’t be reckless with any activity that involves fire, as things can easily get out of hand.

Activities Around The Campfire

Gathering around a campfire is a one of the most pleasurable activities to do while camping. One cannot even say you have gone camping if you don’t all sit around a fire and tell stories and roast marshmallows if you’re into that.

Closeup of a multitude of marshmallows being roasted around a fire pit.

It has become a tradition that many campers indulge in and you will be missing out if you don’t partake yourself. There are many other activities to do around a fire, including:

  • Telling ghost stories. This works most when you have a group of kids around and an expert storyteller who can narrate fiction and use all the necessary gestures and articulations to spook the audience.
  • Singing campfire songs
  • Dancing by the fire. It’s always fun when the group dances around the fire and sing songs together.
  • Playing a guitar to an audience. If you are good with the guitar, this is also an excellent activity around a campfire. You get to play to an eager to listen audience and the audience sit back and enjoy the melodies, or you can all make up songs together.
  • Playing truth or dare. The campfire is also a great place to play this game because there are no distractions and everybody is involved and focused on the game. So whether its truth or its dare, you get the maximum attention of the participants.
  • Play Chinese telephone. Start by whispering a phrase to the person next to you, who then passes it on to the next person. See how much the phrase has changed by the time it gets to the last person.

All of the above mentioned are various categories of fun stuff to do when camping.

There are so many other ideas that you can experiment with and see which suits you the most. For instance, you can go camping with your pets and they can also join in some of the activities and have fun with you.

Many camping activities

You can seek out other campers around you and socialize as a group.  It all depends on what you want to get out of your camping trip. You get to meet a lot of interesting people and hopefully make new friends. Whatever you do, try to let loose and have the most possible fun you can. Don’t be afraid to try new stuff and do your best to be in a relaxed mood to enjoy the moments as much as you can.