Home Blog Page 39

Fire Safety Tips: A Guide to Fire Safety

0
Fire safety, indoor and outdoor is something every individual should take seriously. Even a single mistake, no matter how small it may seem, could lead to a serious disaster. Anything which can cause a fire, whether in the house or outdoor is dangerous when mistreated. The situation can be more difficult if you and your family neglect the basic rules which are required to survive in case of a fire. This article offers fire safety tips that can help you survive in case fire erupts when you are in the house or out camping.

When it comes to fire and safety, you first need to know about the basic characteristics of fire:

  • Fire is hot: The heat and smoke created by fire can be dangerous. Inhaling the hot air can burn your lungs.
  • Fire is fast: In a matter of minutes, a fire could become life-threatening. In about five minutes, a whole residence could be covered in flames
  • Fire is dark: Fire that burns in less oxygen can produce gasses which make you drowsy and disoriented. When a lot of carbon monoxide is produced, you can easily get poisoned. Asphyxiation is the primary cause of death by fire, exceeding burns by a ratio of three-to-one.

Using A Fire Extinguisher

Before an emergency occurs, it is advisable for you to know how to use a fire extinguisher. You can check with the fire departments close to you to ascertain whether they offer training for homeowners.

Keep extinguishers within reach or close to the exit of a building. This way, you can fight it while making your way to the door to make an escape in case the flames are out of control.

Using A Fire Extinguisher

The acronym PASS can be used to help you recall how you are to use the extinguisher.

  • Pull the safety pin of the extinguisher
  • Aim the extinguisher at the base of the flame, but not the flame itself. When doing so, you should be at least six feet away from the fire.
  • Squeeze and hold the trigger, keeping your extinguisher in an upright position
  • Sweep the flames’ source until your extinguisher runs dry

Any time you use an extinguisher, regardless of whether or not the extinguisher is empty, make an effort of replacing or refilling it as soon as possible. The same applies for any extinguisher that has its pressure gauge into the red zone over time.

Companies that manufacture extinguishers charge about fifteen dollars to refill a five-pound ABC extinguisher, as long as it contains a metal valve. Devices with plastic valves cannot be refilled and should be discarded once they have been used.

Tips for Preventing A Fire

Before a fire

There are a number of things you will need to consider if you want to protect yourself, your family as well as property in case of a fire.

Carbon Monoxide and Smoke Alarms Detectors

  • Make sure you have your smoke alarms installed. Alarm systems that are working appropriately can reduce the chances of getting trapped in a fire.
  • Ensure the smoke alarms are placed in strategic locations within your residence. This can include the roof and the basement.
  • The smoke system can be complemented with a working carbon monoxide detector placed in common areas of the residence
  • Test and clean the systems at least once every month and make sure their batteries are in excellent condition. You are required to replace the alarms once every ten years.

Cooking Safety

  • Do not at any point leave cooking unattended
  • Keep pot holders, towels, and curtain far from the flames
  • When cooking, remember to put in a tight-fitting cloth
  • Never use an oven to heat your house

Escaping Fire

  • For the purpose of avoiding fire, make sure you have an escape plan. Make sure you review the plans from time to time
  • Verify that the windows are not painted or nailed shut
  • Always remember to remain flat on the floor, hallways and stairways.

Heating Source

  • Put the space heaters a distance away from any combustible or flammable objects
  • Use only the fuel that is designated for the space heater you are using.

Lighters/Matches and Smoking

  • Always keep lighter and matches out of children’s reach
  • Do not smoke in bed. Also, never smoke when medicated or feeling drowsy
  • Be a responsible smoker

Electrical Wiring

  • Make sure all the power outlets have been covered, and there is no exposed wiring
  • Inspect electric wire extension to ascertain whether there are loose plugs or exposed wires
  • Do not overload power outlets or extension cables
  • Make sure the wires do not run underneath the rugs, across high traffic zones, or over nails

Wildfires

Unlike most natural calamities, wildfires are as a result of human action and can also be prevented by the same human.

Wildfires

It is a problem for meteorologists to predict the outbreak of wildfires, so people in areas that are prone to fires should make plans and prepare themselves in case they may be required to evacuate without notice.

Here are a number of tips you need to consider so as to prevent wildfires and what actions to take in case you happen to be caught in one.

Preventing Wildfire

  • Call 911, contact the park service, or the local fire department when you notice an out-of-control or unattended fire
  • Do not leave the fire unattended when you are out camping. Completely put it off – by pouring water and stirring its ashes until they are cold – before going to sleep or leaving your campsite
  • Take an extra precaution when using and fueling stoves, heaters, and lantern when you are out camping. Making sure the heating and lighting devices are cool before you can refuel them. Avoid fuel spills and store flammable objects away from appliances
  • Avoid disposing matches, cigarettes, and smoking objects from automobiles, or discarding them on park grounds. Make sure you completely extinguish cigarettes before you can dispose of them.
  • Follow the laid regulation when burning waste. Avoid burning yard waste during windy conditions, and keep water, shovel, and a fire extinguisher nearby to ensure the fire is in check. When burning materials, remove all flammable ones from the yard.

Tips for Evacuation

  • When advised to evacuate, it is crucial to do that immediately
  • You should familiarize yourself with evacuation routes in advance, and prepare a checklist and evacuation emergency supplies
  • Put on protective gear to protect yourself from the ashes and sparks

Preparing your House before Leaving

  • Get rid of combustibles such as yard waste, firewood, fuel cans, and barbecue grill from your compound
  • To prevent drafts, close all vents, windows, and doors
  • Switch off fuel oil supplies, propane and natural gas
  • To discourage or slow fire, fill any large vessels, including hot tubs, pools, and garbage cans

If you are in a Wildfire

  • Never attempt to outrun the fire. Instead, look for a water mass such as a river, a lake, or pond to crouch in.
  • If you cannot see water nearby, look for a depressed, cleared region with no vegetation. Get on the ground and cover yourself with wet cloths, soil, or blanket. Remain in a low position until the blaze passes
  • Avoid respiratory complications by breathing the air close to the ground surface using a moist cloth to avoid breathing in smoke

Campfire Safety Tips

Campfires are the primary causes of injuries among campers. It is imperative to have an idea of how you are to light your fires when you are out camping to avoid incidents of fire and protect the forest as well.

You need to check the weather forecast to ascertain whether there will be wind gusts which encourage wildfires.

Ideally, the size of your campfire must not exceed a diameter of four feet with a height not exceeding three feet. Moreover, you need to use untreated wood only or charcoal when creating your campfire. Surround it with large rocks to keep the site safe and add heat to the fire.

Campfire Safety Tips

It is advisable to build a fire far away from tree limbs, shrubs, automobiles, dry grass, and rotten stumps.

Also, build your fire away from combustible or flammable objects. Take note of its clearance since the heat from a fire normally extends further than what you see. Therefore, the clearance should be approximately three times the height of your piles.

Additionally, you need to make sure that the campfire site is surrounded by gravel or mineral soil that needs to be about ten feet in all directions. Alternatively, you can decide to water down its surroundings so as to prevent the blaze from spraying outwards.

Safety around the camp fire

  • Before building a campfire, make sure you have the permission to set up one. Consult with the local fire department to ascertain whether it is permissible to make a fire in your camping location
  • If campfires are permitted, you will need to set up one at least twenty-five feet away from anything combustible
  • Clear any dry sticks and leaves, and overhanging low branches to avoid fire from spreading
  • Avoid setting up fire on dry, windy days. Fire can quickly spread during dry and windy conditions
  • Make sure you attend the campfire all the time. When left alone, a campfire could easily become a wildfire
  • Build a small campfire. It is much easier to control a small campfire
  • Gasoline and other flammable or combustible fluids cannot be used to build a fire as these can easily lead to a damaging fire
  • Always keep a bucket of water, hose, or shovel nearby as these can help you put out the fire in case it becomes uncontrollable. When putting off fires, make sure it is completely off as hot object can rebuild a fire
  • When your garment catches fire, drop to the ground and roll over and over until the fire is off completely.
  • In case you get a burn, treat it right away. Use water to cool the burn. Apply medication and cover with a dry, clean cloth.

Putting out the campfire

The most important thing when it comes to setting up a campfire is ensuring that it is completely put out. Thousands of acres of forest land and wilderness are destroyed by allowing campfires to go wild.

When camping and building campfires:

  • Put off the campfire at least thirty minutes before planning to leave the site
  • Make sure the coal is burned to ashes. When leaving, there should be a few coals and no partly burnt wood
  • When extinguishing a blaze rather than hot coals or ashes, use a stick to disturb the ash and wood. This will help in extinguishing the fire effectively.
  • Put some water over the coal. If the pieces of wood or charcoal are extremely hot, they can create so much steam that contains ash. To prevent coming into contact with the ash and steam, avoid standing directly over the fire.
  • After the ash and coal have been wetted down, stir everything using a stick.
  • Keep sprinkling water and continue stirring until there is no more steam
  • Leave the fire zone for about ten minutes. This is a perfect opportunity to get water.
  • Look for hot spots in the area. You can do this by stretching your hand toward the ash, but be keen not to burn your hand.
  • When everything is cold, you are done with the extinguishing. Sprinkle more water and stir for the last time
  • You can dispose of the ash after you have put off the fire
  • Scoop all the ash, coals, and the wood, and place them into a bag or some container
  • Carry it far away and spread it around
  • Alternatively, you can carry it down a half a mile along the trail and disperse it
  • For the unused wood, you may scatter it into the surroundings or leave it stacked nicely if the location is an established high-use campsite

What to do in case of a fire during camping

When camping, it is important to be cautious during incidents of fire. Get everyone away from the fire because it is easier for a tent to catch fire and spread. You should also make an effort to alert Fire and Rescue Service immediately and give them a reference map to the location, including landmarks such as hills and farms so they can find you easily.

Fire in the camp

When smoking, ensure you extinguish the fire on your cigarette. Do not throw the end outside the window of your car as this could easily cause a wildfire.

Do not leave glasses and bottles in the wilds as these could easily catch fire as a result of the scorching heat from the sun.

Tips for avoiding fire in a campsite

Take precaution when utilizing gas canisters and ensure they are always upright. Store the canisters in areas that are well-ventilated and confirm whether there are leaks by applying soap in all connection areas. When not in use, make sure they are turned off. When the stove is lit, do not try to remove or install new propane cylinders or installing one close to a flame or a source of ignition.

When filling a tank, use a funnel and be careful not to spill the fuel. Do not store an operative stove or a fuel container close to a source of the fire. Operate the stove in an area that is well-ventilated and not a confined place such as a tent.

During camping, you need to be aware of carbon monoxide. Do not carry a smoldering barbecue into a tent since its charcoal emits toxic gasses mainly carbon monoxide which is odorless and colorless. This gas can remain in the air even after cooking, so be keen to ensure the gas does not accumulate inside the tent. Make sure you cook in places that are clear from tents.

Tips for avoiding fire in a campsite

When camping, people tend to use mobile homes, caravans, and boats. These components are prone to fire as they carry with them portable devices and bottled fuels such as kerosene, paraffin, and petroleum gas. These products must not be used indoors or within the tents.

Do your research about fire safety in and around a campsite. Avoid using substances that burn with oil such candles and lanterns inside the tents. Avoid smoking inside the tent as this could easily lead to a fire.

Set your cooking zone at a reasonable clearance from the tent and use appliances that are not combustible. Remember to keep gas cylinders, matches, and other flammable things out of the reach of children and ensure you always have an escape plan in case of a fire during camping.

How to Survive a Bear Attack: Tricks to Minimize Encounter with a Bear and How to Handle One

0
How to Survive a Bear Attack

For centuries, bears have known to attack humans with early day explorers narrating horrible experiences with them. In the early days, there was a funny story that went around among the Yukoners and Alaskans.

They believed that bear and humankind were closely related. Despite this assumption, they knew that bears could be dangerous. They, however, thought that if you met with a bear, you needed to raise your hands on your head and talk to the bear “Hello brother bear, I didn’t mean to agitate you. I will move from your territory now and leave you in peace.”

After this, one would slowly walk away from “brother bear” unharmed. When this legend seemed to work, it is a dangerous move.

Identifying The Different Types of Bear

An encounter with a bear is a terrifying confrontation you can experience during your camping or exploration expedition. Your approach on how to survive will depend on your ability to identify the bear and its attitude towards you.

Your speed and disposition to protect you from the animal will also determine how you will come out of the confrontation. Below are types of bear and their characteristics.

The black bear- this is the smallest of all bear species, and their color can range from black to blond. It’s more of a scavenger than a hunter and, therefore, found near humans. His love to live near man is probably brought about by the fact that he can easily find something to eat from man’s leftovers. This fact has also led to him not being afraid of humans.

The black bear

The black bear will rarely attack you unless he confuses you for food, thinks you have food or suspects that you are rogue. To know you are dealing with a black bear, look out for the following features;

  • Straight face and backline.
  • A small head.
  • Dark colored short claws.
  • He has a lighter muzzle than the rest of the body.
  • Most black bears have a white patch on the chest or throat.

The grizzly bear- this bear is apathetic to humankind and has no fear towards the man at all. It is huge in size compared to the black bear but a little smaller than the polar bear. He is, however, very unpredictable as he can either run away for seeing a man or decide to attack.

The grizzly bear

There is a difference in size between the coastal grizzly bear and the interior area bear, with the coastal one tending to be larger. You can recognize the grizzly bear by the following characteristics;

  • He has a hump between the shoulders.
  • He has a sloping back line.
  • He has a concave shaped face.
  • He has a large, light colored head.
  • He has long curving claws.

The sloth bear- these bears mostly exist in the Indian subcontinent. They are the evolved species of the brown bear and mostly feed on termites and other insects.

The sloth bear

These types of bear are rarely known to attack humans but can do so in the case of territory invasion. Characteristics that make them recognizable include;

  • Have a “Y” or “X” shaped cream color on the chest.
  • They are thinner than the black and brown bears.
  • They have long sickle-shaped claws.
  • They have long shaggy fur that forms a mane around the face.
  • They have a gap between teeth which enables them to feed on termites, ants, and other insects.

The polar bear– this is the largest and deadliest of all bears. It has adjusted well to living in cold waters, snow and ice hence making him familiar in the Arctic Circle. This habitat makes seal his first food.

However, at times he can cunningly stalk and attack humans.

The polar bear

You can know you are dealing with a polar bear by checking out the following characteristics;

  • Elongated body
  • Longer nose and skull
  • White in color

What Would Prompt A Bear into Attacking You?

As we have seen from the four species of bear, other than the polar bear, the other three will rarely attack you. We, therefore, need to look at what is it that prompts a bear to attack you.

This information is important in helping you not trigger the animal into coming on to you. You will also know the bears’ reason for attacking you, either offensive or protective. A bear will attack you if;

  • She has cubs: a mother bear is a very dangerous creature if you walk anywhere near her children. Bear cubs are cute and can be tempting to hold. However, don’t be tempted as the mother is just around the corner. To protect her kids from you, she will have no options than attack you.
  • To protect his territory: nobody likes having his territory violated. It is the same case with bears. If he feels that you are getting too close, he will attack you to keep you from his home.
  • If you catch them by surprise: assuming you somewhere mind your own business and out of nowhere, somebody surprises you. Your first reaction will be getting alerted of the danger that has come and then plan to retaliate. It is the same case with bears.
  • If they sense danger: we can say that bears too, as human beings, have sense. If a bear sense that you want to harm it, it will come on to you.

How to Avoid A Bear Attack

There’s an adage that goes “protection is better than cure.” Avoiding a bear attack is wiser than having to deal with it when it attacks.

How to Avoid A Bear Attack

You can avoid an encounter with these dangerous animals by doing on of the following;

  • Stay in the open and maintain the designated trails: bears most like to make their dens in dark caves or hollow logs. Avoid exploring such areas while hiking.
  • Make noise while hiking: to avoid getting the animal in surprise, you need to make as much noise as you can. If in a group, converse loudly. Singing out in a loud voice can also alert the bear that you are near. Whichever means, avoid moving silently.
  • Keep off the bear territory entirely: these animals don’t enjoy having their territories invaded. If not sure how close to their territory you are, use a pair of binoculars. This way you can easily spot them from a distance and change your track.
  • Refrain from taking photos: in most cases bear attacks happen when victims are trying taking pictures. If you love your life, beware that bears are not friendly creatures and won’t entertain you capturing their photos. Leave that to the wildlife photographer professionals.
  • Be untraceable: if camping, remember always to clean up your mess. Any food stuff should be cleared and discarded appropriately. This way, it will be hard for any bear to know that there are humans around.

What to Do in A Bear Attack

So, you have tried all the above measures to avoid a bear attack but still you get an encounter with one.

What to Do in A Bear Attack

It won’t be a “hello brother bear” kind of a meeting. You, therefore, have to be smart how you handle it.

  • Be calm and don’t panic. Otherwise, if you break into a run, you will only make the bear more agitated, and it will come after you.
  • If you recognize the animal to be a black bear, stand tall and start making noise. Being a bit friendlier than the others, it will leave you in peace.
  • Sometimes the bear might only be bluffing to see what you can do. If you have in no way provoked her, try talking to her in a friendly manner. Being friendly will calm her down, and she will leave you in peace.
  • If it’s a grizzly bear, stay quiet and calm and be ready with your bear spray.
  • Do not make a mistake of using the spray unless the bear is a few meters away from you. Remember using the spray will only make the bear angrier. You cannot, therefore, afford to miss.
  • When dealing an attack from a grizzly bear, it is highly advisable that you play dead by going into a fetal position. This move will make you look vulnerable to the bear. No matter how much it snarls at you or tries to bite you, do not move an inch. Acting so will make the animal lose hope and leave you alone.
  • Hide yourself using your backpack. While in the fetal position, protect your back using your bag. This way, when the bear tries to bite, he won’t reach you but instead bite the backpack leaving you unharmed.
  • Run to the nearby tree and climb as high as possible. Black bears know how to climb trees but in the case of the other bears, climbing on a tree is a safer option than waiting to fight back.
  • Do not try to fool the bear by hiding in a tent. It will follow you in by tearing it down since it is weak. This move is a very dangerous one considering there is no much space in the tent.
  • Fight back with all you got. If no matter how hard you try the bear still won’t leave you alone, you have no option than fight back. You don’t need someone to tell you that it’s your life that is in danger. With all your energy make lots of noise and try to reach out for the bear’s eyes with your fingers. At all this time you should be very tactful to avoid his bites and scratches. In this case, your swiftness will be the best weapon.
  • Learn about the bear’s weaknesses and use it against him. For instance, try attacking from behind rather than in front. The bear has such a neck structure that makes it hard for him to freely look behind him without having to turn his entire body.

How to be Prepared while Hiking/Camping in Bear-Prone Areas

If you love fun and enjoy outdoor activities, bears should be the last thing to deny you the opportunity.

Be Prepared while Hiking Camping in Bear-Prone Areas

The secret is to go prepared that an encounter might happen.

  • While packing your camping/hiking gear, remember to park your bear spray.
  • Do not go out alone, be accompanied by friends. This way you will have someone to help you in case Mr. /Mrs. Bear appears out of nowhere.
  • Always have your backpack with you. It will save you if you meet with a grizzly bear.
  • Never underestimate the bear’s ability to spot you. According to scientists, the bear has as good eyesight as humans. If you can spot it from far, be sure it will also spot you. In this case, you can change direction to avoid a meeting.
  • Always make sure you clean out any food stuff near your camping site. Keep remaining foods on trees high enough that it’s difficult for the bear to sense.
  • Carry powerful flashlights to use at night. You can use these to blind the animal if they pay you an expected visit.
  • Be knowledgeable about how each type of bear poses for an attack. The knowledge will help you distinguish between a bluff attack and an upset one. The black bear moves in zigzag and tries to attack from undercover while the grizzly will give a direct charge.
  • While hiking in the arctic, you need to be extra careful as polar bears have an adamant sense of smell. If you spot the bear from afar, it is better to run back to your car while there is still time. Otherwise, you will find yourself trapped in ice and a grievous animal.

Conclusion

You can easily avoid a bear attack by using one of the above measures. However if no matter how careful you are you still encounter one, use the tips discussed above to protect yourself.

Avoid a bear attack

While under a bear attack, never try to use a gun to protect yourself. Using a gun might get you in conflict with the wild animal protection unit as well as make you prone to getting serious injuries. Statistics from previous encounters have shown that people who try using a gun against bear get more injuries than those who use bear spray.

You should always know when to play dead and when to fight back. With the black bear, playing dead is never a good choice. The grizzly bear, on the other hand, requires that you play dead no matter how much it provokes you.

How to Stay Hydrated: Best and Surest Ways to Keep Your Body Refreshed

0
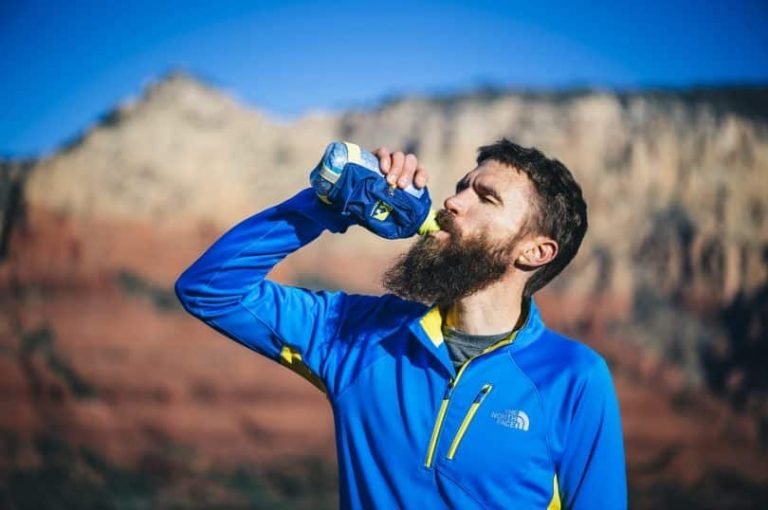
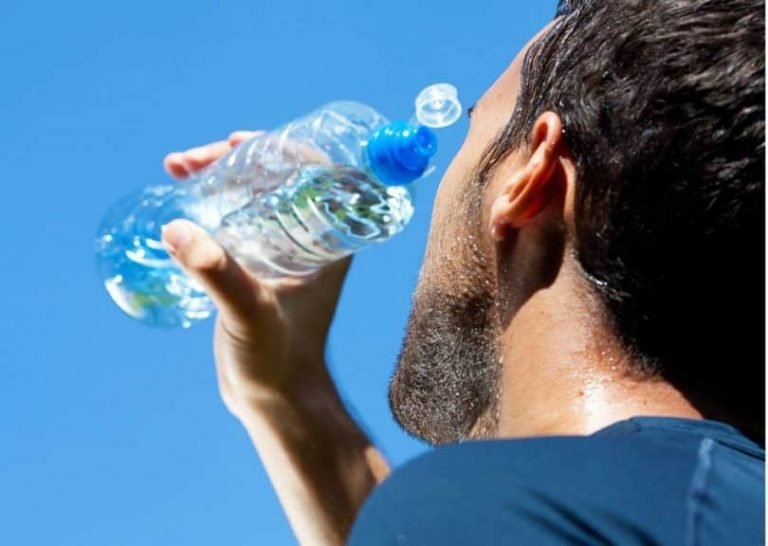
Stay hydratedBody dehydration occurs naturally, whether it is during summer or winter.  The only difference is that during hot seasons, our bodies lose water faster than when it’s cold. Now the big question is how to stay hydrated? There may be different ways to maintain your fluid level to the recommended levels.  However, one need to be cautious as some methods might lead to health complications like obesity.

Having enough water in the system is vital in keeping your heart healthy.  This enables it to pump enough blood to the farthest end without straining due to pressure deficit. On the other hand, it is a medium that each body process requires. We are going to look into different ways to stay hydrated to maintain healthy bodies. The rate of dehydration differs, for example, when hiking; the rate of sweating will generally be high. Consequentially, you’ll need to keep your body hydrated by taking enough water.

Before we get to our main discussion, you need to know what causes the body to dehydrate.

What Are Leading Causes of Body Dehydration?

Sweating

Everyone sweats regardless of whether you’re working or not.  However, people who are more active, are prone to dehydration since they profusely sweat.  Additionally, weather conditions and seasons determine the rate of sweating.   During summer, the sweating rate is higher than in the winter, hence people lose water faster.

Illnesses

A healthy person experiences the normal water loss through the biological processes. The water loss from the body is gradual, unlike in a sick person.

Causes of Body Dehydration

If someone is suffering from vomiting, diarrhea, or diabetes, they lose water more gradually.  This call for recharge or the person will suffer from a dehydration.

Alcohol consumption

Consuming alcohol without taking enough water can result into lesser blood fluids. Upon drinking alcohol people urinate more, drawing much water from the body. The reason is that alcohol requires a lot of water to be flushed out of the body. Hence, it leaves the body dehydrated.

Age

When it comes to age and dehydration, children are more sensitive than older people. Their bodies require constant hydration since they are smaller and more exposed to environmental factors.  For an adult, dehydration might be slower to notice than on a kid.

How to Know You Are Dehydrated?

  • Dry skin. One of the surest ways to ensures to know you have a low fluid level is drying of the skin.  This is common among the people who sweat heavily and take less water.  To some extent, it can cause skin flushing and cracks. For example, medics indicate that dry lips are a sign of dehydration
  • Fever, chills, and headaches. Though sweating causes dehydration, it is essential for cooling our bodies.  If you have a little water in your system, you might experience high temperatures leading to headaches, chills, dizziness, and fever.
  • Bad breath. Bad breath is the top indicator of a dehydrated person.  Regardless whether your oral health is okay, when you are dehydrated, lack of enough saliva causes your mouth to smell bad. This is due to the reaction of salivary bacteria causing the foul smell.

After knowing some of the causes of dehydration, and their effects, it’s good to know how to protect yourself.

Know You Are Dehydrated

Keeping your body hydrated is worth than wait until the fluid level decline.

Who Are People Prone to Dehydration?

Although water loss from the body occurs to everyone, the rate at which one is exposed is different from one another. For a normal healthy person, dehydration might not cause dangerous effects.

However, there is a group of individuals who are sensitive to excessive water loss and need to rehydrate their bodies always. The group includes

  • Infants and little children
  • Critically ill people
  • Aged
  • High altitude living people
  • Sportsmen

How to Keep Your Body Hydrated?

Keeping your body in the correct fluid level can depend on the personal commitment.  As you know, all the surrounding factors will lead to loss of water from the body.  To counter this, you need constant refreshment.

However, it is advisable to keep away from drinks that can lead to weight gain like soft drinks.

Drink enough water

Water is the best ways to rehydrate your body.  It is the most available fluid and everybody can easily afford it.  When leaving the house, make sure you refill your bottles with water.  You don’t need to worry about weight gain as with soft drinks.

Also, water is neutral, it won’t affect your blood pH much.  In fact, it helps to create an osmotic balance if the person is suffering from dehydration.

Drink enough water

There is no daily recommendation on how much an adult person should drink.  The state of the body is what determines the amount one should take.  On average, a healthy person should take at least 8 glasses of water, though this is not fixed.

Some people will require more than others.  Also, it is important to note that the body produces some of the water through metabolic processes. But, it is not to sustain the body, and that is why drinking water is necessary to cover the deficit. It is estimated that through these processes, body only produces about 750 ml.  As stated earlier, production of dark colored urine is an indicator you have lesser water in your system.

Fruit juices

Natural fruit juices are ideal ways to ensure you keep your body fluid at the correct level.  The juices are perfect for everyone as they do not cause weight gain.  Further, unlike other beverages like coffee and tea, natural fruit juices do not have a diuretic effect. In fact, they have many body benefits besides maintaining the dehydration levels.

When a person is sick, he/she loses a lot of water and electrolyte. Giving them pure water is ideal, but an electrolyte is greater than pure water. The good thing is you don’t need to rely on commercially prepared oral rehydration formula; a combination of different fruit juices can correct the situation.

Fruit juices

Therefore, don’t wait until you are dehydrated to start looking for solace.   Make fruit juice daily!  One of the most natural juices available is coconut water, and no blending or additives are required for you to drink it.

Besides being useful for keeping the body hydrated directly, the juices help in reducing toxins in the body’s vital organs. Some of the organs involved in water absorption, such as intestines and kidneys, sometimes have their effectiveness reduced due to the presence of toxins from food.

The water found in the juice is used in the elimination of these toxins. By consuming a lot of fruit juice, your body will become effective in fighting microbes such as bacteria and fungi and lowering the level of free radicals in the body.  When the internal organs are working properly, absorption of water and other nutrients is efficient, hence the body is well hydrated.

Eat a lot of vegetables and fruits

Vegetables are the greatest source of water, which can help in keeping your body hydrated and your skin smooth and tender.  Fruits are made of over 70% water.  This shows that besides drinking water and other refreshing drinks, fruits and vegetable are perfect Dehydrators.

Unfortunately, the majority of people nowadays value processed food, hence they will only consume processed food and drinks. The fact is that commercially prepared fruits and vegetable aren’t useful as they are in natural ways.

Eat a lot of vegetables and fruits

If you aren’t so keen on making fruit or vegetable juices, all isn’t lost.  You have a chance to keep your body hydrated as well as detoxified and in good health. All you need is to include a lot of vegetables and fruits in your meals.

Through research, some of the fruits are found to contain 90% water of their total weight, such as watermelons, radishes, grapefruits, and tomatoes among others. But, the general rule is, eat as much fruit and vegetables as possible and you will not experience dehydration.

Listen to your body

When you become dehydrated, there are some of the common feelings that your body will portray.  For your own good, never ignores these signs, and refresh as soon as possible.

When you feel thirsty, it is an obvious indicator that your body doesn’t have enough water. By observing your body needs and listening to them, you are giving your internal body organs time to perform vital processes.

Listen to your body

Urine color can also suggest the state of your body.  Normal urine should appear clear and not colored. Sometimes you can experience a change in urine color due to many factors. The most common one is due to insufficient water in the body system.

Amazingly, you also might experience this scenario, but you without feeling any sign likes being thirsty.  But, to counter dehydration early, it is ideal to find a refreshing drink.

Avoid diuretic drinks

A diuretic substance is one that causes a person to experience frequent urination.  These are substances that contain alcohol and caffeine.  Though people drink coffee and tea as a way of rehydrating their bodies, the truth is that they are doing more harm than good.  While taking a beverage with caffeine, one tends to have an increased frequency of urination.

Caffeine is not ideal to the bladders as it causes irritations causing a person to feel the urges to urinate.  This increased urination contributes to massive water loss from the body which needs to be replaced.

Avoid diuretic drinks

Alcohol, on the other hand, it is a great contributor to body dehydration.   Upon ingesting alcohol, some people may experience nausea resulting in vomiting.  Further, when it gets into the body system, it prevents the absorption of water by the kidney through inhibition of antidiuretic hormone.

Without ADH, water absorption can’t take place, hence all is channeled to the bladder causing the urge of constant urination. Also, alcohol requires a lot of water to eliminate it from the body; this causes dehydration of cells, leading to a significant loss of water.

In some instances, individuals who have taken excessive alcohol are given coffee to reduce the effect of alcohol. But, since both coffee and alcohol are diuretic drinks, the situation can leave the victim badly dehydrated.

Additionally, taking excessive caffeine can also lead to vomiting, worsening the overall situation. Therefore, when people think that taking caffeine beverages is a way of hydrating their bodies; the fact is they are totally wrong and are actually doing the opposite.

Measure weight before and after exercising

People, who are involved in strenuous sports activities, need to monitor their levels of body hydration. Failure to check can result into their bodies underperforming and can suffer from heat strokes.   Knowing your body water loss during the exercising period can help you to drink the correct amount of water.  Before you embark on an activity, it is advisable to measure your body weight.

After completing the exercise also get your body weight measured. This will indicate how many pounds you have shed.  It is recommended that for every pound of weight lost; one should drink 16-24 ounce of water to maintain the body hydrated.

Measure weight before and after exercising

As with other situations, when you are exercising, there is no fixed amount of water that you should take.  What is important is to ensure your body doesn’t suffer from dehydration.  Ideally, before you start exercising, take over 17 ounces of water a few hours before the actual training.

When you start exercising, it is ideal to take about 10 ounces every 30 minutes. Otherwise, you are going to experience dry mouth, dizziness, muscle cramps and dry sweat.  These are the common indications of dehydration for sportsmen.

Drink sports drinks

Sports drinks are more ideal for people who are engaged in strenuous exercises.  During the training session, people lose a lot of water through sweating. Besides, the water is lost with a significant level of sodium and potassium ions.  Therefore, drinking pure water might be useful, but these particular drinks are the best.

They are designed with other ingredients such a glucose and salt to add an electrolyte level in the body, besides hydration.  The glucose is the provision of energy, hence preventing muscles from fatigue and cramping.

Drink sports drinks

There are different options of sports drinks that one can opt.  However, you don’t need the commercial ones.  You can also use the naturally occurring ones, and you will get the same results. For instance, people have been using coconut water for refreshments after sports.

Further, grapefruit juice is ideal for individuals who are on a weight loss mission.  Milk, on the other hand, is vital hydrating fluid for muscle building, due to its protein composition.   Alternatively, adding salt to drinking water to replace the lost salt maintains osmotic in the cell and avoids more dehydration, due to low osmotic pressures in the cells.

Exercising

Exercising is known by many people as one of the ways your body loses water. So, a lot of people consider it a dehydrating factor.  However, exercising, when done properly, is one of the best ways to ensure your body is properly hydrated.  When you are training, the body’s blood circulation is boosted, facilitating the efficient movement to the farthest body cell.

Exercising

The enhanced flow is ideal for the supply of nutrients and electrolyte in the body cells.  Also, it increases water absorption in the intestine due to increased blood flow. Therefore, any kind of training is necessary for the enhancement of blood circulation and at the same time more cell hydration.

Avoid smoking

Many people, if asked, know that smoking causes cancer and other breathing problems.  But, according to research, tobacco smoking is directly related to skin damage caused by dehydration.  Additionally, smoking causes a deficiency of vitamins due to harmful chemical substances in the tobacco smoke.

Avoid smoking

People who have recovered from smoking have shown a great difference regarding skin elasticity and hydration after the detoxification process.  Therefore, avoiding smoking can help your skin to remain elastic and prevent hardening of the cells.

Getting enough sleep and rest

A lot of skin damage and dehydration occur during the daytime.  High sun rays and other environmental stresses are the main culprits. During the night when one is resting your body undergoes the repairing mechanism at a cellular level.

Getting enough sleep and rest

This creates a more alkaline body due to reduced level of stress, hence more elastic cells.  Sleeping also leads to more hormone stabilization, and more efficient body processes. With more relaxed skin and better-restructured skin cells, the body remains tender and soft throughout the next day.

Therefore, having a better sleep and resting is vital in ensuring you have a well-hydrated skin.

Dehydrated Food Recipes: Dehydrating for Survival

0
Best Dehydrated Food Recipes hiking

Imagine getting to enjoy meals free from preservatives and additives throughout the year, minimize the size of your backpack, create additional storage space, and have nutritious meals at your disposal? All these components can be achieved as long as you have your dehydrated food recipes with you. Dehydration is one of the ancient, yet healthiest forms of food preservation which can be useful for your backpacking of camping trip.

Dehydration is a technique that involves the removal of moisture from food components, preventing bacteria and mold from forming and making them more durable for consumption. Most people may be worried that dehydrating food affects their nutritional value, but this is not necessarily true. Dehydrating ensures the flavor of the food is locked so it remains darker and richer and with more fragrant. In some cases, dehydrated meals become even sweeter to the taste.

When utilizing this technique as your cooking tool, you may decide to become as creative as possible. This will make it possible for you to benefit from the in-season vegetables, fruits, nuts, meats, and herbs. Buying these foods in bulk and dehydrating them for later can be beneficial for your outdoor survival.

Is Food Dehydration The Best Technique?

As much as you may enjoy tending and gardening fruits and vegetables, you will always be keen on the time associated with the production of food. People have been disappointed when they find mold and other signs indicating their preserved food has perished.

Other techniques

While there may be no absolute technique for preserving food, one may agree that dehydration has its place when it comes to matters of outdoor survival.  Have a look at how this technique stacks up to other common methods of preservation:

  • Canning and Pickling: Dehydrated and canned meals both have a common demerit in the sense that low salt, low oxygen, low acid food can result in botulism. However, unlike the canning process, dehydrations lead to the reduction in volume, which makes the food to occupy less space.
    Although dehydration may result in food that is not as tasty as those in cans, they are still edible and can sustain your survival for a longer time.
    When you are planning to can meals in a post-crisis situation, you should also consider using fuel as well as the cost you would incur in obtaining supplies.
    Alternatively, you can dehydrate the food using the sun in locally made Dehydrators. Considering canned meals lose their nutritional value, dehydrating food is a much easier and reasonable option.
  • Freezing: Although frozen meals do not lose their taste and do not need to be dehydrated, they can only be preserved in the freezer. Ones the electricity is lost, or you lack an alternative option to fuel the freezer, you can opt for salt and ice to continue freezing the food for more days.
    Since dehydrated fruits and vegetables do not need to be frozen, they can remain in excellent condition as long as they are stored in dark, dry, and cold areas. Frozen foods can only last for a maximum period of one year, while the dehydrated ones last three to five years.
  • Smoking: If you want to preserve your meat for months, smoking will be suitable, as long as you use a recipe that would be ideal for the meat under consideration. Although dehydrated meat is long-lasting, smoked meat tastes better.
    However, with dehydration process, the amount of food that would go to waste is quite lower compared to smoking.
  • Vacuum Packing: Since this technique also minimizes the content of oxygen in stored meals, they may also hide botulin toxin. Additionally, vacuum packing is not as durable as dehydration, and it’s difficult to leak or break open over time.
    When comparing the two, dehydration process is much better since the number of wasted meals is lower than vacuum packing.
  • Salting: When this technique is combined with smoking, it can extend the shelf life of food to about a year. Salt can act as an anti-bacterial and has a drying effect on any food, particularly meat and fruits. Additionally, salt is a shelf life extender for any food preservation technique.
  • Fermenting: Apart from making alcoholic beverages and wines last for an extended period, this technique is also essential for dairy products. The soft dairy products may take months to perish under refrigeration while milk only takes a few days.

Moreover, at room temperatures, cheeses are able to last months and years without going bad.

With wine as an exception, most fermented products do not last longer than the dehydrated ones. Nonetheless, fermented foods contain high levels of moisture which makes them suitable in situations of inadequate water.

Basic Tools And Supplies

If you have ever dehydrated products before, then you can agree that the process does not require a lot of supplies or tools when dehydrating food.

Basic Tools for Dehydration

In many cases, these tools can either be purchased at a low cost or constructed using the locally available materials.

  • Tongs: Since your hands can easily harbor bacteria and other harmful microorganisms, it is recommended to using tongs for grabbing food and placing them in containers.
  • Dehydrator: This is a cheap item to obtain. Making a dehydrator is an easy process that would require the use of locally available materials. You may decide to use wood or any other material.
    If you construct your own dehydrator, you may decide to utilize a design that uses no fuel but only heat from the sun.
  • A scrubber and disposable latex gloves: A scrubber will be used to wash your hand before handling food. An excellent hand scrubber and a good pair of latex gloves create an additional line of defense against bacteria and other harmful microorganisms which could hamper the effectiveness of the dehydration process.
  • Salt: This is the cheap and readily available resource. Although adding salt to dehydrated food may not guarantee longer shelf life, it can still be beneficial.
  • Oxygen Absorbers: If you want to minimize the risk of bacteria, oxygen absorbers are a suitable option. However, it is not recommended for use in dehydrated food due to the issue of botulism.
  • Other Preservatives: Herbs such as Rosemary can be used in helping extend meat and vegetable life. Since a good number of these herbs have medicinal value, they are an excellent dual-purposes to the dehydrated food products.

Get Started With Fruit Dehydration

Pears, apples, grapes, citrus fruits, strawberries, and other fruits do not last longer than dehydrated vegetables.

Nonetheless, these are all important if you are in need of a well-balanced diet. The following guideline is essential for dehydrating fruits for your survival diet:

  • Begin by selecting fruits which are somewhat ripe and not in the brink of rotting. Avoid using the ones with bug bites or marks that may indicate their skin is compromised. If no fresh fruits are available, you can decide to dehydrate the frozen ones.
  • Make sure the temperature of your dehydrator is between 125 and 135o When using the solar dehydrator, ensure the temperatures remain at that level for about ten to twelve hours depending on the type of fruit and the number of trays used.
  • Make sure your hands are thoroughly washed. You may decide to use latex gloves, but they are optional at this stage.
  • Wash the fresh fruits thoroughly. If you bought them from a farm, be certain to wash off the pesticides and waxes. Unless they come from your farm and you are sure you did not spray pesticide on them, make sure they are carefully and thoroughly washed.
  • Remove the core from the apples, pears, and pineapple. Core enough fruits for a tray in the dehydrating equipment.
  • When drying peaches or plums, make sure you remove the pits. Additionally, you may want to remove the skin from fruits you would dry without skin. However, it is recommended that you leave the skin for most fruits as this is where the nutrients are found. As long as you are confident there is no wax or pesticide on the skin, peeling them off would not be a good idea.
  • Fruits will dry properly if they are cut into slices of about 1/8 or ¼ inch. You should only cut whatever you would need so the slices can fit into the tray.
  • After the fruit is cut, it will start oxidizing. Although this effect is apparent in apples (which usually turn brown), other fruits undergo the same process. To minimize this effect and decrease the impact it has on the nutritional value of fruit, spray the fruit using lemon juice.
  • When loading your dehydrator, ensure there is an adequate flow of air around the pieces of fruits and in the ventilation zones.
  • After drying has occurred, remove the trays. Wash your hands using the scrubber and put on the latex gloves. Using clean and sterilized tongs to put the fruits inside the bags and do not vacuum seal them.
    Keep them open until they are completely cool. Sealing the bags quickly will lead to accumulation of moisture, which could hamper the dehydration process. Depending on your fruit, it could take a day or a few to condition.
  • After the fruits are cold and easy to tear, it will be possible to put them in air proof container. You should also note that some fruits such as oranges can become brittle and could crack with ease.

Examples Of Dehydrated Fruit Recipes

Apart from making great backpacking or camping foods, these recipes could be suitable for children, the elderly, diabetics, or people who cannot eat tough or brittle foods.

  • Apple Chips: This is an excellent recipe for anyone who is in love with crunchy foods and cinnamon. You can also use different fruits, sugars, and spices to create other crisps or chips.
  • Fruit Leather: You could already be purchasing this in supermarkets without knowing it. Why not come up with your “fruit rolls” and include your prepping skills
  • Candied Fruit: You may try this recipe to make dehydrated fruit that has a higher sugar content. In case you require a calorie dense meal or a lot of carbohydrates, this would be an ideal way to go about it.

Dehydrated Vegetable Recipes

If done the right way, dehydrated vegetables will be soft when boiled or fried.

Dehydrated Cauliflower Popcorn

For a fast bug out food, you may use these recipes to combine dehydration with pre-cooking processes.

  • Cauliflower Popcorn: You may also decide to utilize other herbs and spices to suit your tastes.
  • Tomato Sauce Leather: As is the case with fruits, some vegetables create a pliant, rollable “leather” when mixed and dried in small slices.
  • Sweet Potato Chips: This recipe may be utilized in making potato chips. There is no need for putting up with chips soaked in oil when you can obtain excellently seasoned chips from a dehydrator.
  • Starchy Food Bark: Foods rich in starch such as pumpkins and potatoes will not make leather as they will become brittle when dried. If they come into contact with moisture, they will rehydrate and regain their original flavor. It is possible to combine different types of ingredients to come up with tasty barks which act as gravies, sauces, and other nutritionally dense foods.

How to Dehydrate Meat

Although dehydration can extend the shelf life of meat for a period exceeding one year, salting and smoking is a much better option when you want to retain the taste and flavor of the meat.

Additionally, you should note that the hydrated meat can be hard or tough to consume. That said, here is how you can dehydrate your meat:

  • When dehydrating, you may decide to use meat acquired from the store or an animal you hunted. Ensure the meat is prepared and ready for cooking. When handling it, follow the same hygienic steps used when dehydrating fruits. If you will be dehydrating various types of meat, remember to scrub your hands between every kind of meat.
  • Unlike the fruits, you will need to clean the meat thoroughly before you can begin the process of hydration. Cleaning will help to get rid of fat, oil, and grease since they rot quickly.
    If you broil, fry or bake the meat, make sure you remove the drippings once the meat is cooked completely. Put water into a vessel and allow the meat to boil. Fat and oils will begin to form at the top layer. Take out the top layer and discard it. You may decide to add more water about three or four times to ensure all the out and fat is eliminated.
  • To improve tenderness, try using pressure cookers as this conserve more heat energy, allowing the meat to cook more.
  • While it’s cooking, add rosemary since this product will help in stabilizing ant fat and oils still left in the meat.
  • Once the meat has cooled, cut it into small, one-inch strips. Before doing so, do not forget to wash your hands thoroughly. It is not recommended to put various types of meat together in a tray during dehydration.
    In addition to that, do not dehydrate meat, fruits, and vegetables together as the oils and fat from the meat could come into contact with the vegetables and fruits. In turn, this will make the fruit and vegetables go rancid faster than you had expected.
  • Dehydration of meat needs to be done at 160oF for six to ten hours.
  • After the meat has been dehydrated, give it time to cool before you can seal them into bags.
  • Remember that dehydrated meat will not last more than two weeks without refrigeration. You will need to freeze it if you expect it to last longer.
  • As a cautious step, try and avoid including meat to dehydrated vegetables and fruits. Although these products are sweet when rehydrated, the meat will reduce the shelf life of all products in the bag. Adding meat to fruits and vegetable is suitable when you are preparing for immediate consumption.

Recipe for Dehydrated Meat

  • Dehydrated Chopped Beef: You may modify this recipe to make bits of bacon or other combinations of meat from chopped chicken, deer, or turkey.
  • Beef Jerky: You can also decide to modify this recipe using other seasonings.
  • Fish Jerky: This is suitable for any fish and seasoning combination. Do not forget that some fish species have a lot of fat and oil. In such a case, it will be suitable to take the necessary steps to get rid of the oils and fat.

What Have We Learned?

Since dehydrated food takes way less space in your backpack than regular or frozen food, it is actually a much better solution for hikers, campers, and backpackers.

Dehydrated food for survival

You will leave more room for other pieces of your gear, and you will still have a nice, nutritious meal. Hopefully, our recipes will help you the next time you start preparing for your outdoor adventure.

Let us know if you ever made dehydrated foods for outdoor survival, and what were your experiences, your tips, and advice by commenting in our comment section below. We would also love to hear more about the recipes you used and the precautions you took to ensure your prepared food is tasty and safe for consumption.

Overhydration: Is There Anything as Drinking Too Much Water?

0
Overhydration guide

When it comes to healthy living, the phrase “drink a lot of water” is common. To many who know the importance of taking lots of water, this phrase is positively embraced. And there is nothing wrong with this considering it has a full list of benefits.

These benefits include; flushing out body toxins, maintaining a bright, healthy skin, relieving, helping in weight loss among many other advantages. However, at times, a lot of water in the body can cause overhydration.

Causes of Overhydration

There are usually two main causes of overhydration;

  • Increased intake of water: there is a reason why there is a specific amount of water that you should take on a daily basis. This water helps you achieve the health benefits above. However, if you take too much, your kidneys will have a problem getting rid of it through urine.
  • Water retention: this is caused by medical conditions which make it hard for the body to get rid of the water. It’s the most dangerous type of overhydration as it leads to an imbalance between blood salts and body water.
  • Medical conditions that cause water retention include: heart failure, liver problems, kidney complications and syndrome of inappropriate antidiuretic hormone (SIADH)

If the body is taking in more water than it is losing, there is a high likelihood of getting overhydration. Initially, there are no serious observable symptoms, but if it gets severe, there are evident signs as we are going to see below.

Overhydration Symptoms and Signs

Just like any other disease or body complication, overhydration has signs and symptoms that you should look out. Brain cells are the most affected by low sodium levels caused by the increase of water in the body.

Overhydration Symptoms and Signs

f water accumulation occurs slowly, the brain cells have time to adapt to the changes hence unnoticeable signs at the initial stages. However, if overhydration happens rapidly, severe problems related to the brains will be noted immediately.

  • Quick to irritate, drowsiness, confusion and being inattentive are some of the first signs that you will realize. One also tends to shout while suffering from overhydration. As you can see, these first symptoms are related to the brains and the reason is that is the first organ to feel the effects of low sodium levels in the body.
  • Nausea, vomiting, and headaches.
  • Blurred vision, other eyesight problems
  • Muscle cramps
  • Unending seizures that might even lead to comatose
  • Overhydration can also lead to paralysis on one side of the body and in other cases lack of body parts coordination.
  • One can also experience anemia and hemorrhage which result from high acidity in the blood
  • Overhydration also causes a decrease in oxygen levels in the body leading to cyanosis.

Dangers of Overhydration

In addition to the above symptoms, overhydration can cause other problems that are life threatening.

Dangers of overhydration

If it goes untreated for a long time, overhydration causes hyponatremia which is a decrease in body sodium to dangerous levels. This result into:

  • Weakening of the body muscles
  • Unconsciousness
  • Cramping
  • Seizures
  • Comatose

The mental problems that result from excessive water in the body can lead to confusion. These issues make it hard for someone to concentrate or do anything sensible.

How Do You Avoid Being Overhydrated?

The effects of overhydration are many and detrimental as you can see above. It is, therefore important to keep your health in check to ensure you do not fall a victim of this condition. So, how do you go about avoiding overhydration? The following tricks will help keep your water levels in check.

Taking only as much water as you need is one of the most important precautions that you can adopt to avoid problems. You can achieve this by keeping watch of your thirst levels. Do not blindly take water just because the adage tells us to take eight glasses of water per day.

Avoid overhydration

The amount of water you take should be determined by whether you involve with activities that make your sweat such as exercising. If you are not sure if you are drinking enough water, check your urine color.

If the urine is dark yellow, you need to increase your water intake. If it is amber clear, then know your water levels are in check.

The weather should also determine the amount of water you take in a day. If it’s not too hot, your body won’t excrete sweat and therefore no need of taking too much water.

On the other hand, being exposed to too much sun increases the likelihood of your body will sweat a lot. To cover for the lost water, you need to take a lot of water.

However, you can likewise avoid taking a lot of water during hot days by;

  • Staying indoors where it’s cool; this prevents over sweating.
  • Make sure you wear light weight and bright clothes that emit heat, unlike thick and black clothes that absorb heat and make you all sweaty.
  • Be sure to take at least two glasses of water/non-alcoholic fluid while exercising.
  • Ensure you rest in shady places

Overhydration Diagnosis

You should visit a physician if you note any of the symptoms mentioned above. Your doctor will do tests that will help confirm your suspicions by carrying out;

  • An evaluation
  • A blood test

The assessment test helps determine whether the symptoms are caused by overhydration or by an excess of other body fluids such as salt and blood.

Overhydration Diagnosis

The blood test will give electrolytes concentration hence knowing what it is that you are suffering from precisely.

How to Treat Overhydration

  • If diagnostic tests confirm that one has overhydration, reduction in water intake is advised.
  • Where overhydration occurs due to heart or kidney diseases, other body fluid levels are also high. In such cases, the doctor will advise you to cut off the use of salt as it retains water in the body.
  • In cases where the condition is severe, one might be admitted and prescribed with diuretics to help increase urine flow hence getting rid of excess water. However, prescription of these medicines only happens under a doctor’s supervision.

Any other underlying conditions that might cause water retention should be treated accordingly.

How Do You Avoid Overhydration?

As you have seen, overhydration can cause fatal health problems.

How Do You Avoid Overhydration

Like many other diseases that can be prevented, you need to know how to stay healthy and avoid this unforgiving condition. You can achieve this by;

  • Always making sure you take water when your body needs it; you can sense this through thirst.
  • Always be on the know-how about your weight. You can do this by taking weighing weekly. If you note suspicious weight fluctuation, notify your doctor or take a test.
  • When it comes to health matters, you can never be too careful. That’s why it is important to add at least one low carb drink in your daily meals. The carb drink can be hot tea and lemon with little salt. Drinking this ensures your body temperatures are in check while the salt helps you absorb fluid.
  • For athletes and sportspeople, ensure you take sports drinks that are low in sugar. Also, monitor your urine color which should either be clear or pale. Anything other than this should raise concern.
  • Avoid taking water or fluid for that matter immediately you wake up in the morning. Train your body to feel hydrated after waking up.

How to Dry Clothes Fast: Helpful Tips for Outdoor Enthusiasts

0

While camping, backpacking or hiking in the countryside of your preference, it could happen that your clothes get wet either by the heavily sweating or after soaking in the rain. How to dry them as fast as possible in these unfortunate occurrences? Well, there are apparently many drying options and we will explore such techniques in here. Let’s say it rained on you while enjoying your outdoor activities, it will then be totally uncomfortable to even continue with your outdoor adventure with wet clothes.

They can make you catch a cold or other illnesses. It is, therefore, a matter of utmost importance to know how to dry clothes fast in order to prevent the inconveniences of wet clothes on you.  The another need to dry your clothes quickly is when you have washed some clothes in your camping site. It happens often that you overstay the anticipated excursion for days, so some of your clothes may be dirty.

Drying your clothes

There are techniques allowing you to dry bundle of clothes fast even in camping rather than having to wait until you get home to use modern gadgets like hair dryers and cloth drying machines. However, drying in the wilderness depends on weather conditions only, because there is no modern equipment to use in drying your clothes.

Backpackers, hikers, and campers often rely on heat, air pressure/flow and spinning in drying their garments. We will explore all these manual techniques in this article in a quest to make your outdoor fun hassle-free.

Tips on How to Dry Your Clothes Quickly

Let’s start with the situation where you have soaked in rain or you have sweated heavily while hiking in hot temperatures. Travelers hate wearing heavy clothes, especially in hot temperatures.

Presuming that you are wearing lighter clothes, it will be relatively ease to dry light, wet clothes fast, only if you are cognizant of the helpful techniques.

In this instance, techniques to be employed are: To dry the clothes in the sun/wind, wrap the clothes with towels, put them in your sleeping bag or hang them on your backpack.

Drying clothes in the sun and/or wind

After you have soaked in the rain, just go straight to your shelter or camping tent to put on the other pair of clothes while preparing to dry the wet ones faster in the sun. The problem may arise when there is no enough sunlight to dry the clothes or you got wet in the night. In the presence of enough hot sun, lay your clothes on rocks to dry quickly in contact with sun rays.

Alternatively, you can put the clothes on your camping tent or on the camping chair to be in direct contact with the hot sun. You must, however, keep monitoring them so that you can fold them over repeatedly for the other sides to dry fast too.

Drying clothes in the sun

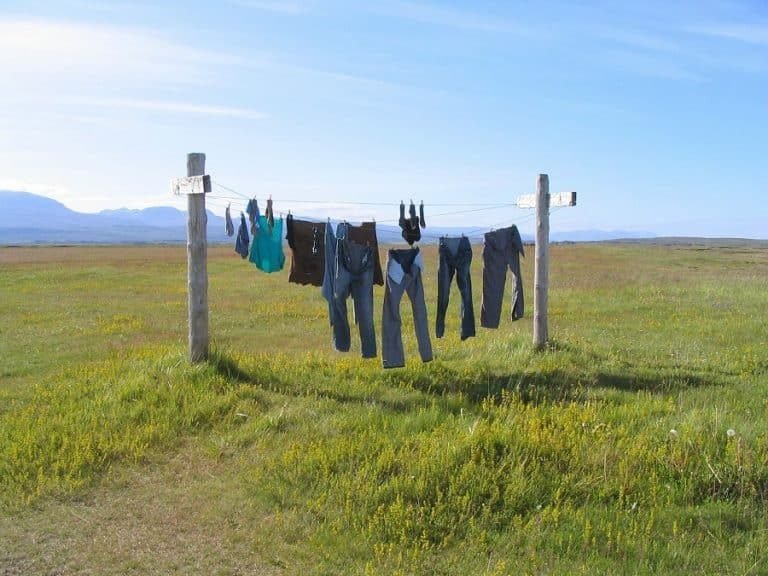
If you brought clothesline you can easily hang the clothes for the quick dry out. To set up this clothesline, use adjacent trees or attach it between the tent and the tree. Make sure you put the garments a distance apart to dry easily without distractions.

The clothesline should be in direct with the sunlight not under the shadows of the trees because the clothes may not dry as quickly as you want. In cases where there is no enough hot sunlight, but strong winds, you can still leave the clothes on the clothesline or a drying rack the entire day or night. The wind is also powerful in drying out the moisture out of your clothes to dry faster.

Even during the night, you can still continue drying out your wet clothes relying on the strong winds at night. Alternatively, you can start a campfire, but a few feet from your camping tent to help dry your clothes. Hang your clothes on a tree next to the fire, but not too adjacent to avoid the possibility of your clothes burning.

There are some synthetic fabrics that are very flammable so they can catch fire through the sparks of the camp fire. That being said, you must keep monitoring your clothes and keep folding them over for all sides to dry out before you probably wear the clothes the next morning. You are advised to keep touching the clothes to feel with your hand if they are not overheating due to strong flames of your wildfire.

Before drying out your clothes in the sun or winds, make sure that you wring out excess water first. Failure to do so will lengthen the drying time. Squeeze the garments tightly to help them dry quickly. You can also spin them to help remove excess amounts of water.

The same methods of drying your beloved clothes in the sun or winds can be accomplished in cases where you have sweated profusely. Sweat may not make the clothes too wet, unlike the heavy rainfalls. They should, therefore, dry out quickly compared to when you have soaked in the rain.

Wrap your clothes with towels or blankets

In your camping gear, we assume that you brought extra blankets and towels for your warmth at night. The power of wrapping wet clothes in unused towels or blankets cannot be overlooked. Dry thick towels or blankets can easily absorb water from your wet clothes and make them dry quickly.

Wrap your clothes with towels or blankets

As a camper or hiker, you probably  wouldn’t tolerate a long wait for your garments to dry in poor sun conditions. That could delay your purpose of walking around to explore the elegant amenities or mountains in the countryside. With the towels, you will not be disappointed.

How to use this method?

Simply take off your wet clothes and fold them in a towel. But squeeze as much water as possible before folding the clothes with the towel.

This will help expedite the drying process and will help eliminate the need to use more towels successively. Then twist the towel and squeeze it to help expedite the absorption of water from your wet clothes.

However, do not put many clothes at the same time, otherwise, the technique could be ineffective. Fold maybe two clothes at once if you have worn more clothes. Repeated application is also preferable with more towels in case the garments have not dried up completely.

But do not use the towels you sleep on during the night because then you will need to devise a plan on how to dry them as well before you could lay your head on them. The important thing to note with this technique is the material of the towel. Some have lint that could remain on your clothes after wrapping them.

Use your sleeping bag

The sleeping bag also has the power to dry your clothes quickly. However, only slightly damp clothes are recommended depending on the material of your sleeping bag. Too wet clothes could make your sleeping bag too wet as well to inconvenience you when sleeping. The same applies to putting the clothes in the sleeping bag – you must wring out excess water using both hands.

Use your sleeping bag

When you are sleeping on that bag at night, there will be some body heat to be used in drying out your damp clothes. If your clothes are too wet, expose them to enough ventilation before putting them in the sleeping bag.

Also important is not to put many clothes at once otherwise the method could be rendered trivial or it could take too long to even dry out. Remember, you want a method that could dry your garments fast.

Hang clothes on your backpack

Backpackers have extra clothes in their waterproof bags. In cases where you soaked in the rain while still enjoying backpacking in the wilderness, you can quickly dress in dry clothes and then hang the wet ones on your waterproof bag.

As you proceed with your trip the sufficient airflow and the sunlight will take their course in drying out your lovely clothes. Only light clothes will dry quicker, more especially in the presence of a hot sun.

Strong winds should also work just fine for this purpose. Even in cases where your clothes are wet due to sweating, this method still works effectively.

Iron the clothes to dry them fast

Not only electric irons are dependable as in our homes unless you have purchased a portable and inexpensive solar panel that can power your electric iron. Then that could be an advantage to steam out the moisture from your clothes to let them dry quick at your campsite. After ironing, you can hang them for the final dry-ups of the sun or the winds.

There are some alternative traditional irons than can be put on fire so that you can iron your clothes. These were used in olden days prior to the availability of electric irons. You can still rely on these irons to steam out the water from your wet clothes so that they dry rapidly.

Iron the clothes to dry them fast

However, you should be vigilant when using these irons on your wet clothes to avoid any damage to the fabric. Do not put the iron directly on your cloth. Rather, place a towel wherein you can put the iron to dry the garment. That towel will help in absorbing water for quick dry off your clothes.

Let’s now consider the situation whereby you wash your clothes in your camp and then expect them to dry faster. Washing a bundle of clothes may not be easy to let them dry as fast as when you’re drying few clothes soaked in rain. In this instance, you need to take cognizance of the favorable weather conditions.

If a downpour is anticipated, then the mission of drying clothes faster, could not be accomplished. Almost the same techniques of drying clothes as we stated above can apply except putting many clothes in a sleeping bag or folding many clothes in a towel. Let us delve into a few viable quick dry clothing methods of a bundle of clothes.

Wring out excess water

Whether hanging clothes during the day or night, it is important to squeeze excess water out of them to help them dry rapidly. After washing the clothes, if at the campsite, wrench and wring them out.

Use both your hands to tightly wring out a large amount of water directly to the ground, but far from your camping tent to avoid seepage of water into the tent. Otherwise squeeze the garments directly into the tub.

Wring out excess water

After squeezing the clothes using both hands, you can use a dry towel to twist the clothes until excess water has been absorbed. Towels have proved to be more effective in drying slightly wet clothes by absorbing excess water. Well, this depends on the material of the towel. Often wool or cotton towels are preferable. If the clothes haven’t dried well you can repeat with extra dry towels.

However, this process can be long if you washed many clothes because you will have to repeat using small bundles. We assume that you won’t take many clothes to camping even though it can be inescapable if the entire family went out with the kids. This method can, therefore, work well to dry your clothes faster.

Immediately after wringing out excess water from your clothes you must put them on a clothesline or drying rack you brought. Otherwise, lay the clothes on the rocks in sunny conditions for them to dry quicker. Keep monitoring them to change sides so that either side gets enough sunlight evenly.

In windy conditions, you can consider hanging the clothes on the trees for better airflow and air pressure that will help get rid of the moisture. While hanging your clothes, make sure you put them apart for a quick dry out. Light clothes will effectively dry faster in windy conditions than your jerseys or jeans.

Use campfire to dry your clothes

In the inconvenient instances where there is no sun at all or a promising strong wind, a campfire can be helpful. The fire can replace the hot sun rays It is not only in winter where sunlight is rare but also in some seasons. The fire can also help to dry out the clothes fast during the night. How to go about this technique?

Firstly, you need to set up a fire pit wherein you can make a sufficient fire flame. But the fire should be made of natural materials because other fire accelerant substances such as gasoline or paraffin could transfer their odor onto your clothes. Procurement of proper materials is needed to execute this task of starting a campfire with organic materials.

Use campfire to dry your clothes

The chemical substances can adversely burn the clothes if used in creating fire when clothes are put too close. With this in mind, use only natural materials and hang your clothes in a comfortable distance where enough heat can dry the clothes faster. Keep feeling the heat with your hands on the clothes and then change the side of the clothes for even distribution of the heat.

Use iron to dry your bundle of clothes

Traditional irons are also effective in drying out the clothes fast. These irons also need a campfire to use them. The safety tip to be noted is not to put the iron directly on the wet cloth. Also take note of the type of fabric to be ironed. It is safe to use a towel in ironing your wet clothes. This towel will also play a role in absorbing excess water.

Important Considerations

In your quest to dry clothes fast, you must employ only the viable methods for effective drying of your clothes.

For example, you cannot use a sleeping bag to dry out a bundle of clothes irrespective of being heavy or light clothes. You must opt for other techniques such as a clothesline, squeezing the clothes or folding them in a towel and then twisting it.

When using fire to dry garments, take into account all safety precautions of starting a campfire. Avoid creating fire too adjacent to the camping tent or other flammable materials that could destroy your outdoor great fun. Do not rely on chemicals to start a fire because their odor can affect your clothes which will then prompt you to wash them again.

Drying clothes outdoor

Before washing your clothes, check the weather forecast to avoid washing the clothes in imminent downpour conditions. It becomes relatively hard to dry clothes fast in rainy conditions even if you use ample ventilation in your tent.

In case it rains after you have just washed your clothes, make a plan to hang them in your tent overnight. The camping tents often have rainfly and roof vents that could help in drying your clothes.

DIY Camping Toilet: How to Create Your Own Toilet for a More Comfortable Camping Experience

0
DIY camping toilet

Camping is a relaxing and a great way to get away… until you have to go to the bathroom. This is the reason a lot of people, especially women, don’t enjoy going camping. Taking care of business in the outdoors can be a real challenge – but it doesn’t have to be! Wouldn’t you enjoy camping again if you had a comfortable and easy to use camping toilet? Then we have good news for you: You can make your own DIY camping toilet to eliminate all of your outdoor bathroom problems.

Portable camping toilets are environmentally friendly to prevent any pollution in the outdoor environments we all love to spend our free time in.

Toilet for camping variation

Follow our simple step-by-step directions to build your own camping toilet to take with you on all of your future outdoor trips and adventures. You’ll never have to worry about going to the bathroom outside again when nature calls.

How to Build Your DIY Camping Toilet

Items you will need:

  • Bucket of 5gallons, with a snap on lid
  • Plywood piece (make sure it has enough surface going over a toilet seat)
  • Regular, hardware store toilet seat
  • Small saw, like a scroll saw
  • Glue, fasteners (nails, staples, or screws), caulk, and paint

Directions:

  1. Collect the materials you will need to build your camping toilet.
  2. Modify your store bought toilet by removing all of the lid bumpers, screws, and
  3. In this step, you will trace the top of the 5-gallon bucket onto the plywood. The bucket should be turned upside down and placed on top of the plywood. Trace the bucket outline onto the plywood, leaving enough room on the plywood to be able to cover the toilet seat.
    Drill a hole inside the pattern circle and make sure it is enough to allow a scroll saw blade to fit through.
  4. Now it’s time to trace the toilet seat onto the plywood. Start by cutting out the circle you traced from the bucket with a scroll saw. Place the plywood under the toilet seat. Center the hole in the toilet seat with the hole in the plywood, then trace the toilet seat onto the plywood.
  5. Cut the plywood into the correct shape by carefully cutting the outside of the pattern you just traced using a scroll saw.
  6. This step teaches you how to fasten your toilet together. Apply a layer of glue to the plywood and place it on the bottom of the toilet seat.
    Make sure the plywood is lined up with the toilet seat and fasten it. Use any fastener you want but make sure it doesn’t go all the way through the toilet seat.
  7. Sand, caulk, and paint your new camping toilet to make it look nice.

Additional Tips for Making Your Camping Toilet an Enjoyable Experience

A portable camping toilet comes in handy when you want a comfortable and easy to use the toilet for going to the bathroom outdoors. Make your experience more enjoyable by making cleanup easy and controlling the odor.

When you set up your toilet at a new campsite, fill it with a trash bag to make bucket cleanup easier. Keep extra trash bags in the bottom of the bucket so you never run out.

Never bury plastic, simply tie the trash bag and leave it in the bucket with the lid on until you can dispose of it in a trash receptacle. You can also help control the odor in your camping toilet by using sawdust to absorb any unwanted odors.

Place sawdust in the bottom of the trash bag when you set up your toilet and keep a container of sawdust next to the toilet to sprinkle it over after every time you use the toilet.

Most importantly, don’t forget to bring toilet paper! You can easily store it inside your 5-gallon bucket when you are transporting the toilet, but what about when your toilet is already set up?

There are several DIY ideas you can use for making toilet paper dispensers to leave next to the toilet. By making clean up easy and eliminating odor from the start, it will make your camping toilet more durable, easier to use, and a lot more comfortable.

Here are two toilet paper dispenser ideas we like best:

  1. Soda Bottle Toilet Paper Dispenser: Find a 2-liter soda bottle and measure 230mm from the top then cut off the bottom of the bottle. Next, measure 60mm from the bottom and cut off the top of the bottom piece.
    Recycle the middle piece and place the two ends together to form a shorter soda bottle. Now pull the cardboard piece out of the center of a roll of toilet paper and pull out some of the toilet paper from the inside.
    Feed the toilet paper through the top of the soda bottle then attach the two pieces of the bottle together with the toilet paper roll inside and you’ll have an easy-to-use toilet paper dispenser.
  2. Baby Wipes Box Toilet Paper Dispenser: Simply place a toilet paper roll inside an empty baby wipes box. Feed the end of the toilet paper through the hole in the top of the box and put the lid back on to create a toilet paper dispenser.

Key Takeaways for Building Your DIY Camping Toilet

Bringing a toilet along on a camping trip makes the whole experience a lot more comfortable. Camping is always fun until nature calls and you have nowhere to do your business. Solve all of your outdoor bathroom problems by creating your own camping toilet to take with you from now on.

You can build a comfortable toilet using a real toilet seat fastened over a bucket and use a few easy tips to make cleanup easy and eliminate any unwanted smells. Portable camping toilets are also environmentally friendly allowing you to dispose of your waste properly instead of polluting the environment you love to spend time in.


DIY Camping Gear: Spend Less, Enjoy More!

0
DIY gear for camping

Spring is here, which means that the camping trip you could not wait to take is set to begin anytime. Of course, you have been planning to acquire your camping gear but your budget only allows for a few. Do not panic; whether you are a vet or a complete beginner, we’ got you covered! This article will take you through the process of designing the necessary DIY camping gear you will need for your camping survival.

What you should carry to your camping tour depends on the kind of trip you are engaging in. If you are taking part in a small day’s hike from a camp that is populated, you can carry a nice, big stove for your cooking needs. If you are taking part in extended tours, you will need equipment that is light and portable. Moreover, it is imperative to differentiate between backpacking and camping. Campers usually drive and camp out while backpackers hike and then camp with the equipment they have brought with them.

The gear which is suited for either of the two situations often has to do with packability and weight. Therefore, when planning your outdoor expedition, you need to consider which of the two you will spend most of your time doing.

DIY camping gear

Backpacking gear is usually pricier as they focus mainly on weight, but it is perfect for backpacking and camping. However, you will need to note that it is possible to make your own camping gear and reduce the cost you would incur in acquiring new equipment.

Nevertheless, before you decide to go with a DIY approach, you will first need to consider your specific needs instead of depending on a generic checklist.

You should also remember that the right gear will make your life simpler while outdoors. Also, the perfect gear can help you save a lot of money while on a camping tour.

Crafting your DIY or homemade gear can be an excellent solution to saving money and enjoying your camping holidays without having to fear costs exceeding budget.

What You Will Require for Your Camping

Paper Maps

Irrespective of whether you are backpacking or camping, there is a perfect chance there will be no cell phone service. You will need to get a map of the location you will be camping before getting out.

Paper Maps

After that, learn how to read a map and do not entirely rely on GPS even when you own a portable satellite GPS unit. A map can be found at the ranger station, or you may decide to print one online. Either way, ensure you bring a map with you.

First Aid Kit

It should not surprise you that a first aid kit is a necessity when you are out camping.

First Aid Kit

Include the usual bandages, gauze, and aspirins, but also include some hiking-specific items such as bug sprays, moleskin for blisters, and aloe vera for cuts and burns.

Pots and Pans

If you are camping and can access to a storage truck, just use the pans and pots you already own. You do not need any special camping utensils unless you do not need to mix your camping stuff and household cookware.

Trash Bags, Dishcloths, Scrubber, and other cleaning equipment

Just because you are out in the wilderness does not mean you will not have to clean your dishes or tidy up.

Camping equipment

Carry along some dishcloths, trash bags, and scrub brush as well. There is no magic camping-specific item here, just carry along whatever you have, and try as much as possible to leave your campsite better than it was before.

Do-It-Yourself Camping Gear

Fire Starters

Gasoline is dangerous. Dryer lint is not exactly what we always want to inhale. Twigs can get damp. Let us focus on a fire starter which is more reliable and one that is less dangerous and unhazardous to your health.

Various techniques can be used in creating homemade fire starters. One of the easiest and convenient methods involves the use of cotton balls. Simply place the balls of cotton inside the Vaseline jars, then cover the balls using a plastic bag.

When you are ready to start a fire, just use one of the greasy pieces of cotton and use it to light your fire. As a starter, the cotton will burn for a few minutes, at least two to three, giving you the time you will need to build a fire. You can use twigs, leaves, and pieces of logs to build a lasting fire.

The second and more elaborate technique for developing a fire starter is to use an empty cardboard egg carton. Fill the wells of the egg carton with small shaving and sawdust.

While on minimum heat, melt a paraffin wax in an aluminum liner (disposable pan) and pour the wax in every egg well. After these have cooled, you will have your homemade fire starters!

In addition to that, used coffee grounds and soy candle wax to make a foolproof igniter suitable for use when you have got less-than-perfect fire conditions. Additionally, it produces a great smell.

Here is how:

Collect some coffee grounds and scatter them on a cookie sheet. Bake in the oven at two-hundred and fifty degrees, or set in the sun to get rid of moisture. Place dry coffee ground into an egg carton. Cut the filters into tiny pieces, and put them on the grounds. You can also stick matches in if you have them with you.

Melt some wax and place them on each egg cup. After they have cooled, cut off one egg-cup at a time. Now you can light a filter or match and watch it burn. Place the starter under some logs or twigs to get your fire going.

Buy it alternative – when you decide to buy a starter, look for an eco-friendly option that will not produce strange odors. It’s even a plus if the starters are packed in repurposed containers such as used soda bottles.

DIY Pulks (Pulkas)

These pull-behind sleds the wintertime backcountry travel easy and fun. Moreover, they are great for carting gear or firewood. What is more interesting, you can make them with as littles as $20 with parts from the local hardware store.

Using a plastic winter sled, drill about ten holes around the sidewall of the sled. Beginning at the front corner, pass a rope through the holes, moving around the back of the sled and then towards another front corner.

Although it’s a meticulous process, guide the end of the ropes though two PVC pieces that are of relative to the length of your sled.

After you are done with threading the rope, you should be able to hand them out of the PVCs. Attach a carabiner once you have tied some loops on all ends. This can be attached on the pack’s waistband.

For an increased control, you can cross the pipes to form an “X.” Your children can sit on camp chairs in the sled. To prevent outside elements from getting on the surface of your sled, you may decide to add some extra insulation on it.

Lantern

Some little hands-free light can be achieved courtesy of a headlamp, but having a lovely lantern to offer an extra illumination is nice when you are camping, on the picnic benches, or inside the tents.

DIY Lantern

Still, people rather spend their money on items they find more interesting such as fish tacos. Chances are they probably have everything they need to create the illumination they require. However, for those looking to set up their own lanterns here’s how to go about the process:

  • Fill a gallon-sized jug with water
  • Slip the headlamp over the center of the jug
  • Click to turn the bulb on and point it toward the jug
  • Light reflection on the water will act as the lantern

Buy it alternative – When investing in a lantern, you need to make it a device that can pull double duty. There are lanterns which can charge cameras, cell phones, and GPS gadgets, and can convert into flashlight mode if required.

Dry Bags

Fold down a 2 cm hem of fabric on its edge and sew to come up with a slot. Stich at the center to create two pockets and holders for the stiffening strips.

Attach by sewing, the female and male plastic clips to the webbing, one on either ends and melt the webbing’s edge using a lighter to prevent fraying.

Again, attach the webbing (by stitching) to the pocket on the top edge, making sure the clasps dangle over the edge. Also, ensure you have a clearance that will allow you to stitch together the seams.

Make cuts all the way, following the cloth’s edge where you will attach the base. This is important as it will assist with attaching to the edge. Create tacking stitches that will aid in position the disc to the body.

Put in a webbing to help when you want to remove items from the bag; however, this is optional. Using a machine, you can then sew around the edge.

Put in the stiffeners at the top slots, taking precautions to ensure they are sufficient to allow for seams. Sew on the length to create a tube. That’s it! The bag is complete.

Bug Spray

If there is anything that can convince any die-hard camper to book a motel, it’s the swarm of bugs. High grasses, damp weather, and wetlands are conducive for bugs, but you can keep away ticks and mosquitoes with some few natural products.

Here is how:

Mix two parts of water and one part of tea oil in a spray bottle and squirt your socks, shoes, and pant cuffs to keep off ticks.

Bug Spray

When dealing with mosquitoes, put some distilled or boiled water in a spray bottle and add witch hazel and thirty drops of essential oil such as clove, rosemary, peppermint, cinnamon, lavender, and eucalyptus (the more the oil, the stronger your spray).

If you have no oils, you can use some tablespoons of dried herbs such as cloves, spearmint, and catnip to boiling water. After that, press the herbs and then combine its resultant water with rubbing alcohol or witch hazel. Apple cider vinegar has a strong odor but is a powerful bug repellent.

Add some sage on the campfire to get a similar effect.

Buy it effect – Pick the herb-and-oil solution, and choose a spray which will not damage your equipment or fabric.

Ice Jugs

Before going out for your camping, simply freeze some water in advance in some couple of one-gallon milk jugs or two-liter bottles. Put these in the cooler to keep the food cold. Avoid melting ice as this may keep your food soggy.

Bike Pannier Buckets

When heading out for your camping escapade, instead of buying expensive panniers for a hundred dollars or more, try bolting five-gallon square buckets to the rack of your bike.

You may be in a position to get these free-of-charge from any local restaurant, or you may decide to use some empty kitty litter buckets.

Bike Pannier Buckets

For this purpose, you will require a strong rear bike rack and some U-bolts. You will need to size these U-bolts so they are largely sufficient to go around the posts that provide support to the rack.

Place the buckets next to the rack’s frame, so the base of the top extension of the buckets are on top of the rack’s rail. Mark and make holes to create connection points for the U-bolts. With the nuts outside the rack, bolt them on.

You may decide to keep the bucket permanently attached to the rack so it can aid in transporting items such as clothes or even ice creams.

Soaps

If you are planning on rinsing off your dirt in the nearby lake or stream, it will be meaningful to hand craft some soap for your camping needs, devoid of artificial fragrances and colors so as to protect the environment.

Here is how:

  • Use a cup of distilled or boiled water
  • Add a few tablespoons of castile soap
  • Toss in some teaspoons of essential oil such as rosemary or lavender
  • Shake well until suds appear
  • Toss in a soap bottle
  • Since this is natural soap, you will not see a lot of lather

Buy it alternative – Buy a soap fragranced with naturally distilled products such as moss, bark, mushrooms, and other plants you may find in in an outdoor retail outlet

Rain Mitts

It is not unusual to encounter some rains while you are out camping. If you have taken part in a hike with several hours of rain and wind, you probably know how it feels to have numb fingers. It is possible to tailor a pair of rain mitts using nylon fabric to make the nasty rainy days pleasant.

DIY rain mitts resemble the oven one and can withstand rains for several hours although the gear is not entirely waterproof due to their seams.

Rain Mitts

Additionally, it is important to note that homemade rain mitts can only be as useful as their constructions and materials. If quality materials are used, you will be able to create more reliable and durable mitts.

It is advisable to wear finger gloves or fleece mitts underneath the mitts. The combination of these two layers should provide sufficient protection and insulation against the cold as well as the rain.

Tip – A fully waterproof and cheap alternative would be the rubber gloves such as the ones you use when doing your dishes.

Trail Mix

The trail mix is a hiking-fuel trifecta: filling natural energy, protein, and the required caloric punch from seeds, nuts, chocolate, berries, and dried fruits. Too bad the versions bought at stores are bogged down with sodium and sugar that are not good for you.

Play it safe and make a batch of your own. This makes it possible for you to know exactly what the mixture contains.

Here is how:

Visit any pantry-style shop (those which allow you to get large scoops of candy and nuts out of plastic bags) and choose your favorite seeds, nuts, and berries.

Make Trail Mix

Look for raw or dry-roasted and unsalted nuts, and keep away from the extra sugar and salt. Dried fruits are low in sugar; an excellent mix of chewy (raisins, cranberries, pineapple) and crunchy (apples, bananas) adds variety.

Add some chocolate if needed – aim for the all-natural dark chocolate – or get creative using low-fat granola, coconut flakes, oyster crackers, or pretzels. Toss them together are you are ready to go!

Buy it alternative ­– The portable, individually packages nut-and-fruit bars made with cranberries and pistachios are an excellent option.

Camping can be cumbersome and costly if not well-thought out. However, earlier preparation can put you at a more advantageous position as far as your camping gear is concerned. Making your DIY equipment would help save a lot of money you would have otherwise used to buy items for camping.

So, have you crafted your DIY gear yet? Let us know. You can post in our comment section, and we will be ready to respond in case of any questions.


How to Snowshoe: Hiking is Not Meant Just for Summer

0
How to snowshoe hiking

Snowshoeing is a form of hiking by walking over snow using snowshoes. The snowshoes help in floatation by evenly distributing your weight on a large surface, hence preventing you from sinking. In this article, you are going to learn how to snowshoe, and everything else there is to know about hiking in the snow. The exact dates when snowshoeing started aren’t clearly defined, though some historians believed it dated back 4000-6000 years ago. The idea of walking on snow without sinking came from some animals that had extra-large feet which enabled them to advance in deep snow without sinking.

Snowshoes invention was a way of confronting the snow. They were more of a necessity than a recreational measure. Different regions had different shapes and sizes of these shoes depending on snow depth. To come up with an object like this, you might think the man had to watch how different animals walked on snow without a struggle. It is from this that he developed the snowshoe. As years go by, the shape, size, and use of it have evolved. Nowadays snowshoeing is more of a recreational activity.

The Advantages of Snowshoeing

If you are looking to have a healthy and fit life, then snowshoeing is one of the best leisure activities that you can involve.

Advantages of Snowshoeing

It is known to help in burning more calories than skiing, walking or running can ever achieve. It is also a good measure of building strength, agility, and balance. Overall benefits you get by snowshoeing include;

  • Muscle building: if you are looking to build muscles, then you should consider adding snowshoeing on your to-do list. To work out your back, arms and shoulders, consider adding a set of poles.
    The snow acts as a cushion to absorb any bumps and shocks making this activity the perfect workout method for anyone with a knee It’s ideal for both kids and the senior citizens.
  • Burning calories: snowshoeing is similar to running, walking and skiing when it comes to burning calories. The only difference is that with snowshoeing, you burn more calories per hour having covered the same distance.While snowshoeing, you tend to lift your legs a bit higher than when running. Due to the cold weather, your body, on the other hand, tends to work hard to keep warm.
    The result is burning a higher number of calories than when walking or running. The number of calories consumed during this activity is dependent on the snow depth, your speed, and the terrain difficulty.
    The following table highlights some calories you burn during various snowshoeing activities in comparison with walking, skiing and running.

    Activity/Speed Snow Depth Calories burnt/hour
    Snowshoeing 2.4mph Compacted on a flat trail 420
    Snowshoeing 3.0mph Compacted flat trail 510
    Snowshoeing 3.5mph Compacted flat trail 740
    Snowshoeing 3.3mph Powdered snow flat trail 744 women/ 984men
    Snowshoeing 2.9mph Powdered snow hilly 774women/ 1046men
    Walking 3.0mph Flat trail 335
    Running 5.2mph Flat trail 570
    Running 7.5mph Flat trail 890
    Mountain biking Rolling 550
    Skiing 3.5mph Flat 600

    It is evident from the above table that snowshoeing gives you a higher boost in calorie burning than most other aerobic workout exercises. It is one of the best methods that marathoners, cyclists, and hikers can use to keep fit during the winter months.

  • Fresh air: hard as it may sound, working out outdoors during winter has a lot of benefits compared to going to the gym. The fresh air increases your body’s ability to relax and decreases stress levels.
    Exposing yourself to the natural environment during exercising makes your body connect with the outdoors. Snowshoeing also gives you an opportunity to get a break from breathing the polluted indoor air and germs. Don’t lock yourself all winter, get on your snowshoes and join other snowshoers for a happier healthier snowshoeing expedition.

Things You Need to Have in Mind Before Embarking on Snowshoeing

Just like many other activities, there are a few things that you need to keep in mind before you start snowshoeing.

  • Choose the right snowshoeing gear: always ensure you have the proper footwear, clothing, and accessories. (At all cost avoid cotton. It absorbs your sweat which makes it soggy in turn minimizing body insulation. In turn, this makes you feel the cold and disoriented.)
  • Footwear: these should be waterproof and heavily insulated. They can either have leather or rubber upper. If you fear of getting cold while exercising, you can wear wool or synthetic socks; these will keep your feet warm and dry. If you consider snowshoeing deep in powder snow, knee high boots with the qualities mentioned above will work well.
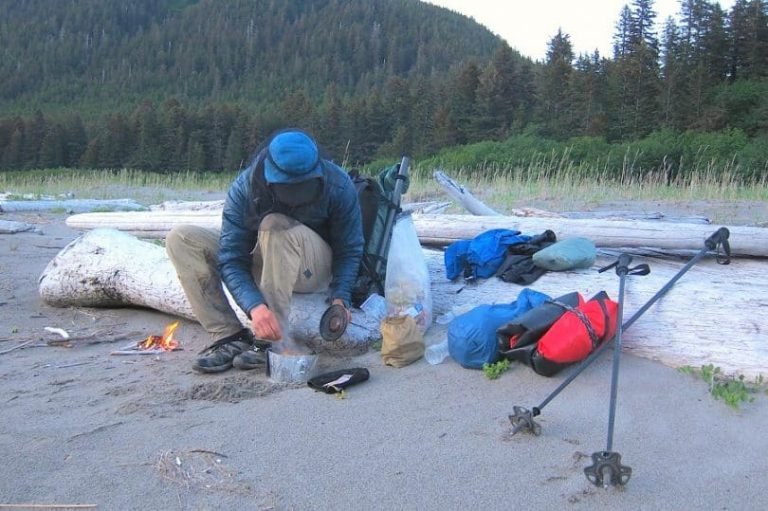
  • Clothing: your clothing should be layered to enhance adjustment depending on your activity level. For the base layer, you should consider wearing synthetic or woolen material as it can help you keep warm.
    Choose long pants that dry fast, keeps you well insulated and quickly wicks away moisture. Polyester fleece acts well as an insulating mid layer as it keeps you warm even when wet and easily aerates even when you are busy exercising. For the outer layer, select a waterproof jacket and long pants to keep you moisture free.
  • Heat accessories: your overall body temperature is paramount. You should, therefore, ensure you maintain it at all cost when snowshoeing. To achieve this, you will need to keep your head and hands covered.
    To cover your head, use a wool or synthetic hat. Keep your hands warm and dry by wearing waterproof woolen gloves. If you go snowshoeing on sunny days, ensure you wear sunglasses to protect your eyes from the ultraviolet light.
  • Be sure of the weather by watching weather forecast: when it is fun to snowshoe, it can also be very dangerous, and especially you meet with a snow storm. To avoid such a scenario, you need to make sure you have watched the weather forecast.
    Go out for snowshoeing after a snow storm has cleared and there are some sunshine and warmth.
  • Locate a trail: do not go snowshoeing blindly.
    You need to select a trail which to follow when exercising. There are plenty of options including your regular hiking trail, your local parking area or ask around in your snowshoeing store.
  • Go out fully prepared: at one point during snowshoeing; you will break a sweat and need to rest. It happens regardless of whether it’s your first time or 100th.
    For this reason, you should consider bringing a backpack with you containing water, a snack and some screen lotion. The meal will keep you stay energized while sunscreen is good for any exposed skin.
  • Get friends’ company: They say that if you want to go fast, go alone, but if you want to far, go in a group. Snowshoeing will be more fun if you go with a friend or in a group.

During winter, the weather is also bound to change without warning. When you are in a group, you can help each other in case anything happens.

During snowshoeing, you can bring a camera along and capture all the fun moments you have in the snow. With so many social media platforms for sharing photos, create great memories with friends through sharing photos.

Snowshoe hiking

Fearing is the worst thing you can do during your first snowshoeing expedition is to fear. Get out of your fear cocoon and put your feet on the snow. The first step is usually the hardest and the moment you take it, and the rest will flow smoothly.

Snowshoe Basics

Getting the basics is the first most important lesson in learning snowshoeing. With an excellent guide and ambition, you can quickly grasp the basics. The training doesn’t necessarily have to be long.

They can even take an hour or so, and you are ready to get in the snow and enjoy the pleasant, fresh winter weather. Below as some of the most important first steps that you need to learn as a snowshoer.

  • Rising: as a newbie snowshoer, you are obviously going to experience a few falls. It is normal, don’t worry about that. The most crucial thing, however, is how you get up after falling. Roll over on our front, raise one knee while kneeling with the other and support yourself with one arm and the rise. If you were using hiking sticks, you could help yourself with it to get up.
  • Going in rounds/turning around: this is another basic when learning how to snowshoe. You can either use “kick turn” or “step turn.” The kick turn requires you do 180-degrees turn by placing one snowshoe in the opposite direction and then making a full fast turnaround.
    This type of turnaround requires that you have a very flexible lower body. The step-turn on the hand needs you lift one snowshoe about 90-degrees above the other so that you are making a “t.” Then shift your body and bring the lifted leg on the ground.
  • Progressing: this is moving forward, and it’s not hard to learn. Move as if you are not wearing snowshoes; just make sure you are distributing your weight on the snowshoe’s width. By doing this, you minimize any chances of getting back pains after training.

Once you are conversant with these basics, you can now progress into learning different techniques of snowshoeing. These are;

  • Traversing: this is a snowshoeing technique that you use to avoid steep trails and challenging terrains.
    To ensure you are on the right track, if you are snowshoeing as a group, it is advisable to follow the tracks of a more experienced snowshoer. Also, make use of your of hiking poles; at all cost maintain balance.
  • Going uphill: snowshoeing trails are not flat always, there will, however, be hills to go up and down, and these are the challenges that will make the sport more enjoyable.
    To go uphill, you need to maintain your grip by placing your feet firmly on the snow. If the hill has hard packed snow, you will need to use your hiking poles and snowshoe “claws” to maintain your traction. For powdered snow, you use the kick snow technique whereby you kick the snow with your toes. If the step is not too difficult, engage the heel lift at the bottom of your snowshoe.
  • Going downhill: this is easy. You need to ensure your body is relaxed, put your poles in front and slightly bend your body backward.
  • Use of poles: once in a while you will require to use poles and especially if you are snowshoeing in a little bumpy terrain or are snowshoeing for exercise purposes; poles give your upper body proper training.
    You will need to adjustable poles which you can adjust depending on the terrain. When going uphill, you will need to shorten and increased while coming downhill. Poles are meant to help you maintain balance while snowshoeing.

What Have We Learned?

It is wonderful to get outdoors during winter. Snowshoeing is one of the many activities that you can enjoy doing during this season. However, it can be dangerous considering there are snowstorms or dangerous objects buried under the snow.

To make sure you are safe, always go snowshoe as a group. In addition to watching the weather forecast, make sure you perfectly understand the terrain you are going to snowshoe. You can carry a map with you or follow the tracks of other hikers. At all cost, your safety is paramount.

Snowshoe hiking

Also, as discussed above, make sure you dress properly for the occasion. Be aware that your body should not be exposed to excessive cold as this can lead to hypothermia. Hiking in windy areas is dangerous as it not only speeds up cold, but also causes freezing of body tissues, a problem known as frostbite. Frostbite mostly affects the face, fingers, and toes. It gets worse if you don’t realize it sooner. It causes long-term effects on the body.

You can overcome this by wearing wind protective gear. Get the right gear, follow the above steps on how to snowshoe and enjoy working out in the snow this winter.

Spider Bites Treatment: A Spider Bite Remedy

0
Spider bites treatment

A good number of spider bites are not harmful, but there are a few that could be dangerous. Culprits – from the venomous brown recluses and black widows to the common house spiders – can nip from a bag containing grapes, lurk at the house beside the lake, hide in a pile of books, or creep out from the gym locker. Knowing about various spider bites treatment can help you remedy cases of this kind, whether indoors or outdoors.

Spider bites can be painful and deadly. It is essential to be in a position to identify the symptoms of a spider bite fast after they occur and to be able to treat them. Identifying and treating spider bites early can make a whole difference between getting an infected wound and remedying the situation. By examining some images of spider bites and getting advice regarding the same, you can be well informed when it comes to treating spider bites.

Identifying A Spider

Often, people do not recognize insect bites at an instance but later notice a red spot or bump. If it is an itchy and not painful bite, the high chances are that you are dealing with a mosquito bite and not a spider bite.

Bites from spiders can itch or hurt. Their bites tend to swell more for an extended period of time. Although not smooth, bites from spiders have a central puncture area, which indicates fang marks where a stinger was inserted. If you are bitten by a venomous spider, the swelling and pain could be exaggerated.

Identifying A Spider

When indoors, you can find these insects under in your attic, under eaves, or in the dusty, neglected sections of the house.

Outdoors, anything close to water tends to attract spider. Your lake house, for instance, could be a suitable habitat for spiders. These insects love to spin their webs in places that have plenty of bugs; therefore, watch out for these nooks and crannies.

When you happen to identify the spider which bit you, carrying it along to the medical center could be helpful in providing a guiding treatment.

If you want to determine a bite from a spider:

Evaluate the Pain

If you are in pain when a spider bites, there is a chance that you were bitten by a black widow spider. Bites from these insects are common but are not always painful. You can also develop fever and severe body aches.

The bite of a brown recluse spider is a slight sting. A good number of times, you will not feel anything.

These spiders hide in and under boxes, in your clothes, or under your bed sheets. You will begin feeling the pain from this a few minutes or hours after the bite. The bite from a brown recluse spider takes a nasty turn once it has been left to progress.

Evaluate the Pain

A bite from a hobo spider is similar to that of the brown recluse, and pain takes place minutes or hours after the bite.

Assess the damage to the skin

This is the key to identifying a bite from a recluse spider. You might not recognize when you got a bite, but the area affected turns red, gets blistered, or becomes black. The region with the bite begins small, and its redness spreads.

A spot of dead tissue, black in color, forms in the middle. The dead tissue can be anything from superficial and small to large and deep – sometimes adequate to form a skin graft. The area becomes painful when the tissue begins to die.

Although the hobo spider can cause your skin to damage, the magnitude is not as severe as that of the brown recluse.

Bites from the black widow lead to the creation of red spots which are sometimes difficult to see. While you may not be able to identify the spot, other symptoms could be obvious – a bite can cause a lot of cramping and muscle aches throughout the body for about a week or two.

First Aid for Small Bites

If a spider bites you, wash the area with water and soap. A cool compress can lessen the swelling alongside some medical prescription such as Aleve and Advil can help relieve the pain.

Most bites subside on their own. If discomfort and itching continue, topical steroid cream will be of much help. If you are uncomfortable during the night owing to the pain, the prescription steroid pills are an excellent option.

First Aid for Small Bites

If you scratch the area a lot and open up the skin, you may require a topical antibiotic to prevent infection. Scratching opens the skin and allows harmful bacteria and other microorganisms to get in and cause infection.

With bites in the neck or head, the largest concern is swelling. Significant swelling from inflammatory or allergic reaction could compromise the airway and other functions of the vital face structures. Since some spider bites can cause necrosis (such as the brown recluse), it could be difficult to get treated.

Venomous Spiders

Spider bites are hardly fatal, but even when they do not kill you, the trauma can be long-lasting and severe. The most dangerous spider species are the brown recluse, hobo spiders, and the black widow.

While the tarantulas, golden silk orb weavers, and sac spiders cannot giver fatal bites, they can still cause so much pain. Most spiders are active during the night; therefore, avoid sticking your fingers or hands into areas you cannot see – especially in forested regions and trail shelters.

If bitten, make sure you clean the affected area with water and soap and use some ice packs to soothe the pain. In case the situation gets out of hand, make an effort of visiting a medical practitioner to help remedy it.

Black widows

With their long legs, shiny bodies, and red hourglass marking, the black widow species are quite simple to identify. However, their bites are known to be very painful.

These spiders bite in the gym locker rooms since they are attracted to moist and dark places. They can also be found in areas with woodpiles.

Black widows

At first, the skin around the bite swells, and you may be able to identify the fang marks. These marks are accompanied by redness, burning, and swelling.

Later, the pain increases and spread to other parts including the belly and the back. You could also experience rigidity and severe cramping in your abdominal muscles.

There are other symptoms that you may experience. These include tremors, nausea, sweating, difficulty in breathing, restlessness, fever, and a rise in temperature and blood pressure. The pain normally lasts up to twelve hours, with the symptoms possibly continuing for several days.

If you think you have been bitten by this or any other venomous spider. Wash the area and elevate it to prevent the venom from spreading to other parts. You can then call a poison control center for advice.

They may tell you to seek emergency care in your nearest health center. Treatment for a black widow spider bite can include anti-venom administration, muscle relaxants, pain medications, antibiotics, steroids, and a tetanus shot. All these will depend on your symptoms.

Rarely, a bite from a poisonous spider can lead to a life-threatening condition known as anaphylaxis. If you begin having swellings on your lips and tongue, an experience wheezing, short of breath, light-headedness, and dizziness, then that is not a good thing. Call an emergency number for medical assistance.

Brown recluses

The brown recluse spiders are well-known for their conspicuous violin patterns on their surface as well as their rare but dangerous bites. These insects can be found in the Midwestern and Southeastern states but can occasionally be seen elsewhere.

As their name suggest, these spiders are more reclusive than aggressive, and only bite when they have been threatened.

Brown Recluse Spider

At first, some bites from the recluses may be painless or could have a slight burning sensation. However, severe itching and pain can develop with time, along with other symptoms such as vomiting and nausea, muscle aches, and fever.

Even when delivered in small quantities, the venom from a recluse is destructive and toxic. Enzymes found in these venoms attack the nearby cells, destroying fat, skin, and blood vessels surrounding the bite, resulting in necrosis.

With this condition, the area bitten turns dark purple and black in the center, making it look like a deep bruise of scab.

As the immune system of the body responds to the toxins, severe side effects develop. This could include blood-clotting problems, destruction of the red blood cells, acute kidney destruction, and death. However, death from these spiders’ bites are rare and often occur in small kids.

In other cases, cartilage and skin damage can be severe, leading to surgery and leading scars among other lifelong aftereffects. For this case, the emergency treatment is similar to treatment offered when bitten by a black widow spider.

Treatment Of Poisonous Spider Bites

It is important to see a doctor. But if it is impossible to get to one, you can do the following:

If you are almost certain that the spider was a brown recluse or the hobo, disinfect your wound and keep your breathing slow. This will prevent the venom from spreading rapidly. Put some ice and keep the wounded area above or at the heart level.

It is very rare for the bites to be fatal but there is the possibility of a secondary infection if you do not do everything possible to prevent that from happening. If you notice that the dark layer of dead skin – also called eschar – is sloughing off, begin treating the wound like a typical wound.

Treatment Of Poisonous Spider Bites

Always keep the area clean and covered and apply honey or antibiotic cream. Large wounds may take several weeks to heal. If you notice any signs of infection, you will need to take oral antibiotics.

Use over the counter pain reliever to treat the pain. If the spider was likely to be a black widow, take pain relievers like aspirin or ibuprofen to relieve the muscle cramps.

A bite from the black widow can turn fatal within minutes to hours. It can cause severe chest and abdominal pain resembling a heart attack or appendicitis. It can make your BP rise and may need treatment (possible signs are flushed faces and a quickened pulse).

If you are not in a position to see a doctor, rest so you can lower your blood pressure. In worse case scenarios, you may be required to take some anti-venom.

Home Remedies for Treating Spider Bites

If a venomous spider such as the black widow or recluses bites you, seek medical attention immediately. If you are uncertain whether a venomous spider was involved, seek medical assistant just to be a hundred percent sure.

Symptoms of a poisonous bite can include intense pain, several swelling, muscle spasms, stiffness, abdominal pain, breathing difficulty, fever and chills, and lightheadedness.

Like some biting insects, spiders don’t feed on humans. They usually bite to defend themselves from what they could be harmful to them. Most bites from spiders are not an issue of concern.

When treating bites, the main objective is to remedy or neutralize the bite and remove any toxins from the body. A lot of effective home remedies can help mitigate symptoms and encourage healing. If the symptoms persist after a few days, you are advised to seek medical attention.

Here are some remedies that could help you treat a spider bite. Note that the information provided is for informative purpose and must not be considered as medical advice. This steps can only be used for mild bites.

Ice Remedy

When a spider bites you, the first thing you have to do is clean the area affected using mild soap and water and then apply ice packs on the wound.

Ice Remedy

The cold temperature from the ice will help in numbing the area, soothing the itchy sensation, and reducing inflammation and swelling.

  • Wrap some ice cubes in a towel and put it on the bite at 10 minutes intervals. You can repeat this as required in the initial twenty-four hours.
  • Alternatively, you may place the affected area in running water for some few minutes.

Note – Do not place the ice directly on the bite

Baking Soda

You can actually use baking soda to treat spider bites. The alkaline substance can help in drawing out the venom.

Baking Soda

This reduces pain, inflammation, and itching.

  • Mix a teaspoon of baking soda with three teaspoons of water
  • Gently rub the mixture on the bite using cotton for about five minutes
  • Wash the affected area with some lukewarm water
  • You can repeat the process after a few hours if discomfort continues

Salt Remedy

Another natural remedy for spider bites is salt. This substance as an anti-inflammatory and antiseptic properties.

Salt Remedy

Salt can draw venom out of a bite effectively to enable a quick recovery. Additionally, it mitigates redness and inflammation.

  • Use lukewarm water to wash the affected area
  • Sprinkle salt on a wet cloth
  • Bandage the cloth to the affected area or a few hours, then remove it
  • Repeat the process as needed

Potato Remedy

Another efficient and easy technique is to utilize a potato. A potato can minimize the inflammation and itching, mainly due to its soothing and anti-irritating properties.

Potato Remedy

Additionally, it keeps the bite moisturized to enable quick healing.

  • Peel a large potato wash it carefully and thoroughly
  • Use a grater to grate the potato
  • Put some wet potato shred in a piece of cloth
  • Place the potato poultice on the bite
  • Leave the wet potato shreds inside the thin fabric until it begins to dry
  • Dispose of the potato poultice, and use warm water to clean the area
  • Use a fresh poultice repeatedly until the symptoms are gone

Aspirin Remedy

Minor symptoms can also be relieved using aspirin. Aspirin can neutralize venom and promote a quick recovery process.

Aspirin Remedy

Moreover, its anti-inflammatory properties can control swelling and inflammation effectively.

  • Soak one to two tablets of aspirin in some water to create a paste
  • Rub the paste on the bite
  • Leave it for some hours then use lukewarm water to wash it off
  • Repeat step one and two if needed

Lemon Juice Remedy

Lemon juice can also be used to keep your itching, inflammation, and swelling at bay.

Lemon Juice Remedy

Since it is natural astringent that helps to quickly dry out the rashes caused by bites and prevent infection.

  • Use the juice from fresh lemons and apply it on the affected area
  • Rinse it off using lukewarm water
  • Alternatively, use a piece of lemon to rub the bite 2 to 3 minutes
  • Rinse it off after a waiting period of 5 minutes

Aloe Vera Remedy

An aloe vera plant or gel can be use in treating spider bites. With an antiseptic and anti-inflammatory properties, the gel is able to reduce swelling, itching, and pain.

Aloe Vera Remedy

The aloe vera can also help in faster healing by moisturizing the affected areas.

  • Wash the aloe vera leaf thoroughly
  • Slit it open so as to extract the gel
  • Apply the gel on the bite
  • Reapply several times a day