Home Blog Page 38

Tarp Tent Setup: Easy Designs That You Will Enjoy!

0
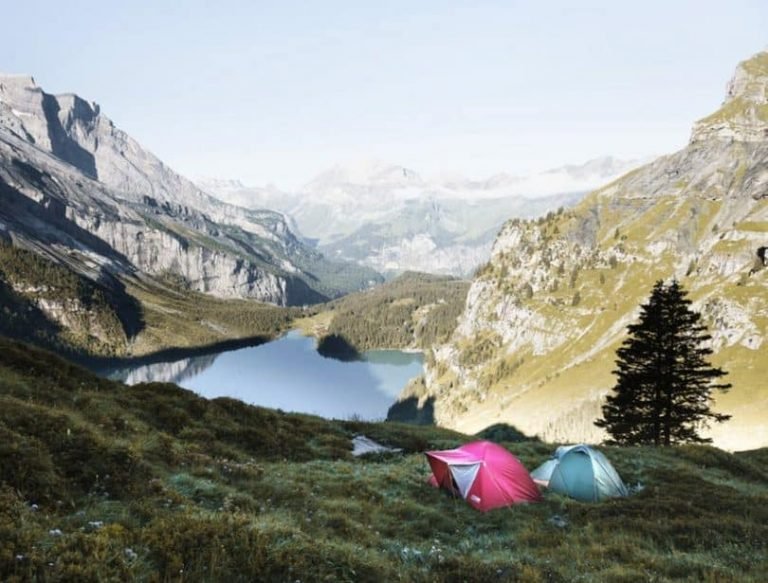
Pink and Gray Tents on Green Grass during Daytime

We all love camping, backpacking and other outside activities that require sleeping under the stars. However, in order to make our trip pleasant, we must consider the items that we are going to need and prepare ourselves from home.

For the true campers and backpackers, less means more. In this spirit, we are providing you tarp tent setup design suggestions that will ensure you have a nice time, regardless of the weather conditions.

But before that, read through the gear that you should wear in order to set up the tarp tent properly. After you choose the most suitable tarp tent setup design, make sure you have all the gear that you are going to require in the field. It is also recommended that you try setting the tent up at home first, so there are no surprises on the field.

White Green and Black Outdoor Tent

The gear you are going to need

If you are going to set up a tarp tent properly, you are going to need the proper gear. It is always advised to set up the tarp tent at home, before going backpacking. Otherwise, you might end up without a gear part, and setting it up would be impossible.

The most important thing you should double check if you have in your backpack are guy ropes. Even though when you buy a tarp tent, the ropes are usually included in the package, double check, just in case.

Another thing to remember to take with you are the stakes. Some tarp tents have plastic poles, others come with metal stakes. Metal stakes are more convenient if you are planning on camping in a closer location since they weigh as much as your whole other equipment. If you are planning on backpacking, but have metal stakes only, check in a local shop for plastic ones.

They usually come at a very low price. If, however, you are a survivalist, you could lose the stakes all together and use branches instead. Although they are not as straight, if there isn’t a strong wind, you should be fine with the branches substitution.

Another option is using your trekking poles as tarp tent stakes. They work exceptionally well in the snow. With the trekking poles, you will get a double use. And if you need an extra pole for your tarp tent, you could always find some dry branches, even if this wasn’t your initial plan.

Tent Cordage & stake

Convenient locations for setting up the tarp tent

The tarp tent setup location is very important, since the comfort of your stay will depend of this choice. If you choose a location with rocks, you will sleep uncomfortably. If you choose a windy location that is not protected by trees around your tent, there is a probability that the wind will destroy your shelter.

However, all these advices are just precautions, they aren’t a guarantee that this will happen. So if you choose a wide open location with a nice view and you know that there are no strong winds in the area, you will probably be safe.

Another important factor to consider when choosing the location for setting up the tarp tent is if there are natural slopes. Slopes provide your tarp tent a good protection from the rain, since all the water that will fall on the tent will go through the slopes, away from you. If you fail to do to so, you will end up sleeping in a small pond and all of your stuff will be wet. Another option you have if you fail to find slopes is digging trenches to keep the water away.

Group of People Camping on Forest during Daytime

The location is also closely correlated with the design. If your main idea for the setting up of the tarp tent is for people to gather around and have fun on a large table, you should choose the appropriate design for this kind of gathering. Dining fly in this case would be the most convenient option.

Bellow, we have described some of the tarp tent setup designs which have been used the most.

Basic tarp tent design

A basic tarp tent design is probably most suitable for beginners who are not keen on setting up tents. This basic design represents a common A-frame which is pretty easy to set up. The thing you need is two trees at a relatively close distance of around 4 feats. The next step is tying a line with the ropes previously packed from one tree to the other.

The line should be tied as tight as you can and it shouldn’t sag at all. Once you secure the line, throw over the tarp so that the line is in the middle of the tarp. The corners should be reinforced with stakes on each corner in order to ensure that the tarp will stay on during bad weather conditions. The more stakes and straps you put on, the more secure your shelter would be.

How To Make A Tarp Shelter

This is the easiest tarp tent design and it provides a good protection from rain, snow or wind. If there is a lot of snow, make sure the angle is sharper so that the snow runs off the tent.

The A frame type of design is also used when you need protection from the sun. You could set up a tarp tent in your backyard and relax under it. If you are making a shelter from the sun, you shouldn’t put the tarp in the middle of the line. Instead, you should place it almost completely on the one side, with a small part hanging from the other side.

This construction is also very convenient if there is wind only from one side since you are able to pull down the tarp to the ground and stay protected. If the other side is sunny, you will have the best relaxation ever. The downside to this design is that there is no floor, so you are not fully protected from the elements.

Cornet shelter design

The cornet design of setting up a tarp tent provides the user a relatively good protection, and setting up is considered pretty easy. It could be managed with only one tree. The cornet design is commonly used in hunting when hunters need to stay still for hours waiting for their prey to come. Meanwhile, they are completely protected from the elements, and the once open side gives them a large vision field which is enough for the purposes.

The setup process starts with tying the rope on a tree of your choice and the other side should be staked to the ground. Your legs would be placed on the staked end since there is less space on that side. Make sure you face the cornet with the staked end on the windy side. This way, you will stay protected from the weather and the shelter will have a point.

After staking the end, do so with the remaining ends of the tarp. When you stake them, make sure you stretch the tarp as much as you can, by hammering the stakes into the ground at a certain angle. When doing so, make sure the ground that you choose for setting up your shelter is not rocky because hammering the stakes into the ground will be much harder.

cornet shelter design

With this shelter design, you will also get a nice protection from the rain and snow if any since the sides of the tarp are sharp enough that the snow slides through them. The one downside, this design has, is that it is not very spacious. However, the fact that you only need one tree in order to make it happen sometimes makes up for this fact. It all depends on the area!

Box shelter

The box shelter is actually a half box shelter that provides the user three sides of protection. It has a cover which protects you from the rain, although it is not suitable for snow since there are no sharp sides. Its main downside is that it is rather difficult to erect this tarp design.

However, it is also the best design for some outdoor activities such as fishing or you could even use it at a beach as a sun protector for a larger group of people. The box design is not suitable for harsh conditions such as heavy rain or snow as previously mentioned. It does provide a good protection from the rain, though.

For this configuration you will need higher poles, longer ropes and more stakes. This means that it is not suitable for backpacking. In order to erect this design, you will need to set up the poles first. Set up three poles which are placed at a 90 degree angle at an equal distance.

This distance will be the side of your shelter box so keep this in mind before you measure. The fourth pole should be set further apart and out of the box, since this is only a supportive pole which wouldn’t carry the weight of the tarp. Once you have done this, proceed to the next step.

Your next step would be setting up rope lines from one metal pole to another. The ropes should end up hammered into the ground on both sides. Once you have set up the ropes, put the tarp on such a way that ends up covering only three sides of the box, one of them being the “roof” over your head. Once you place the tarp on, make sure you tighten all the ropes and stakes in order for the sides to be flat.

tent in a forest

Additional notes: If you are planning on using this design in an area which has a rain possibility, make sure you apply to the following advice. Place the corner pole and the pole on the one side lower than the other two which would be parallel to the lower ones. This way, if there is a heavy rain, the water wouldn’t cause your shelter to collapse, but it will slide over it.

In order to place them lower, you could stake the poles to the ground a bit. This is only possible, though, if the ground is soft. If this is not possible, then place them at an angle opposite to the ropes. This would keep the whole configuration stable and it will succeed the result.

Diamond shelter

Hammocks are lately becoming very popular because of some of the advantages they have over the tents. If you share this belief, here is a suggestion on how to make a hammock shelter that will keep you dry far from the ground.

This shelter is also called diamond tart setup and it is mostly intended for hammocks since no floor is needed in order for it to work. In order to erect this design you are going to need two trees that are the same distance as the trees that the hammock uses.

Tie each side of the rope to each tree and tighten them god in order for the rope not to sag. Place the tarp over the rope in a diamond shape which means that the opposite corners of the tarp should hang from the rope and face the ground. After that, stake the ends into the ground in order to make it more secure and there you have it – a hammock shelter!

woman sitting next to a hammock shelter

A roof shelter

The basic roof shelter doesn’t require many skills, although it takes some time to be done. However, it does require 4 poles, which mean that trekking poles are not going to do unless you are travelling with a company. For setting it up you would require only good tightening skills.

First, you need to put two poles in the ground well tightened, in case you want to hang some clothes on them. We all know how much hanging places are required when on camping. And even though there are trees, there are never close enough to us.

After that, tighten the rest two poles with two parallel edges of the tarp. After doing so, stake the same two poles into the ground and attach the rest two edges on the already staked poles. This is the easiest way of setting this design up with two people. If you are four, this design would be much easier to make and it would require much less time.

A similar to this design, but a bit more protective and with less ventilation is the flat roof leaning design. It is consisted of a roof over your head and one closed side that protects you from the wind. This design is also suitable for sun protection. The main advantage of it is that it requires only two poles, or two branches, depending on what you have decided to use and ropes.

First, you should find two trees on a distance that matches the length of your ropes. Then, place the tarp over the rope and one part of it should fall to the ground. The part that falls to the ground would be tightened by staking the edges to the ground. The length of the other part, however, should let you know how far you should place the poles from the rope.

Of course, they are placed on the edges of the tarp. The two poles are then stuck to the ground firmly.  The next step is optional, but it is recommended if there is wind on site.

Tighten the poles with ropes that go from their top to the ground. Also make sure you place the poles at an angle that will make harder for the wind to crush them. In order to do so, you should first check the direction of the wind.

beautiful view in the forest

Ground tarp sheet

This is more of an option than a design because it doesn’t require erecting a tent. It simply works as isolation between your body and the ground. Although simple it is perfect for spring weather when the temperature is just right and the sun is warming your face. Just lie down and relax. Another of its uses includes using it as a ground cover inside of an A frame tent.

This is recommended for colder weather conditions, although, it also requires, you carrying the extra weight of an extra tarp. The only thing you need to do for setting it up, is staking it into the ground so that it doesn’t get blown away from the wind if there aren’t any objects on the tarp. It protects you from the dirt and mud and it is as simple as it gets to make!

Ground tarp sheet

Final thoughts on this topic!

A tarp tent will provide you enough coverage and protection in poor weather conditions, while allowing you to carry as lighter gear as possible. We have also suggested some camping tart tent designs that will protect you from the sun and will create a nice atmosphere for a whole group to hang out and share moments.

The most important thing that you should remember when choosing the most convenient tarp tent design for your trip are the weather conditions and the ventilation that you are going to require. If you think you are going to need more air circulation, choose a configuration with more open sides.

However, if the weather is bad, make sure you are as protected as you can. Of course, you must leave one side open. That said, in cold weather conditions, you should also pack a warmer sleeping bag because the tarp tent could only provide you as much protection from the elements.

tent camp near the mountain

As always, make sure you leave us a comment in the comment section below, if you have any questions about any part of the tarp tent set up. We would be glad to answer.

What is a Daypack: Find the Right One, Fill it, and Go!

0
New daypack

What is a daypack? Many people are unsure of what it really is, and actually, it is just a pack that hauls your gear and any essentials that you might need during your day trip hiking or enjoying nature in various ways. It will vary in size, depending on what you need out of it.

You will usually be overwhelmed with all the options they have, which makes each one different than the rest. Therefore, there are certain things which you should be on the look for.

a daypack standing near a river

Some of the things you need to keep in mind, include what options they have, what materials they are made from, and what type of configurations the daypack has. We will go over some of the styles and options that are included, further down in the article. If you are a person who loves to hike, you can look for a daypack that will be more geared for hiking.

No matter what activity you are doing outdoors, there is a daypack for it. From small to big, you can find the perfect one that will fit all of your gear for a variety of activities from hiking, to climbing, and traveling. If you are great at packing a suitcase, you could be great at packing a daypack, which would give you an organized pack that fits everything you need perfectly.

Features to Consider

You will want to consider which features and options work for you. There are some basic features that you should take into account first.

  • Packability: You will need to find a pack that fits everything you need without being too small or too big. You may want to find one that has extra hooks and pockets so you can attach things you need quickly like keys, snacks or water.
  • Weight: Your pack should hold everything but not be too heavy that you cannot finish your hike or climb without being overwhelmed. Find a durable, yet lightweight daypack that is comfortable, and maybe includes straps so you can distribute the weight better.
  • Space: Many daypacks can pack down easily because they are so flexible, so you can store them easier. You will need to determine how much space that your gear takes up in the bag. Being mindful of this and the other things, will help you choose a daypack much easier.
  • Straps: If your pack has straps, they will let you distribute the pack weight evenly. Some packs have waist straps that can be attached with a clasp around your waist. If you are a woman, look for a pack that has straps, but also a contour on the shoulder straps. This is due to women having more narrow shoulders than men.
  • Internal Frame: This is also called a frame sheet and it keeps the pack from shifting around and allows the packs weight to move from the shoulders to the hip area. This prevents fatigue and allows you to hike or climb comfortably.
  • Sizing: You will want to read the sizing chart to make sure you meet the torso height for the daypack. If you are under 5 feet, 4 inches, then you will want a small or medium one. Anyone over that height will want to use a medium or large model.

The Granola Day Pack

Reviewing Daypacks For Your Consideration

First, we are going to talk about the type of daypacks there are for your enjoyment. This can help you narrow down a type of pack that works for you.

Panel loading packs

Are the most common and contain zippers that go from side to side to get to your gear inside. Generally, this pack looks simple and will include some small compartments. This type is known for zipper failures due to over stuffing the pack.

Panel Loader Backpacks for Hiking

Top loading packs

Are opened at the top and generally have a flap with a zipper attached. With top loading packs, you can find one that has a roll top closure or a cinch top closure. This is up to your personal preference, of course. Roll top closures do not have a zipper, but instead rolls up to seal and is held in place by a clip.

The pack is a top loader

This type is loved because it is less breakable and it keeps out water. The cinch top closure is most common, using a cord to pull the bag closed. The flap can be used to cover the small hole that the cinch will not reach once closed.

Keep in mind that some companies that make top loading packs also make them with zippers on the side so you can reach into the bag, not having to dig deep to the bottom. This is an extra feature, of course, and is not on each top loading pack.

Here is a table of some of the extra features that you can find with a daypack.

Features Their Purposes
Sternum Strap These reduce weight on the shoulders as well as keep the straps for the shoulder in a comfortable position.
Hip Belt A hip belt will keep the pack from shifting, plus it helps with weight distribution in the hips.
Organizer Pockets These are pockets for small items that need to stay organized.
Sleeve for Electronics This is a padded area for a laptop or other electronic device that needs extra safe storage.
Hydration Pocket This is a reservoir for water that comes up through the pack and goes past the shoulder area for easy hydration.
Back Paneling Ventilation These are panels made of foam or mesh that allow air to move through the pack and your back area.
Padded Back Paneling These are thick panels made from foam usually that keep the items in the pack protected.
Exterior Pockets and Exterior Storage Exterior storage allows you to keep things like water bottles, mp3 player, headphones, and the like outside of your pack for easy reaching and use.
Loops for Tools Loops for tools are used to keep items in your belt for easy access like ice axes, trekking poles, and more.

Are you using your daypack for hiking, climbing, or skiing? What about trail running or mountain biking? There are different things you should look for with your specific activity that will make your next hike or climb just that much better.

a man skiing on a gorgeous day

Let’s take a look at what you need in a daypack for each activity.

Day Hiking

If you are hiking, you should find a daypack with a lot of space, upwards of 30 liters. It should include pockets on the sides so you can store your water and a snack. A hiking daypack should have compartments in which you can store your smaller but necessary items like your keys or medication. The better daypacks for hiking will be equipped with the capability to hydrate you.

Climbing

A daypack for climbing should be as big or bigger than one for hiking, upwards of 40 liters, so it can hold all of your gear for climbing, like ropes, and even extra clothes. The pack should be narrow in case you encounter harsh terrain and it should be padded on the backside so that it is more comfortable to carry, since your load is a little heavier. Some climbing daypacks will have loops for axes, crampon patches and a daisy chain.

Friedberger Climbing

Skiing

For skiing, you will need a narrow daypack that has a sternum strap and even a hip belt, too. There are packs that allow you to attach your skis as well. Your pack should have room for your shovel and a probe, too.

Trail Running

For trail running, you will want a pack that gives you lumbar support and one that includes a space for your water so you can stay hydrated. Lumbar packs, or waist packs, are designed to stay in place and let perspiration release from your body.

Mountain Biking

A daypack for mountain biking would be around 15 liters, low profile and are for the most part, panel loaders. Usually, these packs have a hydration sleeve, and space for tools. They are breathable and come with straps for the hip and sternum.

a mountain hiker with his bike

Next, we will show you a table of the type of materials you can choose from for your daypack.

Material Description
Nylon This fabric resists wear and tear and is commonly used as a sturdy fabric for outdoor gear.
Ripstop Fabric This fabric is woven in such a way that it is reinforced and resists tearing.
Kodra This is made of many fibers of nylon that keep your pack durable and strong. This fabric is heavy, however.
Nylon Oxfod This is a light weight fabric that is woven for extra durability and is commonly used in pack making.
Nylon and Polyester These two go together to make different colors on a fabric. This is more for fashion than anything else, though nylon is durable.
Hypalon This is a synthetic rubber that is used for packs to resist abrasions, but it is very heavy.

Your pack will have a denier, or unit of how fine the fabric is. It will be made from one of two coatings. The first is polyurethane, which is put on the inside of the packs and resists water, but is not waterproof. The other is silicone, which keeps weight down and resists tearing, plus it is water resistant.

admiring the beautiful nature

Now, let us talk about what you should include in your pack. These items should be important and will aid you in a safe hiking, climbing or trail running experience. Some items you want to pack include, but are not limited to:

  • Jacket
  • Change of clothing
  • Water
  • Food
  • Spare socks
  • First aid kit
  • Rain cover
  • Liner for your daypack
  • Any other equipment you need

group picture of water bottles

Now that you have all of the necessary items for your daypack, we need to learn how to pack it. There are six steps listed below.

  1. Give your daypack a waterproof lining. You can do so by putting a big plastic bag inside and placing it in with space in the middle. This will keep your items and gear dry and free from ruin if you happen to somehow get in the water, or the weather is rainy.
  2. You will want to put your extra clothing like shirts, pants, and socks at the bottom of the pack. You should seal the clothing in a bag for extra protection against wetness.
  3. If your pack has a hydration pack included, then you need to ensure you do not keep any sharp items near it. You can keep the hydration pack outside of the liner you put in to make sure that no water gets on your gear. Even if you have a hydration pack, you should bring extra water just in case.
  4. Next, you will want to pack in your camera or electronics. Then you can pack in the first aid kid and any food or snacks you wish to bring.
  5. This step requires that you pack in the items that you need that can be quickly accessed. This can include rain covers or other items. They are packed at the top of your bag, or in the top pocket area.
  6. Now you can pack your items that will come just before you leave for your hike or climb. This should be bottled water for the side pockets, your walking poles, and any items that can be connected to the hooks on the outside of the pack.

Nikon F3HP camera

Below are some examples of what to include in your daypack for certain activities.

Day Trip Outdoors

  • Bottled water
  • Umbrella
  • Camera
  • Food or snacks
  • Jacket
  • First aid kid
  • Sunscreen
  • Book, or art supplies to draw

abandoned sunscreen on the beach

Hiking

  • Bottled water
  • Camera
  • First aid kit
  • Snake bite kit
  • Sunscreen
  • Map
  • Bug spray
  • Bear spray
  • Compass

a must have piece for hiking

Going to the Beach

  • Bottled water
  • Book
  • Clothing
  • Sunscreen
  • Food or snacks
  • Towel
  • Radio

the old radio sings

What Do Others Say About Daypacks?

Those who have used daypacks for hiking or climbing generally love them. They get to choose which size they want, the style and colors, too. They like the options of top loading or panel loading, as well as extra compartments, zippers hooks and pockets on the outside for easy access to their water or keys.

Tenba Shootout Daypack

Users love being hands free so they are free to explore the nature around them. Users also stated that they like the waist straps that some daypacks include for weight distribution. For women, they enjoyed the contoured shoulder straps that help with the narrower shoulders that women have.

Some users were not pleased with how expensive some of these packs can be, especially if they have many options and features. Some people say the packs have too many compartments and want something simple. This, of course, is a matter of opinion, and why doing research is very helpful in choosing any item, including a daypack.

Pros and Cons of Daypacks

Many people think daypacks are important and essential on any outdoor activity where gear is needed. Let’s take a look at the pros and cons of daypacks.

Pros

People love daypacks because they come in many sizes and can fit all of their gear that they need for the day. Many include special compartments, pockets, and hooks so that you can keep things you need often close to you and easy to access. Daypacks are easy to store as they do pack down easily for storage as well. Users enjoy the sternum straps and the hip straps that allow you to prevent fatigue and distribute weight better.

Cons

Some of the things that people do not enjoy about daypacks are that they might not all be waterproof or water resistant. Some of them do not have as many compartments and outside storage for them. Some people did not like the top loading packs because they usually have to dig to the bottom, for the item they need. If the pack is explicitly packed, this can distort the items into any position, making things out of place.

What Have Learned?

Daypacks are an essential part of any outdoor activity where you need some food, water, and other gear to get through the day. If you pack them correctly, you will be able to reach the items you need first, which will be on the top of the pack.

Keep in mind your pack size as well, because you want the straps and pack to fit correctly. They come in various forms to fit most everyone’s personal style, and allow you to take everything you need and remain hands free as you explore the outdoors!

load adjusters of a daypack

Now that you know more about daypacks, what are your thoughts? What kind do you use when you go hiking or climbing? What do you put in it? Let us know in the comments and thanks for reading!

Tent Zipper Repair: How to Fix Your Broken Tent Zipper

0
a tent zipper repair

You may have a tent with a zipper that just does not cooperate. So you yank on it, restless, and after that what happens? The tent’s slider gets full scale of whack, and eventually, the zipper just quits zipping.

You could return it to the producer for a substitution, but that will definitely cost you some dollars in transportation, and also a repair expense of the organization, and above all, you will be without your camping tent for some while.

a man checking tent zipper

A better solution? Carry out the tent zipper repair yourself.

It is usually the nightmare of most campers: you are moving in for the nighttime in a billow of mosquitoes, and just as you are wildly trying to shut the tent, the zippers on the entryway come up short. The dreams streak before your eyes, while you’re tormented by parasitic bugs the entire night.

So, before trying to sleep in such a tent, you need to fix the zippers properly. In this article, we have made ready some essential information you need, to effectively and efficiently fix your broken tent zipper and the proper ways you need to maintain and prevent the zipper from failing again.

Reasons for Failure of Zippers

The zipper is generally referred to as the parallel lines of metal, nylon or plastic teeth. The zipper is bolted together by means of a sliding metal tab commonly referred as a slider. At the point when your tent entryways fail to close, it is likely due to the fact that the slider has already been worn out by dirt and sand and cannot in any way close down the zipper’s teeth.

You can avoid this occurrence to a specific length by giving your zipper a regular cleaning.Everybody fears the possibility of shutting the zipper on their camping tent, just to have it disjoined behind the slider and expand back open. In a violent rainstorm or substantial mosquito plagued region, this can possibly make life miserable.

broken tent zipper

Luckily, there are a few things you can do to repair this in the camp field. More often than not, the coil or zipper teeth are fine, and you only need to replace the zipper slider. Then again, if the teeth, or coil, pull out of the woven tape, then you need to replace the whole zipper.

The reason for zipper failure happens because people tend to take a hold of the zipper slider tab and draw far from the fabric of the tent – this can make it less demanding to utilize the zipper with only a hand, but puts weight on the two parts of the zipper slider tab forcing them to disjoin.

Only a minor piece of spread amongst the two parts of the slider can cause the teeth of the zipper to not lock in. These things will bring about the failure of any size zipper. A bigger size zipper will fail, similarly as fast as a smaller one. But, unless the zipper slider is made with metal, the metal utilized is fairly soft and abuse of usage will definitely destroy the biggest one as fast as the littlest.

How to Fix a Broken Tent Zipper?

Which section of the zip is damaged will let you know how you can fix it. In the event that the teeth are damaged in any way, then it is better you just replace the entire zip, which isn’t a thing to be suggested doing mid outdoors trip. If the teeth are quite recently misaligned, then running the slider here and there a couple times will definitely fix this more often than not.

the teeths of a zipper

If it is the slider that had been broken, then you might have the capacity to repair that yourself. This section of the article will show you how to go about doing it. If the zipper slider is stuck, then you might have the capacity to slacken it utilizing some WD-40, but you need to be very watchful not to get any of it on the flysheet of your tent.

First Aid Treatment for Tent Zippers

At the point when the zipper had already been damaged, you can begin the fixing by attempting ‘first aid treatment’ for your zipper by softly crushing the jaws of the sliders unitedly a little bit so as to enhance better closing of the teeth. In case of emergency, the first attempt is to crease the back end of the zipper slider with a pair of pliers.

Somebody around will likely have a multi instrument with a pair of pliers on it in case you do not have. It just takes a minor bit of creasing, excessively, and you will bolt the slider and not have the capacity to move it at any length. This is a brief repair at the most, and the slider needs to be replaced at the earliest opportunity.

Repairing Zipper Slider

If that does not work well for you, the next attempt is to replace the tent’s sliders. Fear not. It is a simple task, particularly if you were sufficiently insightful to get some extra sliders in the correct size before you left. In the next section, we are going to show you how you can properly replace the slider.

Replacing the Slider

While not the most effortless thing to do, it is absolutely conceivable to replace the slider in the mid of your camping trail. You should have some approach to clip the threads and evacuate a portion of the stitching that is on the zipper.

You will likewise require a needle and thread to shut it, and obviously, you need to get the correct size substitution slider. Zippers arrives in various sizes. Sliders are not generally compatible among zipper brands, so unless you already have a YKK slider model, don’t make use of it with a YKK zipper.

How to Replace a Zipper Slider

However, the first approach in removing the slider is to take off the one that was already there. To do this, you need to take it off from the tape end, at the back/flat end of the slider. When you remove the slider from the tape, the zipper teeth will be disjoined. You will then be inserting the new slider on front/round end first. While it is highly conceivable to put a zipper slider on from the flip side, it is to a great degree complex and the teeth should be locked in before doing this.

Therefore, when, supplanting the new zipper sliders on an entryway that has two main zipper sliders, you should work from both door ends so as to successfully replace the zipper sliders. And for the tent fly, you will be replacing it from the extreme top end, not the base stitch of the tent’s fabric.

Grab a set of small pliers or needle nose pliers and gently squeeze the slider back together.

Replacing the zipper sliders can be somewhat frustrating since you will need to get both tape sides in the front/round end of the slider. Ensure that the teeth are facing the removed slider groove You will likewise need to evacuate the textile patch covering the zipper end. It has bunches of fastens in it – slice through the textile if important, you won’t replace it. Take it totally off and discard it.

Ensure that you can disjoin the teeth to the end so as to insure that you have taken off all the stitch lines crossing the teeth. Attempt to clip as few lines as important to remove it. Now, pull off the slider from the tape. You need to be careful because it can be stranded on the opposite side as there is only a small opening for the zipper slider tab to pass through.

Right Selection of Tent Zippers

When it comes to selecting zippers for camping tents, quality can’t be compromised. Just imagine you tucking in to spend the night after an extremely blustery day of outdoors, only to find out that the tent zipper stops closing, and its teeth have also come loose. Without a good repair kit and substitution zipper available, the campers will definitely be in for an intensely wet, icy, and blustery night.

There are two main kinds of zippers often utilized in camping tents and any other canvas things.

Coil Zip

This is the first type of tent zipper and is also regarded as ‘spiral zip’, this kind of zipper has a continuous material coil, running through both zip sides. Its principle feature is its adaptability. It can be utilized on curved tent entryways and bags/suitcases with curved openings. Nonetheless, its primary downside, is that it can wrinkle or pack up on itself, easily, therefore, resulting into adhered zippers that refuse to close or open.

zipped up the tent to join the zips together

Tooth Zip

This is another kind of zipper, and is otherwise regarded to as the Chunky or Vislon zip. The name “Vislon” originates from the corrosive and water-proof Vislon plastic that this zipper kind is generally made of. It is likewise known as the “tooth zip” in view of the way that the zipper teeth is formed straightforwardly on the tape. While extremely tough, this kind of zipper can be rendered futile if each of the teeth pieces gets broken or dislodged.

Huge, Grabby Zipper Teeth

Both coil and tooth zippers arrive in open-ended and continuous structures. Continuous zips cannot be opened on one or both ends and they always come in protracted pieces that can be reformed to size, and while open-ended zips are the inverse and arrive in a scope of set, pre-decided lengths.

The teeth thickness and width, vary from one maker to another. It is best to check very well if the size is the right one for the tent. Choose coil zippers if a camp tent has curved tent entryways, and choose Vislon ones if durability is the primary need. In addition, pick heavy weight zippers for huge undertakings and continuous use.

Ways to Extend the Life of Your Tent’s Zippers

The best quality apparatus is surely an investment. You are paying more for better materials and development. You anticipate that your gear will last more. Makers endeavor to manufacture the best items. They make use of quality materials and equipment. They put resources into better development.

Indeed, even the best parts will wear out if not appropriately maintained. Periodic, minimal maintenance will augment the life of your gear.

You would not purchase a car then disregard to wash it or replace the oil, so zippers are a typical fizzle point on backpacks. Indeed, even YKK zippers, viewed as the best brand will definitely benefit from good upkeep. When appropriately maintained, zippers can outlive rucksacks. Here in this section, we will talk about how to properly maintain your tent zippers so as to extend its lifespan.

Try not to Force It

The first approach to proper zipper maintenance and care is to not exhaust them. Over stuffing your tent can put weight on the zippers, particularly when shutting the tent. Try not to utilize the zipper to apply force. Do not apply force to a stuck zipper.

Rather, hold the track of the zipper with one hand and tenderly back up the slider, squirming it from one side to the other till the stuck textile is completely free.

In the event that the zipper split off, back it up gently again until it re-locks in. In the event that it keeps on splitting, take pliers and gently press the slider to give it a marginally tighter hold on the track of the zipper. Be mindful so as not to over tighten and stick the slider.

tent zip composite

A similar rationale applies when the material gets trapped in the zipper. Try not to apply force to it. Back out the zipper from the obstacle if possible. Make use of your hands to haul out the obstacle.

At that point, try the zipper once more. Never drive the zipper past an obstacle. You will just exacerbate the issue. Diminish the force applied on your zipper by drawing from the metal tab for pulling, not from any fabric loops or pullers.

Silent zippers that have no metal draw tabs is worse compared to zippers with metal draw tabs. Continually utilizing impeccable form while zipping and unfastening your tent isn’t down to earth. Just keep in mind that the gentler you are when using the zippers, the more they will last.

Clean Your Zippers

Getting grit and dirt trapped between zipper teeth is a typical issue that will definitely reduce a zipper’s life expectancy. This issue is very common in dusty surroundings. Keeping your tent zippers clean is simple and requires small work. Dirty zippers are quite popular in the outdoors industry because they are usually left on the floor and get matched on by grimy shoes.

You should clean your tent zippers with soap and water. You can hand-wash your tent and its zippers by means of a washcloth. Make sure you wash the zipper by applying more force at any headstrong, messy spots. Ensure that you evacuate anything build up into the teeth, or impeding the free movement of the zipper. Dry your tent and zippers properly after washing.

how dirty tent coil gets

Always remember to brush off grit and dirt before storing. When absolutely necessary, a moist cloth will work for cleaning dirt and dust out of a tent zipper, which will definitely diminish wear on the teeth of the zipper; simply make sure everything is already dried before packing it up.

Additionally, make sure you clean your tent zippers subsequent to being close to the sea. Salt can be destructive to zippers. Rinse the zippers with fresh and cool water after too much exposure to ocean air or to sea air. A fast rinse and dry will help to avoid long-term damage from the salty water or air.

Lubricate Your Zippers

And finally, to enhance the lifespan of your zipper you need to constantly apply lubricant to it. Go through the extra length by applying a dry grease to zipper post ends and tracks.

Get one made primarily for outdoor gears. Campers who advocate utilizing wax neglect the fact that dirt can get stuck to it and scented waxes draw in bugs and even wildlife.

Greasing up your tent zippers can be a useful safeguard measure and next stride. By greasing up the zippers, you will surely keep them up and running. Make sure you always take time to clean the zipper before putting any lubricant. You would prefer not to trap dirt in the tent zipper.

Zipper Cleaner & Lubricant

It is possible that you might have found a lot of various recommendations on what to make use of for lubricant. You can make use of paraffin wax, pastels or powdered graphite. You can likewise make use of beeswax softened with heat gun or hairdryer to make it simpler to apply. Some campers also make use of Teflon-Silicone Lubricant. These lubricants should easily handle your tent zipper.

Concluding Thoughts on the Topic

We believe you now have a deeper understanding of how to fix a tent zipper when broken. Make sure you are always ready because you never know the day when disaster could occur and you may need to fix your tent zipper. Always take along the necessary tools with you on your outdoor trip, so you that can fix every damage and remain dry and warm.

Mesh tent zipper

Nonetheless, if your tent truly is unrecoverable and you are in need of another one, then you can check out various tent brands on the market and get the one that you like. There are significantly more zipper tips and repair products at local and online buying stores including new zipper sliders. Do not abandon those old zippers.

Tips for Hiking in the Winter: Proper Safety and Preparation

0
a winter landscape

When the winter weather rolls in, most people put their hiking boots in storage along with their summer clothes and prepare for a few months of hibernation to escape the cold. But cold weather doesn’t mean you have to spend the winter months on the couch. In fact, winter is an ideal time to take advantage of hiking trails that were packed with people all year long, and you’ll find that many parks and mountains show off their true beauty after a fresh snowfall.

If we didn’t already make hiking in winter sound appealing enough, winter hikers love the beauty and peacefulness of a pristine winter day. On a winter hike you can escape the bugs and the crowds that plague you for most of the year, and have fun playing in the untouched snow!

true beauty of the mountains after a fresh snowfall

However, winter hiking brings different challenges than summer with more severe weather and shorter daylight hours. And don’t forget that sun protection and hydration are still important (maybe even more important) when it’s cold outside. So while winter hiking brings a lot of beauty that you don’t get to see for most of the year, it does require extra gear and skills, and some planning ahead.

With a little preparation, you can make yourself comfortable in the cold and snow. We’ll walk you through the proper gear and clothing you’ll need to be just as content hiking in winter as you are the rest of the year. Here’s how to stay outside all winter long:

Preparation for Winter Hiking

Our simple rule to winter hiking is to stay dry and warm. This means purchasing hiking clothes made out of the proper materials and dressing in lots of layers – like an onion!

You’ll want to invest in good gear like waterproof and insulated hiking boots and clothing that wicks moisture, dries quickly, and insulates. Don’t forget your accessories either. Hats or hiking socks might seem unimportant, but they’ll actually go a long way in keeping you warm and comfortable.

Clothing – Three Basic Layers

Dress in hiking clothes that wick moisture, dry quickly, and insulate but are waterproof and breathable. A good option might be to purchase a tri-climate outdoor coat that combines an insulating layer and waterproof shell in one to minimize your gear. Make sure to layer plenty underneath your outer shell with our advice for how to layer properly. The three basic layers you’ll need are as follows: base layer, middle layer and the outer shell.

Base Layer – This is the layer next to your skin that goes directly on top of your underwear. Long underwear made of synthetic fabric or merino wool work best, and be sure to stay away from cotton. Your base layer should wick perspiration from your skin so it can evaporate to keep you dry and warm. Base layers should dry quickly so that you spend minimal time in wet or damp clothes. On really cold days or if you’ll be camping overnight, wear two base layers for added warmth.

base layer for hiking

Middle Layer – This is your insulating layer. A middle layer is designed to retain body heat with synthetic or goose down insulation. A fleece or microfleece middle layer will also help keep you warm on a cold winter day. If you decide to wear a tri-climate coat with an insulating layer, you may still want to add a fleece between that and your base layer on particularly cold days.

Men's Polar Fleece Jacket

Outer Shell – This is your waterproof and windproof layer. An outer shell should also be breathable and extra features like core or underarm vents will help to expel excess heat and moisture. These vents might look silly, but you’ll appreciate their functionality when you start to sweat under all of your layers. Look for materials like Gore-Tex for the best protection from outside elements.

a man wearing a waterproof jacket

Hiking Boots

Depending on where you’re hiking, you might be able to get by with traditional hiking boots, but for snow trekking you will want to wear winter boots that are waterproof and insulating. Having the proper footwear will make you a lot more comfortable and ease the difficulty of trekking through snowy conditions.

If you’ll be camping overnight on a hiking trip try keeping your socks and boot insoles next to you in your sleeping bag so your body heat warms them for the next morning.

Standard hiking boots on a mountain shot

Key Winter Accessories

Hat – You lose a significant percent of body heat through the top of your head so a warm hat is a must for winter hiking. The best options are windproof models and materials. For knowing when you should be wearing a hat, follow this old rule: “If your feet are cold, put on a hat.”

Gloves or Mittens – Gloves and mittens will help keep your hands warm and protect your fingers from frostbite. On really cold days wear two layers, and always carry extras in your daypack, in case they get wet.

man wearing winter gloves

Gaiters – This accessory is necessary for keeping snow and water out of your hiking boots if you’ll be trekking through deep snow. They’ll also insulate your legs for added warmth. Make sure you purchase a waterproof and breathable model.

Socks – Wear a thin layer with a second warm layer over the top made of wool or synthetic fabric for optimum moisture wicking and warmth. Take extra socks too in case they get wet from the snow or damp from sweaty feet.

Important Tips for Your Next Winter Hike

Never go alone –There is safety in numbers, especially in wintry conditions. Winter weather can change fast, and weather conditions often differ between the bottom of a mountain and the summit. Always hike with at least one other person and trust each other to make safety decisions together. You’ll be even better off if you hike with an experienced friend who knows what they’re doing.

Research the area and carry a map –You should always know how long your hike will take before you go. Research what emergency services are available in case something goes wrong. Is medical or search and rescue help available? How can you get in contact with them?

Backpacking compass

Leave a trip plan behind with a friend or family member –Always let someone know where you are going and you will return. In the unfortunate case that something happens, you’ll have a safe person who can call and alert medical or search and rescue personnel where you are and how long you’ve been outside in winter conditions.

Prepare for the unexpected –It’s a good safety precaution to carry extra food and clothing in your day pack in case the weather changes or you get lost. You want to be prepared in case something happens and you’re forced to stay outside overnight.

Check the weather forecast – This is an obvious tip, but an easy one to forget. Always check the weather before you go hiking, especially in the winter where extreme weather poses a dangerous threat. Know how cold it will be and if there is a chance of rain or snow, then be prepared for all possible weather.

Check local trail conditions – Even if it isn’t going to snow on the day of your hike, you can’t guarantee what condition previous weather has left the trail in. Visit the park website to check local trail conditions so you’ll be prepared for snow trekking or slushy ground.

Avalanche

Recognize and avoid avalanche areas – Know the signs for avalanche warnings and avoid those areas if you come across them. Avalanches are very dangerous and more common in the winter when heavy snow weighs down a potential avalanche zone.

Carry cash for unexpected fees or emergencies – It’s always a good idea to have cash on hand in case of emergencies. You never know when you might need a little cash for a park fee or unexpected camping expenses (like firewood!).

Dress like an onion – In layers! This is especially important in cold weather where temperatures can vary drastically between the bottom of a mountain and the summit. Wear a variety of insulating clothing to regulate your body temperature and help you stay comfortable no matter how cold it is or how the weather changes unexpectedly.

Start small and early –A 12-mile loop might be easy in the summertime, but winter conditions could have you running into ice and deep snow on the same trail, adding significant mileage to your hike. Choose a trail you know you can handle. Also, remember that the sun sets much earlier in the winter months, so start early and plan to be off the trails before dark.

Carry safety gear –All winter hikers should carry a few basic winter hiking items: a trail map, first aid kit, compass, pocket knife or multi-tool, hand warmers, and headlamp. Some of these items might not seem necessary for an easy day hike, but you never know what might go wrong, especially in unpredictable winter weather. Day hikers should be prepared to spend the night in case of emergency so keep a day pack stocked with plenty of food and an extra change of clothes.

Safety Gear

Be prepared to turn around – For many hikers, the goal is to make it to the top of the mountain to enjoy the amazing views. But it’s important to remember to focus on the entire trip, not just the ascent. While reaching the summit might be rewarding, don’t forget that it’s only half the battle and you still have to make your way back down before nightfall. If reaching the summit is taking longer than expected due to wintry conditions, be prepared to turn around before you make it to your destination to avoid hiking after dark or coming across more difficult terrain.

Skip the cotton –Cotton absorbs water and stays wet for days. We mentioned in the clothing section that base layers should never be cotton. Cotton will leave you cold, uncomfortable, and more prone to frostbite and dangerous winter cold. Leave it home and opt for the proper materials, even if they’re more expensive.

Nutrition – Hiking in the cold and snow burns more calories than on a summer day. Digesting food helps keep the body warm and provides calories for energy so it’s important to carry the right kind of snacks and make sure you have enough. Choose high energy snacks like protein bars, trail mix, chocolate, dried fruit, and beef jerky. If you’re worried about the cold, keep your snacks in your jacket so your body heat keeps them from freezing hard.

dark chocolate with coffee taste

Hydration –Most people don’t sweat much, or at all, in the winter so it’s easy to forget or think you don’t need to drink as much water as you do when it’s hot outside. However, staying hydrated in winter weather is just as important, if not more. Make sure you use an insulated water bottle so your drinking water doesn’t freeze, and keep it close to your body overnight if you’ll be camping.

Key Takeaways for Safe Winter Hiking

Winter hiking brings new challenges and can be more dangerous than summer hiking if you’re not prepared, but we’ve provided all of the information you need for safety and comfortability despite the cold conditions. Don’t let winter be an excuse to hang up your hiking boots for the season when you could be taking advantage of empty trails and bright snow.

a gorgeous winter landscape

You’ll feel like you’re experiencing old trails for the first time and enjoy the newfound beauty in your favorite parks after a fresh snowfall. Although snow can make winter hiking, a fun and unique experience compared to the rest of the year, you should also be prepared for more severe weather and earlier nightfall.

If you’ll be hiking in the winter, always bring a buddy, know the local trail conditions, check the weather before you go, and be prepared for emergencies or having to turn around.

And don’t forget that sun protection and hydration are just as important in cold, overcast weather. Read our tips for wearing the proper attire, packing the right gear, and following basic safety tips for safe but exciting winter hiking!

Tips for Hiking Alone: All For One!

0
hiking alone

As someone who grew up in the countryside and who spent hours as a child wandering and riding my pony alone since I was about 7 years old, I have always loved some solitude in my life. As a teenager, I even lived in a hut some 50 feet from the house so I fell asleep to the sound of owls and the occasional cat fight and woke up with the birds chirping outside my window. The thought of having no time alone away from other humans is a stranger to me than constant human contact.

This was, however, possible for me since I had plenty of people from my surroundings, offering me tips for hiking alone, so I kind of knew what I was doing.

an adult enjoying the view of a mountain lake

However, I realize that is not how the majority of humans live in this world. We are successful social creatures and we take comfort from living and working in groups, be they family or based on other organizations.

In the “Western” World at least, our social groupings are not always so family oriented over the whole period of our lives and there are times when we may find ourselves isolated from people we love and know. A healthy attitude to independence can always be helpful in our daily lives, as we travel and move to new living areas.

There is a total difference between being alone and loneliness. I read somewhere that “Loneliness makes you want to find distractions to free yourself from it. Being alone allows you to follow your heart.”

  • Loneliness is a state of mind where one feels there is a lack of someone or some people missing from one’s life. It is usually associated with sadness and emotional pain, sometimes leading to personal angst and depression.
  • To be alone is a physical state where you are not in the presence of other people. Learning to hike alone will help you consider just where you fall on that loneliness/alone spectrum.

Depending on one’s relationship with animals, being in their presence may mean you do not feel lonely and are not alone. In this world you are just not with humans. The world is actually full of creatures going about their daily lives all around us and hiking alone can make us so much more aware of this.

Black diamonds mine trail

I spent a few months daily riding horses around 2000 hectares of high bush svelte in Namibia. When there was just me and my horse it was like my own private safari every day. I never knew just what animals would be crossing my path at any time – kudu, gemsbock, baboons, mountain zebra, warthogs, meerkats to name but a few.

a horse looking for food

The only predators in the vicinity were leopards which have a preference for eating baboons so I was wary but not afraid. I am fairly sure my horse detected the scent of one and she was quite happy when I changed route to avoid the empty river bed. That’s thing about hiking alone – it raises your level of awareness. You learn to trust that rather be intimidated by it.

Humans are such rambunctious gregarious creatures we tend to blot out many of the other creatures around us. Most animals travel quietly, vocally at least, except for insects. Strange how the smallest of creatures can be the noisiest!

Hiking alone means you usually travel quietly and you become part of nature. In Namibia, if someone came riding with me, I hardly saw anything because we chatted and made far too much noise. It was still enjoyable, but different. For this reason I am a confirmed occasional solo wanderer.

favorite place to take a break

Solo wandering or hiking has benefits:

  • Allows you to connect with nature on a profound level
  • Improves self awareness
  • Improves self confidence
  • Gives time for self reflection
  • Improves your planning skills and self reliance
  • Tests you outdoor skills
  • Gives you complete freedom of choice
  • Forces you to overcome adversity
  • Develops the joy of being alone

And a few things for consideration:

  • No shared responsibility
  • Loneliness
  • Vulnerability

Steps in a Solo Direction

To begin hiking alone, I suggest you

  1. Do trips on the tracks you are already familiar with to build confidence and help with planning your hike.
  2. Start with day hikes along well trodden paths. During the hike you may find others on the path and at other sections find yourself alone on the track. This will give you a halfway adjustment to knowing others are likely to be around should you need help but you will essentially still be travelling alone.

These familiar hikes will allow you to get used to preparing what you need for yourself. Practice planning hikes regarding the route, estimating how long it will take, what food and water you will need. You will get used to stopping when you feel like it, to start the joyous feeling of making your own decisions totally for yourself.

shoes of a mountain hiker

Gradually make these day trips into more remote areas where you are not so likely to meet anyone. I used to make day hikes into the foothills and back country in New Zealand and not see another person at all on the trail. The trails were relatively well marked and I could sense direction, but there was not another human for miles. It was a glorious feeling to walk up through the honey dew smelling bush up on to the tussock (long grass) hilltops with views to die for.

Planning Trips

Planning is one major key to success of any trip is and as a solo hiker all this ultimately comes back to you. Get all the advice and information you can before you leave – whether from other experienced hikers, the internet, weather reports and local information centers.

Know yourself and your skill levels. It is fine to set yourself challenges and goals but err on the side of caution when heading out on your own. While you are hiking solo always remember that if something goes seriously wrong and you are in need of rescue, other people may end up risking their lives to save yours. No one is pushing you but yourself so don’t overdo it. Don’t take unnecessary risks that may harm others.

an adult writing on a notebook

Make sure you are physically fit enough for the trip you plan to take. Build up muscles by carrying your pack on short trips and build your personal fitness level.

Practice good risk management. Think in low charts that “What if…” then the events that may or may not ensue from each point. Try to eliminate what risk you can. This doesn’t mean you should not go out and try things but try to plan make contingency plans along the way. If possible have points where you pull out safely along route. Most accidents or disasters do not happen in isolation, they are a chain of events or concurrent problems that layer over each other to result in an accident.

Always brief someone of your plans or preferably two people who know each other, where you are going, how long you plan to be away, and when you expect to be back. Plan with them what should happen at any stages should you have to alert them or you fail to return. These actions will depend on where you are and the authorities in your area that organize search and rescue.

Make a list of what you need. The “Ten Essentials” from the book, Mountaineering: The Freedom of the Hills recommends you hike with a minimum of these items,

  • Navigation – relevant maps in a waterproof container, a magnetic compass, optional altimeter and GPS receiver
  • Sun protection – high factor sunscreen, sunglasses, brimmed hat, clothing
  • Insulation – gloves, hat, jacket, layers of clothing for extreme weather
  • Illumination – LED headlamp, flashlight, new batteries
  • First-aid kit – including insect repellent
  • Firelighter – butane, matches protected in waterproof container
  • Tools – multi-tool, or pocket knife, pliers, screwdriver, trowel/shovel, duct tape, cable ties
  • Nutrition – Daily ration plus one additional day extra (for emergency). Don’t forget the chocolate!
  • Hydration – Carry 2 liters of water as emergency ration
  • Emergency shelter – tent, tarp, bivy sack, space blanket, jumbo trash bags, plastic tube, insulated sleeping pad
  • Signaling devices – whistle, two way radio, mobile/satellite phone, robust mirror, signal flare, laser pointer

Even you are only planning a day trip you should consider some of these items in the case of emergency, especially relating to signaling, water, food, first aid and shelter.

Regarding electronic devices there are a number of choices. People have been hiking in the wilds for thousands of years without devices so while they are extremely helpful; learn to not rely on them. There are a number of GPS suitable for hiking, having better battery life and being more rugged than a mobile phone.

a GPS track in the hand of a man

You might also consider Personal Locator Beacons, two way radios, satellite phones and other devices that hopefully you will never need but having them will give some security.

Clothing and Equipment. Some say, “There is no such thing as bad weather, just bad clothing.”Make sure you wear and pack relevant clothing for all the weather you may encounter – hats, gloves, sunglasses, layers of clothing, and so on. Make sure your footwear is tried and trusted and not likely to give you blisters.

Make sure you have a pack that is comfortable and carries all the equipment you wish to carry. Start out wearing it on shorter trips, gradually adding items to increase weight over longer distances. Carry it often enough so that it eventually becomes like it weighs nothing.

a pair of hiking shoes

A few (unlikely) Dangers

Weather

Always check out current and future weather forecasts and err on the side of caution if there is any likelihood of problematic weather, even more so than if you were to be traveling in a group.

If you are going into the back country, learn to read cloud formations and weather patterns in the area you will be hiking. Learn to ascertain the safest places to camp, for instance away from rivers where there are possibilities of flash floods, away from trees with old branches that may fall, and so on.

cumulus clouds

Know that it is much more difficult to cross flooding rivers solo, snow storms cover trails, high winds can bring down trees and even blow you off a mountain.

Losing your way

Despite the best laid plans this can happen if the weather is adverse for instance, in heavy fog, snowstorms and such like. Learn survival techniques and consider retracing your steps if you are unsure. In case you need to retrace any steps, when you are walking in unfamiliar territory, take the time to look back occasionally as views always look different from the other direction.

feets on the ground

Never rely on a cell phone

Learn about navigation techniques with a magnetic hand compass to back up any digital device you may be using. Make sure you are comfortable with it before you leave for any trip. Don’t rely only on digital GPS as they may break, get lost, or stop working.  There are lots of good sites on the internet and good books to learn about survival skills and finding routes.

Animals

These depend on the country you are hiking so research about the likely dangerous animals that might be in the area you intend to hike. Any attacks are usually if the animal feels threatened or you accidentally harmed them. Some animals are more dangerous at certain times of the year, for instance, male deer can be aggressive in their mating season, but would run at any other time of the year.

a beautiful red deer

But remember most animals are happy to go about their lives, leaving you to go about yours. Animals have a much keener sense of smell so even empty food packets may be a problem. When camping, avoid leaving food around your campsite at any time. If food is likely to be a problem, it may also be advantageous to eat somewhere else before making camp.

I am going to lump humans in here with animals as far as dangers go. I believe the danger of being accosted by a human diminishes as you go further away from urbanization, not just in the actual likelihood of coming across another person but also in the mindset of people you are likely to meet. Other hikers are there to hike, not cause problems.

As for women being at more risk than men while hiking solo I can only speak for my own feelings and I have no qualms. Some people recommend not camping near roads or parking areas where unknown people may come, especially if alcohol is likely to be involved. As for weapons, it may be fortuitous to carry something, like bear spray which could be used against an aggressive animal or possibly human.

Injuries

This is probably to most risky thing to plan for because they can happen to anyone, anywhere and as a solo hiker they truly can be a huge risk depending on the area you are hiking through. It is advisable for everyone to have some knowledge of First Aid or Emergency First Responder techniques regardless of where and who you are.

First Aid kit

As a solo hiker it is imperative to have these skills so you have the knowledge and skills to survive various injuries. Always carry a well checked First Aid kit and know how to improvise your gear if needed. These dangers are there, possible, but not probable, so with risk management outlines minimize them as much as possible and go hiking anyway.

Wrapping it Up

To build confidence, visualize your trip quietly to yourself, especially if you already know the route. Visualizing is always a good method to keep things moving in a positive manner and is not reserved for elite sports people.

Even though you may be on a trail or following a map, get in the habit of using natural methods to tell the time such as where the sun is in the sky, the length of shadows and such like. The sun will also help you know the direction in relation to time knowing that it moves through south when in the northern hemisphere and through north when in the southern.

a man taking pictures of the beautiful nature

As for learning to travel by the stars, that may be quite difficult to learn. However, there are basics like the Southern Cross for the southern hemisphere, the North Star in the northern hemisphere. Practice until the sense of direction can become a second nature.

One bonus of travelling alone is, there is no one else to make sure is organized. You can decide when to leave, how far to go, when to pitch camp. Regarding that, make sure you know how to pitch your tent or tarp quickly, in good and bad weather.

Tune back in to all your senses – sight, hearing, smell, taste and touch. Everything will seem more intense when you are hiking alone. Take a deep breath, make a small step and start a new journey hiking alone on this awesome planet! “Nature here I come!”

Urine Filter: Converting Urine into Drinkable Water

0
Converting Urine into Drinkable Water

Hopefully, there will never be a time where you find yourself in a need for filtering your own urine to drink it. This is a life or death situation, most of the time, and if you find yourself trapped in the woods, lost on a hike, or somewhere in the middle of nowhere with no help or supplies, you may need to filter your own urine to stay alive.

While this is not the easiest task, it can keep you alive longer than if you had not filtered it at all. Using a urine filter, you can turn your urine into piss water that is drinkable. Even astronauts have found themselves in the act of filtering their own urine.

Aboard the International Space Station, astronauts have used a urine conversion system for nearly 10 years. With the average person using the restroom 7 times a day, it is no wonder that someone would figure out how to take urine and turn it into clean drinking water. With their prototype, they hope it will be fully used for space travel and within homes.

For astronauts, filtering their urine is important because without it, the space ship would have a lot of excess fluid to hold onto. However, the device that NASA persons came up with is extremely costly and will never be able to be used by everyday people.

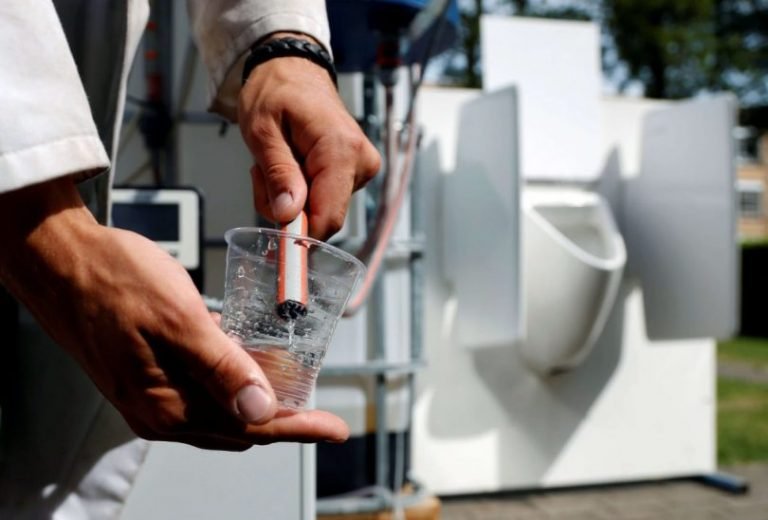
Designer Leonardo Manavella has come up with a device that will actually convert your urine into safe drinking water. While it is meant for emergency situations, it is easy to use and is called the H2O Purifier. This device takes away the waste from the water, removing nitrogen and other materials, and will leave clean water at the other end.

h2o urine filter

After all, urine is 95% water. Let us dig into what Leonardo Manavella has started and look into the H2O Purifier a little more.

The features of the H2O Purifier are many, so let us take a deeper look into this intriguing product.

  • Container: This product comes with a container in which you will urinate. The container sits within a stand to keep everything still and in one spot. The container also has all of the gadgets that will make the product work.
  • Pressure: After you have urinated, and are ready to filter the urine into water, this is where you will apply pressure with both of your knees to the side of the device. Applying the knee pressure will allow clean water to flow to the bottom bowl and be ready for consumption.
  • Spout: The spout allows you to drink straight from the canister or allows you to pour the water into another glass. Just be sure there is no excess urine on the outside of the filter.
  • Carbon: Carbon will begin its job once you start urinating, cleaning the urine and allowing it to pass through the micro filter and get cleaned. Carbon is a known cleaning agent, being able to filter what goes through it. Carbon is also used in air filtration.
  • Bacteria: While urine is 5% waste, you still do not want to drink dirty piss water. However, with this product, you can expect “1 a 4 Micrones” left over, which is a small amount.
  • The Ground Method: The ground method that we will speak of later, is another urine filtration system that can be done by hand but is tedious. This involves gaining condensation while keeping out the waste, leaving water that is drinkable. The features of this are that it involves many little items and lots of time, which can be a bad thing.

Urine filters should be only used when there is no option of water and you are in an emergency situation. These are not meant to be a replacement for water intake on a daily basis. Overall, the product is great and works wonders if you are outdoors and have a shortage of drinking water or find yourself in a situation where you may need to filter your urine until you can get safely back to where you need to be.

This product uses carbon filtration and a micro filter to clean the urine and prepare it for consumption. The cylinders on the sides allow you to use your legs to apply pressure for the urine to filter.

h2o urine filter

Once cleaned, the clean urine water will flow into the bottom portion of the device and then be ready to drink via the spout, or poured into a drinking glass. The taste is not the best, but you will prevent your body from dehydrating.

Most other methods of urination filtration make you wait hours, waiting for a buildup of condensation and getting little amounts of water in return. Using a product like the H2O Purifier speeds up the process and allows you to have a larger amount of water versus a few sips over a period of hours.

So, what is another way to turn your urine into water? You can take the long way by doing the following:

  • First, you need to dig a hole where the ground can get sunlight. A plastic sheet, or grocery bag, can be used to put inside of the hole. Here is where a container can sit in the center. The urine should be spread around the sides of the container.
  • When the sun goes down, you can cover the hole with something and secure it with rocks at each end. There will need to be a dip in the center, which will help with condensation and distilling. The heat from the sun will distill the urine and the vapors of water will collect in the container.

This gives you actual clean water versus drinking the urine. But, this process is long and tedious and you must wait a long time to drink your water, which might be hot at first.

Comparing Urine Filter Methods The H2O Purifier The Ground Method
Amount of Time to get the Water Minutes Hours
Convenience Easy Difficult
Clean Up Easy Medium
Portability Easy Not Portable
Work Involved Little Lots
Amount of Water Lots Very Little

The ground method requires much more work than the H2O Purifier and involves more clean up as you cannot leave your mess sitting in a hole in the ground. It is not safe for the environment or for anyone who may come along and hurt themselves in the hole. You cannot leave your plastic there as animals may eat it or become injured.

One of the best things is that you can grab your H2O Purifier and go, whereas you have to otherwise dig a hole and use the same spot, thus not being able to stray too far. It can easily be taken with you in your gear, whereas bringing along plastic bags and containers can get bulky in your backpack.

What Do Others Think of Urine Filters?

Users who have had experience with urine filters say that they can be messy to use. Some are more convenient like the H2O Purifier and easier to clean. Most urine filtration systems require the use of many items, some that are found in nature to take hours to make urine into little amounts of water.

Users say that modern products work best and allows you to get more water in return. Users like that some filtration systems are easier to clean up and move on. If the process involves several hours or getting too messy, then users must be so inclined to do what they have to in order to survive.

Water Filters, Micropur & Desalinator

Users who use the technique with the ground and producing condensation find that it takes too long to produce water. This can mean that a person will be dehydrating as they wait and could experience dizziness or worse. But they do like this method because it is tried and true and does not cost a thing, even if it can get messy.

Overall, uses like the portability of the H2O Purifier versus the ground method. They could take the device with them wherever they were, instead of using one hole that they took a while to dig.

Using more energy when you are already out of water and becoming dehydrated can be bad for you. This is the time where you would want to conserve all of the energy you have, especially if you are in danger or do not know when you can get to fresh water again.

Pros and Cons of Using a Urine Filter

Most products have a good and bad side. For urine filters, you can tell that there would be some concerns. The H2O Purifier has a few pros and cons listed below.

Pros:

  • Easy to use and stable
  • Easy to convert urine into water by using knees to make the product work by applying pressure
  • Small enough to tote along with you
  • Great for emergency situations
  • Has a carbon filter and micro filter, which optimize the cleanliness
  • Easy to clean up
  • The ground method does give you absolutely clean water that can be consumed.

Cons

  • Can seem gross to use to some people
  • Your water is not going to be 100% clean, but it will be drinkable
  • Some ways of filtration can be tedious and unsanitary
  • The taste leaves something to be desired.
  • The ground method is long and hard
  • The ground method requires a lot of condensation

Wrap Up

You can see how this product would be great in an emergency situation where you are at risk of becoming dehydrated and you have no actual water. This product is fantastic and small, and easy to take along with you camping, hiking, or an outdoor adventure that can last days or weeks.

How do water filters work

Many filtration ways are easy to use, but some are messy. Consider what is best for you. The H20 Purifier works like a charm and is perfect for those who do not want a mess.

How to Care for a Blister: How to Have Pain Free Hiking Adventures!

0
How to Care for A Blister

Everyone of us, at some time in our life, had to deal with a painful blister. To know how to take care for a blister, first you need to know what a blister actually is, as it can prove to be very painful and problematic if you don’t know what to do about it.

Blisters happen once the epidermis, which is the upper layer of skin, is separated from the inferior layer of the skin. It can be often because of chafing or heat, but it can also happen due to some medical treatment or skin condition.

The best way to keep the bacteria away from the affected area is to avoid bursting or draining the blister, as this will protect you against any infection. However, in the case your blister bursts, it will cause pain and will be difficult to deal with.

Furthermore, you’ll have to take extra care of it. But, you don’t need to worry because knowing the following, easy steps, will make caring for blister much simpler and less painful.  Keep reading to find out more.

How to Prevent Blisters

Friction could be a quite common reason for blisters to appear, particularly if they occur on your feet.

Prevent Blisters

You can avoid blisters by wearing fitted shoes.

  • To avoid blisters start wearing thick socks. Wearing a tights can be a second option if you can’t wear thick sock.
  • Keep the skin dry, because there’s a big chance of blisters to make on the wet skin. Foot spray can be additionally used to assist cut back sweating.
  • Wear gloves. Sporting gloves, particularly throughout labor like  production and farming can facilitate forestall the event of hand blisters.

You should additionally wear gloves whereas doing activities like weightlifting, which may additionally cause hand blisters. Acute sunburns also can cause blisters. Shield yourself within the sun by sporting protecting wear, hats, and cream lotion.

  • Moisten your feet: Similar to sweating skin, dry skin is additionally additional at risk of friction. Use skin creams and lotions munificently on a everyday to take care of correct moisture.
  • Choose blister-free socks: Use Cotton socks instead of synthetic socks because they are lighter, however, they can retain fluid.
  • Run with glossy skin: Before running use a petrolatum or other material on your feet or use a material to cover your feet, which remains intact even when perspiration occurs.Each ways type a defend between your socks and skin.
  • Wear socks and shoes that are appropriate: Smaller shoes can cause blisters below the front area of the feet and around the nails. There ought to be a thumb’s breadth of the area between the end of the toe box and the toes. The socks ought to work swimmingly, with no additional material at the front and back part of the foot.

What to Do If The Blister Bursts

Clean your hands carefully

Before you touch the affected area you need to make sure you wash your hands with a mild soap. Clean the hands for a few seconds. It will provide protection against spreading of bacteria, that can be a reason of an infection.

Cleanse the affected area methodically using warm soap and water

You should never rub the blister because it can cause the tearing of skin even more. Refrain from using alcohol, oxide, iodine as this will irritate the affected skin.

Let the blister dry off

You need to let the blister dry off if attainable, or use a towel gently.

Again, you should not rub the towel on the blister to dry it off as it can cause tearing of the skin even more.

Try to keep the flap of skin intact

Flap of the skin that shaped the highest of the affected part could ultimately come back off, however, it can still help shield the red skin beneath during the healing process.

Try to make sure that you leave the skin unbroken.

  • In case the blister gets broken and you find dirt beneath the flap of skin, then in order to prevent infection and tearing of skin, you need to clean it away.
  • Initially, clean the affected area thoroughly. After that in order to disinfect the scissors that you are going to be using on the blister use alcohol. Scissors can also be sterilized by putting them in water and boiling for twenty minutes.
  • Dead skin needs to be clipped away carefully. Avoid clipping too near the skin which is healthy. Better to be safe than sorry.

Put on a cream or an ointment on the blister

By putting an ointment there is lesser chance of an infection to occur, which is actually a huge risk with a torn blister.

Blister caring

Medicine ointments and creams that are commonly available  have antibacterial ointment, each of that contain polymyxin, fradicin and antibiotic.

Put a clean bandage on the blister

A normal bandage is a good option for a small blister, but if you are dealing with a big blister then you need to put on gauze pad which sticks to its place with first aid tape.

  • Make sure that you use solely  non-stick bandages or you can use gauze pads on an open blister.
  • Hydrocolloid bandages could facilitate accelerated healing. They’ll stick to the skin, however, not to the blister.

Utilize a special bandage which is particularly designed for blisters

In case the skin on the affected area has come back away, or for the treatment of foot blisters or other sensitive space, a special bandage which is particularly made for treating blisters should be used.

  • A  variety of brands of special blister and cushion bandages is available,that are soft to shield sensitive skin.

Additionally, moleskin can be used on blisters, which is a tender and soft  substance that always has a glue backing.

  • You can cut 2 items of material a little larger than your blister. First one should be in round shape and almost the size if your blister
  • Then place the item on the blister in such position that it makes a space for air on the blister.  Use the other item of material on high of the primary.
  • Don’t use a something like a liquid bandage because they are appropriate for cuts and laceration, and will cause more nuisance for the blister.

When doubtful, ask your pharmacist or get a subscription from a specialist for a particular recommendation.                                                                    

Bandage needs to be changed regularly

It is important that the bandage is changed regularly, before it gets wet or dirty. Also, whenever you change the bandage, you need to make the whole process of cleaning and putting an ointment on it. Unless the skin heals completely, you need to keep doing the bandage.

Handling itchiness

Usually a blister is supposed to itch because of the healing process, particularly if it is permitted to dry, however, it’s vital to avoid scratching to prevent any skin harm.

Blister on the foot

To avoid itchiness you need to keep the affected area moisturized and cool. In order to do that soak a piece of clean cotton cloth in cold water and use it on the blister, or soak the area in a cool water tub.

Eliminating the flap of skin when the healing is done

When the skin under the blister starts to heal and isn’t soft anymore, you can cut the skin flap by employing a combination of clean, modify scissors.

Look for infection signs

Open blisters will easily become infected, therefore, you need to look at them closely. In case that you see any signs of infection and in case the affected area is not recovering after a few days, obtain a specialist opinion.

Signs of infection are:

  • Increased pain round the affected area.
  • Redness and swelling or heat close to the wound.
  • Pus debilitating from the wound
  • Feeling sick

Blister Treatment

An oversized blister should be drained otherwise it can burst on its own and become very painful.

How to drain the blister

  • First and foremost, you should clean your hands properly.
  • Then sterilize a needle by wiping it with alcohol.
  • Try not to place it in an exceedingly flame. Carbon particles can get into your skin. The carbon will additional aggravate the wound.
  • After you have pierced the blister, rigorously deplete the fluid with your fingers by pushing mildly close to the outlet. Then cowl the area with a decent bandage to stay microorganism since moving into.
  • Take the bandage off sporadically and soak your foot in specific salts  to put off the fluid. Once soaking, placed on a recent bandage. It’s a decent plan to apply another bandage  till the skin gets tight once more.

If you’ve a tiny, low blister, you should avoid touching it . The skin protects as a covering over a disinfected surroundings.

Moreover, when the liquid quantity is tiny and you are trying to burst it, this may cause further issues by causing some bleeding. Tiny blood blisters should be left undamaged, as well. If not, there is a possibility of obtaining microorganism into your blood.

Cut an opening the scale of the area within the center of a chunk of fabric, then apply it on the affected area and apply some gauze to canopy itself.

A doctor must be consulted for the treatment of a blister under the nail. One ne’er needs to intentionally take away the toenail.

Hotspot Management

If you are being negligent regarding the prevention you may get lucky and get an early warning in the form of a hot -spot.

A hotspot is simply a burning sensation on a specific spot.

Blister kit

Its management is just to take the prevention steps as soon as possible.

Blister kit

You should have a blister kit at home and it must contain:

  • silicon gel toe sleeves.
  • orthopedic felt.
  • ENGO blister prevention patches.
  • scissors.
  • hydrocolloid dressing.

Some Useful Ways to Make A Blister Heal Faster

  • Give it Air: The first and foremost rule of blisters is to let that dirty sucker breathe.By exposing the blister wound to the air speeds up  the healing process. If you can’t avoid walking, do so loosely by tenting your adhesive bandage at the sides to allow air flow in the middle.
    Indeed, the healthy treatment of any blister depends on whether the wound is closed or torn open. If the blister is closed, leave the skin covering the wound to prevent the possible infection.
    Simply clean it with care, but leave the attached skin in place to protect the wound from dirt and infections and also to lessen the pain associated with exposed nerve endings on an open wound.
    Air is important to support healing. However, if you are somewhere outdoors not  in a clean environment, the use of a clean bandage or gauze pad can prevent infection.
    To prevent future blisters in the same area, wear padded athletic socks or cover affected areas with a padded bandage to protect the area prone to rubbing.
  • Elevate, Elevate, Elevate: If you have a blister on your foot or heel, elevating it by putting up your legs will surely relieve inflammation, and pressure to the specific area and it will help decrease pain and discomfort.
    Position your foot to elevate the blister as much as possible above waist height. This elevation will  decrease pain, causes proper drainage of all fluids by working with gravity, and helps fresh blood flow to the area and speeds up healing.
  • Cushion the Injury: Some more padding on the blister can make walking  more comfortable.
    Sheets of foamy adhesive pads can be bought for this purpose and you can cut the shape of your required padding to fit and cushion the injury.
  • Soften the Area: Soak a blister a few times daily with a saline solution, especially if you pop and drain a blister.It will speed up the healing process and help flap away torn skin. It’s important to soften a blister before  popping it.
    Whereas, popping and draining an extremely painful blister can give pain relief by relieving pressure to the area. To try the procedure, soak blister in hot water or saline solution so you can properly clean it to prevent infection.
    By softening the blister popping it with a sanitized needle will be much easier. Also, softening the area after it’s drained in warm, clean water will support speedier healing and putting less pressure and pain in the area.
  • Moisturize the Area: Aloe Vera is a gentle, anti-inflammatory gel that can help moisturize and speed the healing of a blister.  Apply the gel after cleaning the area and allow the area to dry before covering. Aloe will also cool to the blister.
  • Have Patience: Most importantly, be patient with your blister. Like any injury, it may take a few days to a week to heal completely. As advised, take the time to properly drain, clean, and dress your blister.
    And if you can, leave the blister open to the air in a clean environment so that it speeds the healing process.

Wrapping It Up

These few steps will help you take care of your blister fully. When you are hiking, taking care of a blister can prove to be very difficult, so to know a few tricks can come handy and save you from the pain and trouble.

Preventing a blister

The steps that are mentioned above are very easy to follow and you can know all precautions and measures you need to take to avoid blisters in the future. By following the preventive measures and precautions you’ll be protected from blisters in the future and if you ever have to deal with a blister you will know not to panic and do what needs to done.

So you just need to know the necessary steps and tricks to deal with a blister effectively on your own which can be very helpful when you are outdoor.

How to Purify Water: Tips and Tricks for Any Situation

0
How to Purify Water

Clean drinking water is essential to life, and chances are that at some point, you will need to know how to purify water. This could be on a camping trip or in an emergency situation, such as a hurricane, where access to clean water is suddenly limited. Although tap water is almost always considered safe to drink in the United States, where it is thoroughly filtered and chemically treated, there are many countries in the world where this is not the case.

If you are traveling abroad and do not have access to bottled or clean tap water, you may need to know how to purify water, not only for drinking or cooking but possibly for other things, such as bathing. According to the US Geological Survey, water is considered safe to drink if it has “sufficiently low concentrations of harmful contaminants to avoid sickening people who use it.” Some of these contaminants include microbes, such as bacteria and harmful microorganisms; pesticides; and chemicals that could be toxic or harmful above certain doses.

Purifying water involves killing or physically removing these harmful substances, in order to ensure water safety.

Purify your water first

In this article, discover how to make water cleaner – and safer – to use. Some of the different ways you can employ to purify water include filtering it using a filtration system; sanitizing it with UV light; and using chemical treatments, such as chlorine or chlorine dioxide tablets. In many cases, it may be advisable to combine methods, depending on the specific circumstances.

If you’re outside camping, for example, and need to drink water from a stream, you will need to thoroughly filter and treat the water. This could involve a two-step process, of filtration followed by some additional purification method, such as the addition of chlorine tablets, or boiling.

You may, on the other hand, simply want to purify water that is already considered safe, such as tap water, but could still contain trace amounts of a harmful substance, such as lead from pipes in an old house.

Using A Filtration System to Purify Water

One of the most common ways of purifying water is to use a filtration system. Any clean water must have undergone, sooner or later, some sort of a filtration process. Filtration systems can be portable or non-portable, and they range from simple devices to complicated systems.

To purify water using filtration, you need to run it through a machine or device, which physically strains out particles and sediment, as well as chemicals and microorganisms, depending on the type of filtration system.

Using A Filtration System to Purify Water

Filtration is distinguished from reverse osmosis and distillation, which are two processes for obtaining clean water that are generally more involved, and frequently used to purify seawater.

In the case of portable filtration devices, you need to insert the water manually and let it run through using, for instance, a drip or pump system. Non-portable filtration systems, however, are generally built-in and do not require additional effort on the part of the user or household. The main types are explained below.

  • Portable filtration systems: Two of the main types of portable water filtration systems are drip filters and pump filters. Filter straws are another option and are most often used by campers or travelers.
    Drip or gravity, filters utilize the natural force of gravity that ensures water will drip downwards, in this case through some chamber that contains porous layers designed to draw out impurities. Pump filters require some sort of action (that can be mechanical, or powered externally) to achieve the same effect.
  • Non-Portable filtration systems: According to the CDC, there are two main types of household water treatment systems – point-of-entry and point-of-use.
    Point-of-use systems treat water “in batches and deliver water to a tap”; point-of-entry systems are installed to ensure that water is treated as it enters the house. These filtration systems are easy to use once installed. Simply turn on the tap, and enjoy the benefits of purified water!
  • DIY filtration systems: Any porous material – such as a towel, cheesecloth, or coffee filter – can be used to strain out impurities. In an absolute emergency, even natural materials, such as tree bark or sand, can be utilized. These methods should, however, be combined with other strategies, and only used if no other options are available.

A key limitation of some mechanical filtration systems, particularly smaller portable ones, is that they do not always have the physical capability of removing the smallest disease-causing microbes, such as viruses and bacteria, that can contaminate water.

If the water is of questionable safety and there is any doubt, combine simple filtration with an additional purification method, such as boiling or a chemical treatment.

But, on the other hand, if the water source is fairly clean, to begin with – such as tap water – and generally considered safe, then even a simple carbon filter (such as a pitcher with replaceable cartridges) could be beneficial for improving the overall taste, or drawing out residual toxins that would not be removed through other means, such as UV or chemical treatments.

Using Chemical Methods to Purify Water

Common chemical water treatments include iodine, chlorine, and chlorine dioxide. These are available in tablet or liquid form, and can be found at most camping or outdoor supply stores. Be sure to read the instructions, as you will need to carefully measure out the amount of water needed per tablet (or drops in the case of a liquid treatment).

Also, be aware of potential sensitivities, and keep in mind that these treatments may not always be suitable for long-term use. Although chemical treatments should be used cautiously and may leave your drinking water with a bitter taste (iodine especially), they are often quite effective.

Purification tablets to Purify Water

In emergency situations, liquid household bleach can also be used. Again, be sure to dose carefully!

This method of water purification is quite useful for travel, particularly in places where the tap water may not have been adequately treated chemically. If you are camping in the backwoods and do not have access to bottled water, you may also find chemical treatments a good supplement to mechanical filtration systems.

Tablets are portable and take up very little room in a suitcase or backpack. A supply of tablets or drops should, in addition, be added to your home emergency preparedness kit.

Using UV Light to Purify Water

Using ultraviolet (UV) light is another common – and highly effective – way you can use to disinfect and purify water. This method kills or neutralizes dangerous microorganisms and parasites – such as viruses, bacteria, and cysts – by destroying their key cellular functions, rendering them harmless.

UV purification systems come in several forms and, like filtration systems may be portable or installed in water treatment tanks as part of a household system. Small UV wands can efficiently be used on-the-go, and require very little space. Simply insert the UV wand into your container of water, turn the device on, and wait for the specified amount of time.

Using UV Light to Purify Water

A major advantage of this technique is that it does not rely on chemical additives, making it very safe. UV light does not, however, remove impurities, such as sediment or non-biological toxins, from the water. It is also worth noting that the effectiveness of UV light for disinfection is related to the clarity of the water.

This method may be significantly less effective if the water is cloudy. In an emergency, solar radiation can also be used to disinfect water; however, this process is time-consuming, and water must be left in direct sunlight for at least six hours.

Combining Water Purification Methods

In many cases, it is advisable to combine purification methods in order to ensure that water is clean and safe. Many of the techniques mentioned above can be combined. For example, certain intestinal parasites may resist chemical treatments, which kill bacteria and viruses.

NSF International, therefore, recommends using chemical treatments together with boiling. But, boiling does not remove particulate matter or chemical impurities, such as potentially toxic heavy metals. It simply depends on the case at hand.

What Have We Learned?

This article has gone over some of the main ways you can use to purify water, including filtration, chemical treatments, and UV treatments. Depending on the specific circumstances – whether you are camping or simply want to improve the taste of your tap water at home – it may be advisable to combine one or several of these water purifying techniques.

One of the simplest – but most effective and time-tested – ways to kill disease-causing microbes is to boil water.

Boil water outdoor

Boiling water for at least one minute (three minutes at altitudes above 1,000 meters), at a full rolling boil, is one of the most effective ways to kill waterborne pathogens, according to the EPA.

If some other technique is used, but there is any doubt, don’t hesitate to also boil your water! Considering all the ways water can be contaminated, it’s always better to be safe than sorry when it comes to water treatment.


How to Sharpen a Pocket Knife: Learn a Valuable Life Skill Today

0
Pocket knife sharpening

Knives are a practical, standard item that most of us use on a daily basis. Pocket knives are especially handy as they are easily portable in your pocket, meaning you can keep them on your person until you come across some fruit that needs skinning or some other need for a knife arises. Then Bam! Out comes the pocket knife. These incredibly useful tools come in a variety of shapes and sizes, from the larger army style survival knives, through to the smaller single purpose collapsible blades.

The important thing with any of these pocket knife types is that the blade is sharp. This article will explain how to sharpen a pocket knife in clear steps so that you can easily ensure that your pocket blade stays ready to use and razor sharp all the time. Why is this an important life skill to learn? Well, we’ve all heard the saying, “Don’t chop harder, sharpen the axe instead.”

This is especially true when it comes to pocket knives. Because of their relatively small blades and lack of use for long periods at a time, they often need to be sharpened before use. Having a sharp blade will make your cutting tasks so much more efficient, and even enjoyable. But before you can learn how to sharpen a blade you’ll need to learn how to tell if your pocket knife is dull and actually needs sharpening.

How To Tell If Your Blade Is Dull

Dull blades can not only be frustratingly slow to use, but they can also be dangerous. Just try (or rather, don’t try) cutting a ripe tomato with a dull edge and not slicing any of your fingers in the process.

How To Tell If Your Blade Is Dull

To ensure your blade is reliable and safe, test its dullness before starting any cutting. There are several ways to do this:

  • The safe way: Shine a bright light like your headlamp at the blade or put it in direct sunlight. A sharp blade will not reflect light, so if your blade is sparkling it could probably use a sharpening.
  • The easiest way: Touch the sharp part of the blade to your thumbnail, if it’s the blade is sharp it should catch on your nail. If it’s dull the blade will slide easily along the nail surface.
  • The obvious way: Start sawing away at whatever task you want your little pocket knife to perform. If your blade is dull you’ll notice pretty quickly because it will be a slow and frustrating journey to make any progress.

All of these tests work well and are fairly simple to carry out. You might want to test them on your pocket knife now. Once you know how to ascertain whether your blade is dull, you can start learning how to sharpen it when that occurs.

How To Sharpen

There are lots of methods for sharpening knives, but we’ll focus on the three most popular ones. There is no one best way to sharpen a pocket knife. The first two methods below are great for sharpening flat edge blades, and the third is specifically for serrated edges. So check out your blade’s edge before trying any of these.

We’re sure you’ll be able to get your pocket knife sharp in no time. Even if you don’t have one on you, right at this moment, just keep reading and try to commit the basic steps involved in memory. Knowing how to sharpen a blade is a valuable life skill to have. You never know when it might come in handy, especially if you’re fond of the great outdoors and/or fishing.

Method #1: Sharpening with A Stone

The most traditional method known to man, sharpening knives with a stone goes back centuries. Nowadays you can locate the necessary materials very easily as both the stone and lubricants required can be picked up at most any local hardware store.

A good sharpening stone (also known as a wet stone) usually has a fine/smooth surface on one side and a rough gritty surface on the other. It is possible to get two separate stones that have only one type of surface each but we recommend the two tone stones as they’re easier to keep track of. Kind of like socks.

Because seriously, how many pairs of your socks have somehow become separated from one another over time? The point is pretty clear, one two-sided stone is better than two separate stones. If, however, you can’t get hold of a proper sharpening stone because of an immediate need for a sharp knife with no stone around, don’t worry, there are other options available.

Improvisations for sharpening objects include bricks, flower pots, unglazed porcelain, water-smoothed river rocks or anything made from aluminium. The last improvisation, aluminium, works quite well because the outer layer of aluminium items has always been always aluminium oxide. This oxide is an abrasive substance that sharpens knives very well.

We do however only recommend using aluminium for the “final” sharpening stage, though.

Now that you have a good idea of the type of stone to get for sharpening, it’s time to think about getting some lubricant. Lubricant is an anti-friction substance that is used to ensure that the heat created by the friction of the blade against your stone doesn’t warp the blade.

It also acts to help remove the fine particles coming off your blade as it’s sharpened, thus helping to ensure the cleanest possible edge. Clearly, the lubricant is not absolutely fundamentally vital for sharpening a blade, but we’d definitely recommend it for a sharper edged finish and to look after your knife better.

A good quality pocket knife can be quite an investment so it’s important to look after it! Now, what happens if you’re out in the wild without lubricant on hand? Well, the good news is there is a readily available alternative, the bad news is that it’s your own spit. Gross, but it works.

Once you have an understanding of the stone and lubricant necessary for sharpening your pocket knife, you can start learning the technique and skill of sharpening. You’re a fast learner because you’re already there!

Sharpening pocket knife with A Stone

The key to sharpening any knife well is to maintain a consistent angle of rub between your knife and stone. For a smaller pocket knife blade, you should aim for about 10 to 15 degrees between the blade and the sharpening stone.

The easiest way to achieve this is to lay your blade flat on the stone and then tilt it up to the desired angle. Next, you can begin to glide your knife along the rough side of the stone. Around five or six strokes per sides should be enough.

Expert Tip: The strokes should have an almost ‘clean’ sound to them, if they have a scraping noise, then you probably need to adjust the angle of your knife.

Once you’ve finished on the gritty side of the stone, flip it over and do five or six strokes per knife side on the smooth side of your stone as well. Make sure to apply lubricant to your blade before starting this part of the process.

Once you’re finished make sure that you wash and dry your knife well to get rid of all the small metal particles that have come off it during sharpening as well as any remains of the lubricant. And voila! You should have a wonderfully sharp knife ready to effortlessly cut through tasks with.

Method #2: Sharpening with A Honing Rod

A more modern form of knife sharpening than the stone method involves a honing rod, or “sharpening steel” as they are sometimes called.

These rods are extremely popular in commercial and household kitchens because of their great ease of use. The smaller ones are also perfect for using out and about in tandem with a pocket knife.

When choosing a honing rod, it’s important to consider to the degree of sharpness that you’re looking for. Most rod options are created from steel, but they can also be produced from ceramic and diamonds.

Clearly, diamonds will give you the sharpest blade, but every type of rod will actually do a pretty decent job. Unless you’re in it for the showiness (and hey, that’s fine) we’d recommend just getting a regular sharpening rod made of steel. Chances are you won’t be able to tell the difference in your ending pocket knives’ sharpness between rod types.

The technique for sharpening with a rod is fairly simple, you can start by holding the rod by its handle and placing the tip firmly on a solid surface. Often it’s a good idea to place a towel or other material under the rod’s tip to avoid slipping during the sharpening process.

As well as avoiding slippage, this material will protect your bench or table top. If you’re out in the wild, find a log or large flat rock to rest the tip of your rod against.

After finding a good rod position, you’ll need to assess the angle at which to place your blade at. For pocket knives, the ideal sharpening angle is usually between 25 and 30 degrees. Angle really is fundamental to the sharpening process so take your time identifying and practicing your angling.

Sometimes asking someone who is proficient in sharpening knives is a god idea to get an initial understanding of the right angle. If all else fails, there is always YouTube!

Unlike stone sharpening, when using a rod, you’ll want to run your knife along the rod in a slow gentle motion. The gesture shouldn’t have too much pressure behind it and ought to run from the knife’s handle right through to the tip of the blade.

A couple of strokes should be enough for most edges, and doing these double strokes on both sides of your blade will ensure a nice even finish. And that’s that. Your blade is ready!

Method #3: Sharpening with A Serrated Rod

If your pocket knife has a serrated, “jagged” edge then you’ll need to sharpen it with a specially designed tool for the job. These tools are in rod form with tapered ends to carter different sized serrations.

Once you have obtained the appropriate tool, you’ll need to identify your pocket knife’s bevelled edge.

Sharpening pocket knife with A Serrated Rod

A bevelled edge is slanted in design. Regular straight blades generally favour both sides with bevelled edges, but serrated knives are often significantly more bevelled on one side than on the other. It’s important to only sharpen the obviously bevelled side of your serrated knife.

After you’ve identified the bevelled side of the pocket knife you can sharpen each of the gullets by holding them at a slight angle to the rod and making small short strokes.

Expert Tip: For safety, make sure that your sharpening strokes are always moving away you’re your body.

When each gullet has been sharpened individually your pocket knife will be primed and ready for action.

You Can Now Get The Most Out Of Your Pocket Knife!

By now you’ll know exactly how to sharpen a blade, regardless of whether it has a serrated or smooth edge. Congratulations! This is certainly a useful and worthwhile life skill to have, especially if you’re in the habit of carrying around a pocket knife.

But knowing isn’t the same as doing, so make sure you practice these techniques a few times to perfect your motions with low-class knives before moving onto any highly prized pocket knives you may have.

Sharp Pocket knife

Being able to sharpen your knife will quickly increase the efficiency of any tasks that you use your knives for, and it will no doubt come in useful soon. Our last note to you: Always remember to get rid of the metal burs that will have broken off of the pocket knife during the sharpening stages. This can be done via washing the blade or rubbing it against the smooth side of your sharpening stone, or against fine grit sandpaper. Once your knife is clean, it’s ready to go!

Bee Sting Treatment: What to Have on Hand as First Aid

0
Bee Sting Treatment

There are many things to consider before stepping out into the great outdoors, a feat in which being over-prepared is, in many cases, beneficial. Of course, everyone’s pack, and most importantly, their first-aid will look different based on which sector of the outdoors they plan on venturing out to; from a run through the local park to forging out to the bush.

Depending on your geographical location, and the time of year, your first aid should contain the basics according to these elements. One of these first-aid basics includes bee sting treatment and remedy for bee stings. It may sound like something medial, but it is important to be prepared for even the most simplistic problems you may encounter. Being prepared for the small things that typically overlooked will ensure that something small will not change the course of your trip.

Bee and wasp stings fluctuate in severity based on the person. Every person based on their genetic makeup will react differently. Therefore, it is important to gauge what your reaction might be, and plan accordingly. Having a thorough knowledge of your allergies and reactions is important on what to have on you at all times. If you have no allergies, ice packs, cleaning wipes, and ibuprofen will typically be sufficient in your first-aid.

However, if you are prone to allergic reactions, or any other systemic reaction, talk to your doctor about what you can bring along with you and steps to take in the case a reaction does happen. Keeping up to date on your shots is a good thing to consider, as routine immunizations such as the tetanus shot, can increase immunity in your body and fight off infection or reactions to things like bee stings. If your immunization is not current, you’ll most likely receive a booster shot if you have had a severe reaction to a sting.

Types of Bees

Before we continue with our text, it is important to get familiar with types of bees and their natural behavior, so that you can easily identify the type ot he bee that stung you, or to know where to expect them and what to expect from them.

Honey bee

Although there are around 25,000 known species of bees around the world, all belonging under the Super-family “Apoidea”, you won’t find the majority in your backyard. If you reside within North America, here are the most common bees you’ll see:

  • Honey Bee. Classified as the ‘Social’ bee, the Honeybee will live in colonies consisting of around 50,000- 60,000 workers. Honey bees play an important role in conservation and used extensively in crop pollination.
  • Bumblebee. Bumblebee colonies will comprise of about 50 to 400 workers.They are excellent pollinators of all kinds of flowers, their efficiency due to their furry body shape and their ability to buzz pollinate.
  • Carpenter Bee. Carpenter Bees are solitary, and make nests for boring holes in wood. They use mall amounts of wood chips to form partitions between the cells in which they lay their eggs. This species lays the largest egg of any insect!
  • Leaf-cutter Bee. Leaf-cutters like hollow stems and ready-made holes in wood. These bees belong to the You might notice their effects in the garden by a small cut in the piece of the leaf which it takes to construct its egg cells.
  • Miner Bees. Mining bees are solitary and will excavate tunnels and cells underground for nesting and pollination purposes. They prefer sandy soil, but can be found throughout many gardens.

What Happens?

When a bee or wasp stings a person, they inject venom through their stinger into the skin of the victim. The difference between the two stings is that a bee has a barbed stinger that remains in the victim’s skin with a venom sac attached while wasps gave stingers without barbs, retracted upon stinging.

This is why wasps can typically sting people multiple times while stinging people results in the bee’s fatality.

Bee venom, or apitoxin, is a colorless liquid made up primarily of proteins, which cause the inflammation and symptoms of a sting. A typical honey bee can inject approximately 0.1mg of venom, and the typical adult, without a severe allergy to the sting, can withstand about 10 stings per pound of body weight.

As soon as a bee sting occurs, remove the stinger at once as it takes a mere second for the venom to enter your bloodstream. If the venom enters the bloodstream, it will prolong symptoms, create a greater chance of infection, and if prone to an allergic reaction, make the reaction more severe.

It is important when removing the stinger to not grab the end and pull it out. The venom sac is delicately attached to the end and may release more if pulled out this way. Instead, scraping the stinger out is a proven safe way to take out the stinger.

Bee sting process

You can do so with your finger, or many recommend using a credit card. The stinger, upon release into your skin, will also release a pheromone that signals to others bees that you are a threat.

This doesn’t necessarily mean that a swarm of bees will come straight for you, however, it’s smart to remove the stinger in a timely manner as to prevent the bees reacting to the pheromone.

After removing the stinger, wash the sting area with soap (unscented) and water. After the area has been thoroughly cleaned, apply a cold compress or ice to relieve pain and ease the swelling.

Avoid putting ice directly on the body, and instead, wrap in a compress or cloth, to keep from freezing the skin. Apply ice for 20 minutes once an hour as needed. Gauge what type of reaction you have, and perform an appropriate treatment or remedy accordingly.

Wasps, similarly, are equipped with a stinger for self- defense, but unlike the bee, the stinger will remain intact. Wasp venom will inject into your skin without the removal of the stinger and can cause quite significant pain and irritation.

The treatment for the sting is exactly the same as that of a bee, and the reactions will look very similar. The major difference you’ll notice will be a raised welt around the sting site, with a white mark visible where the sting punctured the skin.

Treatment

Treatment for a bee or wasp sting depends on the severity of the reaction to the sting. More often than not, degrees of a localized reaction will occur, and the treatment is straightforward and does not pose any need for further medical assistance.

To tell if it is considered a normal reaction, the skin will be reddened and painful, and swelling and itching may occur. This end of the spectrum results in the pain disappearing over a few hours and symptoms will not typically persist.

Treatment for bee sting

In some cases, the local reaction will last about a week, and surrounding areas of the skin may be affected. In all of these localized reactions, that is to say, a reaction that does not cause a severe allergic reaction, home treatment is enough, and repeat the steps taken right after the sting will be sufficient.

If there are multiple stings that cause a localized reaction, and there is no evidence of an allergic reaction, take precaution and seek a further medical assistance. You may need prolonged observation and blood tests done by doctors to determine the level of venom that was released into the bloodstream.

Bee Sting Remedy

Most of these localized reactions can be helped along using home remedies or things found over-the-counter at your local drugstore. These remedies will help make the healing process go faster, as well as decrease swelling and pain associated with the sting.

Taking an antihistamine such as diphenhydramine (Benadryl) or loratadine (Claritin) will help the itching and swelling and ibuprofen (Motrin) or acetaminophen (Tylenol) will help with pain relief. A hydrocortisone cream on the sting and surrounding area can also help relieve redness, itching, and swelling.

Home Remedies for Bee Stings

If you’re not a big fan of medications, sodium bicarbonate (baking soda) is an agent that is known to help relieve swelling and soothe itching. Add enough water to a bit of baking soda to create a paste, and apply to the affected area.

Bee sting baking soda

Lavender essential oil is also known to soothe and ease discomfort in a sting. It is recommended to use the oil undiluted, and apply it right to the affected area. It can reduce itching, help with swelling along with easing the discomfort of the sting.

That being said, ensure you are not prone to skin irritation brought on by essential oils, or this will make the skin around the sting more irritated.

The majority of problems that require further medical assistance come from an allergic reaction to the sting. We’ve discussed local reactions, which can be easily tended to with home remedies or over-the-counter medications.

About 10 percent of people have adverse reactions and they are referred to as a “large local reaction”. This can be any other reaction other than pain, swelling, redness and itching, and may come in the form of dizziness and difficulty breathing. If you are experiencing these symptoms, or if you are experiencing any greater reaction (which would suggest an allergy), you should be taken to the emergency room to seek medical help.

How Will I Know it’s An Allergy?

Approximately 3% of people who are stung by bees or wasps have allergic reactions to the sting, and the only way to know if you have an allergy to a sting is to confirm it with a doctor. If your first sting proves to be incredibly reactive and is proving severe, seeking further medical help is imperative.

You’ll want to confirm if it’s an allergy, and not just a localized reaction, as all allergic reactions will need further medical assistance. If you are aware of your allergies and happen to get stung, call 911 or get someone who is with you to drive to the nearest emergency room.

Bee sting allergy

Treatments can start as early as at the scene or in the ambulance and will be monitored in the emergency department. In the moderate to severe cases, you may be admitted to a hospital.

A mild allergic symptom might appear as a rash over your body but will not compromise your breathing or other vitals. A symptom such as this would require further medical assistance and you would likely receive antihistamine, steroid, or epinephrine injections.

A moderate allergic reaction to a sting yields a low blood pressure, swelling in the esophagus, or other problems breathing. This is a cause for emergency and can be treated by professionals with injections, and intravenous fluids.

The most severe allergic reaction is the life-threatening anaphylaxis., and up to 0.8% of victims experience this reaction. During an anaphylactic attack, an emergency medical team may perform cardiopulmonary resuscitation (CPR) if you stop breathing or your heart stops beating.

Therefore, it is crucial that if you are prone to an anaphylactic reaction to triggers such as bee and wasp stings, to carry prescribed epinephrine (EpiPen), or its equivalent, at all times.

Make sure that you know how to use the EpiPen, as well as others who are with you in the case of an emergency.  All three of these reactions differ from localized reactions, and can not be treated with home remedies.

Prevention

Avoiding further stings is fairly straightforward. It is recommended to wear protective clothing, long shirts, pants, thick layers etc. as stingers have a tougher time getting through layers of fabric as opposed to exposed skin.

Knowing infested areas is also a great way to prevent coming in contact with bees and wasps. Doing your research beforehand or playing it by ear when you’re out is crucial to sidestepping a possible sting.

Bee sting prevention

Therefore, it’s important to keep your eyes at the ready for nests, and other habitats of bees and wasps.

If you do find yourself near a hive, calmly move away and do so with ease. Any large reaction or disruption will upset the bees and you are more likely to cause stress within the insects.

As complete avoidance of a bee or wasp is unavoidable if you’re outside, I recommend packing an insect repellent that specializes in bees and wasps. Spraying yourself and repeating this process every few hours will, along with extra layers and avoidance, nearly guarantee your chance at avoiding a sting.

Bee and wasp stings are very common, especially during the warmer months and during the pollination season. They can be painful and uncomfortable, but as we’ve found out, more than 85% of people will have a small, localized reaction that can be treated quickly and without complication.

Interesting facts about bees

  • There are over 4,000 species of bees in North America alone.
  • Bees tend to be thought of as just yellow and black, but can actually be found in a wide range of colors. They can be amber, metallic green or deep metallic blue-black, and can have turquoise or emerald eyes.
  • 70% of native bees nest in the ground and most are solitary- meaning they do not live in a hive. The social nature of bees is one that is considered quite odd within the insect species.
  • Beekeeping is no longer only for professionals, and becoming a ‘Hobbyist Bee Keeper’ has grown widely popular in the last decade.
  • Bees will only sting you if they feel threatened or if their home is in danger. Otherwise, bees are quite pleasant and non-aggressive insects.
  • Yellow-faced bees are now on the Endangered Species in North America List. Yellow-faced Bees are native to Hawaii.

In Summary

Now that you know what can happen if a bee stings you, what to do and use in such an event, and even which types of bees can appear in certain areas, you can confidently plan your next adventure in the great outdoors.

Bee allergy symptoms

But, just to make sure, we have also included  the symptoms that can tell you if you can handle the sting on your own or you need to go and seek doctor’s help.

The symptoms that suggest that you are experiencing a normal or large, local reaction (both of which can be treated at home):

  • Pain
  • Itching
  • Swelling
  • Redness
  • Irritation
  • Rash

Symptoms that would suggest an allergy:

  • Hives
  • Difficulty breathing
  • Dizziness
  • Low blood pressure
  • Lightheadedness
  • Loss of consciousness
  • Nausea or vomiting
  • Diarrhea
  • Stomach cramps
  • Weak or racing pulse