
FOOD & COOKING
Best Water Enhancers: Adding Some Flavor to Water
If you are looking to be healthier, one of the easiest things that you can do is swap drinking sodas and juices for drinking water. Studies have shown that even drinking diet sodas versus plain water can cause more weight gain than just drinking water.
The downside that some people bring up is that water doesn’t have any flavor to it, so it can be a bit dull to drink.
In the past few years, though companies have put out new products to add a touch of flavor to the water, to get you drinking more water. But what should you look for in your search for the best water enhancers? We’ll need to go through what you need to know to pick the right choice for you.
What are water enhancers?
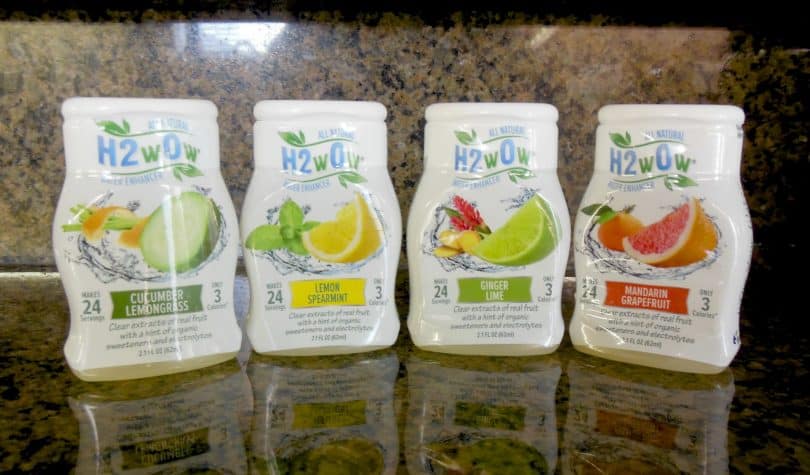
These are little bottles filled with a liquid that you squeeze into a container of water. They are formed from a mixture of ingredients that will differ from company to company. Some will just add flavor in, others will add in various vitamins or ingredients like taurine to help keep you alert. Since they are sold in easy to carry small sizes, you can take them with you on a hike or to the office.
Also, you are in control of how much you put into your water bottle. This will be affected by how big of a bottle you are using and also how strong you want the flavor to be.
One of the main selling points of these little bottles of flavoring is that they are shelf stable. Where you may need to keep a bottle of juice refrigerated, especially after you open it, these can easily be tossed in a bag or a pocket and toted all over town. There is no need to refrigerate the water after you add some unless you really would like it chilled.
Though for your own safety it might be a wise idea to not leave an unfinished bottle just sit out on the counter for a number of days. You might wonder what about calories since you are adding in substances to your water. For that, we need to take a dive into what is used to make these enhancers.
What are water enhancers made of?
If you are trying to be healthier, you have probably already learned how important it is to look at the ingredients on the foods that you buy. The problem is that sometimes it is hard to tell what is good for you and what is more on the chemical side of the equation.
For example, in water enhancers, you will often find things like citric acid, propylene glycol, and sucralose, among other things. Are these natural ingredients or man-made ones? Let’s take a look.
First, consider citric acid, it is a naturally occurring acid. This one is found in citrus fruits and can be beneficial to your body. But as we move on, things get a little bit muddier. As we take a look at propylene glycol, there are some interesting things to consider. It is used to prevent food discoloration when food is stored over periods of time.
Some people will tell you that it is the primary ingredient in anti-freeze, which it normally is, but it can also be found in shaving creams, toothpaste, brake fluid and e-cigarettes. While studies have shown that this can be problematic and even be damaging to some of your organs if used in high amounts, the FDA does recognize this substance as generally safe.
Is this an ingredient that you should run in fear from? Probably not, though it may not be the worst thing to consider how many food items it is in that you use.
Then we have the case of sucralose, this is what is sold under the brand name of Splenda. This substance is apparently made from sugar and so it is supposed to taste like sugar. However, adding this in instead of sugar means that the product can be labeled sugar-free. Since it is several hundred times sweeter than the ordinary sugar, you can buy companies can put a lot less of this into you a product and make it just as sweet.
This has also been approved by the FDA after they ran tests and found no threat to humans if it is used in the proper amounts. There are some people that will say that it isn’t great for people much like aspartame. All in all, this is not a product that you should be overly worried about.
In addition to these, some will have various other extracts like taurine, ginseng or guarana. Also, some add in vitamins like B vitamins to perk you up a bit more. At the end of the day, you have to make the call if you are ok with these ingredients, but they have all been approved by the FDA, showing that they are safe for use.
How much should I use?
Here is where the real push happens. You have to exhibit some level of portion control to get the most out of these products. All of them will have a suggested serving size printed on their packaging. This is a good place to start.
You will want to remember that there are still artificial sweeteners in these products while depending on which study you would like to believe they are better for you or perhaps no worse for you than regular sugar, you don’t still don’t want to take in great gobs of them.

Many will also have some level of caffeine in them. In a number of cases, adding in a single serving is like drinking a six-ounce cup of coffee.You might want to up the dosage somewhat if you would like a stronger flavor in your water. There are some people that have taken it to what could be considered unhealthy levels, though.
If you search on YouTube you will find videos of people pouring the entire bottle into a shot glass and knocking it back all at once. While this is clearly the extreme end of the spectrum you will have to determine how much is enough for you. At some point, after adding water flavoring to your water bottle the product that you are drinking would be more correctly considered a juice or flavored drink instead of the water.
What does the evidence say?
When you go through the studies and the fact that these are approved by the FDA, it is fairly safe to say that these water enhancers aren’t harmful to you if used according to the serving size. Like nearly anything that you eat, if you disregard the serving size and go hog wild, they might not be the best thing for your body.
On the other side, though, even with using them according to the serving suggestions, there is no evidence to suggest that they are necessarily healthy for you. The biggest benefit is most likely being able to get people to swap from drinking soda and sugary juices to drinking more water. If nothing else, this will keep you well hydrated.

Which to Choose
Any number of companies are putting out water enhancers. Are they all equal? Well, no, not at all really. There are a wide variety of options and choices and a lot will have to do with your personal preferences. One of the first things to consider is the reason why you are looking for a water enhancer in the first place.
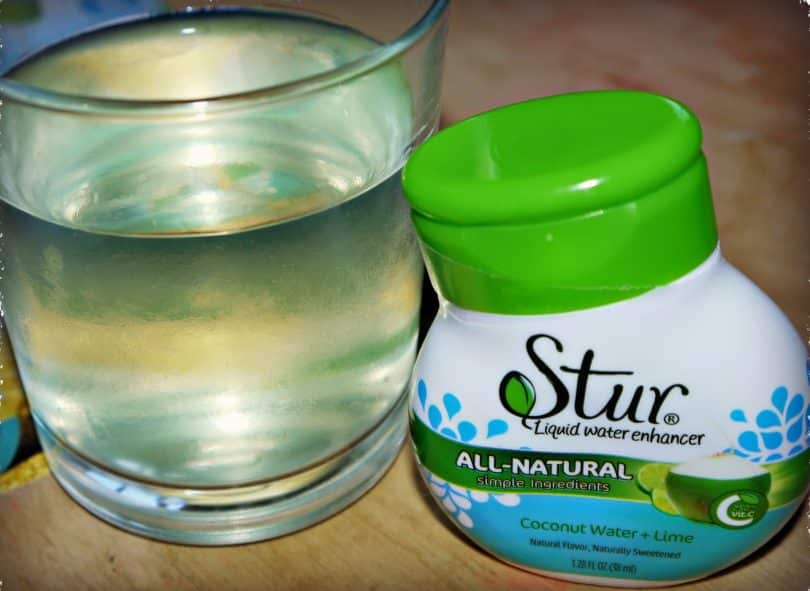
If you are going about it to get healthy and kick your soda habit you might want to take down some of the offerings from Stur or Skinnygirl Water Enhancement. These are also good choices if you don’t feel comfortable with propylene glycol.
If you are looking for more of something that is easy to carry with you to add a bit of flavor to a bottled water you plan to pick up on your travels, the search is a bit wider. With so many companies giving you offerings you can narrow it to what style flavoring you want.
If you are looking for a simple fruit flavor there is a range from Dasani or Mio. If you would like a bit of iced tea on the go Crystal Light has a good selection, even a few lemonade options as well. If you want to have a connection back to your youth or looking for something your child might enjoy there are several Hawaiian Punch and Kool-Aid offerings that are sure to please.
How about some other options?
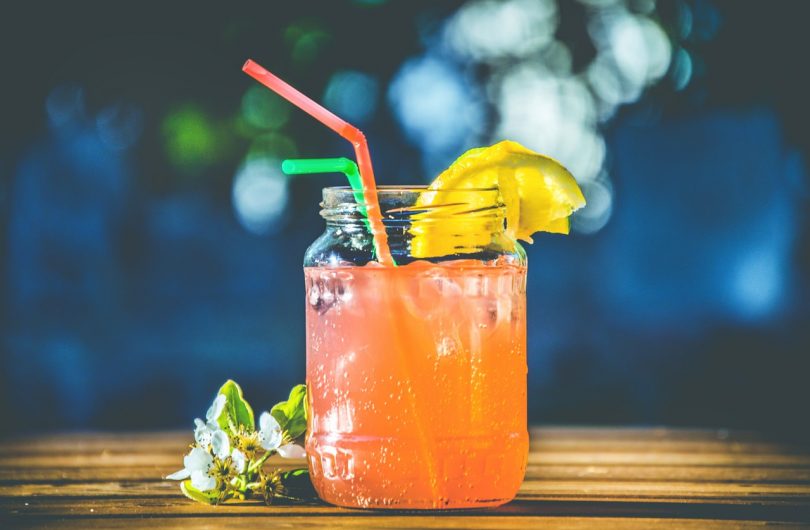
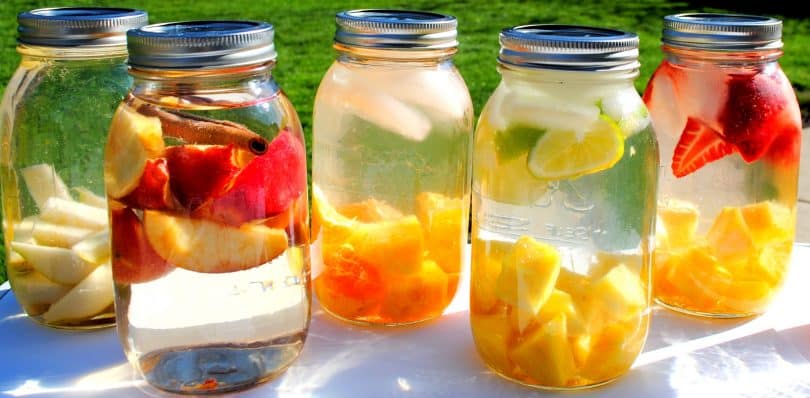
There are other choices than just buying a bottle of stuff to squeeze into your water to add a splash of flavor. You could always just pour some juice into the bottom of your bottle and then fill the rest with water. This will dilute the juice and give you a hint of flavor while still giving you, the health benefits of drinking mostly water. Then there is infusion water. This is normally accomplished by adding some fruit or vegetable to your water.
One of the most popular is to add a wedge of lemon or lime (or even both) into your bottle. This gives you a crisp bit of flavor to your water. Of course, it works best when you have a bottle with an opening big enough to add the fruit in. There are a few bottles on the market now that have a separate compartment to hold the fruit with a screen, or even a juicer, that will let the water flow through but keep the seeds and most of the pulp at bay.
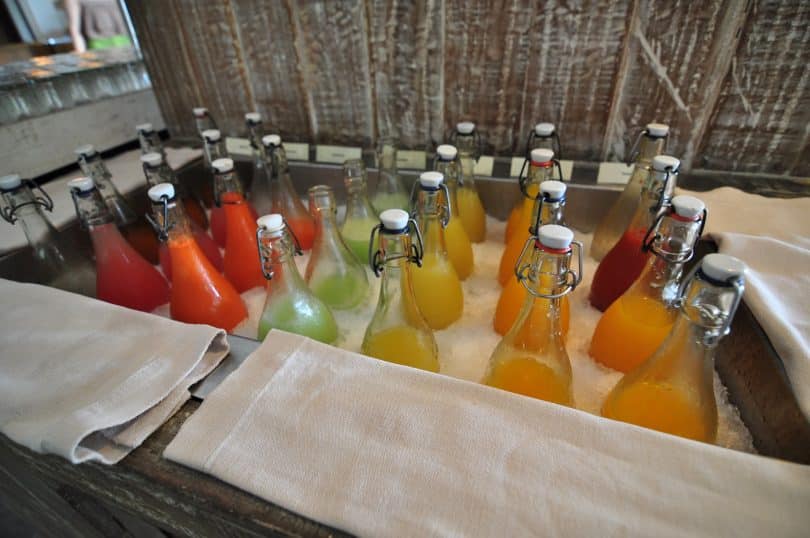
You can also buy a number of seltzers or carbonated waters. These can come with any number of flavorings added to them. This may be a choice if you love that fizz of soda, but are looking for an option that is a bit better for your waistline.
Or if you like your water ice cold, why not add some flavors to the ice itself. You can toss a berry of your choice into each opening of your ice cube tray and then add your berry ice to the water. As an added bonus the freezing process will burst a number of the cells inside the berry, letting its juice flow out more readily.
Or if you need a bit of a caffeine boost, why fill an ice cube tray up with coffee and let that freeze. This can add a bit of a coffee bust with your hydration. If you get creative you can come up with a number of ways to craft your own water enhancers.
Water enhancement on the trail
One place that these little bottles can truly shine is on the trail. If you are going out on a backpacking trip, there is no way that you’ll be carrying juices or drinks that require refrigeration.
However, with these enhancers, you can add a splash of flavor to your drink as you roll down the trail or stop for a meal. The ability to switch from just water all day long could be a saving grace or that special treat when it comes to having a glass of juice with your meal.
While there is any number of amazing filter pumps to get great tasting water out of streams and other water sources, not everyone goes that way. There are some people that purify their drinking water with iodine tablets while out on the trail. Other times you might stop by a campsite for a night or two only to find that their water is delivered via old rusty pipes, giving it that hint of iron taste.
In either of these scenarios or any number of others that might come up on the trail, a little flavor enhancement when it comes to your water might be a welcomed change of pace.

One thing you will want to consider is if you feel comfortable adding these flavorings into your water bottles. Some back country hikers will tell you that if you add any flavoring, or even use soap, in a water bottle, then it has to go into the bear bag overnight and definitely can’t be taken into your tent. These people might only want to add this to water in their mess kit cups to feel safe.
Others may choose to mark certain water bottles that they feel comfortable adding flavors to and leaving others for straight water. Then there will be some laid-back types that have no trouble adding these to water they happen to be drinking from. You might want to experiment with your gear to see if adding certain levels of flavoring might leave a residual flavor in your chosen water bottles before using it in too many of them.
Wrapping Up Water Enhancements
As you may have come to see water enhancements can be a bit of a murky topic. There is no doubt that they are big business, the first-year Mio was out it brought in over $100 million dollars. As a new product goes that can’t be ignored. Those kinds of numbers are the reason that so many companies are now making their own offerings.
One thing that you will have to remember is that just because a company makes money with a product doesn’t mean that it is for you.
Helping people to drink more water is a great idea, as water is a very healthy beverage. Some people drink it all day without a thought of adding anything more than a slice of lemon to it. Other people can only drink so much before they are looking for something with some flavor to it.

These bottles can help to add to that flavor and if that is enough to get people to swap sugary sodas and juices for more water, we have no doubt that doctors will be happy about the change.
As for the ingredients, you have to make a call on that one on your own. On one side of the argument, all the options that are sold in the US have the Food and Drug Administration’s approval that they are safe and use ingredients that are considered safe.
From the government’s point of view if you use them in accord with the serving suggestions there is no problem. On the other side of the debate, people are arguing that anti-freeze and fake sugar substitutes are not good for the human body. If those are things you are concerned with there are still a few options on the market for you.
Finally, we would love to hear what you have to say and find out what your favorites are. In the comment section below to let us know what your top choices are and why you chose them. Also, how much do you add in a standard bottle of water?
FOOD & COOKING
High Energy Snacks And Meals For Hiking: Hiking Food Ideas For Healthy Snacks And Meals

Eating on the trail is both similar and different from eating at home. While you are hiking and backpacking your body is burning a lot of calories. In order to remain healthy and active throughout your trip, your food will have to replace the calories that you are losing. The best hiking food guides suggest eating foods that are high in good fats and proteins. Make sure and consider this when packing your gear. Eating enough calories will help you avoid headaches and lethargy.
Studies also show that sufficient eating allows us to focus and concentrate better as well. You do not want to adhere to a strict diet while on the trail.
How Much?
Some experienced hikers suggest packing enough food to allow for 2,500-4,500 calories per day per person.
These estimates are, of course, going to vary according to your weight and individual needs. As you gain more experience yourself, you will become more familiar with how much food you will need for summer hikes, winter hikes and anything in between.

The most important thing to be aware of is to make sure you will not run out of food. It is always better to have a little more weight in your pack than to run out of food before you get home. So in the beginning, always pack more than you believe you will need.
Good Types of Food
When deciding what kind of food to take with you on your hike, you need to consider a few things before throwing it in your pack.
- Durability: How well will this food do when being shaken around in a backpack for days on end? Bananas are a great snack, however, they bruise and ruin easily. Unless you only pack one or two for the first day, chances are they will not do any good.
Peanut butter, on the other hand, is not affected by temperature or being shaken and tossed around. This makes it a perfect candidate for hiking food. - Prep time: How long will it take to get this food ready to eat? We will be discussing cooking on the trail in a little while, and a hot meal is always welcome when you are working hard, but everything should not have to be cooked.
For breakfast, lunch, and snacks, you should choose a food that is quick and always ready. You do not want to have to spend 30 minutes cooking every time you get hungry. You simply need food to replace the calories that you are burning so your body remains healthy. - Trash: What is the trash that comes along with this food? Remember, you are in the woods, on the trail, far away from a proper trash can, you must choose a food that does not produce a lot of trash that you will have to keep with you for a week.
- Weight: Basically, you need to consider the calorie to weight ratio. If your food for breakfast each morning adds 1 lbs for each day, but you only receive half of the calories you need, it is probably not a wise choice for food.
Again, peanut butter is a good choice. An entire jar may weigh a pound or two, but it is packed with protein and calories that are extremely beneficial. - Taste: Do you like the food? Do yourself a favor: Don’t try a plethora of new foods that you are not sure you will like while on the trail. You have two choices; Try the foods before you leave OR Only pack one or two foods to try while you are out. If you force yourself to eat foods that you discover that you hate for a week in a row, you will be miserable. Don’t do that to yourself.
There are a ton of choices and combinations for great hiking foods, what you enjoy and what is best suited for your type of hiking will determine which choices you will make. Most experienced hikers tend to agree on the best types of food to take along on your trip.
Peanut Butter
The versatility and durability of this food make it perfect for the trail. Having 94 calories, 3 carbohydrates, and 4 grams of protein per tablespoon makes it extremely beneficial. Some places offer peanut butter in a squeeze tube that makes it even easier to carry along.

If you are unable to find those convenient packs, don’t fear. A small jar of peanut butter will serve you just as well while you are hiking.
For a variety of snacks try smearing the peanut butter on crackers, apple slices, celery and other foods to mix it up. Each of these, are healthy and fairly easy to take along the trail. If you really need a quick pick-me-up, eat a tablespoon or two straight out of the jar.
Tuna
Tuna is not for everyone. Personally, I do not touch it with a ten-foot pole, however, it is a great food to take on your trip. At only 179 calories per 154 g of tuna, it is not a high-calorie food. What it brings to the table is the amount of protein it carries.
There are 39 grams of protein in that 154 grams of tuna. These proteins are essential in keeping your muscles functioning properly. In case you did not know, muscles are the only thing keeping you alive. Your heart, lungs, and other organs are muscles. The proteins will allow them to work at their full potential.

There are several suggestions when making tuna on a mountain. The favorite can of tuna is one that is small and has a pop top. When you choose the can that has a pop top, it eliminates the need for a can opener.
Most hikers simply put the tuna on crackers or bread as a snack. Some even bring individual packages of mayonnaise to add a little flavor. Again, experiment with different combinations before you go. See which options are the tastiest and the easiest to whip up.
Energy/Granola Bars
Energy bars are packed with calories and are as simple as you get. For example, Cliff Peanut Butter bars have 240 calories and 11 grams of protein. This is a perfect replacement for the calories that are burned while climbing the trail.

These bars are not meant to entirely replace meals or other foods while hiking. However, they are a very light, easy and efficient snack to keep you moving forward and to keep you healthy.
Dried Fruit/Jerky
Dried fruit and jerky are also great options for the trail. They are sturdy enough to withstand the abuse of the backpack and can stand the heat on summer trips. Calories are included in each and they make a great snack.
There is one issue with packing dried meat and fruit. Make sure and take in plenty of water while snacking on them. Dried fruit and meat will absorb water from your body while it is being digested, if you do not take in extra fluids you can easily become dehydrated.

Jerky does not provide enough calories to truly replace burnt calories, but it does make for a nice treat when the there is a lull in the trail. Many hikers prefer to dry their own fruits and meats to avoid any added chemicals that companies may place in their products. There are tons of simple recipes to get you started online and a dehydrator can be purchased for a reasonable price from most super or outdoor stores.
Fresh Fruit
On the flip side of dried snacks, there are fresh fruit options. We have discussed that bananas may be appropriate for day trips and possibly two days on the trail, but will not withstand the abuse that the trail offers on longer trips. Apples, oranges, and pears are all decent options for a healthy snack while hiking.
While they are not exactly the most efficient snack because of the lack of calories for their weight, they do have the ability to replace water in your body naturally. Several seasoned hikers suggest apple slices, hard cheese and crackers for an afternoon snack in the mountains.
Cooking on The Trail
Snacks and easy meals will most likely contribute to the majority of your diet while hiking for several days. However, after eating several meals for calories and not necessarily enjoyment, you may crave a nice hot meal to finish off your day.
Packing cooking utensils for a week long backpacking trip can be daunting and take up a lot of space. Thanks to many helpful hikers before you, there are tons of tips and suggestions to help guide you along the way.

There are basically three different types of cooking that you can manage on the trail.
- Real cooking-involves actually cooking raw materials
- Cold meals- prepackaged meals that require no heating or cooking
- Rehydration- using dehydrated food and hot water to “remake” the food
Now, while these options are all completely feasible while hiking, there are major opinions of each of them.
Real cooking is usually not a good option due to the number of supplies needed to make it happen. You would need to bring all of the raw ingredients, with no refrigeration, in order to make the meals. After packing each ingredient, you must add in pots/pans and a stove.
Finally, after you are able to stuff all the materials in your bag, you will need to allow extra time for cooking.
Cold meals are a great option. They are quick and satisfying and do not need any preparation. The food is ready to go whenever you want. If you are on a short trip these are the perfect solutions. However, if you are on the trail for several days, it will begin to get very monotonous.

Rehydration seems to be the favorite for most backpackers. Some hikers even dehydrate and prepare their own meals before leaving and simply rehydrate it on the trail. These recipes and meals can be as simple as macaroni, or noodles and as complex as a rehydrating cake for dessert. It is amazing how versatile this method can be.
When deciding to rehydrate food you will need very basic materials. Most hikers prefer “one pot meals” which means that only one pot is used for cooking the meal. This eliminates having to scrub or clean several pots or pans.
When preparing your own meals to rehydrate there are two options. You may dehydrate the food yourself or buy already dehydrated ingredients. After gathering all the ingredients for the recipes that you choose, it is best to combine them all into a single bag for less trash while hiking. Be sure to include a note on each bag detailing which meal it is and how much water is needed to rehydrate it.
Utensils
Cooking on the trail can be overwhelming and depending on the type of cooking you decide to use, it can be very bulky and heavy. Real cooking will require a few more pots or knives or utensils, but using this basic list will get you started.

You may come to find that you can manage real cooking with very few materials as well. Rehydration can be very minimalistic and often you will only use one pot.
You will also need to consider a heat source, of course. Stoves are the most popular choice as open fires are sometimes prohibited and stoves are quick and easy.
Stoves
There are benefits and downfalls of each type of stove. Most hikers have different preferences based upon what type of hiking they will be doing.
- Canister stoves are great and double as a pot and a stove. They are simple to use, reliable and because some are a mix of propane and butane, they are fairly stable and able to be carried in lightweight containers.
There are drawbacks to using a canister stove as well. The added propane allows the stove to work at colder temperatures, but it is possible for the propane to burn off quickly and leave you with butane that will not function at cold temperatures, rendering it completely useless.
There is also the fact that while the containers are lightweight they are also very small. One container has been suggested to be able to last for 2 people on a trail for 2-3 days.
You will need to pack extra containers of fuel and also carry around the empty containers as well. - Alcohol stoves are also a popular choice among hikers. They can be homemade and are very simple. You can also transport the fuel in any plastic bottle or other containers.
There is the possibility of having extreme problems with this type of stove if you are not familiar with them. If these stoves get tipped over while burning, the fuel will spill out and can cause a bigger fire. It is recommended to use extreme caution when using these stoves. - Multi-fuel or white gas stoves are also a great choice. These are probably what most novice hikers will be the most familiar with. These stoves are exactly what the name implies, multi-fuel.
Hikers can use white gas, propane, gasoline, kerosene or diesel fuel. This is extremely convenient if hiking for long periods of time. You can fill up your fuel at any trail stop along the way. - Solid fuel stoves are an extremely popular choice among single hikers. These tablets are easy to store, carry and relatively inexpensive. Most tablets burn for about 10-12 minutes which would be long enough to heat water for rehydration meals.
This would probably not be a good choice for real cooking. The time that it would take to prepare the meal would be too long for the tablet to last. However, if you see that you are done cooking before the tablet is gone, you may extinguish the tablet and save it for later. This will help you to never use more than you truly need.
Each of these options has been proven effective on the trail. Again, stoves are recommended to take on the trail due to the fact that open air fires are prohibited in some areas, especially during dry spells. Keep in mind when and where you will be going hiking.

Cold temperatures and lack of refilling options often will be able to help you determine which stove will best suit your needs.
Eat Up!
Using these tips from the experienced hikers is a great way to get started. Always remember to pack enough food for your trip and to hydrate as much as possible when eating dried fruits and meats. There is no reason to compromise great snacks and great meals just because you are roughing it on the trail!

No cook camping meals can be a fun way to eat without having to create a fire or bring along a camping stove. Eating no cook camping food means you can eat faster because there is less preparation and wait time than when you decide to cook a hot meal. While some may enjoy a hot meal, there are many camping food ideas, no cooking required!
This means you can still eat healthy, with less wait time than cooking, and still come up with some great no cook backpacking meals! As you will see, there are several delicious recipes out there that can be made without heat while you are enjoying the outdoors. You may find something that you did not think you would enjoy, but now love!

In this review, we are going to show you the features you need to think about before you prepare meals, as well as several recipes to give you an idea of what you can make. They can always be tailored to your liking, and prepared before you leave for your camping trip. Hopefully, you will find a new favorite camping food after you see what we have in store!
Things To Consider
When it comes down to finding recipes for your next upcoming camping trip, you will need to think of foods you enjoy and then what you can make from that to enjoy while out on the trail. Check out some of the features below to see what you can gather for your next adventure.
Choices
You have a variety of choices of meals and snacks you can make just before or while you are out camping. Things like sandwiches, salads, trail mix and more can keep you full of energy, without having to start a fire and get dishes dirty!

Once you have a few recipes, you can gather the foods and prepare your meals, which will be easy to make, easy to eat and a big help once you are outdoors. Bringing along a cooler will help keep many foods edible, so you have a wider range of foods to enjoy.
Health Factor
You get to choose what goes into your meals, which means you can choose healthier options. Things like vegetables, fruits and more can be eaten cold, without much preparation.

You can prepare wraps with beans and other items that are healthy and give you fiber, protein, and the things you need while you are exploring the outdoors.
Amount Needed
Gear space is going to be limited, so you only want to take what you know you will need. Bringing too much can mean less space and possibly wasted food. Therefore, think of how much you will need to eat in a day, plan it in meals and snacks, and then take that amount with you.

Each meal can be stored in a container and labeled for easier eating and access.
Storage
Your foods will most likely need to be stored in containers so they do not spoil. This is why bringing a cooler is helpful. Certain things like fruits, veggies and meats will spoil if it is not stored correctly.

If you bring along, bread or crackers, make sure they do not get exposed to air and go bad. Keep what you need to in the cooler and you should be good to go as far as food storage and food safety.
Preparation
There will be a lot of preparation before you leave for your trip as far as getting the meals together. While many things can be prepared while you are on the trail, some items, like salads and pastas should be prepped before you leave and stored in a container for later.

Things like sandwiches can be made while you are on the trail.
10 Simple No Cook Meals for Camping
Below we have compiled 10 simple recipes that require no heat that you can pack up and take with you on your camping trip! Keep in mind that some items need to be put in a cooler to prevent anything from spoiling.
Be sure to properly wrap or use containers for foods so you do not go through any bad experiences such as eating spoiled food that could make you ill.
Burritos and Wraps
There are many types of wraps and burritos you can make, including banana and peanut butter, chicken, and more.

See below for a no cook burrito recipe that feeds 4.
- Take the 100 grams of Bulger wheat and add 100 ml of hot water in a bowl. Cover it and leave it for 40 minutes.
- Next put the 120 grams of cherry tomatoes in a bag and squish them to separate the juice. Pour the juice into the bowl once it is ready, and keep the tomato bits in the bag for use later on.
- Stir the Bulger wheat with salt and pepper. Use another bowl to mix the 3 tbsp of Tahini with 3 tbsp of water.
- Put out the wraps and add the mixture in the middle, with kidney beans on one side and the corn on the other. Add some smoked tofu over it and then add in the pieces of tomatoes from earlier. Add some lime for zest if you wish.
- Fold them and enjoy!
Granola
Granola bars are easy to make and best of all, you can tailor it how you like!

Below is a simple, no cook granola bar recipe that makes 24 bars and takes only minutes to make!
- Take 2.5 cups of rice cereal, 2 cups of rolled oats, and 1/2 cup of raisins (or your choice) and mix them in a bowl.
- Mix together 1/2 cup of brown sugar and 1/2 cup of corn syrup. Then stir in the 1/2 cup of peanut butter and 1 tsp of vanilla.
- Add the mixture to the dry bowl of cereal and mix it all together well. Pour it into a 13 x 9 inch pan and let sit. Cut into pieces and enjoy!
Energy Bars
This recipe makes 20 to 24 bars depending on how big you cut the portions.

- Take 2 cups of dry oatmeal and 1 1/3 cups of coconut flakes and mix them together with 1 cup of flax seed.
- Add in 3/4 cups of chocolate chips with 1 cup of peanut butter (You can substitute for almond butter). Stir in 2/3 cups of honey and 1/2 tsp of vanilla.
- Once you have mixed it together well, add the mixture to a 9 x 13 inch pan and spread it around.
- Put it in the freezer for one hour and slice them up. You can store these for about a week!
Chilled Avocado Soup
This delicious Mexican soup can serve between 6 and 8 people if you follow this recipe.

It will have to be prepared before you head out, however.
- Take 2 chopped serrano chilies, 2 avocados chopped up and peeled, and half of a chopped onion into a food processor and make it into a paste.
- Add 6 cups of chicken stock, 1 cup of heavy cream, and 1/3 cup of lime juice and turn it into a puree. Pour it through a strainer into a bowl and season it with some pepper and salt to taste.
- Cover this and put it in the refrigerator for a minimum of 2 hours.
- When serving, you make a bowl and add the rest of the chilies, onions and tomatoes on top of the soup.
Crab Rolls
This recipe serves 4 people and takes about 15 minutes to make!

Keep stored in a cooler on your trip.
- Take all of the ingredients and mix them into a bowl together. This includes 1/2 pound of crab meat, 1/4 cup of mayo, 4 chopped radishes, 1/2 apple, 2 tbsp of lemon juice, 1/2 tsp of salt and 1/4 tsp of pepper.
- Take the mixture and add it to hot dog buns and enjoy! Serve it along with some chips or trail mix for a full meal.
Trail Mix
This delicious snack offers everything you need to keep up on the trail. Full of energy, you only need a few minutes to put this recipe together, and you can add in other items to make it how you like it!

Plus it will store for a couple of months!
- Choose 2 types of nuts (pecans, cashews) and add 3/4 cup of each in a bowl.
- Choose two or three types of seeds (sunflower, chia, flax seed) and add 1/2 cup of each to the mix.
- Take 2 types of dried fruits to add to the mix such as cherries or bananas. Add 1/2 cup each to the bowl
- If you want to add chocolate, you can then put in 1/2 cup of chopped bits or chocolate chips.
- Add in 14 tsp or sea salt, 1/2 tsp of cinnamon and a touch of nutmeg and mix it all together.
Cold Cut Sandwiches
Cold cuts offer the protein you need when you are exercising and enjoying outdoor activities.

You can make any type of sandwiches, but the idea is to get proteins and sugars your body needs while you are out.
- Take a sub bun or two slices of bread and lay your meats on there, such as ham, turkey or chicken.
- Add on cheese and condiments to your liking, and enjoy with some chips or granola!
Tuna Salad
This easy, no cook recipe takes about 15 minutes to prepare and will serve 4 people.

Keep stored in a sealed container in your cooler.
- Take 12 oz of tuna and add in 2 tbsp of chopped celery, 2 tbsp of chopped red onion and 1 tsp of chopped parsley.
- Add in 1/3 cup of mayo, 1 tbsp of mustard, with pepper and lemon juice to taste.
- Mix everything well and keep cold until ready to eat.
Stuffed Tomatoes
Stuffed tomatoes look fancy, but really only take about 15 minutes to prepare, and really fill you up.

This recipe serves 4, so double it if you have more people.
- Slice off the top of the tomatoes and cut a cone shape into the each tomato. Take out the core and throw it away.
- Dice up the other piece of tomato and put it in a bowl. Hollow out all of the tomatoes and put the seeds and other “flesh” into a sieve to drain.
- Add in mango, salad onion, and cheese in a coriander, pour the dressing (tbsp of tomato juice in the bowl with oil, lime zest and juice) over the combination.
- Add everything into each hollowed tomato top it with the lids you sliced off!
Avocado Chicken Salad
Okay, so you are going to need chicken that is cooked, but you can purchase a rotisserie chicken and use that, which is ready to go.

- Mix together the shredded rotisserie chicken with 1 sliced cucumber, 4 chopped tomatoes, 1/4 red onion, 2 diced avocados, and 1/2 cup of chopped parsley.
- From there, add in 2 tbsp of lemon juice, 3 tbsp of olive oil, along with salt and pepper as you like.
What Do Other Campers Think Of No Cook Meals?
Campers find that there are many recipes that they can make before they leave or while they are camping to satisfy their hunger. The choices of making wraps, sandwiches, snacks and breakfast foods are vast and can satisfy nearly everyone.
While some people would rather have a hot meal, especially for dinner, you do not necessarily have to eat cold food for each meal. However, if you are doing so because you are packing light, then some people will have to deal with it for a few days until they can get to a stove or fire. Overall, many do enjoy the great amount of meals you can create without using heat.
Pros And Cons
While many people prefer a hot meal at the end of the day, some do not have the space for a camping stove, or the money to purchase extra conveniences while camping. Some camping areas do not let you make your own fires.

Overall, many people can enjoy foods that do not have to be cooked over a fire to enjoy. See below for the pros and cons of taking no cook meals with you on an outdoor adventure.
Pros
- Convenient
- No wait for cook times
- Less clean up
- Minimal dirty dishes
- Less load to carry without a stove
- Fun, creative recipes to be enjoyed
Cons
- Some prefer a hot meal after a long day
- Much preparation before leaving for the trip
- Must carry all food with your gear

When most people hear about edible snails, one of three thoughts pops right into their minds. Some people may think “yuck”, others might think of French cuisine, and some might think of both. But there is more to this particular meal than you might think. You may be surprised to find out just how some of this snail eating began and how to get your hands on some snails.
Let’s take a trip through the history of people chomping down on snails, give you a recipe or two and perhaps even a few ideas on where to find them.
History of Snails as Food
Snails have been eaten since prehistoric times. It shouldn’t come as any surprise, snails are a rather slow-moving critter that even the poorest of the hunter should be able to gather up. And since most snails tend to be about 15% protein and 80% water they aren’t too bad of a meal to have.

The Greeks and the Romans ate snails. The Romans would even have special vineyard gardens reserved just for snails. They would feed them such foods as wine and milk to fatten them up for consumption.
Snails became a very special dish for the Romans, and the Roman Legions brought snails with them as they conquered most of the world that was known to them. This may be how the little critters became spread so far and wide across Europe.
During the middle ages, the snail had a special place among all people. First, snails were cheap, often free, so even the poorest people could collect up some for a meal. Also, they were not viewed as fish or as meat, so people could eat them, even on meat-free days as proclaimed by the church.

Often times, during Lent, the monks would have a dinner of snails and monastery beer. And since snails were so easy to come by, some people realized that they could sell them for a profit.
The snail trade would eventually center in Paris, where, for example, a village that was in the snail selling “business”, was able to sell 4 million snails in one year. Snails grew to hold a very interesting place in food. In some areas, they are considered a meal for everyone, in others, they have become a special delicacy.
Is This the Right Type of Snail
There is a vast array of snails out there and to be perfectly honest, mankind isn’t exactly sure if they are all edible. There are over 100 different varieties that are edible, though, and they cover snails that live on the land and in both fresh and salt water. For the most part, if you are looking for a snail to chow down on you will want either the “helix” or the “achatine”. The helix is the easiest to recognize as they have a spiral in their circular shells.

While the Helix pomatia and Helix lucorum are often eaten as escargot, one of the most popular versions is the Cornu aspersum (in many older texts this was referred to as the Helix aspersa). In French cuisine, this little snail is often called “petit gris”, which means little gray. But this snail has a name that might be more well known to you, garden snail.
One thing to consider when eating snails are if there is any chance of poisoning yourself. All snails can have various levels of poison, depending on what they have recently eaten. If you gather up some snails that you find in your garden, there are ways to go about detoxing them, though.

Some snails though have a bit of a stronger poison. For example, the Marine Cone Snail has a rather powerful poison. They use it to paralyze fish. It is not a snail that you would want to eat, but chances are that an encounter with this snail won’t prove fatal for a human.
Garden Snail’s Journey
This snail started out native to the Mediterranean region and into parts of Europe and even into the British Isles. However, it has managed to spread to every continent on the globe, save Antarctica and to a large number of islands. For some of its travels, it was brought and specifically introduced.
One example of this is when the Huguenots introduced it into South Africa during the 18th century to be grown as a food animal.

In others, such as California in the United States, it seems to have just stowed away and found itself a suitable home. This snail has also proven very adaptive, being able to adjust to many and varied climates that are quite a bit different than their original habitat.
Where to Find Snails
Depending on where you live you will have a few options of where to track down some nails to munch on.
Snail Shop
Some areas will have snail shops that you can go to pick up your fresh snails. The upside to this approach is that you know the snails will be safe to eat and be already detoxed. This means that if you are looking to have snails right away this would be your best option.

Depending on how well stocked the snail shop is you might have the option of both fresh and canned snails. There may be a wide variety of snail species to choose from. Also, a well-staffed snail shop, will help you to both make an informed selection, as well as give you some pointers on how to prepare them.
The Internet
If there are no snail shops in your area, you can always look online to order some snails for your meal. There are plenty of options, such as this can from Amazon. This means that you get specialty snails from all over the world. Now the downside is that you will only really be able to get canned or jarred options. If you have never had snails before this might not be a bad idea, but you won’t be able to experience fresh snail this way.
Also, when planning your meal, you will need to factor in shipping times, or of course, you could just keep a few cans in your pantry. These cans have quite the long shelf life, so you can put them in the pantry and just have the ready for when it is time to cook some up.
Collect Your Own
Of course, if you have snails in your garden or around your property you can collect up your own. You will want to double check that the snails you are gathering are the correct type.

If you find them in your garden you are probably all right. If you find them along your fruit trees, though, they might be from a different species that is protected. Be sure to check in your local area to make sure that you aren’t eating a protected species.
One way to catch some snails in your garden is to take a board around a foot by a foot and a half and attach pieces of wood to raise this board up about one inch. Put this out into your lawn or garden over a damp area. Since snails tend to seek out wet or damp areas the snails will flock to these boards. You can check the boards every few days and just pull off whatever snails you find there.
A second way is to find a bowl and bury it to the point that just about an inch is exposed over the top of the soil. Then you merely have to pour some beer into the bowl, if you don’t want to use beer combine two cups of warm water with a half teaspoon of yeast, two tablespoons of flour and a teaspoon of sugar.

This type of trap will attract snails from only a few feet away so if you need to cover a large area you’ll need several such traps. Also after a day or so the beer or yeast mixture will need to be refreshed.
You will need to remember that you will need to put your snails through a detox prior to eating them. The process will take a few days, so you will need to factor that into your plans for snail collecting.
Farm Your Snails
A final way to get snails for you to eat, is to farm your own. This practice is called Heliciculture. One of the perks is that if you farm them you can, for the most part, skip the detox process. And in addition to snails for consumption, there are some other products that you can collect from snails. There are people that collect the slime trail from snails in cosmetics and others use snail eggs as a type of caviar for humans to eat.

As if raising your own snails with the possibility of selling them and other products wasn’t enough, you can also raise other types of snails. You may have to do some research to get your first set of snails, but if you get the chance to bring in some snails that are not otherwise available in your area, you might find yourself in a nice little niche.
Shell Options
As we get to cooking the snails you’ll have to determine if you will want to serve your snails with the shells or without. Without, is the easiest option, since it won’t matter if you break some shells along the way. With is a little bit trickier, but you have options depending on how you get your snails.
If you are farming your snails or just captured them and have time, feed them crushed oyster shell for a period of one to two weeks. This will boost their calcium and toughen up their shell. After that, you can proceed as normal.

If you would rather just have a set of shells to serve with this dish, you can look around in search of gros blanc shells. These are from larger snails, and tend to be a bit tougher.
Detox Process
We have mentioned before that for the most part land snails aren’t poisonous, but they can pick up some amount of poison based on what they eat. Also, their flavor can be changed based on what they consume.
If you are farming your own snails you will be sure of what they eat, but even if you find some in your garden you can’t be sure of everything that they’ve been eating. Luckily, the process is not complicated, it just takes some time to work through the process.

There are two different options on how to detox your snails. The first is to put your snails in a container (with plenty of air holes) and keep them from any food. They can be given water or wine during this time, though. The second route starts by putting the snails in a container with plenty of air holes and feed them something like oats for three or four days. After that, you will have them fast for another two days.
No matter what option you go with, you’ll want to de-slime your snails as well. You’ll put all your snails in a container and cover them with water. For each dozen snails, you’ll want to add a tablespoon of vinegar and two of sugar. You’ll then let them soak, until the snails let all of their slime go.

This process normally takes four to five hours. You can speed up this process by changing out the solution they are soaking in. Next, you’ll want to rinse the snails off in cool water.
Cooking Snails
There are a vast number of ways to cook a snail that is to be consumed. The classic French method involves butter and garlic. But for a little more detail, let’s start with the snails that have been detoxed and de-slimed. At that point, you’ll want to toss them in some water and bring them to a boil.
This is only the first step, so you aren’t looking to have a completely done dish. We only need about 10 minutes of boil here for our purposes. After this, you’ll want to remove the snails from the water and let them cool. The next step is to remove them from their shells and here you will have a choice.

If you want to serve them in their shells you will need to be rather careful while you extract them. Some people use a long knitting needle to spear the snails and pull them out. While different species of snail have shells of different hardness, if you have a garden snail or petit gris, it most likely has a somewhat delicate shell.
Of course, if you don’t intend to use the shells for serving your snails it is a much quicker process, just be careful that any shells that break in the process are completely removed from the snails you intend to eat. When the shell is off, you should have no problem peeling the skin from the meat. Normally, you will also cut off the back tail portion.
Method 1: Quick and Easy
Now that you are ready to finish this dish, you’ll want to heat up a sauté pan with some butter. When it is ready you’ll want to add in some garlic, when that becomes transparent you can add in the snail meat. You’ll want to cook it for about 3 minutes.

Method 2: A Touch Longer
For a different approach, you can place the snail meat into a pot and cover them with water. Feel free to pour in a bit of cognac or replace half the water with a white wine. From there you’ll add in whatever flavors you feel would work well, but a wise idea would be to include peppercorns, parsley, thyme, onions, and garlic. Let this simmer for a few hours. During this time, you could prepare a compound butter.
Simply take some butter (no imitations like margarine for this one please) and add in some chopped parsley, a touch of garlic and perhaps a pinch of salt and pepper. Mash it all together, then put it back in the refrigerator until it is time to serve the snails.
Service Options
When the time comes to remove these snails from the cooking vessel and serve them to your guests you have a number of options. If you want to go formal there are various serving dishes that can be found online. These will let you place each snail, either in its shell or not, into its own groove.

Sometimes guests will take a snail in a shell, or more than one, to their plate to consume it. Other times, everyone will end up eating snails right from this dish. This method is often paired with specialized forks, designed to spear a single snail and bring it to the diner’s mouth.
For something less formal, but still elegant you can dish out an amount to each person’s plate. For a basic pairing, you can add a salad and perhaps a crusty French style bread. This will give you a meal that covers all the bases, looks like it came from a fancy restaurant, but is fairly simple to make. No matter how you make them, they would pair well with a bottle of French wine.
Wrapping it All Up
Snails can be a cheap and easy source of food. Some people might think they are an odd thing to eat, but when you consider the fact that these little critters have been consumed for thousands of years, they become less odd.
They have been food for peasants and royalty alike, yet edible snails can be found for free in many corners of the world.


Discover The Beautiful Trails In The Phoenix: A Guide To Must See Places In Arizona!
Ranked by the National Geographic as an ideal hiking destination in America, Phoenix is often seen as the safe haven...


Health Benefits Of Drinking Water: Be Positively Hydrated!
We all know that humans simply cannot live without water. It is essential to our livelihood and helps the body...


Camp Safely With These Essential But Simple Camping Safety Guides: The Do’s And Don’ts About Camping!
There is nothing like escaping into the great outdoors for a fun, relaxing trip away from the bustle of daily...


Winter Hiking Tips: You Don’t Have To Freeze Out There!
Winter is coming sooner rather than later, and for those of us that love the outdoors it means one of...
-
 HIKING BASICS9 years ago
Best Hikes in Arizona: Best Trails in the Grand Canyon State
-
 ESSENTIAL SKILLS9 years ago
How Long Until Poison Ivy Rash Appears: All Detectable Symptoms
-
 ESSENTIAL SKILLS9 years ago
Fire Building Techniques: Know How to Build a Fire in Minutes
-
 ESSENTIAL SKILLS9 years ago
Urine Filter: Converting Urine into Drinkable Water
-
 FOOD & COOKING9 years ago
Edible Snakes: How to Know Which Ones You Can Eat
-

 SLEEPING BAGS7 years ago
Western Mountaineering TerraLite Sleeping Bag: The Perfect Outdoor Sleeping Bag
-
 HIKING BASICS9 years ago
Best Hikes In Alaska: Great Ideas for the Frontiers
-
 ESSENTIALS9 years ago
Shewee Review: A Look into the Shewee Extreme Female Urination Device