Home Blog Page 3

Bee Stings Symptoms And Remedies: Learn Some Simple Natural Relief Tips

0

Insect stings are not such a common occurrence even when hiking or walking in nature, however, it is best to have some knowledge about them, and bee sting remedies in particular.

Most times, if anyone is stung, there is nothing to be very concerned about, however, stings do cause varying degrees of reaction and the most severe can be life threatening. Let’s look at how you can treat a bee sting with confidence in different situations.

Prevention is better than Cure

Prevention is better than cure, so, if you are in an area that has a lot of bees, there are a few precautions you can take to reduce the risk of being stung.

  • When there are bees flying around, remain calm and resist any temptation to swat at them as that may cause them to become alarmed and actually sting you. Move quietly away from their area if you can.
  • If you are drinking sweet beverages in the open with bees or wasps in the vicinity drink from a wide open cup so you can see if any insect is in it before taking a mouthful. I know of someone who was stung on the lip when taking a sip out of a can of sweet soda. At least check before taking a sip each time.
  • Keep food containers and rubbish bags as sealed as possible to avoid attracting insects. Keep all garbage tidy and pick up windfall fruit and animal feces as flies attract wasps.
  • When hiking wear closed footwear, long sleeves with closed cuffs and higher necklines so that bees cannot get trapped close to your skin. Be aware that floral prints and bright colors may attract bees.
  • Take care when you are walking through flowers and fields that have foraging bees and other insects. Also take care if you are moving vegetation or collecting firewood as you may disturb a nest unwittingly.

Symptoms

How can something so small cause so much pain? Even if you do not see the insect that stung you, you will usually be aware of it instantly because of your immediate reaction to the pain it causes. If you do get a chance to identify the insect all the better so you have an idea of what any further action is to be taken.

The initial pain can be anything from mild, temporary discomfort, through to intense pain, to severe allergic reactions. But be aware that different insects may cause different reactions in each individual person for each subsequent occasion.

What happened last time may not be the same this time, which is one of the reasons anyone should have some emergency responder skills. It is imperative to at least watch for immediate severe reactions as they will require immediate medical assistance. Mild to moderate reactions are not life threatening.

A mild reaction:

  • Instant burning pain where stung
  • Area of the sting shows a red welt
  • There may be slight swelling
  • May resolve in a few hours

A moderate reaction:

  • Extreme red welts
  • Swelling may increase at the sting site over the following days
  • May resolve after 5-10 days

A severe allergic reaction, called anaphylaxis, can be life threatening:

  • Rapid skin reactions, like itching, hives, and pale or flushed skin
  • Breathing difficulties
  • Swelling of the tongue and down the throat
  • A rapid but weak pulse
  • Feelings of dizziness, vertigo, or fainting
  • Nausea, vomiting and/or diarrhea
  • Convulsions
  • Loss of consciousness

How to Treat Various Bee Sting Reactions

Ascertain where the person has been stung. This should be relatively easy as there will be some level of immediate pain at the sting site.

  1. Look for any visible sting. (Honey bees are the only insects that leave their sting behind. More about that later)
  2. Remove any visible sting as quickly as possible by scraping it back from the angle it entered. It doesn’t really matter how you achieve this. SPEED IS MORE IMPORTANT THAN METHOD. It can be with your fingernails, using a flat surface like a credit card. The main thing is as quickly as possible because the sting can still be pumping venom into the victim even though the bee has gone. Try not to squeeze the venom sac.
  3. Cleanse the area with something from your medical kit, saline, or even soap and water if you are at home.
  4. Apply a cold ice compress for a short while, for maximum 20 minutes per hour. This can be repeated over some hours, but take care not to freeze the skin by making sure a fabric layer is between ice and the skin.
  5. Applying a hydrocortisone cream on the dry sting area may relieve some symptoms like redness, swelling, and itching.
  6. If the sting area, is on a limb, elevate the area above the level of the heart.
  7. You could also take an internal antihistamine like diphenhydramine or loratadine to relieve symptoms providing you have no reaction to these medicines.
  8. If the pain is causing discomfort, a painkiller like ibuprofen or acetaminophen could also be taken internally.
  9. Get a tetanus booster vaccination if it has been longer than 10 years since the previous injection.

Home and Alternative Medicine

When it comes to “home remedies” for bee stings it is wise to be cautious but some may help.

  • I have used quality pure essential lavender oil on burns with success, and some people recommend it for stings, so it could be worth of a try.
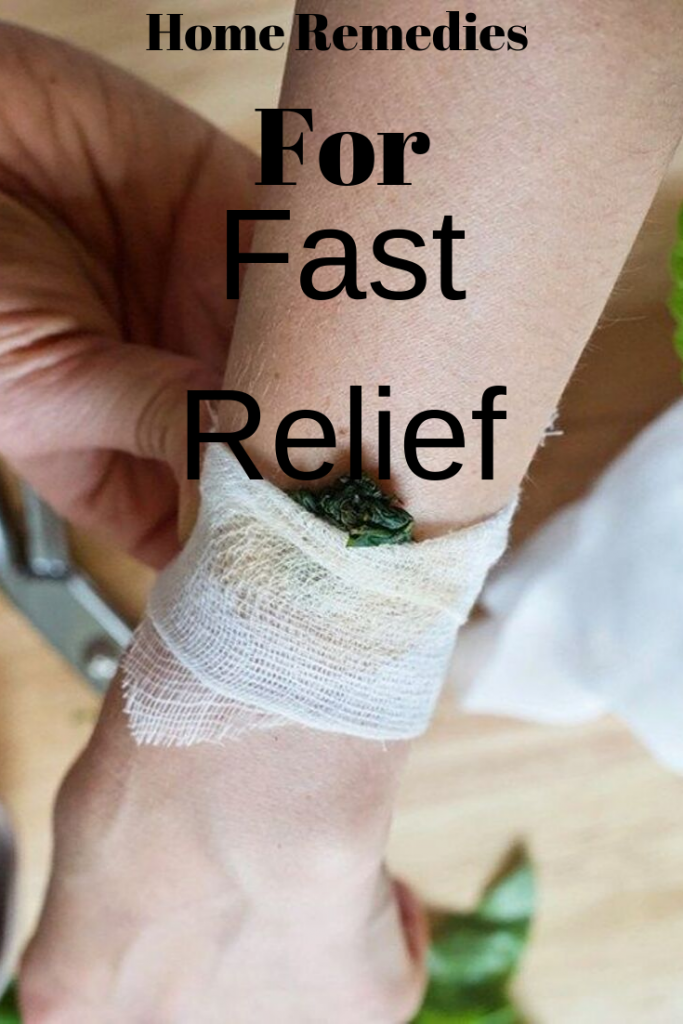
  • If you are somewhere without any access to medical first aid (which is quite possible if you are going for a short hike somewhere) you could make a mud/clay poultice. Clay would be my choice as it is sticky and dries quickly, taking some of the heat out the area.
  • Another recommended paste is made with baking soda, but trying to neutralize the effect of the acidic venom is not likely to be useful as the nature of the sting means the poison is pumped under the surface of the skin and not exposed to any outside medication.

Severe Reactions to Bee Stings

If the victim is showing other signs of physical stress soon after the sting you will have to consider seeking immediate professional medical aid.

If there are signs of severe allergic reaction as mentioned above, the result may quickly become life threatening, so immediate evacuation for medical assistance should be taken. An allergic reaction may require emergency responder skills which at least one person in a hiking group, but preferably everybody, should have.

Symptoms may include very low blood pressure, swelling and, possibly, blockage of the trachea. During an anaphylactic attack, the victim’s heart may stop beating so group members or bystanders may have to administer cardiopulmonary resuscitation (CPR) in the hope of keeping the blood circulating and maybe restart the heart.

Medical response may be to administer intravenous antihistamines, steroids and adrenaline in the form of epinephrine. The victim will most likely be admitted to hospital for further observation over a prolonged period of time.

Most people who know they are at risk also carry an emergency epinephrine autoinjector that can be simply injected by the victim or by another person. An autoinjector, is a combination syringe and short needle that is injected as a single dose into the thigh – very easy to administer.

If you do carry it in a First Aid kit, check the expiration date regularly. People at risk should also consider wearing a medical alert bracelet to indicate their allergies to bee or other insect stings.

People who do suffer a severe allergic reaction have a strong chance of 30 to 60% chance of repeating the anaphylactic response if stung again. It would be wise for those at risk to take medical advice before venturing into the back country or anywhere where medical assistance is remote. There are preventative measures that can be taken with immunotherapy.

These series of shots, usually given over a few years, can reduce or even eliminate allergic responses to bee venom. An emergency epinephrine auto injector is also a wise addition to any First Aid kit should you likely to be in any vicinity where bees are foraging and forming hives.

If any victim receives multiple stings it would be wise to seek medical advice as soon as possible as well. Multiple stings from between 10 to 20 may not provoke an initial allergic reaction, however, there complications could still develop so best err on the side of caution. Victims will often be kept under observation and various blood tests be taken.

Also, if the victim is stung on the lips, mouth or throat it is best to seek medical advice as these areas could swell and make breathing difficult over the following hours.

The Nature of Bees

There are more than 20,000 species of bees in the world, but humans usually only interact with a few of them, mainly honey bees, bumble bees, and carpenter bees. In many ways we should be grateful that there are bees around to sting. They are such important insects in nature that if they were to disappear from the planet, all plant and animal life would be threatened with extinction.

Person Wearing White Sombrero With Yellow Gloves

Bees like most animals are not aggressive in their normal behavior. Different species live together in harmony y most of the time. Even predators and prey share the savannah and it is only when the former are hunting for food or protecting territories is there any aggression.

Likewise bees will mostly ignore humans while they are gathering food and only sting if they are provoked, usually by accident. Honey bees have bred to be quite docile by apiarists who prefer to care for peaceful hives. But they’re more aggressive species of bees and some variants have interbred making for more aggressive behavior.

Some Stings have more Bite

Honey bee stings have the barbs along their sting which rip out of thin substances like other insects and the bee comes to no harm. Not so lucky for the other insect though. However, in the case of human skin the barbs get caught and hold fast so that as the bee tries to fly away, it literally leaves the sting and part of its abdomen in the skin. That bee is essentially toast and will die within minutes. Not good for the bee, but not good for the human either.

The stings are so effective that even though the bee has departed to die, the sting will continue to work its way further into the victim’s skin and continue to release venom. That is why it is necessary to get the sting out as soon as possible.

The actual amount of poison injected by a honey bee is usually very small, something between 5 and 50 micrograms of fluid. The main substance that causes the pain we feel is the apitoxin melittin, which is colorless and made up of particular proteins. Some histamines and other amines may also cause some pain and itchiness. A healthy person can actually withstand about ten stings per half a kilogram of body weight unless they are allergic to the toxin.

Bees sting from a point in their abdomen with venom or poison which is completely different from an insect bite. And a person’s reaction to one insect sting may be completely different to another. For instance, bee stings are acidic, whereas a wasp sting is alkali so reaction is completely different. Bumblebees and the like have smooth stings so can sting more than once without harm to themselves.

When it comes to honey bees it is only the worker bees that will sting. The male drones are usually just hanging around the hive, waiting for a chance to impregnate the queen but they have no sting.

The queen never leaves the hive under ordinary circumstances and although she has a smooth stinger she only uses it to kill prospective rival queens. When hives are swarming, looking for a new hive they are usually non aggressive as they have no territory or hive to protect.

Pheromones – Tiny Scents can Create Big Action

If the bees do sting or many insects start to fly around you, cover your mouth and nose quickly and retreat from the area as quickly and calmly as possible. If a bee stings, it releases a chemical called pheromone that alerts other bees to danger and they may come to attack. If you can, get into a closed vehicle or building immediately.

Being brave little creatures, bees will seek out the monster in their midst and come to attack even though they are essentially committing suicide by stinging. Honey bees are the only ones that injure themselves by stinging though. Before long there is more and pheromone flying through the air and even more bees will come to attack.

I was once stung by a bee that got entangled in my hair. I couldn’t see what it was but certainly felt the sting. Seconds later other bees were swarming around my head, but luckily I was not far from my car and got in and closed everything up quickly. I had already been stung a few times and the welts took some days to go away. Not a pleasant experience!

Pheromones do not wash off easily nor do they dissipate quickly so take care to get rid of as a much as possible. If you dive into a pool or river, the bees will continue their attack if they smell the pheromone again when you get out. Apparently this alarm pheromone smells a little like bananas. Wonder if that is where the expression, “going bananas” comes from?

Wrapping It Up

So, you can see that bee stings are usually easy to treat and bee sting remedies are simple to apply even in back country situations. Problems only arise when an individual has a severe allergic reaction which can quickly become life threatening if medical treatment is not available. If there is any possibility of this or there is an unknown aspect, it would be wise to ensure any emergency kit contains at least one up to date epinephrine autoinjector. Better to have it and never have to use it than vice versa.

I would also urge anyone to take a certified Emergency First Responder course and stay current with methods for CPR and resuscitation. Those skills may be life savers at any time and place.

Arizona: The Land Of Natural Wonders: Discover Bright Trails, Falls And Mountains

0

When people talk about Arizona, they speak about its capital of Phoenix, the stellar universities in the state, that enrich the educations of so many students every year, and then people think about the Grand Canyon – geologically aged at 5 – 6 million years old and said to be the location of some of the best hikes in Arizona for homo-sapiens since our first steps on the soils of the Americas, some 15,000 years ago.

The 277-mile in length gouge in the earth that, at certain intervals, have dips and falls to the river below ranging a mile drop. It is truly a wonder of the world, a revel to the human eye, and a masterpiece of nature. Arizona has much more to offer by way of natural, unbelievable beauty in is plentiful landscape.

The state boasts over ten national parks to hike, camp, skip, jump, and run through. All with adverse similarities and obscure differences. It is a hell of a state for those into their hiking, though, more than anything else. Finding the perfect spot for you and hiking needs of the modern homo-sapien hiker can be tricky with such a plethora of areas to choose from.

A little research into the land can do a world of good when it comes to your next trip, so let us take a look at the best hiking trails in Arizona, their attributes, what makes them unique and worth seeing. So fill your day pack that you require, and let’s get hiking.

Let’s Start Slow, With Some Simple Hike Trails

Starting with some of Arizona’s less formidable trails is merely to ease us all into the where and the what that Arizona has to bring; but know this, that only because these hikes are easier on the foot than traversing down the banks of the Grand Canon by way of path or by abseil, does not make them all 100% safe.

So stay ever vigilant, keep your party safe, and remember to have fun in the promise. Now, after that brief note of caution, onto the trails.

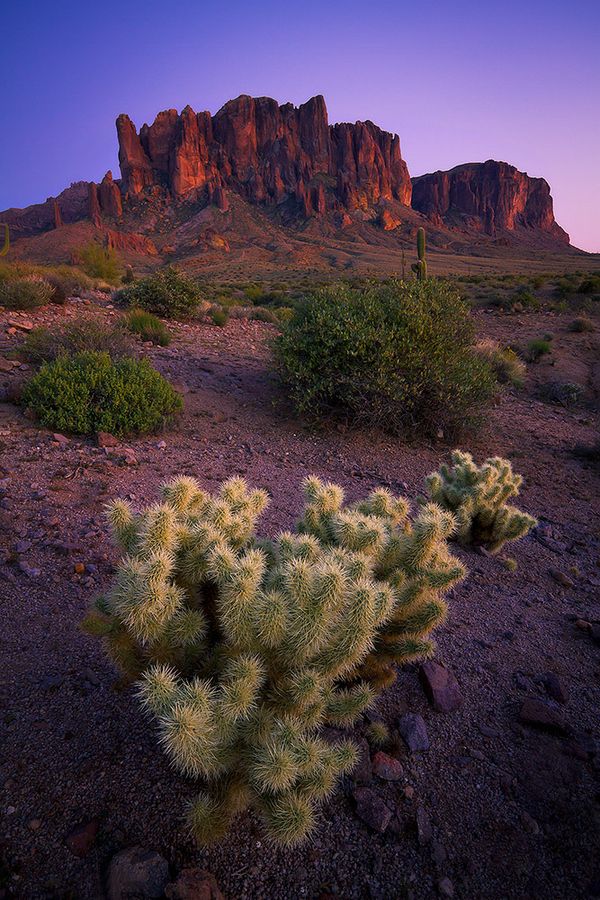
Reavis Ranch found deep in the Superstition Wilderness

Named after Elisha Reavis; a hermit who had come to settle up in the mountainous region in the late 1800’s. An elusive man who spent most of his life either teaching elementary schoolers, divining for gold in the most tumultuous regions of the state, or fighting in the many Indian Campaigns of the time.

As well as owning the first library of books in the Superstition Mountains, killing a bear using a gun that misfired, and rearing horses and mules, he is best known for his planting of an apple orchard 700 ft in elevation. A working orchard that surpassed its planter and continues on some hundred years later.

The ranch and surrounding areas have turned into hiking tourist attractions as of late, where the views are stunning and the apples are plentiful, free to those travelling through the orchards.

This trail is for those interested in the deep history of the gold rush of the late 1800’s outside of California, beautifully kept meadows and orchard, and if you wish to find something as amazing as pine trees just above the blazing heat of the desert sands of Arizona.

Flat Iron, the connection trail to the Superstition Mountains and Four Peaks Wilderness

Another trail of note in the Superstition Mountains is that of Flat Iron. Also known as the Siphon Draw, this is a little less a walk in the park as it is more of a trek through the a rocky terrain that once surpassed will make you feel like a king of all that surrounds you.

A six mile round trip through the rough of the Superstition Wilderness, with some of the most prominent and bewildering rock formations that you are likely to find in the great state, this hike is well worth the effort of its traverse.

This hike is not recommended, though, right after even the slightest of rain falls, as the majority of its paths is made up of slick rock which is not fond footing when slippery.

The gaining of both of the territory’s names are interesting in of themselves, Flat Iron is aptly nicknamed for a large protruding spike of rock that stands at 4,800 feet in the air, and the name of the land Siphon Draw came from the name of the trail.

Browns Peak – Prominent in the Four Peaks Wilderness

A beautiful mountainous pass, found out east of Phoenix in the northern region of the Four Peaks Wilderness. Brown’s Peak is the highest of the four peaks in the territory at over 7,000 feet tall. The path takes you all the way up to the summit, which offers an incredible view.

A good sized portion of the entire state of Arizona, and even the highest mountain in the state Mount Humphrey’s, can be seen on a clear day up there.

As well as being revered as an all natural crows nest, the area that surrounds Brown’s Peak has a large black bear population, so be careful when on the trail and stay in packs. Do not let the presence of bears be of alarm, as they stay away from hike trails and rarely cross them unless majorly provoked.

From Molehills to Mountains – Higher Elevated Trails

Mount Wrightson, found just outside of Tucson, in the Santa Rita Mountains

Just over 9,000 feet, Mount Wrightson looms over the nearby city of Tucson in an almost protective fashion. Found in Madera Canyon of the Santa Rita Mountains, this mountain’s peak offers an incredible panoramic view of southern Arizona.

If you make it to the summit on a clear enough day, you can even be able to see parts of Mexico as you gaze across the landscape. There are two trails available to the public for reaching the summit, and they both cross one another making a classic figure 8 symbol.

The shorter trail of the two at 10.8 miles round trip is the Old Baldy Trail, and three longest coming in at 14 miles round trip, is known as the Super Trail. As mentioned before, both trails lead to to the mountain’s summit, and cross over one another. So the only question you need ask yourself is can I make those extra four miles?

Mt. Baldy Loop looming over the top of the White Mountains

Not to be confused with California’s Old Baldy Mount San Antonio, Mt. Baldy of Arizona shares the same beauty and majesty as its cross state cousin, though towers a lot higher than the SoCal treasure. There are two main hiking trails available for the general public to take with two different peaks to achieve on the hike.

Unfortunately, if you are not a member of the White Mountain Apache Tribe, you are not permitted to make it to the true summit of the mountain. But there is beauty in both the public trials of West Baldy #94 and East Baldy #95, and the connection path, #96, that turns the whole trail into a perfect loop. A lot of fun in taking these paths, with some incredible views to compensate the tough journey.

Mount Kimball of the Catalina Mountains

Another mountain that stands close to the city of Tucson, but this time found in the southern peaks of the Santa Catalina Mountains. Mount Kimball is the highest peak in that region, and is what is known as a ‘Sky Island’ – a mountain with its lower slopes deserted, cracking and hot, but the higher you go, the more vegetation and even forestation is found on the higher you get.

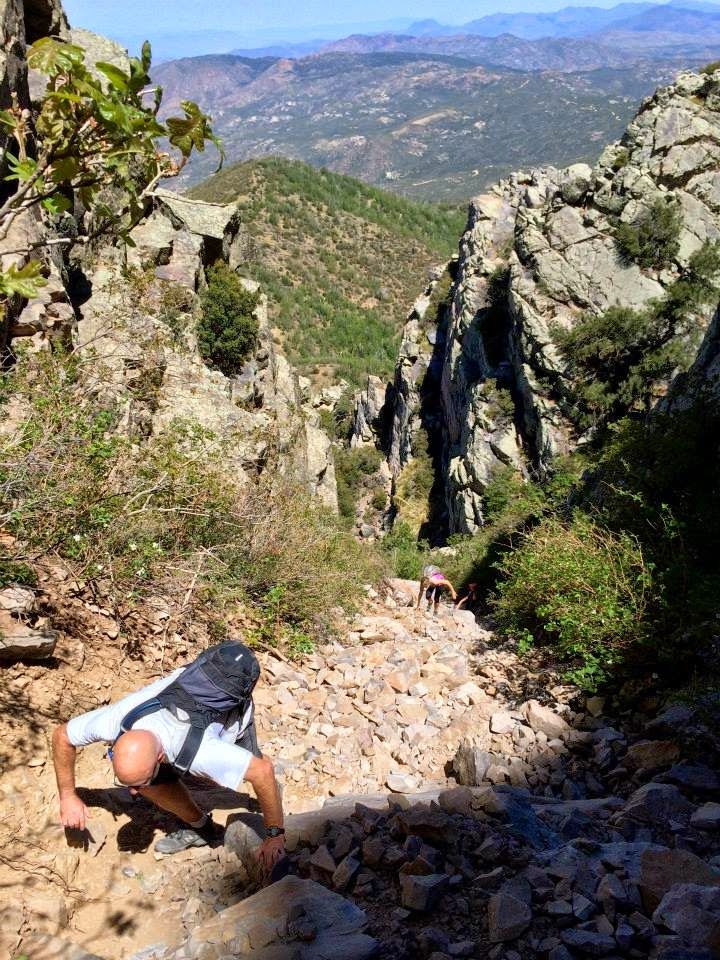
The mountain trail is best for seasoned hikers as it is a steep climb on the way up to the summit, and even then can be a tricky trail to hike. Like many of the great mountains in Arizona, this hike is giving you the option of what trail to walk up; Finger Rock Canyon or by Pima Canyon.

Both will get you to the summit of Kimball, they just provide different starting routes. Finger Rock Canyon starts you off on a major road that lead to foothill paths, whereas the Pima Canyon trail starts further west and cuts through many other trails along the way. Both are the same level of difficulty to hike up.

Mount Humphrey’s – Highest Mountain in the State

Mount Humphrey’s stands as the tallest mountain in the entire state of Arizona, its peak at 12,633 feet, makes it less of a hike and more of an expedition. Yes, people, before you have come and planted their proverbial flag, but you know what they say, “you gotta do whatcha gotta do”.

Humphrey’s Peak is the hiking trail used to scale the sides of the mountain. The mountain is found a few miles out of Flagstaff, Arizona, and helps form the Kachina Peaks Wilderness Area, that takes up nearly a 18,000 acres of land within the Coconino County.

The mountain was named after General A. A. Humphreys, who worked for a time as US Chief of Engineers. The views from the summit of Mount Humphrey are truly remarkable and will brighten up any photographic portfolio; you just have to be proficient enough a hiker to make it all the way to the top.

For Those Opting for the Scenic Route

Kendrick Peak – a lesser Humphrey’s Mountain

Those who wish for a less grueling hike and climb than that offered by Humphrey’s Mount, then you should be heading over to Kendrick Peak; a less intense elevation at 10,000 feet, which still allows bragging rights for you and your party.

Just shy of Flagstaff and an hour from Phoenix, the state’s capital city, stands Kendrick Peak. Found in the San Francisco volcanic field, a 1,800 square mile area filled with over six hundred volcanoes. Some of which have been geographically aged at around six million years old, and the youngest at around a thousand.

So, even though the area has not seen a deadly eruption of one of the volcanos for some years, does not mean that it is wholly advisable to stray too far from the beaten hiking path. It is still a fun trail that afterwards grant you the bragging rights of hiking through a volcano field.

Oak Creek Canyon, Sedona

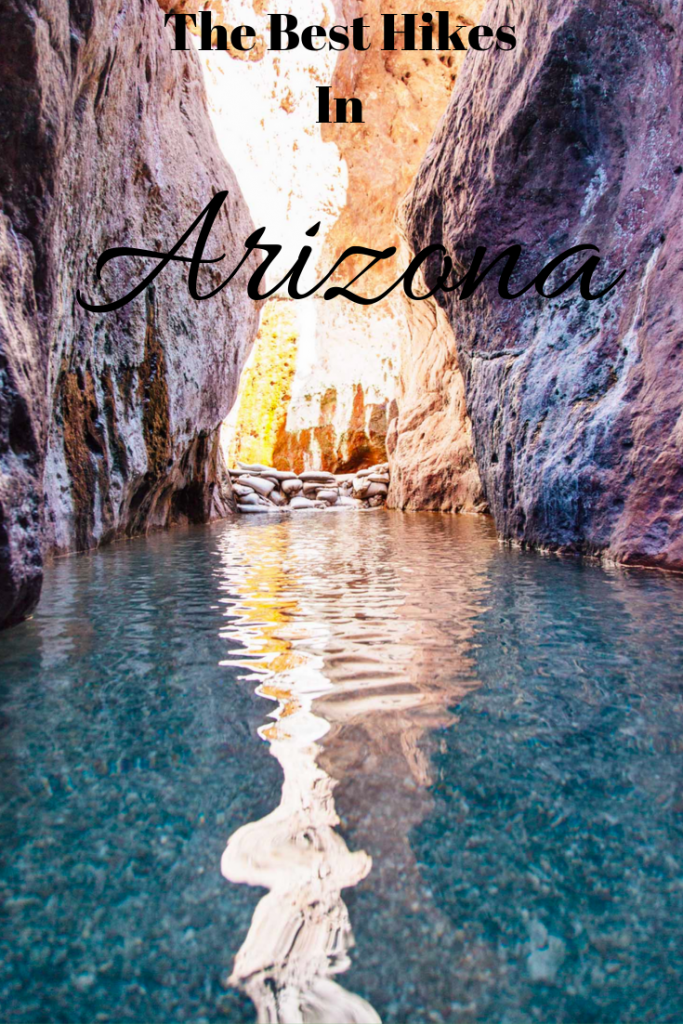
Sedona is an area of Arizona that is plagued, and bettered, by steady and unrelenting tourism attractions, which makes it a hard place to find and maintain a little bit of solitude. Though there is a small area, within a small canyon, where peace and quiet should really be present in its name. At the West Fork of the Oak Creek Canyon, beauty and serenity can be found with ease.

A hike trail lay deep in the east of the tourism, hiking down to this river bed enclosing feels like something out of an old western film. The waters give the looks of those ripe for divining, and are cool to the touch as you trail through. A real refreshing experience to travel to and through.

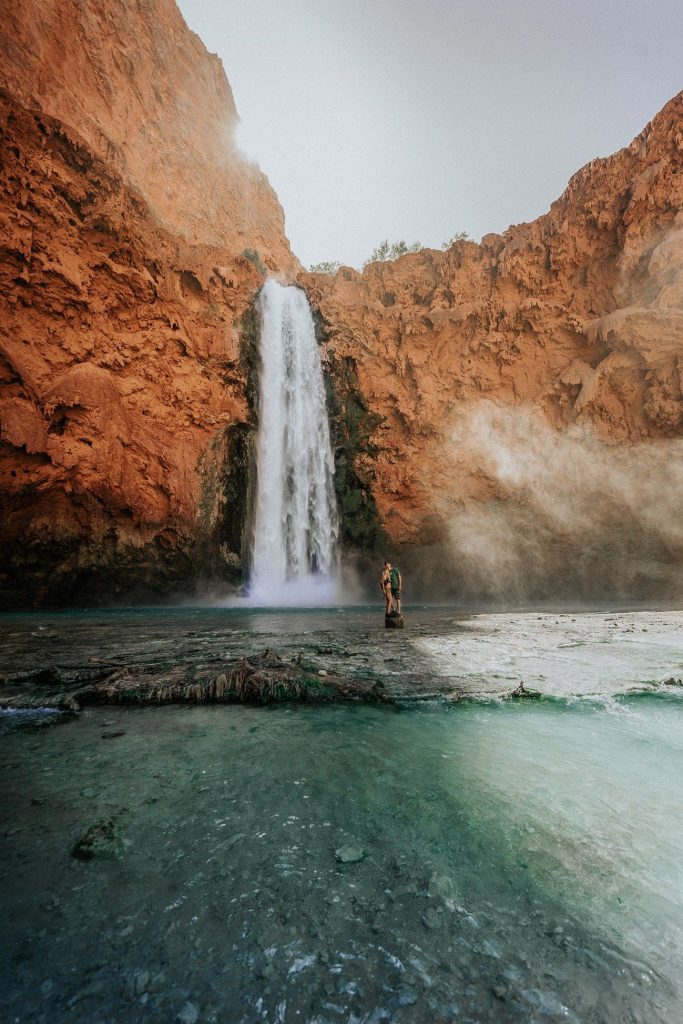
Havasu Falls. Visit as long as you obtain permission

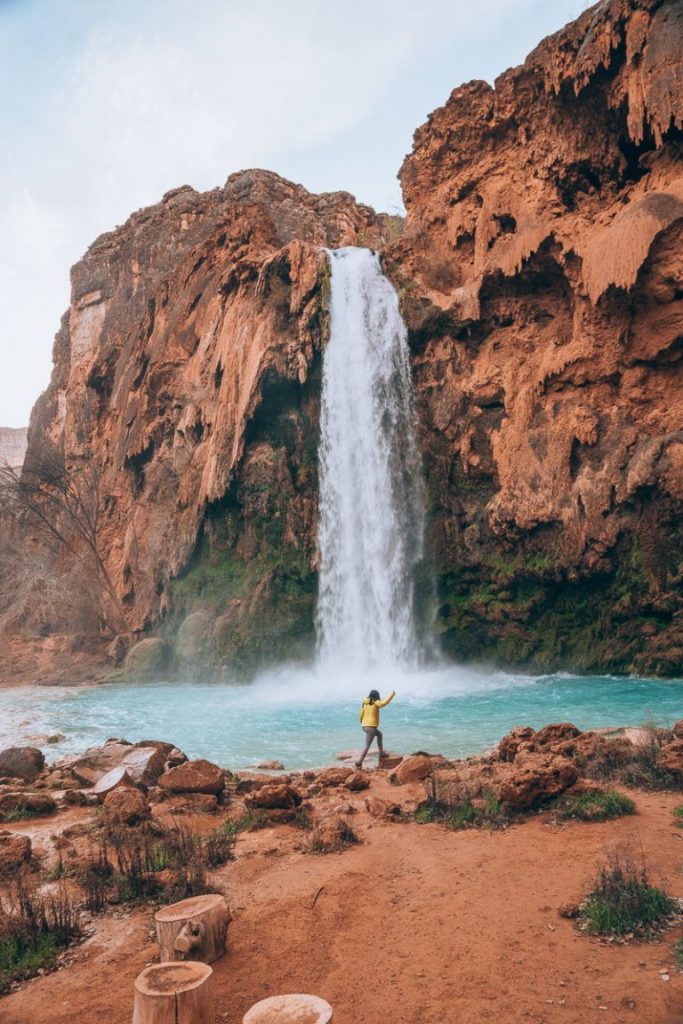
The beauties of the Grand Canyon never cease to amaze people. Like the fact that in the middle of all of that dry earth, scorching deserts, its high peaks and mountains, there cascades deep and mystic waters for us to take our time in hiking to, and then spend the rest of your day diving into the scenery.

Majestic waterfalls are awaiting you just within the Havasupai Indian Reservation, one of many located in the state of Arizona, so that means that these waters are only accessible to you after obtaining a special permit to use the land for hiking through and camping on.

But the turquoise rich, waters, are so worth the hassle of the permit offices. One of the other minor hiccups is the fact that the car park and main entrance are both located a smooth downhill climb from the campsite – which makes for a steady climb to get back to your vehicle so pace yourself.

With photogenic scenes of raging white waters protruding from a mouth, cut out of the red rock holding the valley together, who needs Instagram filters? The Havasu Falls are simply stunning and they are a must see during your time in Arizona. Make sure you check it out.

Enjoy Your Hikes and Stay Safe Out There

Regardless of which of these magnificent trails to hike down, to the top of one of the many mountains the state has to offer or plunge deep into the valleys and ravines in the most famous canyons the country has to offer, you are guaranteed to enjoy yourself and wish that you had more time to explore the next trail head endeavor.

How To Make Adorable Snail Snacks: Easy Family Dinner

0

When most people hear about edible snails, one of three thoughts pops right into their minds. Some people may think “yuck”, others might think of French cuisine, and some might think of both. But there is more to this particular meal than you might think. You may be surprised to find out just how some of this snail eating began and how to get your hands on some snails.

Let’s take a trip through the history of people chomping down on snails, give you a recipe or two and perhaps even a few ideas on where to find them.

History of Snails as Food

Snails have been eaten since prehistoric times. It shouldn’t come as any surprise, snails are a rather slow-moving critter that even the poorest of the hunter should be able to gather up. And since most snails tend to be about 15% protein and 80% water they aren’t too bad of a meal to have.

The Greeks and the Romans ate snails. The Romans would even have special vineyard gardens reserved just for snails. They would feed them such foods as wine and milk to fatten them up for consumption.

Snails became a very special dish for the Romans, and the Roman Legions brought snails with them as they conquered most of the world that was known to them. This may be how the little critters became spread so far and wide across Europe.

During the middle ages, the snail had a special place among all people. First, snails were cheap, often free, so even the poorest people could collect up some for a meal. Also, they were not viewed as fish or as meat, so people could eat them, even on meat-free days as proclaimed by the church.

Often times, during Lent, the monks would have a dinner of snails and monastery beer. And since snails were so easy to come by, some people realized that they could sell them for a profit.

The snail trade would eventually center in Paris, where, for example, a village that was in the snail selling “business”, was able to sell 4 million snails in one year. Snails grew to hold a very interesting place in food. In some areas, they are considered a meal for everyone, in others, they have become a special delicacy.

Is This the Right Type of Snail

There is a vast array of snails out there and to be perfectly honest, mankind isn’t exactly sure if they are all edible. There are over 100 different varieties that are edible, though, and they cover snails that live on the land and in both fresh and salt water. For the most part, if you are looking for a snail to chow down on you will want either the “helix” or the “achatine”. The helix is the easiest to recognize as they have a spiral in their circular shells.

While the Helix pomatia and Helix lucorum are often eaten as escargot, one of the most popular versions is the Cornu aspersum (in many older texts this was referred to as the Helix aspersa). In French cuisine, this little snail is often called “petit gris”, which means little gray. But this snail has a name that might be more well known to you, garden snail.

One thing to consider when eating snails are if there is any chance of poisoning yourself. All snails can have various levels of poison, depending on what they have recently eaten. If you gather up some snails that you find in your garden, there are ways to go about detoxing them, though.

Some snails though have a bit of a stronger poison. For example, the Marine Cone Snail has a rather powerful poison. They use it to paralyze fish. It is not a snail that you would want to eat, but chances are that an encounter with this snail won’t prove fatal for a human.

Garden Snail’s Journey

This snail started out native to the Mediterranean region and into parts of Europe and even into the British Isles. However, it has managed to spread to every continent on the globe, save Antarctica and to a large number of islands. For some of its travels, it was brought and specifically introduced.

One example of this is when the Huguenots introduced it into South Africa during the 18th century to be grown as a food animal.

In others, such as California in the United States, it seems to have just stowed away and found itself a suitable home. This snail has also proven very adaptive, being able to adjust to many and varied climates that are quite a bit different than their original habitat.

Where to Find Snails

Depending on where you live you will have a few options of where to track down some nails to munch on.

Snail Shop

Some areas will have snail shops that you can go to pick up your fresh snails. The upside to this approach is that you know the snails will be safe to eat and be already detoxed. This means that if you are looking to have snails right away this would be your best option.

Depending on how well stocked the snail shop is you might have the option of both fresh and canned snails. There may be a wide variety of snail species to choose from. Also, a well-staffed snail shop, will help you to both make an informed selection, as well as give you some pointers on how to prepare them.

The Internet

If there are no snail shops in your area, you can always look online to order some snails for your meal. There are plenty of options, such as this can from Amazon. This means that you get specialty snails from all over the world. Now the downside is that you will only really be able to get canned or jarred options. If you have never had snails before this might not be a bad idea, but you won’t be able to experience fresh snail this way.

Also, when planning your meal, you will need to factor in shipping times, or of course, you could just keep a few cans in your pantry. These cans have quite the long shelf life, so you can put them in the pantry and just have the ready for when it is time to cook some up.

Collect Your Own

Of course, if you have snails in your garden or around your property you can collect up your own. You will want to double check that the snails you are gathering are the correct type.

If you find them in your garden you are probably all right. If you find them along your fruit trees, though, they might be from a different species that is protected. Be sure to check in your local area to make sure that you aren’t eating a protected species.

One way to catch some snails in your garden is to take a board around a foot by a foot and a half and attach pieces of wood to raise this board up about one inch. Put this out into your lawn or garden over a damp area. Since snails tend to seek out wet or damp areas the snails will flock to these boards. You can check the boards every few days and just pull off whatever snails you find there.

A second way is to find a bowl and bury it to the point that just about an inch is exposed over the top of the soil. Then you merely have to pour some beer into the bowl, if you don’t want to use beer combine two cups of warm water with a half teaspoon of yeast, two tablespoons of flour and a teaspoon of sugar.

This type of trap will attract snails from only a few feet away so if you need to cover a large area you’ll need several such traps. Also after a day or so the beer or yeast mixture will need to be refreshed.

You will need to remember that you will need to put your snails through a detox prior to eating them. The process will take a few days, so you will need to factor that into your plans for snail collecting.

Farm Your Snails

A final way to get snails for you to eat, is to farm your own. This practice is called Heliciculture. One of the perks is that if you farm them you can, for the most part, skip the detox process. And in addition to snails for consumption, there are some other products that you can collect from snails. There are people that collect the slime trail from snails in cosmetics and others use snail eggs as a type of caviar for humans to eat.

As if raising your own snails with the possibility of selling them and other products wasn’t enough, you can also raise other types of snails. You may have to do some research to get your first set of snails, but if you get the chance to bring in some snails that are not otherwise available in your area, you might find yourself in a nice little niche.

Shell Options

As we get to cooking the snails you’ll have to determine if you will want to serve your snails with the shells or without. Without, is the easiest option, since it won’t matter if you break some shells along the way. With is a little bit trickier, but you have options depending on how you get your snails.

If you are farming your snails or just captured them and have time, feed them crushed oyster shell for a period of one to two weeks. This will boost their calcium and toughen up their shell. After that, you can proceed as normal.

If you would rather just have a set of shells to serve with this dish, you can look around in search of gros blanc shells. These are from larger snails, and tend to be a bit tougher.

Detox Process

We have mentioned before that for the most part land snails aren’t poisonous, but they can pick up some amount of poison based on what they eat. Also, their flavor can be changed based on what they consume.

If you are farming your own snails you will be sure of what they eat, but even if you find some in your garden you can’t be sure of everything that they’ve been eating. Luckily, the process is not complicated, it just takes some time to work through the process.

There are two different options on how to detox your snails. The first is to put your snails in a container (with plenty of air holes) and keep them from any food. They can be given water or wine during this time, though. The second route starts by putting the snails in a container with plenty of air holes and feed them something like oats for three or four days. After that, you will have them fast for another two days.

No matter what option you go with, you’ll want to de-slime your snails as well. You’ll put all your snails in a container and cover them with water. For each dozen snails, you’ll want to add a tablespoon of vinegar and two of sugar. You’ll then let them soak, until the snails let all of their slime go.

This process normally takes four to five hours. You can speed up this process by changing out the solution they are soaking in. Next, you’ll want to rinse the snails off in cool water.

Cooking Snails

There are a vast number of ways to cook a snail that is to be consumed. The classic French method involves butter and garlic. But for a little more detail, let’s start with the snails that have been detoxed and de-slimed. At that point, you’ll want to toss them in some water and bring them to a boil.

This is only the first step, so you aren’t looking to have a completely done dish. We only need about 10 minutes of boil here for our purposes. After this, you’ll want to remove the snails from the water and let them cool. The next step is to remove them from their shells and here you will have a choice.

If you want to serve them in their shells you will need to be rather careful while you extract them. Some people use a long knitting needle to spear the snails and pull them out. While different species of snail have shells of different hardness, if you have a garden snail or petit gris, it most likely has a somewhat delicate shell.

Of course, if you don’t intend to use the shells for serving your snails it is a much quicker process, just be careful that any shells that break in the process are completely removed from the snails you intend to eat. When the shell is off, you should have no problem peeling the skin from the meat. Normally, you will also cut off the back tail portion.

Method 1: Quick and Easy

Now that you are ready to finish this dish, you’ll want to heat up a sauté pan with some butter. When it is ready you’ll want to add in some garlic, when that becomes transparent you can add in the snail meat. You’ll want to cook it for about 3 minutes.

Method 2: A Touch Longer

For a different approach, you can place the snail meat into a pot and cover them with water. Feel free to pour in a bit of cognac or replace half the water with a white wine. From there you’ll add in whatever flavors you feel would work well, but a wise idea would be to include peppercorns, parsley, thyme, onions, and garlic. Let this simmer for a few hours. During this time, you could prepare a compound butter.

Simply take some butter (no imitations like margarine for this one please) and add in some chopped parsley, a touch of garlic and perhaps a pinch of salt and pepper. Mash it all together, then put it back in the refrigerator until it is time to serve the snails.

Service Options

When the time comes to remove these snails from the cooking vessel and serve them to your guests you have a number of options. If you want to go formal there are various serving dishes that can be found online. These will let you place each snail, either in its shell or not, into its own groove.

Sometimes guests will take a snail in a shell, or more than one, to their plate to consume it. Other times, everyone will end up eating snails right from this dish. This method is often paired with specialized forks, designed to spear a single snail and bring it to the diner’s mouth.

For something less formal, but still elegant you can dish out an amount to each person’s plate. For a basic pairing, you can add a salad and perhaps a crusty French style bread. This will give you a meal that covers all the bases, looks like it came from a fancy restaurant, but is fairly simple to make. No matter how you make them, they would pair well with a bottle of French wine.

Wrapping it All Up

Snails can be a cheap and easy source of food. Some people might think they are an odd thing to eat, but when you consider the fact that these little critters have been consumed for thousands of years, they become less odd.

They have been food for peasants and royalty alike, yet edible snails can be found for free in many corners of the world.

Learn Some Basics About Snake Bite: Tips On How To Survive Snake Encounters

0

Receiving a snake bite out in the wilderness can be fatal, if not handled with utmost care and precaution.  In this light, it is important to stay informed and prepared, just in case you do have to administer snake bite first aid. Not unlike learning CPR, it’s good to know how to do it, or better still versed with some basic knowledge on how to easily and effectively handle cases of snake bite.

First and foremost, never hike alone!  Always have a buddy, safety in numbers.  Secondly, always tell someone else where you’re going and for how long you’ll be gone.  If you’re not returned by the time you said you would be, chances are that something went awry.  Having someone else know your general whereabouts, can cut down on valuable hours if indeed you do need rescuing.

Getting to Know Your Snakes

There are about 50 different species of snakes found in the United States.  Less than half of those snakes are poisonous.  That’s still 20 different types of snakes slithering around that can potentially be fatal!  Most of the bites are caused by rattlesnakes, though coral snakes, cottonmouths and water moccasins (a venomous snake that traverses the water and land) can do their fair share of damage. Keep in mind that snakes only attack when they feel threatened.  Not all snakes will deliver deadly amounts of venom with each bite, as they save their venom supplies for hunting and debilitating prey.  More information on dry bites is detailed later in the article.

While we don’t recommend getting up close and personal with a snake to see if it’s venomous or not, there are some telltale signs on which snakes to give a wide berth, and which snakes pose less of a threat.

Pit Vipers

A pit viper refers to a snake with distinguishable heat sensing pit organs located on the side of the head between the eye and nostril (one on each side).  The purpose of this organ is to allow a snake to accurately strike its prey or predator by sensing exactly where the heat is radiating from.

These sensors are very precise, and can detect even the slightest change in temperature.

  • If you hear a dry rattling sound, like a baby rattler being shaken very vigorously, then you are very close to a mature rattlesnake. Trek in the opposite direction!  Rattlesnakes are found throughout nearly all of North America, but are predominantly found in the South West region of the United States.  The account for the highest number of snake bites reported in the U.S. each year.
  • Cottonmouths and Water Moccasins look similar to some types of rattlesnakes, as they are brown and camouflage into the dry environment very well. They are missing one key feature however, they do not have the rattler.  As they don’t have a trademark rattling noise, understand that they can be just as deadly.  They live near water and are spread from the southeastern states, and can be found as far west as Texas.
  • Copperheads have a distinct copper color with a series of repeating hourglass shaped figures lining their entire length. While considered a venomous snake, their venom is rarely harmful to humans as it is fairly mild in comparison to some of their more poisonous counterparts.  They reside in the eastern half of the United States, with a good majority in the south and southeastern states.

Another North American Venomous Snake

  • Coral snakes are the only venomous snake in North America that do not have the pit organs. They have a very unique color pattern with the majority of their skin in red, with yellow and black rings surrounding the chunks of red.  There is a little rhyme to help you identify if the particular snake you’re looking at is venomous or not, “Red and yellow, kill a fellow; red and black friend of Jack.”  So, if you see a snake that is black with yellow rings, and no evidence of red on him, the snake is not venomous.  If there is yellow, back away.  Coral snakes are found throughout the south, spreading from Florida to Arizona.

This list is by no means comprehensive.  There are hundreds of other dangerous vipers spread throughout the world.  There are volumes of books and entire college courses dedicated to the study of snakes.

Prevention

We understand that you don’t plan your day expecting to get bitten by a snake, especially a poisonous one.  You also may not be thinking that prevention tactics are useful in snake bite first aid.

But there are a number of things you can do to prevent a snake bite from happening in the first place, and some things you can do to prevent yourself from unnecessary suffering.

  • Protect yourself with the tetanus vaccine. The bacteria that cause tetanus and lockjaw, Clostridium tetani, can be passed on to humans by a number of wild animals, including snakes.  The snake doesn’t even have to be venomous.  Any wild animal bite has the potential to be carrying the dangerous bacteria.  While lockjaw, is not usually fatal, it can be easily prevented.  Tetanus vaccines and tetanus boosters will prevent mal effects of Clostridium tetani for ten years.  So, every decade, head into the doctor’s office for your vaccination!
  • Always carry a first aid kit with you. While you don’t need to be toting around a syringe of anti-venom in your daypack, it’s a good idea to have clean bandages, antihistamines in case of an allergic reaction, soap to clean hands and wounds, a towel, and bandages.
  • Keep a mental note of where the nearest hospital was, where the last spot you had cell service was, and where your car is. Keep a map and a compass on you at all times.
  • Wear hiking boots and long pants. While this doesn’t exactly act like a coat of armor, it will definitely protect your feet and ankles.  Unfortunately, snakes are more active in the warmer summer months when you may be more inclined to wear hiking sandals.  Err on the side of caution and wear the warmer shoe options to avoid snake bite first aid measures.
  • Avoid clearing big rocks and logs. Snakes that are surprised by a sudden hand appearing out of nowhere will be more likely to strike.  If they’re not out in the open, which is where most people see the snakes and the least amount of snake bites occur, they could be hiding under rocks or nestled under tree branches where they feel safe.  Always take great caution when going off trail and exploring in rocks, trees, or tall grass.
  • Keep your eyes peeled. Snakes only bite as a last resort if they feel threatened.  If you see one in the distance, or if you accidentally come across one and it’s much closer than you anticipated, respect the animal.  Give it a lot of space, and don’t waste time in doing so.  Just like with any other wild animal, respect the fact that it is indeed wild.  They are unpredictable, and often times more scared of you than you are of it.  Keep your distance from snakes.  No picture is worth the risk of a potentially deadly snake bite.

First Aid for Snake Bites

At this point, you have taken all the necessary precautions, have familiarized yourself with the dangers of venomous snakes, and were trying to enjoy some time in the great outdoors.  But, as luck would have it, you or someone in your party inevitably fell victim to legless carnivore.  First aid for the snake bite should be administered quickly and calmly.  If it has been established that the snake bite was from a nonvenomous snake, it is still important to follow the proper first aid instructions to prevent any possible infection. Any open wound in the body, whether from a scrape, laceration, or wild animal bite, must be treated with haste or the possibility of infection expounds.

The main priority for a snake bite is getting to an emergency room.  The only way to successfully recover from a venomous bite is to receive antivenom from a medical professional.  Follow these first aid instructions while making your way to an emergency room:

  • Stay calm. This is perhaps the most important thing to remember.  Keeping a level head is very important in any emergency situation.  If you start to panic, take deep breaths.  The last thing you want to do is send your body into shock.
  • If you suspect the snake was venomous, dial 911 as soon as possible. Additionally, call the poison control center as soon as possible to describe the incident and describe what the snake looked like to the best of your recollection.  The sooner emergency services know what kind of snake it was, the sooner they can begin to administer treatment.
  • Lower the affected region so it rests below the injured person’s heart. Snake bites commonly occur on the lower legs or hands, so have the person lie down and ensure the bite stays below the heart.  Do your best to not elevate the injured person’s heart rate.
  • Remove any jewelry, socks, or gloves as swelling may occur.
  • Wrap the bite loosely in clean bandages to prevent any contaminants entering the affected area.
  • If you have a pen or marker, mark an ‘X’ where the bite occurred. When you get to an emergency services facility, doctors can determine how the venom is spreading if they know where the bite occurred.
  • Once the wound is cleaned, bandaged, and marked, begin to make your way to a hospital as soon as you can. Keep the individual hydrated and calm.  Once you get to a hospital they will administer an antivenom.

If you are absolutely certain that the snake was harmless, but it still bit (which can happen), follow these slightly less dire set of first aid tactics:

  • Clean the infected area. Look closely to ensure that no part of the tooth was lodged into the skin.  If you see part of the tooth lodged in the skin and are unable to remove it, make your way to the nearest emergency room as you run the risk of infection.
  • Rinse the wound with clean water. Wash with soap and clean water after rinsing.
  • Wrap a sterile bandage around the affected area to prevent contaminants.
  • Elevate the affected area to limit swelling. Take an ibuprofen or acetaminophen for pain.
  • If the bite is painful, swells excessively, or causes any other symptoms such as dizziness or confusion, seek professional medical attention as soon as possible.

Here are some things not to do in any circumstance:

  • Do not attempt to suck out the venom.
  • Don’t try to cut out the bitten area.
  • Never apply a tourniquet or attempt to slow blood flow to the affected area in any way other than elevating the limb.
  • Don’t continue on with the hike or engage in strenuous activity, begin making your way to the emergency room.
  • Don’t drink alcohol or caffeine, don’t eat anything, and only drink water if you feel at risk of dehydration.

What to Expect – The Symptoms

Symptoms for snake bites can vary from individual to individual, and also depend on the type of snake, the amount of venom injected (if any), and the potency of the venom. Elderly people and children are more susceptible to bad reactions.  The same bite delivered by a poisonous snake may have a negligible effect on a healthy, middle aged individual, while it could be deadly for a child.

Venom travels through a person’s lymphatic system.  Lymph nodes are organized throughout our bodies by the hundreds, and one of their main purposes is to deliver vital fluids (not blood) to the heart.  As such, the venom that is introduced to the lymphatic system can reach nearly every corner of the body (including the brain) causing severe damage if not treated with an antivenom in a timely manner.


After a snake bite, if venom was indeed spread, the victim might begin to suffer from these initial symptoms:

  • Weakness
  • Dizziness or Lightheadedness
  • Low Blood Pressure (which could result in fainting)
  • Blurry Vision
  • Mental Confusion

More severe symptoms which can potentially develop after the bite include:

  • Convulsions
  • Muscle Cramping
  • Difficulty swallowing
  • Paralysis

Snake bites may also bleed a little initially, and bruise.  If there is excessive bleeding, apply pressure with a clean bandage until the bleeding stops.

More Information about Snake Bites

Even if you received a snake bite from a pit viper (rattlesnake, copperhead) or other venomous snake, there is a high chance that it was a dry bite, meaning no venom was injected into your body.  That’s not to say the bite isn’t painful, it’s probably very painful, and there is a good chance the bitten area will redden and swell.  However, a dry bite is not life threatening.  Professionals sill recommend treating the bite as if it were venomous, elevating the bite and wrapping in bandages while making your way to the nearest emergency service facility.


Sometimes, the symptoms of a venomous bite will not manifest at first, it may take up to eight hours for symptoms to appear.  If there are no symptoms for eight hours, post bite, the bite was likely dry.  If such is the case, closely monitor the bitten area, checking for any swelling or discoloration.  If the swelling does not increase or become very red, then you’re safe to go about your day.  The site will more than likely bruise over time, as bruising occurs whenever there is a blood vessel breakage (from fresh cuts or localized impacts).

In any case, the number one thing to do after being bitten by a venomous snake is to seek immediate medical attention.  Dry bite or no, it’s not worth the risk to wait and find out if you were infected with snake venom.

The Take Home Message

Finally, these preventive measures should be able to guide you accordingly in the wilderness:  this includes; never hike alone, wear protective footwear, and keep your wits about you.  If you can prevent a snake bite by being cautious and follow practical common sense, then do so at all costs.  If the unfortunate happens, your main priority is to get help from medical professionals.  However, we understand that isn’t always as easy as it sounds.  Staying calm and getting to a safe place, are the best snake bite first aid measures you can perform.

Romantic Camping Trip Tips: A Romantic Getaway Weekend For Couples

0

Camping is definitely the first thing that crosses someone’s mind when it comes to a perfect Valentine day or any other romantic event, especially if you and your partner love camping and spending time in the wilderness.

Imagine the fun and romance taking the love of your life somewhere far away from the hustle, bustle and busy schedule of city struggles. It would be up to you to turn “the wild environment into the romantic one”.

In this article, we are going to take a look at some really amazing romantic camping ideas. If you are still not sure about romantic camping, then stay tuned because you might end up loving it.

How to Plan Your Romantic Camping Trip

If you don’t want your romantic getaway to turn into a disaster,there are some important things to consider before actually going on a trip.

Pick the perfect spot

It is crucial to do some research beforehand and get yourself familiar with the area. Of course, unless you are planning to go somewhere where you have already been. If not, then make sure to find a place that would suit both of you. Since you are planning a romantic trip, go somewhere where you will have privacy and peace and quiet.

How to find the perfect spot? Do a research on all of the campsites online. By using online maps you can take a look at each detail, route, and path. By doing this you will be able to make sure nothing goes wrong.

Make reservations

This is very important, especially during the peak vacation months. You do not want your camping spot to be reserved by someone else, right? Not only reservations, but you should also use the online info to find out about entrance fees and the price of the activities being performed there.

In this way you won’t be surprised in a bad way.

Camping Gear You Must Not Forget

Let’s take a look at some of the goodies that you should not forget. These goodies would come in handy during your romantic camping.

But make sure to remember that you cannot really bring all of them together, because that depends on the location.

  • Since you will be sleeping in the wilderness, a comfy air mattress of high quality is a must. You might even want to go for a two-person sleeping bag so you would make sure that both of you have enough space. However, if you are camping somewhere with freezing temperatures or during the winter, you might want to buy a warmer and a waterproof sleeping bed with good insulation.
  • Pillows will spice up the cozy atmosphere and allow you to snuggle.
  • Make sure to bring extra blankets if you are camping in the winter or in case it suddenly gets colder. Or imagine what would happen if you get trapped in a rain or storm.
  • Take your romantic event in the wilderness to a higher level by hanging string lights around the tent, or even in the bushes and trees around it. You will need a battery powered, light strings or the solar ones.
  • Many couples go for candles when they want to achieve romantic mood, but remember that you must bring only the risk-free light. That is why you should consider bringing LED tea lights which can create the same Valentine effect.
  • Bring a guitar or some other musical instrument that is easily carried around. You can woo your partner or get wooed. You can also sing some favorite songs together. You will be probably alone, so there won’t be any need to be embarrassed.
  • Nobody would go camping without bringing a camping stove, so you can make delicious hot drinks like hot chocolate. It is not very romantic to eat canned food.
  • Do not forget to bring cards and games you both love to play together.
  • A cooler will keep all food and drinks fresh and cool. It is actually a must with regular camping as well.
  • If you are not able to play any musical instrument, then take a portable music player with you. Make a romantic playlist of favorite songs in advance and surprise your partner! Music makes everything better.

Other Things to Consider Before You Go

Besides the camping gear that you must not forget to bring, there are also a couple of other things to consider, such as:

  • Clothes: avoid smelly fabrics that quickly absorb sweat. Cotton becomes very stinky and should be avoided while synthetics, wool and Gore-Tex are great choices. Wool is warm while Gore-Tex is waterproof. Polypropylene and polyester can be used as under-layers because they do not get as stinky as cotton.
  • Prepare the menu: instead of wondering about the food there, make sure to prepare the full menu before you go. Spice up the camping trip activities and surprise your partner with dishes that she or he adores. If both of you are fond of alcoholic drinks, bring a favorite beverage, but place it in a bag or thermos. Do not forget desserts!
  • Do a research on wildlife: you would not want to get surprised by a bear, right? Even though it can be quite exciting to come upon a wild animal, you should know how to behave in its presence and if it is possible, to avoid if it is dangerous. You can even find about which products to bring with you in order to prevent insect bites or which places to avoid so you would not come face to face with a rat, skunk, snake, or mountain lion. While you are taking a break, inspect your body to see if there are ticks, because they must be removed immediately. That means that you should not forget an antiseptic.

Ideas for Romantic Camping Destinations

Here are some wonderful ideas for romantic destinations. Depending on where you live and your budget, you can choose at least one that would suit both you and your partner.

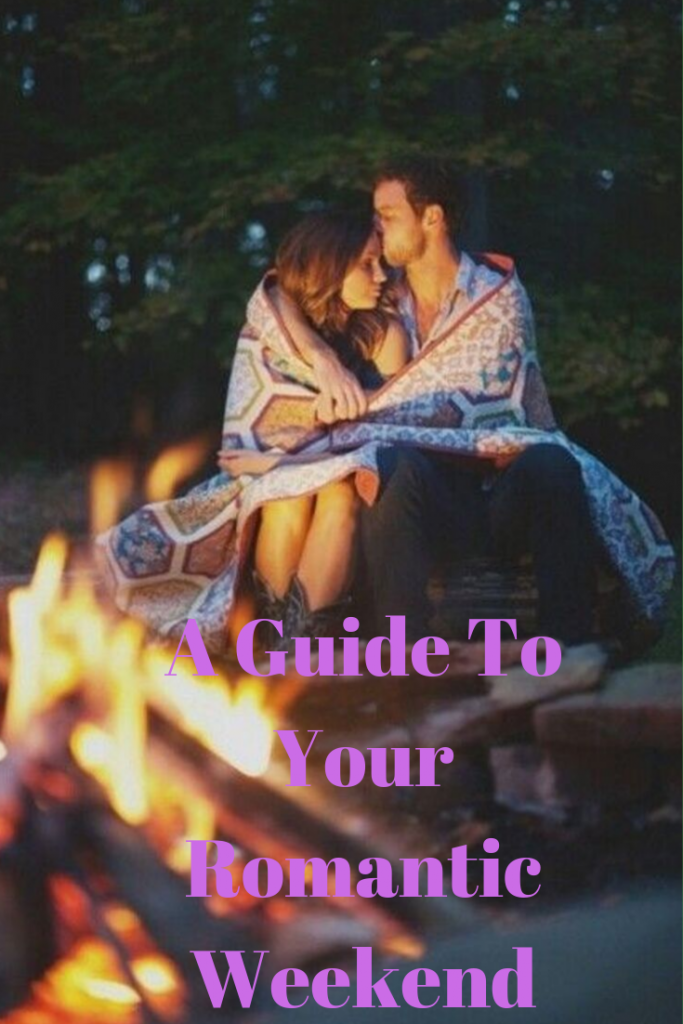
Campfire

In most states and countries, campfires are forbidden due to the risk of forest fires.

That is why you should be aware of the fact that you would be able to go camping only when it is colder. However, what is more romantic than sitting around a warm campfire and looking at the stars? You can also enjoy a nice dinner and create a wonderful atmosphere.

Do a research on sites and locations that allow campfires and purchase the firewood only if you are sure that you can really go. Follow the campfire policy for your own safety and everything will be good.

Beaches

Beaches are another amazing and romantic getaway.  You can swim, bathe in the sun, and make a beach fire, play beach games etc. Camping at the beach is different than camping in the woods, so you will need to bring beach-specific supplies. The basics are the same, but you will also need to protect your skin from the sun and bug bites.

Track the tides regularly, stay away from the dunes during the night and stay hydrated.

Hot Springs

Have you ever tried camping near a natural hot spring? Then make sure to try it, because it is relaxing, amazing and utterly romantic! If you manage to find a hot spring, imagine soaking yourself in hot water with your partner under the starry night. You can spice it up with tea-light candles, a portable music player and drinks.

However, make sure not to use glass for your drinks, never use soap and do not leave any litter behind.

Hiking

Hiking can be another great way to spend a romantic day with your partner. Just imagine a nice weekend in the wilderness, and away from the crowds. However, make sure to bring boots of good quality because you will be on foot for hours; developing blisters is never romantic. Your shoes should provide you with ankle support and the socks should be designed for hiking. It would be a good idea to spend your day hikes in light-weight hiking shoes instead of the heavy high-cut boots. Your toes should have enough space to move around otherwise they will swell.

As for the destination, it is all up to you. With a blanket, water, enough food, and a headlamp, you can take your beloved on a romantic hike through the woods or hills. Hiking is not only great for physical health, but also mental health as well.

Paddling

Looking for an unusual romantic getaway? Then what about canoeing, rafting or kayaking? Take your boyfriend or girlfriend on a paddling journey in which both of you will have fun! This is a great activity because it can lead you to an isolated campsite where you can take a break and enjoy the view with your partner. You do not really to buy a boat or canoe, you can simply rent one, but you have to be experienced in peddling it. Do not go paddling if you have never done it before because you can endanger not only yourself but your partner as well!

For this kind of adventure you need drinking water, food, sun protection, waterproof footwear and life-jacket. Make sure to get familiar with the area and its rapids before you go so you can avoid unexpected danger. Also, do not only peddle but take mini breaks to show your partner the area and the landscape. It will be an unforgettable adventure!

Safety

When you have finally chosen a destination, make sure to be aware of possible dangers and give your best to prevent them. It all depends on your experience, and if you are the one planning the romantic getaway, then you are responsible for your partner’s life as well.

Let’s take a look at some safety measures:

  • Sunburn can be prevented by wearing hats, sunglasses and applying lots of sunscreen. It does not matter where you are, you can get a sunburn at high elevations during freezing temperatures just as same as at the beach. However, if you do happen to sunburn your skin, apply lots of gel and seek medical attention if the burns turn into blisters.
  • Blisters are mostly caused by bad footwear, especially during hiking. Make sure to wear socks of high quality and to keep them dry. If your feet hurt, then make a break and check the blister. Apply a padding if it is not broken; however, if it has already turned into an open wound, then clean it with soap and water and cover it with a hydrogel.
  • Sprains are serious injuries that can happen anywhere. People who have sprained their wrists, knees or ankles should rest, then apply ice to the sprain to prevent swelling. After that a bandage should be used and the sprained joins kept elevated above the heart level.
  • Make sure to always have a First Aid Kit with you, whenever and wherever you go.

Final Thoughts on This Topic

To sum up, we have covered the most important things regarding romantic camping ideas. We have also mentioned some great destinations that might spark your interest and positively surprise your partner. Depending on your budget and location, you can explore camping areas online by using maps and official camping sites. In that way you will be informed about the all possible fees and taxes that might come along your way.

In order to turn camping into a romantic trip, prepare everything beforehand and make sure to remember your partner’s taste and preference. After that it is up to you to create a romantic location and transform it from the wild one into a truly Valentine setting.

Additionally, do not forget that it is better to be safe than sorry. If you are not experienced when it comes to hiking, paddling or camping in general, do not venture into long and far-away journeys that might endanger both you and your partner. Stick to a place where you can ask for help in case you need it.

ABC About Camping: Learn Some Outdoor Tips, Skills And Techniques That Will Help You Enjoy Your Outdoor Adventure

0

Hiking is a strenuous exercise that is equally breathtakingly rewarding since you get to explore scenery and spectacular wilderness views as well as lose weight if you’re overweight. The nature has blessed us with plenty of hiking destinations some of which have been frequented by enthusiasts, while others are less frequented perhaps due to intolerable weather conditions or slippery terrains.

This, therefore, calls for an informed hiker who can carefully choose the best hikes in the world with all factors in mind. Don’t worry if you are a newbie to this exciting and adventurous outdoor activity because we’ve got you covered in this guide below.

To start with, it can be mentally exhausting for the inexperienced in hiking to choose the best hikes. As thus, we will start by discussing the types of hiking as well as the tips on how to find the best locations that are best for you. There can be plenty of locations but not all are the best locations for you. For example, you might find out that a certain country has exotic and breathtaking scenery that is great for alpine hiking but then country’s safety is not on par. You wouldn’t like to hike in a destination that jeopardizes your safety no matter how amazing it is.

How to find out which hikes and locations are best for you

It’s of paramount importance to first know that which types of hikes and locations are best for you. Let’s first give you an overview of the types of hikes that you can look up to.

Snowshoeing (winter hiking)

With this type of hiking, you get to hike in the snow during winter times in the wilderness. You should visit the places that are frequented by this nature’s ice. However, you have to be well-prepared to buy sufficient winter clothing such as snow boots, jackets and clothes that are well-insulated. Moreover, your snow shoes should have a better traction to prevent slippery when you hike in the snow.

Snow gives you an opportunity to explore many off-trail routes because it covers almost all the obstacles such as rocks and thorn trees so you can traverse freely. But you still have to be cautious of your safety. As long as you are fully prepared with your hiking gear dedicated for snow hiking, you can then proceed.

Day Hiking

Day hiking can be a great experience even for newbies in hiking. You can spot your desired destination and, depending on the number of days to hike, bring a camping tent at night and other needed accessories to make your trip enjoyable. With day hiking, you can explore as many interesting landmarks as possible and also take photographs using advanced cameras such as the GoPro camera models.

You also have to be fully prepared for the fluctuations of wilderness temperatures when hiking to avoid temperature-associated deficiencies such hypothermia and hyperthermia. Make sure that you take versatile clothes or take extra clothes, but avoid backpacks especially if you have opted for alpine or subalpine climbing. Temperatures can be adverse if not well anticipated. What we mean is that, take heavy and light clothes and shoes so that you can be prepared for the inclement or hot weather conditions.

The camping tents and other ancillary tools are also indispensable for day hiking. If, for instance, you plan to explore nature for more than a week or months, you need to pitch a mobile at night to rest before you resume your adventurous activity the next morning. This means your backpack should be spacious enough to store food and your changing clothes, to mention a few needed items.

Overnight hiking

Some aspirant hikers may regard this type of hiking as a blessing because it negates the use of a camping tent at night. You can hike through the night, but then it is equally demanding. It’s demanding due to the infamously harsh temperatures in the wilderness predominantly in the night. That said, you need enough insulation to undertake overnight hiking.

Furthermore, you need enough lighting to see your trails. A headlamp or a torch can be your best friends in overnight hiking. But if there’s a full moon, then your problems are solved because no headlamp may be necessary unless you are desired path is going to be in the forest amid large shadowed trees.

Furthermore, be mindful of your security in overnight hiking unless you are in a group because dangerous animals can be bad news for your adventure in the night. They often go hunting at night. That’s one of the setbacks of overnight exploration of nature.

Backcountry hiking

This is more about the locations that you want to hike at. You might come across well-groomed or off-trail paths and you need to be prepared for all of them. The solution is the quality, functional and durable hiking boots and convertible hiking pants.

All other tools such as the ultralight tent and other accessories are still must-haves for backcountry hiking.

Weight loss hiking

Hiking has been found to be a weight loss intensive exercise wherein hikers can potentially lose thousands of calories depending on the number of days and the types of terrains you traverse on. Alpine hiking, in particular, can be very effective in burning fats from our body. After a few days of hiking, you might have lost massive calories to keep your body in shape.

Hiking for weight loss can be done alternatively for repeated short trips whereby you eliminate the need to camp in the wilderness. You can spot the nearest mountains in your locations and climb it in a bid to lose weight.

All that you need are light clothes and sport shoes or hiking boots because off-trails can be treacherous for lighter sport-shoes. Also versatile clothing is important because weather conditions may fluctuate.

Romantic hiking

It’s self-explanatory that two people can engage in this type of hiking. The couple can find the best location with exotic landmarks to explore. You can accomplish this in daylight or overnight. But it would be preferable if you do it in a daylight, so that you can take beautiful photographs to reminisce the moments later on to spark the romance.

Now that we have gone through the types of hiking that you can opt for, let’s now bring you the best locations that can be amazing to you.

Hiking locations that are best for you

We have included a few locations across the world that have been frequented by seasonal hikers. We believe that they can be the best locations for you. Our advice is that, you must prioritize your security and your health when choosing a specific location to travel on.

  • Security: This can be minimized if you travel in groups. A solo hiker may be susceptible to security concerns. For example, isolated forests can be too dangerous more especially those without well-groomed trails. As thus, we encourage you to consider only the safest locations that are most traversed by other hikers. You should go to your library or local bookstore or search google to search the backgrounds of your targeted location before you embark on it.
  • Your health: Knowing your health status before hiking is of paramount importance too, because a deteriorating health cannot withstand high altitudes. Moreover, a deteriorating health may not be able to carry a hiking gear for long distances or survive the fluctuating harsh temperatures. That being mentioned, if you are unsure about your health, choose the simple locations, perhaps a few miles from your home.
  • The distance to travel: For each hiking location, especially the renowned locations, there are approximated miles. Inexperienced hikers, for example, may find it exhausting to travel for long miles. The same applies with unfit hikers, they may find it challenging to climb high mountains for long distances.

Tour Du Mont Blanc

Location: France, Switzerland and Italy

Length: 104 miles

Best time: Summer

Tour Du Mont Blanc is such a great choice if you want the longest hiking experience. It extends to three countries, France, Switzerland and Italy. You can take about 2 weeks in this long-distance hiking adventure while coming across beautiful and exotic glaciers, great valleys. You will also get a chance to capture a beautiful 15 781 ft mountain on your travel.

As you travel on this hiking path, you will be stopping villages to grab something to eat or find accommodation in their guest houses as you rest before the next morning. Alternatively, you can bring a tent, well if that’s relatively cheaper than hiring in guest houses. The trip exposes to varying cultural food between these three countries. If you are quick enough, you can complete this hiking journey in less than 2 weeks including climbing the Mont Blanc.

Laugavegurinn/Fimmvorduhals Pass

Location: Iceland

Length: 50 miles

Best time: Summer, preferably between June and September

This 50-mile trail is also a great choice for you to explore stunningly and breathtakingly beautiful views and waterfalls as well as mind-blowing glaciers. As you proceed with your journey, you might descend into Thorsmork valley. It can take you up to 4 days traveling on this trail wherein you can start from the Landmannalaugar hut in the north and then end in the Thorsmork park in the south. A 200 ft high Skogafoss waterfall is also worth exploring.

As you hike on this trail you will come across volcanic landscapes and volcanic rocks as well as spectacular Rhyolite peaks colored in copper. There are huts for you to rest during your travel, but you need to book beforehand as this is a popular hiking trail and those huts might be full. But to err on the side of caution, you can bring your ultralight tent.

Mount Everest Base Camp Trek

Location: Nepal

Length: 40 miles

Best time: Spring (March to May) and Summer (September to November)

Ready to explore the highest mountain in the world? Then the trek to the Everest Base Camp is a must-have for you. The area is known for its great scenery and incredible guest houses along your way. This negates the need for camping tents unless if you find the guesthouses expensive compared to your self-catering tents.

It can take you about 2 weeks to complete this hiking trail. The trek passes through Khumbu region and extends to Namche Bazaar to give you that first-hand experience of the local culture. From there, it leads to the 13074 ft Pangboche where you can capture the beautiful Buddhist monastery just before you climb the 11000 summit. This could be a great strenuous exercise to lose calories fast.

Kilimanjaro

Location: Tanzania

Length: 35 miles

Best time: January/February/September

Prepared to spend a week exploring Africa’s most renowned mountain? It is 19340 ft high and dubbed the Africa’s highest mountain. Many seasonal hikers have frequented this highest peak. It has plenty of climbing routes to make your alpine climbing a cinch.

If you are a newbie do not worry because there is a guided tour so that you do not get lost in this large area.

Te Araroa Trail

Location: New Zealand

Length: 1894 miles

Best time: October to April

You are probably scared after seeing that you will travel for 1894 miles. Trust me that it is quite a rewarding hiking trail for you to explore the NZ’s incredible landscapes, coastal sands, national parks, alpine ridges, volcanoes areas. It is a frequented thru-hike by many enthusiasts who are determined to travel almost the entire New Zealand. The journey starts at Cape Regina adjacent to the North Island tip and extends to Bluff next to the South Island.

Be prepared to spend 3 months traveling on 160 tracks. You will be coming across the Queen Charlotte tracks on the South Island and the river valleys at Whanganui National Park situated in the North Island. The Tongariro volcano slopes will also be worth exploring as you trek through Auckland metropolis. This journey is equally rewarding for newbies in hiking as the Te Araroa Trust has put in place experienced guiders and volunteers to help you achieve your goals.

Kings Peak

Location: Utah

Length: 28.8 miles

Best time: September

It is best to undertake this journey in September when snow has melted unless you prefer snowshoeing. For only 28.8 miles, you will be exploring the Kings Peak in Utah by passing through the Henrys Fork, Gunsight Pass and the Anderson Pass. Lakes and ponds will be a blessing to your eyes. The waterfall to the Anderson Pass is one of the great views of this trail.

The High Uintas Wilderness is also at reach to view its beautiful peaks, alpine ridges and valleys. Furthermore, you might trek about 2 hours to the summit of Kings Peak from the Salt Lake City. Just be prepared and wear quality and durable hiking boots because this journey is known for its sedimentary rocks on your way to climbing the Utah’s highest peak of 13528 feet high. Meanwhile the Henrys Fork Campground might be the initial trial for you as it has an elevating trail. If you have a tent you can pitch at the Dollar Lake to rest at night.

Franconia Ridge Loop/Traverse

Location: New Hampshire

Length: 9 miles

Best time: Fall and Autumn

Newbies can start with this short hiking trail on the Franconia Ridge in New Hampshire. It has beautiful and miniaturized flowers to view where you can take priceless selfies to show your friends. You will also have a chance to hike in 3480 ft alpine tundra from Fenway Park.

Be prepared for the White Mountain weather conditions as you travel between the Mount Lafayette, Mount Lincoln and Little Haystack.

Overland Track

Location: Tasmania (Australia)

Length: 50 miles

Best time: October 1 to May 31

To hike on this 50 mile trail, you need to make reservations first because it is part of Tasmanian Wilderness World Heritage Area. This area is well-known for its Tasmanian devil (largest marsupial in the world), platypus, wombat and its diverse wildlife. It can be a great place for hikers who are in fond of the Australias diverse landscapes that include the highland mountains, rain forest, and the eucalyptus groves. This trail extends into the Cradle Mountain’s Lake St. Clair National Park. It is short but worth taking because it offers more spectacular views than some 200 mile trails.

The Tasmanian Parks and Wildlife Services manage this Overland Track. You can spend 6 days exploring the trail’s breathtaking views and climbing the Tasmania’s highest peak, Mount Ossa, at 5305 ft.

Pacific Crest Trail

Location: California, Washington and Oregon

Length: 2650 miles

Best time: April to October

This is one of the longest hiking trails you will ever encounter. You really have to prepare yourself for this thru-hiking adventure that traverse from north to south regions of the United States. The spectacular Pacific mountain is never to be missed in this journey. Hikers are advised to hike from April to October in order to avoid the snow fall in Sierra’s spring and the Cascades fall. This trail runs across the Sierra and the Cascade ranges. It is, however, not an easy attempt to complete this journey when given its weather conditions.

On your way to the finish line, you will be exploring 7 national parks, state parks and national forests. You will also tap on the Mojave desert, 13153 ft Forester Pass found between the Kings Canyon and Sequoia national parks. Your journey will extend to the Yosemite’s Tuolumne Meadows through into the volcanoes of the Cascades from Lassen Volcanic National Park. The finish line can be the British Columbia’s E.C Manning Provincial Park.

Grand Canyon Hike

Location: Arizona, United States

Length: 44 miles

Best time: March to May or September to November

Within a week you can complete this hike exploring the nature’s scenery. Only 4 to 6 days either between March and May, or between September and November during summer times.

Additional tips for hikers

For any type of hiking you have to buy enough backpacking gear, camping tents, and cooking tools. There are many local stores or online stores where you can order your essentials before time. As you shop around, keep the following questions in mind:

  • How many days of hiking
  • How many miles
  • The type of terrain to hike on
  • The frequent weather conditions
  • The seasonal changes
  • How many people to hike with

It is advisable to team up with other people if you are going to hike in isolated areas. Accidents do happen along the way where you might slip into dangerous pits, and your only rescue is a second person. The second person can also help you minimize the heavy hiking gear and in all preparations such as pitching the tent. It would be much better if you travel with your partner.

To avoid getting lost, buy a tour guide of the desired destination and acquaint yourself with it before embarking on your journey. Take cognizance of the landmarks along the way, so that if you do not meet them, it can be a signal that you got lost.

It is also recommended that you let know your family about the you’ve planned to take so that they can be on a hunt if you do not come back accidentally. To minimize any confusion, the compass or the GPS can be good essentials to use in finding your track.

Wrapping it up!

Hiking can be overwhelmingly amazing when you hike in the right locations at the right time with adequate preparations. We have mentioned a few of the popular hiking locations in the world for you to include in your to-do list. These locations were chosen based on their popularity among many hikers across the world. The types of hikes have also been highlighted to widen your choices so that you can choose the suitable ones for yourself.

Do you have any recommendations about the hiking location in the world? Please share with us in the comment section below. If you have any questions you can also leave them below and we will attend to them.

Alabama: Great Hiking Destination With Beautiful Hills And Trails

0

Alabama goes by many names, notably the Heart of Dixie, the start of the Appalachia, the 22nd state.  Though many do not often see Alabama as a land of some excellent camping locations, however going through this article you will discover some of the best camping in Alabama, and some true hidden gems outdoor activities.

Alabama has four national forests: Tuskegee National Forest near Auburn, Bankhead National Forest in the north, Talladega National Forest in the East, and Conecuh National Forest to the south.  There are 26 state parks and historic state parks sprinkled throughout the state.

There are hundreds of privately owned and government owned, established campgrounds with year-round availability.  Many areas of the national forests and some state parks allow wilderness camping, horseback riding, fishing and hunting.

Many of Alabama’s best camping spots boast of a prominent aquatic feature: a river, a lake, a pond, a bay or even the ocean.  The diversity of Alabama’s ecology is surprisingly varied- it’s not all thick daunting woods.

In this article, we will elucidate a number of different prime camping sites in Alabama.  The different camping sites are categorized by region, and vary in terms of camping type, whether you are looking for something more upscale and comfortable, or something more primitive and wild, there truly is a spot for everyone in Alabama.

North West Alabama

The top west part of the state is home to the Bankhead National Forest, home of the famous Alabama Sipsey Fork River.  This part of Alabama has some of the most remote areas for camping and exploring.  The forest land here is lushly thick with trees, poplar mostly, but is also cut with steep towering rocks, waterfalls, and gorges.

Sipsey Wilderness

This area of land spanning over 24,000 acres is the largest wilderness area in Alabama.  It has been dubbed the Land of 1000 Waterfalls, and for good reason.  Scattered throughout the forest along the Sipsey River, are a number of beautiful limestone and sandstone formations creating the perfect environment for waterfalls.

The number of waterfalls and cascades along the trails in the forest, change with the seasons and the rainfall, but you’re guaranteed to see some year-round. There is one parking lot for day use or to leave your car to go backpacking and camping, but that’s about it.

There are no established campsites, no bathrooms, no modern facilities, just nature.  A popular hike with a safe spot to camp at the end of the hike is the Bee Branch Trail, or official trail number 204.  The trail ends in the heart of Sipsey wilderness.

The hike begins along the river at the day use area parking lot.  It’s rated moderate to difficult due to its length and the at times unmarked trail.  You can start at the Sipsey Trail Head and follow the river, or start at the Thompson Trail Head which passes by some abandoned churches and ancient cemeteries.

You are legally allowed to camp anywhere within the Sipsey National Wilderness, no permit required.

Clear Creek Campsite

This campsite is located within the Bankhead National Forest alongside the serene Lewis Smith Lake.  This area is more suited for families and those wishing to experience the beauty of Alabama’s Appalachian wilderness, but not be so far removed from civilization.

This area has over 100 campsites, over 500 miles of lake shore, and two designated hiking and biking trails. As this campsite is located within the Bankhead National Forest, you can easily reach hundreds of miles of trails that web through the national forest, including Sipsey wilderness.

Lewis Smith Lake is a prime spot for year-round fishing, boat activities, and leisure.  The campgrounds operate April through October, but the day use area is open year-round.

Northern Alabama

Less wild than the northwest corner, the other northern parts of Alabama contain some interesting camping options as well.  You, of course, have the more traditional sites along rivers and lakes, but there are other options on farmland or private properties that have opened their home for the outdoor enthusiasts.

Honey Comb Campground

A recently renovated campground situated along Lake Guntersville on the Tennessee River.  The campground is located about an hour outside of Huntsville.  It’s a quick and easy getaway to relax along the river, with beautiful wooded trails and quiet walks on the lake shores.

You can camp in a tent or an RV, the grounds accommodate for both types of camping. This campground has a little something for everyone.  You can rent a pontoon boat, and you can rent an RV, something that not many campgrounds have to offer.

Fishing, swimming, kayaking, bike riding, and boating are just a few of the more popular activities at Honey Comb. You can use the day use area or camp any day of the year.  The only thing that changes are the hours of operation of the general store, which is open later during the summer.

Tune Farm’s Whistle Stop Camp

This stop is a true hidden gem, it’s one of the more off the beaten path camping spots in Alabama.  The Whistle Stop Camp, so named for its location along an old railroad stop, is an interesting experience in between Huntsville and Birmingham.  It is catered more for the road weary travelers, or those of the more weekend warrior persuasion.

You may even go so far as to call this one ‘glamping’ or glamorous camping. The 260 acre land was first purchased by Dr. Tune, a successful surgeon, in 1968.  He raised cattle and grew various crops.  His decedents kept the farm alive by eventually switching to sustainable farming practices and became Alabama’s first certified organic farm in the 1990’s.

Today, the Tune family, had opened their doors to camping enthusiasts.  They offer nearly 200 acres of space to pitch a tent and camp, as well as offering a cozy room in their renovated barn or farmhouse, complete with private bathrooms and small kitchens.

Central Alabama

Talladega National Forest is the largest nationally protected land in Alabama.  There are also a number of beautiful wilderness areas surrounding popular cities in central Alabama such as Birmingham and Montgomery.

Talladega has a more varied topography with a more mountainous terrain, and is the southernmost start of Southern Appalachian ecology.  The famed Appalachian Trail runs through this ecology, but the trail officially starts in Alabama’s neighboring state Georgia.

Oak Mountain State Park

Oak Mountain is Alabama’s largest state park and a popular camping destination.  Hiking and mountain biking trails abound.  Many of the trails permit horseback riding as well. Peavine Falls, a 65-foot waterfall located within the park, is accessible by a well-maintained hiking trail.

The fall feeds into a decent sized swimming pool with refreshingly crisp spring water.  Swimming is allowed and encouraged. Horseback riding is also very popular within the 25 miles of trails in the park.  If you can’t bring your own steed, you can sign up for a guided trail ride with the Rusted Roof Barn.

Children ages 10 and up can ride as well.  No horseback riding experience is necessary to ride in the park with the trail guides. Oak Mountain State Park offers its campers a private beach to relax on.  There is another beach open to the public as well for day use, but they have reserved one solely for their camping patrons.

Camping options in the park range from back country wilderness camping to posh, waterfront cabins.  There are also equestrian campsites with amenities for the horses as well as humans, RV hookups, and tent pads.  There is an admission fee to the park and camping fees vary.  The park and campsites are open year-round.

Prairie Creek Campground

Nestled in a fork in the Alabama River lies this tiny piece of public land, a haven for the fishing enthusiast.  It’s a quick getaway from Montgomery, under 30 minutes, and has 55 campsites along the banks of the river.  It’s a quiet spot not too far from the city, with peaceful views of the river and surrounding woodlands.

It definitely isn’t for the extreme backpacking enthusiast, but it does make a very nice, quick little get away for those living in nearby Montgomery or Selma.

Eastern Alabama

As you approach Alabama’s borders, Georgia to the east and Florida to the south, the wilderness areas begin to thin.  However, there are still some remaining smaller National Park Service areas that remain available for camping and recreation, such as the Tuskegee National Forest, the smallest of the four national forests in Alabama.

Chewacla State Park

Located not too far from Auburn and one of the largest universities in the southern United States, Auburn University, lies the near 700 acres of Chewacla State Park. It’s a swimming enthusiast’s dream destination with a huge 26-acre spring-fed lake, surrounded by lush green foliage.

There’s a web of hiking and biking trails that you could spend days upon days exploring. In addition to well-groomed campsites for tents and RVs, the now disbanded Civilian Conservation Corps built six rustic stone cottages in the 1930’s that are available for rent in the park as well.

You definitely wouldn’t be roughing it in these cottages, as they now each have a TV, air conditioning, heater, and modernized flooring, bathroom and kitchen.

Southern Alabama

A small portion of the state lies along a beautiful coastline.  There are a number of smaller barrier islands along the border of the state that host some really beautiful campgrounds.  Alabama’s beaches are a very popular tourist destination, however, so there isn’t much land that’s been left untouched.

If you are more interested in the wilderness aspect of camping, beach camping in Alabama may seem a bit too crowded for you.  However, if you are seeking a more family friendly camping experience, the beaches may be perfect.

Beach camping isn’t the only place to set up a tent at the south end of the state.  There’s access to the Conecuh National Forest, which lies right along the border of Alabama and Florida.  It’s a change of pace from its more northern national forest counterparts, as this park is of more coastal ecology and less densely forested.

Dauphin Island

If beach camping is more what you’re looking for, head south and drive across the Mobile Bay to Dauphin Island.  It’s a small place, only about 1,000 full time residents, but the island has so much to offer.

Besides a beautiful beach side campground with stunning views of the Gulf of Mexico, there’s an aquarium, bird sanctuaries, rich Native American history, historic Civil War Fort Gaines, and a hefty tourism scene- restaurants, condos, hotels, and many family friendly activities.

The lower right side of the tiny, 166 square mile island hosts a decent sized campground, the Fort Gaines Campground.  There is access to secluded beaches, boat launches, bike paths, and bird sanctuaries.

You can also rent water sport equipment, such as kayaks or stand up paddle boards, or simply enjoy the salty breeze rolling off the Gulf of Mexico while relaxing on the beach.

The only thing to keep in mind about travelling and camping on Dauphin Island is tropical storms.  If you are tent camping, check the forecast before you go to ensure you won’t be trapped in bad weather on the tiny island.

Gulf Shores

Gulf State Park is another premier beach camping spot in Alabama.  The state park encompasses miles of striking white sand set against the deep blue waters of the Gulf of Mexico.  There are a number of sites for more primitive tent camping, but there are also cabins and cozy cottages for rent along the shoreline.

The Gulf Shores campground is minutes away from the airport, and is a short drive away from the Alabama Gulf Coast Zoo- a must see for the family.  The range of activities varies drastically from beach volleyball to biking, sun bathing to boating.

Open Pond

The Open Pond Recreation Area, located within Conecuh National Forest, is a well-maintained campsite in southern Alabama.  The area is an ideal spot for game hunting and fishing, as well as hiking and exploring the great outdoors.

There are over 70 tent camping sites and 60 RV sites, all available year round.  Hiking enthusiasts can enjoy a full day spent along the 20 mile Conecuh Recreation Trail that circles the lake, meanders through beautiful pines, all the while not changing too much in elevation.

It’s a quiet, often overlooked spot, and makes a great camping destination for those seeking more wilderness and seclusion.

Things to Look Out For

As always, before heading out into any wilderness or outdoor adventure, be aware and be safe!  Be prepared by always carrying a first aid kit, a light source, and plenty of water.  Alabama can get very hot and humid in the summer, and the southern parts of the state can receive heavy rains and strong winds from tropical storms coming in along the Gulf of Mexico.

The wilderness is home to some potentially dangerous animals such as feral hogs, bears, and venomous snakes.  Read up on the ecology and fauna before heading out just so you know what to expect.  Often times with any animal encounter, as long as you don’t act as a threat and don’t provoke them, they will leave you alone.

A final thing to be aware of is the annual Hangout Fest in Gulf Shores.  If you are planning on camping along one of Alabama’s many premier coastal campsites, you may want to avoid the weekend of the Hangout Fest, usually in May.

It’s a music festival with a variety of genres that attracts tens of thousands of visitors to the small Gulf Coast.  The area can quickly fill up and be very crowded.

Why We Camp

So why do we camp?  Why do we spend our hard earned money to leave the comforts and amenities of our home and hang out in the elements?  We do it for the love of the outdoors, our deep appreciation of nature.  We are so lucky in the United States with literally millions of acres of protected forest land and wilderness.

There are seemingly endless opportunities to camp in the United States, and Alabama should not go unnoticed for its magnificent expanses of wilderness. Stephen Maher, the first director of the National Park Services in the 1920’s, has famously been quoted for the reason behind operating the National Park system and why protecting natural land is so important.

You can’t over emphasize the importance of having a date with nature, away from the stress of daily life: “A visit inspires love of country; begets contentment; engenders pride of possession; contains the antidote for national restlessness.”


Simple Techniques On How To Keep Your Food Warm During Hiking: You Need to Avoid Cold Foods

0

Food is an essential part of keeping your energy up during hiking or camping expeditions into the great outdoors. It becomes especially important to consume enough food when you are out in icy cold conditions as your body will burn extra energy trying to keep your body temperature warm. Your body temperature has very little room for fluctuation to maintain safe levels so your body will automatically allocate a lot of your calories to this crucial function. As such, knowing how to keep food warm during hiking is an absolute must for anyone planning on going exploring in sub-zero temperatures.

Eating enough food will not only help to keep you safe, but a hot meal can also be very satisfying when you’re surrounded by sleet. Now, whether it’s eggs frozen solid or wilted vegetables, food left to take care of itself in cold conditions will simply become inedible. This happens because most food contains some water content which quickly turns to ice when you venture below 0 degrees Celsius. As the water within your food freezes it hardens the overall food item into a rock-like substance.

Anyone who’s been hiking or camping in the great outdoors during cold winters, will know that this can be a real problem. So if you’re planning a hiking trip in sub-zero temperatures then you’re going to need to learn how to unfreeze your food to cook/eat it and also how to keep it warm/unfrozen until you’re finished consuming it.

There are a few different solutions to the age old problem of heating up frozen food, namely traditional fire pit cooking and also the more recent inventions of hot tenting and stove top cooking. We’ll go over the best in-snow practices for all of these methods and also show you how to enjoy your food whatever the temperature is outside.

Other than actually heating up the food in the first place, we’ll also cover how to keep your first day’s food warm so that it doesn’t require reheating, and also how to keep your food warm on the trail once you’ve cooked it. But before we get started on the nitty gritty how-to instructions, here’s a list of the best foods to take with you if you’re going on a winter hiking trip.

Best Foods to Take with You On Cold Weather Trips

Some foods on this list have been specially packaged by their manufacturers for easy transportation and cooking in cold hiking conditions. Other ones have merely got a lower water content than regular food or come highly recommended by experienced cold whether hikers.

Here they are:

  • Fruitcake
  • Baked bannock (this is less likely to freeze than bread)
  • Shortbread
  • Cheese (pre-sliced and separated by cooking paper to avoid solidification)
  • Dried meat (pre-sliced and separated as per cheese above)
  • Bacon
  • Stew
  • Shepherd’s pie
  • Chicken Fajitas
  • Beef tacos
  • Dehydrated food packets

In general, we’d recommend doing as much preparation as you can BEFORE heading out. There are several reasons for this. Firstly, slicing food while it’s at room temperature will be a lot easier than trying to cut it up while it’s super cold and hard and secondly, pre-cooking food reduces the amount of water content in your food (as this is released in steam while cooking) which will make it likely to freeze more slowly.

As an alternative to making food yourself before heading off you can visit your local camping/hiking outdoor shop. These stores will usually stock a few pre-prepared food options – often times dehydrated. The easiest day to pack for will be your first day as this food doesn’t even need to be reheated or cooked while you’re on the trail – provided that you store it properly.

How to Keep Your First Day’s Food Warm

There are lots of methods for reheating food, but ideally during your first day of hiking you won’t need to. Our recommended approach for preparing your first day’s food requires:

  1. Hot liquid thermos
  2. Insulated bag
  3. Wax paper

Once you have the above winter hiking essentials for your day’s lunch box composition, you can get started. The best thing to do is to fill your thermos with hot water, or premade tea, soup or hot chocolate. Make sure your thermos is of a good quality that is made to handle sub-zero temperatures.

Once you’ve made your thermos place it inside your insulated bag. Once again, be sure to go higher quality with your insulated bag to ensure it will be able to stand up to the harsh conditions. Having a double layer of insulation around your hot liquid (first the thermos, then the bag) will help to ensure that your tea, soup or hot chocolate is steaming hot for you when you want it.

There should be enough room left in your insulated bag for you to place homemade snacks like sandwiches and sliced meat and cheese into the bag as well. We recommend separating your snacks with wax cooking paper to ensure that they don’t stick together by the end of the day.

This approach will generally ensure at least your first day’s lunch is warm and ready for you without any fuss. But what about dinner that night? Or food every other day if you’re going on a multi-day trek? Well, we’ve narrowed down the best two ways to reheat food when you’re out hiking, the first is traditional campfire cooking which we’ll get into now.

How to Reheat Food Using a Campfire

I know what you’re thinking – cooking food over a campfire is easy. Well, let me tell you, even though we’ve been doing it since forever, it is a lot harder to cook food using a campfire in the snow. It doesn’t have to be an insurmountable challenge, though; you merely need to know HOW to do it. And that’s what we’ll get into now.

Take these steps next time you are using fire to warm up your food in the snow:

  1. If you do choose to use a campfire to heat your food, then your first port of call is finding a sheltered area where any wind or snow won’t drown out your fire. Often this place can be found under canopies. Fortunately, you are able to make your campfire close to trees in the snow as they’re not likely to catch fire by accident.
  2. Now that you have your camping spot you should dig a depression in the snow – preferably all the way through to the underlying ground or stone. A depression will not only mean your fire isn’t built on melting snow, but will also mean it is shaded from any wind that does happen to get into your area.
  3. The third step is placing your kindling into the depression. A layer of green sticks at the bottom is a good idea as this will help to prevent your fire from sinking down into the cold base below it.
  4. Place your fire kindling on top and get the fire started!
  5. Once your campfire is going you can chuck your pan over it and get that frozen curry, chickpea soup or stew cooking.

EXPERT TIP: Eat quickly! It’s a lot easier to clean your pot while it’s still warm than when the food has refrozed and solidified on it. Plus, staying still too long while cooking your phone may not be comfortable for your body, so down that food as fast as you can when you need to.

Cooking over a campfire may be the most traditional approach to warming up your food in the snow, but it’s also one of the most difficult. We’d recommend either hot tenting. Or stove top cooking as described below.

How to Warm Up Food Using a Camping Stove

The instructions for cooking using a camping stove are pretty short. These devices are made to be used in cold conditions, where making a campfire would be difficult.

That being said, there are a few things that will make using a camping stove to heat up your food in sub-zero temperatures a lot easier. These are:

  • Placing an insulated pad beneath the stove to stop the snow from melting underneath it (thus stopped the stove from becoming unbalanced while you cook).
  • Making good use of the stove’s heat reflector and windscreen in order to keep its flame alive.
  • Holding the fuel canister inside your clothing – preferably under your armpit – for a few minutes before wanting to use it to ensure it works well.

You’ll find it’s similar to cooking in regular temperate conditions. Just remember to heat up that fuel canister with some body warmth awhile before you actually want to start cooking! The instructions for cooking using a camping stove are pretty short. These devices are made to be used in cold conditions, where making a campfire would be difficult.

EXPERT TIP: Some alcohol stoves come with snow specific fuel pre-warmers. These are a lot easier to light in frigid temperatures and will help to ensure you don’t spend too much time in one spot waiting to get your camp stove going.

The last method remaining is probably the most comfortable, if the most expensive. Let’s take a look at hot tenting.

How to Use Hot Tenting to Get Hot Food

We’ll start by being clear about one thing: in order to do this, you will need a canvas prospector’s tent. These tents won’t catch on fire easily or let all the heat escape from them, but they do come at an extra price. Most of these tents come with a wood stove to heat food with on their inside’s. There is really no toastier and a more comfortable way to spend your winter evenings outdoors!

Hot tenting is best done when you’re planning on staying in a spot for more than one night and don’t need to hike too far on either side of it as carrying everything can get quite heavy. It’s certainly cozy, though, and we assure you sitting inside with your stove roaring and a pot simmering at 25 degrees while it’s freezing outside will feel amazing.

EXPERT TIP: Hot tenting may seem less ‘extreme’ than going it cold, but honestly, who are you trying to prove something to? Hot tenting is much safer than going ‘cold camping’ and can make for a very comfortable and even romantic trip out into the wild.

This is our favorite option but it really depends on whether the major part of your trip is hiking or staying put. If it’s hiking, then you’re probably more interested in learning how to keep food warm while you’re on the go. So let’s take a look at that.

How to Keep Your Food Warm While You’re On the Go

After you’ve cooked your food chances are you’ll want to get going again as soon as possible. It can get very cold stopping for any period of time while hiking in the snow, so as soon as your food is cooked we’re recommending getting back on your feet. This means that you’ll need to find a way to keep your food from freezing as you walk and eat it.

The easiest way to keep your food warm on the go is to get yourself an insulated pouch. You can then place your newly cooked food into the pouch and eat straight from that as you walk. This works especially well, for rehydrated and freeze-dried meals.

Whatever you do, please make sure that your spoon is heated up before using it. Getting your tongue stuck to metal cutlery is a real problem in the snow! To avoid this horrible dilemma just put your spoon under your clothing next to your body for a few minutes before using it. This should help to lift its temperature above frigid.

If you’re in super cold temperatures, then you’ll definitely want to close the lid on your insulated pouch of food in between bites to keep it from freezing. At the end of the day the faster you eat, the easier it will be when you’re consuming food in snowy conditions.

EXPERT TIP: There are certain foods that are better than others to eat on the go as they actually help to keep you warm (scientifically proven). These include pemmican, sardines and spicy foods.

Never Go Hungry in The Snow Again

When you’re hiking in cold conditions your body burns more calories than normal in order to keep its body temperature inside safe levels. This is a matter of serious safety and means that you need to know exactly how to make food when you’re out and about in the winter wilds.

Hopefully this article has clarified the best ways for you to both heat food and to keep it warm as you hike along. Remember that food isn’t the only thing you need to think about giving your body. Despite being surrounded by snow dehydration is a real problem for winter hikers, so ensure you learn how to stay hydrated in the snow as well.

Once you’ve got your food and water needs sorted you’re about ready to set off on your winter expedition! We wish you all the best with it and would love to hear about any prior winter hiking experiences you’ve had below.

How To Get Rid Of Mosquitoes: Tips On How To Avoid Mosquitoes When Backpacking

0

Mosquitoes can be a nuisance if you happen to encounter them during your backpacking or camping trip. They cause itching and due to  their irritating bites, you can have a lack of sleep. No matter how you had planned your trip, it can end up being ruined by those small yet irritating creatures.

So, how to prevent that? Using mosquito repellent will help if there aren’t too many of them around, but if you happen to find yourself near water, where there are swarms of them, the repellent won’t help much.

So, how far away from water do you have to be safe? How far do mosquitos travel? Keep on reading to get all the answers. But first, a few facts about those pesky little insects.

Facts about Mosquitoes

Mosquitoes depend on plant juices and nectar for nourishment and survival; they suck blood to provide protein for their eggs. This explains why only female mosquitoes are involved in blood sucking. Surprisingly enough, there are very few creatures in the world that do not harbor an abhorrence for these creatures. Their first choice source of blood is not from humans, but cattle, birds, and horses.

Therefore, they can be pretty dangerous for us because they carry some of the humanities deadliest diseases including malaria. It gets worse with the fact that they have an annoyingly strong ability to sense danger. If you want to kill them, they can feel your murderous intentions and take a flight within milliseconds.

There is a wide range of mosquitoes, with millions available in over 3000 species worldwide. The best thing is that not all of these are known for biting. Only three female species are known to cause trouble for humans. These three species have the ability to transmit diseases. They are:

  • Anopheles– it causes malaria, elephantiasis, and encephalitis.
  • Aedes Mosquitoes– they carry yellow fever, dengue, and encephalitis.
  • Curex Mosquitoes– these are known for carrying encephalitis, filariasis, and West Nile Fever.

These three types have a mouth structure that allows them to bite and suck blood.

Furthermore, mosquitos have the ability to sense dinner when they are 50 meters away. They can travel up to 40 miles away looking for a meal. People who have high cholesterol levels and steroids in their blood stream, have a tendency to attract mosquitoes. Younger people and those who have blood type 0 are the most vulnerable to mosquito attacks.

Other factors that tend to attract mosquitoes include sweating and panting. These two act like a mosquito magnet and, therefore, you are exposed if exercising heavily in an area known to have mosquitoes.Mosquitoes hide in shelters, bushes, and farms, during the day, and become active only at dawn and dusk. Therefore, these are the time periods when you have to avoid them because a 2 hour encounter  with a swarm of these blood sucking little creatures, is enough to make you lose about 50% of your blood!

Many people believe that mosquitoes die after their first bite like bees. But remember their bites are not for protecting the mission, but a feeding spree. If they died after their first bite, then would have no use biting in the first place. The only time a mosquito dies when biting, is if you squash her after her first attempt.

Also, they have little brains, but surprisingly enough, they have outwitted human beings for centuries. As much as they are a bother, they are preyed by lizards, bats, birds, spiders, and fish among other small creatures. Despite having a list of enemies, their population is too high to wipe out from the face of the earth. One female mosquito hatches up to a hundred eggs in one batch and after only one mating.

Places Most Prone to Mosquitoes

The largest population of mosquitoes can be found in Tropical regions, where you can find the widest varieties of mosquito species. The largest numbers can be found when the climatic conditions are warm and humid. During cold times, they go into hibernation. But, there are places where they are present throughout the calendar. Mosquitoes breed in wet areas and especially in stagnant water.

To avoid them, you need to keep off all wetlands, marshy areas, swamps, creeks, and rivers. They can also breed in a puddle as small as a bird bath or run-off ditch. Some mosquitoes require fresh water, when others reproduce in salty waters. Whatever the case, avoid any place with stagnant water. Fish ponds are nevertheless safe since the fish will feast on the larva.

Mosquitoes are attracted to animal smells. You should, therefore, be careful when visiting the zoo. You can either use the traditional mosquito repellent, or the modern sunscreen that is incorporated with a repellant. Since you cannot keep off your pet, make sure you regularly check your dog’s kennel and spray it often. This will keep you both safe from these irritating creatures. Another place to avoid, is a big crowd, since they are associated with carbon dioxide that is exhaled and sweat. However, it is uncommon for mosquitoes, to show up during the day.

Another important thing to know is that fruit and flower scents are strong mosquito magnets. If you have to put on colon when backpacking, it should smell different from those two. Or, you can avoid wearing any at all for your safety. Some plants, such as marigold, repel mosquitoes.

In case you have a kitchen garden with flowers, consider planting a few of these. They also tend to be attracted to dark colors. When buying your hiking gear and especially sleeping bags, consider buying luminescent materials. Knowing the things that can attract mosquitoes towards you is crucial in helping you keep them at bay.

Mosquito Range

The species determine Mosquito range. However, the most common distribution is between 1-3 miles. Other varieties spread to as far as 7 miles.

A hungry female mosquito will fly up to 50 miles, looking for an animal or human to feed on.

Means of Dispersal

New mosquito species can be introduced to areas where they aren’t indigenous, through various ways, including:

  • During transportation of cut flowers.
  • Delivery trucks, personal vehicles, and even aircraft.
  • Eggs and larvae inhibit water filled tires.

How to Deal with Mosquitoes

There are two ways you can handle mosquito bites, either by preventing it or treating a bite.

Avoiding the Bites

There is nothing that can disturb your backpacking trip on a summer afternoon more than a mosquito bite. This, however, doesn’t mean you should cancel your plans. All you have to do is not to expose yourself to these irritating insects.

To avoid an encounter with mosquitoes when backpacking:

  • Ensure that you have covered your hands and legs using light clothing.
  • Do not wear shorts when hiking in a mosquito infested area.
  • Get into the habit of hiking during morning hours and midday when these insects are less active.
  • Mosquitoes rarely like being in the hot sun. When hiking, you can keep your route in the opening and avoid going under shades as much as you can.
  • While sleeping, avoid using dark-colored sleeping bags or sleeping clothes, primarily black and blue. Mosquitoes are known to be attracted to these colors.
  • You can use anti-repellant lotions to keep them off.
  • Petroleum jelly is known to repel mosquitoes. Apply it to every part of your uncovered skin when going to sleep.
  • Since mosquitoes are attracted to lactic acid, which is found in sweat, make sure you always take a shower before going to bed.
  • Citronella plants are good at repelling mosquitoes. In case you are hiking in a place where they grow, cut a twig and put it near your sleeping bag and you will enjoy a quiet night.

Dealing with the Bites

Avoiding mosquito bites when you are outdoors is not 100 percent possible. There are still chances that you will encounter them and especially at night.

You can mitigate the bites by doing one of the following:

  • Place ice cubes on the spot where the mosquito bit you, and avoid itching as much as you can. Sometimes the bite is made worse by the constant itching, which can at times lead to infection. Funny enough, other animals also experience the itching after a mosquito bite, it’s only that they do not complain much as humans do.
  • Use antihistamine products to lessen the bumps and the itching after a mosquito bite. You should use these products before going to sleep since they are known to cause drowsiness.
  • The calamine lotion is also a good solution for treating mosquito bites.
  • Always make sure you keep the bites as clean as possible by washing them with anti-bacterial soap. By doing so, you reduce the chances of infection. Rubbing the spot using bar soap also lessens the urge to itch.

Getting Rid of Mosquitoes

Mosquitoes are hard insects to get rid of. In addition to their thousands of species, their breeding rate is also very high. Weather changes don’t affect their breeding patterns. During the winter, they seem to disappear, but in the real sense, they are usually in the larvae stage. By the time summer comes, they are already mature and flying all over, causing a nuisance.

Even if you cannot get rid of mosquitoes, you can try to control their number and minimize the chances of these insects ruining your camping trip. There are people who seem to attract mosquitoes more than others. This attraction is caused by the smell of your sweat, which in most cases, is affected by what you have eaten.

For instance, if you eat a banana and another person eats garlic, mosquitoes will be more attracted to you than the latter, this is because garlic acts as a repellant. Since you cannot avoid bananas or eat too much garlic while hiking, why don’t you try to make your own mosquito trap?

Requirements

  • 2 cups of water
  • A knife
  • Pinch of yeast
  • An empty two little soda bottle
  • Four tablespoons brown sugar
  • Black construction paper

Instructions

  • Cut the soda bottle into two halves, where it starts to curve and keep the upper side as you will require it.
  • Place one cup of water on a stop, and bring it to nearly boiling before adding the four tablespoons of sugar and dissolving it completely. Then add the remaining cup of water to cool down the mixture. Once you are confident the mixture is cool enough, add a pinch of yeast. Doing this, makes the mixture produce carbon dioxide, which mimics the exhaled human breath. Then pour the mixture on the lower part of the cut soda bottle.
  • Take the upper part of the bottle, which you cut, and place it inverted on the top of the bottom part holding the mixture. Press it down so that it completely seals that bottom part. Make sure it doesn’t touch the mixture base, but it needs to be close enough. The design allows mosquitoes to fall into the liquid once they fly into the trap.
  • You need to disguise your trap to help catch unsuspecting mosquitoes. You can do this by wrapping the trap, using a black construction paper. Place the trap in any near water body; you can place it near your camping site before going to bed. The smell will lure the mosquitoes into the trap, leaving you to sleep in peace.

The trap is easy to make and highly versatile so that you can carry it every time you go hiking. You can also extend its use for your home. The best thing about this trap is that it is durable and can, therefore, be utilized for a long time.

The only thing you need to do is change the liquid, at least once a week. Doing this minimizes the chances of mosquitoes breeding in the liquid.

Plants You Can Use to Keep Off Mosquitoes

There is nothing that can ruin your backpacking trip like a swarm of mosquitoes. They can deny you peace, both during the day and at night. Luckily for you, there a number of plants that are known to repel these irritating pests. You can use these plants either on your patio, gazebos or carry them with you while on a hiking trip.

  • Citronella– it has a sweet lemony smell and is commonly known for repelling mosquitoes. It’s strong enough so that it is referred to as the mosquito plant. Several mosquito repellant products include this plant as an ingredient. The best thing about it is that it doesn’t require lighting or spraying. It repels these insects while in its normal status.
  • Ageratum- the plant produces white or blue flowers which have Coumarin. Mosquitoes are known to fear these flowers more than anything else. The plant is up to 4-6 feet tall. It can, therefore, make a good part of your hedge near the patio. With it around, you are assured that mosquitoes will keep a distance from your home.
  • Marigolds– these plants are annual plants and are easy to grow. They are strong mosquito repellents and for this reason, they are incorporated in making mosquito repellant products. You can grow them in containers, patio or on a porch. They also come in different colors including blue, yellow, red, orange, and gold. Some are available in multicolor. In addition to spurning mosquitoes, marigolds are also very powerful in keeping off other insects away from your home.
  • Catnip– this plant is stronger than DEET, so have studies shown. It has heart shaped leaves and produces lilac, white, pink, or blue flowers. By planting this plant, you will kill two birds with one stone; keep off mosquitoes and make your cat love you more.
  • Horsemint plant– it has purple flowers and works just like a citronella plant. It has a lemony smell, which makes it add a sweet smell to your flower garden, in addition to repelling mosquitoes.

While going for hiking expeditions, you should consider picking the leaves or flowers of these plants to bring them with you. Crushing the parts will keep off the mosquitoes as much as carrying conventional repellents. You can also try applying the juice of these plants to prevent bites.

Ageratum plant

However, you need to try on a small part of the skin to see whether there will be a reaction.

Homemade Mosquito Repellant

Summer is way too beautiful to spend the day indoors, however, you do not want to be feasted on by the mosquitoes either. Even though there are a number of repellents that you can purchase, you can also make some, using ingredients readily available in your house.

Ingredients

  • Citronella Oil/ Eucalyptus oil
  • Hazel/ vodka
  • Apple cider vinegar
  • Lemon balm oil

Mix a third of a cup of apple cider vinegar, a third of a cup of witch hazel, and five drops of citronella oil. In case you do not have citronella oil, you can use eucalyptus oil, and you can also replace hazel witch with vodka. Mix the ingredients thoroughly in a spray bottle, and you are ready to go. You can carry the mixture even when going for hiking in a far place.

You can also use aloe Vera gel, sweet almond oil, clove, thyme, lemon eucalyptus, rosemary and peppermint. Mix the ingredients thoroughly. However, since essential oils are known to cause skin irritation, make sure you dilute using neutral carrier oils such as sweet almond oil. You can also use Neem oils as a repellant. Due to its unpleasant smell, consider using it during the day when you are busy hiking not at night.

Wrapping it up

Despite their small size, mosquitoes can be a nuisance and make your outdoor experience a nasty one. The worst thing is, that in addition to their irritating bites, they also spread life threatening diseases.

The only way to keep yourself safe is by using repellents and making sure you drain all water near your campsite. However, when going for hiking expeditions, covering your skin and using repellants might be your only option.

You can also do a survey on the area you are going camping. By doing this, you have a clue on the mosquito population of the area you are going to. This way you will be able to apply the right measures of protecting yourself.

Hiking 101 For Outdoor Adventurers: Your Travel Guide To Help You Enjoy Nature

0

Hiking is a strenuous exercise that is equally breathtakingly rewarding since you get to explore scenery and spectacular wilderness views as well as lose weight if you’re overweight. The nature has blessed us with plenty of hiking destinations some of which have been frequented by enthusiasts, while others are less frequented perhaps due to intolerable weather conditions or slippery terrains.

This, therefore, calls for an informed hiker who can carefully choose the best hikes in the world with all factors in mind. Don’t worry if you are a newbie to this exciting and adventurous outdoor activity because we’ve got you covered in this guide below.

To start with, it can be mentally exhausting for the inexperienced in hiking to choose the best hikes. As thus, we will start by discussing the types of hiking as well as the tips on how to find the best locations that are best for you. There can be plenty of locations but not all are the best locations for you. For example, you might find out that a certain country has exotic and breathtaking scenery that is great for alpine hiking but then country’s safety is not on par. You wouldn’t like to hike in a destination that jeopardizes your safety no matter how amazing it is.

How to find out which hikes and locations are best for you

It’s of paramount importance to first know that which types of hikes and locations are best for you. Let’s first give you an overview of the types of hikes that you can look up to.

Snowshoeing (winter hiking)

With this type of hiking, you get to hike in the snow during winter times in the wilderness. You should visit the places that are frequented by this nature’s ice. However, you have to be well-prepared to buy sufficient winter clothing such as snow boots, jackets and clothes that are well-insulated. Moreover, your snow shoes should have a better traction to prevent slippery when you hike in the snow.

Snow gives you an opportunity to explore many off-trail routes because it covers almost all the obstacles such as rocks and thorn trees so you can traverse freely. But you still have to be cautious of your safety. As long as you are fully prepared with your hiking gear dedicated for snow hiking, you can then proceed.

Day Hiking

Day hiking can be a great experience even for newbies in hiking. You can spot your desired destination and, depending on the number of days to hike, bring a camping tent at night and other needed accessories to make your trip enjoyable. With day hiking, you can explore as many interesting landmarks as possible and also take photographs using advanced cameras such as the GoPro camera models.

You also have to be fully prepared for the fluctuations of wilderness temperatures when hiking to avoid temperature-associated deficiencies such hypothermia and hyperthermia. Make sure that you take versatile clothes or take extra clothes, but avoid backpacks especially if you have opted for alpine or subalpine climbing. Temperatures can be adverse if not well anticipated. What we mean is that, take heavy and light clothes and shoes so that you can be prepared for the inclement or hot weather conditions.

The camping tents and other ancillary tools are also indispensable for day hiking. If, for instance, you plan to explore nature for more than a week or months, you need to pitch a mobile at night to rest before you resume your adventurous activity the next morning. This means your backpack should be spacious enough to store food and your changing clothes, to mention a few needed items.

Overnight hiking

Some aspirant hikers may regard this type of hiking as a blessing because it negates the use of a camping tent at night. You can hike through the night, but then it is equally demanding. It’s demanding due to the infamously harsh temperatures in the wilderness predominantly in the night. That said, you need enough insulation to undertake overnight hiking.

Furthermore, you need enough lighting to see your trails. A headlamp or a torch can be your best friends in overnight hiking. But if there’s a full moon, then your problems are solved because no headlamp may be necessary unless you are desired path is going to be in the forest amid large shadowed trees.

Furthermore, be mindful of your security in overnight hiking unless you are in a group because dangerous animals can be bad news for your adventure in the night. They often go hunting at night. That’s one of the setbacks of overnight exploration of nature.

Backcountry hiking

This is more about the locations that you want to hike at. You might come across well-groomed or off-trail paths and you need to be prepared for all of them. The solution is the quality, functional and durable hiking boots and convertible hiking pants.

All other tools such as the ultralight tent and other accessories are still must-haves for backcountry hiking.

Weight loss hiking

Hiking has been found to be a weight loss intensive exercise wherein hikers can potentially lose thousands of calories depending on the number of days and the types of terrains you traverse on. Alpine hiking, in particular, can be very effective in burning fats from our body. After a few days of hiking, you might have lost massive calories to keep your body in shape.

Hiking for weight loss can be done alternatively for repeated short trips whereby you eliminate the need to camp in the wilderness. You can spot the nearest mountains in your locations and climb it in a bid to lose weight.

All that you need are light clothes and sport shoes or hiking boots because off-trails can be treacherous for lighter sport-shoes. Also versatile clothing is important because weather conditions may fluctuate.

Romantic hiking

It’s self-explanatory that two people can engage in this type of hiking. The couple can find the best location with exotic landmarks to explore. You can accomplish this in daylight or overnight. But it would be preferable if you do it in a daylight, so that you can take beautiful photographs to reminisce the moments later on to spark the romance.

Now that we have gone through the types of hiking that you can opt for, let’s now bring you the best locations that can be amazing to you.

Hiking locations that are best for you

We have included a few locations across the world that have been frequented by seasonal hikers. We believe that they can be the best locations for you. Our advice is that, you must prioritize your security and your health when choosing a specific location to travel on.

  • Security: This can be minimized if you travel in groups. A solo hiker may be susceptible to security concerns. For example, isolated forests can be too dangerous more especially those without well-groomed trails. As thus, we encourage you to consider only the safest locations that are most traversed by other hikers. You should go to your library or local bookstore or search google to search the backgrounds of your targeted location before you embark on it.
  • Your health: Knowing your health status before hiking is of paramount importance too, because a deteriorating health cannot withstand high altitudes. Moreover, a deteriorating health may not be able to carry a hiking gear for long distances or survive the fluctuating harsh temperatures. That being mentioned, if you are unsure about your health, choose the simple locations, perhaps a few miles from your home.
  • The distance to travel: For each hiking location, especially the renowned locations, there are approximated miles. Inexperienced hikers, for example, may find it exhausting to travel for long miles. The same applies with unfit hikers, they may find it challenging to climb high mountains for long distances.

Tour Du Mont Blanc

Location: France, Switzerland and Italy

Length: 104 miles

Best time: Summer

Tour Du Mont Blanc is such a great choice if you want the longest hiking experience. It extends to three countries, France, Switzerland and Italy. You can take about 2 weeks in this long-distance hiking adventure while coming across beautiful and exotic glaciers, great valleys. You will also get a chance to capture a beautiful 15 781 ft mountain on your travel.

As you travel on this hiking path, you will be stopping villages to grab something to eat or find accommodation in their guest houses as you rest before the next morning. Alternatively, you can bring a tent, well if that’s relatively cheaper than hiring in guest houses. The trip exposes to varying cultural food between these three countries. If you are quick enough, you can complete this hiking journey in less than 2 weeks including climbing the Mont Blanc.

Laugavegurinn/Fimmvorduhals Pass

Location: Iceland

Length: 50 miles

Best time: Summer, preferably between June and September

This 50-mile trail is also a great choice for you to explore stunningly and breathtakingly beautiful views and waterfalls as well as mind-blowing glaciers. As you proceed with your journey, you might descend into Thorsmork valley. It can take you up to 4 days traveling on this trail wherein you can start from the Landmannalaugar hut in the north and then end in the Thorsmork park in the south. A 200 ft high Skogafoss waterfall is also worth exploring.

As you hike on this trail you will come across volcanic landscapes and volcanic rocks as well as spectacular Rhyolite peaks colored in copper. There are huts for you to rest during your travel, but you need to book beforehand as this is a popular hiking trail and those huts might be full. But to err on the side of caution, you can bring your ultralight tent.

Mount Everest Base Camp Trek

Location: Nepal

Length: 40 miles

Best time: Spring (March to May) and Summer (September to November)

Ready to explore the highest mountain in the world? Then the trek to the Everest Base Camp is a must-have for you. The area is known for its great scenery and incredible guest houses along your way. This negates the need for camping tents unless if you find the guesthouses expensive compared to your self-catering tents.

It can take you about 2 weeks to complete this hiking trail. The trek passes through Khumbu region and extends to Namche Bazaar to give you that first-hand experience of the local culture. From there, it leads to the 13074 ft Pangboche where you can capture the beautiful Buddhist monastery just before you climb the 11000 summit. This could be a great strenuous exercise to lose calories fast.

Kilimanjaro

Location: Tanzania

Length: 35 miles

Best time: January/February/September

Prepared to spend a week exploring Africa’s most renowned mountain? It is 19340 ft high and dubbed the Africa’s highest mountain. Many seasonal hikers have frequented this highest peak. It has plenty of climbing routes to make your alpine climbing a cinch.

If you are a newbie do not worry because there is a guided tour so that you do not get lost in this large area.

Te Araroa Trail

Location: New Zealand

Length: 1894 miles

Best time: October to April

You are probably scared after seeing that you will travel for 1894 miles. Trust me that it is quite a rewarding hiking trail for you to explore the NZ’s incredible landscapes, coastal sands, national parks, alpine ridges, volcanoes areas. It is a frequented thru-hike by many enthusiasts who are determined to travel almost the entire New Zealand. The journey starts at Cape Regina adjacent to the North Island tip and extends to Bluff next to the South Island.

Be prepared to spend 3 months traveling on 160 tracks. You will be coming across the Queen Charlotte tracks on the South Island and the river valleys at Whanganui National Park situated in the North Island. The Tongariro volcano slopes will also be worth exploring as you trek through Auckland metropolis. This journey is equally rewarding for newbies in hiking as the Te Araroa Trust has put in place experienced guiders and volunteers to help you achieve your goals.

Kings Peak

Location: Utah

Length: 28.8 miles

Best time: September

It is best to undertake this journey in September when snow has melted unless you prefer snowshoeing. For only 28.8 miles, you will be exploring the Kings Peak in Utah by passing through the Henrys Fork, Gunsight Pass and the Anderson Pass. Lakes and ponds will be a blessing to your eyes. The waterfall to the Anderson Pass is one of the great views of this trail.

The High Uintas Wilderness is also at reach to view its beautiful peaks, alpine ridges and valleys. Furthermore, you might trek about 2 hours to the summit of Kings Peak from the Salt Lake City. Just be prepared and wear quality and durable hiking boots because this journey is known for its sedimentary rocks on your way to climbing the Utah’s highest peak of 13528 feet high. Meanwhile the Henrys Fork Campground might be the initial trial for you as it has an elevating trail. If you have a tent you can pitch at the Dollar Lake to rest at night.

Franconia Ridge Loop/Traverse

Location: New Hampshire

Length: 9 miles

Best time: Fall and Autumn

Newbies can start with this short hiking trail on the Franconia Ridge in New Hampshire. It has beautiful and miniaturized flowers to view where you can take priceless selfies to show your friends. You will also have a chance to hike in 3480 ft alpine tundra from Fenway Park.

Be prepared for the White Mountain weather conditions as you travel between the Mount Lafayette, Mount Lincoln and Little Haystack.

Overland Track

Location: Tasmania (Australia)

Length: 50 miles

Best time: October 1 to May 31

To hike on this 50 mile trail, you need to make reservations first because it is part of Tasmanian Wilderness World Heritage Area. This area is well-known for its Tasmanian devil (largest marsupial in the world), platypus, wombat and its diverse wildlife. It can be a great place for hikers who are in fond of the Australias diverse landscapes that include the highland mountains, rain forest, and the eucalyptus groves. This trail extends into the Cradle Mountain’s Lake St. Clair National Park. It is short but worth taking because it offers more spectacular views than some 200 mile trails.

The Tasmanian Parks and Wildlife Services manage this Overland Track. You can spend 6 days exploring the trail’s breathtaking views and climbing the Tasmania’s highest peak, Mount Ossa, at 5305 ft.

Pacific Crest Trail

Location: California, Washington and Oregon

Length: 2650 miles

Best time: April to October

This is one of the longest hiking trails you will ever encounter. You really have to prepare yourself for this thru-hiking adventure that traverse from north to south regions of the United States. The spectacular Pacific mountain is never to be missed in this journey. Hikers are advised to hike from April to October in order to avoid the snow fall in Sierra’s spring and the Cascades fall. This trail runs across the Sierra and the Cascade ranges. It is, however, not an easy attempt to complete this journey when given its weather conditions.

On your way to the finish line, you will be exploring 7 national parks, state parks and national forests. You will also tap on the Mojave desert, 13153 ft Forester Pass found between the Kings Canyon and Sequoia national parks. Your journey will extend to the Yosemite’s Tuolumne Meadows through into the volcanoes of the Cascades from Lassen Volcanic National Park. The finish line can be the British Columbia’s E.C Manning Provincial Park.

Grand Canyon Hike

Location: Arizona, United States

Length: 44 miles

Best time: March to May or September to November

Within a week you can complete this hike exploring the nature’s scenery. Only 4 to 6 days either between March and May, or between September and November during summer times.

Additional tips for hikers

For any type of hiking you have to buy enough backpacking gear, camping tents, and cooking tools. There are many local stores or online stores where you can order your essentials before time. As you shop around, keep the following questions in mind:

  • How many days of hiking
  • How many miles
  • The type of terrain to hike on
  • The frequent weather conditions
  • The seasonal changes
  • How many people to hike with

It is advisable to team up with other people if you are going to hike in isolated areas. Accidents do happen along the way where you might slip into dangerous pits, and your only rescue is a second person. The second person can also help you minimize the heavy hiking gear and in all preparations such as pitching the tent. It would be much better if you travel with your partner.

To avoid getting lost, buy a tour guide of the desired destination and acquaint yourself with it before embarking on your journey. Take cognizance of the landmarks along the way, so that if you do not meet them, it can be a signal that you got lost.

It is also recommended that you let know your family about the you’ve planned to take so that they can be on a hunt if you do not come back accidentally. To minimize any confusion, the compass or the GPS can be good essentials to use in finding your track.

Wrapping it up!

Hiking can be overwhelmingly amazing when you hike in the right locations at the right time with adequate preparations. We have mentioned a few of the popular hiking locations in the world for you to include in your to-do list. These locations were chosen based on their popularity among many hikers across the world. The types of hikes have also been highlighted to widen your choices so that you can choose the suitable ones for yourself.

Do you have any recommendations about the hiking location in the world? Please share with us in the comment section below. If you have any questions you can also leave them below and we will attend to them.