Home Blog Page 2

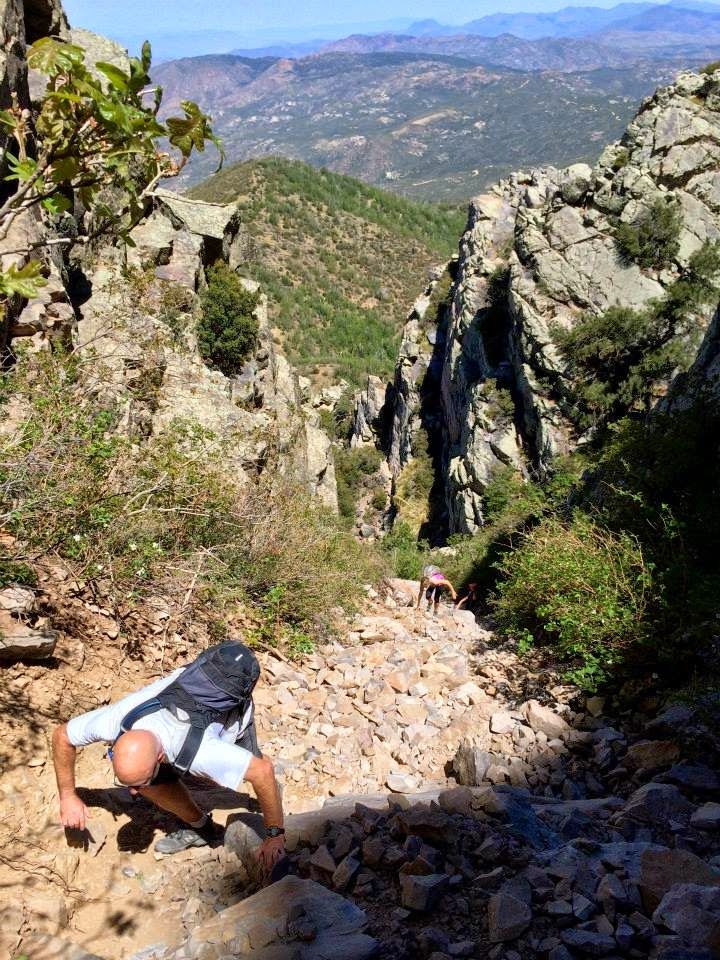
A Beginners’s Travel Guide To The Phoenix: Experience The Best Hike In Arizona

0

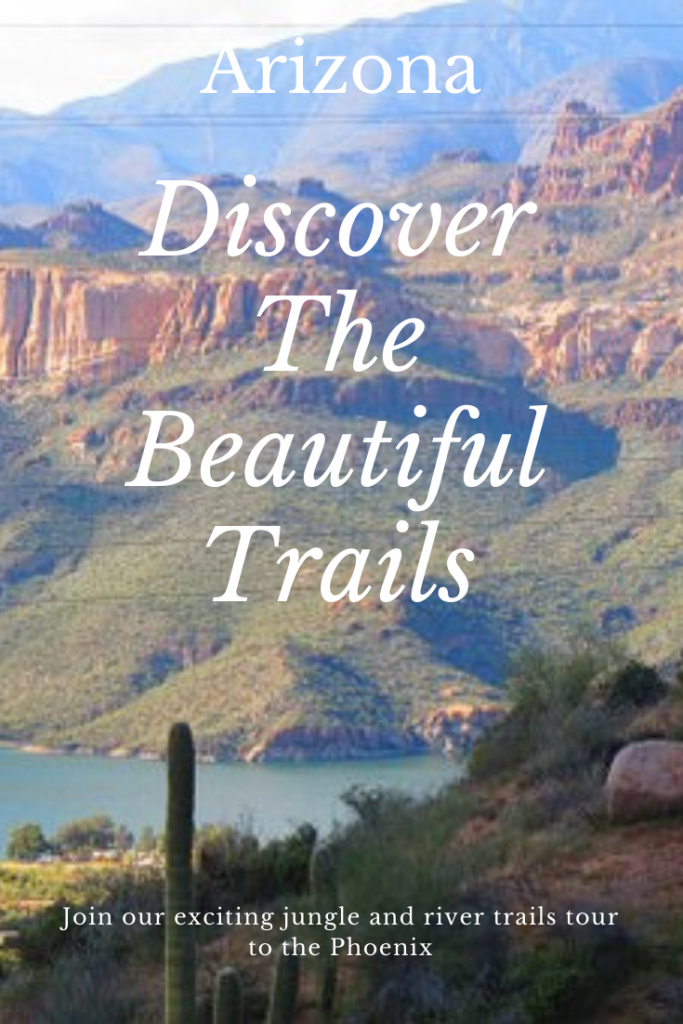
Currently ranked by the National Geographic as one of the best cities for hiking in America, Phoenix can be regarded as a mecca of hiking and many explorations. This great city of Phoenix has three remarkable mountain preserves where there exist many trail heads leading to more than 180 miles of notable and developed trails.

These trails are source of attraction for hardened trekkers and even, casual walkers. South Mountain encompasses the whole of the southern border. Camelback Mountain remains solitary and covers the Central Valley horizon. Piestewa Peak stays a series of mountains located on the northern side of Phoenix.

Inside the Phoenix city herself, there are uncountable numbers of preserves, green belts, and parks that are easily accessible for great hikes and casual walks. Are you interested in knowing some of the best hikes in Phoenix? If yes, read on!

Best Hiking Places in Phoenix

Listed below are some of the 10 best hiking places you need to know in Phoenix, these are arranged in no particular order.

Piestewa Circumference – Freedom Trail

Average Time: 2 hours

Level of Difficulty: Moderate

Distance: 3.8 miles round trip

While Piestewa Peak is generally known for its ever-famous Summit Trail, the Piestewa Circumference Freedom Trail offers a more intensive look at and a closer involvement with the landscape of the desert. Wound around the bottom of the peak, this region holds a variety of desert flora you can ever find in the mountain preserve.

Some portion of this trail synchronizes with the Nature Trail, which offers educational plaques itemizing different flora. The trail starts at the north end of the trail park and will promptly take you over a dry, rocky spring bed, before joining with the Freedom Trail Loop. Since, this is a circumferential hike, you can take either direction.

However, you should consider whether to choose a steep climb before you start a hike or go for a right at the intersection. Within Four miles in the preserve, there is some mellow rise picks up all through the hike that are ordinarily close to few memorial saddles.

These are decent chances to stop and take a proper look at the landscape: the peaks, the Phoenix horizon, and many other exciting desert landscapes.

Picketpost Mountain

Average Time: 3 to 4 hours

Level of Difficulty: Difficult

Distance: 4.3 miles round trip

With just 2,000 feet of rising, hiking in the Picketpost Mountain is one that will make you return for more. It provides you a brief trip on the Phoenix Trail before climbing a series of bent curves such that in a matter of one mile, it will make you look down toward the Valley ground floor from 2,800 feet away.

At this point, the trail gets somewhat specialized as we bend, leaning on the cliff walls and intersecting shaky edges before entering a very narrow valley. This area will test your strength and should be done with caution. Just stay focused and engaged.

From the valley, the trail starts an upward series of bent curves and some fun stone bouncing to the upper plateau and lastly the summit. Make sure to stop a while and observe your surroundings as you climb. You will find the views amazing as you ascend.

When you reach 4,375 feet, you will find the panorama incredible, starting from the Superstition Mountains to the Four Peaks to the Weaver’s Needle. During the day, you will have an extraordinary perspective of the Catalina Mountains which is located in the north of Tucson. To your surprise, there is a mailbox on top of the mountain? The Picketpost Mountain is one of a kind trail to enroll in without a doubt.

Tom’s Thumb

Average Time: 3 hours

Level of Difficulty: Moderate

Distance: 4 miles round trip

Situated in the more isolated northern region of the McDowell Sonoran Preserve, you will find Tom’s Thumb sitting at 140 feet and can be seen all through the East Valley and Scottsdale. Numerous hikers often call this local landmark “the dork” due to the amazing patriarch of the climbing scene.

Nevertheless, you do not have to be a climber to appreciate the sheer views of this bulging hiking scene. After climbing for a half-mile, you will reach a precarious series of bend curves. The perspectives are stunning and will help in keeping your mind off the work you are putting in.

You can also anticipate for more stunning perspectives of Cave Creek Mountains, Four Peaks, and Bartlett Lake. At about one mile, you will be sitting at an amazing 3,680 feet. About a half-mile later making two miles, you will gain a saddle for another extraordinary perspective.

At that point, there remain just a half-mile to the ridgeline and an appropriate perspective of Tom’s Thumb and its remarkable proportion.

Camelback Mountain’s Echo Canyon Trail

Average Time: 2 hours

Level of Difficulty: Difficult

Distance: 2.3 miles round trip

Camelback Mountain should be a once in a lifetime hiking. Regardless of whether you are simply going to the Valley or living around here, Camelback Mountain hikes offer probably the most encompassing perspectives of Phoenix.

Situated in the heart of the city, this 1,264-foot climb is an extraordinary taste of the mountain tucked inside the suburban boundary, one that is certain to blow your mind in more courses than one. Throughout this hike, you will enjoy the areas of stair stepping and scrambling.

If you are a little bit nervous to climb, be rest assured that handrails have been set up for your help if necessary. At simply under a mile, you will see a false summit. While this may appear like a dreadful trick after the cardio you have been using, the main summit is some steps away from this, and you will soon be on the most remarkable top you can ever find in Phoenix.

Feel relaxed, catch your breath, and appreciate the sights of the amazing metro Phoenix right from South Mountain to Chase Field, Superstition Mountains, and Four Peaks. This is a completely remarkable way to see the beauty of the whole city.

Hieroglyphic Trail

Average Time: 1.5 hours

Level of Difficulty: Easy

Distance: 3 miles

This short climb offers awesome perspectives of the Grand Superstition Wilderness Area and in addition an ancient accumulation of Hohokam petroglyphs. Situated at the bottom of the Superstition Mountains, hiking on the hieroglyphic trail is ideal for families and even a beginner hiker.

The trail head shared something in common with the Lost Goldmine Trail, yet advance you up a little hill and you will discover two wooden sign post stamping where the trail divides. Move left and proceed towards the mountain. At about a half-mile of hiking, you will eventually see the Sombrero Butte, Camelback Mountain, and South Mountain.

Proceed with another half-mile, and you will be entering the Hieroglyphic Canyon; move along this trail and at about five to nine minutes, you will get into an extensive rocky zone with scores of Hohokam petroglyphs and few small-scale pools of water. You might be wondering why this preserve was not given the name Petroglyphs Trail.

It appears that the early pilgrims and mine workers are to be blamed for the misconception. The Hohokams occupied the Central Arizona, roughly 800 years back, leaving a lot of petroglyphs behind that the early pioneers mixed up as Egyptian hieroglyphics. Hence, give rise to your Hieroglyphic Trail.

Mormon Trail to Hidden Valley Trail

Average Time: 2.5 hours

Level Of Difficulty: Moderate

Distance: 3.9 miles

Situated inside the biggest municipal park in the city of Phoenix, the Hidden Valley Trail of South Mountain gives you a chance to get away from the city with uncommon rock developments and two natural rock channel marking the end of this half-mile trail.

Quietness is always a common thing during this hike, as the city and its sounds look like they have vanished, abandoning you with dazzling rock formation and dry sandy washes. Now entering the Mormon Trailhead hike, the rising is prompt, because it is like half-a-mile to the saddle, where there is a fantastic perspective of downtown Phoenix.

You will then hit a steep area of the trail from here, which will straighten out around the one-mile checkpoint. In a matter of minutes, you will come across the crossing point with Mormon Loop and you will need to go straight, remaining on the Mormon Trail throughout until the point that you run into the National Trail.

At this point, take a right and you will be going towards Fat Man’s Pass leading to the Hidden Valley Trail. You are going to enjoy the view and exit through the other rock channel to go back through Mormon Trail.

Cave Creek Trail to Skunk Tank Loop

Average Time: 6 hours

Level of Difficulty: Moderate

Distance: 10 miles

Situated in the upper east of Phoenix within the Tonto National Forest, this particular trail features the riparian desert spring that is Cave Creek. This is more than a city; a real creek flowing through some region of Tonto National Forest, supporting a broad cluster of fauna and flora and not typically found in the desert.

After entering this hike, you will probably overlook that you are right in the desert and some miles away from the city, all regards to the lavish vegetation and the sound coming from the streaming creek adjacent to you. This loop gives you an awesome day hiking adventure.

It starts with a quiet trek through shallow and short water intersections and underneath lavish shades of trees, before finally dropping into a limited canyon and sending you climbing along a lovely, rocky creek bed. At that point, the Skunk Tank Trail loop includes some cardio, with wonderful all-encompassing perspectives on moving hills and mountains that appear round.

It is not an awful result, and simply going over part of the way through the trail, the long bend curves have hoisted you to 3,665 feet. After just a mile, the trail makes a curve and meet up with the Quien Sabe Trail 250. This is the most elevated purpose of the hike at 4,075 feet.

Proceed a little more, you will soon reach the Quien Sabe mine, and after, the old mine worker’s camp. This is a decent place to stop by and appreciate a little history before finishing the two miles remaining.

Boyce Thompson Arboretum

Average Time: 2.5 hours

Level Of Difficulty: Easy

Distance: 3 miles

Situated at the floor level of Picketpost Mountain just close to Queen Creek, Boyce Thompson Arboretum is a headquarter for most of the desert plants throughout the world. This Arboretum hike is more than just a hike.

It is more or less an educational walk and an awesome chance to start perceiving what vegetation you have seen on the trails. For a starting hiker, what you will be amazed by what normally occurs in the Valley area you are trekking through.

Upon landing, you should desire to go through the Main Trail as it interfaces with the arboretum’s remarkable elements and appealing routes. For an absolute taste of what you may experience on hikes close to Phoenix, ensure you hit up the Sonoran Desert Trail before going back to the Main Trail.

From that point, you will discover why you need to visit the Smith Interpretive Center and the Hummingbird Gardens, a memorable structure repurposed to hold two nurseries, displaying succulents and desert flora from around the globe. As you continue going on, you will soon arrive at Ayers Lake, a fabricated reservoir giving water to the whole grounds and serving as a flying creature asylum.

Past this, you will be hiking through a riparian territory, Eucalyptus Forest, an intuitive herb cultivations and a brush of palms. Your trip will be ended with a stroll over the Outback Bridge, finishing on the walkabout trail located along the Australian Desert Exhibit.

Peralta Trail to Freemont Saddle

Average Time: 3-4 hours

Level of Difficulty: Moderate

Distance: 4.9 miles

There is a considerable measure of mystery and history related to the Superstition Wilderness Area, bringing the early historians and hikers to the old mining grounds. Regardless of whether you believe the story or not, this trail is an extraordinary insight into the majesty and beauty of this amazing region.

More so, it leads to one of the best perspectives of its popular landmark: the 1,220-feet-tall Weaver’s Needle. Peralta Trail is named after a family from Sonora, Mexico, who mined the in this same region before an extraordinary slaughter, resulting in different stories of hauntings, lost maps, and gold.

It begins with a heading left to the trail head. At this point, you are going to appreciate the beauty of the gliding mountains that surround you before intersecting the Peralta Creek at the quarter-mile checkpoint, where you start your rising.

After a mile, you will reach a fork in the trail; keep going right and proceed through a series of bend curves upwards. At about a mile and a half, you will come across the Geronimo’s Cave while looking over the canyon. The trail will cross the desert spring bed again before directing you upward and onto some brilliant colored volcanic region.

Thereafter, you will pass a cave entrance. At that point, it will be left with one-half mile Freemont Saddle for a stunning perspective of Weaver’s Needle.

Reavis Falls

Average Time: 9 hours

Level of Difficulty: Difficult

Distance: 14 miles

Did you realize that there is a 140-foot waterfall just some minutes away from the city of Phoenix? Yes, the Reavis Falls is just 30 feet taller than the famous Niagara Falls. Located deep in the Superstition Wilderness, this fall is not for the swoon of heart, but rather it is unquestionably justified regardless of the effort.

The condition of the waterfall fluctuates based on any last rainfall occurrence, so arrange in like manner. Start at Reavis Trailhead, with a wonderful perspective of Apache Lake, which is right behind you and an extraordinary visual upon your arrival.

From here, you will make a curve and move through Reavis Trail for a little more than two miles, gaining a saddle at around 4,000 feet. A snappy swing to look behind you yields an extraordinary perspective of Four Peaks. After a mile, you will start to see Castle Dome.

This is a precarious aspect of the trek arrival at a saddle at around 4,675 feet. In a matter of one mile, the trail starts to slip. The descent is around 1,625 feet. And, recall that this will be a jump while going out. At about six miles, you will get to Reavis Creek and trace it upstream, where you will traverse the creek a few times.

This includes much rock jumping and customarily extremely icy water. In case the stream is great, you will hear the gliding sound of the waterfall before you see it. The sounds will allure you nearer until you get to this mind-blowing sight, smack spot at the very center of the desert.

Tips for Hiking in Phoenix

Over 200 hikers are being delivered every year from the preserves, mountain stops and desert of the city of Phoenix. The essential tips below can help prevent you from adding to the number:

Tip 1: Watch the Weather

Yes. “It’s a dry warmth”. However, Phoenix’s temperature can be misleading and fatal. Climb when it is cool outside. Attempt early mornings and nights when there exist more shade.

Tip 2: Dress Appropriately

Wear appropriate sunscreen, cap or hat, clothing, and shoes

Tip 3: Bring Water

Ensure you Hydrate before you leave for the hiking trip. Winter climate in Phoenix may fluctuate around a high of 67°, yet make sure to pack water along, regardless of what the temperature might be. Have a lot of water, more than you might predict you require.

However, if you are outside in the Phoenix sun, you will require significantly, at least 8 cups of water for the day. In case you are heading outside for any reason at all, carry along a bottle of water. If the purpose of going out is hiking, carry along many bottles of water or preferably, a drinking system.

Many individuals have encountered their death after heading into the preserves inside a temperature of 110-degree heat without enough water. That is the main reason hikers are often warned to stay inside or create a shelter beside one of the pools available in the Valley until the month of October.

In case you need to go outside, you may be enticed to hold up until night when it is cooler. It is an intelligent arrangement, but you should know.

Tip 4: Keep in Contact

Convey a cell phone or a satellite phone along anywhere you go and let your friends and family know your plans and the locations you plan on visiting.

Tip 5: Team Up

Don’t ever go hiking alone. In case you feel like going alone, tell somebody about your area of interest, begin times and end times.

Tip 6: Be Honest

Do you have any medical condition? Back issues, knee, diabetes, heart issues, Asthma? Try not to encourage yourself.

Tip 7: Don’t Trail-blaze

You are free to enjoy the beauty of the Sonoran desert landscape. But please, remain on assigned trails.

Tip 8: Take Responsibility

Try not to be somebody that won’t get ready, shouldn’t have been there for wellbeing reasons or overlooked security rules. Be the mindful climber, who gets out for hiking and does it right.

Tip 9: Know the indications of heat stroke

As indicated by the Health Services Department of Arizona, the way to an existence debilitating heat stroke takes after genuinely predictable steps, with a few cautioning signs, for example, warm stroke, warm fatigue, Heat spasms, Thirsty, et cetera.

Most heat strokes can be prevented by staying inside, wearing lightweight clothing in light hues, taking even and consistent breaks, and, more importantly, drinking a great deal of water.

Tip 10: Avoid the honey bees

Based on the information provided by the Health Services Department of Arizona, you won’t see a ton of animal creatures or bugs all over the place. Most turned out around evening time, so watch the path you step on when you are doing the night walk.

Phoenix honeybee season and summer go as one. Each mid-year, honeybees attack no less than a couple of individuals and dogs present around the Valley.

Tip 11: Always take your sunglasses along

With shorter storms found in Phoenix, the sun frequently set and changes roadways into mirrors, reflecting a very bright light in your eyes and making it difficult for you to see the path lines.

Keep your sunglasses close to you all the time and drive with caution.
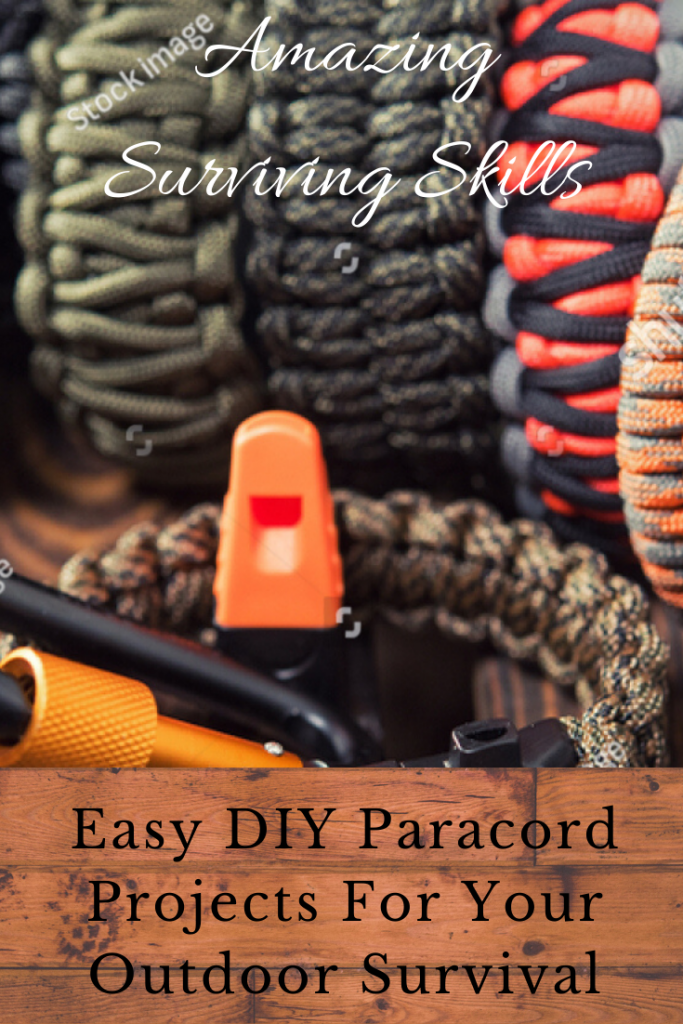
Great Paracord Hacks: Discover Different Paracord Patterns And Their Techniques!

0

Originally called parachute cords, these cords are one of the most reliable classes of materials applied by wilderness experts all over the world for adaptability and survival. Both in living environments, and in the harsh and severe conditions of the wild.

They are usually made of finely intertwined lightweight nylon materials that are carefully knitted to produce tread harmonies, which are later-on covered with a woven nylon covering to produce the tough cords. These multipurpose cords used by both military and civilians alike for various purposes are wildly applied in numerous DIY projects. A few of the paracord uses would be discussed later in this article.

Paracord is a great material suitable for a whole lot of projects now called paracord crafts. This is because of the flexibility, durability, suppleness and reliability of the cord. In fact, in survival settings the application of paracords are unimaginable, as new ideas appear to spring up every time survivors get into a situation that requires ideas exploration and exploitation.

It is however, advisable to have a clue of how to use paracord at home before you get them into your rucksack as one part of your outdoor gear. That way, you are free to explore the uses of the cord when you would possibly need to apply it for survival.

What You Need to Know About Your Paracord

First of all, you ought to know exactly what material you are about to work with, because, having the right supply is key. If you get that wrong, all your efforts are already in shambles right from the very beginning. A good way to get that sorted, is by checking to see that all the salient things that make the real paracord unique are found in the utility cord you are about to acquire.

The unique features of a real 550 paracord may be easy to find after you have known them or refreshed your memory by reading this article. However, if you do not know about them before now, beware, they can be very tricky details that could easily ruin your choice of gear.

What to Find

Paracords are thin cords with about seven inner strands for each, that are composed of interwoven strings, covered with a top sleeve that is wrapped around the inner strings. They are actually made that way to withstand pressure and increase their break-strength. The common is for measuring their break strength is usually in pounds.

The strength of parachute cords during World War II was about 550 pounds, which is why it is called 550 paracord. Some veterans do say they that these cords are battle- and time-tested ropes. Not only because they were originally used for battles as parachute cords, but because over time, they have been used for several other purposes by soldiers and paratroopers in survival situations.

Paracord uses are evident of their versatility. That has made them very popular among civilian voyagers and wilderness explorers over the years as well. They have applied some basic skills and transformed the cord into parts of survival tools, such as for building traps for fishing and hunting. They have also used it in building shelters and applied as tools for climbing, repairs, medical crises ,and for general hygiene.

How to Use Paracords

Paracord uses are limitless; if it has not been done, then it just hasn’t been thought of yet. So, how to use a paracord basically depends on the need. Wilderness explorers will agree that you use what you have to get want when in the wild. But you need some basic skills in order to do so, or even to think in that direction.

A few distinguished and common examples of how paracord have been frequently used might influence your thought pattern into a path that could make you a Paracord DIY pro, or give you an eye to cherry-pick great paracord applications, or even modify some methods of application and crafts to suit your own interests.

Paracord can be used as:

Apple Bags. Paracord bags are usually airy, as they are fondly designed with large holes, knotted at the edges of their rectangles or slanted squares. They are very good to store apples or all other domestic fruits that would need enough air to stay on fresh and crispy. No matter the amount of fruit or vegetables you stuff into the bag, you can be rest assured that it will not break, and secondly you can easily monitor the fruits to use them just before they go off.

Backpack Strap Wrap. As a wilderness explorer, you would find that sometimes you have just carried much more than is required for your trip. Probably because you got a bit indecisive, or just because you do not want to miss any important detail and then your backpack gets bulky, untidy and heavy.

Now you are not sure if your straps would last through all the hikes in your trip. Paracord backpack strap wraps can just be used to save the day. They can boost the durability of your backpack straps, if you wrap your paracord neatly around the straps. They also appear stylish to other paracord lovers.

Slim Pouches. A multipurpose slim pouch is one of the most important gear an outdoorsman would not want to miss while preparing for any adventure. It is a very important tool, and can be useful for various purposes when the need arises.

It only wise to always have atleast one. A paracord slim pouch would just be an ideal pouch to have with you at all times. In fact, not just in the wild, but wherever you are. You can protect anything from key-holders to several types of locks, stylishly in it.

Lanyard Holders. Keys and whistles and sometimes multiband tools are better reserved together. So, lanyards are typically used to protect and keep keys together. Currently, a fashionable and easy way to keep your keys together and also send a statement to your peers as a wilderness enthusiast, is by the use of a Paracord Laynard. In fact, they are also used as holders to several items now. Ranging from identity cards, to badges, and pen-knives. Interestingly, you can also add some sort of a modern tracer to keep your item traceable and even more easy to find when misplaced.

Dog Collars. Paracord can be weaved neatly into slim collars that are suitable for dogs. The beauty of this type of collar is that the material of which it is made from are very durable, and the collars can have different colours too from the combination of varying coloured paracords. With only about 40ft of paracord you can actually make a fine but very sturdy collar.

Waist Belts. Some trousers or pants as the case may be are one of the priceless, rugged, components of the outdoorsman’s gear. So, a rugged waist belt to match their ruggedness is just what you need, especially when you are someone who hangs stuff on your belt line. Paracords are used to make such handsome but tough belts that can last beyond leather belts and serve you better then you can imagine.

Leatherman Pouches. These are typical traditional pouches that are used to keep close very valued gadgets such as pads, phones, touches, and handy equipment. Unlike the slim pouches, these Leatherman Pouches could be designed to hold items that can be ordinarily be kept in probably leather pouches to retain them close-by.

Fishing Line. This is actually amongst one of the most commonly recommended uses of paracord. Using the paracord as a fishing line, is a long time emergency trick that has now become a welcome trend for fishing enthusiasts in love with paracord.

But here, you would need some basic tools like a knife to get into the cord and extract a single string, up-to the length of thread that you need. Attach it to your hook, and then the other end to your stick in the right way, and you are ready to fish in the wild.

Fishing Nets. These are usually built into scoop nets with which you place the net in a river, but against the tide and just scoop it from time to time, or built into barricade nets where you position the net to cover through a stream, from side to side and down to its bottom to prevent escape of the fishes and pull the nets after a while with fishes that are stuck in them.

Snares. The durability of the rope makes paracord a fantastic tool for setting traps. It is a joy to be able to ensnare a life animal and decide what to do with it right from the catch all by yourself. The strength of the rope can keep the animals from escaping, no matter the size, so long as it is well fastened unto a solid post.

Also, since the they are not too sharp, they also do not cut off any part of the catch. You are most likely to meet them whole and alive.

Shelter Lines. Paracords are great tools for building shelters in the great outdoors. Especially in putting up the traditional tents. The cordage is just what you need to withstand any sort of weather condition. So long as your tent is strong enough and the attachments are right, you need not fear the storms of the night and day. You may never be in tent that will get cut-off and blown away if the winds go wild when you are using a paracord to hold it emplace.

Attraction Bags. Commonly called bear bags, these could be made directly with paracord, or protected by paracord bags, i.e., when you place your original bear bags within the paracord bag, or also by merely using the paracord to hang the bag on a height, high enough to protect your bag.

Fire Bows. This is essentially a life saver if you can do it efficiently and you happen to find yourself or your team in a position where you need a fire desperately. It requires tact and experience though; you will definitely need some other tools to make this happen. These will include tools such as: a fire board, a drill and a socket cap, a bow, and of course your paracord.

The Essence of Quality

Paracord crafts are desired mostly for the strength of the material. So, in order to maximise the potentials of a real cordage, you need to know how to use paracord as a gear and how to identify a top grade, real cord. In this case, if you want to make some paracord gear by yourself, there are plenty of helpful instructions online to guide you through the process.

There are lots of commercial paracords in the market. These are not ‘the top quality’ paracords. The top quality paracords are Military Spec paracord, and they are made of inner layers of about 7 – 9 strands, and a quality outer layer of nylon material.

The strands are also made of 3 nylon yarns that stretch all the way to the end of every cord. That being the case, you will have 21 – 27 individual yarns altogether, if you totally loosen the inner part of a Mil Spec paracord. Most importantly, make sure the material is 100% nylon, that way you will not be far from the real stuff.

However, in order to be sure you are about to purchase the right stuff, here are a few ‘reliable checks’ to look out for:

  • Check the amount of the inner strands: It must be at least 7. Anything less is less than Military grade paracord.
  • Check the colour of the inner strands: A combination of colour-coded inner strands is required for tracking Mil Spec cordage, and also for the purposes of quality control.
  • Check the label properly: The ideal Mil Spec cord are properly labelled and classifications are specified. Avoid labels such as Mil Spec, Mil Grade, etc., but look out for such; ‘MIL-C-5040’.
  • Check the coupling of the inner strands: Three (3) stings make up each inner strand, and they are always twisted to enhance strength and reliability of the cordage.
  • Check the smoothness of cordage: A combination of tight, dense weave, and smooth twist are what should expect in a Military Spec paracord, because the military has a specific weave and cabling standard that is to be followed strictly.
  • Check the measure thickness: 550 cordage has the overall diameter of 5/32”.
  • Check the quality of material: A top grade Mil Spec will always be 100% nylon. Avoid anything less. Because it might just deteriorate after it has been used a few times, if it is not 100% nylon.

Finally, it is obvious that paracord uses are vast and numerous. So, all you need to do is learn how to weave the cordage into neat collections and get creative in order to satisfy your desires. The main thing is that the material is durable and reliable. Because of that quality, you are sure it can be used to fill in the gaps for several needs and also to save lives.

101 Paracord Projects: Basic Survival Skills You’ve Probably Never Seen

0

Originally called parachute cords, these cords are one of the most reliable classes of materials applied by wilderness experts all over the world for adaptability and survival. Both in living environments, and in the harsh and severe conditions of the wild.

They are usually made of finely intertwined lightweight nylon materials that are carefully knitted to produce tread harmonies, which are later-on covered with a woven nylon covering to produce the tough cords. These multipurpose cords used by both military and civilians alike for various purposes are wildly applied in numerous DIY projects. A few of the paracord uses would be discussed later in this article.

Paracord is a great material suitable for a whole lot of projects now called paracord crafts. This is because of the flexibility, durability, suppleness and reliability of the cord. In fact, in survival settings the application of paracords are unimaginable, as new ideas appear to spring up every time survivors get into a situation that requires ideas exploration and exploitation.

It is however, advisable to have a clue of how to use paracord at home before you get them into your rucksack as one part of your outdoor gear. That way, you are free to explore the uses of the cord when you would possibly need to apply it for survival.

What You Need to Know About Your Paracord

First of all, you ought to know exactly what material you are about to work with, because, having the right supply is key. If you get that wrong, all your efforts are already in shambles right from the very beginning. A good way to get that sorted, is by checking to see that all the salient things that make the real paracord unique are found in the utility cord you are about to acquire.

The unique features of a real 550 paracord may be easy to find after you have known them or refreshed your memory by reading this article. However, if you do not know about them before now, beware, they can be very tricky details that could easily ruin your choice of gear.

What to Find

Paracords are thin cords with about seven inner strands for each, that are composed of interwoven strings, covered with a top sleeve that is wrapped around the inner strings. They are actually made that way to withstand pressure and increase their break-strength. The common is for measuring their break strength is usually in pounds.

The strength of parachute cords during World War II was about 550 pounds, which is why it is called 550 paracord. Some veterans do say they that these cords are battle- and time-tested ropes. Not only because they were originally used for battles as parachute cords, but because over time, they have been used for several other purposes by soldiers and paratroopers in survival situations.

Paracord uses are evident of their versatility. That has made them very popular among civilian voyagers and wilderness explorers over the years as well. They have applied some basic skills and transformed the cord into parts of survival tools, such as for building traps for fishing and hunting. They have also used it in building shelters and applied as tools for climbing, repairs, medical crises ,and for general hygiene.

How to Use Paracords

Paracord uses are limitless; if it has not been done, then it just hasn’t been thought of yet. So, how to use a paracord basically depends on the need. Wilderness explorers will agree that you use what you have to get want when in the wild. But you need some basic skills in order to do so, or even to think in that direction.

A few distinguished and common examples of how paracord have been frequently used might influence your thought pattern into a path that could make you a Paracord DIY pro, or give you an eye to cherry-pick great paracord applications, or even modify some methods of application and crafts to suit your own interests.

Paracord can be used as:

Apple Bags. Paracord bags are usually airy, as they are fondly designed with large holes, knotted at the edges of their rectangles or slanted squares. They are very good to store apples or all other domestic fruits that would need enough air to stay on fresh and crispy. No matter the amount of fruit or vegetables you stuff into the bag, you can be rest assured that it will not break, and secondly you can easily monitor the fruits to use them just before they go off.

Backpack Strap Wrap. As a wilderness explorer, you would find that sometimes you have just carried much more than is required for your trip. Probably because you got a bit indecisive, or just because you do not want to miss any important detail and then your backpack gets bulky, untidy and heavy.

Now you are not sure if your straps would last through all the hikes in your trip. Paracord backpack strap wraps can just be used to save the day. They can boost the durability of your backpack straps, if you wrap your paracord neatly around the straps. They also appear stylish to other paracord lovers.

Slim Pouches. A multipurpose slim pouch is one of the most important gear an outdoorsman would not want to miss while preparing for any adventure. It is a very important tool, and can be useful for various purposes when the need arises.

It only wise to always have atleast one. A paracord slim pouch would just be an ideal pouch to have with you at all times. In fact, not just in the wild, but wherever you are. You can protect anything from key-holders to several types of locks, stylishly in it.

Lanyard Holders. Keys and whistles and sometimes multiband tools are better reserved together. So, lanyards are typically used to protect and keep keys together. Currently, a fashionable and easy way to keep your keys together and also send a statement to your peers as a wilderness enthusiast, is by the use of a Paracord Laynard. In fact, they are also used as holders to several items now. Ranging from identity cards, to badges, and pen-knives. Interestingly, you can also add some sort of a modern tracer to keep your item traceable and even more easy to find when misplaced.

Dog Collars. Paracord can be weaved neatly into slim collars that are suitable for dogs. The beauty of this type of collar is that the material of which it is made from are very durable, and the collars can have different colours too from the combination of varying coloured paracords. With only about 40ft of paracord you can actually make a fine but very sturdy collar.

Waist Belts. Some trousers or pants as the case may be are one of the priceless, rugged, components of the outdoorsman’s gear. So, a rugged waist belt to match their ruggedness is just what you need, especially when you are someone who hangs stuff on your belt line. Paracords are used to make such handsome but tough belts that can last beyond leather belts and serve you better then you can imagine.

Leatherman Pouches. These are typical traditional pouches that are used to keep close very valued gadgets such as pads, phones, touches, and handy equipment. Unlike the slim pouches, these Leatherman Pouches could be designed to hold items that can be ordinarily be kept in probably leather pouches to retain them close-by.

Fishing Line. This is actually amongst one of the most commonly recommended uses of paracord. Using the paracord as a fishing line, is a long time emergency trick that has now become a welcome trend for fishing enthusiasts in love with paracord.

But here, you would need some basic tools like a knife to get into the cord and extract a single string, up-to the length of thread that you need. Attach it to your hook, and then the other end to your stick in the right way, and you are ready to fish in the wild.

paracord as fishing lines

Fishing Nets. These are usually built into scoop nets with which you place the net in a river, but against the tide and just scoop it from time to time, or built into barricade nets where you position the net to cover through a stream, from side to side and down to its bottom to prevent escape of the fishes and pull the nets after a while with fishes that are stuck in them.

Snares. The durability of the rope makes paracord a fantastic tool for setting traps. It is a joy to be able to ensnare a life animal and decide what to do with it right from the catch all by yourself. The strength of the rope can keep the animals from escaping, no matter the size, so long as it is well fastened unto a solid post.

Also, since the they are not too sharp, they also do not cut off any part of the catch. You are most likely to meet them whole and alive.

Shelter Lines. Paracords are great tools for building shelters in the great outdoors. Especially in putting up the traditional tents. The cordage is just what you need to withstand any sort of weather condition. So long as your tent is strong enough and the attachments are right, you need not fear the storms of the night and day. You may never be in tent that will get cut-off and blown away if the winds go wild when you are using a paracord to hold it emplace.

paracord shelter lines

Attraction Bags. Commonly called bear bags, these could be made directly with paracord, or protected by paracord bags, i.e., when you place your original bear bags within the paracord bag, or also by merely using the paracord to hang the bag on a height, high enough to protect your bag.

Fire Bows. This is essentially a life saver if you can do it efficiently and you happen to find yourself or your team in a position where you need a fire desperately. It requires tact and experience though; you will definitely need some other tools to make this happen. These will include tools such as: a fire board, a drill and a socket cap, a bow, and of course your paracord.

The Essence of Quality

Paracord crafts are desired mostly for the strength of the material. So, in order to maximise the potentials of a real cordage, you need to know how to use paracord as a gear and how to identify a top grade, real cord. In this case, if you want to make some paracord gear by yourself, there are plenty of helpful instructions online to guide you through the process.

There are lots of commercial paracords in the market. These are not ‘the top quality’ paracords. The top quality paracords are Military Spec paracord, and they are made of inner layers of about 7 – 9 strands, and a quality outer layer of nylon material.

The strands are also made of 3 nylon yarns that stretch all the way to the end of every cord. That being the case, you will have 21 – 27 individual yarns altogether, if you totally loosen the inner part of a Mil Spec paracord. Most importantly, make sure the material is 100% nylon, that way you will not be far from the real stuff.

military spec of paracord

However, in order to be sure you are about to purchase the right stuff, here are a few ‘reliable checks’ to look out for:

  • Check the amount of the inner strands: It must be at least 7. Anything less is less than Military grade paracord.
  • Check the colour of the inner strands: A combination of colour-coded inner strands is required for tracking Mil Spec cordage, and also for the purposes of quality control.
  • Check the label properly: The ideal Mil Spec cord are properly labelled and classifications are specified. Avoid labels such as Mil Spec, Mil Grade, etc., but look out for such; ‘MIL-C-5040’.
  • Check the coupling of the inner strands: Three (3) stings make up each inner strand, and they are always twisted to enhance strength and reliability of the cordage.
  • Check the smoothness of cordage: A combination of tight, dense weave, and smooth twist are what should expect in a Military Spec paracord, because the military has a specific weave and cabling standard that is to be followed strictly.
  • Check the measure thickness: 550 cordage has the overall diameter of 5/32”.
  • Check the quality of material: A top grade Mil Spec will always be 100% nylon. Avoid anything less. Because it might just deteriorate after it has been used a few times, if it is not 100% nylon.

Finally, it is obvious that paracord uses are vast and numerous. So, all you need to do is learn how to weave the cordage into neat collections and get creative in order to satisfy your desires. The main thing is that the material is durable and reliable. Because of that quality, you are sure it can be used to fill in the gaps for several needs and also to save lives.

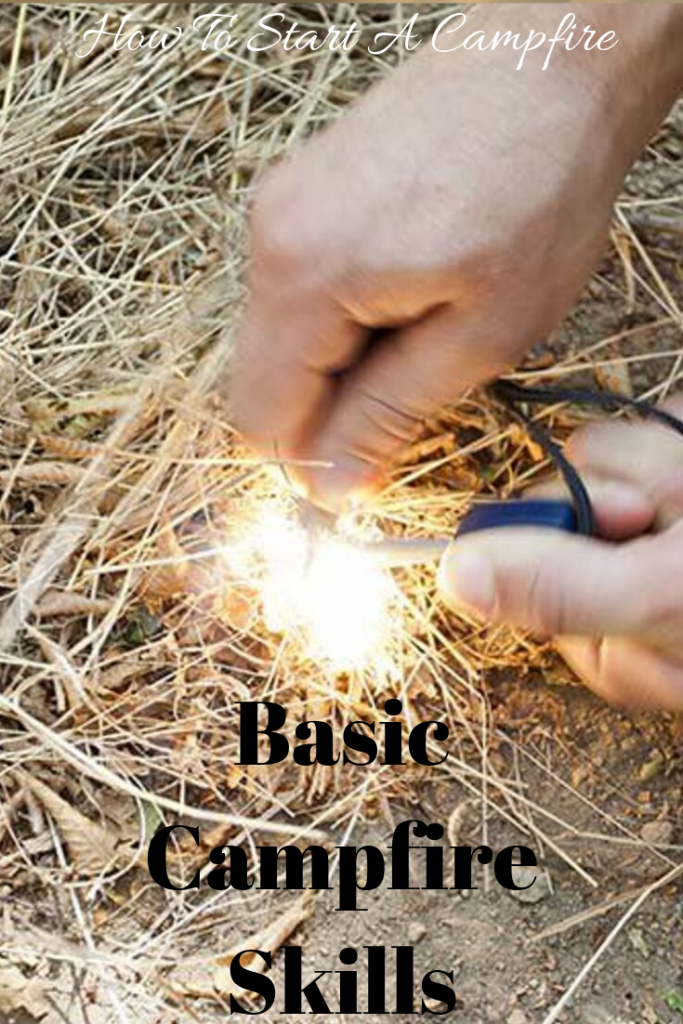
How To Light A Fire In The Wilderness: Useful Tips For Starting A Campfire!

0

Staying overnight in the wilderness is something that requires us to find a way of procuring ourselves with warmth, light, and opportunities to prepare some food. Prehistoric people have been troubled for thousands of years until they figured out how to start a campfire.

This, essentially, was a skill which moved the ancient human community towards a further development of culture and civilization. Today, people no longer depend on bonfires, but camping in the back country limits our technological readiness close to that of the cavemen, calling for a well lit, effective and overall safe campfire.

Just like the prehistoric people, those who stay in the outdoors at night like to gather around the fire and spend the whole evening around that source of warmth and light. Properly placing the campfire is the first thing you need to think about. Some campsites have reserved areas for lighting fires, some don’t.

But if you’re not going to a campsite, but instead to a locale rarely occupied and used by humans, it is needed to know where exactly to light a fire without any risks. Once you go to a campsite, ask the local ranger or the camp staff about whether you can start a fire, whether there are some specially designated areas and fireplaces, and check which ways of fueling the campfire are allowed.

Things to Keep an Eye on Before Starting the Fire

To start a campfire in a campsite without any supporting infrastructure, one needs to find an area of bare dirt which is at least 20 feet wide. Look for spots with signs of recent campfires, if someone burned a campfire several days ago, why not just use that same place? It is likely well prepared and without any flammable materials remaining from the previous campfires, though it requires basic checks.

Look for any plants that could be growing nearby. Also, look around and above to see if there are any trees with branches close to it. Other safety precautions are also needed, especially if you don’t find enough barren land.

  • Bring a bucket of water or two. Hold it at a safe distance from water, but close to someone’s reach so one can react quickly in case the fire goes out of control.
  • A shovel. It is needed to dig out some dirt when the fire appears to be excessive. It would also be useful for putting out the fire.
  • Sand (optional) would be good if the area is already sandy or exposed to sand from nearby dunes or beaches. It is not appropriate to use the sand when in an area where it is not naturally present.
  • Never use fire extinguishers or any other equipment which would release artificial compounds.

Weather

This is the last thing you need to check before making any campfire decisions. While we know rain, snow and overall wet conditions will prevent us from lighting a fire, the wind is much more of a risk. If it is likely to wind in the area where you’re going to stay, maybe it is better not to start any campfires unless it has a vast area of barren land or sand. Winds can blow the fires much more efficiently than we think, and if you’re inexperienced, there will be a high risk of causing a forest fire or burning the tent and the equipment.

Tinder and Kindling

While firewood is the core fuel for your campfire, tinder and kindling are materials used to make enough heat and make any firewood catch fire. Tinder is something very light, fluffy, dry, and flammable. It can be grass, weed, oak leaves, tree bark, some species of mushrooms. That is what is best for use in campsites. The paper  should be avoided, especially newspaper and other printed materials you’d discard since it contains lead and other highly harmful materials.

Any products containing petroleum, such as some kinds of lighter cubes should be avoided too. On the contrary, environmentally-friendly lighter cubes that contain no gasoline, plastic and other petroleum-based materials would be ideal.

Kindling is what tinder needs to ignite, should it burn enough time to make the firewood catch the fire. Kindling is usually dried out wood of any kind, dry tree bark, cedar bark, small twigs. These need to provide for at least several minutes of flame, which is usually enough for most firewood to start burning.

Firewood

Unlike tinder and kindling, which in many cases can be picked up on the campsite freely, firewood is what you usually need to bring with yourself. Before going to a campfire or wilderness, check if there are any rules and regulations regarding firewood.

In most places, you will not be allowed to cut local trees or branches, in and around campsites that would lead to a quick deforestation. You won’t be able to use dead trees or branches either, even if there are some next to where you’re lighting the fire. Deadwood plays an important role in the biological regeneration of our forests. Some places, however, would allow limited use of local dead wood in certain periods and even then you would be limited to the amount of wood allowed by the rangers.

Firewood regulations may be federal, state, local, as well as internal campsite “house rules”. These regulations define the possibility of bringing wood from the outside, amounts, and types of allowed firewood as well as where to place a fire bed. Some locations, such as national and state parks usually don’t allow firewood to be brought from outside of it.

Brought firewood can contain non-native and invasive species of plants, insects, and microscopic organisms. Most such parks would sell you their own local firewood stockpiled through a controlled process of forest exploitation. The good news is that in most cases, firewood is sold at a market or below-market prices.

The best is if the campsite, park or forest you chose offers some way of contacting or provide firewood information on their website. This way you will only learn what you need to know quickly and be sure you would not breach any regulations unintentionally. Many campfires sell their own wood, kindling, and tinder, which is environmentally friendly and  cut to sizes ideal for maintaining a campfire.

For reasons of keeping their biodiversity safe from invasive species, some states prohibit bringing firewood from other states. Some others do allow bringing bundled and stamped USDA certified clean wood.

Building the Fire

Now you have a good location, and all three types of fuel: tinder, kindling, and firewood. Before you commence with building the campfire, make sure the place is cleared of any flammable debris such as leaves, paper, dried grass. If there are ashes, charcoal and any other traces of previous fires. The clean floor will allow better air flow, which is essential for proper campfire combustion.

Dig a shallow hole in the place where you want to put the fuel. The hole needs not to be too deep, and it should be large enough to keep the fuel pieces together. Put the excess dirt close to the hole, you will need it in the case of emergency and as an additional aid for putting it out.

This way you created a fire bed. The role of it is to protect ultralight materials you use as tinder from winding out, while the kindling and firewood will not fall aside, keeping all pieces of the fuel together.

Tinder needs to be handled with a great care. Avoid using very lightweight materials which can be moved by the air flow, not only that of wind, but also from movies of your hand when building the fire. You can squeeze tinder in your hand to make it into heavier balls.

Dried grass is ideal as tinder, it is intertwined, highly flammable and fluffy allowing a plenty of air to get through. It is also fully environmentally friendly and can be found in many campsites, especially during summer. The best alternative to dried grass is environmentally-friendly kinds of starter cubes.

Tinder always goes first. Make sure you put enough of it. Kindling goes over the tinder, and proper orientation of kindling materials, especially if it is in long pieces such as wooden sticks or bark – is essential for letting the firewood catch on. Tinder usually burns out after some 10-15 seconds in most cases, so you need to make sure kindling is dry and has a good ventilation.

Try to build a pyramid-like structure around the tinder bed. Do not align pieces of kindling towards the same direction, for catching fire quickly a good ventilation is of major importance.  A properly set kindling will certainly catch on fire and keep burning for several minutes, which is enough for most kinds of firewood to start burning.

In the beginning, it is not good to put many pieces of firewood.

Campfire Building Styles

A campfire can have various purposes. Depending on whether you need a lasting fire, a fire for cooking or a multi-purpose campfire, you can choose from four styles of arranging the kindling and firewood around the tinder bed.

The teepee Fire

Teepee is the most common arrangement of kindling wood. Its shape resembles the conical tents of Native Americans, hence the name. The teepee is built in two phases. The first phase is making the cone of kindling around the tinder bed and lighting it. The second phase is placing the pieces of firewood in the same arrangement one or two minutes after setting the kindling on fire. Teepee catches on fire quickly and is ideal for cooking.

Cross Fire

Instead of making a conical structure of kindling over the tinder bed, you just lie the kindling over the tinder in a crisscross arrangement horizontally. Once it catches on fire, add the firewood gradually. This style may require a bit more space than a teepee fire meant for starting long lasting fires.

Lean-To Fire

Stick a couple of kindling sticks into the ground at a certain degree over the tinder bed. Put several smaller pieces of kindling directly on the tinder, so you can form a tent-looking structure and start the fire. As the fire catches on, add more pieces of kindling and later firewood. This style is ideal for those who have never built campfires before, as there is little risk of dying out. This style is also good for cooking.

Log Cabin Fire

The Log Cabin arrangement is the secret behind those large and bright, elegant campfires around which people don’t have to perform much legwork to keep these as such. The core of such a fire is a teepee or crossfire type of kindling arrangement (the teepee is highly preferred) over the tinder.

Around that structure, you need to make a log cabin like structure. Put two logs on either side of the structure, aligning in the same direction. The third log would connect the two log ends that are on the same side – the one which is upwind. The downwind side remains open.

Now build a cube-like structure, putting sets of several parallel aligned pieces of firewood, and put several such sets one over another. The number of pieces on every “floor” or set should not exceed five. Add smaller pieces with every new floor.       Make some space between each piece of wood to allow better air flow. This style requires plenty of firewood in the beginning, but once started it will give a good brightness and warmth for a long time without adding much new wood.

Making Sure the Fire Will Catch On

The certainty that your campfire will catch on without much hassle, depends on  materials used. All materials need to burn enough time should the next material catch on. The critical connection is that between the kindling and the firewood. Some types of wood don’t catch fire easily and should be rather used for keeping an already lit campfire.

Some of the best woods for starting a fire include ash, beech, birch,  hornbeam, hazel, and yew. Woods that are better kept at a later stage when the campfire is lit and it is just needed to keep as such is oak, apple, plum, acacia, and cedar.

Avoid plane and spruce, these burn very well, but cast a plenty of sparks, which is perhaps the last thing you want to see in your base camp. Check with the campsite staff or rangers which woods would be most suitable for you to pack. The best is to bring two kinds of wood – one that burns quickly and catches on easily and the other one that burns slowly.

Coal can be used in most areas, but for many reasons, it is better to stay away from it. Coal produces more pollution, releases  poisonous compounds such as carbon monoxide or sulfur for the same amount of energy burnt than wood, it is dirty and often smells bad. Some people consider quality coal more convenient for keeping the fire burn longer. Most types of coal produce more ash and other debris when burnt out.

Never use any liquid fuels to aid in starting the fire. Gasoline, alcohol, kerosene, various oils and other liquid products which come with a “Flammable” warning sign are not meant to help people starting fires. The flaming power of the most of such substances is much greater than that of tinder and kindling, so once started, a fire aided by these would be hard to control. Also, mind that most flammable liquid products are not environmentally-friendly, while some are poisonous and dangerous.

Never use materials that you’d discarded or wasted, such as packaging of food. Plastics, rubber, bags and similar. Even if the discarded food packaging looks just like any cardboard box, it may still contain some materials which are meant to preserve or keep the contents but  can be harmful or dangerous when exposed to open flame.

Ignition

To ignite a campfire or any other outdoor bonfire, you can use safety matches of any kind, but look for those extra long ones which increase the likelihood the tinder and kindling would catch the fire on.  A long neck lighter is a great alternative. The best ignition device so far is a flex neck lighter you can pour into the tinder bed and light until it catches the fire on safely.

Fire Dies Out

If it happens that your fire dies out for whatever reason, don’t rush to stuffing it with tinder and kindling materials. Patiently allow it to chill a bit. Even if the fire appears to be dead, it might be still alive. Some types of wood don’t burn in flame, instead, they just glow slowly until the heat burns it down. Acacia is one such example, but many other things people mistakenly use as initial firewood or kindling has slow burning properties like that.

On the occasion your campfire is dying out, you should rather start a new one at least several yards away from it. Dig a new fire hole and use new tinder, kindling, and wood. Do not use any unburnt fuel from the fire to start a new one. Use it only when the new fire has caught on the firewood.

If the fire that died out doesn’t seem to have much useful burning material, spill the water over it to make sure it will not catch on when you don’t need it and clean the debris.

The Bottom Line

Starting a fire requires a certain level of skill and knowledge, in particular, knowledge of flammable materials, their use and safety. But don’t be afraid, people have been starting bonfires and campfires since prehistory.  The techniques and technology used to start a campfire described above do help a lot. If you know how to light a barbecue fire you will probably have no problems starting a bonfire.

Take care of proper selection of kindling and firewood. If some of the wood mentioned in this article is not available in your area or is forbidden to use in the campsite you’re going to visit, consult with local staff or administration about the best alternatives offered. In any case, by respecting the recommendations from this article, starting a campfire will be a breeze and you will stay safe from wildfires and other hazards.

If you found our article useful and interesting, feel free to share it with your friends on social media. Also, if you have your own thoughts on this topic, leave a comment in the comments section, where you can also ask questions if you have any, and we will be more than glad to answer you as soon as possible.

Hiking: The Scenic Route To Weight Loss By Walking And Enjoying Nature

0

Hiking for weight loss is simply one of the most inspiring ways of getting into shape, and it is pulling many people, especially women, onto hiking exercise. This activity is one of the ideal approaches to reduce weight. Not exclusively do you burn a larger number of calories than you do when going for just a walk, but you get the chance to enjoy the excellence of the natural view where you are on the hiking trail.

Hiking can turn out to be considerably more than an activity you do with a specific end goal of losing weight – it can also become an obsession, or even a treasured exercise. Hiking activity is one of those exercises that completely can’t be overestimated with regards to weight reduction.

In this article, we will discuss the benefits of hiking over all other exercises as regards to weight loss and some vital tips on how to maximize your hiking activity in order to lose weight and get in shape. So read on!

Proven Benefits You Will Get from Hiking

Walking a mile wouldn’t burn a similar number of calories like running one, however turning into a runner is difficult and not for everybody. Some people may likely not enjoy running like some other people do, and that is the point hiking can be an extraordinary tradeoff between the two activities. Read on to know some essential benefits you will get from hiking activity:

Enhanced caloric burn

Burning calories is not the most critical thing with regards to exercise, yet it can still make a huge commitment to a weight reduction or maintenance plan. Hiking will burn significantly a greater number of calories every hour compared to walking. In light of the expansion in your heart breathing rates, the tough bit of hiking activity is comparative, from a calorie-use point of view, to that of a fairly-paced run.

It is a logical movement

Rationally it’s less demanding to motivate yourself while hiking compared to while running. In case you’re prepared to rev up your activity schedule, but running isn’t likely (regardless of whether because of an injury or absence of intrigue), then hiking is definitely an extraordinary option. In case you are planning on running eventually, hiking is likewise an extraordinary gateway practice as it will develop your cardiovascular wellness and fortify the muscles of your leg when you have leveled with your typical walking pattern.

It’s much easier to get to

Hiking activity can be performed anywhere there is a hill. You don’t have to head off to the rocky-mountains just because you want to hike, and for the tenderfoot, there are a lot of areas within a short drive that have sufficiently huge hills to get a similar physiological impact. For people who are unable to get a hilly area, hiking on a treadmill at a magnified incline will make the same experience, however we do propose getting outside.

It can be adventurous and social

If you dwell in an urban range, hiking can make for an extraordinary end of the week activity. You might need to get out some place with an astonishing perspective at the top or potentially bring friends and families along with you. The quest to be the number one at the top is an inherent inspiration and you will be encountering each other in another setting. Rather than sitting and watching TV together for a couple of hours, why not go on a hike and challenge your friends and family to inspire themselves in an outside setting (also the great benefits of natural air).

Hiking is a full-body exercise

In spite of the fact that the majority of the movement occurs starting from the waist, you can get your arms worked more in the event that you utilize trekking poles. Regardless of the possibility that you don’t, there will be significantly more pumping and swinging arm motion compared to with walking. Your main burden will be more connected to keeping your body stable while hiking over rougher areas, while the thigh, butt and calf muscles will burn some calories when you are done.

Your lower body will get to be distinctly stronger, more conditioned and strong with hiking compared to a less-varied walking pattern. And finally, since it’s harder cardiovascular workout, your lungs and heart will get an incredible benefit also.

Why Hiking Is an Ideal approach to Shed Unwanted Weights

As weight reduction, seems to be the major desire of most people, when it comes to body fitness, you might want to have a go at hiking for a simple approach to lose and keep up your weight and develop your physical wellness. The significant thing when it comes to hiking is that basically anybody can do it, it does cost much, and it gets you outside.

Hiking along with a pack works each major body muscle group, developing muscle tone, while enhancing your cardiovascular wellness. Though many folks just think you are building up your glutes and quads, hiking requires and builds up a solid feeling of balance and intense core muscles. As mentioned earlier, hiking with the use of trekking poles firms and tones your arms too.

One reason as to why hiking is such an incredible exercise is that it’s enjoyable to do. Exercising in the recreation center is so exhausting for such a large number of people, however, the fact that you can feel the mountain air or fresh forest makes hiking activity a great fun. You can even lose yourself in the magnificence nature around you, and you will nearly overlook that you are getting exercise.

As anyone might expect, you can wreck to 500 calories for each hour hiking, however you will need to walk entirely quick. Hiking at a rate of 4.5 miles for each hour will consume 500 calories, while hiking at 2.5 miles for each hour consume around 250 calories. Regardless of how fast you hike; you will be burning off those weight extreme heat while you move around the wonders of nature around.

If are tired of city life, hiking activity will offer you a reprieve from all the stress and noise around you. You can simply enter the isolation of nature, where there is only you and the lovely wildlife surrounding you. Regardless of whether you hit a climbing trail, climb up a mountain, or meander through a woodland, you’ll see that it’s quiet and extremely stress-less.

One major factor that makes hiking so useful for exercise and weight loss is that you are compelled to walk. On the off chance that you spend up to an hour hiking a distant far from your car, you will have to spend one more hour hiking straight back to where you pack your car. However, even if you did not make it to the highest point of the mountain or hike through every 40 miles of the trail, you will simply have to hike just to return to progress. Unless you stop within the first mile or somewhere in the vicinity, you will get great exercise and burn fat regardless of what you do.

The weight of your body and the kind of trail you pick decide the quantity of calories you consume while hiking. More difficult trails will prompt to more prominent energy use. By and large, a 200-pound grown-up will consume around 546 calories while on a hike for close to an hour. Though hiking activity burns less calories, and subsequently less fat, it helps you develop balance, adaptability and quality in the muscles of your legs and back. In the event that you convey a pack, hiking likewise helps fortifies your shoulders.

Hiking Versus Walking

Beside keeping up a spotless and sound way of life and eating the correct sort and amount of food, you have to likewise build your physical exercise if you are not kidding about getting in shape and holding weight down. Walking is thought to be the most famous exercise for individuals who need to deal with their weight. Notwithstanding, before leaving yourself to walking as your lone exercise, take a stab at contrasting it with hiking first. Here are the comparisons between hiking and walking:

Hiking burns calories speedier than walking

On an ordinary day, a man who has a weight of 130 lbs thereabout, hits the gym for 60 minutes in long, walking exercise on a treadmill. Even better, he would bring along his mp3, insert his headphones and do some lively walking for 60 minutes. This would consume roughly 295 calories. On the off chance that he walks any quicker, say, at 4.5 mph, he may consume about 372 calories.

The following day, he chooses to hike the trail. In an hour of cross-country hiking activity done on a normal pace, he will consume 354 calories. If he’s conveying a rucksack, it will attain up to 413 calories. In short, hiking burns a larger number of calories and at a speedier rate than just walking.

Hiking gives more chances to burn calories than walking

Walking the trail is as easy as it comes. Wear your walking shoes or boot, wear some good clothes for walking, bring along some water and also your mp3 with you, and begin to walk a generally straight and uncomplicated trail.

However, when it comes to hiking, you will definitely have more methods for expanding the rate at which your body consumes calories. Conveying a backpack alone will significantly accelerate the procedure. So does dealing with rough terrain, for example, climbing a mountain and hill trails, or even something as straightforward as attempting to pass over rocks.

There are some hiking tools and implements that will help you shed pounds and also make you less fatty and stronger. Backpacks and trekking poles are especially helpful with regards to working up the strength and endurance of your upper body.

Hiking is more enjoyable than walking

If you cherish nature and you desire to invest as much energy and time as you could in the outdoors, hiking is certainly the better choice. Walking could just take you to specific places, most likely very well-known places in the event that you have walked through them innumerable circumstances before. It turns out to be significantly all the more exhausting if all your walking activity is done in a recreation center. When you go on a hike, you will get nearer to nature and have an excursion of disclosure as you run over trails that are seldom taken.

Making Hiking a Weight-Loss Activity

Here are a few tips on the best way to make hiking an activity for weight-loss:

Make it a regular activity

For hiking to result into a noteworthy weight-loss approach, you have to make it a regular exercise – i.e. at least once in a week. Hiking usually makes the physiology of your body sensitive to it, in this way, making weight loss and metabolism quite easier.

Level up

Since weight reduction is connected to the intensity level of the hiking activity, go for harder hikes with lengthy trails. Increase the weight of your backpack. Carrying full backpack even while on a day-hike isn’t cool enough — it’s likewise healthy. Given of course that you are carrying your backpack in the proper way. In any case, going for a harder hiking trip may be more advantageous: a few studies have proven that you will keep on burning more amounts of calories even after a powerful activity.

Accompany it with other aerobic exercises

Number 3 is the enchantment number of minimal recurrence of aerobic exercises each week. So in case you are hiking on Saturdays, perform that swim or jog on Tuesdays and Thursdays. Tune in to your body — you need to likewise abstain from workaholic behavior yourself.

Consume simply enough trail food

Most hikers are tamped up for trail food, yet in the event that you eat excessively, you may even put on weight from hiking! There are some trail bars that have 300 calories or considerably more, and in case you are eating chocolates, treats, that is a great deal! In the event that you truly need to eat something while on the trail, opt in for healthy options, such as celery sticks, carrot sticks and zucchini cuts. Fruits must also be eaten with some restraint.

Abstain from drinking in the campground

Alcohol, besides being a wellspring of hangovers, is additionally a wellspring of calories. One jug of Red Horse, for example, has 220 calories — 10 percent more than one rice cup! If you are unable to do it, then ensure that you drink modestly.

Don’t fix your calories burned with an overwhelming post-climb dinner

Justifiably, there is much motivation to celebrate after finishing a hike. Nonetheless, you will be neutralizing the weight-loss in the event that you will eat excessively. It’s alright to eat more — but concentrate more on the protein and the vegetables, which you probably didn’t have a lot of amid the climb itself. With respect to the carbs, if you have been eating a large portion of trail meals and having overwhelming camp dinners, don’t eat excessively. Avoid the extra rice.

Maximizing Your Workout

One of the things that makes hiking a great activity is that it needs no special athletic aptitude. If you can easily climb a staircase, that means you can hike. Obviously, the simplicity of beginning doesn’t mean that there isn’t an approach to hike more viably. To get the greatest advantage from your exercise, keep the following tips in mind:

Slow down

Plan to hike at a direct pace for a lengthy time frame, rather than walking as quick as possible. In case you are not ready to easily address a friend in full sentences, then you are really pushing yourself.

Embrace the evolving weather

For whatever length of time that it is not frosty, you can securely climb year round. However, hiking in the cold weather can enhance your calorie burn by roughly 50%. Indeed, even simply hiking on a blustery day will enhance your calorie burn by up to 5% because of the wind resistance.

Hike through the trail less traveled

Hiking on sandy paths or trails burns a larger number of calories than adhering to cleared regions because of the exertion required to impel your body forward on rough terrains.

Consider investing in hiking poles

In case you are on a financial plan, it is secure to hike with just a decent pair of shoes or boots and a bottle of water to enhance hydration. However, in case you’re not kidding about getting fit as a fiddle, consider grabbing a couple of hiking poles for trekking. These adjustable poles help to appropriate your energy utilization, enhance your endurance and provide your arm with an extra workout.

Monitor your progress

Fitness tracker tools such as Fitbit can be superb devices for assessing your hiking progress, since they display detailed information with respect to every day’s physical movement. Taking a look at the numerical proof of your change can help give you the inspiration you require to adhere to a consistent exercise schedule.

Concluding Thoughts on This Topic

In case you are attempting to build up a long-term weight reduction plan, or you are simply keen on investing more of your time outside, start planning on embarking on more hikes. You will encounter first hand the means by which hiking burns a large number of calories than the recreation center!

Hiking is absolutely the best choice for all around physical wellness, and in addition, it has the benefit checking through one’s mental wellness, as well. All aspects of the body, every joint and muscle, gets worked up while calories are burned up at a faster rate.

Bringing you nearer to nature while performing all these will likewise deal with your emotional balance, helping you to maintain a strategic distant from the diversions of your monotonous routine that, normally, are the primary things that prevent you from taking proper care of your weight, health and body.

Has hiking been able to fulfil your desire to lose weight? Have you been able to burn more calories by hiking? Let us know by leaving us a comment below.

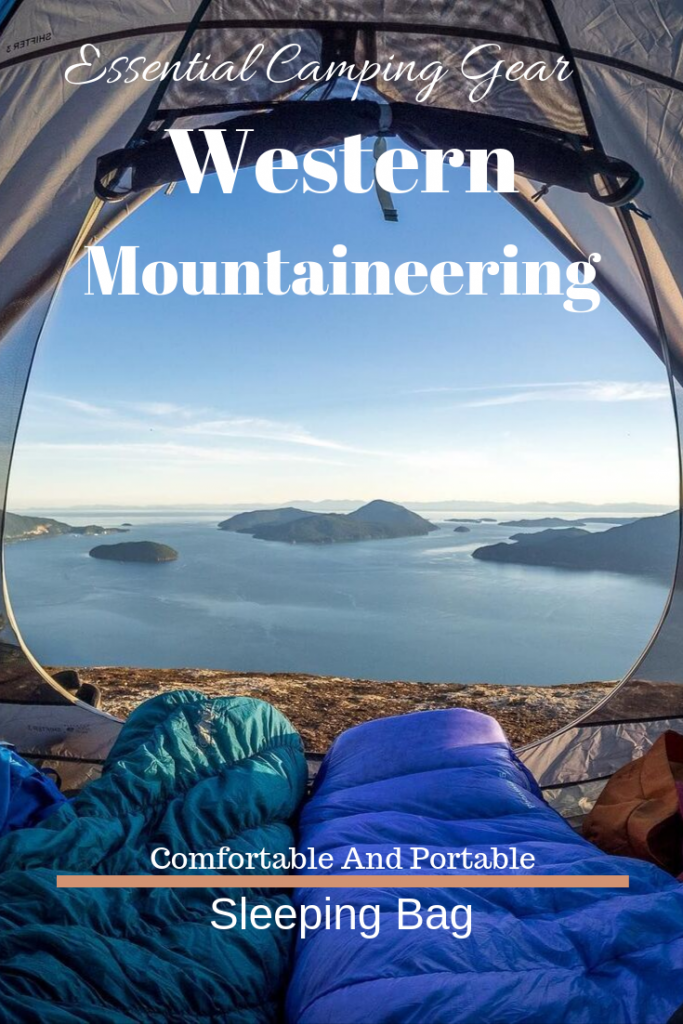
The Western Mountaineering Sleeping Bag: The Most Important Outdoor Gear For Adventurers

0

The difference between backpacking and hiking is that the former implies you will spend at least a night in the wilderness. As a result, backpacking can be quite different from hiking, especially when you consider the duration you will be spending outdoors and the kind of gear you will need to take with you.

However, whether hiking or backpacking, a rough night spent in the wilderness could ruin your entire experience. Since a sleeping bag is crucial for most of these trips, looking for one that suits you will go a long way in ensuring you have a memorable expedition.

The best sleeping bag should cover you in a cocoon of comfort and warmth, enabling your whole body to recover, so it’s ready for the next day’s expedition. But selecting the right gear can be a little cumbersome.

That is why we are going to show you the Western Mountaineering Cypress Gore WindStopper -30 Degree Sleeping Bag so you will have to search no more! This semi rectangular sleeping bag is so comfortable and warm, that you can literally sleep in really frigid temperatures and still stay toasty inside! Let us dive into all of the information about this summer time sleeping bag!

Review

Packaging

Your sleeping bag will come compressed in the package that is just a little bigger than 6 x 14 x 22 inches. The package weight should be about 7 pounds and include the sleeping bag as well as the stuff sack so you can compress your bag down to a size that lets you tote it around.

Durability and Design

This sleeping bag is designed to be semi rectangular, very warm, and cozy. It is designed with a storm flap, draft tubes that keep cold air out, and is weather resistant with the Gore Wind-Stopper. It is also highly durable, has a left side zipper, and will last you for many years of outdoor adventures! This sleeping bag has proven to be great for summer use, but it can be used on warm winter nights as well.

It has a temperature rating of 25 degrees F, so it will work down past freezing temperatures. It may get too warm for you if the temperature outside is too warm, but it gives you the ability to vent the sleeping bag so you do not feel too warm or get sweaty. This bag is made to give you the perfect sleeping experience no matter where you are sleeping. If you feel the need for more padding, you can put a sleeping pad inside of it with ease.

Shell and GWS

The shell of the Cypress GWS is excellent and adds to the amazing features of this bag. This component is extremely water resistant and highly breathable as well, given its weight-to-performance ratio. The GORE-TEX WindStopper shell offered by Western Mountaineering makes the sleeping bag ideal for use in humid areas as this feature is water repellent. Good breathability, is essential in a cold weather sleeping bag as the build-up of perspiration will compromise the down’s lofting power during your extended trips.

Insulation

The Western Mountaineering Cypress LZ Gore WindStopper Sleeping Bag is amazingly wide, with more girth and insulation compared to other bags, in its rating. Even though the Cypress GWS isn’t a mummy bag, it’s capable if keeping you warm at thirty degrees Fahrenheit.

With an average loft of eleven, this bag will engulf your body with a wall of the best thermal protection. The bag consists of 850+ fill power premium goose down. The Cypress Gore Wind-Stopper is an excellent way to cover yourself in a warm goose down as each of them is filled with almost fifty ounces of it.

In addition to its excellent fit, the Cypress GWS Sleeping Bag is made of a down collar that runs on the upper side of the chest to prevent heat from escaping during the night. Additionally, this product has a full zipper which is significant for venting in warm weather. The down filled draft tube is also important as it helps prevent side drafts.

A goose down is the most compressible and the lightest insulator available, giving a bag a surprisingly high warmth-to-weight ratio. In that case, a 30o down bag would weigh less compared to a synthetic sleeping bag of the same rating. Down insulation is important for hikers or backpackers who are looking to pack more efficiently.

Manufacturer Recommendations

  • Do not store a wet bag. Always ensure the sleeping bag is dry before you can store it
  • For goose down options, never store them in a stuff sack. Store them in large bags, such as the laundry bags. The synthetic options are quite forgiving and can be stored, at least for some time, inside the stuff sack
  • If you have to wash your bag, make sure you utilize a front-load machine, with some cold water and soap.
  • Never dry clean a bag, especially those filled with goose down.

 Value for the Money

The value of thus sleeping bag is one that is hard to bear. One of the greatest reasons why most backpackers would go for quality down sleeping bags is that these products have a long lifespan, and the Cypress GWS is not an exception. Compared to the synthetic products, these models can be easily stuffed and unstuffed without damaging their insulation. If you can acquire a quality sleeping bag that can handle the on- and off-trail adventures, you’ll be able to save a lot of money in the long term.

At about $1,130, the Cypress GWS sleeping bag is quite worth the investment. In addition to that, if this bag is able to withstand abuse, and can sustain being used for an extended period without losing its efficiency, then it’s worth the investment. Given its features, the Cypress GWS can be used for all backpacking adventures, as well as periodic ski tours and mountaineering expeditions. These aspects are what make it a go-to option whenever you are in need of something that can serve you efficiently while in the wilderness.

Cypress LZ GWS utilizes down from free-range mother geese. With its features, you can use this bag to climb mountains and camp in areas you’ve always dreamed of. As the wind blows through the night and the cold is almost freezing your bones, you can zip yourself in the Cypress GWS for warmth. As mentioned, the bag is packed with 850+ fill power down to create a loft of about 11” so you are able to sleep soundly, dreaming of accomplishing your tour objects come the next day.

The Gore WindStopper shell fabric offers the weather resistance you desire in extreme temperatures and weather. Who would have imagined that all the warmth of this sleeping bag can weigh in at about 7 pounds?

The Cypress GWS comes with outstanding features that make it suitable for your outdoor needs. These include an insulated draft tube on the inside of the zipper combined with a storm flap covering on the outside, a three-dimensional draft collar (insulated), a GWS outer shell material, and a second zipper that allows the bag to open entirely around the foot. Other features of the Cypress GWS are as follows:

  • Full down collar
  • 64/39” foot/shoulder girth
  • Insulated external hood ruff
  • 5 ¼” V-block side baffle

This sleeping bag compresses down to a smaller size in a compression sack. This is an important aspect for backpackers looking to save some space on their pack. If you are a mountaineering enthusiast, you are aware that the size of the sleeping bag is directly proportional to the size and weight of the backpack you carry, since it takes almost fifty percent of the space in the pack.

The GORE-TEX WindStopper fabric, the soft, lightweight, and lofty materials of the Cypress GWS make this product quite attractive and a suitable place to sleep in. If you prefer comfort over anything else, then this is the right product for you. It offers the softest and most comfortable touch compared to most sleeping bags within the same ratings.

PROS:

  • Temperature rating down to -30 degrees F
  • 50 oz of down filling
  • Weather resistant, Has Gore Windstopper
  • Adjustable Collar
  • Warm and well insulated, includes storm flap
  • 5 inches of loft

CONS:

  • Very pricey, over $1,000
  • Only comes in one color
  • Gets too warm around 50 degrees F

When it comes to choosing a backpacking equipment such as a sleeping bag, there are numerous aspects you will need to consider to ensure you make the right choice. This guide provides some essential pointers that will help you to make an informed decision as far as selecting a sleeping bag is concerned.

Make sure you choose a bag that has the features that will enable you to survive the outdoor conditions. One of the best options that would suit you during cold weather camping and backpacking is the Western Mountaineering Cypress LZ GWS Sleeping Bag.

Great Outdoor Tips For Couples: Camping For Two!

0

Camping is definitely the first thing that crosses someone’s mind when it comes to a perfect Valentine day or any other romantic event, especially if you and your partner love camping and spending time in the wilderness.

Imagine the fun and romance taking the love of your life somewhere far away from the hustle, bustle and busy schedule of city struggles. It would be up to you to turn “the wild environment into the romantic one”.

In this article, we are going to take a look at some really amazing romantic camping ideas. If you are still not sure about romantic camping, then stay tuned because you might end up loving it.

How to Plan Your Romantic Camping Trip

If you don’t want your romantic getaway to turn into a disaster,there are some important things to consider before actually going on a trip.

Pick the perfect spot

It is crucial to do some research beforehand and get yourself familiar with the area. Of course, unless you are planning to go somewhere where you have already been. If not, then make sure to find a place that would suit both of you. Since you are planning a romantic trip, go somewhere where you will have privacy and peace and quiet.

How to find the perfect spot? Do a research on all of the campsites online. By using online maps you can take a look at each detail, route, and path. By doing this you will be able to make sure nothing goes wrong.

Make reservations

This is very important, especially during the peak vacation months. You do not want your camping spot to be reserved by someone else, right? Not only reservations, but you should also use the online info to find out about entrance fees and the price of the activities being performed there.

In this way you won’t be surprised in a bad way.

Camping Gear You Must Not Forget

Let’s take a look at some of the goodies that you should not forget. These goodies would come in handy during your romantic camping.

But make sure to remember that you cannot really bring all of them together, because that depends on the location.

  • Since you will be sleeping in the wilderness, a comfy air mattress of high quality is a must. You might even want to go for a two-person sleeping bag so you would make sure that both of you have enough space. However, if you are camping somewhere with freezing temperatures or during the winter, you might want to buy a warmer and a waterproof sleeping bed with good insulation.
  • Pillows will spice up the cozy atmosphere and allow you to snuggle.
  • Make sure to bring extra blankets if you are camping in the winter or in case it suddenly gets colder. Or imagine what would happen if you get trapped in a rain or storm.
  • Take your romantic event in the wilderness to a higher level by hanging string lights around the tent, or even in the bushes and trees around it. You will need a battery powered, light strings or the solar ones.
  • Many couples go for candles when they want to achieve romantic mood, but remember that you must bring only the risk-free light. That is why you should consider bringing LED tea lights which can create the same Valentine effect.
  • Bring a guitar or some other musical instrument that is easily carried around. You can woo your partner or get wooed. You can also sing some favorite songs together. You will be probably alone, so there won’t be any need to be embarrassed.
  • Nobody would go camping without bringing a camping stove, so you can make delicious hot drinks like hot chocolate. It is not very romantic to eat canned food.
  • Do not forget to bring cards and games you both love to play together.
  • A cooler will keep all food and drinks fresh and cool. It is actually a must with regular camping as well.
  • If you are not able to play any musical instrument, then take a portable music player with you. Make a romantic playlist of favorite songs in advance and surprise your partner! Music makes everything better.

Other Things to Consider Before You Go

Besides the camping gear that you must not forget to bring, there are also a couple of other things to consider, such as:

  • Clothes: avoid smelly fabrics that quickly absorb sweat. Cotton becomes very stinky and should be avoided while synthetics, wool and Gore-Tex are great choices. Wool is warm while Gore-Tex is waterproof. Polypropylene and polyester can be used as under-layers because they do not get as stinky as cotton.
  • Prepare the menu: instead of wondering about the food there, make sure to prepare the full menu before you go. Spice up the camping trip activities and surprise your partner with dishes that she or he adores. If both of you are fond of alcoholic drinks, bring a favorite beverage, but place it in a bag or thermos. Do not forget desserts!
  • Do a research on wildlife: you would not want to get surprised by a bear, right? Even though it can be quite exciting to come upon a wild animal, you should know how to behave in its presence and if it is possible, to avoid if it is dangerous. You can even find about which products to bring with you in order to prevent insect bites or which places to avoid so you would not come face to face with a rat, skunk, snake, or mountain lion. While you are taking a break, inspect your body to see if there are ticks, because they must be removed immediately. That means that you should not forget an antiseptic.

Ideas for Romantic Camping Destinations

Here are some wonderful ideas for romantic destinations. Depending on where you live and your budget, you can choose at least one that would suit both you and your partner.

Campfire

In most states and countries, campfires are forbidden due to the risk of forest fires.

That is why you should be aware of the fact that you would be able to go camping only when it is colder. However, what is more romantic than sitting around a warm campfire and looking at the stars? You can also enjoy a nice dinner and create a wonderful atmosphere.

Do a research on sites and locations that allow campfires and purchase the firewood only if you are sure that you can really go. Follow the campfire policy for your own safety and everything will be good.

Beaches

Beaches are another amazing and romantic getaway.  You can swim, bathe in the sun, and make a beach fire, play beach games etc. Camping at the beach is different than camping in the woods, so you will need to bring beach-specific supplies. The basics are the same, but you will also need to protect your skin from the sun and bug bites.

Track the tides regularly, stay away from the dunes during the night and stay hydrated.

Hot Springs

Have you ever tried camping near a natural hot spring? Then make sure to try it, because it is relaxing, amazing and utterly romantic! If you manage to find a hot spring, imagine soaking yourself in hot water with your partner under the starry night. You can spice it up with tea-light candles, a portable music player and drinks.

However, make sure not to use glass for your drinks, never use soap and do not leave any litter behind.

Hiking

Hiking can be another great way to spend a romantic day with your partner. Just imagine a nice weekend in the wilderness, and away from the crowds. However, make sure to bring boots of good quality because you will be on foot for hours; developing blisters is never romantic. Your shoes should provide you with ankle support and the socks should be designed for hiking. It would be a good idea to spend your day hikes in light-weight hiking shoes instead of the heavy high-cut boots. Your toes should have enough space to move around otherwise they will swell.

As for the destination, it is all up to you. With a blanket, water, enough food, and a headlamp, you can take your beloved on a romantic hike through the woods or hills. Hiking is not only great for physical health, but also mental health as well.

Paddling

Looking for an unusual romantic getaway? Then what about canoeing, rafting or kayaking? Take your boyfriend or girlfriend on a paddling journey in which both of you will have fun! This is a great activity because it can lead you to an isolated campsite where you can take a break and enjoy the view with your partner. You do not really to buy a boat or canoe, you can simply rent one, but you have to be experienced in peddling it. Do not go paddling if you have never done it before because you can endanger not only yourself but your partner as well!

For this kind of adventure you need drinking water, food, sun protection, waterproof footwear and life-jacket. Make sure to get familiar with the area and its rapids before you go so you can avoid unexpected danger. Also, do not only peddle but take mini breaks to show your partner the area and the landscape. It will be an unforgettable adventure!

Safety

When you have finally chosen a destination, make sure to be aware of possible dangers and give your best to prevent them. It all depends on your experience, and if you are the one planning the romantic getaway, then you are responsible for your partner’s life as well.

Let’s take a look at some safety measures:

  • Sunburn can be prevented by wearing hats, sunglasses and applying lots of sunscreen. It does not matter where you are, you can get a sunburn at high elevations during freezing temperatures just as same as at the beach. However, if you do happen to sunburn your skin, apply lots of gel and seek medical attention if the burns turn into blisters.
  • Blisters are mostly caused by bad footwear, especially during hiking. Make sure to wear socks of high quality and to keep them dry. If your feet hurt, then make a break and check the blister. Apply a padding if it is not broken; however, if it has already turned into an open wound, then clean it with soap and water and cover it with a hydrogel.
  • Sprains are serious injuries that can happen anywhere. People who have sprained their wrists, knees or ankles should rest, then apply ice to the sprain to prevent swelling. After that a bandage should be used and the sprained joins kept elevated above the heart level.
  • Make sure to always have a First Aid Kit with you, whenever and wherever you go.

Final Thoughts on This Topic

To sum up, we have covered the most important things regarding romantic camping ideas. We have also mentioned some great destinations that might spark your interest and positively surprise your partner. Depending on your budget and location, you can explore camping areas online by using maps and official camping sites. In that way you will be informed about the all possible fees and taxes that might come along your way.

In order to turn camping into a romantic trip, prepare everything beforehand and make sure to remember your partner’s taste and preference. After that it is up to you to create a romantic location and transform it from the wild one into a truly Valentine setting.

Additionally, do not forget that it is better to be safe than sorry. If you are not experienced when it comes to hiking, paddling or camping in general, do not venture into long and far-away journeys that might endanger both you and your partner. Stick to a place where you can ask for help in case you need it.

Discover These Beautiful Gems In Alabama: The Top Must See Places You Have To Visit

0

The Heart of Dixie, the start of the Appalachia, the 22nd state — Alabama.  You may not immediately think of Alabama as having some excellent camping locations, but read on to discover some of the best camping in Alabama, and some true hidden gems for those who love the outdoors.

Alabama has four national forests: Tuskegee National Forest near Auburn, Bankhead National Forest in the north, Talladega National Forest in the East, and Conecuh National Forest to the south.  There are 26 state parks and historic state parks sprinkled throughout the state.

There are hundreds of privately owned and government owned, established campgrounds with year-round availability.  Many areas of the national forests and some state parks allow wilderness camping, horseback riding, fishing and hunting.

Many of Alabama’s best camping spots boast of a prominent aquatic feature: a river, a lake, a pond, a bay or even the ocean.  The diversity of Alabama’s ecology is surprisingly varied- it’s not all thick daunting woods.

In this article, we will elucidate a number of different prime camping sites in Alabama.  The different camping sites are categorized by region, and vary in terms of camping type, whether you are looking for something more upscale and comfortable, or something more primitive and wild, there truly is a spot for everyone in Alabama.

North West Alabama

The top west part of the state is home to the Bankhead National Forest, home of the famous Alabama Sipsey Fork River.  This part of Alabama has some of the most remote areas for camping and exploring.  The forest land here is lushly thick with trees, poplar mostly, but is also cut with steep towering rocks, waterfalls, and gorges.

Sipsey Wilderness

This area of land spanning over 24,000 acres is the largest wilderness area in Alabama.  It has been dubbed the Land of 1000 Waterfalls, and for good reason.  Scattered throughout the forest along the Sipsey River, are a number of beautiful limestone and sandstone formations creating the perfect environment for waterfalls.

The number of waterfalls and cascades along the trails in the forest, change with the seasons and the rainfall, but you’re guaranteed to see some year-round. There is one parking lot for day use or to leave your car to go backpacking and camping, but that’s about it.

There are no established campsites, no bathrooms, no modern facilities, just nature.  A popular hike with a safe spot to camp at the end of the hike is the Bee Branch Trail, or official trail number 204.  The trail ends in the heart of Sipsey wilderness.

The hike begins along the river at the day use area parking lot.  It’s rated moderate to difficult due to its length and the at times unmarked trail.  You can start at the Sipsey Trail Head and follow the river, or start at the Thompson Trail Head which passes by some abandoned churches and ancient cemeteries.

You are legally allowed to camp anywhere within the Sipsey National Wilderness, no permit required.

Clear Creek Campsite

This campsite is located within the Bankhead National Forest alongside the serene Lewis Smith Lake.  This area is more suited for families and those wishing to experience the beauty of Alabama’s Appalachian wilderness, but not be so far removed from civilization.

This area has over 100 campsites, over 500 miles of lake shore, and two designated hiking and biking trails. As this campsite is located within the Bankhead National Forest, you can easily reach hundreds of miles of trails that web through the national forest, including Sipsey wilderness.

Lewis Smith Lake is a prime spot for year-round fishing, boat activities, and leisure.  The campgrounds operate April through October, but the day use area is open year-round.

Northern Alabama

Less wild than the northwest corner, the other northern parts of Alabama contain some interesting camping options as well.  You, of course, have the more traditional sites along rivers and lakes, but there are other options on farmland or private properties that have opened their home for the outdoor enthusiasts.

Honey Comb Campground

A recently renovated campground situated along Lake Guntersville on the Tennessee River.  The campground is located about an hour outside of Huntsville.  It’s a quick and easy getaway to relax along the river, with beautiful wooded trails and quiet walks on the lake shores.

You can camp in a tent or an RV, the grounds accommodate for both types of camping. This campground has a little something for everyone.  You can rent a pontoon boat, and you can rent an RV, something that not many campgrounds have to offer.

Fishing, swimming, kayaking, bike riding, and boating are just a few of the more popular activities at Honey Comb. You can use the day use area or camp any day of the year.  The only thing that changes are the hours of operation of the general store, which is open later during the summer.

Tune Farm’s Whistle Stop Camp

This stop is a true hidden gem, it’s one of the more off the beaten path camping spots in Alabama.  The Whistle Stop Camp, so named for its location along an old railroad stop, is an interesting experience in between Huntsville and Birmingham.  It is catered more for the road weary travelers, or those of the more weekend warrior persuasion.

You may even go so far as to call this one ‘glamping’ or glamorous camping. The 260 acre land was first purchased by Dr. Tune, a successful surgeon, in 1968.  He raised cattle and grew various crops.  His decedents kept the farm alive by eventually switching to sustainable farming practices and became Alabama’s first certified organic farm in the 1990’s.

Today, the Tune family, had opened their doors to camping enthusiasts.  They offer nearly 200 acres of space to pitch a tent and camp, as well as offering a cozy room in their renovated barn or farmhouse, complete with private bathrooms and small kitchens.

Central Alabama

Talladega National Forest is the largest nationally protected land in Alabama.  There are also a number of beautiful wilderness areas surrounding popular cities in central Alabama such as Birmingham and Montgomery.

Talladega has a more varied topography with a more mountainous terrain, and is the southernmost start of Southern Appalachian ecology.  The famed Appalachian Trail runs through this ecology, but the trail officially starts in Alabama’s neighboring state Georgia.

Oak Mountain State Park

Oak Mountain is Alabama’s largest state park and a popular camping destination.  Hiking and mountain biking trails abound.  Many of the trails permit horseback riding as well. Peavine Falls, a 65-foot waterfall located within the park, is accessible by a well-maintained hiking trail.

The fall feeds into a decent sized swimming pool with refreshingly crisp spring water.  Swimming is allowed and encouraged. Horseback riding is also very popular within the 25 miles of trails in the park.  If you can’t bring your own steed, you can sign up for a guided trail ride with the Rusted Roof Barn.

Children ages 10 and up can ride as well.  No horseback riding experience is necessary to ride in the park with the trail guides. Oak Mountain State Park offers its campers a private beach to relax on.  There is another beach open to the public as well for day use, but they have reserved one solely for their camping patrons.

Camping options in the park range from back country wilderness camping to posh, waterfront cabins.  There are also equestrian campsites with amenities for the horses as well as humans, RV hookups, and tent pads.  There is an admission fee to the park and camping fees vary.  The park and campsites are open year-round.

Prairie Creek Campground

Nestled in a fork in the Alabama River lies this tiny piece of public land, a haven for the fishing enthusiast.  It’s a quick getaway from Montgomery, under 30 minutes, and has 55 campsites along the banks of the river.  It’s a quiet spot not too far from the city, with peaceful views of the river and surrounding woodlands.

It definitely isn’t for the extreme backpacking enthusiast, but it does make a very nice, quick little get away for those living in nearby Montgomery or Selma.

Eastern Alabama

As you approach Alabama’s borders, Georgia to the east and Florida to the south, the wilderness areas begin to thin.  However, there are still some remaining smaller National Park Service areas that remain available for camping and recreation, such as the Tuskegee National Forest, the smallest of the four national forests in Alabama.

Chewacla State Park

Located not too far from Auburn and one of the largest universities in the southern United States, Auburn University, lies the near 700 acres of Chewacla State Park. It’s a swimming enthusiast’s dream destination with a huge 26-acre spring-fed lake, surrounded by lush green foliage.

There’s a web of hiking and biking trails that you could spend days upon days exploring. In addition to well-groomed campsites for tents and RVs, the now disbanded Civilian Conservation Corps built six rustic stone cottages in the 1930’s that are available for rent in the park as well.

You definitely wouldn’t be roughing it in these cottages, as they now each have a TV, air conditioning, heater, and modernized flooring, bathroom and kitchen.

Southern Alabama

A small portion of the state lies along a beautiful coastline.  There are a number of smaller barrier islands along the border of the state that host some really beautiful campgrounds.  Alabama’s beaches are a very popular tourist destination, however, so there isn’t much land that’s been left untouched.

If you are more interested in the wilderness aspect of camping, beach camping in Alabama may seem a bit too crowded for you.  However, if you are seeking a more family friendly camping experience, the beaches may be perfect.

Beach camping isn’t the only place to set up a tent at the south end of the state.  There’s access to the Conecuh National Forest, which lies right along the border of Alabama and Florida.  It’s a change of pace from its more northern national forest counterparts, as this park is of more coastal ecology and less densely forested.

Dauphin Island

If beach camping is more what you’re looking for, head south and drive across the Mobile Bay to Dauphin Island.  It’s a small place, only about 1,000 full time residents, but the island has so much to offer.

Besides a beautiful beach side campground with stunning views of the Gulf of Mexico, there’s an aquarium, bird sanctuaries, rich Native American history, historic Civil War Fort Gaines, and a hefty tourism scene- restaurants, condos, hotels, and many family friendly activities.

The lower right side of the tiny, 166 square mile island hosts a decent sized campground, the Fort Gaines Campground.  There is access to secluded beaches, boat launches, bike paths, and bird sanctuaries.

You can also rent water sport equipment, such as kayaks or stand up paddle boards, or simply enjoy the salty breeze rolling off the Gulf of Mexico while relaxing on the beach.

The only thing to keep in mind about travelling and camping on Dauphin Island is tropical storms.  If you are tent camping, check the forecast before you go to ensure you won’t be trapped in bad weather on the tiny island.

Gulf Shores

Gulf State Park is another premier beach camping spot in Alabama.  The state park encompasses miles of striking white sand set against the deep blue waters of the Gulf of Mexico.  There are a number of sites for more primitive tent camping, but there are also cabins and cozy cottages for rent along the shoreline.

The Gulf Shores campground is minutes away from the airport, and is a short drive away from the Alabama Gulf Coast Zoo- a must see for the family.  The range of activities varies drastically from beach volleyball to biking, sun bathing to boating.

Open Pond

The Open Pond Recreation Area, located within Conecuh National Forest, is a well-maintained campsite in southern Alabama.  The area is an ideal spot for game hunting and fishing, as well as hiking and exploring the great outdoors.

There are over 70 tent camping sites and 60 RV sites, all available year round.  Hiking enthusiasts can enjoy a full day spent along the 20 mile Conecuh Recreation Trail that circles the lake, meanders through beautiful pines, all the while not changing too much in elevation.

It’s a quiet, often overlooked spot, and makes a great camping destination for those seeking more wilderness and seclusion.

Things to Look Out For

As always, before heading out into any wilderness or outdoor adventure, be aware and be safe!  Be prepared by always carrying a first aid kit, a light source, and plenty of water.  Alabama can get very hot and humid in the summer, and the southern parts of the state can receive heavy rains and strong winds from tropical storms coming in along the Gulf of Mexico.

The wilderness is home to some potentially dangerous animals such as feral hogs, bears, and venomous snakes.  Read up on the ecology and fauna before heading out just so you know what to expect.  Often times with any animal encounter, as long as you don’t act as a threat and don’t provoke them, they will leave you alone.

A final thing to be aware of is the annual Hangout Fest in Gulf Shores.  If you are planning on camping along one of Alabama’s many premier coastal campsites, you may want to avoid the weekend of the Hangout Fest, usually in May.

It’s a music festival with a variety of genres that attracts tens of thousands of visitors to the small Gulf Coast.  The area can quickly fill up and be very crowded.

Why We Camp

So why do we camp?  Why do we spend our hard earned money to leave the comforts and amenities of our home and hang out in the elements?  We do it for the love of the outdoors, our deep appreciation of nature.  We are so lucky in the United States with literally millions of acres of protected forest land and wilderness.

There are seemingly endless opportunities to camp in the United States, and Alabama should not go unnoticed for its magnificent expanses of wilderness. Stephen Maher, the first director of the National Park Services in the 1920’s, has famously been quoted for the reason behind operating the National Park system and why protecting natural land is so important.

It’s a good reminder for all of us why it’s so important to spend some time out in nature, away from the stress of daily life: “A visit inspires love of country; begets contentment; engenders pride of possession; contains the antidote for national restlessness.”

High Energy Snacks And Meals For Hiking: Hiking Food Ideas For Healthy Snacks And Meals

0

Eating on the trail is both similar and different from eating at home. While you are hiking and backpacking your body is burning a lot of calories. In order to remain healthy and active throughout your trip, your food will have to replace the calories that you are losing. The best hiking food guides suggest eating foods that are high in good fats and proteins. Make sure and consider this when packing your gear. Eating enough calories will help you avoid headaches and lethargy.

Studies also show that sufficient eating allows us to focus and concentrate better as well. You do not want to adhere to a strict diet while on the trail.

How Much?

Some experienced hikers suggest packing enough food to allow for 2,500-4,500 calories per day per person.

These estimates are, of course, going to vary according to your weight and individual needs. As you gain more experience yourself, you will become more familiar with how much food you will need for summer hikes, winter hikes and anything in between.

The most important thing to be aware of is to make sure you will not run out of food. It is always better to have a little more weight in your pack than to run out of food before you get home. So in the beginning, always pack more than you believe you will need.

Good Types of Food

When deciding what kind of food to take with you on your hike, you need to consider a few things before throwing it in your pack.

  • Durability: How well will this food do when being shaken around in a backpack for days on end? Bananas are a great snack, however, they bruise and ruin easily. Unless you only pack one or two for the first day, chances are they will not do any good.
    Peanut butter, on the other hand, is not affected by temperature or being shaken and tossed around. This makes it a perfect candidate for hiking food.
  • Prep time: How long will it take to get this food ready to eat? We will be discussing cooking on the trail in a little while, and a hot meal is always welcome when you are working hard, but everything should not have to be cooked.
    For breakfast, lunch, and snacks, you should choose a food that is quick and always ready. You do not want to have to spend 30 minutes cooking every time you get hungry. You simply need food to replace the calories that you are burning so your body remains healthy.
  • Trash: What is the trash that comes along with this food? Remember, you are in the woods, on the trail, far away from a proper trash can, you must choose a food that does not produce a lot of trash that you will have to keep with you for a week.
  • Weight: Basically, you need to consider the calorie to weight ratio. If your food for breakfast each morning adds 1 lbs for each day, but you only receive half of the calories you need, it is probably not a wise choice for food.
    Again, peanut butter is a good choice. An entire jar may weigh a pound or two, but it is packed with protein and calories that are extremely beneficial.
  • Taste: Do you like the food? Do yourself a favor: Don’t try a plethora of new foods that you are not sure you will like while on the trail. You have two choices; Try the foods before you leave OR Only pack one or two foods to try while you are out. If you force yourself to eat foods that you discover that you hate for a week in a row, you will be miserable. Don’t do that to yourself.

There are a ton of choices and combinations for great hiking foods, what you enjoy and what is best suited for your type of hiking will determine which choices you will make. Most experienced hikers tend to agree on the best types of food to take along on your trip.

Peanut Butter

The versatility and durability of this food make it perfect for the trail. Having 94 calories, 3 carbohydrates, and 4 grams of protein per tablespoon makes it extremely beneficial. Some places offer peanut butter in a squeeze tube that makes it even easier to carry along.

If you are unable to find those convenient packs, don’t fear. A small jar of peanut butter will serve you just as well while you are hiking.

For a variety of snacks try smearing the peanut butter on crackers, apple slices, celery and other foods to mix it up. Each of these, are healthy and fairly easy to take along the trail. If you really need a quick pick-me-up, eat a tablespoon or two straight out of the jar.

Tuna

Tuna is not for everyone. Personally, I do not touch it with a ten-foot pole, however, it is a great food to take on your trip. At only 179 calories per 154 g of tuna, it is not a high-calorie food. What it brings to the table is the amount of protein it carries.

There are 39 grams of protein in that 154 grams of tuna. These proteins are essential in keeping your muscles functioning properly. In case you did not know, muscles are the only thing keeping you alive. Your heart, lungs, and other organs are muscles. The proteins will allow them to work at their full potential.

There are several suggestions when making tuna on a mountain. The favorite can of tuna is one that is small and has a pop top. When you choose the can that has a pop top, it eliminates the need for a can opener.

Most hikers simply put the tuna on crackers or bread as a snack. Some even bring individual packages of mayonnaise to add a little flavor. Again, experiment with different combinations before you go. See which options are the tastiest and the easiest to whip up.

Energy/Granola Bars

Energy bars are packed with calories and are as simple as you get. For example, Cliff Peanut Butter bars have 240 calories and 11 grams of protein. This is a perfect replacement for the calories that are burned while climbing the trail.

These bars are not meant to entirely replace meals or other foods while hiking. However, they are a very light, easy and efficient snack to keep you moving forward and to keep you healthy.

Dried Fruit/Jerky

Dried fruit and jerky are also great options for the trail. They are sturdy enough to withstand the abuse of the backpack and can stand the heat on summer trips. Calories are included in each and they make a great snack.

There is one issue with packing dried meat and fruit. Make sure and take in plenty of water while snacking on them. Dried fruit and meat will absorb water from your body while it is being digested, if you do not take in extra fluids you can easily become dehydrated.

Jerky does not provide enough calories to truly replace burnt calories, but it does make for a nice treat when the there is a lull in the trail. Many hikers prefer to dry their own fruits and meats to avoid any added chemicals that companies may place in their products. There are tons of simple recipes to get you started online and a dehydrator can be purchased for a reasonable price from most super or outdoor stores.

Fresh Fruit

On the flip side of dried snacks, there are fresh fruit options. We have discussed that bananas may be appropriate for day trips and possibly two days on the trail, but will not withstand the abuse that the trail offers on longer trips. Apples, oranges, and pears are all decent options for a healthy snack while hiking.

While they are not exactly the most efficient snack because of the lack of calories for their weight, they do have the ability to replace water in your body naturally. Several seasoned hikers suggest apple slices, hard cheese and crackers for an afternoon snack in the mountains.

Cooking on The Trail

Snacks and easy meals will most likely contribute to the majority of your diet while hiking for several days. However, after eating several meals for calories and not necessarily enjoyment, you may crave a nice hot meal to finish off your day.

Packing cooking utensils for a week long backpacking trip can be daunting and take up a lot of space. Thanks to many helpful hikers before you, there are tons of tips and suggestions to help guide you along the way.

There are basically three different types of cooking that you can manage on the trail.

  • Real cooking-involves actually cooking raw materials
  • Cold meals- prepackaged meals that require no heating or cooking
  • Rehydration- using dehydrated food and hot water to “remake” the food

Now, while these options are all completely feasible while hiking, there are major opinions of each of them.

Real cooking is usually not a good option due to the number of supplies needed to make it happen. You would need to bring all of the raw ingredients, with no refrigeration, in order to make the meals. After packing each ingredient, you must add in pots/pans and a stove.

Finally, after you are able to stuff all the materials in your bag, you will need to allow extra time for cooking.

Cold meals are a great option. They are quick and satisfying and do not need any preparation. The food is ready to go whenever you want. If you are on a short trip these are the perfect solutions. However, if you are on the trail for several days, it will begin to get very monotonous.

Rehydration seems to be the favorite for most backpackers. Some hikers even dehydrate and prepare their own meals before leaving and simply rehydrate it on the trail. These recipes and meals can be as simple as macaroni, or noodles and as complex as a rehydrating cake for dessert. It is amazing how versatile this method can be.

When deciding to rehydrate food you will need very basic materials. Most hikers prefer “one pot meals” which means that only one pot is used for cooking the meal. This eliminates having to scrub or clean several pots or pans.

When preparing your own meals to rehydrate there are two options. You may dehydrate the food yourself or buy already dehydrated ingredients. After gathering all the ingredients for the recipes that you choose, it is best to combine them all into a single bag for less trash while hiking. Be sure to include a note on each bag detailing which meal it is and how much water is needed to rehydrate it.

Utensils

Cooking on the trail can be overwhelming and depending on the type of cooking you decide to use, it can be very bulky and heavy. Real cooking will require a few more pots or knives or utensils, but using this basic list will get you started.

You may come to find that you can manage real cooking with very few materials as well. Rehydration can be very minimalistic and often you will only use one pot.

You will also need to consider a heat source, of course. Stoves are the most popular choice as open fires are sometimes prohibited and stoves are quick and easy.

Stoves

There are benefits and downfalls of each type of stove. Most hikers have different preferences based upon what type of hiking they will be doing.

  • Canister stoves are great and double as a pot and a stove. They are simple to use, reliable and because some are a mix of propane and butane, they are fairly stable and able to be carried in lightweight containers.
    There are drawbacks to using a canister stove as well. The added propane allows the stove to work at colder temperatures, but it is possible for the propane to burn off quickly and leave you with butane that will not function at cold temperatures, rendering it completely useless.
    There is also the fact that while the containers are lightweight they are also very small. One container has been suggested to be able to last for 2 people on a trail for 2-3 days.
    You will need to pack extra containers of fuel and also carry around the empty containers as well.
  • Alcohol stoves are also a popular choice among hikers. They can be homemade and are very simple. You can also transport the fuel in any plastic bottle or other containers.
    There is the possibility of having extreme problems with this type of stove if you are not familiar with them. If these stoves get tipped over while burning, the fuel will spill out and can cause a bigger fire. It is recommended to use extreme caution when using these stoves.
  • Multi-fuel or white gas stoves are also a great choice. These are probably what most novice hikers will be the most familiar with. These stoves are exactly what the name implies, multi-fuel.
    Hikers can use white gas, propane, gasoline, kerosene or diesel fuel. This is extremely convenient if hiking for long periods of time. You can fill up your fuel at any trail stop along the way.
  • Solid fuel stoves are an extremely popular choice among single hikers. These tablets are easy to store, carry and relatively inexpensive. Most tablets burn for about 10-12 minutes which would be long enough to heat water for rehydration meals.
    This would probably not be a good choice for real cooking. The time that it would take to prepare the meal would be too long for the tablet to last. However, if you see that you are done cooking before the tablet is gone, you may extinguish the tablet and save it for later. This will help you to never use more than you truly need.

Each of these options has been proven effective on the trail. Again, stoves are recommended to take on the trail due to the fact that open air fires are prohibited in some areas, especially during dry spells. Keep in mind when and where you will be going hiking.

Cold temperatures and lack of refilling options often will be able to help you determine which stove will best suit your needs.

Eat Up!

Using these tips from the experienced hikers is a great way to get started. Always remember to pack enough food for your trip and to hydrate as much as possible when eating dried fruits and meats. There is no reason to compromise great snacks and great meals just because you are roughing it on the trail!

Easy No Cook Meals For Your Outdoor Adventure: 10 Ways To Enjoy Clean Eating

0

No cook camping meals can be a fun way to eat without having to create a fire or bring along a camping stove. Eating no cook camping food means you can eat faster because there is less preparation and wait time than when you decide to cook a hot meal. While some may enjoy a hot meal, there are many camping food ideas, no cooking required!

This means you can still eat healthy, with less wait time than cooking, and still come up with some great no cook backpacking meals! As you will see, there are several delicious recipes out there that can be made without heat while you are enjoying the outdoors. You may find something that you did not think you would enjoy, but now love!

In this review, we are going to show you the features you need to think about before you prepare meals, as well as several recipes to give you an idea of what you can make. They can always be tailored to your liking, and prepared before you leave for your camping trip. Hopefully, you will find a new favorite camping food after you see what we have in store!

Things To Consider

When it comes down to finding recipes for your next upcoming camping trip, you will need to think of foods you enjoy and then what you can make from that to enjoy while out on the trail. Check out some of the features below to see what you can gather for your next adventure.

Choices

You have a variety of choices of meals and snacks you can make just before or while you are out camping. Things like sandwiches, salads, trail mix and more can keep you full of energy, without having to start a fire and get dishes dirty!

Once you have a few recipes, you can gather the foods and prepare your meals, which will be easy to make, easy to eat and a big help once you are outdoors. Bringing along a cooler will help keep many foods edible, so you have a wider range of foods to enjoy.

Health Factor

You get to choose what goes into your meals, which means you can choose healthier options. Things like vegetables, fruits and more can be eaten cold, without much preparation.

You can prepare wraps with beans and other items that are healthy and give you fiber, protein, and the things you need while you are exploring the outdoors.

Amount Needed

Gear space is going to be limited, so you only want to take what you know you will need. Bringing too much can mean less space and possibly wasted food. Therefore, think of how much you will need to eat in a day, plan it in meals and snacks, and then take that amount with you.

Each meal can be stored in a container and labeled for easier eating and access.

Storage

Your foods will most likely need to be stored in containers so they do not spoil. This is why bringing a cooler is helpful. Certain things like fruits, veggies and meats will spoil if it is not stored correctly.

If you bring along, bread or crackers, make sure they do not get exposed to air and go bad. Keep what you need to in the cooler and you should be good to go as far as food storage and food safety.

Preparation

There will be a lot of preparation before you leave for your trip as far as getting the meals together. While many things can be prepared while you are on the trail, some items, like salads and pastas should be prepped before you leave and stored in a container for later.

Things like sandwiches can be made while you are on the trail.

10 Simple No Cook Meals for Camping

Below we have compiled 10 simple recipes that require no heat that you can pack up and take with you on your camping trip! Keep in mind that some items need to be put in a cooler to prevent anything from spoiling.

Be sure to properly wrap or use containers for foods so you do not go through any bad experiences such as eating spoiled food that could make you ill.

Burritos and Wraps

There are many types of wraps and burritos you can make, including banana and peanut butter, chicken, and more.

See below for a no cook burrito recipe that feeds 4.

  • Take the 100 grams of Bulger wheat and add 100 ml of hot water in a bowl. Cover it and leave it for 40 minutes.
  • Next put the 120 grams of cherry tomatoes in a bag and squish them to separate the juice. Pour the juice into the bowl once it is ready, and keep the tomato bits in the bag for use later on.
  • Stir the Bulger wheat with salt and pepper. Use another bowl to mix the 3 tbsp of Tahini with 3 tbsp of water.
  • Put out the wraps and add the mixture in the middle, with kidney beans on one side and the corn on the other. Add some smoked tofu over it and then add in the pieces of tomatoes from earlier. Add some lime for zest if you wish.
  • Fold them and enjoy!

Granola

Granola bars are easy to make and best of all, you can tailor it how you like!

Below is a simple, no cook granola bar recipe that makes 24 bars and takes only minutes to make!

  • Take 2.5 cups of rice cereal, 2 cups of rolled oats, and 1/2 cup of raisins (or your choice) and mix them in a bowl.
  • Mix together 1/2 cup of brown sugar and 1/2 cup of corn syrup. Then stir in the 1/2 cup of peanut butter and 1 tsp of vanilla.
  • Add the mixture to the dry bowl of cereal and mix it all together well. Pour it into a 13 x 9 inch pan and let sit. Cut into pieces and enjoy!

Energy Bars

This recipe makes 20 to 24 bars depending on how big you cut the portions.

  • Take 2 cups of dry oatmeal and 1 1/3 cups of coconut flakes and mix them together with 1 cup of flax seed.
  • Add in 3/4 cups of chocolate chips with 1 cup of peanut butter (You can substitute for almond butter). Stir in 2/3 cups of honey and 1/2 tsp of vanilla.
  • Once you have mixed it together well, add the mixture to a 9 x 13 inch pan and spread it around.
  • Put it in the freezer for one hour and slice them up. You can store these for about a week!

Chilled Avocado Soup

This delicious Mexican soup can serve between 6 and 8 people if you follow this recipe.

It will have to be prepared before you head out, however.

  • Take 2 chopped serrano chilies, 2 avocados chopped up and peeled, and half of a chopped onion into a food processor and make it into a paste.
  • Add 6 cups of chicken stock, 1 cup of heavy cream, and 1/3 cup of lime juice and turn it into a puree. Pour it through a strainer into a bowl and season it with some pepper and salt to taste.
  • Cover this and put it in the refrigerator for a minimum of 2 hours.
  • When serving, you make a bowl and add the rest of the chilies, onions and tomatoes on top of the soup.

Crab Rolls

This recipe serves 4 people and takes about 15 minutes to make!

Keep stored in a cooler on your trip.

  • Take all of the ingredients and mix them into a bowl together. This includes 1/2 pound of crab meat, 1/4 cup of mayo, 4 chopped radishes, 1/2 apple, 2 tbsp of lemon juice, 1/2 tsp of salt and 1/4 tsp of pepper.
  • Take the mixture and add it to hot dog buns and enjoy! Serve it along with some chips or trail mix for a full meal.

Trail Mix

This delicious snack offers everything you need to keep up on the trail. Full of energy, you only need a few minutes to put this recipe together, and you can add in other items to make it how you like it!

Plus it will store for a couple of months!

  • Choose 2 types of nuts (pecans, cashews) and add 3/4 cup of each in a bowl.
  • Choose two or three types of seeds (sunflower, chia, flax seed) and add 1/2 cup of each to the mix.
  • Take 2 types of dried fruits to add to the mix such as cherries or bananas. Add 1/2 cup each to the bowl
  • If you want to add chocolate, you can then put in 1/2 cup of chopped bits or chocolate chips.
  • Add in 14 tsp or sea salt, 1/2 tsp of cinnamon and a touch of nutmeg and mix it all together.

Cold Cut Sandwiches

Cold cuts offer the protein you need when you are exercising and enjoying outdoor activities.

You can make any type of sandwiches, but the idea is to get proteins and sugars your body needs while you are out.

  • Take a sub bun or two slices of bread and lay your meats on there, such as ham, turkey or chicken.
  • Add on cheese and condiments to your liking, and enjoy with some chips or granola!

Tuna Salad

This easy, no cook recipe takes about 15 minutes to prepare and will serve 4 people.

Keep stored in a sealed container in your cooler.

  • Take 12 oz of tuna and add in 2 tbsp of chopped celery, 2 tbsp of chopped red onion and 1 tsp of chopped parsley.
  • Add in 1/3 cup of mayo, 1 tbsp of mustard, with pepper and lemon juice to taste.
  • Mix everything well and keep cold until ready to eat.

Stuffed Tomatoes

Stuffed tomatoes look fancy, but really only take about 15 minutes to prepare, and really fill you up.

This recipe serves 4, so double it if you have more people.

  • Slice off the top of the tomatoes and cut a cone shape into the each tomato. Take out the core and throw it away.
  • Dice up the other piece of tomato and put it in a bowl. Hollow out all of the tomatoes and put the seeds and other “flesh” into a sieve to drain.
  • Add in mango, salad onion, and cheese in a coriander, pour the dressing (tbsp of tomato juice in the bowl with oil, lime zest and juice) over the combination.
  • Add everything into each hollowed tomato top it with the lids you sliced off!

Avocado Chicken Salad

Okay, so you are going to need chicken that is cooked, but you can purchase a rotisserie chicken and use that, which is ready to go.

  • Mix together the shredded rotisserie chicken with 1 sliced cucumber, 4 chopped tomatoes, 1/4 red onion, 2 diced avocados, and 1/2 cup of chopped parsley.
  • From there, add in 2 tbsp of lemon juice, 3 tbsp of olive oil, along with salt and pepper as you like.

What Do Other Campers Think Of No Cook Meals?

Campers find that there are many recipes that they can make before they leave or while they are camping to satisfy their hunger. The choices of making wraps, sandwiches, snacks and breakfast foods are vast and can satisfy nearly everyone.

While some people would rather have a hot meal, especially for dinner, you do not necessarily have to eat cold food for each meal. However, if you are doing so because you are packing light, then some people will have to deal with it for a few days until they can get to a stove or fire. Overall, many do enjoy the great amount of meals you can create without using heat.

Pros And Cons

While many people prefer a hot meal at the end of the day, some do not have the space for a camping stove, or the money to purchase extra conveniences while camping. Some camping areas do not let you make your own fires.

Overall, many people can enjoy foods that do not have to be cooked over a fire to enjoy. See below for the pros and cons of taking no cook meals with you on an outdoor adventure.

Pros

  • Convenient
  • No wait for cook times
  • Less clean up
  • Minimal dirty dishes
  • Less load to carry without a stove
  • Fun, creative recipes to be enjoyed

Cons

  • Some prefer a hot meal after a long day
  • Much preparation before leaving for the trip
  • Must carry all food with your gear