Home Blog Page 4

A Complete Itinerary Of Arizona: Explore The Awesome Trails And Landscapes

0

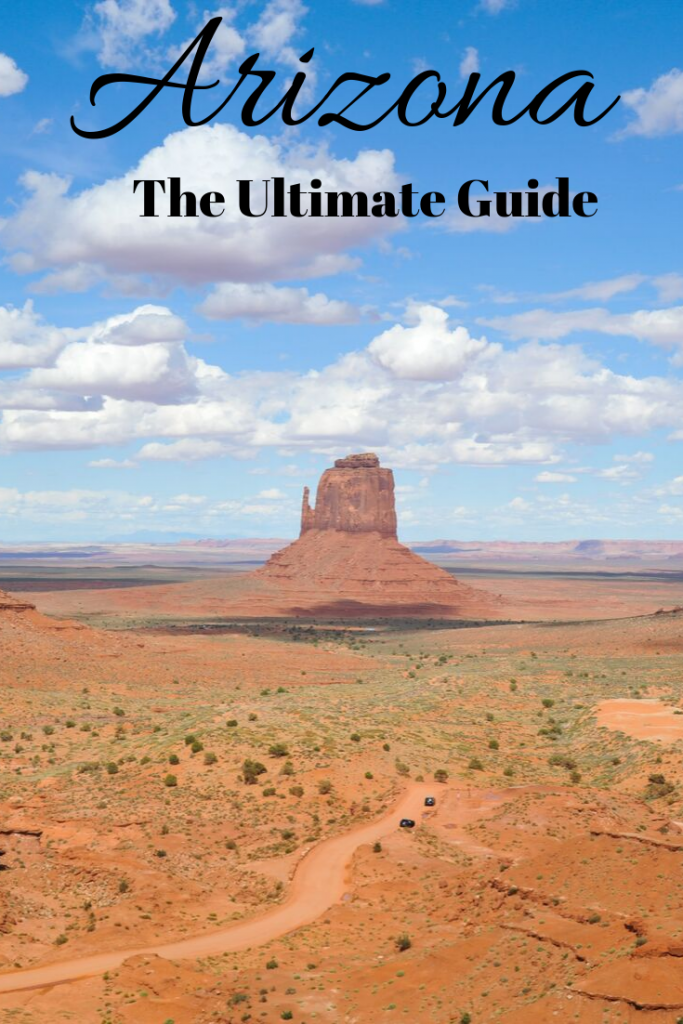
Arizona is considered today by many hikers as the gateway to the land of many trails and as a destination to many students who see it as an ideal area for studies. These amazing tips are going to guide you discover Arizona through my very eyes!

The state boasts over ten national parks to hike, camp, skip, jump, and run through. All with adverse similarities and obscure differences. It is a hell of a state for those into their hiking, though, more than anything else. Finding the perfect spot for you and hiking needs of the modern homo-sapien hiker can be tricky with such a plethora of areas to choose from.

The 277-mile in length gouge in the earth that, at certain intervals, have dips and falls to the river below ranging a mile drop. It is truly a wonder of the world, a revel to the human eye, and a masterpiece of nature. Arizona has much more to offer by way of natural, unbelievable beauty in is plentiful landscape.

A little research into the land can do a world of good when it comes to your next trip, so let us take a look at the best hiking trails in Arizona, their attributes, what makes them unique and worth seeing. So fill your day pack that you require, and let’s get hiking.

Let’s Start Slow, With Some Simple Hike Trails

Starting with some of Arizona’s less formidable trails is merely to ease us all into the where and the what that Arizona has to bring; but know this, that only because these hikes are easier on the foot than traversing down the banks of the Grand Canon by way of path or by abseil, does not make them all 100% safe.

So stay ever vigilant, keep your party safe, and remember to have fun in the promise. Now, after that brief note of caution, onto the trails.

Reavis Ranch found deep in the Superstition Wilderness

Named after Elisha Reavis; a hermit who had come to settle up in the mountainous region in the late 1800’s. An elusive man who spent most of his life either teaching elementary schoolers, divining for gold in the most tumultuous regions of the state, or fighting in the many Indian Campaigns of the time.

As well as owning the first library of books in the Superstition Mountains, killing a bear using a gun that misfired, and rearing horses and mules, he is best known for his planting of an apple orchard 700ft in elevation. A working orchard that surpassed its planter and continues on some hundred years later.

The ranch and surrounding areas have turned into hiking tourist attractions as of late, where the views are stunning and the apples are plentiful, free to those travelling through the orchards.

This trail is for those interested in the deep history of the gold rush of the late 1800’s outside of California, beautifully kept meadows and orchard, and if you wish to find something as amazing as pine trees just above the blazing heat of the desert sands of Arizona.

Flat Iron, the connection trail to the Superstition Mountains and Four Peaks Wilderness

Another trail of note in the Superstition Mountains is that of Flat Iron. Also known as the Siphon Draw, this is a little less a walk in the park as it is more of a trek through the a rocky terrain that once surpassed will make you feel like a king of all that surrounds you.

A six mile round trip through the rough of the Superstition Wilderness, with some of the most prominent and bewildering rock formations that you are likely to find in the great state, this hike is well worth the effort of its traverse.

This hike is not recommended, though, right after even the slightest of rain falls, as the majority of its paths is made up of slick rock which is not fond footing when slippery.

The gaining of both of the territory’s names are interesting in of themselves, Flat Iron is aptly nicknamed for a large protruding spike of rock that stands at 4,800 feet in the air, and the name of the land Siphon Draw came from the name of the trail.

Browns Peak – Prominent in the Four Peaks Wilderness

A beautiful mountainous pass, found out east of Phoenix in the northern region of the Four Peaks Wilderness. Brown’s Peak is the highest of the four peaks in the territory at over 7,000 feet tall. The path takes you all the way up to the summit, which offers an incredible view.

A good sized portion of the entire state of Arizona, and even the highest mountain in the state Mount Humphrey’s, can be seen on a clear day up there.

As well as being revered as an all natural crows nest, the area that surrounds Brown’s Peak has a large black bear population, so be careful when on the trail and stay in packs. Do not let the presence of bears be of alarm, as they stay away from hike trails and rarely cross them unless majorly provoked.

From Molehills to Mountains – Higher Elevated Trails

Mount Wrightson, found just outside of Tucson, in the Santa Rita Mountains

Just over 9,000 feet, Mount Wrightson looms over the nearby city of Tucson in an almost protective fashion. Found in Madera Canyon of the Santa Rita Mountains, this mountain’s peak offers an incredible panoramic view of southern Arizona.

If you make it to the summit on a clear enough day, you can even be able to see parts of Mexico as you gaze across the landscape. There are two trails available to the public for reaching the summit, and they both cross one another making a classic figure 8 symbol.

The shorter trail of the two at 10.8 miles round trip is the Old Baldy Trail, and three longest coming in at 14 miles round trip, is known as the Super Trail. As mentioned before, both trails lead to to the mountain’s summit, and cross over one another. So the only question you need ask yourself is can I make those extra four miles?

Mt. Baldy Loop looming over the top of the White Mountains

Not to be confused with California’s Old Baldy Mount San Antonio, Mt. Baldy of Arizona shares the same beauty and majesty as its cross state cousin, though towers a lot higher than the SoCal treasure. There are two main hiking trails available for the general public to take with two different peaks to achieve on the hike.

Unfortunately, if you are not a member of the White Mountain Apache Tribe, you are not permitted to make it to the true summit of the mountain. But there is beauty in both the public trials of West Baldy #94 and East Baldy #95, and the connection path, #96, that turns the whole trail into a perfect loop. A lot of fun in taking these paths, with some incredible views to compensate the tough journey.

Mount Kimball of the Catalina Mountains

Another mountain that stands close to the city of Tucson, but this time found in the southern peaks of the Santa Catalina Mountains. Mount Kimball is the highest peak in that region, and is what is known as a ‘Sky Island’ – a mountain with its lower slopes deserted, cracking and hot, but the higher you go, the more vegetation and even forestation is found on the higher you get.

The mountain trail is best for seasoned hikers as it is a steep climb on the way up to the summit, and even then can be a tricky trail to hike. Like many of the great mountains in Arizona, this hike is giving you the option of what trail to walk up; Finger Rock Canyon or by Pima Canyon.

Both will get you to the summit of Kimball, they just provide different starting routes. Finger Rock Canyon starts you off on a major road that lead to foothill paths, whereas the Pima Canyon trail starts further west and cuts through many other trails along the way. Both are the same level of difficulty to hike up.

Mount Humphrey’s – Highest Mountain in the State

Mount Humphrey’s stands as the tallest mountain in the entire state of Arizona, its peak at 12,633 feet, makes it less of a hike and more of an expedition. Yes, people, before you have come and planted their proverbial flag, but you know what they say, “you gotta do whatcha gotta do”.

Humphrey’s Peak is the hiking trail used to scale the sides of the mountain. The mountain is found a few miles out of Flagstaff, Arizona, and helps form the Kachina Peaks Wilderness Area, that takes up nearly a 18,000 acres of land within the Coconino County.

The mountain was named after General A. A. Humphreys, who worked for a time as US Chief of Engineers. The views from the summit of Mount Humphrey are truly remarkable and will brighten up any photographic portfolio; you just have to be proficient enough a hiker to make it all the way to the top.

For Those Opting for the Scenic Route

Kendrick Peak – a lesser Humphrey’s Mountain

Those who wish for a less grueling hike and climb than that offered by Humphrey’s Mount, then you should be heading over to Kendrick Peak; a less intense elevation at 10,000 feet, which still allows bragging rights for you and your party.

Just shy of Flagstaff and an hour from Phoenix, the state’s capital city, stands Kendrick Peak. Found in the San Francisco volcanic field, a 1,800 square mile area filled with over six hundred volcanoes. Some of which have been geographically aged at around six million years old, and the youngest at around a thousand.

So, even though the area has not seen a deadly eruption of one of the volcanos for some years, does not mean that it is wholly advisable to stray too far from the beaten hiking path. It is still a fun trail that afterwards grant you the bragging rights of hiking through a volcano field.

Oak Creek Canyon, Sedona

Sedona is an area of Arizona that is plagued, and bettered, by steady and unrelenting tourism attractions, which makes it a hard place to find and maintain a little bit of solitude. Though there is a small area, within a small canyon, where peace and quiet should really be present in its name. At the West Fork of the Oak Creek Canyon, beauty and serenity can be found with ease.

A hike trail lay deep in the east of the tourism, hiking down to this river bed enclosing feels like something out of an old western film. The waters give the looks of those ripe for divining, and are cool to the touch as you trail through. A real refreshing experience to travel to and through.

Havasu Falls. Visit as long as you obtain permission

The beauties of the Grand Canyon never cease to amaze people. Like the fact that in the middle of all of that dry earth, scorching deserts, its high peaks and mountains, there cascades deep and mystic waters for us to take our time in hiking to, and then spend the rest of your day diving into the scenery.

Majestic waterfalls are awaiting you just within the Havasupai Indian Reservation, one of many located in the state of Arizona, so that means that these waters are only accessible to you after obtaining a special permit to use the land for hiking through and camping on.

But the turquoise rich, waters, are so worth the hassle of the permit offices. One of the other minor hiccups is the fact that the car park and main entrance are both located a smooth downhill climb from the campsite – which makes for a steady climb to get back to your vehicle so pace yourself.

With photogenic scenes of raging white waters protruding from a mouth, cut out of the red rock holding the valley together, who needs Instagram filters? The Havasu Falls are simply stunning and they are a must see during your time in Arizona. Make sure you check it out.

Enjoy Your Hikes and Stay Safe Out There

Regardless of which of these magnificent trails to hike down, to the top of one of the many mountains the state has to offer or plunge deep into the valleys and ravines in the most famous canyons the country has to offer, you are guaranteed to enjoy yourself and wish that you had more time to explore the next trail head endeavor.

Survive In The Desert: Find Water In The Desert With Ease

0

Deserts are lands that get at least 250 mm (10 inches) of precipitation per year. They are dry and hot in the day and very cold at the evening time. Therefore an essential thing you will require if you happen to find yourself in the sea of sand, should be knowing how to find water in the desert. The hot temperature in the desert will dry you out rapidly, particularly if you can’t really go away from the sun.

Deserts take about a quarter of the world today, and approximately a billion people now live in the desert. These lands get at least 20 inches of rain per year, which implies that finding clean water for the purpose of drinking and cleaning can be tedious and even unsafe, particularly when it requires trekking to a faraway spring or well. The issues may deteriorate if on-going weather change strengthens dry seasons and human actions, for example, irrigation absorbs most of the world’s available fresh water sources.

Advanced approaches to discover moisture are required. A few researchers are drawing motivation from the natural world, drawing different tricks from animal creatures and plants that have adjusted to living in dry areas. Others are thinking up their own one-of-a-kind techniques for gathering water from more subtle sources. Discussed in this article are the ways of finding the water in the desert. So read on and learn!

Searching for Wet Areas

Here in this section, we shall be looking at how we can accurately search for wet areas.

Just follow the steps below:

  1. Moderate the rate at which water is lost: Sun exposure and exercise will accelerate dehydration. Be careful whenever you look for water. Ensure you stay in a shady area far from the wind if it is hot outside. Keep your skin secured to lessen the loss of water as a result of sweat evaporation.
  2. Take after wildlife: A gathering of animals quite often implies the water is close by. Search for the accompanying signs: listen patiently to birdsongs and watch the sky for birds circling around, if you have experience with swarms of mosquitos or flies, search close-by for water, bees regularly fly in a straight path between hive and water sources,  watch out for animal creature trails or tracks, particularly ones pressing towards downhill.
  3. Search for vegetation: Thick vegetation and most trees can’t get by without a relentless water source. In case you are new to nearby vegetation, go for the greenest plants you can find. Both wide-leafed and deciduous trees are a common sign than the pine trees having a tendency to accommodate more water. In North America, search for cattails, weed, arrow, cedar, salt, hackberry, sycamores, willows and cottonwoods. In Australia, search for water bush, desert oak, needle-shrub or desert kurrajong. Watch out for eucalyptus (otherwise known as mallee eucalypts) that develops with numerous stems rising outward from a similar underground tuber.
  4. Look up valleys and canyons: Your most logical option is the canyon that remains shaded amid the hot dawn. This implies a southbound canyon if you are in the Southern Hemisphere or a northbound canyon in case you find yourself in the Northern Hemisphere. Discover these with the help of a geographical guide if you have one in your possession, or eyeball the encompassing landscape. Snow or precipitation will probably be held in these cooler canyons mostly after a major rainstorm.
  5. Discover dry stream or waterway beds: You can discover water simply under the surface most of the time. The best place you need to consider is a curve in the waterway located on the exterior edge. The streaming water may have dissolved this land down thereby causing a depression effect of the leftovers of water.
  6. Recognize promising rock properties: Groundwater gathers at the foot of and mountains partitioning lines of a landscape. In a perfect condition, ensure you dig where a hard, non-porous rock slopes underneath the surface. Soft stones as sandstone, can create holes that help hold water for some time after a rainstorm. In case it drizzled as of late, look along leveled areas of these kinds of stones, or at the highest point of rocks and disengaged domed outcrops.
  7. Discover sand ridge close to the shoreline: In case you’re close to the sea, the sand ridge along the shoreline may trap and channel the sea water. Burrowing over the high tide line may uncover a thin layer of water, residing on above heavier salt water.
  8. Discover high ground if you’re left with no other alternatives: Climbing the high ground will give you the proper vantage level in order to search for the features discussed above. By the time the sun is getting low, search for a reflection glare on the ground. It might be in the form of a water body. In case you find yourself in a zone being used for cattle rearing, you may see features of artificial water below the gently inclining ground. Remember to take a pair of binoculars along with you if you are planning on going out to a desert. This can be more than a help to spot ranges where you might discover water from a long distance.

Burrowing for Water

Now that you’ve to know how you can successfully search for water, it’s high time we discuss how you can actually burrow the ground and gather enough water for survival.

Let’s go!

  1. Pick a conceivable spot: Once you’ve gotten to a zone that appears to be encouraging, check for any surface of the water body. Most of the times, you won’t be that fortunate the very first time and you have to burrow until you get one. Here are the best zones to carry out this activity: the base of slanting rock features,  close thick vegetation holes, particularly where lumps and cracks may demonstrate tree roots, any place the surface soil feels moist, or possibly more clay-like, least point in the zone.
  2. Hold up until a cooler period of the day: Burrowing during the sunny period is unsafe and cause you to lose sweat to sun exposure. If you can patiently hold on, remain in the shade until there is a drop in the temperature. In the early morning, groundwater has a tendency to be close to the surface, particularly in vegetation zones.
  3. Search for dampness under the surface: Burrow a thin hole around 30 cm (1 ft) deep. In case the ground is still not wet, proceed to another spot. If you see any soggy soil, proceed to the subsequent stage.
  4. Expand the hole: Expand the hole until it reaches around 30 cm (1 ft) in diameter. You may see water leaking in sideways, yet get done with burrowing regardless of the possibility that you don’t.
  5. Hold on for the water to gather: After a couple of hours or toward the closing of the day, come back to your hole. If you find any water in the soil, wait for it to gather at the hole base.
  6. Accumulate the water: In case the water is hard to get to, drench it up with a fabric and press it into a makeshift container. Gather all the water immediately. Water holes can exhaust quickly while in the desert.
  7. Purify the water: If possible, ensure you disinfect the water before you drink it. Sieving it using an anti-microbial filter, applying iodine tablets, or even heating the water up, will help to expel every single microorganism.

Waterborne diseases may bring about diarrhea and vomiting, which get you dried out quickly. In any case, these diseases frequently take a couple of days or weeks to bring about genuine side effects.

Drink the water now in case there is an emergency, and visit the specialist when you’re back on track.

Other Places to Discover Water

Apart from burrowing the ground for water, there are still many water sources available in the deserts.

Some of the are discussed below:

  1. Gather together dew: Search for dew drops on plant vegetation before the first light. To accumulate it, hover a permeable fabric over the dew and squeeze it into a container. In case you don’t have any permeable fabric, improvise one by forming a bunch of grass into a ball.
  2. Look in tree hollows: Dead or rotten trees may still contain some amount of water inside their storage compartment called “trunk”. In order to get into the little tree openings, you need to tie a fabric around a stick and insert it through the tree opening to soak up water. Insects and Bugs entering into a tree opening might be a water indicator.
  3. Search for water under and around rocks: Rocks slow down water dissipation, so dew or water may tend to wait around them for quite a period of time. Because the stone base is much cooler than the encompassing air, we have to turn over the half-covered stones in the desert before sunrise so as to make dew land on their surface. Check for scorpions and all other creatures turning the stone over
  4. Eat Cactus Fruit: These succulent fruits are eatable and contain enough water to supplement other water sources you may have. Gather the fruit with care in order to avert any form of injury. Roast them for about 30 to 60 seconds in a fire for the hairs and spines to be consumed. You can also eat thorny pear cactus pads too. They are really best when assembled still green in the spring and cooked. They are always hard to eat in other seasons.
  5. Gather water from eucalyptus roots: The eucalyptus is a conventional source of water in the Australian deserts.  However, it can be hard to access for an untrained individual. Every eucalyptus resembles a furrow of medium trees, developing outward from just one underground plant. In case you see a eucalyptus that corresponds with the above description, attempt to acquire its water as follows: burrow a root anywhere you see a crack or bulge in the ground or search for them at around 2 – 3 meters (6.5 – 10 ft) from the tree. The most encouraging roots are as thick as the wrist of a man; haul out the length of the root, severing it close to the trunk; break the root into small pieces 50–100 cm (1.5–3 ft) long; stand the roots vertically and allow the water to drain into the container; search for extra roots. There are generally 4-8 of them that are close to the surface.
  6. Drink barrel cactus water only if there is no option: Most waters inside the barrel cactus plants are toxic. Drinking them can bring about pain, vomiting, and even paralysis. Here is how to get the water: the only eatable barrel cactus is called “the fishhook”, found mostly in drainages just in the northwest Mexico and the southwest US. It’s around 0.6 m (2 ft) in diameter, with longer spines that end in a hook or curve. It might have yellow or red flowers at the top; remove the highest point of the cactus plant with a machete or other appropriate tools; squash the white interior part of the cactus into a mash and press out the water; limit the measure you drink. They usually contain oxalic acid and tastes bitter thereby causing bone pain and even kidney disorders.
  7. Wrap plants with plastic bags: Shake the plant to limit potential contaminants. Then, wrap them in a plastic bag, closely fixed around the stem. Cause the bag to weigh down with a stone to form an indicator for water flow. Return before the day ends to check whether the water has gathered, because of the plant discharging vapor.
  8. Test a strange plant with maximum precaution: If you have been left with no other options, you may need to look for liquid in plants that you can’t recognize. Take after these precautionary measures if possible: test just a single portion of the plant at a time. Flowers, buds, roots, stem and leaves may have distinctive impacts. Select a portion that produces liquid when it is being broken; select plants with strong or acidic scents out if you have different alternatives; ensure you don’t eat for 8 hours before the test; the last step is to touch the plant to check for any response.

What Water Sources are in the Abandon?

If you are short of water while in the desert, what other natural substances can you drink, and where would you be able to discover them?

  1. Search for sycamores, willows, and cottonwoods: These are some of the trees, mostly found in canyons where there is quite a lot of water in the soil. It might be that you climb to a forest of cottonwoods and there is a pool or spring of water or, you may need to burrow down a couple of feet along the roots and check whether it tops off with water in a dry year. These trees can be located from miles away and are known for their seriously splendid green foliage (contrasted with the dull green of a juniper or pine tree). I have additionally depended upon aspen trees located in the Great Basin Desert for springs search. Palm trees found in the Mojave Desert can likewise serve as a harbinger of water. These trees are regularly the destinations of desert springs in the Middle East and Africa.
  2. Northbound Canyons can frequently hold extensive pools of water: Perusing a topographical guide can help you with finding these, alongside investigating such Canyon from a long distance with the help of a good binocular.
  3. Focus on birds and insects when climbing: Gatherings of butterflies and bees can be an indicator of a nearby pool of water. Being aware of your environment can be of extraordinary advantage in discovering aqua.

Survival Tool

Luckily, there is a survival method for getting water from the driest deserts amid their most fierce seasons. It is usually called “the solar still”. It is a standout amongst many survival tools available and was created 40 years ago by two physicians working for the U.S. Bureau of Agriculture. After testing carried out by the U.S. Aviation based armed forces on the solar still in the Arizona desert, the result demonstrated that the still could spare your life.

solar-still-in-desert

The solar still operates under the general rule of the so-called “greenhouse effect“. Solar energy warms up the ground by going through a transparent plastic container. Dampness from the soil, then dissipates rises and gathers on the underside of the plastic container above. The still additionally can clean contaminated water. Truth be told, it gathers pure water together from pretty much anything. Indeed, even pee will deliver perfect, drinkable water.

Materials

There are just two basic components to develop the solar still. They are compartment – to gather the water and a clear plastic. A scoop or trowel, plastic tube, and tape are the optional components. The compartment can be a collapsible container, a vacant plastic bottle, a lightweight cooking pot or pretty much anything sufficient to contain falling drops of water. Even tin thwarts or a sandwich pack can be formed into a workable repository.

The sheet of clear plastic can serve as a ground material used under tents when thin painting or backpacking drop fabric. Both functions admirably the length of there are no tears or openings. This is the one thing that ought to be conveyed at all circumstances since there is no normal substitute available in the boonies. Some desert rats love to keep their plastic sheets collapsed inside a hip sack or as a major material of their emergency treatment kits.

A 6-foot length of adjustable plastic tubing, like the kind utilized in fish tanks, is an unimportant yet alluring expansion to the still material. This will enable you to drink aggregated water without expecting to break down the solar still, definitely influencing its proficiency.

Development

The best aspect of this life-sparing gadget is that for something that gathers water from apparently nothing, the solar still is incredibly easy to construct. Here is how you can successfully build one:

  1. Burrow a pit of around 3 feet deep and 4 feet wide. Make use of a burrowing stick, hand trowel, scoop or even your bare hands in the soft soil. Search for a depression where water may be gathered.
  2. In the middle of the pit, burrow another little opening sufficiently profound for the water compartment.
  3. Put the compartment inside, then run the tube from the compartment to the outside of the pit. If there is a tape accessible, tape the tube within the compartment.
  4. Cover the pit with the plastic sheet, equitably on all sides, yet not touching the base of the pit. Grapple the corners with rocks.
  5. Locate a little-rounded stone to put in the middle of the sheet, over the water compartment. This should centralize the plastic and control any fluttering that may possibly be caused by the wind. Tenderly push down on the middleweight until the sides incline to 45 degrees. In case the pit is burrowed deeply, this ought to leave the middleweight only a couple inches over the water compartment.
  6. Next, secure the plastic sheet edges with soils and rocks. Ensure there are no spots where dampness can get away.
  7. Close the tube end using a knot, or twofold it and tie it tightly.
  8. Within the range of 1 – 2 hours, the air inside the solar still will wind up noticeably soaked with dampness and start to gather onto the plastic sheeting underside. Due to the edge of the plastic, water will keep running towards the middle. Lastly, drops will accumulate and start to fall right from the apex into the water compartment

The solar still just takes around an hour to be fabricated. If developed accurately, it can generate about a quart of water per day.

Furthermore, in spite of the fact that the palm trees might be perceptibly missing, you would have made your own one of a kind desert spring, faster than Hollywood could.

Final Thoughts

Most importantly, the exploration and the research carried out from the Grand Canyon by some scientists demonstrates that a man who is lost and short of water can still survive up to 48 hours in this situation if he knows how to manipulate his own sweat. So have a similar thought as a cowboy, take cover in the shade, keep secured, escape the wind and sit tight for searchers.

If you don’t want to do that and start to push yourself looking for water in the warmth of the day, you could eventually drop dead as a result of warmth stroke in a matter of 3 hours for trekking. Therefore, if you’ve told someone you’re hiking arrangements, sit tight and hold on for assistance.

Basic Outdoor Survival Skills For Every Adventurer In The Wilderness

0

We live in a world of convenience where most people do not have much experience in the great outdoors, and don’t have the basic skills needed for outdoor survival. Many of us will hopefully never encounter a situation where we will be put to the test in an extreme survival situation. Having a bit of knowledge behind you truly can make the difference between life and death.

The most common reason people find themselves in life or death situations in the great outdoors is either because they lost their way while hiking, or have had an accident whilst out hiking, camping, climbing, skiing, etc. The great outdoors can be unforgiving and you must adapt and react fast to ensure your safety should an emergency arise. Your first 24 hours can be crucial to your survival.

Outdoor Survival Situations

First and foremost, you should check your situation, where you are and what immediate supplies you have (equipment, food and water). If you have had an accident, you will need to assess physical condition. Do you have any serious wounds, sprained muscles, broken bones or have suffered a serious concussion? If you have, you must attend this first, before undertaking any further action.

If you are fine, ask yourself, can you detect any immediate and present dangers that you need to be aware of or react to? Your exposure to the elements must be considered and you must evaluate the risks posed by wild animals or the terrain itself. First advice, assess your situation and stay where you are, before taking any further actions.

In an emergency, your focus should be on staying safe, finding shelter and sourcing food and water until a rescue party locates you. The further you move from your original location the harder it may be for a rescue team to locate you.

You should only move location if you absolutely need to. The only reason to move should be:

  • To avoid immediate danger.
  • Seek a more advantageous location to establish where you are.
  • Look for shelter and food and water, if there is an immediate need to do so.

Once you have taken the time to assess all the above, then you can decide what line of action to take. Also, remember that energy is precious and the less distance you cover, the better. Remember, stay calm, do not panic and do not make rash decisions.

Ideal location

The ideal location is one which provides safe shelter, food and water. Seek an area that can provide shelter or the materials needed to construct a shelter.

Constructing or finding adequate shelter

The shelter that you fashion or find, will vary greatly depending on the environment that you find yourself in. Your shelter will provide you with protection from the elements be it rain, snow, wind, sun and hot or cold temperatures. It will also serve to keep you safe from wild animals.

Trees

Trees are a great source of shelter and can be a ready supply of decent shelter making materials. A tree can provide you with a natural area of dry ground. You want to maintain and enclose a dry area as a sleeping space and protect it from the exposure.

  • Felled Tree Shelter: A felled tree offers a great base to start building your shelter from. Severed branches and bows can be propped against the body of the fallen tree trunk. By layering up the branches and leaves you can create walls providing protection and insulation. Search for a well weighted and sharp-edged rock and you have a crude axe. With such a tool, you can cut branches to size. Having a stone axe or the use of a hatchet will help you in your construction and is useful for collecting firewood.
  • Standing Tree Shelter: Standing trees also provide a great existing frame from which you can support beams from and build a shelter around. If you can find four well positioned trees you have four pre-made uprights from which you can then build your shelter. Standing tree shelter video: https://www.youtube.com/watch?v=GL_3PFDYxk4.
  • Free Standing Wooden Shelter: It is also possible to create a bender or a stone age hut by creating an X frame like that of a frame found in a standard tent design. You must lash the support beams together and bury the foundations, then construct the walls using branches and leaves. Trenches can be constructed to help secure foundations. Use a strong stick as a makeshift shovel and it is a good idea to dig up and compress your floor. Free standing wooden shelter video: https://www.youtube.com/watch?v=Reav7ZnOrw8.
  • Creating Rope or Lashing with Roots: Green tree bark or tree roots make effective lashing material and can be used to secure joins in a structure. Make sure you peel the bark from well sized branches so they will be long strips. Willow is also another great flexible material that is great for lashing. You want to create strong joins. How to make rope from tree bark video: https://www.youtube.com/watch?v=yhKOSAd_Jng.

Caves and Rocky Outcrops

These natural formations can provide you with a great form of shelter from the wild. The smaller the space the greater the heat retention, this is important to keep in mind if you want to stay warm and equally so if you wish to stay cool. For instance, a large cave will not provide much warmth meaning a fire would have to be lit if you find yourself in a cold temperature zone.

Snow

In winter and in some parts of the world, snowy conditions can present a real challenge and are a threat to your safety. However, it is also true that snow can provide you with the perfect shelter to ensure you are warm enough to keep you from freezing.

Here are some snow shelters to consider:

  • Snow Caves: Snow caves are excellent shelters and are easy to construct. They don’t take much time or energy to make. A snow cave should be constructed in a well sized snow drift. Ideally you are looking for snow of a good compactable consistency, this quality is important as it ensures structural stability. First, locate a snowdrift, the larger the better. Always dig your entrance tunnel at a rising incline, making sure to build your habitation area at a higher level than that of the entrance. This design will create a heat trap and stores warm air in your habitation area, meaning you will not freeze. When digging out the habitation area, construct it in the shape of a dome. The dome shape stops the ceiling from caving in.
  • Tree Den: In deep snow conditions, it may be possible to locate fir trees that provide a natural shelter under the branches. Once you have located a tree, it is then possible to excavate a circular area around the trunk, digging downwards with care. Make sure the snow doesn’t pile in as you dig, compact the walls as you descend. Pack the floor with fir branches and fashion yourself a makeshift lid to create an insulated environment that will be free from snowfall. Tree dens are a great way of staying warm and safe.
  • Igloo: The classic snow structure, igloos are great and provide excellent protection from the cold, as well as being spacious. It is important to consider the validity of constructing an igloo as they are time consuming and often a snow cave will suffice. Building an igloo first requires the creation of a mound of snow, this has to be sited on relatively flat terrain. It is important to make sure the mound is sizable as you will be burrowing into it. As a rough guideline, it is recommended that you make the mound at least 1.5 meters in height and two meters wide. Once the mound has been completed it is important to let it sit and set for a period of two hours, conditions permitting. To create the inner chamber, you need to begin by tunnelling into the centre and slowly begin your excavation. Use the removed snow and loosely throw it onto the outside mound, this will keep the walls at an even thickness. Remember, you want to aim to construct the igloo in the classic circular shape. Hollow out the inner chamber in an even and methodical manner, making sure to go at a slow, steady and safe pace. Use a circular arcing motion when hollowing out the chamber, you are looking to produce a dome like interior. Feel free to fill in any holes as they appear with compact snow and make yourself a comfortable space that fits your needs adequately.

Making a Fire

Learning how to make a fire is a crucial skill that is a high priority. Being outdoors in the cold can be fatal. Hypothermia can set in quickly and being able to create a fire and generate warmth is a sure way of avoiding such dangers. Food preparation can also require the use of a fire and fire can be helpful it warding off unwanted creatures.

How you go about making a fire will depend on the resources you have available. Most importantly, it is good to have a source of dry fuel, in the form of tinder, kindling and then larger longer burning pieces of wood. Tinder can be made from a variety of flammable substances. For example, dry fungus, dry wood fibers or cotton work well. These are the first materials that you will use to start your fire.

You should then have an ample selection of kindling available. These should consist of small dry sticks that you will then add to your burning tinder to build on the existing flame. Lastly, it will help to have a pile of larger pieces of wood, or dry branches, are great and can be snapped by hand into segments. If you will be in the wilderness long term, it helps to have a dry store of fuel for fires saved for future use.

  • Starting a Fire with Rocks: It is possible to light fires using two pieces of rock, or a rock and the blunt side of a steel blade. The technique is the same as the one you would use when striking a ferrocerium rod. Quartz and flint are the ideal stones you want to look out for, they are great for starting fires. You must use the quartz or flint strikers in accompaniment with a larger piece of stone or the blunt side of a high carbon steel blade. If you fail to have a knife handy the stone that you will be striking the flint or quartz against should ideally be a stone containing some iron content. You can experiment with different rocks to see which combinations work best. Also, make sure your quartz or flint has a good sharp edge, as this ensures a good spark.
  • Starting a Fire with Sticks: This method of lighting a fire is well known, but can require a large amount of effort. The stick method requires the build-up of friction between two pieces of wood. There are three different variations that are commonly used: Hand Drill, Bow Drill and Fire Plough.
  • Hand Drills & Bow Drill: The hand drill and bow drill are practically the same, the only real difference is the use of a bow which will save your hands from blistering. Hand drilling is not for the faint hearted. These techniques are energy intensive in comparison to the other methods, but work effectively if done correctly. You need a stick with a sharpened point which you will spin to create the friction and a piece of wood that you will drill the sharpened point into. It is possible to create variations on these methods and the video below is an excellent example of this: https://www.youtube.com/watch?v=ZEl-Y1NvBVI.
  • Fire Plows: For the fire plow, you will need to create a channel in one large dry branch using a stick and drag a smaller stick along the channel, rubbing it vigorously backwards and forwards. This creates friction which creates heat and eventually smouldering coals How to make fire plows video: https://www.youtube.com/watch?v=0iI-eF84ctg.

Drinking Water

Keeping hydrated is crucial and you will not last very long without having access to a supply of freshwater. Most people can last for around 3 days without water, so locating clean drinking water should be a high priority. It is recommended that you drink water at regular intervals if possible to prevent dehydration. However, if you do not have a constant supply of water, it is important to ration the water that you have available, try and strike a balance between regular consumption and water rationing.

Rainwater is the best source of clean drinking water. If your water is sourced from anywhere else always look for clear water and try and drink water as close to its spring as possible.

  • Catching Rainwater: If the situation gets desperate, it is possible to drink rain water off non-toxic plant leaves and it can help to create rain catching pits. Rain catching pits can be constructed easily, you must dig a small hole in the ground and use either a waterproof coat or some leaves to line the hole. When it rains the water will collect in the hole and you should have a decent supply of water to quench your thirst.
  • Getting Water from Plants: Plants not only provide food and shelter, but they can also offer a source of water. If you are lucky enough to have a small plastic sheet or bag on your person, it is possible to use this plastic to capture water from plants. This method requires you to wrap the plastic around the green leaves of a tree or shrub and bind it to the branch. Through transpiration the plant will release water, which the plastic bag will collect, this is a neat trick and can be effective in generating some much-needed purified water. Getting water from plants video: https://www.youtube.com/watch?v=avZtD4gkM84.
  • Tapping Birch: Tapping birch trees is another means of sourcing water and a birch tree can supply you with a good amount of liquid. This method involves removing an area of the bark on the tree, fashioning a wooden stake and piercing the exposed trunk at a steep upwards pointing angle. Make sure you insert your steak no more than an inch into the trunk as this will ensure you won’t damage the tree. The water retained in the tree will then drip down the stake and can be harvested for your needs. Tapping water from birch trees video: https://www.youtube.com/watch?v=UW1LV6D3oLU
  • Solar stills:  Are a fantastic way of purifying salt water and can also be used to collect fresh water from streams or lakes, as well as source water in a desert. These stills work using the process of evaporation. To construct your still you will need some plastic sheeting, a vessel of some description and ideally a piece of tube, although you can do without it. The process involves digging a small pit in the earth. Dig a pit that is roughly 3 to 4 feet wide and to a depth of about 3 feet, or until water starts to appear (if near an existing water source). You will then need to place your vessel in the pit, making sure to secure it if there is water present, rocks will help secure the vessel if needed. The next step, if applicable, is to place your tube in the vessel. Then proceed to cover the pit with your plastic sheet. You can secure the sheet around the edges using sand or dirt to create a seal. The final stage involves you placing a small stone in the middle of the plastic sheet above the vessel. The water will evaporate on to the underside of the plastic sheeting and be channelled towards the lowest point, collect and drip into your vessel. If you have a tube remember to tie the end so you don’t lose any moisture.
  • Purifying Water: Having pure water is of huge importance, waterborne diseases can be life threatening and you want to avoid any chance of becoming ill. The easiest way to prevent this is to boil your drinking water, it is recommended that you do this for a minimum of three minutes.

Sourcing Food in the Wild

Finding adequate food is a real problem in the wild, especially if you do not possess a good knowledge of edible plant species. The average human can survive for around three weeks without food, so be aware of this fact. If you get hungry do not make rash decisions, if you do not know if a plant is edible, it is best to avoid, many plants can be poisonous so try and stick to foods you recognize. It is always a good idea to do research into your environment before entering it, so if possible you will have an awareness of edible and easily foraged food stuffs.

However, generally, if you spot a bird or mammalian animal consuming a fruit, nut or type of vegetation it will probably be edible. There can be exceptions though, so be wary. It is also possible to hunt. Animals can be a great source of protein and if you are lucky enough to find one and capture one, remember to cook it thoroughly. However, the task of hunting an animal if you have no training can be hard work and physically draining.

Wrapping it up

Always be well prepared when heading into the wild as the more equipped you are and the greater the knowledge you possess, the greater your chance of survival should anything happen. Always inform people of your planned destination in case you need to be rescued and stay calm and remember the first 24 hours in a survival situation can be critical.

Basic Hiking Safety Tips: Your Ultimate Safety Travel Tips

0

If you are considering heading into the back country or wilderness in the near future, it might be time to take a closer look at or remind yourself about hiking safety. Of course, whatever you do in life there is no such thing as complete safety, however, there are always ways of managing risk as best as possible.  Before setting out on a hike, here are some simple assessments that will help.

Planning for hiking safety requires research of the overall hike. Ask yourself questions to evaluate the how to proceed.

  • Who? – Assess the people going hiking with you
  • Where? – Learn about the trail you plan to hike on
  • When? – Decide the best time of year, day and time to start
  • Why? – Make sure all your group members are on the same page
  • What? – Shall your group carry while hiking

Who are the people involved on the hike?

A good place to start with hiking safety, is considering the people who intend to take part in the hike. If you don’t know each other it would be wise to meet up during the planning stages and get to know each other socially, if possible. Ask everybody to share their previous hiking experiences and skills to understand the strengths and weaknesses of the group.

Everyone has to start somewhere so it is understandable if group members have different levels skills and expertise. Some might be complete beginners which is not usually a problem; just make sure that they are not overtaxed with too much responsibility they are not ready for. However, if some members are reticent about literally carrying their weight or not participating as much as others it could lead to grievances and unpleasant hikes.

Group dynamics do not always call for a leader as many hiking groups operate by consensus, but those with more experience may naturally give more guidance. However, no one can be made to do something they don’t want to. Personally make sure you are in good enough physical shape for the planned hike. It is not fair to other group members if you have not made an effort to be fit enough.

Also reveal acute or chronic injuries if they may have any bearing on the hike. A reccurrence may not only be unpleasant for you as others may be compromised as well. If they know about any issues and agree to the risk, fine, but they should be in the loop before starting out. I know some hiking tour companies that do a fitness assessment before accepting people on the longer hikes.

VIPs who won’t be joining you

There are also a couple of very important members who won’t actually be on the trip. These are the people who you will tell of all your plans before you leave. These are the people that will be the first point of contact if there are any problems or changes. They are the ones who will notify relevant authorities if your group has not returned as planned.

There should be a minimum two contacts, but so many that might invite confusion. These people will at a minimum have each other’s contact phone numbers, if they don’t know each other as they may have to discuss any decisions that have to be made concerning hiking safety. Consider these as mature VIPs willing to take this important responsibility.

Where does the Group intend to Hike?

The whole group should have an understanding of the route where you all will be hiking – be on the same page, so to speak. Google earth and Google Maps may the group a great overview of the trip. Collate maps together and map out your intended route on a topographical map. All of the group should have some skills at map reading or be in the process of learning with regard to the complexity of the trip.

Try to ascertain which parts of the trip will take longer and perhaps require more energy than other sections and plan accordingly. Decide on bail out points if you need to, so that there are safety factors built into the plan. If you are hiking along well trodden paths there maybe huts and camping areas to aim for.

As well as sharing maps between all members of the group, discuss who has other sources for guidance like Global Positioning Systems (GPS). These have been available for many years now and can be seriously fun tools to utilize on any trip. However, be wary of relying on them totally – they can break, get lost, fall in rivers or just stop working.

Always stay on the trail unless you encounter some unforeseen problem. Staying on the trail is also a good ecological choice to ensure you do as little damage to nature as possible. Bush bashing breaking through vegetation is not wise for direction, hiker safety or good for the environment. If there is a problem that stops you following the trail, consider retracing your steps or how to get around the problem and return to the trail without risking getting lost.

Always err on the side of caution as chances are if there is some reason you cannot easily continue, there may be a growing problem to contend with.  For instance, if extreme weather is causing damage to the trail in one section it may mean there is even more damage ahead.

When does the Group intend to go?

Weather is not Small Talk

Deciding the best time to undertake the hike includes that variable that enters the daily small talk – the weather. However, concerning hiker safety “The Weather” is not at all small talk; it is vitally important as you and your group’s lives may depend on making good decisions concerning it.

Make sure you ALWAYS check current weather and long term. With the ubiquitous internet, not knowing the weather is never and excuse. That is not to say you shouldn’t start out if there are a few showers likely, but if there is any sign of heavy or extreme weather, you should seriously consider cancelling or postponing your hike.

Bad weather is one of the most likely things that will cause a hike to go terribly wrong become dangerous. This can be anything from fog coming down and you lose your way, to floods that cause rivers to rise to dangerous levels, landslides destroying the trail, or snow and freezing temperatures risking group members suffering from hypothermia.

Some trails are definitely best to undertake in certain times of the year so seek local advice if it is not an area you are not familiar with. If the trail is closed, it will be closed for a reason. Most trails are more accessible in the summer simply because of the warmer weather but it may not always be the case if packed snow makes hiking easier.

Agree to Stick Together

Decide on the day and time for departure, the daily time spent hiking, the estimated time en route, how many days it should take – plan the whole trip. If things change, so be it, but at least you all start out with the same goals.

Also, discuss the daily trail timetable with your hiking partners and agree to a system before you leave. Some people are early risers and have no trouble being packed up and on the trail by 6am while others are more reticent to climb out their sleeping bags. Some mountain trails require you rise in the middle of the night so you cover the distance before the snow gets too soft in the heat. Other times it may be important to start walking early to cover the daily miles if you are hiking in desert climates where you rest during the day.

Also learn about what animals are likely to be in the area at certain times of the year and when they are more likely to cause any issues. Possible dangers concerning animals are often related to the seasons. Bears may be more aggressive when hungry after winter hibernation or have young cubs with them. Male animals may be more aggressive during their breeding season – deer, wild goats (yes, wild goats – seriously). Snakes are more active in spring and early summer.

Why is the Group going on the Hike?

While this factor may not seem an essential point discuss concerning hiker safety, but it does help to know “everyone is on the same page”. It may seem obvious that no one would be thinking or discussing the plan if they did not want to go. However, we may all have our own agendas for choosing to take the same route. Try to hike in groups of like-minded people even if you are not friends.

Question yourself and others about whether the hike is to be a casual stroll or a race challenging time and distance. Imagine the scenario where one person wants to stop all the time to photograph dung beetles crossing the path, while other members are jumping up and down with frustration. They may even want to leave him or her behind which is never a good idea. The other extreme is “Harry Hare” who is always racing ahead to the lunch stop and again, it is never a good idea to go too far ahead. This may also cause others to get exhausted trying to keep up with the front runner.

What will each Group Member carry?

What you will take depends to some extent on how long you expect to be on the hike.  This is probably one of the most important factors to staying safe hiking. It would be wise to know what equipment each person has so that all the options are covered and maybe there will be alternative cooking methods within the group. For instance, one person may have a gas canister stove while another has an alcohol stove which will offer alternative methods to suit different cooking methods.

Canister gas stoves are better fast boiling and rehydration of meals as opposed to being used for simmering. Find out what emergency equipment each person carries with them. With a group there may be some things that can be shared to lighten the load, but safety items like basic First Aid Kits and the like should still be carried by each individual.

Make a list of what you personally need and what the group could share. At a minimum there are some items that should be carried:

  • Methods of navigation – maps, a magnetic compass, digital compass, GPS, altimeter
  • Lights – flashlight, head torch preferably with LED lamps for longevity
  • Clothing – suitable for the worst possible weather during the season
  • Shelter – tent, tarp, sleeping bags, insulation mats
  • Fire lighting capabilities – waterproofed matches, lighters, fire lighters
  • Food – daily rations for all, emergency ration, nutritious snacks
  • Water – unbreakable water bottle, 2L emergency ration
  • Knife and tools – sharp knife, multi tool, cable ties, duct tape, string or cord, fish hook and line, aluminum foil
  • Sun protection – sunscreen, sunglasses, shaded hat, clothing
  • First Aid Equipment – enough to deal with any likely small injuries plus perhaps some items that can be innovated
  • Emergency Equipment – heat blankets, signal devices, whistle, locator beacons, flares

Recommendations for a minimum personal first aid kit might include:

  • Sunscreen and lip balm
  • Insect repellent
  • Pain relief – Ibruprofen or paracetamol
  • Antihistamine tablets
  • Triangular bandage sling
  • Crepe bandage 3-4”
  • Sterile dressings – various non stick
  • Gauze dressings
  • Strip dressings
  • Fabric dressing strip
  • Disposable CPR face shield
  • Notebook and pencil
  • Safety pins
  • Scissors
  • Disposable gloves

Each of the above can be discussed at length. You or the group will have to decide how much you can safely carry and how much you can safely leave behind.

What am I going to wear?

Make sure you have adequate clothing for the most likely extreme weather of the season you are hiking. You don’t need the most expensive fashionable hiking clothes, but some fabrics are better than others. I personally like a mixture of natural products like silk or merino wool for warmth and comfort, and synthetic for easy drying and waterproofing.

Layers of clothes are the key to versatility – sometimes I will start out with quite a few layers that I can peel off as the temperatures rise or put back on as they cool. It is better to have 3-4 thin layers than just two bulky ones as layers trap heat more efficiently and allow you to dry off when sweating. Make sure you have suitable headgear too, either to keep you warm or keep the sun off. Extremes of temperature can kill; too hot leads to dehydration and high body temperatures leading to heat exhaustion while to cold leads to hypothermia.

What if?…Risk Management

Every day we take risks doing everything and anything, even lying in bed. Without thinking about it, we minimize risk by deciding to put the light on at night so we don’t knock into something, or we look both ways before crossing the road. Experience teaches us risk management. The problem is when we are about to do something we are not so familiar we don’t know what the risks are or how to prepare to minimize them.

When it comes to hiking, learn from other’s experiences until you are confident yourself. Brainstorm the more common risks that you might encounter and prepare to deal with them. Within your group discuss likely “what if..?” scenarios so less things can take you by surprise, for instance, “What if one of us gets injured and cannot walk…?” “What if fog closes in…?” “What if we are getting seriously chilled…?” “What if we lose a water bottle…?”

Hopefully none of these scenarios will eventuate, but the fact you have discussed them and what plan of attack to take will make you more aware. This planning will you give some confidence to be able to deal with situations confidently. If you do find yourself in an emergency situation, remember the STARR acronym:

  • STOP – pause, sit down and stay calm
  • THINK – be aware of what is around and actually happening, brainstorm ideas
  • ASSESS – evaluate various options re potential consequences
  • REMEMBER – water, warmth, shelter, and will to survive
  • RESPOND – act on the best response

Make sure everyone in the group has attended some sort of Emergency First Responder/First Aid course. These only take a few hours of one’s life to complete, but can literally save your own or another’s regardless of where you are. However, in the middle of nowhere, this knowledge is even more important to make sure what is not life threatening remains that way. There is no point where only one or two group members having First Aid knowledge and they are the ones to be badly injured, leaving no one else confident of the best plan of action.

Everyone should know how to use the emergency equipment that you intend to carry – this includes the GPS, the Emergency locator beacon, heat blankets as well as how to rig a tent or tarp quickly for shelter. In some countries like New a you can hire Emergency Locator Beacons for inexpensive rates from government departments. If you are in serious  danger (and not just out of coffee) you can turn the beacon on, which will alert regional Search and Rescue Teams who will know where you are and come find you.

Do not rely on mobile phones. That is not to say, “don’t take them” but do not rely on them. They can break, run out of battery, be out of range of signal, or all of the above. If you do take one, make sure it is in a robust waterproof container.

Conclusion

Following these advises will not guarantee to keep you safe but it will certainly help. It will also help to give you confidence in your fellow hiking buddies and keep you enjoying your hikes.

Plan your hiking with safety in mind so you and your hiking buddies can get outdoors and enjoy the fresh air.

Great Outdoor Games For Two: How To Make Sure You Aren’t Bored While On Your Camping Trip

0

Those stretched for cash, up for the thrill of it, and especially those with a taste for it, love to camp. Camping brings you out of your comfort zone and slap bang into the middle of nature, with as little or as many necessities as you deem fit, to aid you in harnessing the outdoors. This vacation pass time is best suited like most things; bettered with more people involved and when there are camping games for couples included, it becomes even more interesting.

In the past decade, camping has become a vacation style of choice for people in the United Kingdom, the United States, and globally for its ease of planning, cheap destinations, and an accessibility to the outdoors not many other styles of travel can boast. The freedom of camping has made exploration of a new destination that much easier. Experiencing the great outdoors with a partner and/or a friend is a sure fire way to strengthen any bond.

In this article, we will discuss a variety of different camping games and activities that require little to no preparation or props, all designed to make sure that you are never left bored with nothing to do. Because let’s face it, there are always some quiet moments in any relationship and after reading this, we hope that there are less.

Pre-camping games

Before actually making it to where you are vacationing – be it a campsite or a camp friendly area – you are going to have to journey to get there. Extensively or not, now is an excellent chance to start your gaming rapport with your partner.

A couple of these you would have already played, perhaps as a child or parent, but it is safe to say that none of these games lose their charm when played in the company of just you and your partner.

  • Punch-Buggy: If you have yet to play this game, let alone hear of it, your childhood was pretty good. The premise is this; any time a Volkswagen Beetle passes you by on the road, and you see it first, you get to take a jab at the person sat next to you whilst stating the name of the game. Though, if you live in an area void of Beetles, just change the name of the game.
  • License Plate Possibility: Taking the license plate numbers of the passer by vehicles and attempting to decode them into their actual meanings. For example; making ‘SYT 041’, ‘Send Your Thoughts, Only For $1’. Thankfully, this game takes a lot of imagination and offers the players artistic leniency in its playing.
  • Would You Rather: This game is a real gem of creative genius. Would your rather pits your imagination and nerves against your partners by giving them the choice between two options and which they would rather pick. ‘Would you rather have a learn a foreign language, or learn how to play the trombone?’. The questions do not have to stay tame. Sometimes the weirder the options, the more laughs and difficulty choosing you will have.
  • 20 Questions: A game that should go without saying, but there we feel the need to provide you with its addition. 20 questions, is a spoken word game where you and your partner take it in turns to think of an object (subject) and your opponent has to figure out what it is using twenty questions or less. The catch is you can only answer using yes or no. Really keeps the gears turning.
  • Buzz Word: Though this is a game better suited for more than two participants, it is still an extremely fun game as you get deeper into its playing. Pick a word, any word, as long as it is commonly used in your vocabulary, and assign it as the Buzz Word. From now on, neither of you can use that word. This will keep you creative, with your eyes on the prize of winning. Though this may prove difficult for the driver the entire trip as they have to focus on the road as well. Tough break. Taking a vacation away from your ordinary lives is in part to relieve yourself from the stress that everyday life involves. So now that you have made it to the camping grounds and assembled your gear, let’s look into games and activities that will keep you on your feet and active.

Activities that will bring You Together and Active

All the games that we have spoken about above are little activities to keep silences shortened and to maximize your vacation time with your partner. These games and activities are to help form a stronger bond with each other, connect on different levels, and perhaps learn new things about both of you as a pair.

Building a Hammock

Yes,  this is less a game and more of a woodcraft activity, but nevertheless, it is fun to do and provides you with a romantic seating area for your stay. This does demand a little home-prep by way of a sewing machine. If you have one handy, then this activity is definitely for you.

Items neededHow much you will need
Drop Cloth (thick cloth material)‘9 x 6’ foot
Grommets36. Preferably metallic.
Rope30+ feet. Preferably nylon.
O Rings2 Metallic.

The quickest and easiest way to build a hammock is by taking a nine foot long, six feet wide piece of material (anything from a thick blanket, netting, or even a tarp). Make sure to reinforce the ends of the material by folding the lengthway edges by two inches.

After making good on the edges, set 18 grommets into the reinforced lining. When all the grommets have been laid into the material, take your 30+ rope and start to tie it through the grommets in an over and under style. All the while, pulling every second loop through the O ring. Now that the hammock has been finished, take two lengths of rope and tie them around two parallel running trees and their other ends through the O rings. This whole project will be an extremely fun addition to your DIY camping vacation.

Pantyhose Bowling

A game that has made the rounds at weddings, parties, fun filled family evenings, and can be played whilst camping, is the ever hilarious jousting match that is Pantyhose Bowling. Taking a pair of pantyhose and wearing the band as a hat, whilst placing a water bottle in the end of it, may sound stark raving mad. It is, but it is the apparatus necessary to knock down the line of water bottles (bowling pins) in front of you.

Knock the pins down before your partner and claim victory in this crazed game of wits, cunning, and knocking things over!

Junk in the Trunk

All that is needed for this game are ping-pong balls, an empty kleenex tissue box, a roll of tape, and the dancing moves of a belly dancer. Tape the empty kleenex box to lower area of your back and have your partner place ping-pong balls through the boxes slit. Using a timer, the game is on to try and shake out all of the ping-pong balls.

Player with the shortest shake-to-escape time is the winner.

Board Games that Stave the Boredom away

At the beginning of the article we mentioned the fact that little to no props or prep will be needed, but with the introduction of this section there is a little bit of both involved. Use the camping trip as a double thread to learn chess, introduce your partner to your favorite board game as a child, spool through the seemingly endless selection of travel-ready kits there are available to you. Just remember to keep your cool and maintain focus. No one likes a sore loser or an arrogant winner.

Though when you are camping, we would suggest attempting games that you have made yourself so that they follow the DIY stylings of a camping vacation. But we all know how hard a game of monopoly is to turn down.

Bring a Splash of Vegas with you

A forever steady rival to that of the board game is the incredibly versatile and exciting opportunities brought by a simple pack of cards. Make sure to always leave one in your glove compartment. Never know when you will want to kill a bit of time with a deck of cards at your disposal.

Here, we will look into a few simple card games to while away the nights after dinner, wait for the rain to stop, or just to see if you can beat one another with a spectacular hand. No camping excursion is complete without a good old game of snap, and there are many other variations of card games that can be enjoyed on your trip. Such as:

  • Gin Rummy: Easily the most popular version of the card game rummy. Remember that card values, often change depending on the card game. Gin Rummy runs the Ace as 1 and Face Cards as 10. Each player is given 10 cards, and the 21st card starts the discard pile in the middle of the players.  Attempt to acquire a set or a run of three cards or more (i.e. 4 though to 6 of Diamonds, or cards of the same ranks like three or four numerative valued cards. Three 5’s of diamonds, spades, and hearts). At your turn, you can take a card from either the stock pile or the discard pile. As the discard pile is constantly upright, it is easier to know what you are working with. The goal is to gain a set or a run, so whichever pile you take a card from has to be strategic. When you pick up a card, you must then discard a card into the discard pile face up. Knock on the playing surface to finish your turn. Beat your opponent by attaining the first set or run.
  • Texas Hold’Em: A poker game that all card players need know of. Obviously, this is a game designed to gamble over so remember to bring your small change (or if you fancy your luck, your big money) to the table with you. As Texas Hold’Em is a game with many rules dependent on the size of the cards in your hand and those in the river (the five cards laid out), it is best taking a rule book or a comprehensive list of hand sizes with you. Half of the game is all about the bluff and your ability to be able to lie well and strategically to your opponent. When your opponent is your partner, this skill is seldom warranted anywhere else, but necessary whilst playing poker.
  • Strip Poker: And last but not least, the tumultuous game of strip poker. Always a treat to play with a deck of cards. Sink your competitive side into this game and reap the rewards. Or you could instead end your card games with a fun little set of ‘52 Card Pick-up’, where you throw the cards to the ground and run away. Leaving your opponent to pick them up. Funny up till the fourth time you do it.

Games of Truth or of Dares

Truth or Dare is an age old game, for all ages. Its simplicity and versatility allows it to be played anywhere by anyone. There are few games that offer this kind of gleaming insight into your partner’s past, present, future, and mindset.

Trut or Dare Cards

There are other games like it that make the players feel more mature. Such as a game of would you rather (previously spoken about in Pre-Camping Games), or:

  • Drunk or Child: This is an extremely entertaining game set to see how much you know about your other half’s life and personality, as they regale you with stories of their least perfect and most embarrassing moments, and then you must ascertain whether they were drunk or an adolescent during this time.
  • Never Have I Ever: A drinking game, turned parlor game where the aim is to start small and end up being as outlandish as possible to win. Never Have I Ever is played by stating something you have done in efforts to one up your opponent. If they drink, they have done this thing too. Example, “never have I ever… read a novel to impress someone”. And so on, and so forth, until it becomes as cringy or as hilarious as you want it to end up.

Wrapping It Up

All of these little games and activities have all been created to maximize any camping trip taken with your significant other. From no props or preparation, to the most being some pre-vacation prep for added comfort, this article has provided you with an ample supply of fun and games to occupy the time that could have been spent in silence and boredom.

Night Hiking: Amazing Tips On How To Hike Safely At Night!

0

If you want to make the most of the great outdoors, the night can offer you just as much opportunity to enjoy a good hike as the day does. Night hiking can be a great experience, but once the sun has gone down the outdoors can be a very different place. It contrasts from daylight hiking in many ways. You should always consider your approach and be well prepared for the challenges you may face. Many individuals go out ill-equipped and unaware of their surroundings and this is when accidents can happen.

If you go out at night you need the right equipment and it helps to have some knowledge on the subject.

Why Go Out at Night?

Temperature can make a big difference, it is often cooler at night. In hot climates, these temperature differences can mean it is preferable to walk once the sun has gone down. However, in some parts of the world the changes in temperature between night and day can be drastic, the temperature can change from a sunny day to below freezing at night, so make sure you know your environment.

You can witness the world in a new light, or better said, in moonlight, or only under the stars. To be able to gaze at the stars is an amazing experience and being out on a clear night without the interference of light pollution means you have the opportunity to view the milky way. Stargazing is great and if the moon is out, it can assist in shedding light on your surroundings, so you won’t need to use torches.

Many animals are nocturnal and the world becomes theirs at night. This means you have a good chance to go out and see a wealth of wildlife. Owls and bats come alive at night, as well as a host of other animal life. Their calls and scratchings can appear to sound amplified as they go about their nocturnal business. Be on the alert and you may have the pleasure of spotting something wonderful.

You may have walked the same trail a multitude of times and know it like the back of your hand. Going out at night brings a new dimension to a hike: landmarks, noises and terrain features can appear very different. Welcome to a whole new world of adventure!

How to be well prepared

  • Always Let Someone Know Your Plans: Leaving a proverbial trail of breadcrumbs can make a huge difference! Always inform someone that you will be heading out and give them as many details as possible. You should always inform them of your planned starting point, end destination and the route you will follow.
  • If You are a Newbie: If you are new to this type of nocturnal adventure, then ensure your first planned expedition follows a route you know well. Stay in your comfort zone and stick with a well-trodden path you are very familiar with. You can use this time to accustom yourself to the change of environment, gain confidence and learn about things such as natural night vision.
  • Do Not Go Alone:Having company is great, not only to share the experience, but it also means you can keep each other safe should anything happen. Lack of visibility can be a big contributing factor that can lead to an accident occurring when outdoors after dark. Even by day, an accident could befall you for any number of reasons and more so at night. Safety in numbers as the saying goes, if anything were to happen to you, it helps to know there are people available to assist.

A couple of rules worth sticking to

Always wait for a member of your party to return to the group if you separate (toilet breaks) before continuing on your journey. Stay within a sensible distance of each other. Space yourselves adequately, not too close together or too distant. This helps to ensure you know where you all are and helps to avoid the chance of a domino-style accident if one individual were to slip, trip or fall. An advisable distance is normally at about two meters apart.

Bring the Correct Gear

It is of the utmost importance to head out prepared and well equipped no matter the hike. This advice is even more applicable when you are tackling nighttime conditions. Safety is paramount, so make sure you have everything you need, just in case. Always remember to pack your bag methodically as it can be challenging locating objects in a dark environment.

It is important to know where your equipment is and know how to find it in a hurry.

What Gear to Take

Here’s a list of some key items:

  • Map
  • Compass
  • GPS
  • First Aid Kit
  • Head torch
  • Hand torch
  • Extra Illumination Devices
  • Extra Batteries
  • Extra Food
  • Extra Water
  • Extra Clothes
  • Flairs
  • Fire Lighters and Kindling
  • Knife
  • Warm Blanket
  • Bug Spray
  • Cell phone
  • Wrist Watch
  • Toilet paper

Choose a Decent Bag

You should be prepared for unexpected weather conditions so a waterproof bag is essential. Nylon treated or UPVC bags are a good option to go for and you want to avoid canvas or cotton bags as they are not as weather resistant and a bag of wet items is not what you want or need. It is also advised that you keep the weight of the bag down, if possible. Your bag will be one of the heaviest items you take with you. If you are planning to go on a short hike there is a great range of purpose made lightweight hiking bags that are definitely up to the job, if you are going for a longer stint and need to carry more the options vary.

Being able to adjust the bag to your body frame and requirements is very important and always look to bring a bag that has customizable straps, these will help you carry weight and ensure greater comfort.  Also, remember to take a bag with good shoulder strap padding, this is crucial as padding improves comfort and relieves pressure and chafing.

If you know you have to carry a heavy load choose a bag with a lifter strap, sternum strap and a hip belt. Lifter straps, sternum straps and hip belts are specifically designed to aid you in optimizing the distribution of weight that you have to carry and keep your bag securely positioned in the right place. You want to find the balance between your hips, back and shoulders when it comes to taking on weight and these straps will help you do that.

Now it is important to remember that the nature of a trip may vary in terms of the time it will take, the environment you are in and the equipment you will need. As a result, the requirements that a bag has to fulfill may not always be the same. The volume of the bag will depend on a number of the above variables, so do a mental check before you head off and make sure you pick the right bag for the job. Today the range of hiking bags on offer is huge and some bags come with nice design elements such as inbuilt hydration pack and a whistle. All these design elements are helpful and provide essential bits of hiking gear.

Wearing the Right Pair of Boots

Your footwear makes a big difference to your comfort and protection, so choose a pair of boots that fit and are flexible and are sturdy. At night you want to be able to feel the terrain underfoot as you often might not be able to see it. Bringing a good pair of waterproof ankle height boots is advised, either day hiking or backpacking boots are perfect. Be warned, mountaineering boots can be too rigid and are not designed for all purpose conditions and the high cut of the boot can be restrictive. Unless they are necessary it is advised that you a lighter boot which is more flexible and comfortable, so you feel freer to move your feet. This makes it easier for you to pick your way through varied terrain.

A firm tread ensures stable grip and should protect you both on and off the trail. Most decent boots have Vibram soles which are perfectly designed for your needs and are extremely durable. Remember, a boot that has a stiff midsole will be good for weight support, so useful for carrying heavy loads. However, the stiffness can take away from the sensation of feeling the terrain, so do be aware of this factor when choosing your footwear. Most importantly, your footwear choice should be comfortable as you will be covering some distance, make sure they fit correctly and feel secure.

Testing the Terrain

Your ability to judge your surroundings can be hampered by a lack of daylight. It is important to go slow, measure your footing and test your surroundings. Loose rocks and unstable terrain are harder to spot at night, so always ensure you test the ground before putting your full weight down if you are unsure.

With a light, you should be able to gauge what is underfoot easier, but even still shadows, obstacles and changeable landscape can pose hazards and bring surprises. If it has been raining or weather conditions are averse, then you should be even more alert.

What Clothes to Wear

A range of layered garments is always advised to manage the temperature, ensure breathability and also protect against the elements. You want to bring a range of clothes that are comfortable and soft, light in weight and moisture wicking, as well as waterproof.

Packing waterproof and windproof essentials are always advised. You need a decent coat and trousers, as well as a good hat in case the weather picks up. All items should be easy to store for use when needed depending on the weather. Finding the right textiles to wear is also very important. For example, clothes made from textiles like merino wool or alpaca are perfect for hiking as these materials provide you with warmth and comfort and are moisture wicking.

The three layer clothing system is an excellent means of managing your temperature, especially at night when the temperature could plummet or in colder climates:

  • Base Layer: Thin body-hugging, comfortable and breathable layers should be applied first. These are used to keep the skin dry and stop the buildup of sweat. Try to avoid cotton clothing and instead go for synthetic textiles, wool, or if you are feeling particularly extravagant you can go for silk.
  • Secondary Layer: The middle layer of clothing provides insulation and should be loose fitting and moisture wicking, a good option is a woolen garment, fleece option or clothes made from synthetic textiles.
  • Outer Shell: This last layer is used to protect against wind and rain and should be a hard shell product. Hard shell refers to items of clothing that are waterproof and windproof, as well as breathable.

Remember your clothes should be well suited to the environment you will be walking in so tailor your approach to the outdoors to make sure you are protecting yourself adequately.

Illumination

One of the biggest problems to think about is how you will find your way, locate other members of your group or find necessary objects whilst on your night time hike. You have to consider how different environments and weather can affect your hike, visibility can be affected by cloud cover, or no moonlight. Different environments will offer different visibility issues.

For example, thickly forested areas can throw a great deal of shadow onto your path, so when you are walking in a ravine and the moon is out, the light may not reach you. Whatever the conditions, you need to be a good light source when out at night, therefore it is essential to have an adequate supply of lighting, like torches or glow sticks:

  • Hand Torches: Getting a decent torch is a must and you want to make sure you take a torch that suits your hiking needs. A good battery life paired with a strong beam and adjustable focus is very important when considering what torch to bring with you. Also, a well built and durable torch counts in order to ensure it will not break if dropped. Your torch does not have to be big or heavy, go for a lightweight and easy to pocket option. Hand torches are good for pinpointing specific objects or nightlife from a distance, but do be considerate if sighting wildlife as a torch can be blinding, this applies to people too. Also, carrying a torch takes away the freedom of having the use of your hands.
  • Head Torches: Head torches are a great addition to your kit. They have many benefits. Two of the greatest benefits they provide are that they follow your line of sight and free up your hands. When wearing a head torch, ensure it is angled towards the ground and not directly at eye level, otherwise, you might blind your fellow travelers. Look for head torches that are comfortable and have adjustable light settings, good battery life and a strong beam. Good head torches should have a red light option, as you can apply this setting when encountering other groups on the trail. Also, the red light does not detriment night vision.
  • Glow Sticks: If you want to use a light source that is effective but not overly powerful, glow sticks are excellent. Glow sticks are waterproof, so work in wet weather and require no batteries. Most glow sticks will last for around twelve hours and are perfect for use when stopping to eat or setting up camp. A good idea if you wish to remain visible is to attach one to your bag, they are brilliant visual markers and can help keep a group together.
  • Batteries are essential: Torches are essential, but without a functioning battery, they soon become useless. Always bring a healthy amount of backup batteries and remember to keep a mental note of the battery life of your torch and keep on top of the replacements. Being left in the dark is not fun and can quickly change the atmosphere of a situation from pleasant to worrying. Having control over your lighting situation is very important, so make sure you are well stocked up on batteries.

Night Vision

One of the wonders of nighttime hiking is you have the chance to use your natural night vision. Adapting your eyes to your nocturnal environment is a fun and great way of exploring the hidden world around you. Using artificial light will not only destroy your night vision it can also scare off wildlife. A lot of the time you can hike without the need for artificial light, the stars and the moon and a clear night sky can offer all the light that you need.

Remember to build your night vision, it is not develop in an instant and it takes time for your eyes to adjust. Do not stare directly at a light source and use peripheral vision to your advantage. You will be amazed at what reveals itself once you have fully adjusted your eyes to the night. In consideration to your fellow hikers night vision as well as when you encounter another group of hikers on the path, please remember to watch where you point any torch light, as it can be rude, or ruinous to night vision as well as blinding.

Finding the Way

It is important to be vigilant when out in the night as finding the path and sticking to it can be a challenge even with the aid of a torch. You must always keep an eye out for place markers, signposts and landmarks and be extra observant of your surroundings. Darkness can throw you off course with ease and if you venture from the path it is crucial that you memorize the way back or you can lose yourself in an instant. To help you find the right route slow the pace of your expedition and take your time when traversing the terrain, this also helps ensure you stay safe and lowers the chance of unexpected injuries.

Communication is crucial when in a group and can be a great way of keeping people aware of any present dangers on the path and of your location if for any reason you are not visible. Do keep in mind that any sound you do make will travel and if you are on a wildlife hike you can scare animals easily, so be mindful of your volume and tread carefully.

When confronting Wildlife

If you are lucky enough to stumble across some wildlife when out at night you should be considerate in your approach as you are in its habitat. For both your safety and the comfort of the animal think about the proximity between you and the animal and consider what type of animal it is. Obviously, if it presents a threat, then you should move away from that animal at a sensible pace trying not to startle it.

If it is an animal that you wish to observe and it poses no threat, then approach it cautiously and quietly and find a nice vantage point and remain as still as possible. Most animals probably have better hearing and night vision than you do. Never impose yourself. If you are carrying a torch avoid shining it on its face or even turn it off if you can.

Wrapping it up

Well, there you have it, all you need to know regarding night hikes. We hope that you learned something new and that you found our article interesting to read and useful.

The Amazing Benefits Of Drinking Water: All You Need To Know About Water And Your Body

0

We all know that humans simply cannot live without water. It is essential to our livelihood and helps the body in so many ways that we simply cannot function without it. Even our blood is 92 percent water! Staying properly hydrated allows your body to remove toxins and helps to send vitamins and nutrients, as well as oxygen, through the body to the proper places, keeping you energized. We will discuss all that and more as well as how long to digest water.

Water is helpful when losing weight, as it boosts your body’s metabolism, and it promotes healthy skin. You may feel that you are in a happier mood when you are hydrated, because water is doing its job by working with your body. You probably have a lot of questions, such as how long does water stay in your stomach? That can vary from person to person, but we will discuss more below about water and your body.

Soon, you will know all about water, how to stay hydrated, what causes dehydration and more. Let us first talk about ingesting water.

Ingesting Water

When you drink water, it travels from the mouth to pharynx and then down the esophagus. This takes about a second. Some of that water is absorbed into the stomach, some if it is absorbed into the small intestine. Then the water enters your circulatory system and then flows through the body. Did you know that if you drink 2 liters of water each day, it can turn into upwards of 2,000 ml of urine? The bladder holds up to 16 ounces of urine. For your stomach to digest water, it can take generally 45 minutes to 2 hours. However, if you have not eaten anything, and are drinking water, it can sometimes digest in just a handful of minutes.

On average, a person needs at least 64 ounces of water in their body per day. If you are highly active, you may need more water. Depending on your fitness level, you may need to increase your water intake as well. Ingesting this much water will keep toxins flushing out of the body and will keep you full so you will not want to snack. It boosts your metabolism, keeping you going through the day. The best part? Water has no sugar, no fat, and no calories!

Ways to Stay Hydrated

Besides drinking water and increasing your intake if necessary, you can find many foods also have a lot of water. Stay away from the caffeine, which acts as a diuretic. Many fruits and meats contain a high amount of water.

Some great examples of foods that will keep you hydrated include:

  • Hamburger Meat
  • Chicken breast (not fried)
  • Soups, Broths, and Stews
  • Smoothies
  • Flavored Water or Sports Drinks like Powerade
  • Watermelon
  • Grapes
  • Real Fruit Juice
  • Jell O

There are many things you can do to improve your body’s hydration level.

Making small changes like replacing that soda with some water, can help your body work better and less harder.

Here are some ways to improve your hydration level:

  • If you do not like plain water, you can always eat foods that are high in water, such as those mentioned above.. Some foods can contain up to 90 percent water. While you do want to drink water regularly, you can always add lemon for flavor.
  • Stay away from drinks that will steal water from your body. These would be the sodas, coffees, and teas because not only are they diuretics, causing you to lose more water when you urinate. If you are already dehydrated or sick, stay away especially from apple juice and prune juice as you will lose even more water in the form of stool.
  • To increase your water intake, carry a bottle of water with you wherever you go. Whether it is exercising at the gym, working in your office, or driving your car, keeping water nearby will allow you easy access to hydration.
  • If you are flying, you may notice that your mouth feels dry. The air in the cabin dries out your body. Drink water before and during your flight so you do not feel this way. During this time, you should also avoid soda pop and alcohol while you are in the air.
  • Stay away from any “water diets” that claim to help you lose weight fast. Drinking too much water can be dangerous. Not only that, but your body can only absorb so much water before it just goes straight to your bladder. You will not burn fat doing a water diet.
  • Water is hard to digest when you are eating it with a meal. It also dilutes the digestive acids. If you do want to drink water with your dinner, try drinking sips of room temperature water. Drinking ice water will slow the digestion process.
  • As we said before, drinking two glasses of water when you wake up can help jump start your body for the day. It keeps your body in balance and allows your mood to improve. This is definitely a must when it comes to hydration.
  • Lay off the carbonated water as it only makes you burp. The gas from this will make you feel full in the stomach, which means you will not drink as much as you would with regular water. If you cannot live without a little fizz in your drink, you can always put some seltzer in your water.
  • You can lose weight by drinking more water. It can help to burn calories and can help you feel full between meals. Water will flush the kidneys and release toxins from your body, as well as some fat. If your kidneys are in great shape, the rest of your body will improve.

What Causes Dehydration?

There are many things that can lead to dehydration, namely lack of giving yourself water for your body. If you do not ingest water, you can die within days. Some foods can cause dehydration as well.

Below are 9 foods and drinks that can dehydrate your body.

  • White Asparagus:  This vegetable has aspartic acid, which affects the kidneys, depleting water from your body. This will, in turn, cause you to be dehydrated.
  • Alcohol: Since alcohol is a diuretic, it will make you need to use the restroom more. Thus, you are losing water from your body. Too much alcohol will cause a hangover, leading to a headache, because of lack of water. If you do drink, try to drink water as well to keep yourself from a hangover later.
  • Cured Meats: Because of the high amount of protein and salt in cured meats, your body will lose water. It is recommended to drink water along with your cured meats to ensure the salt does not dry up the water within you.
  • Coffee: If you drink just one or two cups of coffee, you do not have to worry about it dehydrating you. However, if you drink a lot of coffee, it dehydrates you like alcohol does because coffee is also a diuretic. Plus, the caffeine is thought to speed up the process of dehydration.
  • Soy Sauce: We all like to add a little soy sauce to our rice now and then, but it does contain salt, which will soak the water up from your body. In 2013, a girl almost died from drinking a quart of it and it gave her an imbalance of electrolytes, causing dehydration. If you use it a lot, though, you should drink some water along with it.
  • Bouillon Cubes: Used for making soup, bouillon cubes contain a very high amount of salt, which aids in dehydrating you. Essentially, when it is used in soup, you are drinking flavored salty water. Even though water is used in the process of making soup, you will still need additional water to stay hydrated. If you are sick, you will want the extra fluids so water can replenish your body.
  • Popcorn: High in sodium, popcorn can cause you to feel very thirsty. Many like to drink a soda with their popcorn, especially in the theater. Try to replace that soda with water or flavored water to gain some fresh water for your body.
  • Fried Foods: French Fries. Cheese Sticks. Fried Chicken. If it is fried, it is going to dehydrate you. Fried foods and processed foods usually have a lot of salt, which can be over your daily intake amount. Avoid these foods or eat sparingly. Always replenish yourself with some water after eating these foods.
  • Sugary Drinks: Many sodas or juices contain a high amount of sugar, which are acidic as well. While they may be tasty, they are sucking water right out of your body. In turn, all of your organs are working harder to process the sugars, and your body has lost water. Cut back on the sugary drinks, by including more water within your daily diet.

What Happens to Your Body without Water?

Dehydration will occur when you do not have enough water in your body. You need to replace the water throughout the day to keep your body functioning properly.

Some signs that you are being dehydrated include:

  • Dry mouth
  • Feeling tired
  • Headache or dizziness
  • Muscle cramps
  • Dry skin
  • Constipation

There are more signs if you happen to be severely dehydrated, such as:

  • Irritability
  • Sunken eyes
  • Fast heartbeat
  • Fever
  • Little to no urine
  • Low blood pressure

There are more signs, but those are the major ones. The major causes of dehydration are: frequent urination, sweating, vomiting, diabetes, and diarrhea.

Nobody is immune to dehydration and it can affect you more, and this is especially true for certain people like:

  • The elderly
  • Sick people
  • Infants
  • Diabetics
  • Alcoholics
  • Those with adrenal gland disorders
  • Those with cystic fibrosis

The elderly are more likely to become dehydrated because as a person ages, the thirst mechanism in the body is not as strong. Therefore, they will lose water faster. If an elderly person has dementia, they will experience dehydration and the need to stay on top of their water consumption. Infants and small children are at risk of dehydration because their little bodies go through water faster, so they need to be sure to get water regularly.

While a person can live up to 3 weeks without food, the body can only go 3 days without water. Survival experts, stick by the Rule of Threes: You can live only 3 minutes without oxygen. You have 3 hours to find shelter in a harsh weathered environment. You can live 3 days without water, and you can live 3 weeks without food. There have been cases where people have lived a week without water, but those are rare. Since the body is nearly 70 percent water, you can see how essential it is for living.

Best Time to Drink Water

Believe it or not, there are times in the day that are better for drinking water, as well as a few guidelines that will help your body get all of the water it needs.

So, when is the best time to drink water?

  • Drink 2 glasses of water upon waking up. This helps to wake up your internal organs and get them ready for the day.
  • Drink 1 glass of water a half hour before any meal as it helps the digestion process.
  • If you are taking a bath, drink 1 glass of water to keep your blood pressure down.
  • Before going to bed, it is recommended to drink 1 glass of water for heart health. This aids in preventing a heart attack or stroke.
  • Another trick is, after drinking the 2 glasses when you wake up, you can brush your teeth and eat about 45 minutes later. From there, eat your breakfast and do not eat again for another 2 hours. This helps water to process through your body more efficiently.

Best Ways to Drink Water

There are three great ways to drink water and keep yourself healthy:

  • Drink at a slow pace. Keeping a steady pace when drinking water will keep you more hydrated than if you were to down a whole bottle in just a few moments. This is because your intestines can only take so much water at once. If water moves too fast, you will lose it through urination, instead of it being absorbed into your body.
  • Drink water with some lemon! Lemon has many health benefits as you will see below. You will feel more energetic and your body will be able to digest food better. Using a water pitcher that has an infuser will allow you to infuse your water with whatever fruit you want and the fruit will pour into your glass with the water.
  • Timing is key for drinking water, as we stated above. Knowing when to drink water will allow you to better absorb it giving you more energy and releasing more toxins. Drinking water is simple if you have some next to you at all times. You can use a tumbler and fill it wherever you need to, at school, at the office, or at home. Drinking as you eat will slow down the digestion process, as some people think.

Add a Little Lemon

Lemon is not only for enhancing your water with taste, but it can do wonders for your body. Here is how:

  • Lemon keeps you alert and full of energy because it contains potassium. This helps nerve function and brain function, and it reduces stress.
  • Lemon boosts your immune system with Vitamin C. This helps the body heal and helps to break up phlegm if you are sick.
  • A little lemon in your water will keep you not only hydrated but will not hold onto fat cells. They also absorb nutrients.
  • Since lemon has Vitamin C, your skin will produce more collagen, which keeps wrinkles at bay.
  • Lemons have pectin fiber, which keeps your metabolism regulated. This can help you lost weight and curb craving.
  • The liver loves lemons because it helps produce enzymes for your body. The liver works better and the bile helps in digestion. It also keeps toxins flowing out of your body by urination. Plus, lemons help bowel movement regulation.

Wrapping it up

Water is our life, truly. We need to take care of our bodies by drinking an appropriate amount each day. This lessens our risks of heart attacks, strokes, and sickness. It keeps your skin beautiful and helps boost your mood. Without water, we cannot survive. Hopefully, you have learned many things about water and can improve your daily regimen. Thanks for reading!

Shewee: The Go-Girl Female Urination Device For Outdoor Adventurers

0

With the release of many female urination devices on the market, the trend in using these products has soared, for many reasons. Females all over the world have a reason to use them now for hiking, running, traveling, and even those in the Armed Forces.

The Shewee Extreme – Purple is a female urination device that allows you to go anywhere when you feel the urge. With various brands on the market, we will discuss why the Shewee Extreme is a great product. The Shewee Extreme is perfect for those who need to take a pee but have no nearby facilities to use.

Those who camp, hike, and backpack a lot know the struggle of having to urinate and not having a toilet to use properly. The Shewee helps you to urinate discreetly and get back to your activities, whether you are on a mountain or at a campsite. There are many reasons why the Shewee Extreme could be the perfect outdoor accessory for you.

Shewee Extreme comprises of an extension pipe for easier aim or when putting on bulky clothing in bad weather conditions and so that all possibilities are taken care of. The Shewee Extreme is sold in a specifically designed case for the user to be able to store the device easily.

The convenient urinating device for females lets women urinate while standing and without taking out their clothes. This device is perfect for camping, hiking, walking, skiing, traffic jams, dirty public toilets and so much more. So, there is no more uncomfortable squatting or worrying who might see or might not see your nakedness.

Before choosing a device you use to urinate, you need to decide what you want to use it for, either your own needs or for something else. Will you go camping in the summer; will you go backpacking on a mountain; or are you planning a winter hiking trip? This is important because the final choice you make will highly depend on these factors.

According to these factors, you will be directed to a urinating device which is made from specific materials. For instance, if you are planning on spending the night on the road when traveling, you should probably decide on a urinating device because you don’t want to go too far at night just to pee.

The heavier the device is, the more volume it takes. The more lightweight and natural it is, the more expensive it is. These are just a few of the factors you should consider before buying a urinating device.

In this review, we will discuss the features, both good and bad, about this product, and give you a full analysis of the Shewee Extreme in order to help you decide if this product is going to be with you on your next backpacking trip. It is a highly loved product, and you will see why very soon!

Shewee Review

Packaging

The Shewee Extreme comes with an extension pipe and a storage case. The pipe is to protect the user from spilling the urine on herself while the storage case as the name implies is used for storing the device.

If you purchase the Shewee Extreme and it does not come with these extra products you should return it immediately where you purchased it. The pipe also offers comfort while peeing so you don’t inconvenient yourself while peeing.

Design and Durability

The Shewee Extreme is designed with the female in mind. There is a piece that features a wide open area in which to urinate in and will come out of the end of the tube. There is also a connector tube to allow better range. This means you will not have to worry about dripping, or spilling when you are using the product outdoors.

You can keep your clothing free of urine and your shoes, which are the things that are most likely to get wet when you are urinating outdoors without a toilet or a female urination device. The urination device comes with a handy case in which to store your extender piece and urination cup.

This allows for easy storage without a mess that would otherwise get on your clothing or other gear. The piece can be easily washed later with soap and water. This device should not be later washed in a dishwasher, as some can. You do not want to damage your product.

It is made from Polypropylene, which is recyclable and hard to break. You can also find this product in several colors including Purple, Pink, Blue, and Black. The price of each color might differ though, but just a meager amount approximately $1.

Other Shewee products are similar in design, and light in weight. Shewee makes products that fit a range of women so they can relieve themselves easily. Some come with an extender tube, some do not. Of course, some come with a storage case, while others need one to be purchased separately.

The Shewee Extreme is very durable at the same time. The material used in producing this device (polypropylene) makes it strong and very durable.

Weight

This product weighs about 17 grams, making it light in weight and easy to put in your backpack discreetly. It comes with a container to put the urination device in so there is no mess. You will have no issue fitting this small item in your pack.

Many hikers and backpackers worry about gear weight as they have to store food, water, clothing and a sleeping bag usually. There are no worries about the added weight with this device. So, you don’t have to worry about the weight of the device because it is absolutely lightweight.

Size

The item dimensions for the Shewee are 1.46 x 5.98 x 11.22 inches, which is small and compact enough for any gear. Once you connect the extension pipe, the item will be longer in size, but everything is broken down and stored in the storage case with no problem, making it extremely portable.

Users love that they can grab it and go without having to worry about a bulking product fitting with their gear.

Portability

The Shewee extreme is very easy to carry and very mobile due to its portability. The device is very lightweight so you don’t even have to worry about the weight at all. The Shewee Extreme should not be a problem to carry when traveling, hiking, and walking or other outdoor activities you might be interested in because it is extremely lightweight.

Value for Money and Guarantee

You will definitely get value for your money due to the usefulness of the device. The Shewee Extreme can be used in different situations, for example, if you are in traffic and you really have to pee you as a female cannot pee on the road where everyone is watching right?

So, definitely, you will need a device like the Shewee Extreme to pee comfortably in traffic or any other situation. You can use the Shewee Extreme for your outdoor activities too, like hiking, mountaineering, traveling and so on. The device can also be used for sports activities like cycling and also can be used when skiing.

The device is therefore very valuable and will last for a long time. If you purchase the Shewee Extreme and it does not come with the case for storing it or extendable pipe, you should return the device immediately as Shewee is not liable for any missing part or parts because the Shewee always comes with the storage case and the extension pipe.

So, if you purchase the Shewee Extreme and its missing a certain part that should have come together with it, you can email us and tell us what is missing and where you bought the product to avoid future occurrences

Similar Models or Competitors

The best thing for anyone who wants to purchase any product is to compare the products with other products similar to it so as to know the best one to choose from ranging from different specifications. There are many female urination devices in the market today, but only a few stands out.

These few that stand out though are similar at the same time very different from each other. Below are the products similar to the Shewee Extreme, but with little differences which will help you decide which product suits you best.

The makers of Shewee made a product that women can use for various reasons. There have been many times a woman has had to use the restroom, but had no appropriate way of going besides squatting down somewhere. This puts you at risk of getting bit by bugs, brushing against poison ivy, and other dangers.

With the Shewee, you can go anywhere, when you feel the urge! Any woman can respect a product like that! The Shewee comes in various colors to suit your style and is easy to put away in your backpack. The storage case is handy for a mess free storage, without worry that you will get little drips on your other gear.

PROS:

  • The device is very easy to use
  • The Shewee Extreme is portable
  • The device comes in different types of colors
  • The Shewee Extreme also comes with an extendable tube
  • A storage case for keeping the device safe
  • The device is discreet
  • Easy to store
  • Light in weight
  • The device can be used as many times as possible
  • Simple to wash and dry

CONS:

  • Not wide enough for everyone
  • Not for bigger people
  • Not for people with fast urine flow
  • The tube can come off while in use
  • Can get messy

Made of Polypropylene, you can be assured of a durable product that will not break if dropped while hiking. Many of the female urinary devices on the market have similarities such as colors and materials. You can also tell that each urination device has different dimensions and weights.

They are all designed to be as light as possible, though some will always be heavier than others. Many come with storage cases in order to protect your gear from getting wet. When you clean your Shewee, remember to use soap and water. It can air dry. Be sure to wash and air dry the storage case as well.

The product is simple to clean, so you should not have to worry about using chemicals to clean it. It will be ready for use again immediately. The best part about this product is that it is discreet and can be discreetly stored. No more pulling your pants down and hoping that nobody is watching. The Shewee solves that problem!

The product is very easy to use and discreet. It does not spill or drip while using the urination device. The device makes it easier for users to go outside. If you love to hike, have back pain, or are using it for travel, this is the ideal device for you because you will enjoy not having to squat or bend down to use the Shewee Extreme.

Hiking: Discover How Hiking Help Improves Both Your Body And Mind

0

If you are like many people, it can be difficult to find the energy and time to get in some quality exercise. Family, friends and other priorities often take the forefront of your time, while your fitness routine is stagnant.

Maybe you just hate to sweat in front of a lot of people in a crowded gym.

Whatever your reason, hiking is your answer! There are several benefits of hiking, as well as the health benefits of hiking, and we will discuss many aspects of it that will be broken down to body and mind. First, let’s start with the body.

Benefits for the Body

Before you go out on your first hike, there are some tips you should adhere to. Never go out on your first few hikes and expect to be able to make it several hours. You will want to start slowly when you are trying out a hiking routine.

At first, you should try it out for about 10 minutes and then keep adding time to those hikes until you feel ready to knock out a half hour hike, a few days a week. Eventually, you can hike for a couple of hours as exercise and become an avid hiker! You should also consider getting a good pair of boots for hiking, which will increase your ability to get up hills and rough terrain.

Hiking is considered a great cardiovascular workout that will improve many parts of your body such as:

  • Bone density improvement: Having dense bones that are high in mass is the best way to be. If you have low bone mass, you are prone to osteoporosis and arthritis and other issues that could lead to fractures and prohibit movement. Bone loss can be measured by getting a bone density scan done. Ways to improve low bone mass are to get exercise like hiking, taken in some vitamin D (or sun!) and eat foods that have a lot of calcium, which is known to help your bones.
  • Improved sugar levels as well as blood pressure: Blood sugar levels should be maintained for those with diabetes, as they can get out of control. Most of the time, a regular person’s blood sugar level is anywhere from 100 to 140, depending on when you have last eaten. A diabetic’s sugar levels will vary and need to be monitored by diet and exercise. Blood pressure levels that are systolic should be below 120, with a reading of 140 or more being considered high. Blood pressure is taken by how the heart beats squeeze blood through to your body, which then puts pressure on vessels.
  • Lowered risk of heart disease: Heart disease is a term used to describe varying issues with the heart that involve the blood vessels. This can include things like stroke, angina, and heart attack, as well as anything that is wrong with the heart muscles and valves.
  • Increased strength in legs, hips, quads and more: Being stronger has always been a positive thing. With hiking you are improving many parts of your body, especially your legs and hips because you are moving through terrain that is full of hills and surfaces that are not flat. Building muscle means your body can handle long walks, lifting heavier objects, and your body is becoming leaner.
  • Improved balance and stronger core: Obviously, hiking includes going uphill and enduring harsh terrain. While enduring this, you are helping your body to improve its balance because you are not on a flat surface. Hiking also improves your core, as you are working out many parts of your body at once while moving uphill.
  • Weight loss: When you are hiking, your body is going to lose excess fat because you are sweating and exercising. Once you have a hiking routine going, you will notice that you have lost a few pounds, and even gained some muscle mass!
  • Decreased anxiety / depression and less stress: Aren’t we all stressed out? Going hiking boosts your mood, so you feel less stressed and maybe more connected to earth. Getting out there and clearing your mind outdoors is a great way to relieve anxiety because you are getting away from the hustle and bustle of life. Plus, any exercise is shown to improve mood, which decreases bouts of depression.

A few more tips

When you go hiking, you are improving your heart, blood vessels and lungs, which improves overall health. You will also gain muscle mass and see a decrease in chances of disease like diabetes, colon cancer, breast cancer, and endometrial cancer.

When you take that hike, just remember you are prolonging your life! If you are hiking with your family, your children also get the same health benefits from hiking, and they will have a better time sleeping, and build strong bones in the process.

Keep in mind that hiking is not just for special camping trips or when you are going out to the country. You can hike near your home, for instance. Just getting in even 20 minutes a few times per week can greatly improve your overall health.

There are apps and other trackers out there that will show your progress and allow you to feel a sense of achievement. Never hike alone, in case of an emergency. Plus, is it not more fun with a friend?

While you are outside, going on a wonderful hike, looking at all of the beauty around you, DO NOT forget to bring along water and some other necessities that are needed when you are out in the sun. Also, be sure to drink 2 quarts of water if you are going on a hike that can last upwards of 4 hours. You will lose water while you are exercising and sweating. Here is a list of all the things that are essential:

  • Hiking boots or shoes
  • Weather appropriate clothing
  • Hat and sunglasses for protection from the sun
  • Sun screen to keep your skin safe from UV rays
  • Snacks
  • Phone or Map so you will not get lost

Some beginning hikers may feel a little lost at first, but with a few tips, they will feel like a pro in no time. When making a fitness routine for hiking, you can do things like:

  • Try to go up more hills: Even going up a hill with a 10 percent incline can increase your heart rate and burn up to 40 percent more calories!
  • Aim for rough terrain: You can work those muscles out by going uphill on uneven terrain, which will improve your balance, too!
  • Use weights: If you have a backpack with you, consider using some weights or extra water bottles to give you added weight, up to 10 or 15 pounds, and you will burn extra calories by 10 to 15 percent, along with strengthening your body’s muscles!
  • If you find that you have no time for a hike, consider a brisk walk in an area where the terrain is uneven, simulating a true hike. This way, your body will get in a great workout still and your body will not feel rusty.
  • Use poles: Using poles while you hike can help reduce wear on your joints. Using poles, helps you to keep moving in a forward momentum, which gives you a better workout with your upper body. This helps to reduce weight faster. They also keep you from falling, and can be adjusted for the type of land you are trekking through.

The health benefits of hiking are enormous, but remember to stay safe while you hike. Take a friend or family member, or a few! Hiking alone is not a good idea, in case of emergency. Take small steps, so you do not slip and injure yourself. Also, before exploring a new area, you should learn the lay of the land before you go there, and always bring a map or GPS.

Those were the hiking benefits for your body, now let’s see what health benefits this activity brings for your mind.

Benefits for the Mind

Now that you know how hiking can be beneficial to your health and body, you should know how it will affect your mind and attitude. Imagine going for a hike where the entire landscape is beautiful, serene, and peaceful.

You feel free and your mind seems clear, and in turn, your nerves are more calm, your attitude is more positive, and your mood is boosted all because you are exercising and doing so outdoors with everything beautiful nature provides. Everyday stresses such as work, relationships and the need to be connected with technology can be gone in a heartbeat while you are on a hike.

Hiking has been known to be good for mental impairments such as:

Depression: This mood disorder affects many people and can make them feel sad or hopeless. This affects how they think and react, their sleep, ability to work and many factors of their life. Bouts of depression can last weeks or months and can occur for many reasons. Various types of depression exist like postpartum depression, persistent depressive disorder and seasonal depression.

Anxiety: Most people suffer from anxiety from time to time, such as speaking before a large group, or going through a problem. For people who have anxiety disorder, many things can make them nervous from an unexpected visitor to large groups of people. Those that suffer learn that their anxiety gets worse as time goes by and it does not go away, and is very stressful. This may make them reluctant to leave their house or socialize, among other problems.

Stress: This is known as stress or pressure one feels from a situation that causes emotional or mental tension on a person. Stress occurs in many forms, from a demanding job, needy or dramatic people, to paying bills. Each day people encounter stress, and hiking is a great way to relieve it and enjoy life. Stress is known to have adverse affects on your health, which is another reason to get outdoors and enjoy the world.

PTSD: Post Traumatic Stress Disorder is a disorder in which a person may develop adverse side effects of an event that occurred. Many service men and women suffer from this after going to war and seeing people killed or killing themselves.

Some people develop this after they have lost someone or been assaulted. Using hiking as a tool can help a person feel less stressed, and lessen the chances or night terrors, flashbacks and more disturbing side effects of this terrible disorder.

Agoraphobia: This crippling form of anxiety creates the fear that a person is unsafe where they are or in an unsafe situation, when they are actually not. Many of those who suffer feel like this when they are in crowded areas like malls or using a form of public transportation.

Even going outside of the house can seem overwhelming to those who suffer. Hiking can help someone get out of the house, in an area that is not crowded, with beautiful scenery, among people they know. This will decrease the chance of an attack and allow the brain to feel calm.

Rumination: This is the act of thinking about negative experiences, which causes negative emotions. A person will constantly think about situations and consequences of experiences, real or not, and what can cause them. This stresses people out and does not allow them to focus on a solution to their problem.

Those that choose hiking to help them, can clear their minds and allow their brain to slow down and enjoy life a little more. Using this with self regulation, which is the act of asking yourself questions to solve the problem, along with other therapeutic models, can reduce the disorder significantly.

Not only does going for a good hike aid in mental impairments, but is is also good in other ways for the brain. Once you begin a hiking routine, you will notice that your attention span has lengthened and you can solve problems easier, as well as finding yourself feeling more creative. Many people find that simply being in nature, away from the hustle and bustle of life and technology, makes them relax, clear their mind and simply think.

Visiting new places is another exciting perk of hiking. It is fun to find new trails and places to exercise, that are still away from civilization. This will create an exciting feeling within about exploring new territory, and will help the brain form more synopses. Not only that, but you are not going to the same locations, which can create boredom.

After you have new places locally, why not take a vacation somewhere that is known for great trails and adventures outdoors? Finding places that are visually exciting will only increase the chance of a great hike. Going places where you can see mountains, canyons, forests or deserts will surely be beautiful and relaxing!

All in All

As you can see, hiking is a great way to get in some exercise and help renew and refresh your mind. Staying healthy by hiking will reduce your risk of common illness, and is proven to help you live longer and decrease the chances of heart disease, diabetes, and osteoporosis.

Not only is it good for your body, but your peace of mind will grow, while your anxiety and stress decrease! Hiking is a fun way to bond with your family and friends, see beautiful scenery and explore new places! Hiking is a winning activity for everyone!

Essentials About Camping With Toddlers: The Ultimate Guide For All Hikers

0

Not so long ago, you had a baby and you think you won’t be able to go camping any time soon – you’re wrong! Camping with infants is very much possible. Parents are divided when it comes to camping with toddlers and infants.

Some parents think this as a dreadful situation, asking everyone why would they put themselves through that, but some parents are more casual and much less stressed about it, giving them advice.

If you’re a true camping lover and really enjoy being in the nature, don’t be scared to bring your baby with you. Of course, it will be a bit more challenging than it used to be, but that’s life, right?

We have to be honest and agree that simple packing, throwing a backpack into the car, and heading down into the woods, won’t be that simple as it was before you had a baby, but it certainly won’t be as difficult, as some “perfect moms” say it would.

First of all, mobile phones and smartphones make emergency situations much less scarring and the fact that there are lots of kids backpacks and gear, not to mention portable “Pack ‘n play” cribs, makes taking your infant to camping a bit less stressful. How to do it then, you ask? Read on to find out!

Basic things you need to do before you head off

There almost isn’t a parent who has a small baby, that will leave the house without the bag of necessary things. A camping trip is no different, as you’ll carry almost the same amount of necessities as you would if you are heading to the park or a field trip.

You should carefully research the destination where you plan on staying and plan for all the things that “might happen”. Having a detailed plan and lists of everything you need to bring with you is not over-planning.

It is pretty obvious that you need to carry a fair amount of stuff, but you already carry it anyway, so pack carefully. You are probably driving yourself in the woods, so you can stuff your car as much as you like, without having to worry how you are going to bring all those things with you.

Be smart about picking a destination

Keep in mind that your child or an infant, can’t withstand long car drives so choose a destination that is not that far from your home. Do some research on whether there is a supermarket or a grocery store near the campsite. If the answer is no, then we suggest you pick another destination.

You don’t want to think about if you carry enough diapers and whether it is okay to change your baby now or a bit later because you don’t have enough diapers.

Search for campgrounds with running water and flush toilets, or perhaps rent a cabin or a room in the motel in the woods (just in case). Some national parks adjusted their resorts and made them kid-friendly, where you can rent a small cabin while some recreation areas and parks are placed by the strategically placed motels.

Rest before you take off

If you start your trip tired and anxious, there is no way this trip will be a vacation. Give yourself some time to rest, although, it is questionable that you’re going to truly rest unless you ask someone to take care of the baby while you take a 2-3 hrs nap, a long shower, and some time to enjoy the coffee/tea.

Leave early

Be prepared to give yourself enough time to arrive at your camping destination, especially long before dark. It is not a good idea to have a screaming kid and no daylight while you have to set up a camp and a tent. You will only stress yourself with why you even decided to go on camping with an infant and be sorry.

Basic things you need to bring with you

Keep in mind not to bring too much baby stuff with you. We know you will think hundreds of times “but what if I need this?” but you need to not get carried away once you start packing your infant’s things in the car. This is why we listed some basic things (and those that can assist in “making things easier”).

Hydration pack

A hydration pack system such as Camelbak water bottle won’t be so heavy to carry even when full. You and your baby, need to be hydrated when going on hikes or short walks.

The First- Aid Kit

Bandages, alcohol-free cleansing wipes or Curel, sunscreen for babies, bug spray for infants, etc. Every hiking gear store sells first-aid kits, and if you still don’t have it, make sure you buy one, plus some other necessities like medicine for infants, creme for dermatitis (kids often find Poison Ivy to be an interesting plant) and definitely something for bee stings, as this might be the worst injury that you will have to deal with.

It is better to be prepared than finding yourself panicking around because you didn’t bring everything you need. Infants need more mosquito and sun protection. They can’t tell you if they feel sunburns or if they have been stung. This is why you need to use high, baby-safe SPF sun protection and a mosquito protection for babies. Apply it often during the day.

Food

If you’re still breastfeeding then this will be a fairly easy thing to do as you don’t have to carry around anything. You won’t have to bother yourself with filtering water, sterilizing baby bottles and mixing baby formula. If you’re feeding your baby on the bottle, don’t worry about it too much. It’s not a very hard thing to do. Just make sure you always filter water before you mix it with a baby formula.

If you don’t want to bother yourself with boiling and filtering the water, buy a pack of already treated water in any drug store that sells baby food. You also have to wash your infant’s face and hands as you don’t want your baby to get sick.

Besides water, you don’t have to worry too much about it. Also, a bit of dirt on your baby’s pacifier won’t do any harm and is actually a good thing. Just think of how you ate the dirt when you were a kid and you are still alive to read this article.

Of course, you will rinse the pacifier, you won’t let it eat dirt, but don’t worry about stopping and boiling it in the water every time the pacifier touches the ground. You can also carry a small pack of sanitizing tissues in your pocket or use a clean, bottled water to rinse it.

Clothes

Bringing a headwear is really important if you’re taking your infant to camping, as up to 20 percent of human’s heat is transmitted from our heads and you know that infants have bigger heads than their bodies, so they often lose heat faster than you would in cold weather. Also, keep your baby’s little toes and fingers covered as they also get cold faster than ours.

Keep in mind that they are not moving, therefore infants are not generating heat. You need to dress your baby in layers (hoods are okay if you dress it over a beanie, but is not a replacement because they don’t fit as close to the baby’s skin as they should in order to keep the body heat). Layered clothes will provide adjusting the clothing as per weather conditions.

If the weather is nice and warm, you need to make sure you have everything to protect your baby from overheating. You can simply lose some clothing that covers the body, and putting some shaded clothes is mandatory. Keep your infant hydrated and you can even use Pedialyte, as this is an encouragement for drinking, due to its subtle flavor. Your baby will love it.

A lot of baby clothes are made out of cotton material, which is actually not a good material to wear, especially during too hot or too cold weathers. Cotton transfers body heat faster and holds its moisture longer. Pick something that is made out of merino wool for the colder weather and synthetics for the warmer weather.

The material must be able to dry quickly because a wet cotton onesie can lower the body temperature pretty fast even if it is 80 degrees outside, which is not a good thing and it gets smelly really fast. Both synthetic and merino wool are materials that dry fast and even if you hand-wash your baby’s clothes, it will be dry before you know it.

Blankets

Bring a few blankets with you, as you will use them to cover your baby, lay your baby on the ground, shade a baby or cover yourself if nursing.

The Poop Collector

If you’re going on camping in the woods, be prepared for introducing a lot of hassle and extra weight with packing disposable diapers. Therefore, you will need a diaper bag. No, we’re not talking about the standard diaper bag that you’re carrying everywhere. We are talking about a dry, waterproof bag that is easy to close and seal. This is where you’re going to store all the used diapers and dispose it on your way home.

Toilet paper bags

Why, you wonder? Well… You can’t leave dirty diapers in the woods, can’t you? Babies usually need 3-5 changes per day, if you plan to stay, let’s say 2 days, that’s 6 – 10 dirty diapers, minimum, you can’t leave in the woods. On your way home, find the nearest dumpster and empty the bag or, better yet, find a sanitary dump (the one RV travelers are using) and empty your bag there.

As for the cloth diapers, they are eco-friendly and all, but you still can’t leave them in the woods and, be honest, you don’t want to deal with hand-washing and drying all the dirty diapers outside during your camping vacation.

Infant Carrier or Toddler Backpack

This is something similar to your backpack, but is intended for babies and infants. You can use it to carry your infant on your back or in front of yourself and make sure you don’t carry a baby in your arms all the time. This is an especially smart thing to use if you are going on hiking as you’re gonna need free hands because you never know when you can trip over some rock or piece of wood.

Choose a pack that has a safety harness in order to keep your infant from sliding in (if your baby is smaller) or sliding over (if the baby’s bigger)

“Pack ‘n play”

If your baby is an early walker or a crawler, a necessity like a “Pack ‘n play” will save you lots of nerves, especially if you choose to sleep outdoors. It has a functionality as a crib, but can also be a playpen during the day. This way you will have time to hang out or work something you enjoy around camp.

“Clamp-on booster seat”

Although this is not a necessity, this can also save you some nerves, especially if your child is really active and you are afraid to leave kids wander around the camp. This item is useful as a safe spot to put your kid down as well as eating.

Foam Floor Tiles

An alternative to the blanket or a mat is the foam floor tiles. When comparing to a regular mat, kids floor tiles are more comfortable to crawl on. You can put them in the tent or even the play pen. It’s colorful and safe. It’s not heavy to carry around and although setting tiles on the ground inside the tent can be a drag, it’ll worth your while as you can freely let your baby crawl inside the tent.

Something to keep them occupied

If you stake out a big tarp you will have a nice, clean place for you to deal with any infant duties. You will see that it is a lot easier to go camping with infants than crawlers or beginners in walking. Bring a few toys for chewing, but keep in mind to keep them clean.

hiking-infant-playing

How to manage sleeping

Sleeping with infants is actually quite easy. Just zip together a few sleeping bags and put your baby between you. We understand that some parents are scared about rolling over the baby and have a weird feeling that they are going to crush them, but we never heard of this happening. If you are still not sure and uncomfortable of sleeping with your infant beside you then wait until the baby is a bit older before you go camping with it.

Another option is to use a baby backpack that we mentioned above. They improved a lot in the last twenty years as they hold an infant more comfortable and fit a human body better. So, investing in a good baby backpack might be a good idea here, or you can use a car seat that you can place inside your tent beside you.

Simply use your common sense as you will know what works best for your baby. Babies and infants lived outside for millions of years through the history and they survived. Don’t be afraid to put a baby on the ground in a car seat or a backpack – a dingo won’t eat your baby.

Important Tips

  • Many doctors and pediatricians suggest that a child can spend the night outdoors if older than 5 months so don’t get too ambitious and bring your 1-month baby to a camping trip. Use good judgment and common sense.
  • Keep an eye on your infant all the time. No matter what you do, there are lots of dangers outside, especially in the woods and in a campsite. Don’t leave it out of your sight.

What have we learned?

Keep in mind that kids, even though they are out camping with you still need to sleep and eat regularly, so make sure you’re on their schedule and put your infant to sleep at its usual time. Don’t forget the naps, they are equally important too.

Check if your baby can take a nap in your front carrier, if it can – great; if not – plan your activities later or around your baby’s napping and eating schedule. This way you won’t have to unnecessarily stress yourself. Enjoy sharing some time camping with your infant.

Hopefully, you like our article on camping with an infant. We would love to hear your stories about camping with your kids, the good, the bad and the ugly plus some interesting pictures. In case we maybe missed something – a good idea or a recommendation is always more than welcome.