Home Blog Page 17

Crampons vs Microspikes: Getting a Grip

0
Crampons vs microspikes

It’s always winter or autumn somewhere in the world, and for those who live in colder climates that means wearing special clothing and footwear to cope with challenging conditions. This is especially true for those who wish to continue to enjoy the outdoors and wilderness.

It is said, “No shoe, no horse” and this could offer the same advice for humans tackling the wintery streets in icy or snowy conditions. Shoes or boots with traction are needed and the dilemma for every hiker is to choose the best is crampons vs microspikes. Luckily for you, we are here to help. But first, a bit more on this topic.

More on The Topic

Modern developments in footwear designs and construction materials available ensure that the outdoor workers and fresh air lovers have a number of options available to enhance their winter traction.

There are three variations of footwear devices that assist hikers through winter walking conditions – crampons, microspikes and snow shoes; each of these has variations as to materials and construction. The latter is more about moving over snow so we will limit our discussion in this article to the advantages and disadvantages of microspikes vs crampons in slippery icy conditions.

Essentially, there are increasing levels of traction that can be added to the sole of footwear from minimal profiles of microspikes through to longer and sharper spikes on crampons. Of course the initial choice of footwear will reflect the conditions the wearer is planning to be moving through or working in.

A person clearing snow from a driveway will not likely be wearing rigid sole mountaineering boots, nor will a climber be wearing footwear only suitable for casual winter strolls. In that respect, not all traction devices will be designed to fit suitable footwear.

More on tracction devices

The ultimate reason for wearing these footwear traction devices is to provide stability during activities and avoid injury from slips and falls. They should give the wearer the assurance to step out with confidence so that they can place their feet securely and trust the footwear when taking a normal stride.

Footwear with trusted traction will allay fears about moving outside to get work done and enjoy life outdoors, like hiking with confidence along icy or snowy winter trails.

On a cautionary side, however, regardless of whether you choose microspikes or crampons, take care until you are confident and know the limits of individual traction device advantages. Not taking enough precautions can easily lead to emergencies or life threatening situations, especially in the outdoors and wilderness. Take care not to overestimate abilities or to abuse any gear beyond its intended design purposes.

Extra Traction Requires Extra Effort

Starting with the lowest gripping traction devices for footwear, there are profiles in a somewhat of a sliding scale, no pun intended, from low sole profiled coils and studs through to slightly longer profiled “nanospikes”, then “microspikes”, flexible crampons to rigid crampons and up to ice mountain climbing crampons.

They all have different pros and cons for various situations so knowledge will help you make good choices and keep you safe. The opposite can be life threatening to yourself and others.

Essentially the lower profiled devices are simple and easy to wear, while heavy duty crampons offer awesome grip in slippery conditions, but they are physically more tiresome to move with.  There is no point having more traction than required if you are going to exhaust yourself unnecessarily.

Likewise crampons would be overkill and are not suitable for moving across surfaces like frozen concrete or driveways. It is quite conceivable that you will require more than a style of footwear traction device so will have microspikes and crampons for various adventures. Make sure you have the right tool for the job. Check out customer reviews for similar requirements as yours.

Extra Traction Requires Extra Effort

Whatever style you choose, it is also imperative that you make sure that you have the correct size for your footwear. Some styles come in multitudes of sizes for sometimes both women’s and men’s footwear shapes, shoes or boots.

There are many different attachment mechanisms, so check out how easy they are to attach and remove and how well they adjust to fit the footwear and remain in place while walking or running.

One feature that is difficult to check without use is the propensity for snow or ice buildup in the device. Some have special construction to continually resist or repel ice buildup so check reviews for this aspect. Clogging ice or snow will make the device less effective and add weight to every step.

Choose The Right Traction Device for The Job

“Microspikes” is actually a trademarked name for lesser spiked traction devices, but has now become to fit a universal term for similar lower traction devices for footwear.

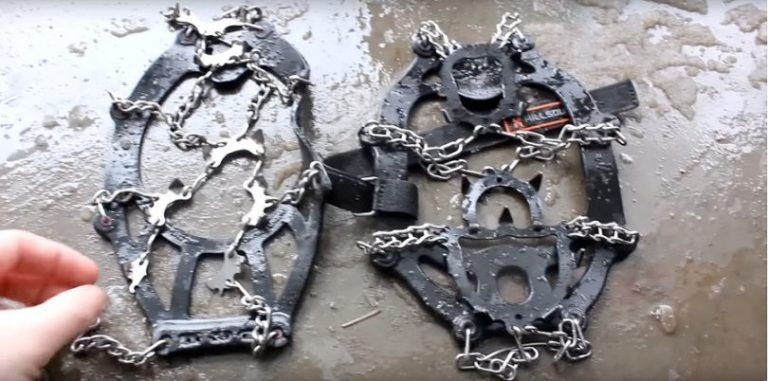
The category of “microspikes” covers a relatively broad spectrum of devices available -from those with low profiles of metal chains, and coils only suitable for icy city walkways, then to “nanogrip” tungsten carbide cleats, through to longer “microspikes” with spikes up to 3/8 inches.

A minor detail perhaps, but if backpacking is on the cards, consider a system that allows for optimum packing and low weight if that is important. Could also be a factor if you have to carry them around inside, but wear them to get to and fro between home and work.

Low Profile

If your limit of use outdoors is walking along icy pavements, shoveling snow off driveways and similar situations, then there are some inexpensive tried and true options available. Yaktrax is one of the oldest established companies producing tried and true minimal, but effective systems that are inexpensive and suitable for city use.

They are lightweight, made from spike less abrasion resistant steel coils. Another spike less version has diamond shaped steel alloy beads that swivel to avoid snow and ice buildup.

This system is strapped under the footwear sole and offers more grip than metal coils. Both of these lower profile options are more comfortable to wear than spiked devices on hard surfaces like concrete or footpaths.

Nanospikes

 If you are venturing out for easy hiking, ice fishing, sledding, outdoor work, or require added safety on icy roads or driveways the next level might be called “nanospikes” although this is also a trademarked name.

Nanospikes

These are good general purpose traction devices, but not suited for tricky winter conditions, nor are they suitable for wearing while driving vehicles. This slightly higher level of traction is achieved by small cleats/studs/ metal loops fitted into flexible plates of various materials worn under the footwear to offer grip in snow and ice.

These grips can be of different materials including hard wearing tungsten carbide or other metals with various configurations available like multi directional steel cleats, metal loops, and so on rather like snow tires have different threads.   Upward facing cleats can interface with the shoe sole to hold the device firmly in place.

Microspikes

If you are more likely to be heading off city streets, hiking up winter trails, then you will be better wearing longer spiked “microspikes”.

The longer protruding levels of traction from cleats and spikes on these are not so suited to very hard surfaces like concrete or roads, but their low level spikes offer enough stability in most track situations.

Microspikes on a boot

They are eminently suitable for walking, hiking, backpacking, trail running, and adventure racing in wintery conditions. Microspikes are flexible and fitted over running shoes or boots as needed.

There are even models suitable for winter marathon racing, orienteering, and other similar running events where a competitor will prefer to wear suitable comfortable trail running shoes. Microspikes are more suitable than crampons on certain winter terrains, especially when not very steep or deep in ice as movement is easier and less tiring.

Aspects to look out for when choosing microspikes are the amount and layout of the spikes, the durability of the metal used and the fit and adjustment of the upper attachment.

Crampons

Crampons are the highest level in footwear traction devices and are required for more aggressive hiking and steep icy terrain. Crampons have much longer spikes that penetrate through ice surfaces facilitating much more secure footholds than any microspike can offer.

Ultimately they are foot-gear for moving safely across glaciers, rock and ice as well as steep snow slopes, ice walls and general mountaineering. Crampons make it possible to traverse and climb in certain terrains that would otherwise be dangerous and life threatening to attempt.

Man with Hiking Crampons

Skill is also required as crampons are sharp and require practice and experience to wear safely.  They can be dangerous as, should the wearer slip or stumble, crampons can inflict serious wounds in difficult situations.

Depending on where you will be doing most of your activities determines what type of footwear you choose to wear and crampons are designed in a corresponding range of styles– for instance hiking crampons, mountain crampons, and ice fall crampons.

The general rule of thumb to follow when considering boot style is that the steeper the more challenging the terrain the stiffer the boot sole should be, likewise the crampon.

Features to look for include the composition and strength of the metal used of the spikes, the method of attachment to the boots, and the number of points and their configuration. Steel crampons are better for longevity as opposed to aluminum, which is more likely to lose effectiveness, however the latter is lighter.

As with less aggressive traction devices consider the crampon that allows as much natural stride and flexion as possible, but that also provides the grip you need for confidence.  The longer the spikes, the more tiring the system can be.

Crampons can be flexible or rigid, more commonly the latter as they were originally designed for climbing and mountaineering. However with more demand now for alpine adventure racing there is an increasing demand for crampons that can be fitted to flexible soled boots for faster moving.

A crampon that can add traction, flex, maintain strength and remain attached to the boot is a huge benefit to a competitor and therefore highly sought after. Instep crampons are still available, however very few experienced hikers or winter climbers actually recommend using them.

Mountaineering boots and crampons

Crampons attach to boots by a few different methods. One style is with synthetic nylon or plastic straps that secure the crampons around the toe and the heel which allow a high level of adjustment so  crampons can be inter changed between boots – offering a change for differing terrain, weather, and temperature.

However, these attachments are less secure in general and more likely to fall off than the other styles. This style of crampons may need re-tightening every couple of miles to remain secure.

Alternative secure fastenings are “Newmatic” style that has a toe bail/cup and a lever for tightening the heel welt and these are good for many boot styles. They are also quick to fit and remove but they do need to be fitted to each particular boot style.

For rugged ice climbing and mountaineering, boots will be rigid with specific sole styles so fit crampons that lock onto specialized boot toes and heel welts. These provide a very secure connection as opposed to strap attachments.

Crampons with 8-10 points are usually adequate for winter basic climbing and “peak bagging” so long as the climbs are not too steep or icy – equivalent perhaps to climbing up a black skiing run. For more difficult underfoot conditions like a glacier, water ice, or névé, 12-14 point crampons are required for optimum safety.

Can’t Decide? Then get More than One

So in conclusion one should not really consider Crampons vs Microspikes. Each footwear traction device offers pros and cons for different levels of terrain and changing conditions and there is more than one style for each profile level.

Decide what to buy

Every user should consider exactly where they wish to use the traction device, what footwear they will wear and what their own personal needs are. It is quite conceivable that a person who wishes to spend a lot of time in the winter outdoors should consider purchasing a number of different options for footwear traction device, at least one from a microspike level and one or two of different crampons.
Tarp Camping: Back to Basics

0
Tarp Camping - how to

There are many personal visions of what the word camping implies. These vary from open air sleeping on the warm ground to bivouacking in mountain snow caves through to somewhat luxurious “glamping”, as in glamorous camping, in the African savannah.

They all require different attitudes and equipment to ensure enjoyment of the surrounding environment to the fullest. However, there is one piece of camping equipment that will be useful in any environment and that is the humble tarpaulin (tarp).

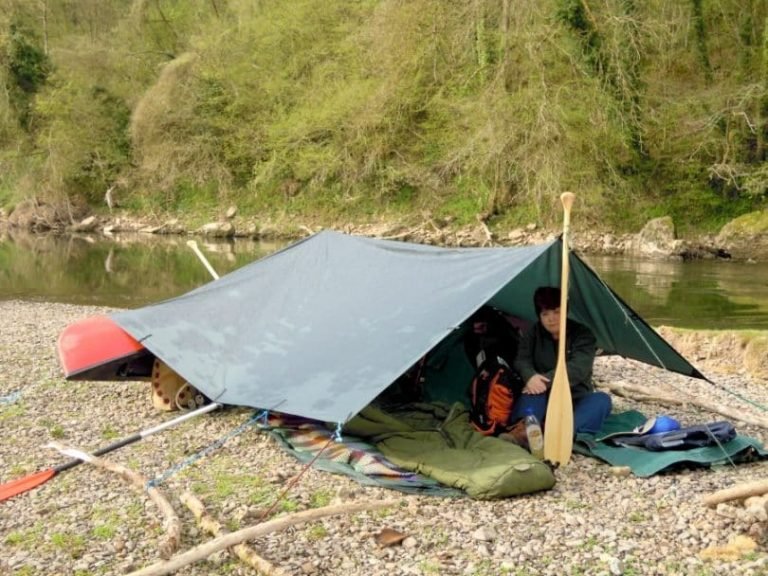
A whole campsite’s shelter requirements can be built around tarp camping or a tarp can be an extra useful piece of equipment added to a sleeping bag, hammock, tent, or even a vehicle.

Tarp Camping

With such a simple piece of equipment a well planned tarp tent setup using any number of tarp shelter configurations will give a wide array of camp comforts, with few disadvantages.

The Pros:

  • Stay close to nature: Camping is usually about enjoying the world outdoors, getting back to nature, simplifying needs and life to a minimal level that is still within your personal comfort zone.
    Utilizing a tarp at a camp site ensures a measure of openness where one can still feel part of the environment yet be assured of some measure of shelter. If you are sleeping in a tent you can’t see the stars or feel the kiss of a breeze across your cheek.
  • Extra security for low investment: For a relatively low cost, a tarp will provide high value protection in many environments, whether for fleeing refugees, rock concert followers of picnicking day trippers. If pitched correctly, what started the day as summer shade can easily become a rain shelter.
  • Tarps are low weight: if you are backpacking and really want to carry minimum weight, there are lots of options for lightweight, durable synthetic tarps that you can stuff into a corner of your backpack. Or if you expect rough weather a tarp will give extra protection for your tent or camping environment in general.
  • A very useful extra camp addition: as a sheltered area to commune in, and as a cooking area where a campfire can be tended without filling a tent with smoke or the risk of damage from flying embers. They are easily repaired with duct tape or special repair kits if they do suffer any damage.
  • Able to be configured in a multitude of ways: Tarps can be configured in many ways depending on their construction and size so can be easily altered to fit the best shelter in the changing environmental conditions.

The Cons:

  • Less warm: Tarps cannot compete with tents for warmth and unless the user is trained in harsh environment, survival skills, tarps should not be considered replacements for tents where temperatures are likely to be very low. This of course includes the likelihood of places with high wind chill factors.
  • No protection from insects or bugs, so in areas with high risk of mosquitoes or other serious numbers of biting insects tarps may not be the best choice for primary shelter. There are other ways of dealing with insects though, like netted hats, portable mosquito nets, covered hammocks, etc.
  • No structural framework included: with tarp configurations, everything needs to be improvised or carried as extra. For above tree line camp sites or where trees and structures are limited, more planning has to be done for these possible improvisations. For instance, in some instances extendable walking poles are enough to build a suitable shelter.
  • Little privacy: Tarps do not offer much privacy so in crowded camping areas they are not likely to be so popular for sleeping under.

Knowledge is Power – Learn some Tarp Skills

To utilize a tarp to its best advantage a reasonable level of knowledge and skill is required to pitch it in the best configuration for the shelter required, for instance wind or rain or both.

These skills are easy enough to learn with a bit of effort and they should also be practiced in a safe environment before they are critically needed, and not on some mountain side with rain and snow threatening to carry away all and sundry.

Learn some Tarp Skills

When considering purchasing a tarp consider a few aspects regarding where, when and what you are most likely to be using it for. Err on the side of the most extreme situation you will use it, as there is no point purchasing a cheap porous sunshade that you will use on the beach yet might consider taking hiking up a mountain pass.

If all your camping is done out of the back of a vehicle you need not worry about the weight or packing size so may opt for a larger size.

Consider features such as:

  • Fabric: does it need to be waterproof, ripstop,
  • Color: does it need have bright color for possible emergency or be camouflaged for bird watching
  • Construction: sealed seams, reinforced stitching, reinforced corners, number of grommets, tabs
  • Weight: for backpacking, or in a vehicle
  • Packing size: for backpacking or in a vehicle
  • Size: is this for sheltering one person or a group
  • Shape: Square, rectangle, sewn in panels for shaped configuration. Square shape is the most versatile, however rectangular may give a better weight ratio for effectiveness. Shaped tarps may be simpler and faster pitches, but less options
  • Attachment Points: placement, style and number of reinforced grommets, tapes
  • Extras supplied: stakes, guy ropes, ridge ropes, karabiners ,

A Little Planning Can Save the Day, and Your Life

Wherever you are planning your camping, always make sure you get current weather reports and plan for bad weather even if it says sunshine. If you are a novice err on the side of caution and learn as much as possible from other experienced campers and hikers.

The problem with being a novice is that you do not know what risks to look for. You may not even be aware of what questions to ask. Make sure you have adequate clothing for the environment – that is the first level of shelter before your tarp or tent.

Little Planning Can Save the Day

Practice using your tarp before you go on any difficult journeys either by setting it up at home or take easy trips until you are confident to know how you can erect ot swiftly and effectively in difficult conditions. This includes the different methods of tarp tent configurations as well as knowledge of suitable knots to tie in various pitches.

Regardless of what you are planning it is always advisable to have knowledge of the environment you are going to be in as well as the weather. Make sure you have first aid skills for wilderness areas and hiking craft skills concerning possible dangers.

Special care should be made concerning extremes of temperature. Heat can lead to heat exhaustion followed rapidly by life threatening sunstroke. On the other end of the scale wet skin in cold environments can quickly lead to hypothermia and death.

There is some discussion that all beginners should start their camping experience by using a simple tarp and various pitches, however to do that safely requires skills and knowledge so the question is, “What comes first the chicken or the egg?”  I feel novices are better with the benefit of a warmer tent and to acquire tarp skills on the side.

Tarp Configurations for All

The most versatile tarp shape is the basic square for which there are numerous tarp shelter configurations, also known as pitches.  Other tarps are rectangular while others are sewn in panels for pre-shaped rapid pitches. Learn with a basic shape and purchase a special one later if you think it’s your style.

It’s useful to know that tarps are traditionally sized according to fabric cut, as opposed to finished size. This can lead to some confusion when purchasers buy a 10’ x 10’ tarp, but measure it to find that it actually measure slightly smaller. Check before purchasing if the final specifications are important.

Tarp Configurations

The most basic use of a tarp is a ground sheet.  Camping with two tarps gives a myriad of options for a comfortable campsite.  The ground sheet can be just an extra seating area or a place to keep packs or precious firewood dry.

Placed under a tent, a tarp protects the floor from sharp rocks and provides for extra rain proofing. It is much easier to pack away a damp tarp, but a dry tent and than a soaking wet tent floor.

Any tarp is always handy to cover spare equipment and keep it clean and dry in camp. Even if you have a tent you can set up a tarp for extra wind shelter, especially when it comes to cooking and preparing food.

Basic Rain Fly. If you just want to pitch a basic shelter to protect from sun or rain, suitable for cooking, eating or communing under, you can set up a basic rain fly.  This can be done two ways ,

  1. A ridge line is strung between two trees or other suitable structures and the tarp draped over and secured to the line on diagonal ends. The remaining opposing diagonals are secured to give an effective slope for rain to run off using guy ropes or to other trees. If tied high enough, people can easily move under this.
  2. Center the tarp over the ridge line on one edge and secure at the center point of the hem. Secure the 4 corners with guy ropes, 2 each side. Versions of these are suitable for setting up over a hammock or over a tent as an extra rain fly.

If more effective shelter is required, configure the tarp closer to the ground and use available natural wind breaks.

A-Frame configuration is like the rain fly, but at ground level and simple and effective for a single or double person sleeping depending on the size of the tarp. A ridge line is set up and the tarp is secured over the line.

Each side hangs evenly and close enough to the ground so that the sides can be secured at ground level with pegs or rocks. If the ridge line is taken even lower, the bottom edges of the sides can fold inwards to form a ground sheet with the corners secured with rocks or pegs. This configuration is ominously called a Body Bag but is snug and secure.

Make lean to tarp

For a Lean To take a long edge of the tarp, and secure it either side to trees/structures at a height so that when and the tarp is pulled back at 45o angle the opposing edge reaches the ground to be secured with pegs or rocks. Even lower and the bottom edge can be folded inwards to form a ground cover for dry seating know as the Envelope, again securing the edges with rocks or pegs or both.

The opposite version of the Envelope called the Windshed Wedge secures the bottom edge on the ground and the extra fabric, instead of being a ground sheet is draped over the top and secured with guy ropes out front for extra wind shelter. If the tarp is large enough, you can combine the Envelope and Windshed Wedge to have both ground sheet and wind shelter.

If you need to pitch a shelter rapidly, the Diamond Pitch is secure and cozy.  You attach a rope to one corner of the tarp (or have it pre tied) and secure it on the windward side of the tree. (I know that sounds wrong,  but bear with me).

Then secure the diagonal corner back out from the tree with pegs, followed by the other two corners out each side which should give you quick, secure shelter to cook or rest under, protected by the tarp behind and tree in front. Another version of this is tied lower on the tree so that there is enough side fabric to be tucked inwards for use as a ground cover to form an Arrowhead pitch.

The Square Arch pitch gives a wide low profile that is suited for two persons. Two parallel ridge lines are set low to the ground and the tarp draped across both and the sides secured. There would be no runoff for rain though, so this is for dry cold weather only.

When there are no suitable places to secure ridge lines alternative methods must be used. If you need to be prepared for the eventuality of not finding suitable poles or sticks, then you need to pre purchase suitable poles or plan to use expandable walking poles. The latter serves as great tarp poles for pitching tent-like structures.

Square Arch pitch

The Forest Tent is a version similar to the Arrowhead but instead of using a ridge line for holding the structure up, two poles are angled and joined at the center top and held in place by two guy lines out to the front. If you only have one pole, you can place that in center of the front edge. It won’t be quite so secure as the Forest Tent but will still offer snug protection.

The Trekking Pole configuration ropes have an edge secured at the back then two poles are placed to hold up the center front, leaving the sides to fold down and form side shelter. Everything is secured with guy ropes, pegs and rocks. The rear edge can also be raised up and tied with ropes secured higher or other poles at the back to form the Two Person Trekking Poles pitch.

These are only a few of the most commonly used variations for tarp shelter configurations to give you a start for the tarp tent setups. They more than adequately cover most situations for temporary shelters. However, with research and using ones imagination, there are many more variations one can design.

Learn Some Extra Skills

Learn basic wilderness skills to ensure you pitch your tarp in a safe place. Avoid any old dead branches overhead that may fall in high winds. Choose a ground area that is wide and flat where possible.

Always take note of wind direction when pitching to make use of natural placed wind breaks. Ask yourself if the wind direction is likely to change and plan to change your tarp if you need to at any time. If it is windy with no likelihood of rain, then a hollow may add extra shelter. Likewise, if it is likely to rain, check out drainage channels and make sure to choose higher ground that will not flood.

Holding more than basic knowledge of how to tie great knots will also stand you in good stead for making the perfect tarp pitch. Make some effort to learn and practice before you head into the wilderness.

There are also extra tips like making a quick release attachment by doubling a thin cord through a grommet hole and placing a sturdy stick through the protruding loop to secure the guy rope.

Also, there are accessories that make pitching easier and quicker. Poles can lightweight aluminum and collapsible for easy packing. Pegs and stakes come in various shapes made of either steel or aluminum. The former is stronger but heavier as aluminum pins will bend easily in rocky ground.  Flat angle shaped pegs are suitable for using in snow and sand where round pins will not work.

Furthermore, if there are tabs/loops on the top of the tarp, ridge lines can also sometimes be secured through rather than running under the tarp. This keeps fabric more water tight and stops any wear of the rope on the fabric. Karabiners can also be hooked through these loops and the ridge line run through these for a quick set up.

Extra guy ropes with adjustable clips can make it easier to keep good tension. Ridge line ropes can be purchased in various lengths and strengths. Often the guy ropes and ridge lines supplied with tarps are of poor quality, so consider upgrading as soon as you can.

Tarp clips can be added to the edge to add guy ropes or other attachments just were you need them. Tarp clips also hold firmly but don’t damage the tarp fabric.

How to Choose Snowshoes: Expert Tips to Purchase the Best Ones

0
How to Choose Snowshoes

Walking or running on snow in winter is one of the greatest recreations that are popular to many outdoor enthusiasts. Snowshoes are a key to enjoying this recreational sport because without them, you might sink in a deep snow. Knowing how to choose snowshoes is yet another key to enjoying Snowshoeing sport during the winter season. It can be quite daunting to choose the best snowshoe when you are not well-versed with the features or other considerations to look for. This challenge has prevailed among the novice snow enthusiasts and has led to the emergence of this article to give you expert tips prior to your purchase.

There are varying types of snows and terrains upon which snow enthusiasts can traverse. There could be deep snow on off-trail terrains, particularly on steep mountains and also on flat surfaces, packed on created pathways.

Each of the snow terrain types requires a different set of snowshoes with their specifically designed features. For instance, the snowshoes used to walk on well-groomed trails may not be as advanced as the ones used to walk on steep mountains, deep snows and off-trail terrains. Off-trail terrains, in particular, require larger shoes with more aggressive crampons and enhanced traction.

Off-trail Snowshoeing is rarely done for recreational purposes, but often for other outdoor activities such as mountaineering, backpacking, and backcountry. It is important to anticipate the type of snow terrain that you will encounter in your travel adventures. This article will extend the emphasis of the tips on this important feature to help choose the best snowshoe for your next expedition.

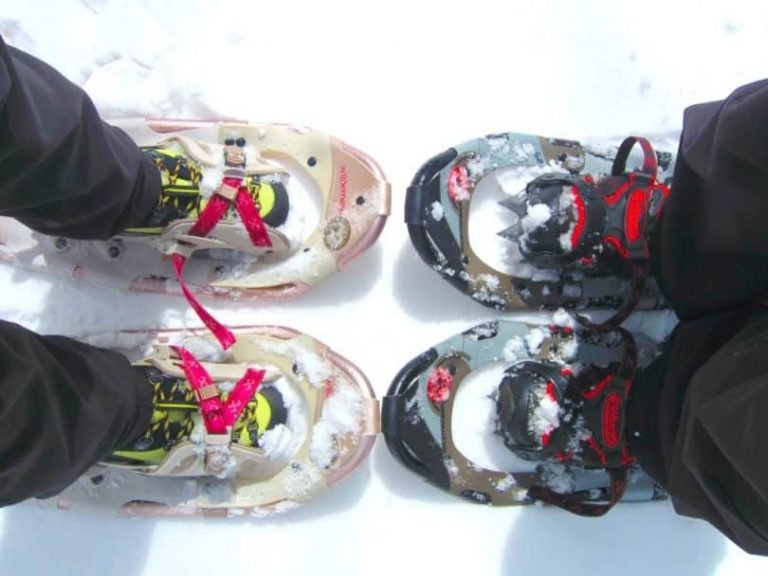
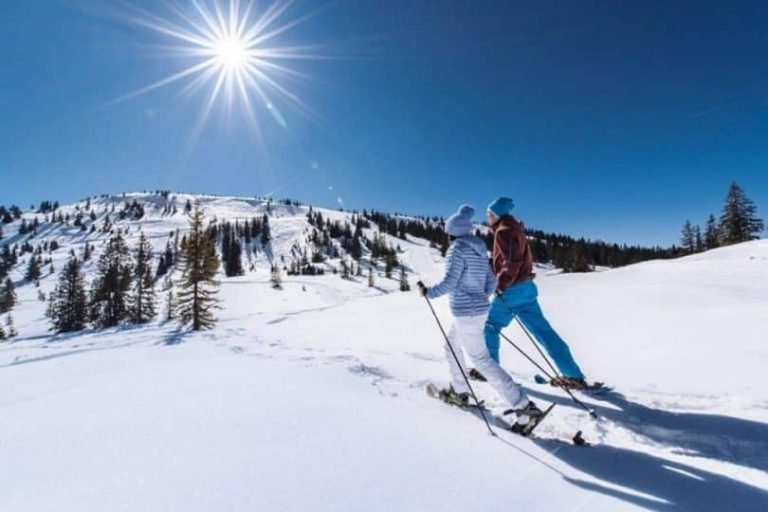
Snowshoes on the snow

Choosing the best snowshoe is also important if you plan to engage in showshoeing for fitness or racing purposes. Running or racing on snow has proven to be a fun activity to burn calories in a bid to reduce body weight.

Some people are racing on snow for fun. The snowshoes for theses purposes also exist on the market with their features that vary from other activities. The main difference between such shoes and the ones designed for other outdoor snowshoeing activities is the minimal need of flotation.

Only the ability for one to run smoothly and comfortably while wearing the snowshoes for running purpose is important. Let’s first help you understand how these shoes work.

How Do Snowshoes Work?

The main purpose of snowshoes is to distribute your weight evenly on a flat surface to prevent you from sinking into the snow you travel on. They make traveling on snow an absolute breeze for all travelers. In the absence of these shoes, you would probably sink in the snow up to your thigh height.

You may be susceptible to health risks more especially when you are wearing weak winter boots. The snowshoes protect you from possible contractions of illnesses due to inclement weather.

In spite of their varying purposes, the snowshoes have common features but different materials. The rawhide and wood, for example, have been used in the past in the production of these shoes. These are now replaced by modern frames that are made of metals such as the aluminum, steel, and carbon fiber to provide stiffness and durability to the shoes.

Other composite plastic materials are also used interchangeably in the manufacturing of these snowshoes. The frames optimize the performance of the shoes to make your snow activities easy.

The snowshoes surpass winter boots with their advanced traction optimized by the featured crampons. The traction varies from one shoe to the other depending on the purpose you want to use them.

How Do Snowshoes Work

For example, the snowshoes bought for running purposes differ with traction from the ones designated for steep mountain climbing to avoid sliding from the top of the mountain. The crampons are tougher for off-trail terrain travel than for well-established trails.

If you want a greater flotation, then a larger decking material on these shoes is necessary. Walking in off-trail mountains would require a larger deck for more flotation while walking on powdery conditions of snow would merely require small decks with minimal flotation.

Your weight also counts in the size of the deck. If you are overweight or have a large camping gear, you need a larger deck to give you more support.

In order to be able to walk firmly while wearing these shoes without your feet flipping or sliding, you need tightened bindings. These bindings give support to the type of the shoes you are wearing. Because snowshoeing is done in winter, you are expected to put on winter boots for this sport. Light, running shoes are also eligible to fit in the bindings.

There are varying types of binding materials. Without bindings, your feet would not grip well on the snowshoes. The straps and other fastenings are used to hold your feet tightly.

Important Considerations for Choosing Snowshoes

In choosing the snowshoes, there are important considerations that will narrow down your choice. For instance, you have to understand that snowshoes are activity- and gender-specific. Considering the activity-specific shoes, there are, among others, recreational or hiking snowshoes, running and backcountry travel snowshoes.

All these differ in size, design, and the materials used in construction, including the price implications. The shoes dedicated for recreational purposes are relatively inexpensive compared to the ones for backcountry purposes wherein off-trail and steep mountains features are common.

The features also differ according to the purpose you intend to use them for. We will detail below the different types of these shoes based on various activities and the features.

Activity-Specific Snowshoes

Backcountry snowshoes

Backcountry Snowshoeing activity is usually done on deep snow, steep mountains, and far from groomed tracks. That being said, sturdy, durable, stiff, and technical snowshoes with superior features are needed.

Although these shoes are quite expensive, they give you the comfort needed to walk up the steep terrain and deep snow without sliding. They have a great traction system with the aggressive crampons and advanced bindings for your winter or snowboard boots.

Backcountry snowshoes

Mountaineers and backpackers will find these shoes very appealing to meet the demands of off-trail travels. Found in these shoes are often long tails, wider frames and very aggressive crampons to give more traction.

Furthermore, these models of snowshoes are made durable to withstand the demands of mountain-climbing and off-trail travel. Unlike the other models, backcountry snowshoes offer more traction and flotation to prevent the dangers of falling when climbing steep terrains.

Recreational snowshoes

These kinds of shoes are capable of traversing on flat surfaces with well-groomed and less-packed pathways. The tracks are seldom packed with deep snow that could require more advanced shoes with advanced features.

These shoes are not designed to withstand technical and more challenging terrain, particularly in off-trail tracks. Hikers are also known as frequent users of the snowshoes for recreational activities. The advantage of these shoes is that they are relatively inexpensive with just intermediate features.

Recreational snowshoes

Some of their features include webbing bindings and less aggressive crampons for traction. The frames used in these shoes are wider, but same in width with the backcountry shoes. In actual sense, the size of the frames helps you achieve more flotation depending on the amount of snow to traverse on.

When traveling on flat snow, narrow and short frames are relevant because only minimum flotation is applicable. The small size of the snow also calls for less aggressive crampons that gives minimal traction on well-groomed terrain.

Running snowshoes

If you intend to run so that you can burn calories and stay fit in the snow, the running snowshoes are the best preference for you. These types of shoes are usually small in size with tapered tails to enable your running activity.

Running snowshoes

Flotation is not maximized for these shoes because only the ability to run smoothly on them is paramount. They are also relatively inexpensive, and designed for flat or rolling terrains that are well-groomed.

The running snowshoes cannot be overlapped with backcountry and recreational models. They are designed for maximum performance in your running or racing adventure. The features often found on these shoes include light weight, shorter frames, shortened and tapered tail lengths. Minimal traction and flotation is required. As thus, the crampons are semi-aggressive.

Gender-specific snowshoes

With gender considerations, women and men tend to have varying shoe sizes and designs. For example, men’s snowshoes have long, wide tails, whereas women’s snowshoes have narrowed tails, and are small in size. Women are, in general, lighter in weight and therefore require less flotation compared to men.

Gender-specific snowshoes

As thus, their snowshoes are relatively small with less aggressive features for more traction. The bindings for women are often narrower and also arch-shaped. There are some unisex models as well, that can be fitted by anyone regardless of gender.

Features of Snowshoes

There is a wide range of features to consider when buying snowshoes for your next expedition. From crampons, bindings, frame, flotation and size, and the decking materials. We will discuss them hereunder to help you in your search of snowshoes.

Frame materials: Gone are the old materials that were used as frames in these shoes. Rawhide panels and wood were predominantly used to construct frames. Unfortunately, they were characterized by a lack of stiffness, durability, and frequent maintenance.

Now a tubular aluminum frame, carbon fiber, steel, and composite plastic materials are predominantly used as features in these shoes to replace the old ones. Traction and flotation are improved in modern snowshoes.

Snowshoes Frame materials

The frames help determine the size and the shape of the shoes. Women’s designed frames are often tapered or narrowed at the tail to enhance natural stride and more efficient travel. In order to enhance flotation, the frames are usually oval-shaped. The sizes and shapes of these frames differ from one manufacturer to the other.

Decking materials: this is yet another important feature of these shoes. It is accommodated by the frame. The size and the shape of the frame, therefore, determines that of the decking. Rawhide webbing has been used in the past to make the deck. Now modern materials such as the urethane nylon, plastic, synthetic leather and thermoplastic urethane are used for this purpose. They are relatively durable compared to previously used rawhide panels and webbing.

Bindings: There are different bindings used in these shoes. Before you purchase, make sure you buy the right shoes with great bindings that will hold your winter boots well. The bindings are also activity-specific because, for example, the bindings for backcountry snowshoes are more sturdy and stiffer compared to the ones designed for running snowshoes.

Backcountry shoes are engineered to accommodate all sorts of winter footwears with their varying sizes. When running in the snow, often light sneakers and running shoes are worn. The bindings for backcountry Snowshoeing will be irrelevant for running shoes.

Below are the various types of binding materials and designs often found in snowshoes that you will purchase. It is important to understand all of them so as to narrow your choices when making purchases.

  • Nylon webbing straps: they are easy to adjust, and are also light in weight. They are also versatile in that they can be used to hold a variety of snowshoes. If you are into light bindings, then these straps are meant for you.
  • Ratchet straps: these are more like the bindings that are usually used in snowboard bindings. They are also adjustable to fit any type or size of the shoe you wear.
  • Rubber straps: they are tough bindings with resistance to stretching when faced with inclement temperatures. They are commonly used in many bindings.
  • Boa closure: it is an easy strap to use in bindings with its wraparound fit.

There could be other bindings on the market than what we mentioned here. However, these ones are commonly found in many snowshoes. Prior to making a purchase, you need to make sure that the bindings chosen are compatible with your footwear and can offer a tight grip on them.

Snowshoes bindings

Buying the snowshoes with incorrect bindings could render them useless because the straps are not removable but only adjustable. On running shoes, the bindings are usually fixed to prevent the feet from slipping.

Heel lifts: if you plan to ascend the steep hills in deep snow, the heel lifts are a must-have for you. Climbing the mountains without this feature could be detrimental or inconvenient to your heels. The heel lifts are flipped up under the heels to enable a comfortable ascending when faced with steep terrains.

Flotation and Size: the size of these shoes goes hand in hand with the amount of flotation. Flotation provides pleasure in the snowshoeing activity unless your main purpose is to remain fit by racing or running on snow. The shoes come in varying sizes that could range from 20 inches to 36 inches. Larger sizes are known for their ability to enhance more flotation. Also to be taken into account is your weight combined with the weight of your gear.

The snowshoes distribute the weight evenly on a flat surface. You therefore have to take into consideration your weight in relation to the size of the shoes to be bought to achieve more flotation.

Running snowshoes seldom take into account flotation. Only the ability of the shoes to hold your running shoes is important. The size of the snowshoe should still be considered important. Many of these running shoes are small in size.

Snowshoes size

To help you buy the right sizes in line with your weight, the snowshoes come with recommended weight per size as tabled below:

Range of body weight: Recommended snowshoe size:
80 to 150 pounds 20 inches
120 to 200 pounds 25 inches
170 to 250 pounds 30 inches
220 to 300 pounds 36 inches

The best advice is to limit the weight of your gear so it does not require larger snowshoes to travel on snow terrain. The type of snow and the terrain you are heading to also has effect in determining the size of your shoes. For example, if you plan to travel or climb off-trail terrains, you need more flotation and larger sizes of these shoes.

Crampons: These are materials located at the bottom of the snowshoes to provide the much needed traction when walking or running on the snow. They can either be made of steel, composite plastic material or aluminum.

The crampon varies from one shoe to the other depending on the expected terrain to use them. More aggressive crampons are used for difficult terrains such as off-trail high peak mountains. They are made to withstand the ice and to make the shoes more secured and stable when wearing them.

Snowshoes crampons

On the other hand, less aggressive crampons are required for the groomed or packed terrain trails.

Wrapping It Up

Having introduced you to the important considerations to choose snowshoes, we are confident that you are now well-prepared to hit the market. The key to choosing the best snowshoe that will remain comfortable and secure in your outdoor winter sports is understanding the foremost important features.

Also highlighted in the article are the activities that play a central role in choosing these shoes. It has transpired that snowshoes are activity-specific. Moreover, they are gender-specific. We gave more valid reasons to expand on these topics. Also important was our accommodation of novice people in snowshoeing activity when we discussed how do these shoes work.

Water Intoxication: Can You Hydrate Too Much?

0
Too much water

We’re told over and over again to drink lots of water when it’s hot outside or while we’re exercising. However, drinking an extreme amount of water in a short time can be dangerous. Water intoxication, or water poisoning, is a potentially fatal condition that occurs when you consume too much water too quickly without replenishing your electrolyte intake. Drinking a lot of water in a short amount of time causes the levels of salt in the blood to drop too low, a condition called hyponatremia.

When the normal balance of these electrolytes is pushed outside safe limits by overhydrating it causes a disturbance in brain functions. According to a YouTube video published by the American Chemistry Society, it only takes about 6 liters of water to kill a 165-pound person.

Drinking a bottle of water here and there in the heat or during exercise won’t hurt you, but drinking too much too fast can. 6 liters might not sound like a lot, but there is no reason to consume that much water and your body shouldn’t be telling you that you’re thirsty enough to drink that much. Water is essential to human life.

Almost all of the major body systems depend on water to work properly. Water helps your body regulate temperature, prevents constipation, and flushes waste from the body, among other functions. Everyone should make sure they drink an adequate amount of water throughout the day and increase their water intake when it’s hot outside or while exercising.

However, certain high-risk groups of people also need to be wary of water intoxication under the same conditions, especially endurance runners, anyone with a chronic illness or psychological condition, and those who work outside in the heat.

How Does Water Intoxication Happen?

The cause of water intoxication basically boils down to sodium levels. The role of sodium in the body is to balance the fluids in and around cells.

When you drink too much water it causes an imbalance, diluting sodium levels in the body and leading liquid to move from the blood to inside cells, which causes swelling. If this results in swelling of the brain it becomes a very serious condition that requires immediate treatment.

So how much water would you have to drink to become intoxicated? Gallons and gallons. The kidneys can only expel about half a liter of liquid per hour. Water intoxication occurs when you’re drinking more than your kidneys can pee out.

Water Intoxication

Dehydration is much more common, and the symptoms are very similar, so it can be difficult to diagnose water intoxication unless you know the person exhibiting symptoms drank 6 liters of water. Young, healthy people are usually not at risk, but there are certain groups of people who have higher risk factors they should be aware of.

The same groups of people who are at risk for water intoxication should also be wary of the symptoms of dehydration and heat exhaustion. Symptoms of all three conditions present similarly and can be difficult to diagnose.

Both dehydration and heat exhaustion can cause weakness, dizziness, confusion, a racing heart, fainting, headache, fatigue, muscle cramping, nausea, vomiting, or diarrhea. As you’ll see later, these are all symptoms of water intoxication as well.

Paramedics know to look for signs that differentiate between water intoxication and dehydration, but everyone should learn what differences to look out for and how to prevent it from happening to them.

There are two types of overhydration:

  1. Increased water intake leading to drinking more than the kidneys can get rid of results in overhydrating.
  2. Retaining water. When the body is unable to get rid of excess water, it starts retaining water that it doesn’t need. People with chronic illnesses like liver disease, kidney problems, and congestive heart failure are more prone to retaining water.

People at Risk

  • Endurance Sports: People who are involved in endurance sports, like distance runners, can drink too much water trying to rehydrate the liquids they’ve sweated out. Paramedics know to watch out for water intoxication symptoms at races, but endurance sportsmen should be aware of what symptoms to watch out for on their own.
    Drinking sports drinks in addition to water can help replenish sodium and other electrolyte levels in the body to help prevent water intoxication, but you should still only drink a moderate amount.
  • Overexertion or Heat Stress: Anyone who works in extreme heat or is prone to heat exhaustion should be cautious of water intoxication. Heavy sweating usually leads to consuming large amounts of water in order to replace lost fluids which can result in an electrolyte imbalance.
    Anyone who works outside in extreme heat should take frequent breaks in the shade to sip water and allow their body temperature to regulate.
  • People being treated for Chronic Illness: Certain medications for conditions like anxiety, depression, diarrhea, colds, or asthma can cause dry mouth, making you constantly thirsty and leading to the over drinking.
    This puts older adults at higher risk of water intoxication because they are more likely to be taking medications that alter the body’s sodium balance. Anyone taking medication for a chronic illness should keep careful track of how much water they are drinking per hour to avoid overhydrating.
  • Heart, Kidney, and Liver Problems: Diseases affecting the heart (like congestive heart failure, or CHF), kidneys, or liver can cause fluid accumulation in the body which dilutes sodium levels and leads to swelling of the cells.
    Medications for these conditions can also increase your likelihood of becoming water intoxicated.
  • Anyone with Psychological Conditions: People with psychological conditions like schizophrenia are predisposed to over consumption of water caused by their condition and as a side effect of several medications. Water consumption for this risk group should be carefully monitored to make sure they are not drinking more than 8 ounces of water per hour during rest periods.
  • Severe Vomiting or Diarrhea: When your body is dispelling liquids in high amounts through vomiting or diarrhea it causes your body to lose electrolytes like sodium. It is important to rehydrate your body when you are losing fluids, but be careful not to drink water too quickly or water intoxication can set in.
  • Drugs or Alcohol: Certain drugs like ecstasy can cause dry mouth and lead to drinking too much water while under the influence. Beer can also lead to water intoxication if you are drinking extreme amounts.
    Be aware of the symptoms of dehydration if you drink other types of hard alcohol frequently.

Symptoms of Water Intoxication

  • Feeling hot
  • Headache
  • Feeling crummy in general
  • Diarrhea
  • Nausea
  • Vomiting
  • Clear urine
  • Confusion or disorientation
  • Difficulty breathing
  • Fatigue
  • Dry or sweaty skin
  • Double vision
  • High blood pressure
  • Swelling of toes, fingers, ankles
  • Short term significant weight gain
  • Muscle weakness, spasms, or cramps
  • Seizures
  • Slurred speech
  • Unconsciousness
  • Coma

First Aid and Treatment for Water Intoxication

If you see someone showing signs of water intoxication, you should pull them aside into the shade and talk to them. Get help quickly before water intoxication leads to swelling of the brain, seizures, or coma.

Call an ambulance or get the person to the Emergency Room as quickly as possible so that doctors can inject a concentrated salt water solution to ease swelling and start reversing the water intoxication. Doctors can also prescribe diuretics to help increase urine production and help the body get rid of excess water.

Treatment for Water Intoxication

Medical intervention for water intoxication can also lead to the treatment of underlying conditions that make a person prone to overdrinking.

While you are waiting for medical help you can ease the symptoms of water intoxication by cutting back on fluid intake and increasing salt intake. Don’t give a person showing signs of water intoxication any medications, even if they are experiencing headache and nausea.

Simple over the counter medications like aspirin and ibuprofen can worsen symptoms. Provide them with oral rehydration salts only if you have them on hand. If you are prone to water intoxication, know your medical history and consult with your doctor regularly to understand what you can do to prevent water intoxication caused by an underlying condition.

For Outdoorsmen

Your first aid kit should always have you prepared for the worst. Plan your water drinking ahead by making yourself familiar with the area you’ll be trekking beforehand. Be aware of the possible water sources and stops, as well as shady areas you can rest to regulate your body temperature.

This will ensure you don’t go too long without water or drink too much water because you went too long without taking a water break. Carry trail food to help your body keep a healthy balance of sugar and sodium.

For Outdoorsmen

A good trail mix contains nuts, chocolate, and beans for providing small energy bursts while you are hiking. Always check the weather before you head out on a trek. Weather can be unpredictable and you want to be prepared for any extreme conditions.

And always carry rehydration salts in your first aid kit to help with dehydration and replenish electrolytes if you drink too much water in extreme heat or while trekking long distances.

Preventing Water Intoxication

The best way to prevent water intoxication is to make sure you don’t drink way more than you sweat out, but that’s a difficult metric to measure. To stay on the safe side, avoid drinking more than 1 liter of water or sports drink per hour, even if you are outside in the heat for an extended period of time or during intense exercise and endurance sports.

Simply drink until you don’t feel thirsty then stop, even if you think you need to continue replenishing your body.

Preventing Water Intoxication

You can also keep track of your water consumption by monitoring your pee. Dark yellow urine means that you are dehydrated and should drink water. Clear urine means you are hydrated and should slow down drinking water to prevent intoxication.

Drink sports drinks when you know you’ll be working hard to help your body replenish electrolyte and sodium levels, but still be careful not to drink too much of any liquid.

So How Much Water is the Right Amount?

We know we should be drinking enough water throughout the day to keep us from getting dehydrated, especially when it’s hot outside or when our activity level is high. But we also have to be careful in these circumstances not to drink too much water or we could become water intoxicated.

So how are we supposed to know how much water to drink to keep each of these opposite scenarios from happening?

The symptoms of water intoxication are scary and can be life threatening. If you’ve been drinking extreme amounts of water and start to feel nauseous and disoriented, those are some of the first warning signs that you might be experiencing water intoxication.

Let someone know and seek medical attention. Follow proper first aid protocol for water intoxication until paramedics arrive. Likewise, if you suspect someone might be experiencing symptoms of water intoxication, seek medical help for them and make sure they stop drinking water immediately.

Water intoxication guide

There is no magic number for exactly how much water everyone should drink. It depends on a number of factors like your size, workout, activity level, and what you’re eating. As a general rule, you can divide your ideal body weight in half and drink that many ounces of water per day or drink 8 glasses of 8 ounces per day.

The best thing to do is to sip water and avoid drinking more than 4-6 ounces every 20-30 minutes during intense exercise. During periods of rest throughout your normal day there is no reason to drink more than 6-8 ounces of water every hour. Listen to your body’s needs and wants; it will tell you what to do.

Layers Clothing: Tips to Stay Warm Even in the Coldest Climates

0
Layers of clothing

Avoiding frostbite and hypothermia are imperative no matter what activities you are participating in. Hiking and camping can require multiple layers of clothing in order to be as effective as possible to keep your body warm. Everyone adapts their layers clothing differently, and some products or methods will differ slightly and change from person to person. You may discover you prefer more layers of thinner clothing or you prefer fewer layers of thicker clothing. Regardless of personal preferences, the concept and purpose are the same: Keep warm in the most effective way as possible.

While the details may change slightly depending on each person, the basic principles are the same. The most important qualities of well-layered clothing are to keep as much heat as possible “in”, keep as much cold air as possible “out” and to keep you dry. As long as the clothing you choose serves these purposes, you are on the right track.

Foundation of Layered Clothing

There are three basic categories that make up the foundation of properly layered clothing.

  • First, there is the base layer. This layer consists of your underwear and perhaps a thin layer of clothing against your skin.
  • Next is the middle layer, or insulating layer. This layer is your thicker clothing designed to keep in as much heat as possible.
  • Finally, there will be the outer layer or your shell. This layer will protect you from the elements. It should be windproof and waterproof to keep you dry.

Each of these layers has unique qualities that are put together to keep your body safe. They all work together to be the most effective.

Base Layer

As we already stated, the base layer will be the layer closest to your skin. This is the essential foundation to build upon for your clothing. This layer will consist of underwear and most of the time long underwear tops and bottoms.

Base Layer

One key quality that all base layers should have is the ability to keep your body dry. In cold temperatures, it is of the utmost importance to keep your body dry. If your clothing is wet and does not dry quickly you have a higher risk of suffering from hyperthermia.

Because of lacking the ability to stay dry, cotton is not at the top of the list for ideal hiking material in cold weather. Instead, most seasoned hikers recommend staying with synthetic materials for a base layer of clothing. Wool and polyester are the most popular choices for cold weather hiking.

Middle/Insulating Layer

The most effective and the most popular insulating products are designed to keep “dead air space” warm.

This means they keep the warm air in AND the cold air away from your body. This is an area that you may prefer to only use one layer of insulation, or you may choose to add an extra layer if you are especially cold natured.

Middle Insulating Layer

Fleece and wool are said to work the best on for this layer. Hikers also choose down filled vests and light jackets.

The most important thing to remember is that you do not want to get in a situation that you are too cold and do not have the proper clothing to warm you up. Not only can this be dangerous, it can ruin your entire trip.

  • On the Top. For the best insulation for your torso and upper body, you have a few different options. Some hikers prefer a fleece pullover or jacket. These are the most functional and will still function well even if you are slightly wet.
    The regular fleece material is NOT windproof or waterproof and will NOT compress well, but it is light and effective. There are options that have a built in the windshield for added protection but do not assume that your jacket has it. Make sure you read the labels to know exactly what you are buying.
  • On the Bottom. For most hikers, your legs should be fairly warm with a base layer of thermal underwear and a windproof/waterproof top layer. However, if you will be encountering temperatures that are below freezing for your entire trip, you may want to consider investing in a pair of down insulated pants.
    These offer the same benefits of a down filled jacket for your legs. Remember when wearing down that it is not effective if it becomes wet AND if it is not coated down, it will not dry quickly. Keep these things in mind before purchasing your gear.

Outer Layer

Outer layers are the clothing that is made to keep you dry and protect you from all of the elements. It is likely that you will run into some kind of weather while you are on your adventure. This may mean rain, snow, or wind. All of these can mean bad news for you if you are ill prepared.

Outer Layer

There are a few different options for an outer shell. The most important questions you need to ask about your outer layer are: Will it keep you dry and out of the wind? Is it durable? Is it breathable?

Will it keep you dry and out of the wind?

The outer layers’ main purpose is to keep you dry and protect you from the wind. When the rain comes you may not be able to keep out every drop of water, so you will also need to make sure that it dries quickly. If the rain penetrates your gear and then it will not dry quickly, it will be extremely difficult to warm back up. It is always best to stay as dry as possible.

The wind is your next enemy. As soon as it penetrates your layers, it will steal your warmth. The less wind that gets through your gear, the warmer the dead air will remain around your body.

Most hikers prefer gear that is made from eVent or Goretex. These materials seem to be the number one choice for durability against the elements. If you are unable to find those specific materials you will do well to find one that is made from coated material that is comparable to eVent or Goretex.

There is one more possible additive to your outer shell; a poncho. Ponchos are not usually very durable and they are quite airy, so they will not provide the best wind protection, but they can offer an extra layer for both wind and rain. Again, it is not recommended as the main shell, but when added on top it can add a little extra protection.

Is it durable?

You want a product that will last. You do not want to be on your hike and have your protective layers tear and become vulnerable to the elements. There have been numerous tests and advancements made to ensure that the jackets you will be buying will last for years to come and continue to serve you well.

Mountain Hardwear Jovian

Mountain Hardwear makes a wonderful jacket called a “Jovian”. This jacket has been rated as one of the best options for waterproof, windproof and breathable.

The company boasts about its Dry Q Elite material which they claim is the lightest and most breathable material that they have made. They also claim to beat out competition by allowing the material to breathe no matter how much effort you are exerting. This jacket should definitely be at the top of your list of considerations.

Is it breathable?

Breathability can make or break a jacket. If the material is unable to breathe if you become too hot, it will keep you too warm and you will begin to sweat. If you sweat and the material still does not offer any air flow, you will remain wet.

When a jacket is able to breathe and release heat and allow air to travel through, you will sweat less and dry faster. As you know, remaining dry and warm are essential to your survival while hiking in freezing temperatures.

Extremities

Layering on your hands and feet in cold weather is equally as important as layering on the rest of your body. If your fingers, hands, and face are unprotected in the elements you can suffer dire consequences. Frostbite can result in the amputation of fingers, toes, and limbs.

To keep frostbite at bay, take the necessary steps to ensure that your extremities stay toasty warm.

Head

Let’s begin at the top. You lose about 10% of your body heat from your scalp according to recent studies.

While that may not seem like much, your head, neck, and ears are more sensitive to temperature changes than the rest of your body. In order to protect these sensitive parts of your body, you must have a hat that does its job.

Waterproof hiking cap

Outdoor gear companies sell hats that are made of a combination of materials. Most winter caps are fairly snug and made from fleece and wool. While stocking hats are the perfect option for insulating your “noggin”, you must also cover your neck.

This is where the hood of your jacket will come into play. Make sure that you can cinch down your hood to make it as windproof as possible when it is necessary.

Hands

When considering keeping your hands warm, you will need to remember that you must also be able to USE your hands efficiently. Therefore, you will need something that is effective, flexible and not too bulky.

The same general rules apply to insulating your hands. A base layer of a thin glove is appropriate for cold weather. Depending on how cold the temperatures are will determine how many layers you will choose to wear. Your middle/insulating layer can consist of a thicker down or fleece glove or mitten.

Waterproof hiking gloves

This will ensure that your hands remain as warm as possible in below freezing. Keep in mind that the more you layer the less you will be able to move your fingers.

You may decide for forgo the middle layer for your gloves if you will not be facing temperatures below freezing on your trip. Perhaps the most important layer on your hands will be the outer layer. Again, you will need a glove or cover that is waterproof and windproof.

Your hands are extremely susceptible to frostbite and cold temperatures. If they get wet, it is difficult to warm them back up. So keep the elements away to effectively keep your hands warm.

Feet

Much like your hands, your feet are also in danger of suffering from frostbite, and if you are like me, if my feet are cold, so is my entire body. You will need your gear to be as breathable as possible, while still keeping out the rain and snow.

Let’s begin with socks. You will need a firm foundation, again, with your thin layer of fleece or wool socks. This will make sure your feet, keep in as much heat as possible.

Following your base layer, you will need a pair of waterproof hiking boots. These are perfect for keeping out any excess moisture that you may find yourself in contact with. Most of these products are also very well insulated, so it is as if you have a second pair of socks on the inside of your boots.

Waterproof hiking boots

Finally, you will want to consider wearing a set of waterproof gaiters. I do not know if you have ever had snow fall down inside your boot, but it is not a good feeling. It makes your feet wet and cold and it seems that they will never heat back up.

When hiking through water or snow in the cold, gaiters come highly recommended to keep any unwanted snow and water out of your boots. They are a big help in keeping your feet dry, which will also keep them warm.

Stay Warm!

Hiking and camping in the winter time and snow can offer some of the most serene and picturesque memories. Everything is quiet and peaceful and pure white in some cases. There is a Swedish Proverb that most hikers tend to agree with, “There is no bad weather, only bad clothing.”

Layer clothes

This could not be truer in the world of outdoor hobbies and activities. As long as you are prepared and knowledgeable before you venture into the wild, you will have some of the best times of your life. You will see unimaginable places and sceneries. Be prepared and layer your clothing according to the conditions you will be facing.

Water Poisoning: How to Recognize it, Treat it, and How to Prevent it

0
Water Poisoning

For many years we have been told to consume more water as possible to keep our bodies healthier because water is an essential element that acts as a lubricant to many chemical processes in the body. Yes, that is true that water is vital for our body. However, too much of a good thing is just bad. This has been evidenced by many people who drank so many liters of water in a short period of time not knowing of the danger of water poisoning. Some recommendations of drinking too much water were not supported by any empirical studies.

In other talks, it is recommended that we consume 8 glasses a day. This depends on the nature of any person and the activities they do. It is undeniable that water is an element and nutrient that our body needs for its optimal metabolic functions. We are expected to have sufficient amounts of water in the body for health purposes but not in excessive amounts as others have perceived.

Too much consumption of water has been proven to give birth to what we call being poisoned by the water. It is interchangeably called water intoxication or over-hydration. This life-threatening condition can be lethal if left undetected and untreated for a long time. Many death cases have been reported previously after the condition turned severe. This article serves as a comprehensive guideline to equip you with the knowledge about this condition and how to stay out of danger.

Who Can Be Most Affected by Water Intoxication?

Almost everyone, not erring on the side of caution can be most adversely affected by this lethal condition. Predominantly, the disease is said to prevail in sports people, labor-intensive employees and others with pre-existing medical conditions such as advanced diabetes and schizophrenia mental disorders.

Too much water

These people are most affected because they tend to release more sweat and then consequently need more water to ease their dehydration. The sweat released, depending on the exercise or activity undertaken, contains large amounts of salt and water. Any excessive amount can be detrimental to one’s health.

If salt is lost, there will be an imbalance in the body which can complicate the body’s biological processes. When water is lost, it can also be severely dangerous. Dehydration causes many people to drink more water to rehydrate.

That action in itself has been proven to be dangerous more especially when people drink more liters or gallons of water in an hour compared to spreading the liters throughout the day. Unfortunately, the kidneys can only excrete a certain limit of water a day, and that is approximately a maximum of 28 liters or 7.4 gallons.

This limitation limits people to over-consume water. Adults and children are advised to carefully restrain themselves from over-hydration which results in the disease hyponatremia.

What Is Water Intoxication?

This is a life-threatening condition associated with excessive consumption of water that causes a significant reduction in electrolyte levels such as sodium in the bloodstream. The medical term often used interchangeably with this condition is called hyponatremia.

Water intoxication cases can range from mild to severe with associated symptoms. The worse symptoms can be a manifestation in coma, seizures, and death.

Water intoxication cases have been countlessly reported around the globe with many people losing their lives. It saddens when the majority of people suffer from this illness unknowingly. Many people have only been told about the paramount importance of drinking lots of water, not about the disadvantages of excessive drinking.

Water intoxication

Poisoning of water results from this lack of knowledge because they end up drinking so much more than can be excreted by the kidneys, thus causing sodium imbalance in the body. Poisoning of water can also result from water retention in the body as well as excessive ingestion of water.

The Dangers of Water Intoxication

The foremost information is that many people have already lost their lives due to the severity of water intoxication. The mild dangers of this condition are treatable without the need to consult with the specialized doctor.

If water poisoning-related symptoms such as diarrhea, nausea or dizziness are detected, you can stabilize that condition by replenishing sodium with drinks that contain sodium and by limiting excess water intake.

The recommended sodium drinks include apple juice, lemon juice, chocolate milk, sports drinks, vitamin water or orange juice.

In cases where the dangers are life-threatening, you must visit the doctor instantly. The symptoms of water intoxication are often misinterpreted with the symptoms of dehydration or a heatstroke.

This misinterpretation leads to advanced stages of dangers because then people continue consuming more water in an attempt to alleviate their dehydration. The severe danger of this condition leads to death. The major damage done is when it leads to the dysfunction of the brain cells.

Excessive water weakens the concentration of sodium, thus causing movement of water from outside into the cells to cause them swell. Other dangers include seizures and coma.

What Are Water Poisoning Symptoms?

It is important to notice the symptoms in order to employ precautionary or remedial measures to curb hyponatremia from advancing.

Water Poisoning Symptoms

Not everyone may react the same way to this condition, but most common initial symptoms that occur when the sodium level is below 130 mmol/L include the following:

  • Dizziness
  • Disorientation
  • Fatigue
  • Mild and severe headaches
  • Nausea
  • Vomiting/diarrhea
  • Lightheadedness
  • Weakness

There are other symptoms that can be seen at a later stage when the sodium levels in the blood have dropped significantly lower than 105 mmol/L. These ones indicate the severity of hyponatremia and demand immediate medical attention. If left untreated, they can worsen to yield death results. They include the following:

  • Swelling of feet and hands
  • Seizures
  • Jerky movement of limbs
  • Coma
  • Drowsiness
  • Blurred vision
  • Tremor
  • Shaking of the body
  • Lung edema
  • Collapsing
  • Coughing out of blood
  • Pulmonary edema
  • Cerebral edema
  • Hearing loss
  • Abnormality of gait
  • Mental retardation

The list of mild and severe symptoms of water intoxication can extend even more. It all depends on the type of person, pre-existing medical conditions and amount of electrolytes lost as well as amount of water taken.

It is, therefore, important to scrutinize each and every symptom you suffer from in order to see if it is not related to this condition. Early detection enhances chances of curbing hyponatremia without further complications.

What Are The Causes of Water Intoxication (hyponatremia?)

The causes of hyponatremia can be attributed to the imbalance of sodium in the bloodstream compared to the excess water consumed or not excreted. Not only athletes or workers are most affected but also everyone involved in an uncontrolled drinking of water.

Causes of Water Intoxication

Water intoxication can emerge as a result of malfunctioning of body organs or body processes in excreting enough water from the body. Mentioned below are some of the causes of this fatal condition.

  • Kidney failure: The failure of the kidney to excrete sufficient water leads to the failure in the regulation of water homeostasis in the body. As a result, the body suffers from substantial amounts of water in the bloodstream. We have only minor concentrations of electrolytes in the body. Excess water will overcome these electrolytes to be absorbed into the cells.
  • Syndrome of inappropriate ADH Secretion: the antidiuretic hormone can cause water retention and over-hydration if secreted in excess. It is often prompted by lung and brain disorders and consumption of other medications.
  • Inappropriate medications: some medications can be rendered inappropriate because of their stimulation of water retention or excessive sodium excretion from the body. They can cause hyponatremia. Such medications include cholesterol-lowering drugs, antidiabetics, antipsychotics, anticonvulsants, chemotherapeutic drugs, antidepressants, and barbiturates.
  • Heart and liver problems: the malfunctioning of these organs leads to the inability to maintain a proper water homeostasis. As a result, more water ends up not being excreted sufficiently. Hyponatremia results from the problems associated with these organs.
  • Cystic fibrosis: patients suffering from this disease are often subjected to excessive excretion of sodium from their sweat. This causes an imbalance of this essential mineral in the body and then cause water intoxication due to excess water.
  • Drinking too much water: this is the main cause of over-hydration. Too much of water more especially in a short period of time is detrimental to the body. It causes an imbalance of electrolytes in the body, thus causing hyponatremia.
  • Compulsive water consumption: an example goes to schizophrenia patients who often drink more water than the recommended liters in a day. They can drink up to 15 liters. This, in turn, results in hyponatremia.

There are relatively many causes that can lead to hyponatremia (water intoxication). The best way is to be vigilant of the transpiring early symptoms that signal the possibility of water intoxication.

The treatment of this condition will then depend on the severity of the symptoms seen. People are advised to act as quickly as possible to the symptoms to prevent advancement of the condition which can be lethal.

Treatment of Water Intoxication

The treatment of water intoxication depends on the level of complexity of the symptoms seen. For mild symptoms, for example, one can be treated at home by reducing the intake of fluids. The advanced stage of hyponatremia requires medical attention in a healthcare setting.

Treatment of Water Intoxication at home

On arrival to the healthcare facility, doctors will perform various tests using either urine or blood samples to verify the symptoms if they belong to over-hydration.

Medical history also helps doctors in diagnosing with ease the symptoms. Among other treatments, the following apply:

  • Intake of diuretics to enhance production of urine which will help in releasing excess water from the body. Frequent urine means more water expelled from the kidneys and that in turn help to enhance the balance of electrolytes and fluids in the body to avoid evolvement of hyponatremia illness.
  • Reduction of fluid intake to help curb excessiveness which is a bad thing. Depending on the severity of the symptoms, water and salt restrictions may be implemented by healthcare professionals. Victims of water intoxication are therefore urged to cut excessive fluid intake to avoid further damage to the body.
  • Medical treatment of preexisting conditions. At times there could be other underlying medical conditions that worsen the symptoms. Such are treated in a bid to stabilize water intoxication.
  • Consumption of medications to curb and deter symptoms. Such as seizures, coma, dizziness, irritability and nausea.

There are numerous treatments used in hyponatremia treatment informed by the nature of the patient. Not everyone may be treated equally.

Prevention of Water Intoxication

The best way to prevent the occurrence of this fatal illness is to instigate precautionary measures which include reduction of excessive water intake. The most affected victims, viz. athletes, outdoor activists, employees in power-intensive jobs and sportsmen, should be acquainted with these precautionary measures.

Often the inexperienced athletes were found to be the most victims of over-hydration. They simply do not have a proper planning of drinking too much water.

If you want to consume water during your exercise of which you have to, you are advised to drink before or during your activities to prevent a prompt consumption of massive amounts of water thereafter. Excess water is best drunk in glasses distributed throughout the exercises undertaken.

It is recommended that you do not drink more than 2 liters of water in an hour. Allow your kidney to excrete the amount of water it can manage in an hour without overloading it.

Because too much sweat is lost during intensive exercises which then lead to a reduction of electrolytes like potassium and sodium in the body. You are advised to replenish such minerals to enhance their concentration.

Reduction in the content of sodium prompts absorption of more water into the cells and the brain, which will eventually lead to swelling of cells. The swelling of cells manifests as coma, death or seizures.

Prevention of Water Intoxication

Patients with known underlying medical conditions should be vigilant of hyponatremia. Their illnesses could also prompt uncontrolled thirst that could lead to over-hydration.

Before these people embark on intensive exercises, they need to communicate with their medical professionals to assess if their actions cannot be adverse. These include patients with sugar diabetes, heart failures, and blood pressure.

Pregnant women are also included in this exclusion. They tend to have more blood, which then requires more concentration of electrolytes in balance with fluids. That being said the sufficient amount of water should be taken.

Furthermore, on the prevention of water intoxication, people should abstain to some water contests wherein people compete with drinking too much water. There are reported cases where such contests have ended in vain.

Health professionals often recommend the consumption of 8 glasses of water throughout the day. Do not exceed this recommendation. Poisoning of water regularly happens when you drink too much water in a short period of time.

To prevent severe dehydration and over-hydration, you must avoid outdoor exercises that are too intense. This is done to limit the amount of sweat excreted during those exercises. Obviously, you will be compelled to drink more water due to an inevitable thirst.

What Have We Learned?

In conclusion, water intoxication is a controllable condition if detected early. If weird symptoms begin to emerge, you must act quickly for medical attention. If left untreated, the condition could be lethal whereby the patient can demise in a few hours.

Water intoxication

To err on the side of caution, you must abstain from over-consumption of water in a short period of time. When exercising, you must make it a point that you drink water before and during your exercises not only when you are done with the exercises. Energy supplementary sports drinks are helpful in replenishing the sodium lost in too much sweat.

How to Make Snowshoes: Hiking Across Snowy Wilderness

0
How to snowshoe

Many backpackers look forward to a winter season when a white landscape attracts numerous wanderers who enjoy traveling through the frozen wilderness. A quality camping gear can protect them from cold quite efficiently. However, crossing vast areas covered with a thick layer of the fluffy snow provides quite a challenge. Heavy walkers can fall into the snow and get stuck or spend a lot of energy to slowly wade through the cold cover. Some people like to run on skis, but they can’t be used on very irregular surfaces, as it could be dangerous. When crossing very loose and fluffy snow, even ski users can sink into the layer.

In such circumstances, these backpackers, who know how to make snowshoes from wild trees, find themselves in a better position. While high-quality wooden ash gear is difficult to make, anyone with an ax and a bit of patience can make simple, workable, DIY snowshoes from spruce saplings.

What Are Snowshoes?

Snowshoes are a special type of winter boot attachments with a wide bottom area. They enable users to travel on the surface of snow without falling in or getting stuck.

While traditional snowshoes were made of wood and animal hides, today, many different modern materials are used in their production, especially metals like aluminum, plastics and synthetic textiles like neoprene.

What Are Snowshoes

Snowshoes made of wood are still popular, as they are quite stealthy and don’t freeze. Wooden devices are called traditional on the market. The snowshoes are designed to not get stuck and not gather too much snow.

With a bit of an effort, users can handcraft their own snowshoes. While quality ash ones are difficult to make, a simple model made from spruce saplings is fairly easy to assemble.

Who Uses Snowshoes?

In the past, they were used by people who needed to cross vast snowy plateaus, such as hunters and lumberjacks, trappers, traders, and wanderers. Different native groups from North America used various designs, but a snowshoe was known everywhere.

Today it has grown in popularity among users who like to trek outdoors in winter. It’s used in sports by outdoor runners and racers who wish to train all year round, by recreational walkers, as well as by people who work outdoors in a winter season.

Some people combine walking on snowshoes with skiing and snowboarding to reach remote areas, which are not suitable for skiing.

A sports equipment should be purchased from an experienced manufacturer, but snowshoes used for travel can be made with DIY methods.

What Type of Snowshoes to Choose?

There are a few types of snowshoes. Their shape and features depend on their intended use, so people should consider their plans before selecting an optimal model.

Sports shoes serve people, who like to run and walk even in winter when prepared jogging tracks are not available. These days there are special sports events organized for racers in Canada. Snowshoeing sections are featured in multi-sport winter events as well.

What Type of Snowshoes to Choose

These shoes are light and relatively small. While they allow for a very quick movement, they aren’t suitable for wilderness treks through a fresh snow.

Snowshoes intended for long distance trips through remote, snowy areas are much longer and a bit wider, than sports models. To stand on the top of the snow, wanderers need a large surface of the shoe to evenly distribute their weight on the deeper layer of snow.

These models are used for backpacking trips through the wild areas. They are popular among skiers, who often need to cross wilderness to get to their chosen skiing spots. If you make your snowshoes yourself, that’s what you will get.

People, who would like to walk over icy areas or climb hills should choose the type of snowshoes which can accommodate these activities, as doing that on the standard ones can be dangerous due to the lack of sufficient traction.

Occasionally, even mountaineering snowshoes don’t provide enough balance and walkers must use crampons.

Advantages of Traditional Snowshoes

Traditional snowshoes made from wood and animal hides served northern Indians for centuries. Natives used them to hunt, track prey and travel through snow-covered landscapes.

While wooden ones tend to be much heavier than those of modern construction, they are also much stealthier. For this reason, some hunters use them to this day.

However, their weight means that it’s more difficult to cover large distances and wanderers are more likely to get injured due to overworking their muscles.

Advantages of Traditional Snowshoes

Unlike the shoes, which are made from aluminum, the wooden frames don’t freeze. They are quite decorative. Tourists in the North America often buy them as souvenirs to memorize their travel and display the gear on the wall as the decoration. The type of decoration and patterns was typical for various cultures – each tribe had their specific design.

Which Size of Snowshoes to Choose?

Different models of snowshoes feature a different contact surface area and benefit different types of users. Any gear intended for runners who move along prepared tracks has relatively small shoes, which can be moved easily.

On the other hand, wanderers who travel through a thick layer of loose, fluffy snow need a wide, long snowshoes to be able to stay on the top of the snow.

The size of a snowshoe will depend on the weight of its user as well. A small snowshoe would be sufficient for a child, but an adult who weighs 200 pounds would require large snowshoes, long, tough and wide to stay on the surface instead of getting stuck in the snow.

The weight on a square inch of a snowshoe seems to be a decisive factor here. Manufacturers usually provide necessary ratings, but to be on the safe side you’d best ask experienced snowshoers for an advice, especially when you intend to make your snowshoes yourself.

How to Make DIY Spruce Snowshoes?

Spruce snowshoes are not very durable and will probably turn out as a one-use equipment. However, they can turn out indispensable during your wilderness adventure.

It’s easy to make your own if you have an ax or knife and follow a few simple steps:

  1. Find two young spruce saplings of a similar height – preferably around 3 feet. Pull them out with roots. Each plant will provide one snowshoe.
  2. Use a knife or an ax to cut off all side branches; keep all these twigs, though. The stem can provide a shoe frame, roots can make bindings and supports and branches can fill out your construction.
  3. Bend the tree stem and tie its ends together with roots to form a tear-shaped frame of the shoe. Make sure to reinforce the knot so that it doesn’t come apart under the weight of a traveler.
  4. In the widest part of the shape connect the frame on both sides with a tied root. Then, tie a few more roots alongside it. Finally, loop one more root clockwise around the bundle and secure its ends.
  5. This part of a snowshoe will support your boots; make sure it’s taut. Cover all the knots with tree sap to prevent the structure from sliding on the frame. Tie a few thin roots around sap-covered knots to protect them from damage.
  6. Select long root and tie its one end around the left knot and the other one around the top point of the frame. Make sure the loop in the top is loose; you will reinforce it later. Repeat it with the right side.
  7. Choose a strong root and use it to tie both loops together. Then, loop it around a new tie to reinforce it and attach better to the frame. Again, apply some tree sap to stabilize the new knot on the frame.
  8. Select two long roots and tie one of their ends around the knot on the pointy end of the frame. Tie their other ends to the central beam so that they are circa 5 inches away from each other.
  9. Now take three solid roots and tie them to the frame parallelly to each other and spaced evenly. Make sure they are tied around the perpendicular strings. Cover all the knots with sap.
  10. To finish off the construction, attach all the remaining spruce twigs weaving them between all the strings in the snowshoe frame.
  11. Repeat the steps 3 to 10 to make another snowshoe from the other sapling.
  12. Use roots to tie your boots to the central beams on the snowshoes. Enjoy!

A Few Snowshoeing Tips

People, who are not used to walking on snowshoes can get quite tired and suffer muscle aches for a few days after the effort. This activity puts a particular strain on upper legs and backside muscles.

It’s best to go easy for a few days at the start of a new season, to get used to long stretches of a demanding physical activity.

People, who plan their trips in advance would benefit a lot from strategically strengthening appropriate muscle groups in the gym and building up their endurance a bit.

These walkers who first cross through a vast area covered with fresh snow, need to put more effort to snowshoe through it. After being trodden a few times, a new path with a compacted snow appears on the surface and then it can be covered more easily.

When you walk with a group, it’s best to let most experienced and strongest snowshoers lead the team, occasionally shuffling their positions.

Snowshoeing and Ski Running

In some areas crossing the terrain on snowshoes was more popular, while in other regions, most local travelers used skis to move efficiently on the surface of the snow. There was a cultural preference for one type of gear or another, but practical reasons were quite essential as well.

Snowshoeing and Ski Running

Snowshoes served best in the flat areas covered with a deep, fluffy snow, while skis were used on hard surfaces like ice and uneven terrain, which required travelers to alternatively climb and move downhill. Today, one will often find parallel tracks for both modes of travel in many areas.

Some backpackers like to alternate both modes of communication and use each of them wherever it’s more efficient than the other one. For this purpose, it’s best to select snowshoes which can be attached to ski boots and backpacks.

As skis tend to be heavy, choose the lightest model to carry them around on your back. Of course, making simple DIY snowshoes is much easier than manufacturing homemade skis; if you need to improvise something quickly, go with spruce snowshoes.

Snowshoers, who come across ski tracks on the snow should stay away from them and produce their own path parallel to the other one. Moving on the ski track on snowshoes doesn’t provide any benefits to snowshoers, but makes the sport more difficult and annoying for ski runners.

A Necessary Gear and Its Maintenance

Traditional snowshoes made from wood and animal hides must be conserved frequently to keep them waterproof. Users typically sand them a bit and cover with a few layers of varnish.

Modern gear made from plastic and metal doesn’t require any particular maintenance. After the end of a season, walkers should clean and dry their shoes before storing them for the next winter.

As the frame of a snowshoe can crack during the travel, users should carry along special repair kits, which allow for splinting and fixing of damaged gear.

Snowshoes Maintenance

Most bindings are sold separately from snowshoes so that users can choose models most suitable for their purpose. Generally, bindings appropriate for uneven terrain are awkward to use during standard walks.

Many walkers like to use trekking poles to move efficiently. Some reuse their ski poles, while others prefer ones designed specifically for snowshoeing and featuring wider baskets. Trekkers using homemade spruce snowshoes like to use DIY poles made from tree branches.

Backpackers who travel over a pristine snow often use gaiters to prevent deep, fluffy snow from getting into their shoes. It’s best to have a carry bag, which can be attached to a backpack, for storing snowshoes during the camp.

As the sport takes place in the middle of winter, trekkers must remember to wear warm, dry clothes and take sufficient supplies for their trip.

Sports Events for Contestants on Snowshoes

Decades ago snowshoeing used to be connected with survival in the frozen wilderness. Later, the activity attracted many backpackers, travelers, and adventurers. Today, it’s becoming an established sports discipline.

Sports Events for Contestants on Snowshoes

Some consider it a winter equivalent of jogging and racing while taking part in multiple contests. Some of these sportsmen are runners, who exercise on track during warmer seasons; others exclusively stick to snowshoeing during winter.

Most of these championships take place in Canada and US, which are attempting to popularize this attractive sport.

People who like extreme sports often compete in winter challenges, which feature different disciplines. Typically, sportsmen who take part in such contest are expected to cross a long distance in the wilderness, using different modes of movement on various segments of the track. A winter challenge can include kayaking, snowshoeing and skiing.

Benefits of Snowshoeing

Snowshoeing is a physically demanding, yet attractive open-air activity, that helps people burn a lot of calories and maintain a fit shape. It appeals to many youngsters, who like the sense of adventure and companionship tied with snowshoeing trips.

This form of exercise can be quite enjoyable and provide unforgettable impressions to walkers. Backpackers, who visited a given area during a summer holiday, will be surprised to see how differently it looks during the winter when it’s covered with a thick layer of fluffy snow.

Many professional sportsmen, who take part in summer team activities, can get out of shape during a cold season. These players who manage to maintain their form during their months off to enjoy a competitive edge at the start of the next season.

Winter activities which can be done together integrate team members and improve their physical conditioning. Endurance sports such as walking on snowshoes and ski running, especially excel at this.

Benefits of Snowshoeing

Backpacking on snowshoes becomes increasingly popular as an attractive winter outdoor activity. Some people prefer brief walks, while others like to cross wide areas in the wild, carrying all the necessary gear on their backs and camping in the wilderness. Wanderers use different snowshoe models to comfortably move on the thick layer of a fresh snow. Some have acquired lightweight, modern aluminum or plastic shoes, while others prefer traditional wooden gear because of its stealth.

In a pinch, you can craft your own pair to use in an emergency. Everyone who likes to stay away from civilization during the winter season should know how to make simple snowshoes from spruce saplings. If you liked our article and would like to let your friends know about what you learned here, feel free to share it.

Best Types of Rope for Outdoors Use: The safest and Most Practical Ones

0
Outdoor rope types

The rope is an essential element of any survival kit or outdoors trip baggage. It can come in handy in a surprisingly large number of ways and is guaranteed to make your camping, hike or another adventuring more convenient. As a general rule; you can never have enough rope. We recommend you have at least some of a few different kinds on hand to ensure you’re covered for a variety of situations. From lifesaving river crossing rope to simple stringing rope for washing lines, the rope is an incredibly useful asset to take with you into the great outdoors. But what types of rope for outdoors use should you have stashed up?

In this article, we’ll explain the different kinds of rope and their uses to you so that you can create the ultimate outdoors pack. There is a wide range of rope choices available on the market today, many of which can be purchased both online and offline. We’ll give you a heads up as to what types of rope to buy for your own particular needs and situation. But first, let’s take a look at some of varying and fantastic uses of rope.

Handy Uses of Rope

These are just a few of the many uses that rope can have outdoors. There are dozens more that may come up in day to day situations out in the wild, but we can’t cover them all here. You are limited only by your imagination in terms of how rope can be used.

Handy Uses of Rope

Keeping good rope on hand will add a lot of convenience to your life. Some of the things it can be used for include:

  • Building a raft or flotation device
  • Creating a trip wire with a noisy can at the end to alert you of trespassers or dangerous animals
  • Hanging out for use as a washing line or food line to dry items on
  • Rappelling/abseiling down sheer cliffs (this should only be attempted by those who have been properly trained in rappelling and have the right equipment and rope strength)
  • Securing your items against strong winds by tying them down
  • Makeshift belt or shoelace usage.
  • Starting a fire by creating a rope bow drill for friction creation
  • Holding together bandages to create a makeshift tourniquet to help stop heavy bleeding
  • Hammock making (especially useful if there are insects, snakes or other undesirables crawling around on the ground)
  • Fishing net construction from smaller strands

Types of Rope

Now that you understand partly the many uses for and the importance of carrying a rope with you when you go off adventuring in the great outdoors, let’s explore the different types of rope available for you to choose from when stocking up your gear.

We’ve included a wide range of options here as we know there is a wide range of activities you may be interested in using them for. Also, you will learn about rope material properties and use cases for every type of rope described below.

Remember, it’s best to highlight about three or four different kinds that suit your needs (widths, strength, durability, etc.) and keep all of these in your pack for when you need them. Now without further ado, here are the main types of rope available on the market today:

Twisted/Laid Rope

This style of rope is aptly named as it is made up of multiple strands (usually three) twisted together like a spiral. As it’s made from polypropylene wire it is not necessarily the strongest rope out there, but it certainly has its uses.

Twisted Laid Rope

Aside from being very cheap, it also has other upsides, such as being impervious to water and sinking when submerged. Unfortunately, it does rot quickly, though and tends to be on the bulky side. We can recommend using it for fishing nets or fish traps as it works well under water and these are usually re-created quite often so the durability issue shouldn’t matter too much.

Also, it’s cheap, so you could make multiple fishing net traps at once, which is far more successful for catching fish in the wild. The durability does make it unsuitable for true survival situations or long-term use, though. Remember that you get what you pay for in the rope industry, and this is a cheap rope.

Sisal Rope

This natural fiber based rope is fantastic for using as a survival rope. It is made from the Agave sisalana plant which is popular for its stiff fibers and is used for making various ropes, cordage, rugs and other items.

Regular users of this rope are fans because of its relative cheapness and its ability to withstand salt water well – a rarity in rope types. It can be coarse in texture and is considered bulky, so it’s up to you how much the comfort of the rope feel on your hands means to you.

Sisal Rope

Clearly, it’s not the best option for the rope that you’ll be touching or tugging on a lot, but in terms of securing things, it’s high up there, especially in coastal environments with lots of sea moisture in the air.

A thinner version of Sisal rope is bailing twine. It is often used on farms for things like tying up hay bales because of its superior strength for such thin rope. To be specific, this thinner form of Sisal rope has about 350 pounds of breakage strength, which is very good for a cheap thin rope.

The only downside would still be the typical Sisal rope coarseness on your hands when handling it, and it’s lack of flexibility. Other than that, we’re big fans of the traditional sisal rope weather in it’s in its thick form or it’s bailing twine thin form.

Braided Rope

A fairly strong type of rope, braided rope is commonly used in marine applications. It is created by weaving fiber strands together in either a hollow or double braided form. The reason it is used in marine applications probably has something to do with its strength, which as mentioned is great when it’s relatively new.

Braided Ropes

This strength won’t last long though as braided ropes tend to rot quickly. They also usually have some stretching appear over time and don’t generally un-braid well. These latter two factors can be advantageous or disadvantageous, it all depends on what you want to use your rope for.

Climbing/Kernmantle Design Rope

Modern day ropes made for climbing are made in a design called “kernmantle”. This is the same design used to make parachute cords and is extremely strong. The “kern” in “kernmantle” is German for core, and the “mantel” part could be used to describe a jacket.

This makes sense when you look at the structure of the rope which has an inner core made up of many separate strands and then an outer layer which is highly resistant to abrasion. The outer layer helps to make the rope more durable and tear resistant by protecting the inner “core” of the rope.

Kernmantle Design Rope

We think you’d agree that durability is very important when it comes to climbing activities like abseiling. Kernmantle ropes can however also be used for activities other than climbing outdoors.

Their key selling points are the minimal (almost zero) stretch factor of the rope and its ability to carry heavy loads under stress. The only downside we could find: It’s expensive price tag and bulky form.

Guyline Rope

These interesting ropes are very different from regular outdoors ropes and are frequently called cords rather than ropes. Their main use is for securing tents or other items to the ground. Having some extra guyline rope in your tent bag can be very useful in case you encounter strong winds.

Guyline Rope

We can’t give you a lot of use ideas for this rope as they’re generally only used to ty things down in adverse conditions. They are relatively thin and strong enough to withstand the wind, but not much else. Guyline rope is perfect for keeping on hand, just in case.

Bungee Rope

Another type of rope that is commonly called “cord”, the bungee rope is extremely stretchy for a rope. It’s another name “shock cord” is commonly used when selling in the extreme sports market. The rope is made up of elastic strands in the center with an outer overlay of propylene or woven cotton.

Bungee Rope

We’d recommend this as a good packing rope. It can be used to lash things onto the back of your trailer or roof and even to hold tarpaulins over things at your camp. More of a good secondary rope than a primary one, it’s still useful to have around.

It shouldn’t be your only available rope at any point though as it is definitely too stretchy for some applications, comes only in short bits, and can rot quickly when exposed to the elements. It’s for holding things together, that’s all.

Tow Strap/Rope

We considered not including this one as it’s not actually a “rope” as per say, but it is so important to have on hand in many outdoors situations that we decided it really should be in here.

Tow straps are usually sold with the purpose of towing cars or vehicles around or for wrapping items to trees. If you ever get stuck in a muddy patch with your car or really need some help tugging something along, then having a tow strap on hand will be very useful.

Tow Strap Rope

Generally, if you’re in the business of hauling around boats, large animals or other super heavy items it’s a good idea to get a strap with about a 30,000-pound limit.

These may be slightly expensive, but they are a good investment for anyone going exploring with vehicles in the bush or greater outdoors landscapes.

Paracord Rope

Our top pick for survival rope, paracord rope is strong, lightweight and durable. Also known as parachute cord this rope comes second in usage only to duct tape (whose fame we shall never diminish). We recommend it for anyone going adventuring in any form outdoors.

A decent coil of paracord rope in your kit can see you through many different situations. It was used in WWII and has since become a commonplace item in both civilian and military operations. Unlike some of the other rope, types discussed this rope doesn’t mold or rot when exposed to the elements, a very useful asset in long-term survival situations.

Paracord Rope

It is, unfortunately, more expensive than regular rope but is well worth the investment because it will last for years.

The rope is made from nylon (a lightweight and strong material) using the kernmantle design talked about earlier. The genuine not “made in China” version of this rope generally has between seven and nine intertwined pairs of two in its inner sheath and braided nylon as its outer layer.

As a result of its design and materials paracord rope has a resilience, flexibility, and strength second to none. (It comes with a 550-pound official strength rating to boot.)

Finally, we’ll also note that this rope can be untwined and the individual strands can be used separately depending on your situation. So really if you’re able to swallow the greater price tag, this is the best rope to get for outdoors usage.

Choosing Your Rope

It’s extremely important to have a rope in the first place, and some will always be better than none, but choosing the right kind of rope for your situation can also make your life a lot easier.

We hope this article has helped to clarify the different types out there so you can make an informed decision when stocking up your outdoors kits.

A great combination of types is the tow strap, paracord and guylines ropes as these cover most of the major areas of rope application needs that you’ll come across.

Choosing Your Rope

That being said, Sisal is probably the cheapest and most varied forms of rope so it’s a great option for those on a tighter budget. It’s really up to you and your intentions for the rope to decide what the best type of rope for you is. Did we forget to mention any important uses for the rope that you’re thinking of? Let us know in the comments below.

To really complete your rope knowledge, we’d say investigate and learn a few good knots. Once you’ve practiced them a couple of times you’ll be an expert and able to truly use many different types of rope to your advantage. In the end, Franklin D. Roosevelt summed it all up very well with his infamous life advice:

Survival Water Purification: Techniques that Could Save Your Life

0
Survival Water Purification

When survival experts are asked what their top priority is when faced with an emergency survival situation, one answer always comes back first; water. It is important that anyone regularly exploring the bush can easily find and disinfect enough water to drink and utilize for wound cleaning or cooking should situations take a turn for the worse.

You never know when you’ll need these skills. So whether you’re anticipating a real life crisis situation, or just want to feel a little bit more like Robinson Crusoe, this article has everything you need to know about survival water purification.

The human body can only survive three days without drinking water. That’s not long at all so it’s fortunate that there is usually an abundance of water sources around – for those who know where to look. Unless you’re in the desert (and there are ways to survive that too) chances are there will be water around for you to use.

The first step in getting drinking water ready is to find a water source. Only after choosing a decent water source can you go on to utilize our techniques for water purification. So, how do you find one?

Selecting A Safe Water Source

Beggars can’t be choosers meaning that often you do not get a choice between water sources. But if your water is a dirty puddle or salty swamp, consider looking elsewhere for at least a little while before settling for what you’ve got.

Not Safe Water Source

Stagnant water sources that don’t run into any other waterway are usually the most rampant with nasty bugs. Your ideal find is a mountain spring. Barring that, flowing rivers are also usually pretty good too.

So take a look around, there may be a better water source than a puddle just around the corner.

The best way to find a water source is to use your basic senses of sight and hearing.

  • Sight: Try climbing to a high point to scan the landscape for any signs of waterways. Don’t climb a tree though as if you’re in a survival situation accidentally injuring yourself can be a fatal problem.
    Also, if you’ve already got a water source but are just scouting out for a better one, considering how much energy you’ll spend climbing that hill for the viewpoint.
    If it’s more than a couple of hours walk, wait until you’re well rested and have ample energy resources to complete the trek. In the wild, energy IS your currency. You pay the wild with it to survive. The wild gives it back to you in food and water.
  • Hearing: You can also try closing your eyes and concentrating on listening out for the sound of bubbling or flowing water.
    This works especially well if you’re in a densely forested area where seeing more than a few feet in front of you is nigh but impossible. Follow your ears to the nearest water source.

Should you be unable to find a river or a mountain spring, there are other options to choose from. You could try catching rainwater, sleet, snow or dew.

Fresh rainwater that hasn’t fallen through too many branches, and melted ice, are the only water sources that can usually be trusted to drink as is. The rest of your water sources ought to be treated as “non-drinkable” until you can disinfect them using any of the following survival water purification methods.

Techniques for Safe Drinking Water

UV Light Sterilization

Water in the wild is usually infected with thousands of micro-organisms. These micro-organisms are surprisingly badly affected by UV light which damages their DNA within just seconds of exposure.

UV Light Sterilization

There are a variety of devices available on the market that you can carry with you to emit enough UV light to sterilize water well. The best ones are battery free and power by your hand’s kinetic energy.

Opting for a kinetic energy-powered device instead of a battery powered one can seem more inconvenient, but it also means that you aren’t reliant on batteries which can run out. Kinetic energy can be counted on to power your device whenever you need it which is crucial in a survival situation.

Note: This method is best for clear water as water that has big obstacles in it (e.g. sticks) can provide shadows for micro-organisms to hide away from the UV light in.

Boiling Water

This age old trick is still the most reliable way to kill all the different bugs present in water. The high temperatures reached by water at the boiling point will eliminate almost all living organisms in it, especially if kept heated for eight to ten minutes.

Boiling Water

A good trick for those without a fireproof pot to hang their water over the campfire in is to heat rocks in the fire for 40 minutes and then place those rocks in your container of water. Remember that quartz and rocks from rivers will explode when heated, so try to find some inland “regular” rocks for this.

Note: Rock heated water won’t be as clean as water fully boiled, but it should still help a lot more than nothing. Also, do keep in mind that boiling water can’t get rid of chemical pollutions. But hopefully, if you’re close enough to civilization for chemical pollution to be a problem then you can find somebody nearby to ask for a drink.

Chemical Tablets

The easiest way to disinfect water is by using iodine tablets. These can be very useful to keep in your camping or survival kit and have a 99% effectiveness rate against water-based pathogens. Some tablets last longer than others so it’s important to read the labels when buying.

If you’re stocking up a cabin it might be worth paying a little extra for tablets that won’t expire within the next two years. Cheaper short-term options are also available for those just going out on a weekend camping trip.

Chemical Tablets

Having these tablets can provide wonderful peace of mind as you know that wherever you go, you’ll be able to create safe drinking water.

Note: Unfortunately, iodine tablets can be slightly toxic and produce a rather distasteful flavor. We do not recommend them for pregnant or lactating women, or anyone with thyroid issues.

Additionally, if your children aren’t used to eating, or in this case drinking, what they’re given, then they may throw up a bit of a fuss. There have been several cases of children becoming severely dehydrated from refusing to drink iodine cleansed water.

In order to avoid these issues, you could try the chlorine-based tablets which can take longer to work, but have a distinctly better taste. At the end of the day, they both do their job well, which is to provide you with clean drinking water wherever you are.

General Use Items

This solution follows on from the idea of using chemicals to purify water, only it’s not tablets we’re using here. Both bleach and iodine (commonly found in laundry kits and first aid kits) can be used to disinfect water.

In general, we would not recommend these options unless you are truly desperate for clean water. If necessary, you can add about four drops of bleach to a quart of cold water or two drops to a quart of warm water.

Clean your water with bleach or iodine

You will then need to put a lid on your water container and shake it vigorously for a few minutes. This should enable the chemicals to do their job and kill most of the nasty bugs within the water.

To use iodine, even fewer drops will be necessary – we are talking very minute amounts here. Make sure the iodine you’re using for drops comes from a 2% concentration bottle (iodine isn’t usually sold in its pure form).

Note: Don’t try this method unless you need to, and never use iodine and bleach mixed together to cleanse your water.

Distilled Water

When done properly, distillised water is the safest water cleansing method available. Water in the wild can contain lots of natural contaminants, the vast majority of which can be avoided via distillation. During distillation, water is heated to the point of evaporation.

The resulting steam is then captured in a container placed above the steam. Droplets will form on this container which can be placed at an angle so that the droplets roll down it and into another container.

Distilled Water

It can take a long time for drops to form a cupful amount of water. But if you’re patient, at the end of this very long process you’ll have a container of liquid gold. Many people choose to go away and do other things while their water is being distilled. Just make sure the fire heating your water is well contained and won’t go out while you’re away.

Note: Of course, like most decontamination methods there are particles that can get past the line of distilled water’s defenses.

These include a few volatile oils and organic compounds. Most of the big scary stuff should be filtered out, though. In general, distilled water is one of the safest options to use for water purification if you find yourself in a tight spot with lots of time.

Solar Water Disinfection

This water treatment method uses direct sunlight to disinfect dirty water. You can leave clear water bottles outside in the sun for at least one day and by doing so harness the sun’s energy to cleanse them.

Solar Water Disinfection

The UV rays of sunlight will severely damage and kill most of the bacteria and viruses in your water. This is definitely one of the easiest water purification methods if you find yourself in a sunny area. It doesn’t require any dangerous chemicals and can be left to complete itself while you tend to other survival necessities such as obtaining food.

Note: There is a 2 liter maximum per bottle amount of water than can be cleansed via sunlight at once, and this method doesn’t work for chemical cleansing. Nevertheless, provided you don’t have rain or overcast skies, cleansing water with sunlight is an easy and affordable option for water purification.

Filtration Straws

Filtration straws are a special, thin type of water filter recently released to the wilderness survival kit marketplace. They are designed, as their name suggests, to be used as a straw with which to suck up dirty liquid.

Filtration Straws

As the water passes through the straw it is filtered through an activated carbon filter element which cleanses the water of pathogens and bacteria. It’s that simple.

Note: Don’t expect filtration straws to filter out every single bacterium or virus as some may still get through. It’s best to opt for clear, cold water when using these straws in order to get maximum water cleansing effectiveness from them.

Water that’s been lying in a puddle all day and is warm is not the best choice for a water source when using straws as purification.

IV Bag

One of the main types of water filter used nowadays is the drip/suction filter. These filters pump water through a filtration cartridge.

They are likened to IV bags because many of them use gravity drip setups to work, though there are some that can simply be placed in the center of a hydration bladder hose.

IV Bag

The advantage of the hydration bladder hose alternative is that users can just suck the water through the filter like they would a straw.

The advantage of the alternative gravity fed system is that it can slowly accommodate and cleanse dripping water while you’re away, giving you an amazing fresh glass of water to come back to. These filters usually work by using ceramic filters to get rid of large pathogens, and then silver parts to kill or damage viruses and other microorganisms.

In terms of water flow, you’re looking at about a quart per minute. So you can’t shower with this. But you can definitely get a good drink.

These Methods Could Make All The Difference

Drinking water of questionable purity is definitely a high stakes gamble. Even when taken from clear springs, water can be infected with all sorts of microscopic horrors. Unless you are truly desperate, do not drink unprocessed water. If you can think of any ways to cleanse the water you should attempt these before giving in to your thirst.

Drink clean water

The above are a variety of tried and true water purification methods that you can choose from. This is an essential knowledge bank to have in order to stay alive in the wild. We recommend you pick a few that you can prepare for (e.g. purchasing tablets) before going out trekking.

What to Wear Hiking: Best Attires for Your Hiking Tour

0
Hiking clothes

If you are preparing to go out on a hike, you need to make sure you have the right gear and equipment such as maps, proper backpack, hiking boots, sleeping bags, and others. If you do not know what to wear hiking, your outdoor experience would probably be one you will not want to remember.

Putting on the right kind of clothes means being aware of the trail you will be on, the climate and temperatures of your location, and the duration you will be outdoors. Therefore, before getting dressed, you need to consider all these factors so as to make informed decisions.

Choosing Your Hiking Stuff

Regardless of where you are going, who you are going with, or how long you will be outside, the gear you select should meet these criteria: comfort, safety, style and versatility.

  • Comfort: Choosing a footwear or clothing item that does not fit you could be dangerous to your health. For instance, you may decide to compromise comfort for the price, which may end up leaving you with wounds and blisters which eventually get infected.
  • Safety: It is important to ensure that your hiking gear is safe for you. Your clothing and footwear should protect you from the environment. For example, a good rain jacket should be waterproof and windproof as rains are usually accompanied by strong winds.
  • Style: This is something most outdoor enthusiasts would probably not consider, but looking good while on the trail is not a crime as long as style does not top your list of priorities.
  • Versatility: If you have equipment that is functional and able to meet various purposes, then you have picked a winner. For instance, convertible pants can be transformed into shorts, making them ideal for warmer weather.

The Essential Gear

When planning to go for a hike, even on clear skies, we never start our journey without the right rain wear, gloves, extra clothing, and hats.

Hiking Essential Gear

Temperatures can drop fast, and you will need these attires to protect yourself. Here are some basic pointers on how to pack when going out for a hiking expedition.

Dress in layers

  • Inside layer: moisture-wicking fabrics such as Capilene or light wool
  • Insulating layer: Light pile or expedition weight long underwear
  • Outside layer: Waterproof and breathable fabric

Hiking boots

  • Do not purchase the classic leather boots as they are heavy for an entire day’s hike and are also difficult to break in
  • The best bet is the lightweight boots that have ankle support
  • The trail running boots are fine if you have no problem wearing them

Bear Protection

  • Do not bother with protection attires since your voice is already an effective deterrent
  • Bear spray is always good to carry
  • Best bet – hike with a pal and keep moderate noises and conversations going. Bears mostly attack people who travel solo.

Sun Protection

  • Carry sunglasses, sunscreen, and a lightweight brimmed hat for rain and sun protection. The tight weave hats provide more sun protection but are not breathable. Therefore, search for the vented wide brim hats. A hat of this kind will help protect both your skin and eyes.

Change of clothes

A change of clothes is necessary when you go out for a hike. Always remember to carry some extra pair of socks, and an extra upper body inside layer or an extra-long undershirt.

Advanced Gear

Thinking of going out for an extended hike? Here are some pointers you need to consider.

Zip-off leg pants

  • This is an excellent attire you need to have around when you are out for an extended hiking trip. If you get too hot or cold, you can zip the legs of the lower pants on or off in seconds – no need to look for a place to sit and remove the entire pants
  • These pants will also protect your calves when you walk through the bush

Gaiters (for the off-trail, hard-core hiker)

  • The nylon coverings can fit over the lower pant leg
  • Extra protection from sand, debris, and scrapes that could get into your boots
  • Excellent if it rains – twigs and ground brush can get messy and mushy fast
  • Are quite affordable

Hiking poles

Do not think of hiking poles as canes.

Hiking poles

Here is how you can benefit from using hiking canes.

  • Uneven terrain: Using poles on side hills and sloping terrain can help protect your ankles
  • Elevation: When going downhill, shifting your weight to these poles can help in protecting your knees
  • Whacking: Poles are excellent in helping to whack brush aside
  • An extra pair of feet: Poles provide stability so you can view the scenery ahead of you
  • Water crossing: The hiking poles can help probe the depth of rivers and streams before planting your feet into it
  • Shopping for poles: The aluminum poles are heavier and cheaper, but carbon may not be very durable. Poles that provide shock-absorbing capabilities can be instrumental if you are carrying a heavy backpack. Look for a pole that can collapse with ease and one you can fit into your bag without any difficulties.

Safety Plan

If you are planning to go for an extended hike, think about your techniques of communication before leaving. Here are some pointers to consider.

  • Do not completely rely on your cell phone as coverage tends to fluctuate especially when in the wilderness
  • Before setting off, call a family member or a friend. Let them know of the route you will be covering, the amount of food you will carry, and the day you expect to return
  • Carry a handheld GPS, compass, and map for emergency cases.
  • Satellite transmitters such as the Spot can be used to update your coordinates, allowing you to send for rescue.

What to Wear When Hiking

Materials

The best clothes for hiking are made of synthetic that help to keep you dry when you begin sweating while on the trails.

While you could be tempted to put on a soft cotton t-shirt, you should know that this is not recommended as it will trap moisture and sweat, remaining wet and creating a cooling effect. Apart from the aspect of poor comfort, a t-shirt will give you chills especially when you are heating up the mountain where temperatures are always low.

Techwick shirt

The best materials to use should be lightweight, soft, and moisture wicking. A perfect example is the Techwick which can be worn as a T-shirt or a skin-tight layer.

In addition to remaining dry, you will notice that synthetic fabrics such as the polyester create a breathability aspect, releasing pent-up heat and keeping you comfortable. A merino wool is also a suitable material which wicks sweat, but also eliminates odors. This material creates an excellent base layer in cooler conditions and an excellent choice for warm-weather hikes.

Moreover, you may opt for a long- or short-sleeve shirt, but this will depend on how hot the place is. However, it is imperative to remember that short-sleeves leave your body and skin exposed to the elements such as sunburn and tree or rock scratches.

Shorts and Pants

The choice to put on hiking shorts or pants is up to you. However, there are advantages and disadvantages of both.

For instance, short sleeves give you the freedom to move and are cooler than pants. Therefore, when you are planning to go for a low-altitude hike in the summer, you will definitely be in excellent shape.

Hiking shorts

On the other hand, pants, which are made of quick-drying and durable fabrics such as nylon and spandex (be certain to avoid cotton) should be worn when you expect heavy vegetation or a drop in temperatures along the trail.

Putting on pants will keep your legs protected from hazards such as allergenic plants and keep you warm if the temperatures begin to drop gradually.

Boots and Socks

When it comes to hiking, there are as many boots as there are trails, but whichever you select, you will need to ensure that it is comfortable, durable, and appropriate for the tasks ahead, and well-suited for the terrain.

If the trail is muddy or excessively wet, consider buying the Gore-Tex boots or any other boots made of waterproof material so your feet can remain dry throughout the hike. If you are traversing on a rocky trail, choose boots that rise slightly higher to the ankle for increased support.

Hiking Socks

Of course, a fit is everything when you are thinking of getting a footwear. The wrong shoes can leave your feet hurting and give you wounds or blisters. To find the perfect fit, you need to go to outdoor stores and try your preferred choices to see how well they fit.

The right socks should accompany the best boots. Like other garments, the best socks are those made of wool or a synthetic material that dries easily and allows your toes and feet to dry.

Rain Gear

Even when it is not raining, do not leave the house without a rain jacket. While outdoors, the weather can change drastically, so it is essential to have a breathable, waterproof rainwear inside the backpack. The advancements in technology have made it possible for these jackets to let sweat and moisture out and prevent the rain or other precipitation from getting in.

Rain Gear

Ponchos are also a good option for keeping you dry during an unforeseeable rainstorm, but they will not be as effective, stylish, or comfortable as the solid rain jackets.

Hats

To protect your head from harmful rays of the sun and keep the sun rays off your face you will need a hat for your outdoor tour. Some of the best hats are water-repellent, full-brimmed garments which are extremely breathable. A good hat can also keep the rain from coming into contact with your face in the case of a storm.

Layering

Before going out for a hike, always assume the temperatures would drop significantly, particularly if you will be going up in elevation. The best way for you to remain protected from the changes in weather is to utilize a three-layer clothing system.

Hiking Layering

As a base, put on a lightweight garment with moisture-wicking characteristics. In the case of chilly weather, pull a medium- or lightweight fleece out of the backpack, and utilize an outer shell to get rid of any rain or wind.

Picking Your attires According to Season

Most items mentioned here could end up in both the winter and summer groups. However, the items are essential for their specific needs as per the season.

All seasons

Clothes – regardless of the weather, put some layers of underwear in your backpack, with long and short sleeves. Underwear made of Polyester or Lycra would be your best choice as it keeps your body warm, letting the perspiration to evaporate unobstructed and allowing the skin to breathe. Even during the summer, you may experience some chilly nights thus the need for layers.

All seasons hiking clothes

Waterproof boots – You will need these kinds of boots regardless of the hiking season. Water is usually everywhere despite the weather specifics. In rainy seasons such as the autumn and spring, waterproof boots will protect you from the chilly condition, and guard you against potential frostbite.

Do not buy cheap boots since you may compromise quality for the price. Instead, ask for a reliable and durable all-season waterproof boots.

Another essential item is a water-resistant and a windproof jacket. In the wilderness, water elements can be unfriendly – excess rain, strong water currents due to melting snow, and too much humidity. Your best bet is the waterproof pants and jackets. Being windproof is also significant as a result of the wind chill factor which can lower the body’s temperature fast.

Summer

Clothes – Along with the essential underwear you carry for cold nights, you can carry a floppy tee that would enable your skin to breath. Do not wear tight clothes unless they are made from synthetic fabric.

This will make you feel hotter and would compromise your comfort making the trip undesirable. Also, carry a summer hat and a rim to create a shadow to protect you from the afternoon sun. Make sure that your hat has a flappy brim to cover your back, neck, and shoulders.

Hiking summer clothes

Boots – If you are going hiking in the mountains, you may come across some streams and rivers along the way. You are advised to put on some waterproof snickers or boots, but if you are very sure that there will be a few water sources or no rain, you may opt for your sneakers instead.

In that case, check your trail on the map to confirm if there are rivers, marshes, or streams along your track. Be prepared in advance by getting a reliable map for your backpacking tour.

A poncho would also be an essential gear to have during the rainy days. This may be a bit useless in the winter, but in any other season, it is an essential item and useful to have with you. It is imperative to protect yourself against the heavy rain or storm which may come as a surprise.

Winter

Clothes – Getting some wools clothes is the best way to keeping yourself warm. The cotton garments absorb moisture and sweat from the body and every time the skin feels the wet areas; you feel uncomfortably cold. Instead, wool garments are the best choice for winter hiking.

Additionally, wool can remain warm when wet. Even when exposed to moisture, wool dries up quickly. Moreover, it does not keep any smell especially for the woolen socks which are highly recommended.

Hiking winter clothes

Therefore, pack woolen clothes to wear over the underwear. The outer layer should be waterproof pants and jacket. Take some wool socks with you and always use a pair when sleeping. Carry enough so you may be able to use one each day while on your tour.

Of course, this list would be incomplete if you lack some pair of gloves. You may decide to carry several pairs and use them interchangeably. Go for a warm thin-layered pair, and also include thicker variants which are windproof and water-resistant.

In case you experience extremely low temperatures, you may decide to wear both the thicker and thinner pairs. This can also be an excellent way to keep your hands warm being exposed to the cold for an extended period of time.

What Have We Learned?

Always remember the basics of hiking gear selection and do not forget to apply them when picking your attires.

For example, it is common knowledge to know that cotton absorbs moisture. A moist cotton makes your body temperature to drop drastically than when you are not putting on anything. This will make you think about your health, safety and the choice of clothing you decide to select.

Hiking clothes

The style is a contributing factor when it comes to issues of comfort and safety. If you choose baggier attires, it may be difficult for you to move, or you may not get enough insulation against the cold.