Home Blog Page 18

Homemade Mosquito Repellent: A Guide to Your Mosquito-free Nights

0
Homemade Mosquito Repellent

Mention DEET in a place that is crowded and you are likely to get a response of various opinions about its health complications and toxicity. Against the background of these uncertainties, maybe the only certain thing is that people – parents or guardians of the young, in particular – have started to minimize their use of repellent products which contain harmful chemicals.

Recently, there have been a handful of mosquito repellents on the market, but most of them tend to be costly, making it impossible for the average person to afford. The good news is; it is possible to make your homemade mosquito repellent at a low cost and with locally available ingredients. The effectiveness of a homemade insect repellent relies on the essential oils, which can be utilized singly or mixed with several other products. Most essential oils are effective against pests. These include catnip, lemon, lemongrass, lavender, citronella, geranium, lavender, eucalyptus, and peppermint.
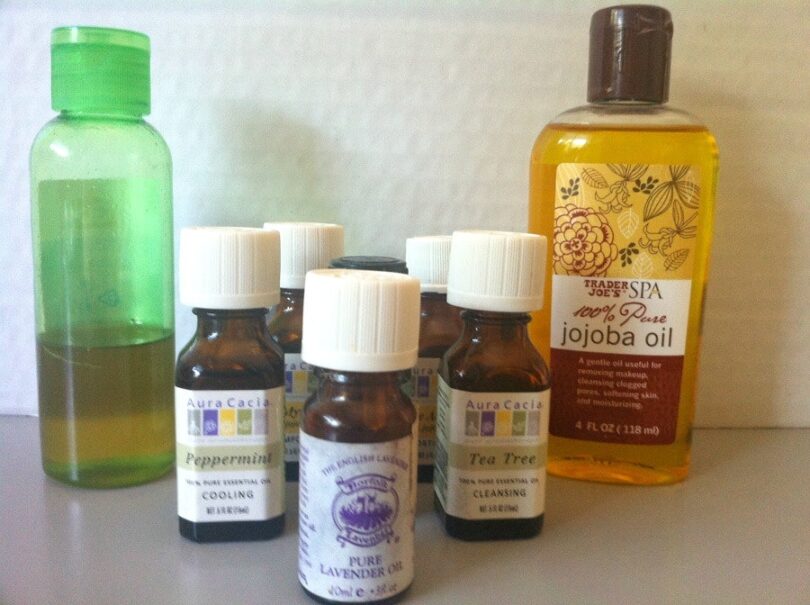
Insect repellents and oils

The choice of these oils depends on the kind of smell you prefer. Some individuals go to the extent of mixing and matching oils to come up with an appealing scent.

In case you want to experiment with various oils, you need to be careful so as not to create one that will be unpleasant to you. Some concoctions smell better than others – for example, lavender mixed with peppermint and geranium – while other combinations are just not meant to be.

What Is An Insect Repellent?

An insect repellent, also known as a bug spray, is a substance that is applied to the skin, clothing, or any other surface to discourage insects from climbing or landing on that surface.

The good thing about insect repellents is that they help in preventing and controlling the outbreak of diseases brought about by insects such as Lyme disease, malaria, bubonic plague, dengue fever, and West Nile fever. Animals which commonly act as disease vectors include insects such as a mosquito, fly, flea, and the arachnid tick.

For pests such as mosquitoes, repellents are any products that prevent their approach. The substance can be diverse and varied as coating, film, oil, spray, cream, and any powder that produces the same effect.

In addition to the irritation and unbearable itching caused by these insects swamping every night, they can be a reason for creating and spreading deadly diseases.

Some mosquito repellents are bug killers, but most of them merely discourage the insects and force them to fly away. The effectiveness of the repellents varies depending on the kind of material they are made from.
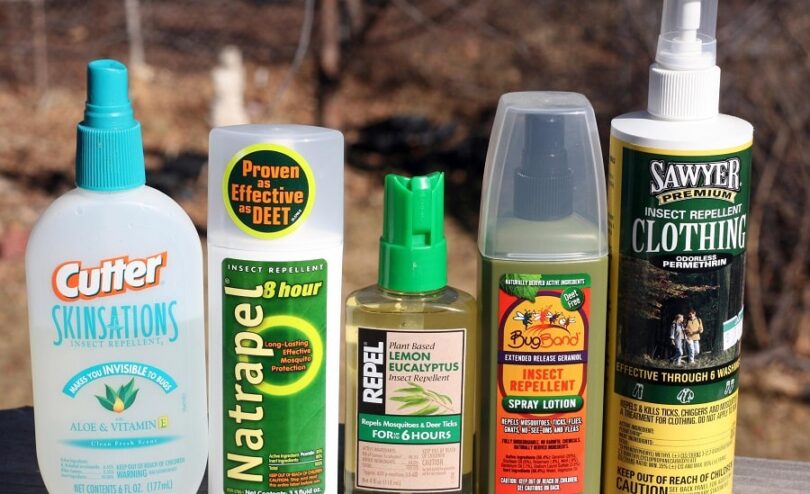
Insect Repellents

Mostly, the synthetic types are known to last longer than the natural kinds. The side effects of their improper use, as well as their risks, could be fatal in certain situations, hence the importance of storing and using the substances according to the instructions given.

In most cases, the mosquito repellent creams do not cause multitudes of side effects. However, if the substance is a multi-purpose product that is used in keeping off bugs and ants, the level of toxicity increases. For that reason, it is important to read the label of the repellent you buy before you can start using it.

Despite whether you reside in areas far away from stagnant water, waste products, or open garbage, you need to remember that pests, especially mosquitoes, can come from any region. Allergic reactions such as rashes and itching are the initial signs of a mosquito bite.

For that reason, you need to watch out for these signs so you can recognize the problem. Acknowledging the existence of mosquito menace is the first step to controlling their population.

Synthetic And Natural Mosquito Repellents

Mosquitoes suck, literally! And for a mosquito magnet, it is easy to attest to the fact that itchy and bumpy skin can be frustrating. People are often prone to bites as a result of light, scent humidity, and heat.

Different mosquito species – such as the ones causing malaria – prefer sweat and bacteria. Others are attracted to hand odors and carbon dioxide. Despite the variation in their source of attraction, you need to know how to deal with these insects when the need arises.
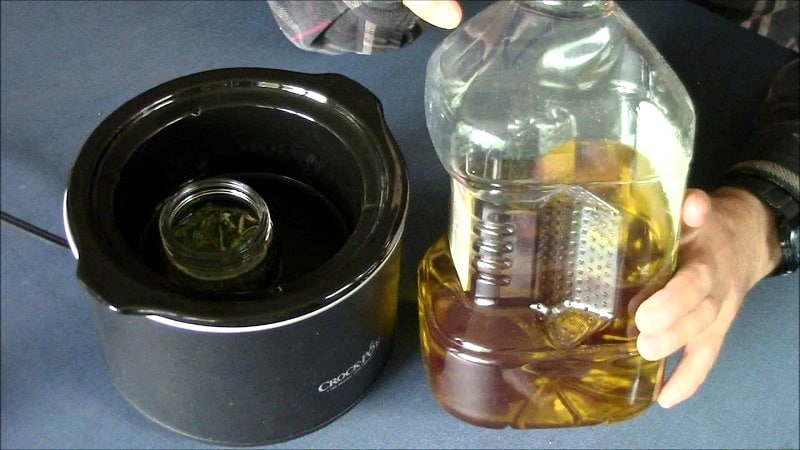
Making Natural Mosquito Repellents

The various kinds of repellent in existence today include the synthetic and the natural repellents.

Here are some of the natural sources that have been used in creating mosquito repellents. The most common ones include:

Thyme oil

Thyme oil is an excellent product that offers protection when it comes to preventing and repelling mosquitoes. In a particular study, hairless mice had five percent thyme oil smeared on their skin, with a ninety-one percent protection rate.
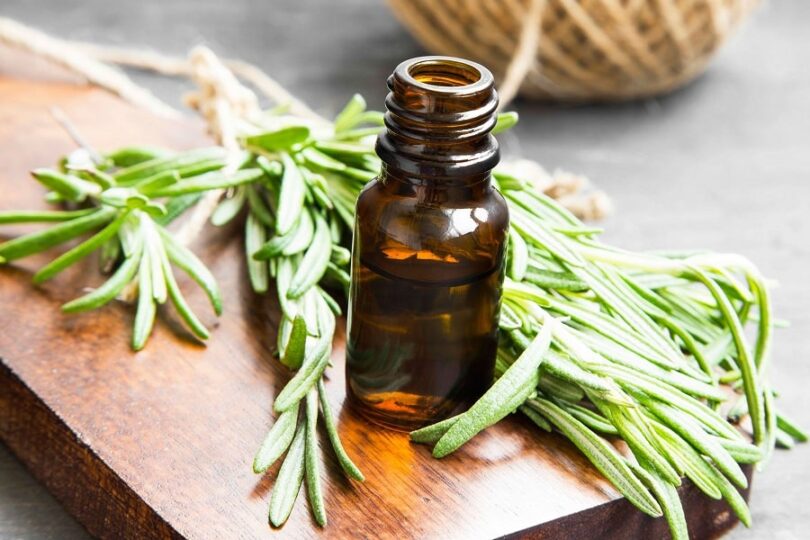
Thyme oil

For your homemade brew, put four drops of this oil to each teaspoon of the base substance, such as jojoba or olive oil. For a spray, combine five drops of the thyme with two ounces of water and your product is ready to go!

Greek Catnip Oil

The Nepeta parnassica is a species of the mint family relating to the catnip that can repel mosquitoes. The pink and white flowers tend to grow up to eighteen inches, but it is the oil and extract from the leaves that is most valuable.

A certain study established that oil from this plant could repel mosquitoes successfully for about three hours. Moreover, a group of researchers at Iowa State University determined that catnip was ten times more effective compared to DEET when it came to repelling mosquitoes.

Soybean Oil

Soybean products such as the Bite Blocker for Kids, which is two percent soybean oil, can offer long lasting protection against mosquitoes compared to the citronella-based products. Citronella is a common ingredient used as an insect repellent.

Soybean Oil

In addition to the soybean oil, you can add some lemongrass oil to the home mixture. This blend has been tested to protect against various mosquito species. It is a powerful and effective mixture which can help keep out the mosquitoes.

Cinnamon oil

This substance is more than just an excellent topper for oatmeal or applesauce. According to research conducted in Taiwan, oil from cinnamon can be used to kill mosquito eggs. Additionally, the oil can be used as a repellent against mosquitoes, especially the Asian tiger.
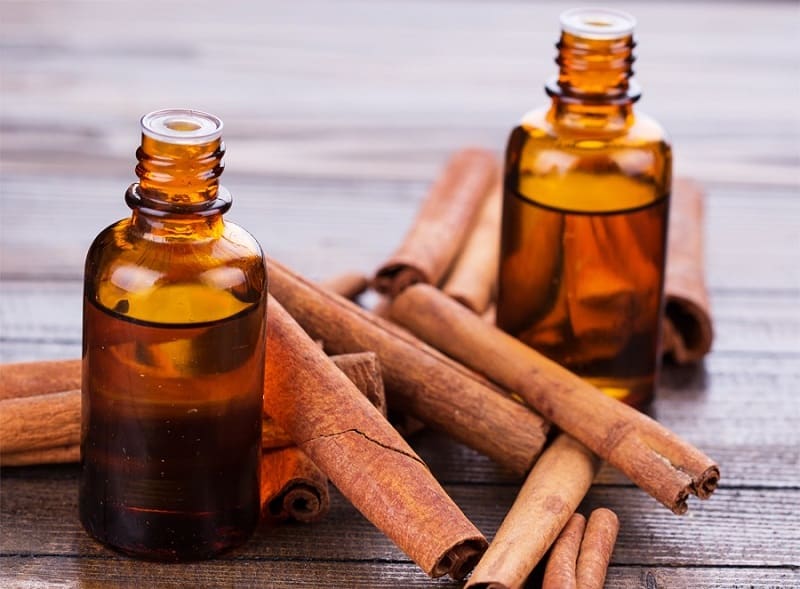
Cinnamon oil

A concentrated amount of cinnamon oil on the skin can be quite irritating, so it is advisable to be careful to avoid this problem with your skin.

To create a diluted one percent solution, mix 24 drops or a quarter teaspoon of oil for each 4 ounces of water. The liquid can be sprayed on your clothing or skin, around your house, and on plants.

Lavender

Lavender flowers that have been crushed can produce oil and fragrance which can be used to repel mosquitoes.

You can grow this plant in indoor planters or outside garden. Crush lavender flowers and smear the oil to areas that are a bit sensitive, such as the arms and ankle. Alternatively, you can drop portions of the oil on a clean fabric and rub it on your skin.
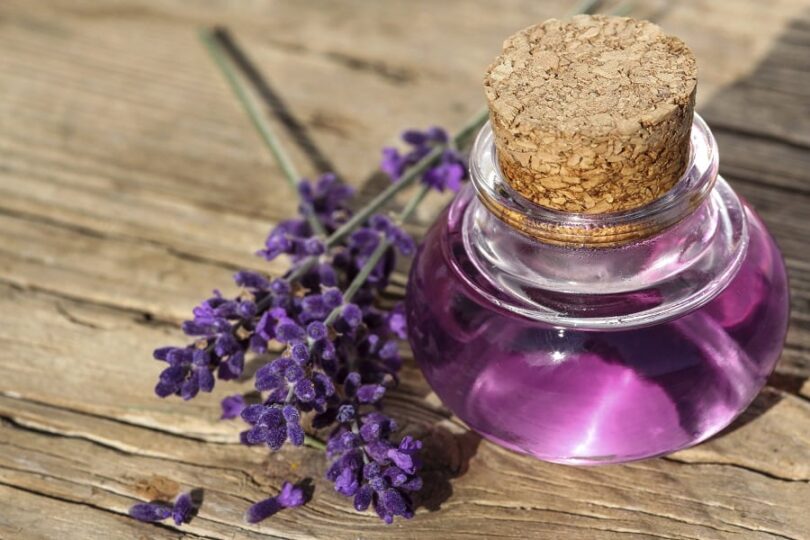
Lavender

You should also remember that lavender has antiseptic and analgesic qualities. This implies that in addition to repelling mosquitoes, it soothes and calms your skin.

Lemon Eucalyptus Oil

This product is one of the most well-known natural mosquito repellents. The (Center for Disease Control and Prevention) has approved the use of eucalyptus oil as a successful repellent.

A recent research revealed that a combination of thirty-two percent lemon eucalyptus oil offers more than ninety-five percent protection against mosquitoes.
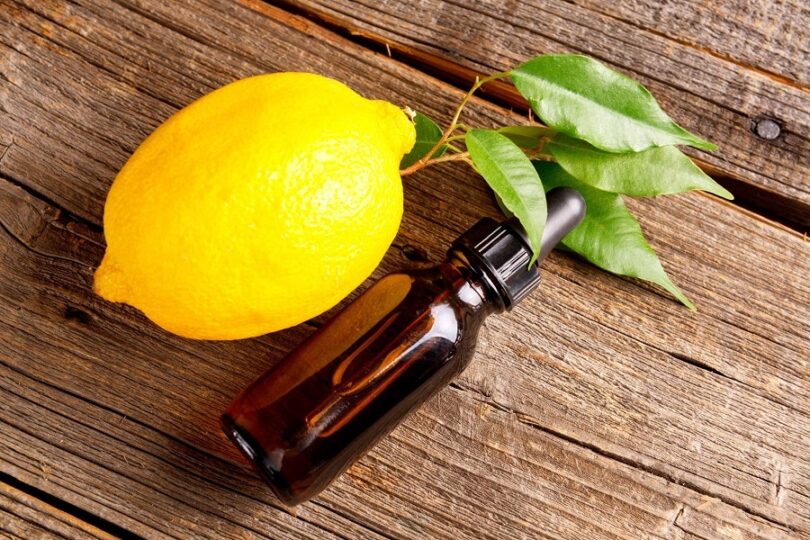
Lemon Eucalyptus Oil

You can make your mixture using a combination of lemon eucalyptus oil and with hazel or sunflower oil.

Other natural mosquito repellents

Other natural sources that can be used as a mosquito repellent include:

  • Alpha-terpinene
  • Achillea alpina
  • Breadfruit
  • Carvacrol
  • Castor oil (Ricinus communis)
  • Cedar oil
  • Celery extract
  • Oil of cloves
  • Garlic (Allium sativum)
  • Fennel oil
  • Lemongrass oil
  • Neem oil
  • Peppermint (Mentha x piperita)
  • Pennyroyal (Mentha pulegium)
  • Rosemary (Rosmarinus officinalis)
  • Spanish Flag (Lantana camara)
  • Andrographis paniculata

The substances used in synthetic mosquito repellents include the following:

  • SS220
  • Permethrin
  • DEET (N,N-Diethyl-m-toluamide)
  • Ethanehexanediol
  • Metofluthrin
  • Icaridin
  • Tricyclodecenyl allyl ether
  • Dimethyl carbate

A Step By Step Guide To Your Homemade Repellent

It is easier to keep mosquitoes out with homemade remedies. You don’t need to spray yourself from your toes to head with toxic substances to avoid getting a bite when you are outdoors.

In most cases, mosquitoes are sensitive to specific scents, and if you are aware of what scent to use, you will be able to keep them far away from you.

Basic steps to mosquito control

What you will need

  • Catnip
  • Marigolds
  • Rosemary
  • Lemon eucalyptus
  • Fabric softener dryer sheets
  • Citronella candles
  • Plastic spray bottle

Instruction:

  • Plant catnip, rosemary, and catnip in your garden or around your home. These plants emit odors which are unpleasant to mosquito helping to keep them away
  • Pin different fabric softener dryer sheets on your clothes while outside. These sheets help in repelling mosquitoes
  • Rub yourself using eucalyptus oil. This can be obtained from a food retail outlet. Put 5 drops of this oil into a cup of water and put the combination in a spray bottle. Give yourself a few sprays before stepping out. The scent of the eucalyptus oil will keep the mosquitoes away.
  • Light citronella candles in and around your home during the night. The scent of the citronella is unpleasant to mosquitoes. Make sure you make a ring of lit candles around the place you are planning to spend your night.
  • Eliminate all sources of stagnant water around your home. Mosquitoes use standing water as a breeding ground. A small planter pot that is left outside and contains rainwater can be an excellent breeding ground for mosquitoes and should, therefore, be removed.
  • Place mosquito netting around the area you are planning to spend your night. A mosquito netting can be obtained from any camping or sports supply store. These have thousands of holes which are big enough to enable you to see out but too small to allow mosquitoes to fly through.

Tip – When you get bitten by a mosquito, home remedy options can be used to treat the bite. An effect process would be to spray some hair spray on the bite. This technique will help stop the itching.

Herbal insect repellent made from essential oils

What you will need:

  • Distilled water
  • Empty, clean spray bottle
  • Rubbing Alcohol, Witch Hazel or Vodka
  • Essential oils
  • Rosemary (5 drops)
  • Mint (10 drops)
  • Lemon (citronella) (10 drops)
  • Eucalyptus (5 drops)
  • Clove (5 drops)
  • Lavender (5 drops)

Instructions:

  • Fill the spray bottle 3-quarters with witch hazel or alcohol.
  • Add the essential oil drops
  • Add distilled water
  • Shake before use

Insect repellents made with herbs

What you will need:

  • Rubbing Alcohol or Witch Hazel
  • Empty, clean jar with lid
  • Herbs: Eucalyptus, Mint, Lemon Grass, Lemon Balm, Catnip, and Lavender

Instructions:

  • Chop the herbs and place them in the glass jar as full as possible
  • Cover the herbs with witch hazel or alcohol, leaving a half to three-quarters space at the top
  • Seal the products with a tight lid
  • Place the glass jar in a sunny location for about two weeks
  • Try to shake the mixture from time to time
  • Strain the herbs and transfer the liquid mixture to a spray bottle
  • Your repellent is ready for use (shake before use)

You can watch instruction on making natural insect repellent in the video above.

Mosquito repelling bands

Many techniques can be used to make mosquito-repelling bands which can be dipped in your liquid homemade repellent oil, cream, or spray to create a long lasting effect on the mosquitoes.

Wearing a wristband that has been treated in a similar manner can help keep away mosquitoes. A treated woolen wristband can also be helpful in keeping fleas away from your pets.

Tips For Getting Rid of or Avoiding Mosquitoes

Tip 1: Avoid mosquito peak hours

Most mosquitoes feed at dusk and dawn, and some hours into the night. However, some species feed throughout the day.
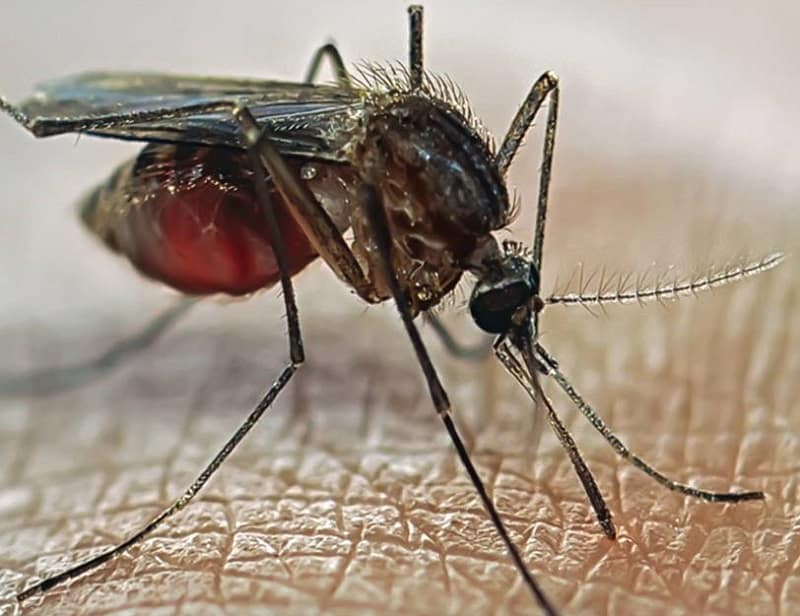
Avoid mosquito peak hours

To minimize the risk of being bitten, avoid the mosquito peak feeding times.

Tip 2: Put on light clothing

Dark outfits are more attractive to mosquitoes compared to light clothing. Why? Mosquitoes find it problematic flying even in places with a slight wind; therefore, they remain close to the ground.

While close to the ground, they spot hosts by comparing silhouette to the horizon. Light colors blend in while dark shades stand out.

Tip 3: Treat or remove standing water

Mosquitoes complete three phases of their cycle (egg, larva, and pupa) in water. Stagnant water should be left standing for at least four days to support the life cycle of a mosquito.

Treat or remove standing water

Getting rid of potential mosquito breeding grounds is one of the most efficient processes of reducing their population.

  • Treat the water using mosquito dunks. These substances slowly release BT in the water. This component is usually toxic for mosquitoes but safe for humans
  • Get rid of objects that could aid water collection
  • Place screen with tiny holes over the rain barrels
  • Use a fountain or pump to aerate water
  • Replace the standing water in bird baths or pools every week

Tip 4: Create a habitat for mosquito predators

Create a conducive environment for natural predators of mosquitoes, so you can reduce or eliminate their population. This can include:

  • Frogs
  • Bats
  • Turtles
  • Fish
  • Birds
  • Dragonflies

Build a bat house, hang bird feeders, invent broken terracotta pots for frog houses, and include some fish pond.

These amazing creatures can help control the mosquito population. And what is exciting, these are all natural ways to keep control mosquitos from breeding and multiplying.

Safety Tips for Using The Mosquito Repellents

There are a number of safety measures you need to consider while using any kind of mosquito repellents, so as to avoid subjecting yourself and those around you to harm.
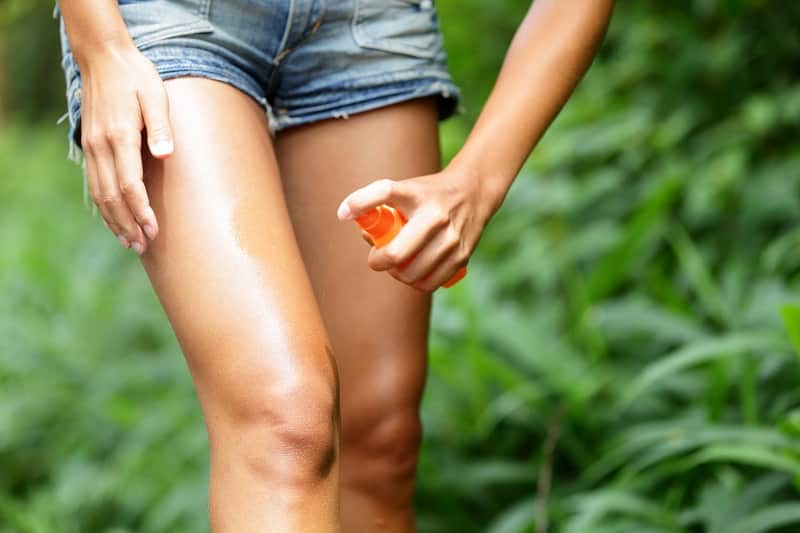
Using The Mosquito Repellents

The most common measures include:

  • Keep the products out of children’s reach
  • Mosquito repellents should not be used in the vicinity of expectant women
  • Do not apply the products on wounds or abrasions
  • Repellents are for external use only
  • Avoid using on rashes unless they have antiseptic properties
  • Do not inhale the mosquito repellents for long hours
  • Read instructions before use to prevent any health risks of complications

Final Words

Now that you know how to make mosquito repellent, we hope that it will help you enjoy your outdoor events with the least damage from the bloodsuckers. Although there is a myriad of repellents on the market, picking one that would be effective is the right choice for keeping mosquitoes off.

On the other hand, making your own natural insect repellent would be an ideal option as this would help prevent the side effects of chemicals from the synthetic products. Most synthetic insect repellents are known to be harmful as they cause respiratory illness and interfere with the ecosystem. This is why it is always advisable to use natural methods for preventing and controlling the mosquito population.
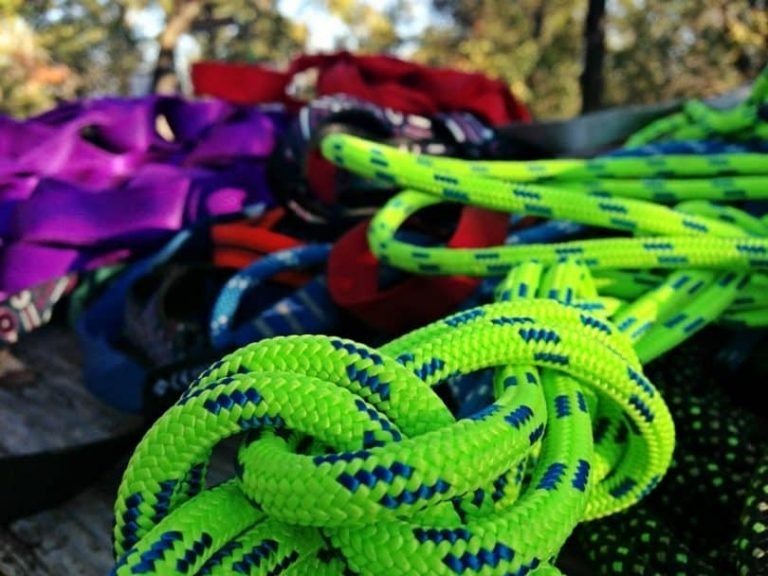
How to Choose Climbing Rope: Make Your Knots Count

0
climbing rope guide

When it comes to hiking, some people just can’t resist the thrill of climbing the more difficult terrains. This is more than just a rocky slope towards a summit; the real challenge is getting to the top of a rocky cliff after a hard day’s work and celebrating your victory. But you can’t do that if you don’t have the right kind of climbing rope.

They may seem the same to you, but there are a lot of different features to rope that you may not be aware of. That’s why knowing how to choose climbing rope is not only vital to enjoying a good day of rock climbing, but it could mean the difference between life and death.

Features to Consider

When you’re shopping for climbing rope for the first time, you should keep four important features in mind so that you can compare and ensure that you’re getting exactly what you’re looking for.

Man climbing with rope

These are:

  • type of rope: comes in single, half, twin, and static
  • diameter and length: this affects weight and durability
  • specific features: these not only improve upon the use of your rope, but help you understand it better as well
  • safety ratings: this is important when you’re considering what kind of climbing you’re interested in

If this is your first time climbing, then it’s best to see the expertise of a professional to help you pick out the right rope. After all, your personal safety is in your own hands.

Types of Rope

Including the types mentioned above, they can be further divided into static and dynamic ropes.  Static ropes are what their name suggests, and are really made to be used on their own. They have less give than dynamic topes, and so are not suitable for top roping or lead climbing.

climbing rope 105mm static

Dynamic ropes, on the other hand, are constructed to stretch in order to absorb the impact of a climber who is falling.

Dynamic ropes come in three different kinds:

  • Single: if you’re going trad climbing, big wall climbing, sport climbing, or top roping, then this is the right rope for you. The term “single” means that the rope is designed and constructed to be used without any other rope. It’s available in a wide variety of lengths and diameters, so they’re more versatile than other ropes and make them the most popular.
    And because there’s only one rope to worry about, it’s much easier to manipulate than a two-rope system. Some brands of single ropes have been dually rated as twin and half ropes so that they can be used with other climbing techniques. You can identify a single rope by the “1” on each end.
  • Half: work well in trad climbing on multi-pitch routes, ice climbing, and mountaineering. When using half ropes, two ropes are used and they are clipped together for protection.
    This way, you can limit your rope dragging when you’re climbing meandering routes. The method does require some practice, however.
    Half ropes does have a few pros and cons that you should be aware of.

    • Pros: as mentioned before, it reduces the amount of dragging rope; you can rappel faster with two ropes than you can with a single rope; if one ropes gets damaged, you’ll still have a backup to prevent you from falling
    • Cons: more effort and skill is required than using a single rope; combined weight is much heavier than single ropes

    When using half ropes, matching pairs should be used; don’t mix up sizes and brands, as this can lead to terrible results. You can identify half ropes with the circled 1/2 at each end.

  • Twin: they work in a two-rope system, but what makes them different from half ropes is that they are always clipped together for protection. This leads to more rope dragging behind you than half ropes, so it is better suited for routes that don’t meander too much.
    Twin ropes are thinner as well, so they’re easier to carry and will be less bulky in your backpack.
    Twin ropes also have their own pros and cons to consider.

    • Pros: you can rappel faster with two ropes than you can with just one; if one ropes gets damaged, you’ll still have a backup to prevent you from falling.
    • Cons: more effort and skill is required than using just one; despite it’s reduced weight, it is still a bit heavier than just one.

    The same can be said for twin ropes: don’t mix up sizes and brands. You can identify twin ropes with this symbol (∞) at each end.

Rope Diameter and Rope Length

It’s a given than a thinner rope is a lighter rope, but it can mean that it is also less durable.

climbing rope ticker diameter

Thicker ropes, on the other hand, are more resistant to abrasion, allowing you to belay that much more safely, especially if you use it very frequently. The diameter of your rope is going to dictate which activities you’ll be engaging in.

  • single ropes with a diameter up to 9.4 mm: the smallest of the climbing ropes, this kind of rope is extremely light and is very good for long climbs with multi-pitches, where how much weight you carry is important. A rope this thin, however, is not equipped to handle as many falls as a thicker rope. They can move more easily through the body of a belay, but they’re not well suited for sport climbs or top roping.
  • single ropes with a diameter 9.5 to 9.9 mm: this kind of rope is good for a wide variety of climbing types, and are very light, so they won’t weigh you down as you hike. They’re also hardy enough to be used in top roping on crags.
  • single ropes with a diameter 10 mm +: these are great for gym climbing, sport routes, big wall climbing, and frequent top roping. Their increased thickness makes them more durable for these kinds of events.
  • twin and half ropes: half ropes are generally 8 to 9 mm; twin ropes are typically about 7 to 8 mm.
  • static: usually about 9 to 13 mm, but are more commonly measures in inches; 7/16″ is the standard measurement for static ropes.

Now that the importance of the diameter has been discussed, it’s time to talk about the length of your climbing rope.

The length if your rope is determined by what kind of activity you’ll be engaging in. In general, dynamic ropes can be anywhere from 30 to 80 meters; 60 meters is considered to be the standard.

Outdoor climbing ropes need to be long enough so that 1/2 of its length is the same or greater than the distance of the route you’ll be climbing. Indoor climbing ropes, on the other hand, are a lot shorter, around 35 meters long.

climbing ropes ready to use

They are used for gym climbing, and should still be long enough to lower the climber to the ground. Static ropes are required in a variation of lengths. They are sold in measurements of feet so that it’s easy for you to get exactly the length required for your climb. If you’re not sure of the length, it would be best to consult experienced climbers as well as a guidebook for recommendations.

Specific Features

These features can make all the difference in the world when you’re comparison shopping for climbing ropes that suit your needs. They can improve your performance, and make your ropes much easier to use.

  • Dry treatment: ropes are slightly porous, and when they get wet, they can become very heavy. Moisture almost makes them less capable of withstanding the forces associated with a fall, and climbing in cold temperatures can make that even worse.
    It will freeze any water that gets inside your rope, making it extremely stiff and hard to work with. For this reason, many ropes are now dry-treated to prevent it from occurring. However, this makes the ropes more expensive.
  • Middle mark: this is a simple mark, usually made with black dye, to indicate the very middle part of the rope. This is essential for those who are rappelling so that they know how much rope that have left.
  • Bicolour: bicolour is more than just the use of two colours. A change is made in the weave pattern of the rope that separates the two halves, and makes it easy to determine where the middle of the rope is.
    This is an alternative to the black dye mark, but is also a bit more expensive. However, black dye can fade over time and disappear, so it’s best to have an identifier that will last through exposure to the elements.
  • End warning marks: black dye or thread is usually used to indicate that you’ve reached the end of your rope. This can be very useful to have when you’re rappelling or lowering a climber to the ground.

These features are intended for safety purposes, and should definitely be considered. Die hard climbers should definitely invest in the more expensive options, especially if they see themselves hiking on a regular basis and on very rough terrain. If you’re only planning to do indoor climbing, however, you may want to invest in the more affordable options.

Safety Ratings

The last important feature to consider is the safety ratings. There’s literally no reason to trust your life to a climbing rope that has little to no safety ratings whatsoever. The safety standards for climbing ropes were developed by The Union Internationale des Associations d’Alpinisme, and all climbing topes are tested in independent labs to ensure that they meet these standards.

testing ropes for climbing

For all dynamic ropes, the packaging will list what the results of the tests are, and include numbers for fall rating, static elongation, dynamic elongation, and impact force. It is these ratings that will help you determine the best climbing rope for the kind of climbing you’ll be engaging in.

  • Fall Rating: this is the number of falls a rope can withstand before it fails entirely. Lab tests use much greater force than what would occur in a real world fall, so you can rest assured that these ropes are durable.
    Single ropes undergo a 80 kg weight being dropped onto them and must withstand at least 5 falls; half ropes use a 55 kg being dropped on a single strand and must withstand at least 5 falls; twin ropes use a 80 kg being dropped on two strands, and must withstand at least 12 falls.
    Any ropes that meet or exceed these minimums are considered safe to be used for climbing. However, it’s still important to always check your rope for damage after a fall, just to make sure. Replace it if you notice any damage.
  • Static Elongation: another term for this is working elongation. The number refers to the amount of stretch a certain dynamic rope has with a weight of 80 kg tied to one end. For twin and single ropes, the elongation cannot exceed ten percent, while half ropes cannot surpass twelve percent.
    These are important figures for those who are interested in top-rope climbing, carrying gear, and climbing with the use of ascenders on fixed ropes.
  • Dynamic Elongation: this is the measurement the rope stretches during the first tested fall. Lower numbers are better, because this means that climber that is falling won’t hit the ground or a ledge. However, a lower number also means that there is more impact to the climber, the belayer, and the gear. The UIAA only allows for a stretch of no more than forty percent.
  • Impact Force: this is measure in kilonewtons, and refers to the amount of force placed on a falling weight in the first test fall. This number is directly related to dynamic elongation (lower impact number means higher dynamic elongation), so a fine balance needs to be struck between the two.
    A lower impact force number, the less force there is on the climber, belayer, and gear. This provides a softer landing when a climber falls. However, that means a much greater stretch on the rope. For this reason, ropes with low impact force numbers are not suitable for top roping.

So how do you go about putting all these numbers together to get the right climbing rope for you? One way is practice. Another is speaking to a professional in the sport or someone who is familiar with the gear at a sporting goods store.

man climbing rope

Getting as much assistance as you can is better than trying to figure it out for yourself, because if you get it wrong the first time, you may never have the chance to make another mistake again.

Climbing in the great outdoors can be quite dangerous, so it’s important that you reinforce your safety as much as possible with the right kind of gear. It’s a lot of information to take in, but once you’ve learned the differences and know what to look for, you’ll soon become a natural.

Hiking First Aid Kit: List of Medical Essentials

0
Necessary hiking first aid kit items

A hiking first aid kit is essential to your enjoyment, and survival when you hit the trails. There are so many different and wonderful places to explore but you don’t want to get caught out there in the wilderness without the necessary tools to handle a medical emergency.

It is easy to purchase a pre-packaged first aid kit at your local pharmacy, but if you are hiking more than a few times a month you may want to consider building a more complete kit yourself.

It isn’t that the store-bought kits aren’t good, but you will find that there are some ingredients you can add to a homemade first aid kit that the stores would never think of because they simply don’t have your type of trail in mind.

hiking first aid kit items

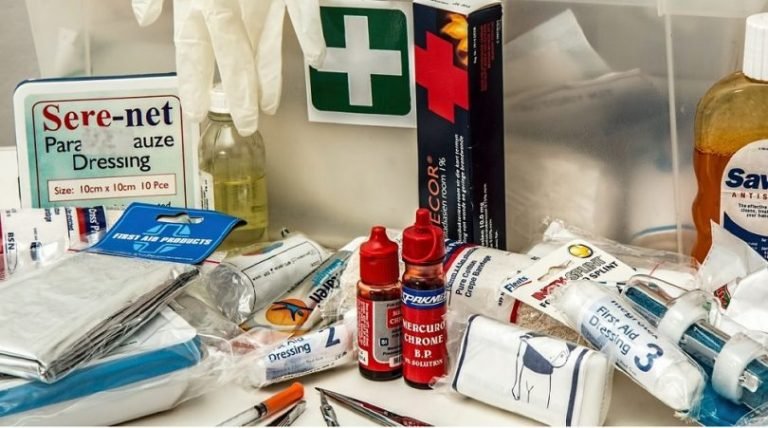
Everyone’s first aid kit will differ depending on their medical conditions and needs. However, here are the most common (and most necessary) pieces you need in a hiking first aid kit. Be sure to add them to your survival kit as a foundation.

  • Tweezers. If you get stung by a bee, hit in the face with a tree branch or anything foreign gets stuck under your skin you will need a strong pair of these.
  • Multi-Purpose Tool. If you have to administer first aid to yourself or a member of your hiking party you will need to have a multi-purpose tool on hand. A basic Swiss Army Knife should suffice as it will include everything you need to cut dressings, prepare a bandage or splint, etc.
  • Irrigation Syringe. A 35 cc syringe should be large enough for wound cleaning. Additionally, you may want to consider purchasing a suction syringe as well, to clear out the mouth before performing CPR.
  • Safety Pins. These are great for just about everything. Don’t hit the trail without a few different sizes of these great multi-purpose fasteners.
  • Bandages. You need to have a variety of bandages in your kit that will be there incase of many different types of wounds. Include small Band-Aids, larger gauze pads, and of course butterfly bandages incase you have a large, open would out there in the wilderness.
  • Medical Tape. In the event that you need to splint a broken limb, or create a large bandage you will need to secure it around the area with sturdy medical tape.
  • Electrolyte Powder. The human body can only go between 8 and 10 days without water. In the even that you get stuck out in the wild without supplies, you may not survive. Always keep a pack of electrolyte powder in your first aid kit. It will help maintain essential minerals in the body to help stave of dehydration.
  • CPR & First Aid Guide. Hikers travel in packs. If you are going out with a friend, or a group it is easy to print out a simple CPR & first aid guide. Just find one online and print it out to have in your first aid kit. These types of guides include vital information that may save the life of a hiker in your group. Just be sure to choose one from a reliable source like the American Red Cross.
  • Eye Wash. Your eyes are very sensitive and can easily get in harms way. Protect them with UVA/UVB protective eyewear and always keep an eye wash in your first aid kit. Oftentimes, you can avert long-term damage by rinsing your eyes with a dependable wash.
  • Prescription Medications. If you currently are taking a prescription medication, you need to remember to pack a few of those pills in your first aid kit. You never know when you might need them and it’s always better to be safe than sorry.
  • Magnifying Glass and/or Mirror. Ideal for starting a fire and signaling for help as long as the sun is shining.
  • Paper & Pencil. If there is an accident out on the trail, you may want to write down a few details about what happened to review later. Always keep a small pad of paper and a pencil in your first aid kit. Pencils are superior to pens because temperature and other elements can affect how well they work.
    Pack a lotto pencil and a small pad to document any injuries, medicines administered, pulse, time and the date of accident.
  • Organizational Tools. All of the items in your first aid kit are important but it is also important that you protect what is inside with waterproof packaging. Pick up a few locking plastic baggies to house and organize the contents of your kit.
    Adding labels to the baggies is also helpful so that you can find the things you need in a hurry, and under the influence of an adrenalin rush if necessary.

The Power of Plants

If you are out in the wilderness hiking, you should always have a first aid kit with you. There are no exceptions to this rule. However, life HAPPENS. And when it does, you do not want to be unprepared. In case of emergency when you don’t have a first aid kit available you can count on the power of plants to take care of your off-the-grid medicinal needs. It’s true!

lady ferns plant

We recommend that you pick up a book that details the medicinal plants of the world, or a book of plants that highlights the native species in your area. It is invaluable to know which plants in your natural environment can slow bleeding, disinfect a wound, or relieve venomous bites from critters you may encounter.

Here are 5 of the most common, and most powerful healing plants found in nature:

  1. Lady Ferns. These beautiful plants are native to the Pacific Northwest and grow like weeds. The tips are delicate and easy to crush between your fingertips. The juice ferns release ease burns, bee stings, and minor cuts.
  2. Mint. There are many different types of mint including spearmint, peppermint, apple mint, Korean mint (hyssop), and more. This plant is usually found around running water and offers many different medicinal properties due to the compound found in the leaves of mint called menthol.
    This plant is a very effective disinfectant and can be chewed to relieve stomach upset, reduce anxiety and boost energy levels. Also known for reducing headaches.
  3. Blackberries. These bushes can usually be found near water sources and have many powerful medicinal uses. The berries themselves are highly nutritious and contain a wide range of vitamins and immune-busting antioxidants, but if you are really in a pinch the roots of the plants, stems and leaves can also be used for healing. Native Americans have been using the leaves and roots for centuries to calm symptoms of stomach upset especially diarrhea.
    Also commonly used to clean wounds due to its astringent properties. Ideal for treating cuts. NOTE: When it comes to mint there are varieties that are poisonous. Avoid pennyroyal, as it is one of those types.
  4. Burdock. This prickly plant grows in many parts of the world. You will recognize it by its large leaves and thistle-like appearance.
    While the purple burs can be a barrier to picking, this plant is a highly effective anti-itch remedy for poison oak and ivy.
  5. Birch. The leaves of this distinctive tree contain an analgesic compound similar to cortisone. This compound is great for reducing pain of venomous bits from insects or reptiles. This plant is a wonderful natural pain reliever that grows in many wilderness areas.
    The leaves and bark sap also provide natural anti-spasmodic, analgesic, astringent, antifungal, and diuretic medicinal properties.

Essential Oils and the First Aid Kit

Essential oils are the volatile chemical compounds found in plant materials including leaves, stems and sap. These compounds are usually extracted by steam or distillation, however they can also be extracted (in very small amounts) directly from plant materials by simply pinching the leaves, boiling the sap in water or breaking stems and twigs.

When you are out on a trail, if you are able to distinguish medicinal plants in your area from toxic plants, you will always have medicine on hand for first aid emergencies.

Which Essential Oils Should I Keep in My First Aid Kit?

Essential oils are first aid kit must-haves! They are able to treat a wide range of ailments and most of them smell good too.

which essential oils should you keep in your first aid kit

Don’t leave your kit without these:

  • For Cuts & Wounds: One thing you can count on when you are out on a hiking trail is that you will get minor cuts, abrasions and wounds. Here are the best essential oils for treating wounds: clove, myrrh, lavender, tea tree, oregano, thyme and elemi.
  • For Bee Stings & Bug Bites: Creepy crawling critters on your favorite hiking trails don’t hold back, so why should you? Be prepared and pack these essential oils for stings and bug bites: peppermint, wintergreen, sage, fennel, cinnamon, bergamot and rose. Echinacea is most notably used as a natural snake anti-venom.
  • For Aches & Pains: When your muscles start aching or your head is pounding out on the trail, reach for these pain-relieving essential oils: spruce, palo santo, clove, cinnamon, calendula and peppermint.
  • For Stomach Upset: There is nothing worse than a troubled tummy when you are on a long hike. Avoid any stomach upset with these essential oils: ginger, nutmeg, tarragon, yarrow, and patchouli.
  • For Insect Repellants: Don’t let flying or crawling insects spoil your good time out in nature. Add these essential oils that work as insect repellants to your first aid kit: citronella, clove, lemongrass, rosemary, tea tree, cajeput, eucalyptus, cedar, catnip, lavender, and mint.
  • For Allergies: When you are out on a long trail in a place not-so-close to home, you may encounter substances that are foreign to your body. In this case, you will need a reliable anti-histamine to stop any allergy symptoms that can slow you down or disturb your experience on the trail.
    Add these anti-histamine essential oils to your kit, today: eyebright, gingko, stinging nettle, jewel weed, and elderberry.

Other Natural Must-Haves for Your First Aid Kit

Natural items are always the best.

Activated Charcoal Tablets

As alternatives to over-the-counter (OTC) synthetic remedies, try these natural first aid must-haves!

  • Activated Charcoal Tablets. Incase of accidental ingestion of the wrong type of plant, toxic water, or a snakebite – it’s activated charcoal to the rescue! This natural compound is able to remove toxins from the body, and fast – within 24 hours! You can find them at most health food stores and at a very low price point.
    Keep a few tablets in your kit so you won’t have to worry about venomous creatures. Tablets can be consumed internally as well as applied topically to the affected area immediately after a bite for quick relief. NOTE: Activated charcoal tablets can also be used as water filters if you do not have access to clean water.
  • Bentonite Clay. This natural detoxifier works wonders for many different ailments. Stash a small amount of the powder in your first aid kit to heal wounds and remove toxins. Once re-hydrated, you can apply the paste to cuts, scrapes, bruises, rashes, burns, bug bites and stings, rashes, blisters and poison ivy.
    If you ingest any toxins, you can also mix a small amount of the clay in water and take it orally to avoid any potential risk associated with consuming plants you found in nature.
  • Arnica. This natural remedy is able to relieve pain, reduce bruising, sprains and strains, ease swelling and speed the recovery for a variety of injuries. Always keep arnica in your first aid kit. You can pick up tablets, oils or tinctures.
  • Shepard’s Purse. If you can find a small tincture of this plant-based liquid – grab one! Keep it in your first aid kit at all times for staunching bleeding. It works both internally and externally to stop bleeding of wounds.

A Note of Safety to All Hikers

Hikers know that when they head out on a trail, whether it is just a day hike or a longer trip that they need to pack survival essentials.

If you haven’t purchased a first aid kit for yourself, and/or your hiking party yet, we encourage you to do so – today!

hiking safety guide

Even the most experienced hikers and backpackers prepare themselves for the unexpected with a wilderness first aid course. There are many different wilderness preparedness courses available, including CPR training and first aid basics. If you have already taken those training classes, you can also consider a more advanced mountaineering course.

How to Use Walking Poles: Keeping Your Balance

0
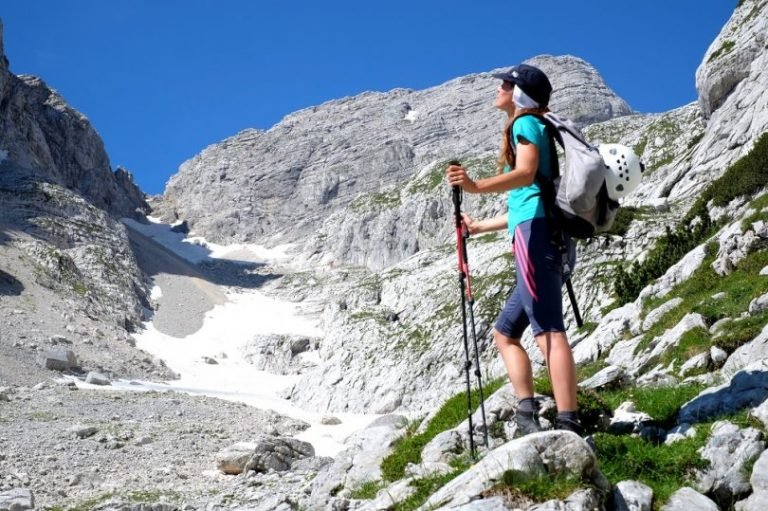
Woman with hiking poles

Hiking can be great fun, and a wonderful source of exercise. It’s an easy activity to take up, but it does take may years of experience before you can start doing it on a professional level, and that means getting all the help you can get.

From professional hiking guides to finding the best boots, you may have never considered the benefits of learning how to use walking poles to help you get around on that rough terrain. However, with this guide to help you, you can learn how to look for the best hiking poles for you, as well as learn the proper way to use them.

Reasons to Get Hiking Poles

A lot of people think that the use of hiking poles makes them look unprofessional, that if they wanted to get a real workout, they would do better without it.

reasons to get hiking poles rough terrain

However, the use of walking poles can actually help you get more exercise. So how exactly do walking poles improve upon your hike?

  • trekking up hills is easier: steady inclines can be killers on your knees and hips, and you could tire out before you’ve even gone halfway. However, poles can help you to get the momentum of your upper body going, making it easier for you to get up those challenging hills. Pushing off from the poles will give you more forward movement, putting more of the pressure on the poles instead of your knees.
  • provides support for your knees when going downhill: going downhill is the same thing; the sudden drop to a lower plane can create a lot of pressure inside your knee joint, and result in a lot of pain afterwards. Instead, using your poles to lower yourself down will save on your joints and minimize the comfort and fatigue you’ll experience once you get to the bottom.
  • improve traction on slippery slopes: even the best hiking boots can wear away over time, especially the traction at the bottom. Instead of putting all of your eggs in one basket when it comes to not slipping, your poles can provide an added benefit in ensuring you don’t fall. Whether it’s been raining or snowing, your walking poles will alleviate some of the pressure in staying upright, and will help you to save more of your energy. No one wants to prematurely end a great hike because they’ve fallen and sprained an ankle.
  • improving endurance: because of the minimization of pain and stress on your joints, you’ll start to go farther and much more quickly with your hiking poles than you would without them. That means you can get to your destination and back in a lot less time, so you can squeeze even more activities into your day.
  • improving your workout: instead of relying on only your legs to get the job done, the use of walking poles will engage your upper body as well, so you can get a fuller, more rounded workout for your entire body.

Considering all of these added benefits to your hiking experience, why wouldn’t you want to include them in your hiking gear?

For More than Just Hiking

In learning how to use hiking poles, you may come across a wide variety of purposes that can make your hiking experience much easier.

hiking poles for every day use

Other than helping you to build upper body strength and helping you maintain your balance, there are a large number of other functions they can serve, such as:

  • make noise to inform wild animals of your presence
  • checking high brush for potentially dangerous animals, such as snakes
  • moving dangerous plants out of the way to avoid skin contact
  • used as poles for a tarp tent
  • defence purposes in an animal attack
  • marking a trail temporarily
  • checking the depth of water bodies
  • getting the attention of your traveling companions

See? The use of trekking poles are seemingly endless, and it’s possible that you may be able to come up with even more uses outside of this list.

Once you’ve purchased the right gear, here are some hiking pole tips you should keep in mind to ensure that your purchase will be put to good use.

Adjusting The Length of Your Poles

You may think that your poles will be ready to use when you take them out of the box, but you couldn’t be more wrong. Not everyone is built the same, and your poles are exactly the same way.

Adjusting the Length of your Poles

They need to be adjusted in order to account for your height so that they’ll be comfortable when you use them. In order to find the right length for your poles, it depends on the kind of pole you’re using.

  • general pole: set pole height so that when you place the tip by your foot, your elbow is roughly at a 90-degree angle. If you know you’re going to be going over difficult terrain, you may want to make it a little shorter so that you can clear plants and rocks much more easily.
  • three-tier pole: set the top adjuster so that the upper section is only telescoped halfway. Adjust the lower section so that you find the right height. Any further adjustments should be made with the top adjuster.

The reason for these adjustments is that your elbow is capable of carrying more load when it’s at a 90-degree angle; a smaller or larger angle will put too much strain on your arms muscles and result in a lot of pain and discomfort.

Holding your Poles

There is, indeed, a wrong way to hold your poles that will tire out your hands and make your poles more of a burden to carry than they should be.

hiking poles wrist straps

It’s an easy process to learn, and with some practice, you’ll get used to this style of carrying your poles.

  1. place your hand through the bottom of the loop’s strap and pull down on the strap by holding the grip. The strap should look like a wristwatch on your wrist
  2. adjust the length of each strap so that your fingers land on the grips
  3. hold the grip loosely to prevent muscle strain. You only need your bottom three fingers to close on the grip. Over time, you can change how your fingers hold on to the grip in order to minimize soreness in your hands and wrists
  4. keep your elbows close to your sides as you use your poles

This method helps you achieve a smooth gait while reducing the work and stress of your hands. And if you happen to lose your grip on your poles, the straps on your wrists will prevent you from losing them. You’ll conserve more energy by keeping your arms by your sides, rather than flailing them around. You’ll also maintain more balance because the feet of your poles will be focused on the centre of your path.

Movement Patterns

Although using trekking poles may seem simple, there are a wide variety of ways they can be used during hiking. Each method is different for everyone, so it’s a matter of personal preference which ones feels most comfortable to you.

First, in moving your poles, you should remember to keep your limbs squarely at your sides. Then, jog the arm up slightly so that the pole swings forward naturally. Swing the arm down again to plant the tip. Alternatively, you can move the pole with a slight flick of your wrist. Either method works just as well, and will help you save on energy.

Learn basic Movement Patterns

Patterns can be created depending on when you move your poles. The various patterns are:

  • alternate: this is when you move the pole opposite of the leg you’re stepping on. This will help you to maintain balance and lets you move naturally as if you were walking.
  • parallel: this is when you move the pole that is on the same side as the leg you’re stepping on. You can use this method when you need to provide relief for your legs when they are fatigued.
  • double: this is when you move both poles forward at the same time. It’s good to use when you’re stepping up or down to a higher plane during your travels, and can be used to gauge the structural soundness of what you’re stepping on.

You’re free to switch up these patterns as much as you like in order to ensure your comfort and preserve as much of your energy as possible.

Hiking Pole Techniques

Other than learning the patterns that can be used with your hiking poles, it’s important that you also learn the different techniques. There are three basic techniques that every hiker should know when it comes to using their walking poles.

Learn hiking pole techniques

They’re easy to commit to memory, but they do require some practice.

  • Technique Number One: Gas/Thrusting. This helps you develop the momentum to move forward. Plant the tip of your pole behind your foot as you walk, usually the opposite leg from your pole. This is useful for going up inclines. In order to maintain your balance, it’s important that you lengthen your pole accordingly to whatever is most comfortable.
  • Technique Number Two: Brake. This is for when you need to slow down, such as going downhill. Plant the tip of your pole in front of your foot and maintain a 90-degree angle with your elbow as you descend. Another key component is altering your grip so that you palms are on top of your grips so that you can steady your poles more efficiently.
  • Technique Number Three: Coast. This method is for traversing mostly flat planes, so you’re not loading your poles at all. Simply plant the tip of the pole without loading, and your upper body can take a break. To gain maximum benefit, you can choose to use both poles at once to provide you with a lot of momentum.

These are the most basic techniques that are used while hiking, and should be kept in mind as you traverse the various kinds of terrain.

Keep These Hiking Pole Tips in Mind

Now that you’re aware of how to use your hiking poles, there are some considerations you should keep in mind that will help to heighten the experience. After all, these tools are designed with your comfort in mind, so knowing what they’re capable of will help you to make a more well-informed decision when you’re ready to buy.

  • Get poles that are adjustable in length. You don’t want to be stuck with fixed hiking poles that become uncomfortable when you start travel up or down an incline. Having rigid walking poles will add more stress to your joints and hands, and will actually hinder how you hike. Adjustable poles, on the other hand, can change in length so you can always find the right height that your poles need to be at. Adjustable poles are also collapsible, making them easier to store in your backpack when they’re not in use.
  • Consider the material of the hiking poles you’re going for. A majority of the poles you’ll find will be made out of aluminium of carbon fiber. Aluminium is much lighter, with poles weighing no more than about 22 ounces. However, it is much more fragile and will bend more easily when put under rigorous tests. On the other hand, carbon fiber is even lighter than aluminium and much more expensive. However, it’s prone to breaking more easily than aluminium, and shouldn’t be used on very rough terrain.

If you’re still confused about what you should get, then speaking with an assistant or professional at any sporting goods store is always the next best option. They can help to fit you with hiking poles that are the right height, and teach you how to hold them properly.

hiking poles on the mountain

That way, you won’t fumble with your new hiking poles and risk misusing them. They may seem like a simple tool that don’t require much thought being put into them, but with how much assistance they provide during one’s hike, you should put a lot of effort into picking the right ones and learning how to use them.

Paracord Bracelet Uses: Staying Safe with a Tiny Package

0
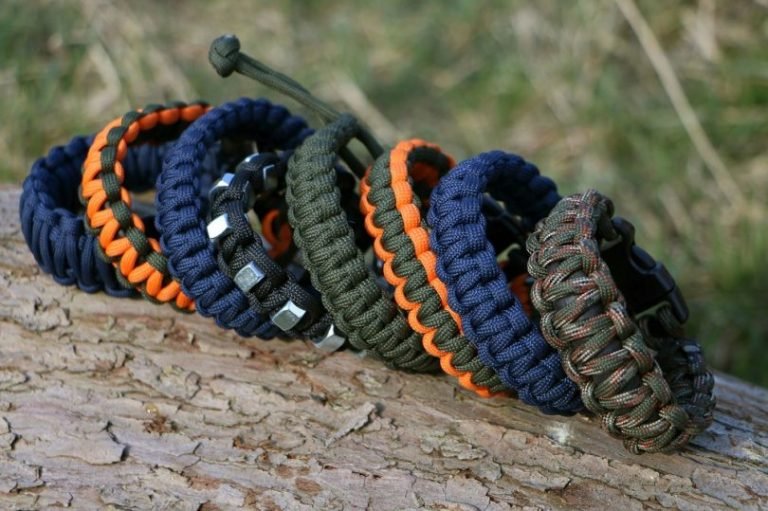
paracord bracelets uses in the wild

When it comes to surviving on your own, whether it’s camping or you’re bugging out to get away from society, there’s one instrumental tool you should have with you at all times, and that is paracord. This handy rope has proven to be very useful and versatile, accomplishing many tasks that you’d need several other tools for. There’s a reason more and more people are wearing those fashionable paracord bracelets that you see in outdoor sporting goods stores.

That’s because this small, light, and unobtrusive tool can mean the difference between life and death. If you’re not familiar with paracord, then this article will show you the many paracord bracelet uses that you’ve probably never considered before.

Why Paracord?

Also called 550 paracord, this handy rope is capable of holding as much as 550 pounds of tension. That’s a lot, and that’s why it’s so perfect to handle many of the tasks you need to accomplish while camping. Originally used in the making of parachutes, these cords have provided many services to outdoorsmen who focus on carrying as little with them as possible to minimize the heft of their gear.

paracord handmade in USA

Thankfully, paracord is very light, but you do need a lot of it to take care of a lot of tasks. It’s useful for more than serving as a climbing rope; you can use it to tie a splint, to fish, or to tie your gear up together so that it’s not spilling out all over the ground. This is only a short list of the things you can accomplish with paracord, and this article is designed to teach you how to use a paracord bracelet in order to maximize its benefits.

Stringing A Bow

If you’re an avid hunter who likes to use the more traditional methods of hunting, then you know how necessary your bow can be. However, your bow string isn’t designed to last forever, and accidents can happen that lead to it breaking.

But don’t worry too much; if you have some paracord with you, then you have the means to replace your bow string easily. Or if you find yourself trapped in the middle of nowhere, you can build a bow from scratch to help you find small game. All you need are:

  • sharp knife
  • lighter
  • paracord bracelet
  • flexible sapling
  • tree shoots
  • feathers

For your sapling, you should choose a dry piece of hardwood, and cut a piece of 550 paracord for your string. String up your bow as you would and see how it bends; remove the string and tiller the limbs of your bow in order to increase your accuracy.

Tillering is the process of altering the lengths of each arm of the bow to create a balance; typically, bows are tillered to have a stiffer lower limb, as this is the part that you hold. The belly of the bow (the middle part) should be carved in order to match the bend when it’s strung.

Here’s a helpful video on how to string your bow with paracord:

For the arrows, you can undo the 7-strand core of your paracord to create a fletch, along with the feathers. Fletching is the means by which your arrows will sail straight and hit your target. After you’ve fletched your arrows, sharpen the points and cut a nock into each.

Building Traps

If you’re not very good at aiming with a bow and arrow, then you might want to consider building traps to help you catch your meals. In a survival situation, having traps set up means that you can spend time taking care of other tasks as well, such as setting up your shelter and looking for bodies of water.

Your paracord can be used as snare nooses or triggers for other kinds of traps, and won’t wear away in even the worst of weather, so it can be used again and again.

Here is a useful video on building a basic snare trap using paracord or wire:

First, you should look for food sources that your prey is going to be attracted to. Set up your traps in these areas to make it more likely to catch them, and be careful not to leave any of your personal belongings behind. If an animal senses that you’ve been around or sees signs of your presence, you can minimize your chances of catching a meal.

Starting A Fire

One of the most essential things you’ll need in the wild is a source of heat, not only for keeping you warm, but for cooking your food as well. It’s also been shown that the presence of a fire can help to keep morale going, so you won’t succumb to negative thoughts as you struggle to survive.

Your paracord can be used as a suitable bow string when using the bow-and-drill friction method. The nylon in paracord provides a slippery surface that makes it easy for you to use the bow. Simply choose from dry, dead softwoods to serve as your drill and board, and some dried leaves and small twigs as kindling for your fire. Find a good curved piece of wood to serve as your bow, and tie your paracord to both ends, making sure that it’s taut. Use another thick piece of wood and to serve as your drill and wrap the cord around it.

Then, using a rock, weigh down your drill against your board and move the bow back and forth. Increasing the speed will crate more friction, and it should start smoking in no time. Add your kindling to get a fire going, and then gradually add larger and larger pieces of wood to maintain your flame.

Above is a helpful video on building your bow and drill, as well as the method used to get your fire started.

Medical Emergencies

Accidents do happen, and it’s important to be prepared for whatever may come your way. Your emergency medical kit is a great thing to have by your side, but it’s not going to have absolutely everything that you need, especially if your injury is quite serious. Paracord is there to save the day, however, as it can be used as a tourniquet, as well as fashioning a splint against a broken bone.

A tourniquet is very useful if you get a deep cut that results in severe bleeding. Bandaids aren’t going to help you, so you need some way to minimize the bleeding until you can find professional medical attention. Just tie the paracord tightly around the affected limb in an area that is closer to your core where your heart is.

If you’ve broken your leg or your arm, you’ll need some way to keep the bones aligned to minimize any damage that can occur while you travel to seek help. Create a padded area around the affected limb and add the stiffening supports (flat pieces of wood work best). Then tie everything together with paracord to ensure that the limb is as immobile as possible.

medical emergencies with paracord

Paracord is also very useful and making slings, which provide support to injured arms. Find whatever material you can (preferably a shirt or some other article of clothing) and wrap it around your arm. Tie the paracord around your body so that it goes over one shoulder, around your back, and goes over the front of your injured arm. It should be tight enough to keep the limb as close to the body as possible and provides added support to reduce the stress on your shoulder.

Lastly, paracord is great rope when you need to bring an injured or unconscious person back to a safer area. Building a makeshift stretcher can get you back to camp or civilization quickly, without risking injury or wearing you out. It’s a lot easier to carry a person on a stretcher than it is carrying their full weight, since you’re pulling on a larger surface area without all of the weight being on your arms and back.

Tie your paracord through the ends of a tarp, gently place the person onto it, and grab onto the paracord. Then walk as you pull on the paracord. Travel will be slightly difficult, given the uneven terrain, but trust us when we say you’ll get there a lot faster.

Building A Shelter

Regular camping tents are built to be strong, but if you don’t place your tent poles deep enough or you’ve forgotten your guylines, you may be out of luck. Thankfully, with some paracord, you can take care of the problem without breaking a sweat.

Undoing your paracord can provide you with a lot of strands that can be used to help you tie up your shelter and keep you dry. Simply tie the paracord between two trees and throw your tarp over it. You can use the extra bits of cord to tie the ends of your tarp to some nearby saplings in order to keep it in place and provide you with roomier shelter.

Here’s a video that show you how you to build a shelter:

And if you want to make an improvised hammock, simply tie the ends of your tarp up to a pair of nearby trees, and you have somewhat comfortable means of taking a nap.

Fishing

Didn’t bring your fishing pole? You won’t have to worry if you’re got a good length of paracord with you. It may not be the most effective method of catching fish, but when you’re in a pinch, it’s better than nothing. Unraveling the outer core of your paracord should reveal the thin, white cord in the middle. Melt the ends so that they don’t fray, and you can tie some small bait to the end to attract your fish.

paracord fishing lure

If you already have fishing line, the bright colours of your paracord are easy to spot, so you can gig up your catch as you continue fishing for more. Gathering more food before heading back to your camp is the best way to ensure that you’ll always have something to eat.

Simply thread the paracord through the fish’s gills, and tie it to a secure source in the water, using either a basic hitch or slipknot. Then, pick it up later when you’re heading back to camp.

If you’re extremely crafty, you can even use your paracord to fashion your own net. It may take some trial and error to get the knots right, as well as making the holes small enough to catch any decently-sized fish.

But when you’re living out in the wild, taking the time to fashion your tools properly will make all the difference in the world and will help to yield bigger rewards so that you won’t succumb to starvation. It’s best to use the inner cords of your paracord to make your knots finer and more secure. It’s best to keep a lighter in hand as well to melt the ends and stop them from fraying.

Above is a very handy video on constructing your own net out of paracord.

Fixing Your Gear

It’s inevitable that your stuff is going to break at some point, since nothing lasts forever. It could be a buckle on your backpack, the shoelaces on your boots, or the seam on the back of your pants. As inconvenient as that is, paracord can take care of all your problems by being a source of raw materials to stitch your gear back together. It’s extremely versatile that you may have difficulties coming up with a predicament that it can’t fix.

fixing your gear with paracord

The great thing about paracord is that it is sold in bulk, and is available in a wide variety of colours to suit your style. This way, you can learn to make your own paracord bracelets if you’re not interested in buying the ones in the store.

Not only does this provide you the skills you need to build your own paracord bracelet from scratch, but it can also become a fun hobby that keeps your mind occupied and reduces any stress you may have in your life. And with the large number of various knots that you can learn, there’s no end to the intricate and fun designs that you an use in making your paracord bracelets.

What to Bring Camping: How to Never Experience That ‘Oh, No’ Moment Again

0
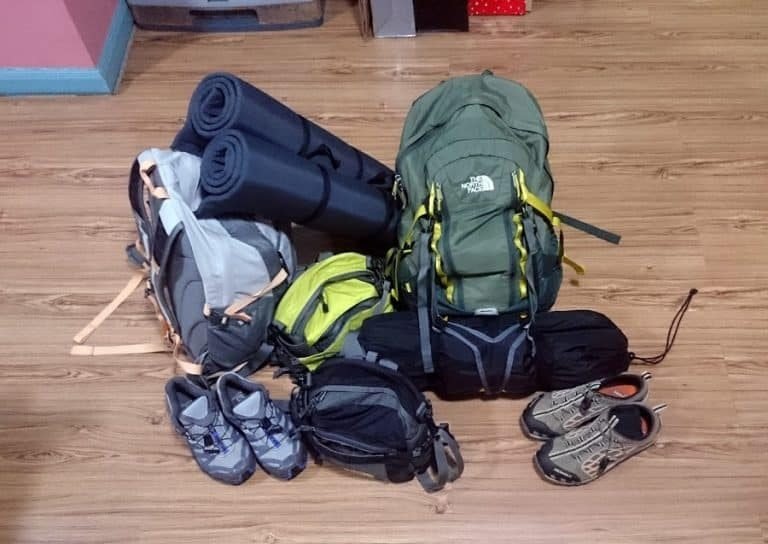
Everyone wants to enjoy the outdoors on their own terms. Even though basic human needs are the same, some people have a high tolerance for getting along without stuff that others wouldn’t dream of leaving the house without. Few campers have the same priorities and desires, and deciding what to bring camping will result in distinctly different piles of gear for almost everyone.There are different types of camping, but all of them will require you to think carefully about what you will need long before you start packing. In fact, the anticipation of what you may encounter and what you will need to respond to new challenges is all a part of your next vacation.

Types of Camping

  • Wild Camping is regarded by enthusiasts as the ‘pure’ camping experience and stretches the concept of “getting away from it all” as far as it can possibly go. The rule is “if you can’t carry it, you don’t need it” and enthusiasts take only the most lightweight gear and bare essentials for a stay while hiking, climbing or hunting in remote or deserted areas. Wild Camping may be prohibited in some regions, or subject to special permission.
  • Campsite Camping is vastly popular, as can be confirmed from the long lists of campsites for hire across the country and the world. Dedicated campsites rent out individual pitches or stands in areas where there are other holidaymakers. Campsites have facilities such as communal toilets, washrooms, electricity on demand and sometimes even small shops where you can buy essential goods or food. You can usually get all your gear to the site in a car which enables you to lug along a lot of extras to make your experience very comfortable. This is a great way for the entire family, kids (and sometimes pets) included, to meet the great outdoors.
  • Festival or Event Camping can be regarded as a ‘compressed’ variant of campsite camping, with fewer facilities and a whole lot more people! You will probably resort to only the lightest, cheapest and most versatile gear like a popup tent, but apart from a barbecue with friends, you are unlikely to need provisions, do much cooking or perform survivalist feats.
  • Glamping (Glamorous Camping) is the ultra-luxurious side of camping and is regarded with skepticism by most purists. Just having electricity for a cooler and lights and water on tap at your camping site does not officially make you a glamper, but taking all of the mod cons along to a supposedly ‘wild escape’ probably will.

The Less You Take, The More You Get

The simple joy of realizing that you can get along without almost every single thing you have in your home can be one of the most liberating experiences of your life.

camping cooking food emergency lighting

Add to this the chance to see sights and places few people ever get to see, the exhilaration of testing your mental and physical abilities against nature and the realization that life need not be all that complicated, and you have the makings of one of the most valuable experiences of your life.

The Less You Take, The Better You Have To Plan

Planned activities like climbing or hiking, the places or area you are going, season and time of year and the duration of your trip will dictate your needs. If you are new to camping, you are unlikely to have everything you need on hand, and conversely, you may even know you won’t use some of the gear which other campers regard as critical. Get only the bare essentials, and then borrow or bargain for gear until experience teaches you which items to regard with reverence – or get along without.

The Secret Is A Master Activity Checklist

Whether you are a lifelong camper, an ‘old hand’ at outdoor life, or a family with constantly changing needs: make a list. Don’t just get “the ultimate list of camping gear” from somewhere on the internet and start buying. We have compiled a list of essentials, but we advise you to evaluate each for your own needs.

camping checklist from the internet

Contrary to popular advice, don’t start by making a list of ‘essential camping gear.’ Start by making an activity list first.

10 Things You Always Need for Camping

  1. Water Supply: Take along some clean water, or if your camping site provides water, take along some canisters and containers to carry water to your camping site. You cannot live without water.
  2. Tent or Shelter: Make sure everyone will fit! Try to buy one size bigger than you think you need to allow more room for everyone to maneuver in. Accessories include a tent porch, tent pegs, mallet and a fly sheet. Practice pitching the tent before you head into the wilds. Always set it up on soft, flat ground but avoid low-lying areas in hilly country in case of heavy rain.  A tarpaulin or groundsheet is a piece of heavy-duty nylon or fabric placed under your tent for protecting the built-in tent floor. It extends a ‘safe to walk’ area around your tent for bare feet and also helps to limit sand, mud, and insects from getting into the tent. It can also be extended over the tent or hung above your kitchen area to protect you from rain.
  3. Matches: Even if you are very experienced in survival skills and can get along without them, matches save time and makes life a lot more pleasant for campers. Waterproof matches or butane lighters are a good idea. Investigate camp stoves or burners, or stick to a wood or charcoal-fueled fire.
  4. Cooking Gear: You will need at least one fireproof pot or pan. A cutting board, wooden spoon, tongs, a bowl for mixing or serving (or use multi-purpose food containers), can opener, dishpan for dishwashing, carrying and storing, a can opener and aluminum foil for cooking on the fire. You will also need a plate, mug, and bowl plus utensils. Mess kits and plastic or steel equipment are lightweight and durable. Do not rely on food coolers to keep meat and delicate foods fresh for long and always stow securely.
  5. Food: Energy-rich food and snacks like trail mix, nuts, no-cook oatmeal, dehydrated vegetables, pasta, tinned beans and meat are good basics, though not the only options by a long shot. You will probably survive without herbs and spices, but don’t forget to pack salt! You can cook almost any modern meal using a combination of fire and camp stoves.
  6. Bedding: A sleeping bag is excellent, but add a sleeping pad to insulate your body from the ground and provide comfort. An air mattress or camping bed is more luxurious and can be used with sheets and blankets just as if you are at home. A pillow is a very good idea, or you can use an extra sack stuffed with clothing
  7. Light: Propane or butane lanterns and candles are fine for outside use. Battery-powered or electrical lamps can be used inside your shelter. Always carry a flashlight and/or headlamps with extra fresh batteries
  8. Utility Gear: A good pocket knife and multitool is worth some investment and will contain a knife, scissors, pliers, corkscrew, bottle opener, saw and much more. Navigation essentials like a compass and area maps are always a good idea as you may not have access to cell phone signals or your GPS.
  9. Personal Gear: Always use sunscreen, and keep a good insect repellent at hand. Investigate wearing EDC articles like a Paracord bracelet or lanyard with a whistle to call for help. Use nature-friendly and biodegradable soap, detergents, and shampoos. Try to layer your clothes so that you always have something warm or preferably all-weather proof at hand. The weather can change in an instant, leaving you in wet clothes and exposed to a cold wind.
  10. First Aid Kit: Small scratches, burns or cuts are bound to occur. Keep your kit up to date with bandages, plasters, painkillers, antihistamines, tweezers, soothing lotions, a disinfectant, and anti-bacterial salve.

Step 1 – Draw Up An Activity List

Run through every possible scenario in your mind, and break it down to basic steps. A simple: “we get there, pitch the tent, make a fire and relax” will not cut it. In fact, novice and experienced campers have been known to arrive at the site later than they planned, couldn’t pitch the tent in the dark, found that they had left behind the tent pens and forgotten the matches.

Spending a pitch dark night in your car after dining on peanut butter scooped from the jar with your fingers is a very educational experience!

draw up an camping activity list

A sample activity list will include: arrival at your destination, unpacking your gear, exploring your immediate surroundings, setting up shelter, taking part in a planned activity, eating, washing, relaxing and sleeping. You should focus on gear associated with these activities.

Step 2: Identify The Items You Need For Each Action

Now that you have identified some of the things you care about, carefully compile a list of what you believe is necessary according to your needs. This is your list, not everyone else’s. It need not be a long one, but it must be well considered. It may include necessary medication and activity-specific gear like a fishing rod or hiking poles.

Step 3 – Categorize The Items

First jot down the items you consider to be essential and then start listing the things that would be “nice to have” on your trip.

categorize the items

To help you get started, here are the categories to use for a list of items commonly regarded as necessary:

  • Category 1: Water. Water, or containers to hold sufficient water for your needs, if water is readily available at your destination. It is easy to forget the importance of water while you only have to open a tap to get a glass of water, but depending on your destination, you could spend a considerable part of your day obtaining enough safe water to survive.
  • Category 2: Food. You can choose to take along ration packs, easy to prepare meals, tinned food, dehydrated food or fresh food. It is entirely possible to go camping in magnificent natural surroundings that are within relatively easy reach of shops where you can replenish fresh food daily, but you probably won’t want to.
  • Category 3: The means to cook and/or preserve your food. The types of food you take along will dictate your cooking needs. You may not want to light a fire just to make a cup of coffee, so a choice of cooking equipment like can be handy. You will need pots or pans, something to boil water in, utensils and bowls or plates to eat from. A cooler won’t keep food like meat or dairy fresh for too long, and you should plan your meals to prevent waste.
  • Category 4: Shelter. You need to keep dry, or you won’t be comfortable. A tent is a splendid idea, unless you plan on practicing your survival skills by building a shelter. Do a dry run and practice pitching your tent before you go to make sure you understand the process, can accomplish it without asking strangers for help and have all the necessary equipment.
  • Category 5: Light. The outdoors is dark at night – there are no street lamps or general lighting. While the moon and stars might light your way on a clear night, you will undoubtedly have to watch what you are doing while cooking, washing, getting ready for bed and in emergencies. Flashlights with fresh batteries are critical, and you need an additional light source such as a propane or butane lantern or an electric lamp if your campsite offers the amenity. Don’t rely on candles as your sole source of light, they are far too dangerous ever to use inside your tent.
  • Category 6: Planned activities. This will include your climbing, hiking, fishing or hunting gear. Families with small children may want to consider games and activities to keep the kids safely occupied and content while you get on with daily camping chores.
  • Category 7: A backup plan. Always make sure you have a first-aid kit and know how to use it. You and your companions should know how to reach help if you need it. You cannot rely on cell phones, as coverage may be a problem in remote areas. Let your friends and family know where you are going and what your plans are if they should need to get hold of you. Provide them with license plate and phone numbers, including details of the local authorities at your destination.

Always follow the rules that may be imposed by your hosts or the management of your destination. They are there for your safety and the safety of all the other visitors.

Step 4 – Research Your Destination Thoroughly

You may find that your campsite offers facilities such as washrooms and electricity at every stand. In that case, your needs won’t change, but the items you need to fulfill your needs will change. For example:

Your list contains: Water

Now that you know that water is available on tap, you won’t need large containers of fresh water and sparing use to make it last until you get home. You will rather need a sizeable, sealed container, possibly with a tap, which you can refill daily to keep near your cooking area for hand washing, drinking, and cooking.

Your list contains: Light

Now that you know electricity is available, you don’t need to purchase a lot of replacement batteries for flashlights. You should rather invest in a heavy-duty extension cable with multi-plugs for an electrical lamp and battery charger, perhaps in addition to a headlamp. Always keep a flashlight handy.

Step 5 – Compare Your List And Review

It is so easy to miss an item.

compare your list-and camping gear

While just making this list is a pleasant way to anticipate your carefully planned break, it is entirely possible that you will arrive at the camping site without tin opener or matches. If it is a brand new destination, or you don’t have a lot of camping experience, you might miss an essential piece of gear. Compare your list to this list (LINK), finalize and start collecting.

Step 6 – Don’t Miss Anything When You Pack

Stick to your list like glue. Keep your list at hand when you pack for your adventure, and tick off each item as you load it. Never rely on buying something in the nearest town before you get to your destination. Finding a 6-person tent, propane lantern or even 10 fresh AA batteries after hours in Remoteville, pop 127 might be a senseless mission.

Step 7 – Get Out There And Have Some Fun

We trust you will now have a solid idea of what you need to bring when you go camping.  Making your own list by anticipating all the great things you will be doing during your adventure is far more satisfying than just following a formula.  However, just to be sure you have a good starting point, we have made you a list of very useful things, just to get you started:

A Few Last Tips

Gaffer tape and Paracord always come in handy for quick onsite repairs, and pack some garbage bags for wet clothes or shoes, rubbish, and even makeshift weather protection. Do a dry run before you leave – pitch your tent and cook a meal using your camping gear before you pack everything away securely using your checklist to ensure you don’t forget a thing.

packing for camping

Always wash and dry every piece of equipment thoroughly before you pack it away after your trip. Discovering that you forgot to clean up when you pull out a musty, stained tent on your next trip is unpleasant. Remove your trash and leftover food, and clean up before you leave a site.

So now that you know what to take camping, here is the one golden rule of outdoors life:  Never leave anything more than your footprints; take all of your belongings and garbage with you when you leave. Your campsite isn’t your home, so leave it clean for the next set of campers, as well as the wild animals who do call it home.

Paracord Survival Belt: Beating All the Odds

0

While a very short piece of Paracord may be handy for replacing boot laces or tying something down in an emergency car breakdown situation, it is evident that lovers of the outdoors should consider carrying longer pieces of Paracord, and a Paracord survival belt may be just the way to do that.

In the outdoors, longer lengths of Paracord will not only allow you to cut off small lengths of Paracord as you need it, but it could make a real difference in a life-or-death situation. If you need to lift or lower someone on a cliff or steep slope, you will need a double or triple length of Paracord to accomplish it safely, and 10ft of Paracord will, sadly, not go a long way.

We Just Love Paracord

Every outdoorsman has a love affair with Paracord. Whenever lovers of the outdoors come together, they will discuss their gear and experiences, and they will invariably come up with a list of essential items including a good knife or multi-tool, first aid kit, shoes and so on.

paracord commercial type III coil

However, when examined for multipurpose uses, not one of these articles are as versatile as a good length of Paracord, and we expect someone to come up with a list of “100 uses for Paracord” soon. In fact, we could probably come up with such a list ourselves! Paracord belongs in every backpack, survival kit or Bug-Out-Bag.

What is Paracord?

550 Paracord is a lightweight, slightly elastic nylon rope with a smooth finish and a break strength of 550lb (249kg), originally used for US parachutes during WWII. Since then, this sturdy, colorful cord has been used everywhere by anyone needing to tie one thing to another including, famously, repairs to a part of the Hubble Space Telescope.

Even though Paracord is slim, long lengths of Paracord can still take up the space you need for something else. For this reason, many people wear Paracord bracelets and accessories. It is sensible – and has become quite fashionable – to “EDC” their Paracord: converting a length of Paracord into an “Every Day Carry” object, in myriad ways.

EDC Accessories

Bracelets are arguably the most fashionable and popular way to carry Paracord. However, cord bracelets typically only contain about 8 to 15ft or less. You can purchase ready-made bracelets or make one to your precise specifications. Depending on which method you use to weave the bracelet, you typically use about 1ft of cord per inch of the final product, and the type of buckle you use will also influence the final length of usable Paracord.

Paracord as edc accessories

Short pieces of Paracord can be utilized for identification of people or objects, marking a trail, hanging tools on hooks, belts, backpacks or your person, and replacing drawstrings in stuff packs or pants. You can hang food or equipment from a tree, tie down items in a storm, and even make a small shelter. More exotic uses include using the internal strands to floss your teeth and repair tears in clothes or even wounds (gasp).

The Long And The Short of It

Bracelets, lanyards, and most other EDC gadgets are fantastic ways to let you keep a short piece of quality cord at hand, but there is no harm in converting 80 to 100ft of Paracord into a functional, daily use item – just in case! Paracord can be purchased by the foot or even by the reel. Making a pet leash is an excellent way to carry a longer piece of Paracord, but Fido may not be conveniently at hand when you need 80ft of Paracord urgently. We suggest you convert 100ft of Paracord into a super-useful and convenient Paracord Survival Belt.

We’ll show you how to make a Paracord survival belt that will not only perform the obvious function of keeping your pants where they need to be during a strenuous hiking trip but will also let you unravel the belt within seconds when you need a really long single cord in a hurry.

unique color and style of paracord

There are even more benefits to making your own Paracord survival belt.

Unique Color And Style

Functional? Absolutely. Colorful? You choose! Make several belts in different colors so that you always have a Paracord survival belt handy, no matter what outfit you are wearing. And remember, this belt is not just for men. Paracord can be obtained in almost every imaginable color, perfect for a fashionable finish for females.

Easy and Fun Instructions

We have instructions for a Paracord survival belt for which you don’t need to measure, clip, or even use tools. You can make it as broad and long as you like, measuring as you go. It is a great family project to let each one make his or her own survival belt and will help to familiarize kids with knots, ropes, and survival principles.

Even Granny might join in, remembering similar knotting skills from her crafting days when it was fashionable to use the same knotting techniques to make macrame hangings and decorations.

Fabulous Fit And Function

Best of all, you can use a standard side-release buckle if you want one perfect fit, or you can make the belt into a multi-function carrier by clipping various devices into the woven design.

survival belt for everyday

If you use a carabiner as a buckle, you will always have an extra one at hand, or you can make the length fully adjustable to fit several members of the family by using a regular belt buckle. There are also great new gadgets to choose from, like buckles that incorporate a whistle and a flint and striker.

Instructions for Making The 1-Strand Paracord Survival Belt

If you have never attempted any Paracord weave we recommend that you watch this video to get a good overview of the weaving process before you follow the step by step instructions:

Step 1 – You Will Need

  • A spool or reel of Paracord. You will need 1 – 2,5ft of Paracord to create 1” of the belt. If you use six loops in every row, the belt will be about 1.6” wide, and up to 47” long, depending on how tightly you weave, taking up about 100ft of Paracord. In these instructions, we used five loops.
  • A pair of scissors
  • A lighter
  • A small pair of pliers
  • A size 5-6 crochet hook (optional)
  • A lacing needle for Paracord (optional)
  • A side-release buckle, carabiner or standard belt buckle of approximately 1″. A wider buckle can be used if you wish to widen the belt.

Step 2 – Burn The End

Always ensure a clean, non-fray start and end point by burning ends. First, snip off about a centimeter of the cord for a solid start. Use the lighter for a few seconds to burn the end, rotating it in the flame to ensure even exposure of all the sides, coating, and inner strands. Squeeze the hot end lightly with a pair of pliers or your fingers to flatten the tip while the cord is still hot.

step 2 burn the end

This will help you to thread the cord and will keep the ends neat while the belt is in use.

Step 3 – Secure The Buckle

Push the loose end through the buckle ring (slit) and feed about 10” through the ring. Immobilize the long end of the cord, and the buckle with your left hand. Take the shorter, loose end and loop it back through, and around, the buckle ring. Make a total of 5 loops for a standard buckle (more loops or fewer loops may be necessary if you use a larger or smaller buckle). Keep the loops loose and even; you will be passing the long end through it soon.

Adjust and make sure the loops are even and loose enough. Leave a few inches of the short end free.

Hold the buckle in your right hand with the short end dangling to the left.

With your left hand, tuck the short end back through the loops towards your right hand. This leaves you with both the short and long end on the same side. Do not tighten yet.

Step 4 – Start The First Row

Take the long end (the working end, from now on) in your right hand and fold it to form a loop (a bight) about 2,5” long. Point it back towards the 5 loops on the buckle ring and thread this looped, doubled-up cord back through the center of the 5 loops on the buckle ring.

You will now have 3 cords passing through the loops, lying flush with the buckle ring, ending in a loop on the left-hand side.

paracord belt start the first row

Once you have fed the bight (loop of doubled-up cord) through the original 5 loops, gently tighten the 5 loops around the buckle ring. Do not tighten it too much; you will need room to spread the loops apart as you start the weave on the next step. Start to tighten the loops from right and work towards your left-hand side.

When you are done, take out the slack in the left-most loop by pulling the short end, and then make a half-hitch knot in the short end to prevent it from coming loose as you follow the next few steps.

The loop you started with on the right-hand side has now been passed to the left-hand side, to form a new side loop on your left. We will return to use this new side-loop in the next few steps.

The short end is on your right. You won’t be using the short end again, from now on we start weaving in earnest using only the long end.

Step 5 – Creating Loops for The Second Row

Keeping the new side loop on your left open, gently tease apart the 5 loops on the buckle ring, starting from the left and working to your right. Identify the long end of the cord where it lies underneath the 5 loops. Pry apart loops no 1 and 2, and tug the long cord upwards to form a new loop between no 1 and 2. This new loop should be of a similar size to the side loop you created in the previous step.

TIP: Use the crochet hook to tug the cord upwards when you create a new loop. You can use any thin object with a blunt end that won’t damage the fiber to make this process easier on your fingers and nails.

Move to the space you created between no 2 and 3, and tug the diagonal long cord upward again, to form a new loop between no 2 and 3. Repeat with no 3 and 4, and then with no 4 and 5.

creating loops for the second row

You have now made 4 new loops, and combined with the side loop, you have 5 loops in total. As you create new loops, tighten the old starter loops a little to ensure there will be no slack between the buckle ring and the start of the belt after you are done.

Both the long and short ends of the cord remain to the right-hand side of the buckle.

Step 6 – Threading The Second Row

Like before, take the long end in your right hand and fold it to form a bight about 2,5” long. Point it back towards the 5 loops you just created, and thread this bight back through the center of the 5 loops.

TIP: As you start to thread the bight, twist the loops gently in a clockwise direction. Turn each loop slightly so that the right-hand side of the loop is rotated towards you before you start threading.

Step 7 – Tightening The Weave

After threading the bight through the 5 loops, you will again end with a new side loop on your left, and the original loop on your right. Before moving on, make sure that the short end did not get caught up in the loop on your right, then pull the bottom cord quite hard from the left to close the right-hand loop and tighten up the right-hand side of the weave.

tightening the weave

Next, tighten the loops individually, this time working from left to right, taking up all the slack; first, tug on loop no 2, then no 3 until you reach the end. It is essential to pull it quite tightly to ensure and attractive end product.

Step 8 – Continue The Weave

Repeat steps 5 and 6, until you have either used up all of your Paracord or have a Paracord survival belt that is long enough to suit your needs.

TIP: Inevitably, the cord will twist a little as you work. Just untwist it gently as you go along, always working from the left to the right-hand side. It is important to untwist the cord during weaving, as it will ensure a smooth ‘undo’ when you need the cord in a hurry. The process gets easier as you find the correct tension for your weave. Practice will make perfect!

Step 9 – Attach The Other End Of The Buckle

After your final row, burn the end of the cord with your lighter to make it easier for you to attach the lacing needle to the short end – you will need about 10” to finalize the belt. Keep the belt in your left hand, with the end of the cord and the lacing needle in your right hand as you will be working from right to left.

Push the needle through the buckle ring, creating a loop, then pry loop 4 and loop 5 apart. Press the lacing needle in between the two loops, underneath the diagonal cord. Continue the loop through the belt ring, and bring the needle back down to separate loops 3 and 4, and up again – pretty much sewing the buckle to the belt using the material of the belt itself. Don’t pull it tight as you work, first, complete the looping to attach the buckle to the belt loosely.

attach the buckle

After passing the lacing needle through the side loop on the left, tighten all the loops firmly. Finish the end with a half-hitch. This will give you a permanent starting point to allow you to loosen the buckle fast in an emergency situation. If you wish, you can pass the needle back to the right-hand side, through the loops, for additional security before making the half-hitch, though this is not recommended if you intend to detach the buckle from the belt extra fast!

Step 10 – Tidy Up

You can use the lacing needle to work the loose end of the cord into the weave, though the half-hitch should ideally be in an easily accessible spot.

tidy up nice and easy

The entire belt may be a slightly loose or uneven directly after you finish, but gentle tugging will soon let it settle in an even, beautiful weave.

Uses

This belt could certainly carry around 6000lb – more than enough to rescue a friend from a pit of quicksand! A few tugs will undo the whole belt, leaving you with 80 – 100ft of prime Paracord for your needs. You will no longer be restricted to small projects:  You can build a shelter, lean-to, ladder, raft, stretcher, hammock or furniture, or rig a pulley system to lift heavy objects.

paracord belt many uses

Jetboil Stove Review: The All-in-One Integrated Stove & Cookware System

0
Jetboil Flash Cooking System

Nobody enjoys doing chores. Unfortunately, even when you’re out in the wild these necessities can be unavoidable. Cooking, cleaning, heating, washing… these are simply requirements if you want to stay at all hygienic during your outdoor expeditions. Our best advice is to simply get them over with as quickly as possible.

The more efficient you are about these activities the faster they’ll be done and the quicker you can get on to enjoying fishing, hiking, hunting or other adventures. The easiest way to speed these things up is to utilize the right equipment and we think we’ve found a real wonder on the market. The Jetboil Flash adds a whole new level of convenience to outdoor water heating & cooking.

So much so that we’ve decided to provide you with a full write up of its features and how it could be used to make your next outdoor trip even more fun by minimizing your ‘chores’ time. So without further ado, let’s jump straight into discussing the features of The Flash Personal Cooking System in this Jetboil Stove review

Review

In less than two minutes the Jetboil Flash can help you prepare a hot drink or an instant hot meal. This is the ideal choice for anyone who is in need of efficient cooking/boiling energy. The Jetboil Flash is well-organized, lightweight and fast.

High fuel efficiency, and all-in-one package, means that you do not need additional cookware. Here are the specifications that make the Jetboil Flash Personal Cooking System special.

Packaging

The very first consideration to make when shopping for an outdoor cookware is packaging. The Jetboil Flash Personal is one of the lightest, weighing in at 0.88 pounds when removed out of the box. The weight along with the system’s dimensions (7.09 by 4.09 by 4.09 inches) makes the stove the ideal choice for backpackers. The cookware will fit comfortably in your backpack.

Jetboil Flash Cooking System

Apart from the weight and dimensions, the major benefit of the Jetboil Flash Personal cookware is simplicity. Basically, it contains fewer parts: 1 liter of the FluxRing cooking cup, adjustable burner, and fuel canister. The fuel canister and stainless steel burner stow suitably inside the cup. This makes backpacking remarkably easy.

Design & Durability

The cooking system’s construction is undoubtedly higher end with the burner being made of stainless steel and the cooking cup of aluminum. Both these metals are known for their durability, which is an incredibly important factor when assessing outdoors products. You want to know that a bit of rough and tumble won’t break your brand new stove, and we’re fairly confident you can be sure of the stove’s durability.

The cookware seems to be a cooperation of a well-made cooking cup and an unrivaled ignition system. Out of the box, you will observe at first glance the cute packaging. Each piece fits in the cup for easy transport. This simply signifies how resourceful and versatile the design is when compared to other backpacking stoves in the market.

Jetboil Flash Cooking System and moutains in the background

The multipurpose plastic cover found at the bottom of The Flash Personal Cooking System’s cooking cup is very useful for the minimalist outdoor packer. You’ll find that it has three uses (that we can think of), namely use as a measuring cup, a small bowl, and as a protective cover on the bottom of the cooking cup to keep your hands from being burnt by the heat while you enjoy whatever is inside.

The cooking system has a clever tripod for added efficiency. The tripod is specifically engineered to be used on rugged terrain and accommodates the little stove perfectly. We think the idea has a fair bit of merit, and anyone who has spilt hot water on themselves before, is sure to agree. The tripod doesn’t add any inconvenience to your transportation needs either as it folds up and fits with the rest of the system into the cooking cup.

Jetboil Flash Cooking System and moutains in the background on the table

The cooking cup of The Flash Personal cookware not only includes something useful at its base (the plastic cover), but also at its top. Built into the neoprene upper lining of the cup is a wonderful little heat indication window. This window will slowly turn orange as the interior contents of the cup heats up, which is a highly resourceful feature when boil water.

You could probably tell that the cup is ready without this window when you are boiling water as the device tends to make a small bubbling sound and let off some steam. Where the heat indication window really shines is when you are cooking up a delicious rehydrated mini meal. Just sit back and relax and wait for the little window to turn orange to let you know your food is hot and ready to be consumed.

Jetboil Flash Cooking System

The Flash Personal Cooking System is ready to go in any weather thanks to the elemental resistance screen. The system not only runs off hot jet fuel, but protects its flame from wind and rain by utilizing a barrier around its flame area. This is great because when it is cold and rainy what can often help to brighten your mood the most is a nice cup of hot cocoa or coffee – this stove makes that possible.

Ease of Use & Efficiency

To use the stove, you have to link the canister to the clever tripod. There is an ignition button, which you have to push to turn on the stove once you have switched on the gas flow. The igniter has actually simplified your work. Then add water to the 1 liter cup and have it fixed to the stainless steel burner. The one liter capacity will allow you to prepare two cups of hot coffee or cocoa in two minutes.

jetboil-flash-components on the table

Basically, the one liter capacity is sufficient, but you are strongly urged to boil less amount of water at a time to circumvent accidents. The reputation of the Jetboil Flash Personal cookware is attributed to its boil time. In actual fact, the boil time is the main reason why most outdoorsmen like the cooking system. Impressively, the stove boils one liter of water in two minutes under normal conditions, and four minutes in extreme conditions.

Storage after Use

To ensure the durability of the cookware, you have to store it correctly after every use. Once you are done cooking, turn the control valve off so as to put out the flame. Then go ahead and separate the cup from the base of the stainless steel burner. Have the stabilizer removed from the fuel canister. At that point, unbolt fuel container from the burner base.

JetBoil Flash Personal Cooking System - components

Make sure you replace the plastic fuel cap. For easy storage, position the stabilizer in the bottom of the cup, followed by the burner base, and eventually the fuel canister. Place the lid to secure the items inside the cup. Never forget to disconnect the fuel cartridge once you are done cooking. To ensure the cup is not damaged, you are advised to wash it by hand.

Unique Features

Jetboil FluxRing Technology: The burner is handily connected to the cooking cup by use of FluxRing tech. This ensures there is minimal or no heat loss during boiling or cooking, thus better boil times.

Built-in Windscreen: Unlike traditional camping stoves that are known not to function properly in windy conditions, the Jetboil Flash Personal has a built-in windscreen that allows it to perform exceptionally in windy climate.

Cooking with Flash Personal Cooking System

A Resourceful Neoprene Lining: The cooking cup is enclosed by a neoprene lining that maintains the warmth of drinks and food for the considerable time duration. The lining also incorporates a color changing window that always signals when food or drinks are hot.

Quick Ignition Ability: The quick ignition ability of The Flash Personal Cooking System makes it ideal for big families who will have multiple users handling it. There is an auto-start filament built into the system which enables the jet flame to be created without the use of matches. Anyone who has ever forgotten to pack matches for their trip will know that this is a big help.

Value for Money & Guarantee

The Jetboil Flash Personal Cookware is worth your every dollar. The price is reasonable when you consider its amazing features and performance, especially its boil time. At approx. $100, you get a fully functioning stove that prevails both in normal and windy conditions. Some individuals may consider it to be an expensive unit; but camping and hiking enthusiasts will appreciate the price.

Flash Personal Cooking System

There are compatible accessories and products that are sold separately, including: 1.5L cooking pot, 1.8L spare cup, 1L tall spare cup, and an 8-inch FluxRing fry pan. There is a manufacturer’s warranty for the cooking system in case it does not perform as expected under normal use. However, the warranty does not cover damages due to improper use, accidents, negligence, poor maintenance, and normal wear and tear.

The Jetboil Flash Personal is the best backpacking canister stove system that addresses the shortcomings of traditional cooking systems. The most defining feature of the Jetboil Flash Personal is the fact that it is an integrated stove system. As aforementioned, it combines a fuel cartridge with an effective built-in windscreen, stabilizer, stainless steel burner and a FluxRing cooking cup.

As far as the Flash Personal cooking system is concerned, every part has its unique purpose and contributes to the general performance of the stove. The FluxRing heat exchanger makes sure that the flame is uniformly distributed at the base of the cup so as to maximize fuel efficiency. The creative temperature indicator alerts you when food or drink is hot and cooked, saving fuel.

Jetboil Flash Personal Cooking System and two adults passing by

The adjustable burner is enclosed by an inbuilt windscreen so as to reduce heat loss and at the same time improve fuel efficiency. You really do not need a match to ignite the stove, since the push button electric igniter is enough to start a flame. This makes the Flash Personal System a very reliable choice for emergency situations other than regular outdoor adventures.

Pros:

  • Stabilizing tripod base for added convenience & safety
  • Plastic cover acts as a measuring cup, small bowl & heat protector
  • Interactive cooking window indicates when food is hot & ready
  • Fabric cozy provides helpful handle and attractive exterior
  • The overall construction is high quality with durable materials
  • Resistive barrier allows the stove to be used in any weather conditions
  • Auto-start filament for matchless immediate ignition included

Cons:

  • 32-ounce capacity only provides enough room for 1 or 2 people rehydrated meal preparations.
  • Relying on the supply of isobutene and propane gas (unable to run off renewable energy)
  • Does not work well in high altitudes and very cold climates. 

A decent Jetboil stove is a worthwhile investment that can take hours off your outdoor ‘chores’ time over the course of years. The Flash Personal Cooking System is one of our favorite choices because of its clever design and easy portability. If you’re looking to create quick and easy meals or simply boil water for purification, then it’s a great option.

BioLite Stove Review: Highly Efficient and Good in an Emergency

0
biolite-gear in a storeAre you an avid camper, hiker, fisher or general outdoors enjoyer? If so, then you’ve probably already discovered the amazing benefits of having a decent campfire. An outdoor stove takes that one step further and provides you with not only warmth and light, but a convenient fireplace to cook/boil water over as well. Add to that functionality the USB charging ports built into BioLite Wood stoves and you’ve got the best thing since portable tents.

These smart stoves are absolutely amazing. As such, we’ve decided to write a full BioLite stove review on our favorite one: The BioLite Wood Burning Campstove. We’ll cover the good, the bad and the ugly about this little stove in this review. So if you’ve been looking for a camp stove in general or at this one in particular, then be sure to read this review. We’ll start with the specifications.

Review

Packaging

This unit will be shipped to you in a 5 by 5 by 8.3 inch box that weighs 2.9 pounds. The unit itself is lightweight and compact, weighing in at 2.1 pounds. This means that you should have no trouble fitting it in a backpack in case you need to carry it with you on a hike. Plus, it definitely won’t weigh you down.

People cooking outside on BioLite Stove

The stove consists of two main components: the stove itself and the power module (where the USB port, fan and internal battery are located). The power module can be placed inside the stove when not in use, reducing its size considerably to be the same as a 1-liter Nalgene water bottle. It also has a grill top for balancing your pots when placed on top the stove. It also comes with a nylon stuff sack that you can place it in after unboxing for proper storage.

Design and Durability

The BioLite Wood Burning Camp stove is a sturdy piece of equipment built to make outdoor fire use easy. Its technology features are some of the best in the outdoor stove industry, including both a USB charging port and fans to help fires burn hotter. That it runs off biomass as well makes this stove particularly attractive due to emergency and environmental benefits.

The stove’s frame is mostly made up of aluminium. This metal is known for being both strong and lightweight, which is a great combination for any portable item. Although still too heavy to carry on extremely long hikes, we certainly think it’d earn an easy spot in the car or boat transport as well as short backpack trips.

BioLite Stove on a table

The creators of the stove have made it a good size in terms of dimensions, not adding more than needed but not leaving anything crucial out either. You might want to test carry an item of similar weight and dimensions to ascertain whether this stove is right for you.

Overall the shape and outer design of this stove are well thought through. They complement its inner, smart technology design well, by making it functional. We appreciate that they’ve kept it relatively small so as to make it easier to transport. There are a few other feature worth mentioning though, so here’s our take on the main features to be aware of if you’re thinking about buying this stove.

Unique Features

This stove comes with some rather unique features that give it an edge over the competition.

Thermoelectric Generator: This BioLite Campstove allows its owners to personally generate electricity from nothing more than burning wood. This means that you can choose to take a variety of USB chargeable items with you when visiting the great outdoors and charge them as you cook or boil food/water. This thermo-electric generator is perfect for those who want to enjoy the great outdoors while remaining contact-able.

USB chargeable on BioLite Stove

You’ll get approximately 60 minutes of talk time on regular smart phones from 20 minutes of charging time on a strong fire. We’d recommend turning off your electronic devices now and again anyway to enjoy the outdoors more, but in general this is a fantastic concept. The best part about it is that the thermo-electric generator technology works off principles and airflow, meaning it’s usable for as many times as you want or have wood for. No running out of battery charge ever again!

Burn Increasing Fan: The internal fan and gas jets built into the BioLite Campstove is ideal for outdoors people who want to get their fires up and running quickly (and don’t we all?). Having appropriate kindling or dry wood certainly helps, but isn’t a necessity with this cool stove’s design.

BioLite Wood and a waterfall in the background

The HI/LO set-able fans push air into your fire which improves the combustion system. You’ll get a hotter, more efficient flame, much faster, and some find the air circulation helps with smoke control as well. If you intend to get started on making your fires late in the evening, this is a perfect choice for you.

Biomass Fuel System: The BioLite Campstove takes renewable energy to a whole new level. The system not only runs off renewable biomass like twigs and sticks found while out and about, but also takes that renewable energy and turns into electrical energy to charge your devices with! We love that it’s not reliant on coals or petroleum. It’s a much more environmentally friendly approach to fire starting and we give it a big thumbs up for that.

Two persons cooking on Biolite Wood stove

NOTE: This stove would be useful in emergency situations because it is not reliant on petroleum or electricity to start. You can charge your electronic devices from it, despite power line outages using just biomass (twigs and wood) from your surrounding gardens. Stay on the grid!

User Friendly Interface: The big, ON button, and easily discernible USB charging port on the BioLite Campstove, are just a couple of the user friendly features of the design. When looking for a smart camp stove you ideally want something that anyone can use. This system makes it easy to start fires by storing a little charge to fan your initial fire starting with.

Barbeque on BioLite Wood stove

That means even beginner fire starters should be able to get the flames going in this stove. For those who have tried fire starting themselves, you’ll know it’s not always as easy as it looks, especially if your wood is damp. That’s why the user friendly fans and gas jets to help start this stove’s fires are so great.

Value for Money and Guarantee

Once you consider how much you will actually be saving in terms of purchasing fuel for a gas powered stove, the decision to get the BioLite Campstove becomes easy. Furthermore, you also don’t need to buy any extra emergency battery packs in case your phone dies on you.

Cooking diner on BioLite Wood stove

The unit costs approx. $130 on Amazon. It is currently not available on the BioLite website, so people looking for this unit will have to purchase it on Amazon. Once you add up the specifications, it is easy to tell that getting the BioLite Campstove will provide you with great value for your money.

We would definitely recommend this BioLite Wood Burning Campstove to anyone looking for a high quality piece of fire making and cooking outdoor equipment. Do, however, ensure that you are aware of the size and weight of the item prior to purchase. To get it to your outdoor spot you’ll have to transport it!

In addition, we’d also recommend taking a couple of small fire-starting cubes and some waterproof matches with you when you head out. This will make the fire-starting process even easier, though the design of the camp stove makes that pretty easy already.

Cooking on BioLite Stove in the wild

A final note is to choose pots and pans to use with this system that are metal, no more than 10 inches in diameter, and no more than 8 pounds in weight. Other than that, this stove is ready to go. You’ll find it adds a whole new level of cool to your outdoor experience and makes cooking/boiling food/water so much easier. When it comes to camp stoves it can be worth digging a little deeper in your pocket to get a great multifunctional product, that will go the distance with you.

PROS:

  • Compatible with most common USB devices
  • Can generate better flames than average stoves because of its fans and gas jets
  • Easy to use scalloped upper design supplies a sturdy surface for pots and pans
  • Cool to the touch safety conscious honeycomb exterior
  • Aluminium frame is lightweight and strong
  • Smart technology runs completely on biomass fuel which is renewable and readily available

CONS:

  • Slightly heavy
  • Somewhat bulky

(Some may find that carrying a portable camp stove around is too inconvenient when they know they can just find sticks and build a fire on the ground at their destination site).

A pros and cons list is good to ensure that you get an unbiased review, and we hope that you agree with us that the pros more than make up for the cons. This is based on our educated opinion, and we are confident in recommending this stove as one of the most highly efficient, easy-to-use and useful outdoor stoves around. If you take it to the great outdoors for off-grid living, you will not be disappointed.

Esbit Alcohol Stove: Camp Cooking Made Easy, Time after Time after Time

0
Esbit Brass Alcohol Burner on a wooden table

Every year, thousands of hikers and backpackers head into the back country and wilderness to enjoy the beauty of nature. If you are one of those happy campers you know the need for a small, lightweight, reliable stove that heats warm nutritious delicious meals time after time. One of the best ways of cooking in the outdoors is with an alcohol burner stove because of their simple, no moving part design and readily available fuel.

So simple, in fact, that there are D.I.Y versions, but if you want a durable, well made, quality burner, with a design that stands the test of time, you cannot choose better than the Esbit Brass. These awesome little stoves have been tried and true, world favorites for decades.

With all its qualities the Esbit Brass Alcohol Burner Camping Stove with Variable Temperature Control is the perfect companion for any outdoor adventure or expedition, whether you are making a short day trip, a long weekend or a week of back country trekking. Kayakers, mountain bikers, as well as any others who want to enjoy nature, will find this little stove a welcome addition to their pack.

Review

Packaging

This alcohol burner will ship in a box just a little bigger than the product dimensions, which are 6.8 x 6 x 2 inches. The product weighs 3.2 oz and when shipped will weigh 4 oz. It will come already put together, including a leak proof rubber seal.

Durability and Design

The Esbit stove is made under German quality assurance systems in high quality, corrosive free brass that can take a few knocks without showing any signs of damage, not that dropping it down the side of a mountain is a recommended test for durability. The actual stove has no moving parts and there are no burners to break or wear out so they are not as susceptible to damage as some other types of cookers.

Esbit Brass Alcohol Burner next to other cooking gears

It is robust enough to cram into a small space in your pack and takes up minimal space. This durability ensures that you won’t find yourself with a broken cooker when you arrive at your remote campsite after 8 hours hiking.

Flame Regulator

The Esbit Alcohol Stove has a flame regulator so you can choose to cook with fully open heat, partly open for simmering or close it to extinguish the flame. The regulator has a unique and practical fold away handle that allows you to adjust the flame without getting your fingers close to the hot burner. Esbit was the first to introduce this design feature.

It essentially will not fail to work so long as you have fuel and it can be placed in a wind sheltered spot. The secure, sealed lid means you can close any unused fuel in the stove rather than decant it back into a fiddle bottle or worse, have to waste.

Esbit alcohol stove and trekking cookset

Fuel for alcohol stoves is relatively easy to find and inexpensive to buy at many universal retailers. It is cheaper than most fuels for alternative stoves. The stove has a low profile so there is less likelihood of accidental tipping over while cooking, although caution should always be taken with any naked flame.

Fuel

The required fuel is relatively lightweight and you only need to pack the amount you need for the estimated meals so no unnecessary weight. Fuel is always on hand; just fill the stove and light it. You don’t need to scramble around looking for dry firewood when it has been raining all day.

Ultralight hikers can buy fuel in larger quantities and decant into suitable smaller bottles to pack. These are advantageous for carrying smaller quantities, but should be unbreakable, leak proof, and the better ones, have pouring measurements and flip-top caps for ease of use.

Close-up of Esbit Brass Alcohol Burner

You can use the Esbit Alcohol Stove with alternative purpose made equipment, for instance the Esbit Pot Stand. The latter is designed for easy placement and removal of the stove, as well as for easy adjustment of the simmer regulator when in use.

Manufacturer Recommendations

For simple, delicious meals, it is best to plan for one pot cooking that is water based. Each meal should take about 20-30 minutes to cook and use about 2/3ounce of fuel with 2 cups of water for two normal servings or one large serving.

Cook meals to a basic recipe with 2 cups of water. Always cover with a lid to be more efficient and bring to the boil. When boiling, stir in the chosen ingredients and bring to boil again with lid. Either turn down to simmer and let the fuel run out. Leave the meal to sit covered for another 5 – 10 minutes.

Esbit Alcohol Stove on the ground

Use easily transportable foods like rice, small shape pasta, noodles, whole or rolled grains, dehydrated vegetables and fruit, dried meat, fish, and eggs (if you can carry safely).  If weight is not so much an issue you can take fresh vegetables, cans of beans, fish, etc. Use first, those ingredients that may deteriorate or break.

All stoves can be dangerous, so a list of precautions:

  • Always consider the weather conditions before lighting
  • Do not cook on any inflammable surface
  • Remove all flammable materials close by
  • Have an extinguisher of some description on hand
  • Never leave a fire unattended

Value for the Money

This product is generally beloved by those who have used it and they state that this product is definitely worth the money. Moderately priced, you are getting a product that works, and is leak proof. While there are some more pricey, and less pricey, this alcohol burner is worth the price you pay.

As a basic description, the Esbit Alcohol Stove looks like a small metal can with a series of holes around the rim. At first glance it may be easy to think such a simple looking stove should be easy to copy but Esbit stoves have a few extra important features that continue to make it a market leader.

Someone preparing to cook with Esbit Alcohol Stove

On closer inspection, you will see an inner cylinder wall which is one the reasons the Esbit Alcohol Stove is so efficient and reliable. When filled with suitable fuel, some of the fuel fills that compartment between inner and outer walls. When the fuel is lit, evaporation develops pressure gradients that ensure the flames burn forcefully through those specifically sized and placed perimeter holes for maximum heat and efficiency.

PROS:

  • Made from quality, corrosive free brass
  • Covered with a secure brass lid fitted with a durable rubber seal
  • Compact dimensions -2 x 6 x 6.75 inches
  • Lightweight – 0.2 lb
  • Has a low profile setup
  • Flame regulator for simmering and shut off
  • Flame regulator has a folding handle
  • Fuel can be carried in the stove
  • Manufactured to German design standards

CONS:

  • Small, easy to lose
  • Can develop cracks on the outside over time that will leak
  • Does not match all Esbit stove kits
  • Have to remove the Heat Control portion to adjust
  • The flame is orange instead of blue

There are various reports that the stove will operate efficiently over many altitudes from sea level up to 12,000 feet, although the higher altitudes may mean colder temperatures do make the stove more difficult to light. Again, however, reviewers have reported using the stove at below freezing levels and it is worth noting that Scandinavian military forces use alcohol stoves all year round when temperatures drop to below -30 F.