Home Blog Page 16

Bee Sting Remedies: How To Prevent and Treat Bee Stings

0
Close-up of Bee on Flower

Insect stings are not such a common occurrence even when hiking or walking in nature, however, it is best to have some knowledge about them, and bee sting remedies in particular.

Most times, if anyone is stung, there is nothing to be very concerned about, however, stings do cause varying degrees of reaction and the most severe can be life threatening. Let’s look at how you can treat a bee sting with confidence in different situations.

Prevention is better than Cure

Prevention is better than cure, so, if you are in an area that has a lot of bees, there are a few precautions you can take to reduce the risk of being stung.

  • When there are bees flying around, remain calm and resist any temptation to swat at them as that may cause them to become alarmed and actually sting you. Move quietly away from their area if you can.
  • If you are drinking sweet beverages in the open with bees or wasps in the vicinity drink from a wide open cup so you can see if any insect is in it before taking a mouthful. I know of someone who was stung on the lip when taking a sip out of a can of sweet soda. At least check before taking a sip each time.
  • Keep food containers and rubbish bags as sealed as possible to avoid attracting insects. Keep all garbage tidy and pick up windfall fruit and animal feces as flies attract wasps.
  • When hiking wear closed footwear, long sleeves with closed cuffs and higher necklines so that bees cannot get trapped close to your skin. Be aware that floral prints and bright colors may attract bees.
  • Take care when you are walking through flowers and fields that have foraging bees and other insects. Also take care if you are moving vegetation or collecting firewood as you may disturb a nest unwittingly.

picture of bees flying around

Symptoms

How can something so small cause so much pain? Even if you do not see the insect that stung you, you will usually be aware of it instantly because of your immediate reaction to the pain it causes. If you do get a chance to identify the insect all the better so you have an idea of what any further action is to be taken.

The initial pain can be anything from mild, temporary discomfort, through to intense pain, to severe allergic reactions. But be aware that different insects may cause different reactions in each individual person for each subsequent occasion.

Bee Sting Treatment With Lemons

What happened last time may not be the same this time, which is one of the reasons anyone should have some emergency responder skills. It is imperative to at least watch for immediate severe reactions as they will require immediate medical assistance. Mild to moderate reactions are not life threatening.

A mild reaction:

  • Instant burning pain where stung
  • Area of the sting shows a red welt
  • There may be slight swelling
  • May resolve in a few hours

A moderate reaction:

  • Extreme red welts
  • Swelling may increase at the sting site over the following days
  • May resolve after 5-10 days

A severe allergic reaction, called anaphylaxis, can be life threatening:

  • Rapid skin reactions, like itching, hives, and pale or flushed skin
  • Breathing difficulties
  • Swelling of the tongue and down the throat
  • A rapid but weak pulse
  • Feelings of dizziness, vertigo, or fainting
  • Nausea, vomiting and/or diarrhea
  • Convulsions
  • Loss of consciousness

How to Treat Various Bee Sting Reactions

Ascertain where the person has been stung. This should be relatively easy as there will be some level of immediate pain at the sting site.

  1. Look for any visible sting. (Honey bees are the only insects that leave their sting behind. More about that later)
  2. Remove any visible sting as quickly as possible by scraping it back from the angle it entered. It doesn’t really matter how you achieve this. SPEED IS MORE IMPORTANT THAN METHOD. It can be with your fingernails, using a flat surface like a credit card. The main thing is as quickly as possible because the sting can still be pumping venom into the victim even though the bee has gone. Try not to squeeze the venom sac.
  3. Cleanse the area with something from your medical kit, saline, or even soap and water if you are at home.
  4. Apply a cold ice compress for a short while, for maximum 20 minutes per hour. This can be repeated over some hours, but take care not to freeze the skin by making sure a fabric layer is between ice and the skin.
  5. Applying a hydrocortisone cream on the dry sting area may relieve some symptoms like redness, swelling, and itching.
  6. If the sting area, is on a limb, elevate the area above the level of the heart.
  7. You could also take an internal antihistamine like diphenhydramine or loratadine to relieve symptoms providing you have no reaction to these medicines.
  8. If the pain is causing discomfort, a painkiller like ibuprofen or acetaminophen could also be taken internally.
  9. Get a tetanus booster vaccination if it has been longer than 10 years since the previous injection.

mud remedy for bee sting

Home and Alternative Medicine

When it comes to “home remedies” for bee stings it is wise to be cautious but some may help.

  • I have used quality pure essential lavender oil on burns with success, and some people recommend it for stings, so it could be worth of a try.
  • If you are somewhere without any access to medical first aid (which is quite possible if you are going for a short hike somewhere) you could make a mud/clay poultice. Clay would be my choice as it is sticky and dries quickly, taking some of the heat out the area.
  • Another recommended paste is made with baking soda, but trying to neutralize the effect of the acidic venom is not likely to be useful as the nature of the sting means the poison is pumped under the surface of the skin and not exposed to any outside medication.

picture of pure essential lavender oils

Severe Reactions to Bee Stings

If the victim is showing other signs of physical stress soon after the sting you will have to consider seeking immediate professional medical aid.

If there are signs of severe allergic reaction as mentioned above, the result may quickly become life threatening, so immediate evacuation for medical assistance should be taken. An allergic reaction may require emergency responder skills which at least one person in a hiking group, but preferably everybody, should have.

Symptoms may include very low blood pressure, swelling and, possibly, blockage of the trachea. During an anaphylactic attack, the victim’s heart may stop beating so group members or bystanders may have to administer cardiopulmonary resuscitation (CPR) in the hope of keeping the blood circulating and maybe restart the heart.

Medical response may be to administer intravenous antihistamines, steroids and adrenaline in the form of epinephrine. The victim will most likely be admitted to hospital for further observation over a prolonged period of time.

A bee sting on a finger

Most people who know they are at risk also carry an emergency epinephrine autoinjector that can be simply injected by the victim or by another person. An autoinjector, is a combination syringe and short needle that is injected as a single dose into the thigh – very easy to administer.

If you do carry it in a First Aid kit, check the expiration date regularly. People at risk should also consider wearing a medical alert bracelet to indicate their allergies to bee or other insect stings.

People who do suffer a severe allergic reaction have a strong chance of 30 to 60% chance of repeating the anaphylactic response if stung again. It would be wise for those at risk to take medical advice before venturing into the back country or anywhere where medical assistance is remote. There are preventative measures that can be taken with immunotherapy.

These series of shots, usually given over a few years, can reduce or even eliminate allergic responses to bee venom. An emergency epinephrine autoinjector is also a wise addition to any First Aid kit should you likely to be in any vicinity where bees are foraging and forming hives.

picture of two adults and a first aid kit

If any victim receives multiple stings it would be wise to seek medical advice as soon as possible as well. Multiple stings from between 10 to 20 may not provoke an initial allergic reaction, however, there complications could still develop so best err on the side of caution. Victims will often be kept under observation and various blood tests be taken.

Also, if the victim is stung on the lips, mouth or throat it is best to seek medical advice as these areas could swell and make breathing difficult over the following hours.

The Nature of Bees

There are more than 20,000 species of bees in the world, but humans usually only interact with a few of them, mainly honey bees, bumble bees, and carpenter bees. In many ways we should be grateful that there are bees around to sting. They are such important insects in nature that if they were to disappear from the planet, all plant and animal life would be threatened with extinction.

Person Wearing White Sombrero With Yellow Gloves

Bees like most animals are not aggressive in their normal behavior. Different species live together in harmony y most of the time. Even predators and prey share the savannah and it is only when the former are hunting for food or protecting territories is there any aggression.

Likewise bees will mostly ignore humans while they are gathering food and only sting if they are provoked, usually by accident. Honey bees have bred to be quite docile by apiarists who prefer to care for peaceful hives. But they’re more aggressive species of bees and some variants have interbred making for more aggressive behavior.

Some Stings have more Bite

Honey bee stings have the barbs along their sting which rip out of thin substances like other insects and the bee comes to no harm. Not so lucky for the other insect though. However, in the case of human skin the barbs get caught and hold fast so that as the bee tries to fly away, it literally leaves the sting and part of its abdomen in the skin. That bee is essentially toast and will die within minutes. Not good for the bee, but not good for the human either.

The stings are so effective that even though the bee has departed to die, the sting will continue to work its way further into the victim’s skin and continue to release venom. That is why it is necessary to get the sting out as soon as possible.

picture of a a bee stinger

The actual amount of poison injected by a honey bee is usually very small, something between 5 and 50 micrograms of fluid. The main substance that causes the pain we feel is the apitoxin melittin, which is colorless and made up of particular proteins. Some histamines and other amines may also cause some pain and itchiness. A healthy person can actually withstand about ten stings per half a kilogram of body weight unless they are allergic to the toxin.

Bees sting from a point in their abdomen with venom or poison which is completely different from an insect bite. And a person’s reaction to one insect sting may be completely different to another. For instance, bee stings are acidic, whereas a wasp sting is alkali so reaction is completely different. Bumblebees and the like have smooth stings so can sting more than once without harm to themselves.

Honey Bee on Red and Yellow Flower during Daytime

When it comes to honey bees it is only the worker bees that will sting. The male drones are usually just hanging around the hive, waiting for a chance to impregnate the queen but they have no sting.

The queen never leaves the hive under ordinary circumstances and although she has a smooth stinger she only uses it to kill prospective rival queens. When hives are swarming, looking for a new hive they are usually non aggressive as they have no territory or hive to protect.

Pheromones – Tiny Scents can Create Big Action

If the bees do sting or many insects start to fly around you, cover your mouth and nose quickly and retreat from the area as quickly and calmly as possible. If a bee stings, it releases a chemical called pheromone that alerts other bees to danger and they may come to attack. If you can, get into a closed vehicle or building immediately.

Being brave little creatures, bees will seek out the monster in their midst and come to attack even though they are essentially committing suicide by stinging. Honey bees are the only ones that injure themselves by stinging though. Before long there is more and pheromone flying through the air and even more bees will come to attack.

Brown Honey Bee Hovering Under White Petaled Flower during Daytime

I was once stung by a bee that got entangled in my hair. I couldn’t see what it was but certainly felt the sting. Seconds later other bees were swarming around my head, but luckily I was not far from my car and got in and closed everything up quickly. I had already been stung a few times and the welts took some days to go away. Not a pleasant experience!

Pheromones do not wash off easily nor do they dissipate quickly so take care to get rid of as a much as possible. If you dive into a pool or river, the bees will continue their attack if they smell the pheromone again when you get out. Apparently this alarm pheromone smells a little like bananas. Wonder if that is where the expression, “going bananas” comes from?

Wrapping It Up

So, you can see that bee stings are usually easy to treat and bee sting remedies are simple to apply even in back country situations. Problems only arise when an individual has a severe allergic reaction which can quickly become life threatening if medical treatment is not available. If there is any possibility of this or there is an unknown aspect, it would be wise to ensure any emergency kit contains at least one up to date epinephrine autoinjector. Better to have it and never have to use it than vice versa.

I would also urge anyone to take a certified Emergency First Responder course and stay current with methods for CPR and resuscitation. Those skills may be life savers at any time and place.


close-up picture of epinephrine autoinjector

Appalachian Trail Apps: Maps and Tracks for the Entire Appalachian Trail

0
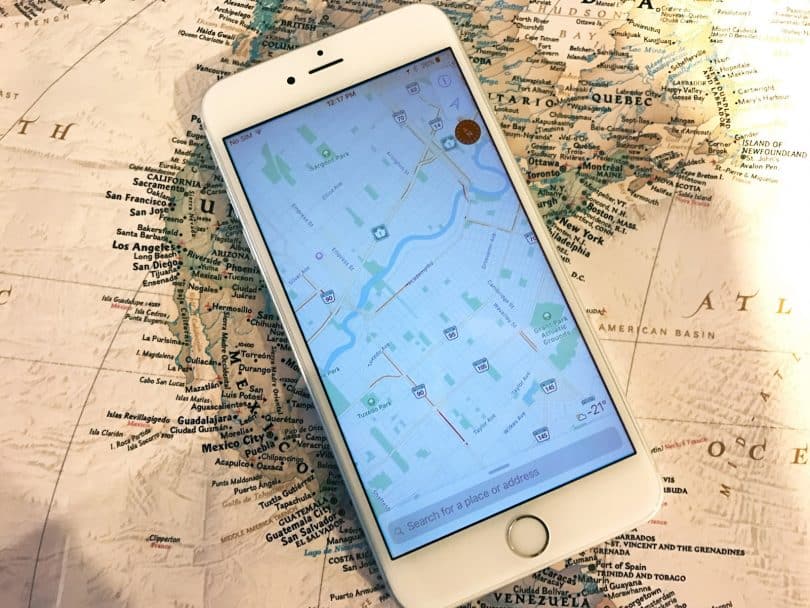
a photo of a mobile phone sitting on a map

An Appalachian trail is the longest hiking trail in the world. The trail is ranging from Maine to Georgia and you definitely need guidance through it. For this reason you need an interactive map or an application with the help of which you could explore different locations, visit the most famous sights and shelters.

Even though some people still choose to use good old paper maps to guide them through the Appalachian Trail, you might want to consider something more modern and interactive, especially if you are planning on conquering the longest hike trail there is. Considering the fact that you would spend weeks hiking, a paper map is not such a great idea. It could easily get wet and you might need to end your tour.

The Appalachian Trail is located in the eastern part of the United States and almost every hiker’s desire is to go through it. However, the trail is not an easy catch. It is long 3500 km and it passes through 14 states. Every year there are new improvements made on the trail since its completion in 1937.

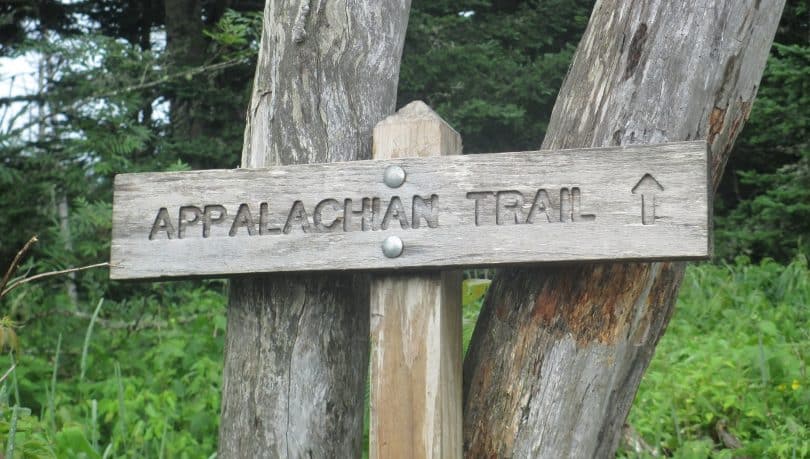
Appalachian trail sign

For this reason, an app instead of a map is a great idea. It is maintained by more than 30 clubs which are working together in order for this trail to be always available to the bravest and most prepared hikers. Don’t be fooled, this trail takes months of preparation. Not because of its height but because of its length.

The Appalachian Trail goes through farms, roads, cities and wild lands. For this reason, the choosing of the proper equipment is a process on its own, which is not an easy task.

Even though there are not many people who are hiking through the entire trail, there are many people who are hiking local at least one mile right on this trail. It is because of this that the trail is always full with hikers; long trail hikers as well as short trail hikers.

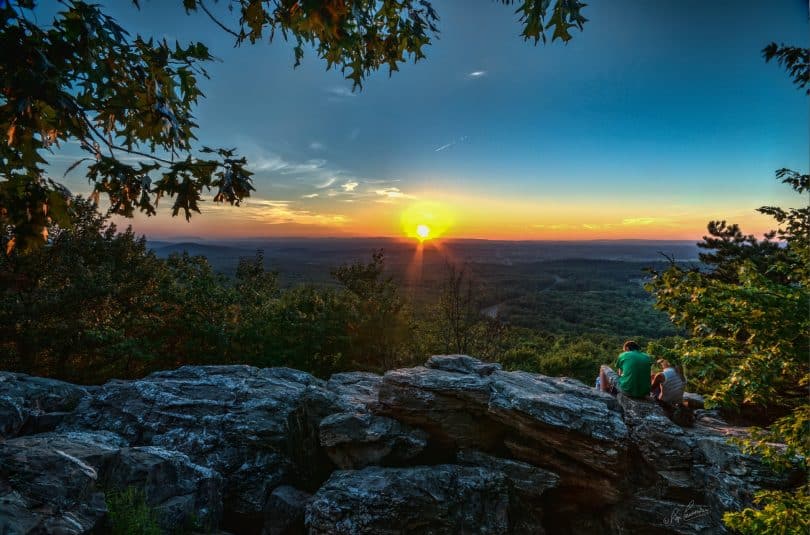
A picture at the Bears Den, which is on the Appalachian Trail close to Bluemont VA

The Appalachian Trail is definitely a wonder of the world and it also has its own international extension which goes through Canada, Greenland, even Europe and Morocco. However, there are sources from Europe who report that some of the trail is not as maintained as in the United States. So a map or a guide is essential if you don’t have the desire to get lost in the wilderness.

The best news for hikers is that bicycles are prohibited from driving on the trail except in some sections where it is necessary for them to be allowed. There are even some areas which are adapted for wheelchair use. However, the navigation is not easy. Without the proper research, there are viewpoints and shelters which you would probably miss on your own.

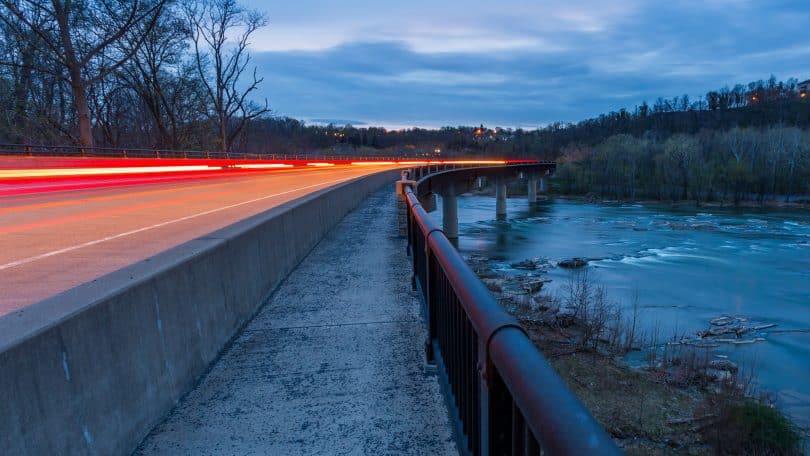
The crossing of the Shenandoah River for the famed Appalachian Trail that extends from Maine to Georgia is across this bridge

Nevertheless, don’t despair since there are numerous applications which will not only help you with the navigation, but they will serve you as a virtual guide. The apps could provide you with every important detail which is more likely for a person to do since it is human to forget something.

Hiking gear in this case makes all the difference. Every experienced hiker knows that there is a great difference whether you carry 8 or 10 lbs on your back, especially on such a challenging trail. For an average hiker which is prepared enough to take the whole trail it would take him around 160 days to complete it.

Hiker with hiking backpack on mountain trail

Although, there are many hikers which prefer to focus on the quality instead of the time, so they are hiking on the Appalachian trail for a full year. In the meantime, they are sleeping in shelters, their tents; they are enjoying the nature, making new friendships and photographing rare species. Although many people assume that the Appalachian Trail is pretty flat without any higher elevations, in fact through the whole trail hikers gain over 89 miles.

It is interesting to mention that a hiker needs around 5000 calories to satisfy his daily needs for food while hiking. It is often the case that a hiker is not able to eat that amount of food and this is why almost every hiker loses weight on the Appalachian Trail. All in all, this is a hike, which you should take as seriously as an Everest expedition! That is why we suggest that you arm yourself with the best Appalachian Trail Apps you can find on the web, and make your orientation as simple as possible.

We also suggest checking out the reviews of the two of our favorite Apps for hiking on the Appalacian Trail.

Appalachian Trail applications

The first thing you need to consider when rating an Appalachian Trail application is how much information it has included. But in order to include as much practical information as possible the creator or some of the team members must be a hiker. Otherwise, it is just an ordinary application based on a lot of research.

Take a look at these Appalachian Trail applications which are based on the knowledge of hikers who have been through this before you. All of these applications include some practical tips and tricks which would assist in making your journey more fun and more bearable.

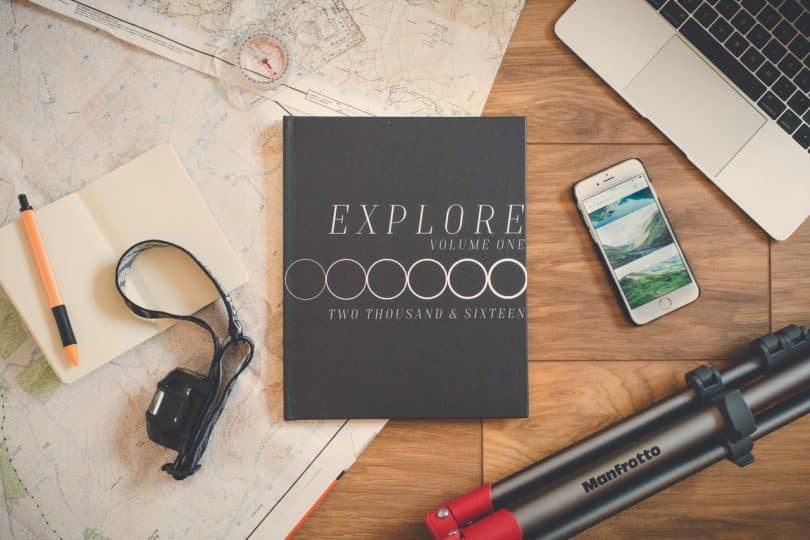
Explore Book Beside Silver Iphone 6 on Brown Wooden Surface

However, this doesn’t mean that you won’t need to do your own research before starting this hike. Your own research would reveal some other things which would probably be as important, for instance the number of hiking shoes you will need in order to go through the entire trail. It is interesting to know that you will need around 5, more or less depending on your walking and the quality of your shoes. This is just one of the examples of the things you need to know before starting your long trip.

AT hiker app

The AT hiker app is the number one application on the market and it is available for Android as well as for iPhone. If you are wondering, the use of a mobile phone on such a long trail is possible because the cities and towns are not far away from each other. The longest walking distance is only couple of days. For this reason, using a mobile or some other rechargeable device is possible to carry with you.

The founder of this application is a passionate hiker himself and but for shorter trails. For this reason, when creating this application, Ryan had help from the Thru Hikers Companion club which discussed with him for ours about their passion until he gathered all the necessary information. After that, he gave the application to the providers of this information for free. It gives you the freedom to choose which part of the hike you want to go through and to download only that particular part of the trail.

an iphone sitting on a map

After downloading the section, you won’t have the need of a cellular reception since it is perfectly working offline too. If you decide to go through the entire trail, it is cheaper that you download the whole application for only 60 dollars.

The features of this application are numerous and they are all described in this article. Of course it allows you to see the whole section and the path in front of you. It is also highlighting the important destinations along the way which are recommended for stopping, recharging or refueling. All the highlights are marked with its own icons, for shelters, water sources, view points, road crossings, trail crossings and many other features.

It is also interesting that when you click on any icon, the application opens another window which shows you photos and any other additional information regarding that particular stop. Apart from its short description and basic information, it also includes fun facts which are very interesting for the more curious hikers. It also provides you the distance between shelters; water sources and other important highlight destinations so that you don’t have to calculate yourself.

Guthook’s AT  application

This started as an iPhone application, but now it is also available on Android. In it, the whole map area is divided into 9 geographic sections. You, as a user would be able to see these sections in several view options such as a satellite view, a map view or a combination of both. Although this is not a practical feature, but it is more of a storage consuming feature, it is a nice addition to the whole application.

If you have an extra storage in your mobile, it is nice to see it in the mobile and know what exactly to expect. The main downside to this application is that it is not clearly stated that you should download the offline map after downloading the application. There are many users who thought that downloading the application was enough.

Of course, there are also four available terrain download options you could choose from. As you can notice, this application is more focused on the design and clarification of the information provided. However, it is not as rich with details as the previous one.

The main advantage of this application is that it is showing all the elevations in front of you so you could anticipate them and get the strengths to go through with it. This feature is very useful to hikers who are always wondering how much further until the end, or in this case, until the next stop.

A man taking a picture with his phone

It is good that the hikers are able to post updates in the information section where you will be notified if there are any changes to the trail or some danger on it. It is also a great way to stay in touch with other hiker groups and if you are competitive, this would be your number one feature. The usual information is also included in the form of short descriptions about the different stops you should make.

There is also an interesting and a very organized feature, called data book. It is providing you with categories you could pick from, such as water sources, views and peaks, camping and shelters, towns and services and restrooms and privies. You could get this information for all waypoints or only the specific ones which are ahead of you.

This provides you with an easier and more organized search of information which is certainly useful in such a complex application. When you open the specific waypoints which you have searched for, below every name, there are the distances. This way, you could clearly see all the distances and plan your trip accordingly.

A few more tips

Now the most important part of every trail map application is the GPS function and how precise it is. As every decent map application, once you download the offline map, and you turn your GPS on, it will tell you where you are no matter if you are using an internet connection or not. This is very good for international hikers which would otherwise be charged with data charges.

If you want a more precise GPS it is good that you put your phone on an Airplane mode and use the application like that. This would make your phone turn all the other functions and focus mainly on the GPS function, therefore providing you with an accurate coordinates of where you are at the moment. This works for every application available on the market, which uses GPS. The Airplane mode is also a great defense against data charges.

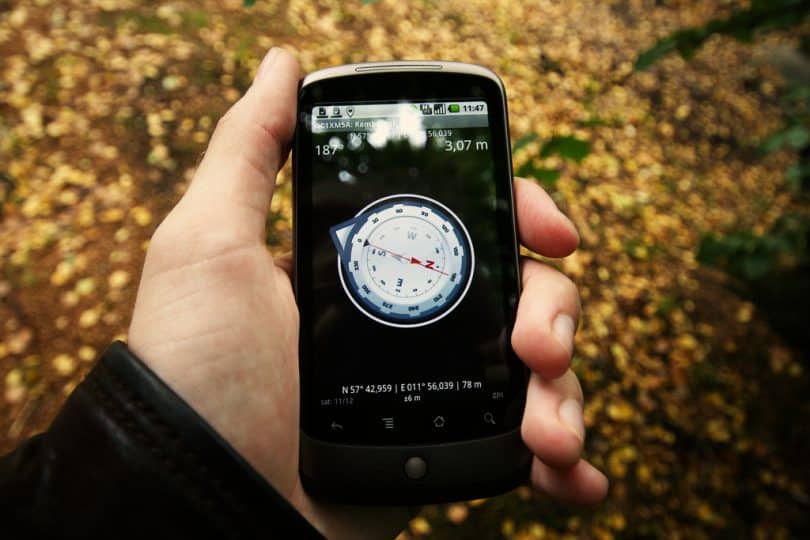
A compass app on the smartphone

The advantages of these applications are that they don’t weight at all. In fact, they are installed on a device which you are probably planning on carrying with you. However, they do require a small planning, meaning you must remember to download the application which you chose before the trip.

It is also very nice that every Appalachian Trail application uses a description with photos too, so you would be able to find the waypoint very quick and easy. With maps, you don’t have this luxury. The descriptions are also something which not map or guide have. The first application has the advantage of having more than a short description and it is more suitable for nature curious types of hikers. And the second recommended application is more suitable for the cautions hikers which want to be up to date with the newest trail information.

Both applications provide you the distances without any big difference other that the design and settings changes. Both applications also provide somewhat accurate location of your current position which you can only get with such an application or by carrying the weight of a GPS device. With a GPS device you lose some of the information advantages these applications have to provide.

A picture of a compass points on a rock

The only downsides to it might be that you have to carry and stare in an electronic device when you are surrounded by such a beautiful nature. This certainly feels as a crime to the nature. However, considering the features they have to offer, most hikers pick Appalachian Trail applications over any other navigation system out there.

And of course, since this is a 2175 mile journey, it is not to be taken lightly. You should plan every section of it separately. If you don’t have the storage on your mobile phone, make sure you get one; because it is better that you download the whole application than in sections. This way, you would be able to study and plan the whole trail before starting your trip.

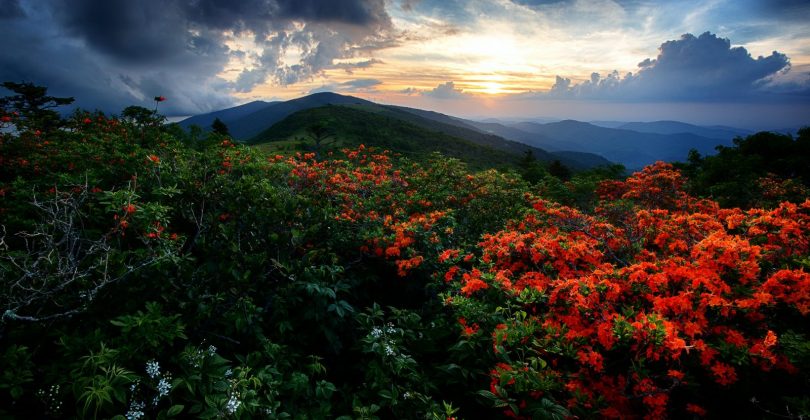
Flame Azaleas along the Appalachian trail at sunset at Roan Highlands on the Tennessee-North Carolina border.

It is recommended that you start with the planning process six to eight months before the trip. You should make sure you go through every camp, shelter and town on the Appalachian Trail. It is also a good idea to know where you are going to sleep every night and announce it on the application as you approach the destination. This is recommended because sometimes there isn’t enough sleep places in certain shelter and you would have to sleep in your own tent. Of course, this is not a bad idea if the temperatures are normal and if you have the right equipment for doing so.

The budget is another subject which you should closely focus on. You will need to plan a specific amount of budget for replacing every piece of equipment which you believe could get old with wearing. There is also the possibility of shipping supplies across the countries, but this is just a waste of money. It could be all avoided with a detailed plan. Our last advice is to also plan on a specific diet while walking.

The applications have good restaurant recommendations, but you will probably spend most of the time and money eating in fast food chains. Coming from a more experienced hiker, it is better that you plan high calorie meals which will satisfy your hunger. This is especially important if you are planning on keeping the pace and walking around 6 hours a day.

Wrapping it up

All things considered, you should make sure you equip yourself with the right navigation system, but also double check every other gear which you are planning on carrying with you. Also, make sure you enjoy the trail and focus on the beauties around you. We know that the information these applications have, are very interesting and attention grabbing, but so is the nature.

A picture of a salamander on the Appalachian Trail

It is also a good idea not to start and hike on a pace because there is no greater fun kill than this type of hiking. Instead, enjoy every minute of the hiking because before you know, it might be over.

Benefits of Hiking: Improving the Body and Mind

0
a picture of scenic view of mountains

If you are like many people, it can be difficult to find the energy and time to get in some quality exercise. Family, friends and other priorities often take the forefront of your time, while your fitness routine is stagnant.

Maybe you just hate to sweat in front of a lot of people in a crowded gym.

People Walking on Dirt Path in Forest at Daytime

Whatever your reason, hiking is your answer! There are several benefits of hiking, as well as the health benefits of hiking, and we will discuss many aspects of it that will be broken down to body and mind. First, let’s start with the body.

Benefits for the Body

Before you go out on your first hike, there are some tips you should adhere to. Never go out on your first few hikes and expect to be able to make it several hours. You will want to start slowly when you are trying out a hiking routine.

At first, you should try it out for about 10 minutes and then keep adding time to those hikes until you feel ready to knock out a half hour hike, a few days a week. Eventually, you can hike for a couple of hours as exercise and become an avid hiker! You should also consider getting a good pair of boots for hiking, which will increase your ability to get up hills and rough terrain.

Hiking is considered a great cardiovascular workout that will improve many parts of your body such as:

  • Bone density improvement: Having dense bones that are high in mass is the best way to be. If you have low bone mass, you are prone to osteoporosis and arthritis and other issues that could lead to fractures and prohibit movement. Bone loss can be measured by getting a bone density scan done. Ways to improve low bone mass are to get exercise like hiking, taken in some vitamin D (or sun!) and eat foods that have a lot of calcium, which is known to help your bones.
  • Improved sugar levels as well as blood pressure: Blood sugar levels should be maintained for those with diabetes, as they can get out of control. Most of the time, a regular person’s blood sugar level is anywhere from 100 to 140, depending on when you have last eaten. A diabetic’s sugar levels will vary and need to be monitored by diet and exercise. Blood pressure levels that are systolic should be below 120, with a reading of 140 or more being considered high. Blood pressure is taken by how the heart beats squeeze blood through to your body, which then puts pressure on vessels.
  • Lowered risk of heart disease: Heart disease is a term used to describe varying issues with the heart that involve the blood vessels. This can include things like stroke, angina, and heart attack, as well as anything that is wrong with the heart muscles and valves.
  • Increased strength in legs, hips, quads and more: Being stronger has always been a positive thing. With hiking you are improving many parts of your body, especially your legs and hips because you are moving through terrain that is full of hills and surfaces that are not flat. Building muscle means your body can handle long walks, lifting heavier objects, and your body is becoming leaner.
  • Improved balance and stronger core: Obviously, hiking includes going uphill and enduring harsh terrain. While enduring this, you are helping your body to improve its balance because you are not on a flat surface. Hiking also improves your core, as you are working out many parts of your body at once while moving uphill.
  • Weight loss: When you are hiking, your body is going to lose excess fat because you are sweating and exercising. Once you have a hiking routine going, you will notice that you have lost a few pounds, and even gained some muscle mass!
  • Decreased anxiety / depression and less stress: Aren’t we all stressed out? Going hiking boosts your mood, so you feel less stressed and maybe more connected to earth. Getting out there and clearing your mind outdoors is a great way to relieve anxiety because you are getting away from the hustle and bustle of life. Plus, any exercise is shown to improve mood, which decreases bouts of depression.

two adults watching a waterfall

A few more tips

When you go hiking, you are improving your heart, blood vessels and lungs, which improves overall health. You will also gain muscle mass and see a decrease in chances of disease like diabetes, colon cancer, breast cancer, and endometrial cancer.

When you take that hike, just remember you are prolonging your life! If you are hiking with your family, your children also get the same health benefits from hiking, and they will have a better time sleeping, and build strong bones in the process.

Toddlers Sitting on Rock during Daytime

Keep in mind that hiking is not just for special camping trips or when you are going out to the country. You can hike near your home, for instance. Just getting in even 20 minutes a few times per week can greatly improve your overall health.

There are apps and other trackers out there that will show your progress and allow you to feel a sense of achievement. Never hike alone, in case of an emergency. Plus, is it not more fun with a friend?

While you are outside, going on a wonderful hike, looking at all of the beauty around you, DO NOT forget to bring along water and some other necessities that are needed when you are out in the sun. Also, be sure to drink 2 quarts of water if you are going on a hike that can last upwards of 4 hours. You will lose water while you are exercising and sweating. Here is a list of all the things that are essential:

  • Hiking boots or shoes
  • Weather appropriate clothing
  • Hat and sunglasses for protection from the sun
  • Sun screen to keep your skin safe from UV rays
  • Snacks
  • Phone or Map so you will not get lost

A Pair of Brown Work Boots

Some beginning hikers may feel a little lost at first, but with a few tips, they will feel like a pro in no time. When making a fitness routine for hiking, you can do things like:

  • Try to go up more hills: Even going up a hill with a 10 percent incline can increase your heart rate and burn up to 40 percent more calories!
  • Aim for rough terrain: You can work those muscles out by going uphill on uneven terrain, which will improve your balance, too!
  • Use weights: If you have a backpack with you, consider using some weights or extra water bottles to give you added weight, up to 10 or 15 pounds, and you will burn extra calories by 10 to 15 percent, along with strengthening your body’s muscles!
  • If you find that you have no time for a hike, consider a brisk walk in an area where the terrain is uneven, simulating a true hike. This way, your body will get in a great workout still and your body will not feel rusty.
  • Use poles: Using poles while you hike can help reduce wear on your joints. Using poles, helps you to keep moving in a forward momentum, which gives you a better workout with your upper body. This helps to reduce weight faster. They also keep you from falling, and can be adjusted for the type of land you are trekking through.

The health benefits of hiking are enormous, but remember to stay safe while you hike. Take a friend or family member, or a few! Hiking alone is not a good idea, in case of emergency. Take small steps, so you do not slip and injure yourself. Also, before exploring a new area, you should learn the lay of the land before you go there, and always bring a map or GPS.

a picture of a person holding a pen over a map

Those were the hiking benefits for your body, now let’s see what health benefits this activity brings for your mind.

Benefits for the Mind

Now that you know how hiking can be beneficial to your health and body, you should know how it will affect your mind and attitude. Imagine going for a hike where the entire landscape is beautiful, serene, and peaceful.

You feel free and your mind seems clear, and in turn, your nerves are more calm, your attitude is more positive, and your mood is boosted all because you are exercising and doing so outdoors with everything beautiful nature provides. Everyday stresses such as work, relationships and the need to be connected with technology can be gone in a heartbeat while you are on a hike.

a picture of a couple enjoying the nature

Hiking has been known to be good for mental impairments such as:

Depression: This mood disorder affects many people and can make them feel sad or hopeless. This affects how they think and react, their sleep, ability to work and many factors of their life. Bouts of depression can last weeks or months and can occur for many reasons. Various types of depression exist like postpartum depression, persistent depressive disorder and seasonal depression.

Anxiety: Most people suffer from anxiety from time to time, such as speaking before a large group, or going through a problem. For people who have anxiety disorder, many things can make them nervous from an unexpected visitor to large groups of people. Those that suffer learn that their anxiety gets worse as time goes by and it does not go away, and is very stressful. This may make them reluctant to leave their house or socialize, among other problems.

Woman on Forest during Daytime

Stress: This is known as stress or pressure one feels from a situation that causes emotional or mental tension on a person. Stress occurs in many forms, from a demanding job, needy or dramatic people, to paying bills. Each day people encounter stress, and hiking is a great way to relieve it and enjoy life. Stress is known to have adverse affects on your health, which is another reason to get outdoors and enjoy the world.

PTSD: Post Traumatic Stress Disorder is a disorder in which a person may develop adverse side effects of an event that occurred. Many service men and women suffer from this after going to war and seeing people killed or killing themselves.

Some people develop this after they have lost someone or been assaulted. Using hiking as a tool can help a person feel less stressed, and lessen the chances or night terrors, flashbacks and more disturbing side effects of this terrible disorder.

picture of a woman jumping from a rrock

Agoraphobia: This crippling form of anxiety creates the fear that a person is unsafe where they are or in an unsafe situation, when they are actually not. Many of those who suffer feel like this when they are in crowded areas like malls or using a form of public transportation.

Even going outside of the house can seem overwhelming to those who suffer. Hiking can help someone get out of the house, in an area that is not crowded, with beautiful scenery, among people they know. This will decrease the chance of an attack and allow the brain to feel calm.

Man and Woman Sitting on RMountain during Daytime

Rumination: This is the act of thinking about negative experiences, which causes negative emotions. A person will constantly think about situations and consequences of experiences, real or not, and what can cause them. This stresses people out and does not allow them to focus on a solution to their problem.

Those that choose hiking to help them, can clear their minds and allow their brain to slow down and enjoy life a little more. Using this with self regulation, which is the act of asking yourself questions to solve the problem, along with other therapeutic models, can reduce the disorder significantly.

Not only does going for a good hike aid in mental impairments, but is is also good in other ways for the brain. Once you begin a hiking routine, you will notice that your attention span has lengthened and you can solve problems easier, as well as finding yourself feeling more creative. Many people find that simply being in nature, away from the hustle and bustle of life and technology, makes them relax, clear their mind and simply think.

a group of people climbing the mountain

Visiting new places is another exciting perk of hiking. It is fun to find new trails and places to exercise, that are still away from civilization. This will create an exciting feeling within about exploring new territory, and will help the brain form more synopses. Not only that, but you are not going to the same locations, which can create boredom.

After you have new places locally, why not take a vacation somewhere that is known for great trails and adventures outdoors? Finding places that are visually exciting will only increase the chance of a great hike. Going places where you can see mountains, canyons, forests or deserts will surely be beautiful and relaxing!

All in All

As you can see, hiking is a great way to get in some exercise and help renew and refresh your mind. Staying healthy by hiking will reduce your risk of common illness, and is proven to help you live longer and decrease the chances of heart disease, diabetes, and osteoporosis.

Not only is it good for your body, but your peace of mind will grow, while your anxiety and stress decrease! Hiking is a fun way to bond with your family and friends, see beautiful scenery and explore new places! Hiking is a winning activity for everyone!

a picture of mountain landscape


Thru Hiking: End-to-End Hiking On the Trail

0
a man admiring the landscapeThru hiking is something that many hikers strive to do as they see it as a challenge. So, what is a thru hike? If you do not know, thru hikes are something that is known as hiking a long distance trail, from one end to the other, within one season. It is a fun and challenging experience that is known in the United States and even around the world.

This type of hiking is not to be confused with section hiking, where you hike parts of a trail by sections at once, that do not have to be in sequential order. This type of hiking is also known as End-to-End Hiking, and there is a lot to learn about it, as well as what areas are known for thru hikes.

End-to-End Hiking On The Trail

This type of hiking actually started many years ago when people traveled strictly on foot, and were doing so for their own personal fun, and to see the world around them. Some people have become well known for their trail blazing thru hikes, such as Lillian Alling, who aimed to walk from New York City to the Bering Strait, to take a boat back to Russia.

Or George W. Outerbridge who was the first person to thru hike the first part of the Appalachian Trail in the 1930s. Earl Shaffer was the first to thru hike publicly thru the Appalachian Trail in the 1940s.

Today, this type of hiking is considered difficult, but definitely fun and something new to do. It can take many months and many miles to hike areas, and there are many things you need to take with you to ensure you are safe and healthy. With the next 4 to 6 months in the mountains, you will want to plan well in advance like what to take, where to go, and where to stock up if you need food or anything else.

AT THRU HIKE 1643

Since backpacking, mountaineering, and hiking, have become more and more popular within the United States and the world, many people try this form of hiking in the most well known places each year. But, not everyone can complete the long journey. For example, The Appalachian Trail Conservancy reports that about a quarter of thru hikers, actually finish the trail. Do you think you can do it? Let us talk more about it before you get too overwhelmed!

Features to Consider

The features of thru hiking are basically preparing yourself for the long haul. See below for some things you should do in preparation for such a feat.

Do not go into this lightly. You are going to want to do a ton of research on where to go, what gear to take, learn new trail skills, and more. This is something you will want to plan well in advance because you cannot wing a trip like this.

research on where to go

Thru hikes are quite daunting at times. Most people do not make the entire hike. To ensure you are successful in your mission, you should know some pitfalls that make people quit, and how you can handle them.

Expectations

Do not go into this thinking it is going to be easy. It will not be. You will be outdoors for several months and it is going to take a lot of determination and work to complete the mission.

Fatigue

Your body is going to get tired. You will be sore, tired, wet and dirty. You are going to be hungry and thirsty. Take care of your body so that your brain does not start telling you to quit. Mental fatigue can be very tough to overcome. Keep yourself going one minute at a time when you feel down.

Time and Money

This is where you want to stay in your budget and stay on track. Put a plan together about how much hiking you want to do on each day. Keep track of your progress and watch over the money you do have. Being aware of these things will ensure a successful trip.

Time and Money

Sickness or Injury

Thru hikes take a toll on your body, for sure. You will feel your muscles, joints and bones ache some days. Take care of your body before and during your hiking adventure. Each day you will want to stretch so that your body is limber. Plan ahead and train yourself and prepare for this. If you do injure yourself seriously, you may have to abort your trip early.

Life Events

We all know life can get in the way at times. Sometimes things occur, such as a death or sickness that requires you to leave the trail. You may have to leave for some time, but you can always get back on the trail at a different time.

Prepare for Success

When you are planning your trip ahead of time, try to define some goals that you want to achieve. Stay focused on big and small milestones to keep you going. Setting goals, such as not quitting if the weather is snowy, can be helpful when on the trail. The idea is to define what successes you want to achieve while you are thru hiking.

Prepare for success

Gear Weight

Thru hikes are not the time to be carrying heavy gear. It can weigh down on you when you need the most energy. You want to be as efficient as possible so you can cover as much area per day. You will want very light gear and equipment in order to not be weighed down.

Attitude

Staying positive is key to being successful through your journey. You can do this and you can stay focused, even if times may be tough. If you are committed, strong willed and prepared, nothing can stop you. There is no time like the present, so start planning as early as you can, to get out there and be successful!

Where Can You Go To Thru Hike, and What Do You Need to Take With You?

Now we can get to the good stuff about thru hiking. There are many famous places in which you can thru hike and they are all over the world. We will discuss 3 in the United States, however. Below, we will discuss some of the most well known places that people enjoy this type of hiking.

Appalachian Trail

When people thru hike, chances are they are going to do so on the Appalachian Trail, as it is the most popular place to do so. Here, you will hike 2,190 miles of the trail and it should take you anywhere from 5 to 7 months to do the entire thing. You will have to register here in order to thru hike and you will have to know all of the regulations for the Trail. It also includes several places in which, to resupply on food and items, and you really only need to carry about 3 to 6 days of food before you need to get more.

Older hiker on the Appalachian Trail

Pacific Crest Trail

This trail is 2,650 miles long and takes at least 5 months to complete. You will need a permit to hike here, which is in Southern California and goes up through Washington. In California, it can be terribly hot and you need to stay hydrated and safe. You can also climb Mt. Whitney while you are out on the trail!

crossing the Pacific Crest Trail

Continental Divide Trail

If you average 17 miles per day, you can complete this trail in 6 months. You will probably need a backpacking permit to go through the national parks. You will travel through 4 states; Colorado, New Mexico, Wyoming, and Idaho. Plus, you will touch on spots of Montana.

You will also run the trail in Mexico on one end and Canada on the other. Overall, you will travel 5,600 miles! That is quite the feat and you get to see some beautiful parts of the country, Mexico and Canada! One fun fact is that only about 200 people try this thru hike each year!

Hiking the Continental Divide Trail

Now that you know some of the places where you can go, let us discuss what you should pack along with you. Remember, you want to keep everything simple and light in weight. Take only the essential items with you. You can always find little towns or places along the trail where you can purchase some food and drinks or pick up some extra items that you need.

Items to Take on Your Thru Hike Why You Need It
Shelter You will need a tent to take with you in order to either sleep in or use in case of bad weather. Be sure it is light in weight.
Pack Your gear pack needs to be light and compact, and should be as big as 40 to 65 liters. You will want something simple and that has a good internal frame. You do not need anything fancy for thru hiking.
Sleeping Bag You will need a sleeping bag to sleep in at night. In the mountains, the temperature can get down to freezing digits and you need something that is insulated and fit for use each day and is resistant to water. Ideally, it will weigh under 3 pounds.
Sleeping Pad You will need a sleeping pad for cushioning as you sleep after a long day of hiking. This helps your body to rest properly and get ready for another day outdoors. This should weigh about a pound or less.
Clothing Many people make the mistake of packing too much clothing. Ideally, you need a couple of pairs of socks and underwear. Never bring along cotton clothing as it absorbs moisture.You will need some insulating layers and clothing to go over that. Synthetic or wool fabrics are best. Also have a spare set of clothing while you are at camp so you can clean your hiking clothing.
Footwear Your foot gear is the most important item to have. Many thru hikers like trail runners as opposed to heavy boots. Trail runners dry quicker, are lighter in weight, and do not cause as much pain or blisters on the feet.You will want your trail runners to be about a size bigger than normal. Using these types of footwear allows you to cover more of the trail.
Water Purification System You want to learn how to treat your water and make it clean and safe to drink. No matter what trail you are on, never take a chance.Always make sure you filter and clean your water before drinking it. Having a purification system in place is important and you can find several when looking into it.
Stuff Sacks Ideally, you will want to take 2 waterproof stuff sacks with you. One will be for clothing and the other will be for your sleeping bag.These items need to stay dry always. Some hikers carry an extra stuff sack with snacks and things they can eat.
Guide Book and / or Map Using a guide book can be helpful when finding shelter, campsites, and supplies. Using a map will give you the lay of the land, like terrain, and will prevent you from getting lost in the wild.Most thru hikers prefer the AWOL’s AT Guide if you are in the Appalachian Trail.
First Aid Kit and Hygiene Products Bring along the essential first aid and hygiene products in order to save space. Some items you will need include antiseptic wipes, gauze pads, cream, tape, hand sanitizer, toothbrush and paste, soap, and fire starter.
Knife or Multi Tool This can help when cutting up your food to eat, or for any number of things you may encounter in the wild. Having this can make life a little easier.

A few other items that you might consider taking, but are not exactly essential include the following:

  • Hiking Poles can be used to help you take less of an impact on your knees when you are trekking along downhill. These can also be used as tent poles in a pinch.
  • Stove or Cook Wear, basically make life easier when it comes to cooking your dinner after a long day. Many thru hikers carry little stoves in order to eat foods that would normally be heated. Having a bowl or pot to cook in allows your food to be eaten properly.
  • Headlamps can be used for hiking in the dark, which is not safe. You should use caution when hiking at night. If you decide to bring a headlamp, look for one with at least 70 Lumens.
  • Electronics are luxury items when thru hiking. Some people want to bring their phone, mp3 player, laptop or camera. They even bring flashlights. You may do this to stay connected with the outside world, but you do not need them. They can be useful if calling for help, but you can always bring a radio for that. Other luxury items include pillows and books.

A picture of hiking poles

What Do Other Hikers Say?

Hikers say that thru hiking is definitely a challenge and that it is not to be taken lightly. Being gone for months at a time, roughing it outdoors, in any kind of weather can take a toll on you, mentally and physically. Hikers say that if you are going to attempt this, months long journey, you need to mentally prepare and get your body in shape for the long duration that you will be gone.

Hikers agree that using the lightest gear possible and bringing along only the essential items is what keeps the weight down and keeps your body going. Be sure to eat right, stretch, and get proper rest. Keeping a positive attitude helps, and having a friend or two to keep the confidence going is absolutely helpful. Hikers also agree that this is something that you will never forget and will be so proud of once you succeed.

How to Thru Hike the Appalachian Trail

Pros and Cons of Thru Hiking

Thru hiking can definitely be a rush and an accomplishment, but does have some downsides to it. See below for a quick synopsis of the pros and cons.

Pros:

  • Unforgettable journey
  • Outdoors for long periods of time
  • Seeing nature at its finest
  • Putting your survival skills to use
  • Getting many great photos

Cons:

  • Takes a toll on the body and mind
  • Can take several months
  • Costs a lot of money
  • Takes time to prepare for
  • Some days will be bad for weather

While thru hiking takes a long time and a huge toll, it is definitely an achievement that not many will complete. This is why you need to be as prepared as possible with your gear, mind, and body in order to make it through this, months long journey.

Thru-Hiking Photography

Tent Footprint Vs Tarp: Which Shelter Design Best Suits Your Outdoor Needs

0
The shelter is the main part of every camping equipment. It is the bulkiest, heaviest and often the most expensive piece of your whole outdoor gear. Choosing a right tent is a process where you need to define many considerations and make many choices on the path to the optimal protection of you, your family and friends and all the stuff you brought on the trip. Tent Footprint Vs Tarp is among the first choices you have to make towards this direction.

It is clear that an ideal shelter needs to be durable, comfortable and efficient in providing security, dryness, and warmth. But what is best for you depends on many things. So, first, we should learn the basics on this issue.

Footprint, Tarp, and Tent Floors

A tent is not just the cloth stacked with guys and framework. When set up, it is a complete shelter system which needs to suffice for its occupants, their belongings and itself. Tents need to be sturdy and sustain damage from various weather conditions and be resistant to wearing and tearing against the ground. The last one is the reason why tent groundsheet is invented.

A tent footprint is a cloth, usually made of nylon, polyester or a similar waterproof, and relatively tear-resistant material. Footprints usually feature ground fixtures at every corner, so the winds can’t wave them. These fixtures and the weight of the tent setting keeps the footprint fixed to the ground.

Footprint for Bell Tent

A good tent footprint can protect the tent setting in all conditions. It means all kinds of ground used for camping and all kinds of weather that let those less or more enthusiastic go camping. Let’s just mention that the ground can be mud, grass, rock, sand, bare soil, various pavements. The weather can range from heat, through the rain to snow, with or without strong winds.

One should first make a difference between a tent floor and a footprint. Footprints go under the whole tent setting, whilst a tent flooring is a part of that setting. The tent floor’s main role is providing comfort to the occupant, shielding from the intrusion of water, feeling of cold from the ground and pressure.

Tent footprints are primarily made to keep the tent safe from wear, thus extending its life. Some people can use footprints as lining for some activities around the tent or storing stuff,  but it is not something that will be the only or main reason for buying it, and the ability of a footprint sheet to serve these purposes is limited. But these large mats add weight and take space in the backpack, and some people simply go for a tarp.

a tarp to protect from heavy rainfall

A tarp is a heavier and a more resistant version of a groundsheet. However, a tarp is not just a groundsheet. It is a large cloth which can serve many protective purposes in a campsite, and its usefulness goes much beyond that of a tent footprint. A tarp cloth, if large enough, can be used as a roofing, additional rain fly, groundsheet, and for wind protection.

However, tarps are bulky and a bit heavier, and it is not practical to have something like that in the backpack. Some people will go with two tarps to get an extra protection, but in most such cases their campsite is accessible by car.

Tent Footprints Overview

Tent footprint will make the whole tent setting look more serious and “complete” It is the foundation of a tent – not in the civil engineering sense of it, as it won’t provide with stability, but to some extent a comparison with a building foundation is correct – it will provide protection for the tent extending its life.

A tent footprint needs to be larger than the tent itself, waterproof and made of a lasting material.  A tent can’t be protected with a material which is less wear resistant than it. Most commonly used tent footprints include the following:

Polycryo

A perfectly water-resistant sheet of fully transparent plastic which gives the whole setting a fresh look. Polycryo is very tear-resistant and durable Its surface is perfectly flat and there is little ground friction. Consequently, polycryo is easier to clean and maintain in a good shape. However, it may not be the lightest material available, collected heat from the sun exposure and may smell when hot.

Tent Polycryo footprint

Tyvek

This is a material developed by DuPont for use in protective work coveralls, additional thermal insulation in buildings, protective envelopes and packaging of sensitive stuff when shipped. It is very resistant to tearing and scratching and provides a complete protection from water and any other fluids. It may be the best material for footprints, and it isn’t particularly expensive. The weight is similar to that of the polycryo.

Tyvek footprint

Silnylon

This material represents a blend of nylon and silicone, and its main advantage is tear resistance. It is extremely durable, but not the best regarding water resistance and ease of maintenance. It is one of the few materials developed for the primary purpose of making tents, tarps, rain flies and other outdoor canopy stuff, such as footprints.

The reason its great durability-resistance-weight ratio. The nylon cloth is impregnated with or immersed in silicone, making it a very slippery and highly water resistant fabric. It is not breathable, making it less environment-friendly.

Silnylon Footprint on the ground

Reinforced aluminum foil

Also very durable, easy to maintain and environment-friendly, though not heat resistant.

Oxford cloth with water repellent coating

When it rains or snows you’re not going for water-resistant materials, since they’re known to collect water and do more harm than good. Since a footprint is there to protect the tent from wearing rather than to sit on, Oxford and similar repellent cloth-based materials are a better choice.

Do-it-yourself footprints

Large sheets of cloth from any flexible and foldable water-resistant or water-repellent material can serve as a tent footprint, and the only condition is that is wider than your tent and nowhere ripped. Window wraps, patio window covers, replaced sheets of Tyvek Home Wrap, car cover, BBQ cover, or anything similar that you no longer need can be turned into useful tent footprints if these two conditions are met.

a man doing a home made footprint

Tent footprints can be placed anywhere you find suitable, which means a flat surface without much stones, stumps and other things which can potentially harm the footprint or cause discomfort to you. The canopy needs to be at least a bit larger than the tent. It doesn’t have to be huge, the larger the footprint the heavier the backpack. Some people prefer larger footprints to leave stuff such as picnic tables or clothes, or park bicycles.

Do I Need the Tent Footprint?

Many people prefer setting up their tents directly to the bare ground, and think that tent is a waste of resources: backpack space, money, weight… Some people even go so far telling that those who don’t want to make their tent dirty are not real backpackers and should rather remain in civilization.

What you need to know is that footprints don’t cost much and little money can provide the tent with additional protection and if your tent is brand new and on the top tier by price a footprint is recommended. Also, despite modern tents come with floors, a bit more protection, and comfort won’t hurt anyone. In some groups everyone has a large backpack and plenty of room, so there are no real cons to having it.

DIY tentfootprint

However, if your tent is not top-tier or you’re going to replace it soon, but it still works well, there is no need to bring additional cloth, and if your backpack space is limited you need not give a footprint any priority.

Tarps

Many campers prefer having tarps, the main reason is a large area they cover. However, a tarp is too bulky for backpacking, and it is always good only if you can reach the base camp by car. If there is a need to walk a lot with a backpack on you to reach the desired spot, a tarp may not be a good option.

Tarps are also better if you want to remain in the woods. Experienced backpackers would still prefer tarps. But they are used to hauling a lot of things and very skilled, if you are still fresh and lack skills on how to set up a tarp and find an appropriate space, you will not need it, of course.

A tarp is generally more useful than a footprint. If it rains, you can use the tarp to cover the whole area where you’re going to pitch the tent. It is much better than remaining inside the tent all that time. You will not be able to enjoy long walks if you don’t like rain, but preparing food, playing and staying active is much easier if the area around the tent is covered. will also offer additional protection from sunlight, wind, even bird droppings.

A tarp above the tent

When you need to put the tarp underneath a tent to offer protection from the ground and mold exposure, the best way is protecting the tent. The tarp is sturdier, more resistant and can sustain much more than a tent footprint, making it good for some more advanced uses, such as preparing food for it, quality dining settings, and even kids playing on it, which would damage many thin footprints.

Just like these footprints, tarps are also susceptible to rain water. To avoid water pooling when it is raining, it is good to fold any excess sheet under the walls of your tent right after you set up the tent. The tarp will keep doing its tent protecting job, and remain perfectly dry. And when it is over you can extend the tarp edges so you can immediately start enjoying on a dry sheet.

If you’re camping on a beach or some similar sandy terrain, the tarp would be folded towards the tent interior to prevent sand intrusion. It is just needed to have all edges of the tarp folded inside a tent, and make sure the folded tarp reaches out to all walls of the tent providing it with tear protection.

Whether it’s better to put the tarp under or above your tent depends on several circumstances:

  • The presence of trees, poles, and other objects you can use to hang the tarp as a cover.
  •  Your skill to install the tarp cover over the tent.
  • Weather conditions: if there is a moderate wind, setting up a tarp right above the tent can provide it with additional protection from the wind blows, but if the winds are too strong, the tarp may better be folded and you should try finding a hideous place.
  •  The size of the tarp. If your tarp is not much greater than your tent, and the tent has its fly, there is no real need to have anything above it, so use the tarp on the ground to protect the tent and/or the fly.
  • Your readiness to secure additional backpack space for the equipment needed to install it above the tent, which can be guys and poles. If you’ve got just a tarp, it can only be used as a groundsheet.

Just north of the confluence of Melton Creek and Crooked Creek.

Tarp Materials

Tarps are often made of joint materials: polyester or cloth, canvas impregnated with a waterproof screen such as urethane, though it can be just a plastic material such as polyethylene, in this case, polyethylene is often additionally coated with a waterproof material giving it additional protective capabilities and extending its life.

OTHER POSSIBILITIES

Tarp Tent

A tarp tent is an improvised camping shelter made of a tarp cloth and essential framing, which can even be wood branches and over things found in and around the campsite. Most experienced campers will buy a pole kit with a few poles to put up a tarp tent. This approach will save you a lot of money since its expense is just a fraction of the cost of a pre-made tent.

Tent and tarp near River Naab

However, this requires great weather conditions. Winds and heavy rain make tarp tents useless. Also, it will provide less protection and comfort for the occupant than an actual tent. Since tarp material is waterproof you will not need the fly. However, privacy compared to actual tents is limited. Tarp tents don’t have a closable door or windows, you can make.

Two Tarps, No Tent

Alternatively, you can bring two tarps for yourself, one for setting up a tarp tent, another one for protection of the setting. There are several options:

Tarp Tent + Tarp Above

This is a widely used shelter setting that offers plenty of comfort and protection for little effort and little money. Put a tarp tent in the woods and the other tarp above it to get additional protection. You can set a campfire to heat up during or after the rain, prepare some food and enjoy it outside the tent.

Alternatively, the tent should be put so close to the shelter, mimicking a fly. This will give you improvised vestibules and additional wind protection.

tarp tent in the woods

Tarp Tent + Tarp Groundsheet

Another affordable option which offers a lot of comfort, but requires predictable weather, especially regarding winds and wind strength. Since poles constituting the tent need to be pinned somewhere, it is needed to avoid pinning it over the groundsheet tarp.

Footprint and rainfly only

Tarp Groundsheet + Elevated Tarp

This is a setting which has a floor and a roof, but no walls. Also requires a great weather, even at night. If your trip lasts just one day or afternoon this would be one of the best shelter options. This is good for picnics. Not recommended for longer stays in the wilderness, unless you’ve got an additional tent, or if you’re experienced enough to quickly convert the groundsheet tarp into a tarp tent.

Tarp Groundsheet and Elevated Tarp in the yard

Two Tarps and a Tent

If you’re a group of skilled campers with a plenty of carrying abilities, you can bring two tarps and an actual tent. This way you get an awesome shelter, which keeps you safe from most difficult weather such as sandstorms or snow storms.

Two adults covering a leaking tent with a tarp to keep the rain out

Groundsheet will protect the tent and offer an additional floor for outdoor activities such as cooking, dining, exercise and similar, the roof tarp will protect the area from precipitation or sun exposure, and the tent will provide for occupant comfort and security. This is the best option for skilled people who spend a lot of time in the wilderness.

Tent Footprint Vs Tarp Pros and Cons

Tent Footprint Tarp
Pros LightweightTakes less space, good for backpacking

Great choice of materials

Can be made out of discarded household items

Offers enough protection for a tent

DurableWaterproof

Relatively lightweight.

Has a plenty of outdoor applications.

Cons Less durableNot all material. Takes a plenty of space in the backpack.Using it for roofing requires more skill.

The Bottom Line

Groundsheets can come in various sizes and be made of various materials. The tarp is the predecessor of modern tent footprints which are often cheaper, lighter, take less space, but offer less protection and fewer possibilities overall, compared to the tarp.

Debate whether you need groundsheets or not is similar to the debate about whether you need bike mudguards or not. Some people just can’t go out with these, whilst some others really hate it.

Overall, the need for a groundsheet is just a matter of personal preference. Those who are looking to keep their tent in a good condition for years will always go for a groundsheet. And if that groundsheet is a tarp, they can use it for many other things.

Who Owns National Parks: The Real Keepers of the Nature

0
arches-national-park

National parks are the recreational and cultural heritage centers that remain protected because of their wildlife, natural resources, and the exquisite countryside. Had they not been protected areas, no one would probably respect them, and consequently, we will be risking to see our wildlife being extinct and our cultural heritage being devalued.

Thanks to the National Park Service in the United States that oversees the management and the recreational activities being undertaken in all the parks, we are happy to have the National Parks looking the way they do now. We believe that, so far, we have already answered your question – Who owns National Parks?

National Park in Canada

However, even though the National Park Service in the United States oversees the operational activities of the National Parks, it cannot manage the operations of individual parks as there are plenty of National Parks. So, it relinquishes the operational roles to third parties, through concession management programs.

Each National Park has its management plan, as well as a compliment of staff to take care of the resources, offer the needed hospitality needs of the visitors, educate visitors about the cultural heritage, and many more functional roles.

We have hand-picked a few of the National Parks among a broad range of them in the United States. The aim is to enlighten you with the way the parks are run and owned. It’s important to familiarize yourself with the way these important natural landmarks are being run. It will help you in approaching the relevant people if any inquiries arise. Below, we will start with the world’s first National Park, the Yellowstone in Wyoming.

Yellowstone in Wyoming

This National Park is remarkably the first in the United States and arguably the world since its inception in the year 1872. It is renowned as the playground of volcanoes in the northwest of Wyoming. You get to explore the iconic Old Faithful landmark, exotic forests, the V-shaped Canyon, the mind-blowing lake and the North America’s highest altitude lake, among others.

Yellowstone-National-Park

Let’s not forget the wildlife as well as this National Park has plenty of mammals compared to other parks. About 67 species are found in this park, whereby you get to see, among others, the mule deer, bighorn sheep, black bears and the grizzly.

This is just a snapshot of the expectations in the Yellowstone in Wyoming. Behind the scenes of exploring these things is a team of committed staff and management that shares the same mission as echoed by the National Park Service.

Among other manageable things, the park’s finances, concession operations, infrastructure, facilities, preservation of cultural and natural resources, and the budget are the most important. The management of Yellowstone ensures that these aforementioned priceless resources are being protected for the future generation to find them intact.

The park is precisely comprised of full-time staff and the volunteers, whose main objectives are to live by the mission of the National Park Service.

Yellowstone National Park lily pads

To learn more about this National Park of Yellowstone, we suggest you contact the park’s management on (307) 344-7381 for the recorded information or (307) 344-2117 to inquire about the weather and road info.

In a nutshell, the park’s management does the following:

  • Ensure safety of visitors
  • Ensure compliance with the State’s laws and mandates thereof
  • Disseminate useful information to and educate the public through comprehensive and interpretive programs
  • Maintenance of roads, ancient buildings and trails for hiking enthusiasts
  • Preserve the natural resources encompassed in the park

All these mandates are enabled by a strong synergy between the office of the superintendent, the concessions management, administration personnel and strategic communications. Among others, concession management reinforces the cohesion of third party service delivery, wherein third parties are assigned contracts to provide visitors with, among others, the medical facilities, foods, endorsed activities such as guided tours, boarding and others. That’s the crux of National Park management.

Yosemite in California

This is yet another National Park in the United States, which has grown in popularity since its inception in the 1800s. It is also paramount to familiarize yourself with the management of this park in order to understand how it operates and to whom you should send your inquiries or address your concerns. It is under the National Park Service, which then prescribes the mandatory rules to be complied with.

Yosemite in California mirror lake

A snapshot of this park: It is home to incredible, exotic natural wonders that you will explore in a short period of time than you would anywhere else. The glacier-carved beauty, North America’s highest Yosemite waterfalls are some of the attractions that are synonymous with this park. There are also some of the spectacular hiking trails that pass through this park. The Tioga Pass Road and the Tuolumne Meadows lead you into this National Park.

There are lots of activities in this National Park. Consider fishing, rock climbing, hiking, camping, and rafting as some of the endorsed activities offered through concession management. Speaking of that, the Yosemite National Park is under the guard of a devoted team of staff and management personnel, which, of course, include the volunteers.

In operational roles, concession management plays a significant part in that, whereby third parties are delegated to provide essential services to the visitors. They are responsible for the day-to-day operations of the park.

Yosemite in California glacier point

So when you’re visiting this National Park, you shouldn’t be worried that who will be serving you food and all that because the Yosemite’s Concessions Management issues contracts to specify that the service provider should provide certain services.

For instance, the Yosemite Hospitality LLC, EI Portal Market and the Best Studio Inc. are some of the service providers assigned a mandate. There is also a Fire Management team. All the inquiries about this National Park can be addressed telephonically on (209) 372-0200.

Zion in Utah

The nature’s blessings to the USA are also seen in the abundance of amazing landmarks and resources in Zion National Park. You get to extend your eyesight to the orangey-red rock walls, valleys located 2000 ft above the Zion Canyon.

Zion National Park

This National Park wouldn’t be that beautiful without the priceless efforts put by a determined team of management and employees. Because of them, there are plenty of options to take while in this park. For instance, you get to hike on a short trek to a trio of the Weeping Rock and the Emerald Pools. Alternatively, you can drive on the picturesque Highway 9 via the Virgin River as well as the Checkerboard Mesa area.

More attractions in this National Park include a range of activities that include canyoneering routes and the big-wall climbing. If any of these are your favorites, you should say thanks to the management of this National Park together with the volunteers and full-time staff that work tirelessly to ensure that you, the visitor, get a wow expression.

Group of people hiking in the Zion Canyon

The Zion National Park has its management plans drafted for the management personnel and staff to live by the mission of the National Park Service. Some of the mandates enshrined in the 2001 general management plans include the following:

  • Management of cultural and natural resources to retain them for future generation
  • Ensure that visitors do not impair the natural resources
  • Equip visitors with the recreational and educational opportunities
  • Maintain the natural resources that include the wildlife and the plants in a bid to retain them for long
  • Reinforce partnership between the public and private organizations in order to ensure a pleasant stay for visitors

Can you imagine the state of Zion National Park without the priceless efforts of management? It’s seemingly unimaginable. The concession contracts are also provided to enable the provision of third party services to visitors. These include lodging, food and medical services, accredited outdoor activities such as climbing and boarding.

Zion National Park management

If you want your inquiries to be attended by management, you can call (435) 772-3256.  Surely management will be glad to help you.

Channel Islands in California

The Channel Islands National Park is another evidence of a great work put together by the management as mandated by the National Park Service. Remarkable about this National Park is southern California coast that extends for about 11 miles.

Channel Islands National Park

Even more, the wildlife and plant species further make this park more remarkable. There are more than 150 species. You will get to see the island deer mouse, island fox, the Coreopsis clinging, the exposed cliffs, whales, sea lions, and the elephant seals.

This National Park is actually one of the America’s newest landmarks. The management of this park has upon its shoulders the protection of the terrestrial and marine natural resources.

These resources are being reserved for future generations. This park, in particular, is under the control of the National Park Service and the Federal Department of the Interior regulations as encompassed in the general management plan published in 1980.

Santa Cruz Island Fox Pup, Channel Islands National Park

The superintendent and other spheres of management, such as the admin staff and concessions management, work in synergy to ensure efficient running of this National Park. Meanwhile, volunteers devote about 70 000 hours on an annual basis. There is a park budget on a yearly basis, which is spent on a number of projects by the management.

Have any inquiries to address with the management? You may call them at (805) 658-5730.

Grand Canyon in Arizona

Measuring about 18 miles wide, this National Park is also the fruits of a dedicated team of management that endeavors to achieve the mandates of the National Park Service. Prepare your eyesight for the exquisite and scenic Colorado River that passes through the park.

Grand Canyon in Arizona

The estimated number of people visiting this park yearly amounts, to 5 million. As such, it turns out to be the second most visited among other parks. Visitors get to hike on many spectacular trails on foot or by mule.

If you are allergic to the concentrated areas in the park, we recommend that you visit the pine-forested North Rim, where 10% of the total 5 million visits. There are essentially many options to explore.

All the scenic views are sustained by the functional management team under the policies and the guidelines as stipulated in the recent general management plan updated in 1995. In the plan, the park’s control is put under public, private agencies, local citizens and the American Indian tribes.

Grand Canyon in Arizona horseshoe bend

In the general management plan, management teams, volunteers, and employees are guided on how to manage the visitors, reserve and protect the natural resources and develop the park, among other guidelines and policies. It is the compliance with the general management plan that has led to the remarkable beauty of this National Park.

Third party service providers are still mandated to provide impeccable services to all the visitors under the supervision of the concessions management. The management ensures that you have the most priceless and unforgettable stay ever. To address your inquiries, please call them at (928) 638-7888.

Olympic National Park in Washington

Embrace the beauty of the nature by exploring the scenic landscape of the Olympic National Park. You will get to explore Mount Olympus, waterfalls, lakes, 11 major rivers, flower-decorated meadows and 7000 feet snowy mountains. There’s more to explore in this park.

Hiker in the Olympic National Park

Your exploration can extend to the Hoh and the Quinault rain forests. Also the Roosevelt elk and the 295 feet Douglas-Fir are worth your eyesight in this park. There is plenty of natural resources and landmarks to explore. All of them are kept clean and maintained regularly. There is no day that you can visit and look as if you are exploring a National Park that has been abandoned year ago.

A round of applause to the dedicated team of management for making this National Park “a dream come true”. Had it not been them, many would certainly hate ever visiting the un-maintained landmarks.

A Creek at Mount Olympus

All other outdoor activities are being offered, predominantly through concession programs whereby concessions management issues the contracts with the external agencies to take care of the visitors.

Final Thoughts on This Topic

Who owns our national parks? We believe that we have responded constructively to your question in this regard. These precious recreational and cultural heritage centers need special care. Without any proper management, some of them could have been abandoned long time ago. The National Park Service in the USA is at helm of owning and maintaining these National Parks.

As it transpires, each park has got its team of management with the common ground of abiding by the mandates stipulated by the National Park Service. Third parties are being assigned duties to help take care of the visitors by providing a plethora of services.

For every park, there is a budget to maintain it and to pay the employees and management personnel. Visitors can address their concerns directly with the management. We have provided you the contact details for every park reviewed above.

Spring in Yellowstone National Park

If you found our article useful, feel free to share it on social media so that your friends can read it as well. Also, if you have any questions or just want to share some of your experience with our readers, leave a comment in the comments section below.

Hammock vs Tent: Which Should You Take on Your Next Trek

0
Inside a hammock

When it comes time to go out on a trek or just to have a Campout you have a lot of choices. Perhaps one of the most important is where you will be sleeping. After a long day of trekking or just enjoying the great outdoors, you will want to have somewhere nice and comfortable to lay your head at the end of a long day.

Some minimalists will want to take merely a blanket and sleep on the ground. But as for us think that it is worth the extra weight of anything else is worth the added comfort. However, that does bring up the question, what to bring with you. You could go with a tent, or you might want to spend the night in a hammock.  So, which is better, let’s dive into investigating a hammock vs tent.

Hybrid tent hammock

But if we are going to decide if it is better to take a tent or hammock on your next trip, we’ll need to look at some of their differences. Each has its own strengths that would recommend it, but to be fair, we’ll take a look at areas where they each fall short.  We’ll need to consider some areas such as setup, sleeping comfort and weight. We will also need to consider their limitations.

Head to Head

Weight

At first glance you might think that the hammock is going to win this one hands down.  After all, a camping hammock with a built-in bug bag only weighs about 30 ounces.  A backpacking tent will come in between 80 and 100 ounces.

But once you think about adding in the hanging straps (which weigh about 15 ounces) and a tarp to keep you dry (which will add another 35 ounces).  When you add in everything you need for the hammock you end up in the range of the backpacking tent.  Of course, you can probably find other options that will weigh more or less.

Size

The next feature that we will want to look at is the size of each.  First, let’s consider a hammock.  As it is out and set up it is about big enough for one person to lay in.  If you are particularly tall you will want to verify the hammock you are looking at will give you enough space to stretch out.

Tent set up

The tarp that you might set up over will end up covering more space, but that doesn’t really add any extra space for you to stretch out in.  When you take it all down and stuff it in a stuff bag it won’t be very large at all.  They tend to be about the size of a Nalgene bottle.

The other option is our tent.  This one has more of a variation in sizes.  While a small backpacking tent will offer just a bit more space than your sleeping bag takes up, other tents could mean more space to stretch out or put some other gear in.

Just like we mentioned when discussing hammocks, if you are tall double check how much space you’ll have to sleep.  At 6 feet 2 inches I’ve come up across a tent or two that I couldn’t fully stretch out in.  A typical backpacking tent will pack down to a size that is comparable to a hammock.  If you go with something bigger you will start bumping up the pack down in size as well.

Other Campers

As a note related to size, take a moment to think about who you will be going on a trek with.  A hammock is great if you want to sleep by yourself.  If you are taking a romantic partner with you, you might feel a bit lonely in your hammock though.  This is a situation when a tent might be a better option.  Also, consider your four-footed companions.

Tent or hammock

If you go camping with Fido, you will have to determine if you want to teach them to sleep under the tarp for your hammock or would you feel better with them inside the tent with you.  Or perhaps Fido sleeps in the car and so you don’t need to worry, just pick which you want.

Comfort

This area perhaps more than any other that we discuss will be a matter of personal opinion.  Let’s start off considering the tent.  Some will find that it is more comfortable to sleep in, completely out of habit.  If you have spent the most of your camping nights sleeping in a tent, it becomes natural for your mind to go the thought of sleeping in one for your next trip too.

And in truth your tent does offer a sleeping experience closer to that of your bed, you have a rather stable surface that you are sleeping on.  However, on cold nights you’ll find that the ground can be quite the heat sink, cooling off anyone who sleeps on it without a few extra layers. Also, there is many a night that the nice spot that you chose to put your tent seems to magically grow some roots and sharp rocks in the middle of the night.

In a hammock on the other hand, you are up in the air.  No amount of rocks and roots will work their way to poking your back in the middle of the night (so long as your hammock doesn’t since down to the ground).  Some may have trouble drifting off to sleep at nice, again from the habit of viewing a hammock for relaxing more than getting a good night’s sleep.

Looking out the tent

Depending on what hammock you have and what you have brought with you, you may wake up with some gifts from the trees.  Some hammocks have a built-in bug screen, others are just open top.  If you have an open top style and don’t put a tarp over you, perhaps since it is shaping up to be a beautiful night, you might find that the trees you have selected will drop leaves, needles, pine cones or nuts on you.

Lastly, some people find sleeping in the classic hammock “banana shape” to not be the way that they want to spend their nights.

Set Up

Realistically, when debating between hammock vs tent this one doesn’t have much of a difference.  We’ve all spent those evenings in camp setting up an old fashion tent that just has a pile of identically sized poles and you just have to guess how it goes together, since the instructions crumbled to dust before you were born.

But if you have a more modern tent it is simple to set up.  Often times the poles are now color coded down to the seams that they go over.  With a few clips and slipping the poles into their holes you will have a tent up in no time flat.

Quick tent set up

And the hammock is another simple set up.  You’ll just need to find some trees located far enough apart (and hopefully not over a massive gorge) and start strapping your hammock up.

Yes, the first time or two that you assemble it, you might have a question to make sure that everything is going correctly.  But then again, you should probably be doing a dry run of any new gear before taking it out on the trail to ensure that you know how to use it properly and to care for it correctly.

Storms

So, you’ve gotten your sleeping arrangements all set up and a storm blows up?  Which would you rather be in?  It would seem that in a storm a tent is still a clear winner.  With walls all around you, even if they are thin tent material there is a mental state that makes you feel better.

And yes, I’ve been camping in those windstorms that made my tent lay down and touch my nose while I was in my sleeping bag, but I would still have preferred my tent over a hammock.

Camping under cloudy weather

While you may have a tarp up over your hammock and it may do a better job than a tent at keeping all the rain off of you (somehow tents always seem to have that one place that rain storms seem to find to let water in).  However, when the wind kicks up you are still swinging in a cocoon between two trees.

A gentle breeze and a soft rocking might help you drift off to the sound of the woods, but a true storm can have you swinging to the point that you are wondering if you can get seasick in a hammock.

Finding a Spot

When you start to consider limitations, there is a very clear on that comes up for the hammock.  You need to have two good sized trees that are spaced the right distance apart.  If you can’t find a pair that is in the right range for your hammock you are out of luck.  This means that beach camping in your hammock is pretty much a no go as is if you are planning on spending a night or more above the tree line on your next peak bagging trip.

You will also want to take a look at where you plan on going for your trip.  Some areas that may have more than enough trees will ban you from using a hammock as they feel continued rubbing of straps around trees could damage them.

Three tent hammocks

But just because a hammock has its own problems doesn’t necessarily mean that a tent is always a better option.  A tent has a fairly set footprint, you will need to find a spot that size that is clear to put your tent down.  In our beach example that might not be an issue, but go up a mountain and you’ll find rocks everywhere.

Also, if you are in a dense forest you may be hard pressed to find a place to stretch out your tent that doesn’t have a tree or at least a root that will be in your way.  And you will still need to double check where you are headed, as many places want you to only camp in designated sites and if everyone else booked those sites then you have nowhere to set up your tent.

Price

It is almost not worth mentioning this one at all.  There are far too many variables.  You might be able to go to a big box store and get a great deal on a basic model of either and not have to spend very much at all.  You could also go to a high-end camping store and think that you are getting a great price on a tent to find out that you have to pay separately for the ground cloth and the rain fly.

But don’t think the same doesn’t apply to hammocks.  You purchase a hammock and even if it has a built-in bug screen you’ll find that you need to get some straps to actually be able to use your new purchase.  Then, if you think there might be rain you’ll be looking at buying a tarp separately.  Sure, both have package deals to make sure you get everything at once.

Buying your tent

At the end of the day, if you get a comparable single person backpacking tent and a similar quality hammock you will end up in the same ballpark price wise.

Consider Your Trip

As you’ve seen when you put them head to head there isn’t a clear winner as to which is better.  And as we’ve mentioned a few times above your trip details will come into play more.  If you are going on a family trip where you can drive up to campsite, maybe it is worth it to just pack the big tent.  You’ll only have one shelter to put up and it will end up being warmer by having a number of people inside instead of just one.

Of course, if you and your buddies are off to hit the trail, perhaps it is better to ensure you have your hammock.  Then you aren’t bunking with someone that will roll over in the middle of the night and push you to the side of the tent or someone that snores all night.  Also, with your hammock, you don’t have to worry about that friend who decided that, since the packaging of the tent said three men, all three of you can fit inside and sleep comfortably.

Change Your Thinking

The biggest thing that stops most people from even considering a hammock for their next trek is their thought pattern.  A tent is the symbol for camping.  Countless places use that simple picture to let you know that they have a campground.  We see it in the movies and magazine ads.

Resting on hammock

We have all been taught to equate using a tent with going camping.  But sometimes we need to question that conventional wisdom.  Sure, sometimes that may end up in you having a terrible experience and realizing why things had been done that way.

But this is one of the cases that you may very well like the hammock route more than the tent way of camping.  As hammock camping has become more and more popular of a way to get out and experience nature, people have become more open to trying a hammock for their trek.

All across the internet people are posting that they tried it and found it more comfortable or more relaxing or more fun.  There are those that didn’t like it as much as their trusty standby of a tent, but they know and they have tried it.

The other great thing about this debate is that you don’t have to be exclusive.  No one is saying that you have to dump tents to go steady with hammocks.  This is a time that you can have and enjoy both.  Let your sleeping shelter be determined by the season and your destination more than the thought of this is how my parents did it so this is how I will do it too!

Wrapping it all up

There are plenty of debates out there, mac vs pc, crunchy peanut butter vs smooth, iphone or android.  And many of them fans will come down hard on their side without ever considering the other side.  I have seen news articles writing about how this famous New York person or that said they like Chicago style pizza more.  But not all debates have to be this opposing.

As we’ve seen going head to head with hammocks and tents there is no clear winner.  A lot of it boils down to where you are headed and what you find most comfortable.  Whichever you end up picking if it gets you out in nature, then clearly you are the winner.

Hammock or tent

If it is one more thing that gets you moving and hiking you will win on a number of different fronts.  But now that we have gotten to have our say, now it is up to you.  Trying to convince someone to try out a hammock for the first time?  Why not share this article so they can see it.

What is a Kayak: All You Want to Know About It!

0
Lets go kayaking

Often, we hear the question, “What is a Kayak?” well, if you are one of them, you are on the right platform, and you are about to get your answer. By simple definition, kayak refers to a small and narrow watercraft that’s propelled with a double-bladed paddle. Most people confuse a kayak and a canoe.

Well, both have some similarities, but they also have significant differences that set them apart. Some of these similarities include: both are lightweight, powered by humans, and they can both be used for similar activities and in similar environments.

Learn to kayak

However, some significant differences can be observed in the design (cockpit, seats, and paddles) and how each is used thus helping one distinguish a canoe from a kayak.

Factors to consider when buying a kayak

  • Your primary uses/ the type of paddling you want to do – Every boat is designed for a different type of paddling, and it’s important to get the right boat for your kind of paddling. Otherwise, it might not serve you as perfectly as it should, and its durability will be compromised.
  • Where you are planning to use it – Some boats cannot be damaged even if they hit hard rocks while some cannot withstand even the slightest encounter with hard rock. Also, some boats do better in flat waters while others are excellent in rough waters. Therefore, you should know where you will be using your boat before purchasing it.
  • Who you are planning to go with – Will you be carrying your dog along or maybe a friend? If yes, then know that there are single and double kayaks and it’s important you get the best accordingly.
  • The kind of load you want to carry with you – Each boat has different cargo compartments in terms of size. Therefore, you should check if the space will be enough for everything you want to carry with you. Also to guide you is the kind of trip you are planning. You might need to bring more for an overnight trip than you would for a day trip.
  • Your budget – Of course, your budget dictates the kind of kayak you end up buying, but my advice is, you’d rather take one more month to save enough for the best instead of going for a cheaper one then live with regrets.

Different types of Kayaks

Kayaks come in different basic types that are so specific to use. These several basic types include:

Whitewater Kayaks (Ideal for paddling fast moving rivers)

The Whitewater Kayaks do not have keel thus can’t track in a straight line which makes them very agile and maneuverable. Their cockpit is tight thus keeping the paddler on the boat, especially when in rough conditions. These boats are mostly short, 7-10 ft. and are perfect for paddling fast moving rivers.

Touring (ideal for long paddling excursions)

Features a well-defined keel, ideal for tracking, thus enabling it to track in a straight line, good primary stability, plus high secondary stability. With these boats, you get perfect turning from “edging” and comfort from the large cockpit interior making them ideal for long paddling excursions.

Red Touring kayak

Large access hatches and bulkheads are available on most touring kayaks thus allowing safe, dry storage. The boats are ideal for lakes, flatwater, gentle-moderate inlets, wide rivers, and bays. You will also find some that are fitted with outriggers, rudders, and provisions for the sail.

Recreation Kayaks (Ideal for flat water paddling)

If you will be paddling in inlets, lakes, slow moving rivers and bays, then a recreational Kayaks is what you need. These are perfect for flat water paddling making them ideal for low-intensity paddlers and beginners as they tend to combine turning and tracking in a smaller hull. They have large cockpits and high initial stability thus serve as excellent platforms for hunting, photography or fishing.

Sea Kayaks (Ideal for open ocean paddling)

The Sea Kayaks are low in the waters, thus reducing the cross wind effects, they measure 15 ft. or more, and most of them have: much smaller cockpit openings, smaller access hatches, and bulkheads.

Sea kayaks on the beach

To compensate on crosswind pattern or a wave, some of these kayaks have rudders or skegs and also have other features like deck mounted pumps and compass housings.

Different Styles Kayak

There are two major styles when it comes to kayaking, and you choose one over the other based on the type of paddling you want to do, your personal preference and your skill level. The two styles are:

  • Sit In – Kayaks in this style have an efficient hull design. They are dryer, allow greater gear storage, have properly fitted cockpits, you get an extended paddling season, and you can easily use your body to control your boat effectively. The Sit In style kayaks allows paddlers to use a skirt, has bulkheads that limit water infiltration and a hatch cover that’s properly fitted to provide flotation plus dry storage.
  • Sit On Top (SOT) – Most paddlers who like to get an all over tan, play in the surf, get a stable fishing platform, have flexibility and mobility or emotional concerns, thus not able to use the Sit-In Kayaks find the Sit On Top kayaks ideal. With the Sit On Top kayak, you will have no worries swamping your boat as almost all of them are self-bailing.

Kayak Design Considerations

Tracking vs. Turning

Normally, a kayak that tracks well doesn’t turn as well, and this is why turning versus tracking make the biggest trade-off when it comes to boat design. However, these two features vary from one boat to another, and it’s also possible to make one that tracks well to turn better.

Stability

How much stability do you require for perfect paddling? There are two types of stability when it comes to kayaks: Initial/Primary stability and Final/Secondary stability.

Keeping the kayak stable

The Initial stability can be told by how tipsy the boat is while at rest and this helps in predicting how stable your boat will be when entering/exiting the boat or while on low motion activities e.g. fishing, bird watching or sunbathing.

The Final/Secondary stability can be told by how tipsy the boat is while underway.

Note: in almost all cases, boats with high primary stability are less likely to be stable while paddled in rough conditions and vice versa.  Conversely, a more tipsy boat while in the immobile state becomes more stable when in peddling state and increases in seaworthiness as the conditions build.

The best guide when it comes to stability is knowing the kind of activities you will be doing and your level of paddling expertise because one tends to feel more stable as their paddling skills improves. Most advanced boats will have less initial stability than beginner boats for this reason, because they are likely to take a risk in rough conditions and they also need a fast boat which is often absent in beginner boats as are traded off for a wider beam.

Material

When it comes to kayaks, the materials range from fiberglass, plastic, wood, Kevlar, carbon, fabric with frame and inflatable plastic.

  1. Plastic: heaviest, but wins in resistant to damage and recyclable
  2. Fiberglass: rigid than plastic, but cracks on impact and not recyclable
  3. Kevlar and Carbon: Exotic, lighter, but costly
  4. Wood: rare, attractive, need sophisticated techniques for classic look
  5. Fabric with Frame: light and sometimes expensive option, collapsible
  6. Inflatable plastic: a portable & storeable kayak

Cockpit Considerations

You have four contact points with your boat: feet on the foot braces, knees on thigh braces or under the deck, hips on the seats’ sides, and the bottom of the seat. The four contact points should give you support and keep you comfortable. Paddlers should brace their feet and knees for turning and stability.

Single kayak cockpit

The whitewater boats are padded to give a tight fit to keep the paddler in their boats during a roll while the sea and touring kayaks feature a looser fit to give enough space to move about and stretch on long excursions. For people with large feet, they should ensure that fit upon the foot braces and under the deck comfortably.

Cockpit Rim Opening size

This size determines the ease of entering and exiting your boat. The newer Whitewater Kayaks and the Touring Kayaks feature an almost similar keyhole cockpit: close-fitting but fairly large keyhole cockpit giving peddlers snug while allowing a rapid and easy exit.

Original traditional Sea Kayaks features small cockpits thus reducing the possibility of large waves caving in their skirts and swamping their boats. Recreation Kayaks features very large cockpits thus can’t keep the peddlers in their boats in case it turns over.

Boat Length

Any peddler should know the importance of the boat length. It’s simple; longer boats are faster and more efficient in the water. When it comes to the boats’ volume, this depends on how big you are and what you want to carry with them, which is mostly determined by the type of trip you are planning e.g. for overnight trips, one will need a room enough for tents, provisions, and sleeping bags.

Single versus Double Kayak

We have solo paddlers and those who like a company. For solo paddlers, a single kayak is definitely the option for you while for those who like to paddle with their dogs or a friend, double kayaks are perfect.

Couple on single kayaks

However, it’s important to note that single kayaks are more maneuverable compared to doubles, but doubles carry more gear. Also, most doubles are hard to paddle alone effectively, some are more stable compared to singles, but more difficult when it comes to rescuing and pumping dry.

Hatches

Only a few hatches’ seals are completely waterproof, and it’s a great advantage to have one that is because it’s important to keep all the water out when rolling. However, if you can’t find one that’s completely waterproof, there are other alternatives like keeping the essential stuff such as clothing and food in waterproof bags then put the bags in your hatch compartment.

Larger items need large hatch opening and also, it’s important to ensure that your hatch covers are securely attached because heavy surf and seas can break and blow them thus there is a risk of losing them. Also, paddlers should not depend on the hatches entirely. If your gear compartments are not full, always have floatation bags for boat floatation and watertight integrity.

Rudders and Skegs

For most touring kayaks, rudders and skegs are not necessary. However, long sea kayaks need a rudder to enable them to move straight, even in a cross wind. If you need a kayak with a rudder, ensure that the design is: durable, has a foot brace that’s easy to use and can be easily stowed.

On a kayaking adventure

Alternatively, if rudder doesn’t work for you, just go for a retractable skeg. It does not work as perfectly as a rudder, but helps in trimming your boat making it more controllable in varying sea/wind conditions.

Boat Weight

When inquiring about the boat weight, keep in mind that you will always have to get it to and out of the water or on and off your car and even portage at times thus weight is very significant. Mostly, the boat’s material and design determines how heavy it is.

For example, rotomolded plastic boats are heavier compared to fiberglass, kevlar, and vacuum formed acrylic ones. However, you can consider getting a kayak cart to help in moving your boats.

Durability of construction

Again, your boats’ material plays a significant role in determining their durability. Each material has different durability, hence the durability of the boat in general. For example, plastic material will withstand abuse much better than fiberglass. It easily scratches but resists fractures and punctures better than fiberglass.

Kayaks under the sunset

Also, to be safe, try and get all the necessary tools for boat repair and ensure that you have the right information/skills on how to go about it. Your boats’ maker will be in a better position to provide the right information.

It’s also important to ensure that you use the boat for what it’s designed for as this contributes a lot on its durability. For example, most of the Touring boats are easily damaged by a hard hit on rocks because they are rigid, but Whitewater boats withstand hard objects much better.

Cost

Boats’ prices, just like for other items, keep changing from time to time, so if you are planning to buy one, you better keep checking the trend. Also, some materials are more expensive than others. The size of the boat also determines its price. The longer/bigger the boat, obviously, the higher the cost.

Try it first

This can never be said enough! Never buy a boat blindly. You have to see it, feel it, and finally, test it before placing your money on it. Think of how frustrated you can be if you carry it all the way to the ocean only for it not to function as expected.

Try out kayak

Always take all the time you need to try all the boats available before settling on one because it’s worth it. You can look for any dealer that rent boats or any demo models available and try different manufacturers/boat types. You can as well call the “Shack” then ask when you can demo your boat of interest.

Paddles

Never underestimate the importance of your paddles. Most newbies don’t know this, and they later learn the hard way. Simply put: your body = engine, your paddle = transmission.

Without a good transmission, even the best car will automatically move down the scale to being the worst car ever. You can never enjoy paddling if you chose a boat with a low-quality paddle so, just get the best one.

What else does a paddler need?

For safe and successful paddling, ensure you have a whistle, Personal Flotation Device (PFD) and a paddle. You will also have to be creative and come up with a way of removing water from the kayak. You can use a sponge or a pump. Ensure that you learn all the necessary skills for survival and handling your boat before taking in the water.

Kayaking with falls in background

NOTE: One important feature every peddler should never fail to check and test before buying a kayak is the FOOT PEGS. Almost all the traditional kayaks had secure foot braces, but due to transformation from using a kayak as a hunting survival tool to more of a recreational art form, foot braces are given less attention. Whatever style kayak you choose to paddle, you should not compromise on getting a secure place for foot rest.

There are different types of FOOT PEGS such as adjustable foot pegs, molded in foot braces, and others with a fixed bulkhead. One sure thing is that a kayak without a foot rest is just incomplete as one will often slump forward, lack comfortable posture, and be unable to use torso-rotation thus can’t propel the kayak effectively.

Wrapping up

A kayak is definitely different from a canoe, and there are different types of kayaks all designed differently and used for different activities. It is important that one gets the right kayak for the type of activities they want to do and also, the kind of environment they want to use it. Each paddler should do some thorough research on the type of kayak they want, then test it before purchasing it to avoid unnecessary frustrations.

First kayak experience

How to Pack a Backpack: Making the Most of Your Backpack

0
How to pack a backpack

When you are going out for a long, multi-day trek or hike, and you will be out camping in the woods, it’s crucial that you carefully plan out not only what you are going to pack but how you pack it.

There is a methodology for properly packing a large hiking or backpacking backpack. Following it will not only make your load easier and safer to carry, but will also help you better organize your time out on the trail.

Therefore, in this article, we go over how to pack a backpack. Below, you’ll find a detailed step-by-step guide explaining the whole process.

Steps Involved in Packing A Backpack

Before going over the individual steps, it’s helpful to understand the two main types of packs, as this will help explain how to most effectively utilize the space you have inside it. There are two primary kinds of hiking backpacks are, namely, external frame and internal frame. These are briefly explained below:

  • External frame packs: in an external frame pack, the frame is, as the name suggests, exposed. These types of backpacks are bulkier, more clunky, and generally considered more “old fashioned” compared to internal frame packs.
  • Internal frame packs: these are today much more common than external frame packs, particularly for backpacking. The support structure in an internal frame pack is inside the backpack, which is overall more conformed to the body and provides higher stability. In addition, most of the weight is transferred to the hips, which is ergonomically better.

Because internal frame packs are more common, and better overall for trekking and backpacking, we provide instructions tailored to this type of backpack.

Now, we can move on to the actual steps explaining how to pack a backpacking backpack.

Step 1: Organize the gear you are going to bring and prepare your pack

It might be helpful to write out a packing checklist or use a premade one. You can also make your life easier by grouping together small items (cooking supplies, toiletries) into plastic bags.

Organize the gear

When you’re backpacking, space is extremely limited, and even the tiniest addition to your load needs to make sense. Because you are carrying your entire load on your back, you definitely don’t want any additional weight.

Cut out anything that is non-essential, and think about how you can “stack” items (for example, if you are bringing a bear canister, fill it with food!). It’s almost always better to go as lightweight as possible. But, on the other hand, you also want to pack everything you might need out on the trail, so make sure you aren’t forgetting anything!

This is also a good time to visually inspect your bag to make sure that it’s in good condition and there aren’t any rips or tears, especially if it’s been a while since you’ve used it.

Step 2: Make sure everything fits – both space and weight-wise!

Next, it’s a good idea to do a quick check space-wise. You can quickly dump everything into your backpack, just to see if it will all fit, before repacking more strategically. Also make sure that your fully-packed bag is not too heavy for you. This is particularly important if you are relatively new to backpacking, or if you are setting off on a multi-day hike.

Step 3: Make a plan

Once you have everything you need, and you’ve made sure it will all fit into your pack, you will need to strategically plan how you will fit everything into your pack. This is the most important part of properly packing a bag. It helps to visualize your load in terms of “layers” or “zones.” You can even group items according to which layer they belong in, before adding them to your bag.

At the bottom of the backpack, you’ll want to place all the larger items that you will need for making camp, but not before. This should include items you’ll need to sleep, such as your sleeping bag, camp shoes/clothes, and your sleeping pad, if you are bringing one.

The second, or middle, layer should be where you place your heaviest items. This will help with stability. The items you pack here should also be ones that you don’t need for your actual hike, such as cooking implements, heavier food provisions, bear canister (which you can fill with provisions), and your water reservoir. Make sure the densest items are the closest to your back.

The top layer is where you should store any items that you might need on your hike (but that wouldn’t fit in outer pockets). Strategically anticipating the items you will possibly need to access before you make camp, such as a rain jacket, toilet supplies, or first-aid kit, will prevent you from having to unpack your entire bag while still out on the trail.

Finally, most packs have multiple external pockets that you can access without having to open the actual backpack. These are very handy and should be fully utilized.

You’ll want to use these for small items that will invariably be used during your hike, such as snacks, maps, sunscreen, water bottle, GPS, and any important personal items such as your phone, wallet, and keys. An accessory pocket is also a great place to store a rain cover for your backpack.

Step 4: Do the actual packing

This is pretty straightforward. Follow the guidelines above, packing the grouped items by layers.

It’s generally advisable to minimize the number of things that you attach directly to the outside of your pack, as this can be cumbersome or even unsafe, but it makes more sense for certain items, such as poles and ropes. Carabiners and other fasteners can also be used to attach additional items to the outside of your backpack.

Note that if you are carrying a water reservoir (many backpacks have either built-in reservoirs, or spaces specifically designed to hold water receptacles) that you plan on accessing during your hike, it’s a good idea to fill it first, before adding the other items to your bag.

It’s also smart to wrap anything that could potentially spill in extra (and ideally leak-proof!) plastic bags. Conversely, if there is something you don’t want to get wet (such as matches or your electronic devices), you can also wrap these in waterproof bags, which are very light and don’t add any additional weight.

Finally, another tip is to use soft, shapeless items, such as clothes or your tent, to fill in spaces between the layers and heavier items in your backpack. This will help distribute the weight and ensure that items don’t shift around (think of it like the packing material in a shipping box!)

Step 5: Check the fit of the packed backpack and make adjustments if necessary

Try your backpack on and make sure that it feels right. Your backpack should distribute the weight evenly, with the heaviest part of the bag close to the center of the bag (and your back). It’s important that you make the adjustments necessary, to avoid back pain. Many backpacks have adjustable hip belts, load lifter straps, and sternum straps.

The backpack’s hip belt should comfortably sit on top of your hips (your hips should be bearing most of the load). Your shoulder straps should feel smug, but they shouldn’t be overly tight or taught, as they aren’t supposed to be bearing the bulk of your pack’s weight.

Packed backpack

Luckily, most modern packs can be easily tweaked for the optimal fit. If you’ve tried your (packed) backpack and everything feels good, you’re all set to go!

What is Merino Wool: Benefits and Great Properties

0
Merino wool base layer outdoor

Merino wool became the most prominent and renowned fabric, among other wool fabrics, due to its sought-after properties and qualities. For those who are thinking: “What is Merino wool and what properties does it have?” , you should know that these include, but not limited to, thermal properties, durability, breathability, and softness. This is actually what encourages many of us to prefer wool-designed knitwears, particularly in winter, because of the insulation properties to keep us warm.

Furthermore, Merino wool is also water-repellent on its outer layers, while other, standard wools, get clammy and damp in inclement and frosty snow temperatures, and can have an irritating itchiness when worn against the skin without any sub-layer underneath. To prevent these adverse inconveniences, the world’s leading knitwear designers use Merino wool predominantly.

To add on, you probably have seen the skyrocketing popularity of this type of wool, but weren’t aware of its indispensable properties. Some people have overlooked the garments made of Merino wool, due to their considerably higher prices, but, nonetheless, it is worth the price.

We will highlight the benefits of this material, its properties compared to regular wool, and its importance to outdoor explorers. But firstly, let’s help you understand what Merino wool is, and what are its roots?

Merino Wool breakdown

This a type of wool derived from one of the rarest, selective bred, Merino Sheep. The sheep is predominantly found in some regions such as New Zealand and Australia, which are infamous for extremely frosty weather conditions, in which normal sheep would probably die if they had been staying there.

Merino wool

The traditional sheep, found in virtually all regions, is not insulated enough to withstand the extremely inclement temperatures. The Merino Sheep, unlike others, has that ability to withstand whichever coldness exposed to. It was this special insulation property that has led to the appreciation of Merino wool in weaving and knitting of, inter alia, outdoor clothes.

Furthermore, Merino sheep produce a soft and durable fleece, which then allows designers to use it for designing their clothes solely of that wool. As a result, the same way that the animal keeps warm in frosty temperatures, outdoor explorers, such as hikers, backpackers, and campers, will be able to keep warm in a durable and soft fleece.

There are many knitwears that are made of Merino wool and these include jackets, V-neck shirts, socks and trousers. You can find such clothes, to prepare for your next outdoor excursion, from various stores, but they are heavily priced, although the price is quite justifiable considering the sought-after properties and qualities that the wool offers.

How Does It Benefit You?

Are you a frequent traveler to a wide variety of countrysides, wherein you get faced with harsh weather conditions? Then Merino wool would certainly allow you to keep your body warm. It can be a great attire in ice climbing, backpacking or snowboarding.

Merino wool benefits

Other synthetic fibers are not a match to the properties found in this wool, and neither are other standard wools from other sheep. Let’s explore the benefits of this wool and then compare with other wools.

Merino Wool vs Other Wools

Merino wool Other wools
It is breathable Also breathable but unequal to Merino wool
Has super ultrafine fibers Have big fibers
Is relatively expensive Relatively cheaper
Lightweight and easy to dry out Heavyweight and take long to dry
Has a greater elasticity due to extremely fine fibers Have minimal elasticity due to big fibers
Soft and not itching against the skin Irritatingly itchy if worn against the skin due to big fibers getting into the hair follicles
Odor repellant due to maximum moisture absorption Minimal odor repellant due to inability to absorb massive moisture
Has antimicrobial properties No anti-microbial/bacterial properties that help prevent odor build-up.
Great water resistant layer Minimal water resistant, which then results with clamminess when exposed to frosty weather conditions
Cool and warm: Can be worn in either summer or winter Often worn in winter due to minimal breathability

These are a few yet important benefits of Merino wool compared to other wool fibers. Let’s elaborate on them below:

  • Breathability: Although, other wools possess this characteristic, they do not surpass Merino wool with its superb and unrivaled breathability.
    It has soft and ultra fine fibers that allow the air to circulate, which ensures that the body doesn’t overheat, and that is especially useful during the scorching days of summer. Meanwhile the standard wool does not offer the same level of breathability.
  • Elasticity: Another great property of this wool is its impeccable elasticity. The knitwear made of Merino wool can easily conform to any shape draped onto. This makes it more ideal for runners because it can stretch to its original shape after use.
    Furthermore, the wool’s natural elasticity enables it to be wrinkle-free even after washing it. You can hand-wash it or use the machine and then wear the garment without the need to iron it first.
  • Softness: Unlike the coarser wool fibers, extracted from other sheep, Merino wool  ultra fine fibers are relatively soft. The fleece of its garments enables your skin to feel soft, and you don’t any additional layer to prevent itchiness.
    Coarser wool fibers, with their big fiber diameters, tend to be rough because the fibers get into the hair follicles of your skin.
  • Adaptability to Warm and Cool temperatures: This wool is versatile in that it can be worn during winter or summer. In summer, for instance, the garment can absorb moisture when your body perspires to eliminate any sweat.
    It helps manage and regulate the body heat by dispersing moisture through the fibers to the outside environment to evaporate. That being done, you won’t see the need to undress when faced with hot days when hiking or doing any other outdoor activity.
    In winter, the garment made of Merino wool will certainly keep you warm because of its unsurpassed insulation.
    The animal from which this wool has been extracted, withstands frosty weather conditions that cannot be withstood by other sheep. Having said this, you need this wool to keep you warm in case you’re planning on hiking or backpacking in harsh temperatures.
    It has a great weight to warmth ratio to ensure the unequaled warmth compared to ordinary wools.
  • Odor repellant: Other garments made of ordinary wools are infamous of odors due to their inability to absorb maximum moisture from the body and disperse it. More perspiration leads to unbearable odor, more especially if you are to wear the garment for a longer period. Merino wool, on the other hand, with its breathability, helps resist the accumulation of odor.
    The fibers absorb the perspiration odor that will be eliminated when washing the garment. You can wear the garment made of this wool for several days in the wilderness without suffering from unpleasant odors from your body’s sweat.
    Furthermore, on odor repellant properties, the wool has massive antimicrobial properties to prevent the prevalence and accumulation of bacteria that cause stinky odor when the body perspires. It absorbs any bacteria and then releases it to the outer area. As a result, no bacteria will build up in, for example, your armpits.
  • Stain Resistant: Because of the extremely fine fibers, Merino wool is capable of resisting stains in case liquids spill on its garment’s outer layer. The stains will not be absorbed, they will instead be repelled. The another interesting thing about this wool is that it attracts less dust than regular wool.
  • Fire Retardant: In the unfortunate event that you mistakenly catch campfire, for example, the Merino wool will not stick to your skin as it doesn’t get melted by the fire.
    You can quickly remove the garment in such occurrences, and get away unharmed. This property makes the wool safer compared to other synthetic fabrics.
  • Lightweight: The soft and fine fibers of Merino wool make it lightweight compared to other synthetics or other wools. Even if wet, they are still lightweight because of their ability to repel much of the water and disperse the moisture to keep you dry.
    This is an especially great characteristic for hikers and campers as their backpacks will weigh less.
  • Protection against the UV: As much as it protects the sheep against the damaging ultraviolet rays from the sun, the garment made of this wool will surely protect your body against such rays.
    Other synthetic garments are not capable of this. With this in mind, wearing merino wool garments in scorching days is never a bad choice because, in addition to keeping you cooler, it will protect you against the harmful UV radiation.

Which Clothes Contain Merino Wool?

Now that you know the vast majority of properties exclusively found in this wool, it is time to discover the range of garments that are made of it.

Clothes Containing Merino Wool

Below are some of clothing products made of this wool.

  • Winter Jackets: hard-shell jackets, jerseys, and other winter wear accessories, have been made with Merino wool to improve insulation. It’s all because this wool has stunning and great thermal qualities to keep the wearers warm. Mostly, the inner fleece is knitted with this wool instead of other fabric materials such as the cotton and polyester.
  • Socks: socks are also predominantly made of this wool due to its warmth and breathability. Our feet, for example, are more prone to sweating due to overheating from the shoes, particularly in the summer. A fabric material that can help deter odor and help absorb the moisture is more preferable, and Merino wool is that material because it absorbs the moisture to eliminate odor.
    As a result, your socks can be worn for longer periods without having that unpleasant odor.
  • Summer knitwear: this wool is capable of making you cool in summer’s scorching weather conditions. It is competitively breathable and disperses moisture in order to regulate the body heat. Moreover, the wool does not cause an irritating itchy feeling on the skin because of its softness.
  • Sportswear: Merino wool has a greater elasticity and anti-wrinkle property. It stretches easily to its original shape and there’s no need to iron it. This property makes it employable in most of the sportswear garments.
    Explorers who like climbing high mountains or running in the wilderness, can benefit from this wool. It will either keep them warm or cool in addition to its elasticity.
  • Inner fleece layers: some clothes can be made of this wool in combination with other fabric materials such as nylon or polyester. The wool is often made as an inner fleece because of its softness on the skin.
  • Blankets: although rarely, some blankets are made of this wool to enhance their insulating properties that correlate with winter jackets made of this wool.

Where to Buy Merino Wool Garments?

There are many “brick & mortar” and online retail stores that sell these garments. As highlighted already, you need to be prepared for the expensive prices you have to pay a bit more for such clothing. To prevent confusion with other wools, check the garments ticket to check the type of wool used.

It should be understood that many winter jackets, in particular, are made of cotton wool or other types of wools because Merino is scarce to find. Perhaps, the observation of the fine fibers can help you spot the right wool.

The Importance of Merino Wool to Outdoor Activists

Campers, hikers, ice climbers, backpackers, skiers and snowboarders, are often exposed to unbearable and extremely cold temperatures in the wilderness. As a result of that, they need warm clothing to survive such frosty temperatures. Merino wool, with its wide range of properties, emerges as the best companion for outdoor activists.

The outdoor temperatures can fluctuate at any time. If you wear other synthetics to keep you warm, you will be prompted to undress when the sun rises. Furthermore, synthetic clothes for winter are often heavy weight. That will be a burden to you, especially when you have to walk longer distances and climb steep mountains.

Merino Wool to Outdoor Activists

Merino wool, on the other hand, is light in weight making it possible to be worn regardless of the distance to be traveled in dry days. It can adapt to the fluctuation of temperatures because it is breathable, thus well designed to keep you either warm or cool.