Home Blog Page 15

Camping Bathroom: Taking the Comfort of Your Home With You

0

Modern backpacking hygiene equipment lets us meet our everyday needs for cleanliness in a breeze and leave little or no trace behind. All we need is to know how to properly prepare and place the equipment and give back the environment its original shape.

Although making and setting up sanitation might look like a complicated task, which requires heavy equipment, lots of backpack space and plenty of legwork to assemble and disassemble the restroom, most designs are actually lightweight, convenient and inexpensive.

Required Equipment for a Proper Outdoor Hygiene

Spending days in the backcountry, is really great, but what makes it even greater, is all the gear which makes us feel like home despite nothing has been set up prior to our arrival.

Outdoor Hygiene Durin Camping

Toilet equipment consists of the toilet seat, optional cabin or tent called “privacy shelter”, and consumables: toilet paper, solid waste bags, disinfection and deodorant solutions.

Portable Toilet

The portable toilet seat can take various shapes: it can be an environmental toilet, which only has a seat part and the legs, to which waste bags are attached. Others may be more advanced, resembling a bucket or a barrel, on which you can sit and enjoy a more fresh and comfortable experience. All these are meant for multiple uses, with regular replacement of any consumables after each or several uses.

Hammock-Style Toilets

The portable toilet seat can take various shapes: it can be an environmental toilet, which only has a seat part and the legs, to which waste bags are attached. Others may be more advanced, resembling a bucket or a barrel, on which you can sit and enjoy a more fresh and comfortable experience. All these are meant for multiple uses, with regular replacement of any consumables after each or several uses.

Hammock-Style Toilets

These toilets are actually made of cloth, which you hang on the either side of a tree or a pole, hence its pretty explanatory name. There is a hole in the middle of the cloth where you sit, and it is just a hole to which is not meant to dock waste bags, so you need to put a bucket with a waste bag spread on its sides, or simply a bag holder.

This kind of sanitation is very lightweight and takes a little valuable backpack room, but you might feel uncomfortable and inconvenient. You need to be careful with this kind of equipment: before going to the loo, as you have to test whether it is well hung, and only when you are sure it hangs well, you can go ahead and use it.

Hammock toilets have to be used carefully to avoid staining, which would make it dirty and useless, all until you reach out to a washing machine. Hammocks are favored by experienced campers and fishermen who spend many days in the wild and having more backpack space for some other necessities is their highest priority.

Foldable thick toilet seat

This is the lightest, solid toilet solution, usually made of plastics, which can hold a waste bag. Legs can sometimes be made of aluminum or other light alloy, and the seat can sometimes be padded. These, are one of the most valuable and convenient outdoor toilets. When folded, it takes relatively little space in the backpack, though, not so little as the hammock seat which has no thick parts.

camping toilet seat

However, most toilets of this type will not require finding a suitable place to mount and will be quite easy to unfold and prepare for use. The ability to put a bag with it is great: you will be able to dispose of your waste in just a few moves and fold the toilet to its original state, or just leave it as it is, with replacing the bag.

Bucket toilets

These have been historically used in many situations, such as mines, war zones, and boats, and are very useful for any outdoor situations including recreation. While old latrines were improvised devices, made of whatever bucket available and common plastic bags, modern purpose-built bucket toilets are comfortable and made for use with special waste disposal bags.

Furthermore, they are often with accessories such as toilet paper holders or paddings, for more comfortable seating. Camping bucket latrines usually consist of an outer and an inner bucket.

Bucket toilets

A variant of the above is the universal bucket toilet seat, which needs to be attached to common buckets. They can be very comfortable too, but this setting is makeshift and often requires more work on replacing waste bags.

Waste and toilet paper disposal bags

Simply called waste bags, these are made to seamlessly and securely keep the solid waste inside, protect from odor, and provide a higher level of cleanliness and sanitation. Quality waste disposal bags are made to keep the environment and retain your comfort and pleasure.

Double layered bags, full sealing closures, and gel powders which make any liquid human waste thick as a gel, all will let you feel like you’ve just stood up from your home flush toilet bowl. Active matters are sometimes used to mask or repel the unpleasant odor, and some bags are perfumed.

Toilet paper bags

Some bags are treated with antiseptic compounds, and most bags are biodegradable, thus complying with the “leave no trace” rules of staying in the wilderness.

Toilet paper bags

Some recreational areas will have specific regulations regarding toilet paper: they will require you to sustain from using it. The only way will be to bring it with yourself until reaching an appropriate disposal storage. That might be gross, but with a good plastic bag made for the purpose, you will be good.

toilet paper disposal bags

These plastic bags are sealable and leave no odors out. They are sanitary enough to keep you safe from germs and filth, and more appropriate for this role than a waste bag.

Digging tool

A trowel or shovel, will be required for you, if you adhere to the “Leave No Trace” rules. Getting rid of human waste requires burying it in a shallow hole, and anyone can dig in the soft soil. If the area consists of just rocks, you can remove a rock which has a pit below it, put the bag in the pit and put the rock back to where it was.

Even in such conditions, you will find a use of that kind of tool to push the rock from its place easier. When you dispose of full waste bags in the soil, you will need just a hole deep enough to accommodate it, and put any surplus land from digging back to the place.

Privacy Shelter

Another essential component of a functional camping toilet or bathroom, is the privacy shelter. It’s basically a tent with a narrow base, but tall enough so most people can stand inside. These share other similarities with tents: a frame of metal or plastic and a synthetic canopy.

camping privacy shelter

Unlike sleeping tents, toilet ones usually don’t have a fly or vestibules and are made just to keep the occupant for short times. However, quality privacy shelters have a window or two allowing for better ventilation and unpleasant odors can go away quickly.

However, privacy is not the only thing a privacy shelter needs to provide you with. Choose shelters which can protect you from adverse weather. Look for a waterproof canopy and wind resistance rather than color, design, and features.

Privacy shelters need to be easy for deployment and takedown. This way you can try multiple places around your base camp to find an optimal one, which should be flat and protected from really strong winds. When a suitable place is found, you can set the privacy shelter up, put the toilet seat inside and keep it in the shape until the end of the trip.

man with privacy shelter

Some privacy shelters feature a floor, while some don’t. Which is better depends on your preferences, some people consider floorless ones more suitable for sanitary use, whilst other prefer the improved comfort of the floor.

Features every privacy shelter needs to offer is a lantern hanger, solar shower hanger (for longer stays) and a couple of pockets for bathroom consumables: toilet paper, wipes, soap, disinfectant solution, spare waste bags etc.

Shower Bag

One of the most commonly noted disadvantages of long trips is the lack of opportunities to take a shower. Luckily, in warm and hot days it should never be a problem if you bring a solar shower bag.

Shower bags look very similar to hydration bladders and are basically a subtype, but solar ones are made of a material able to collect heat while exposed to sunlight and make the contained water hot.

shower-bag

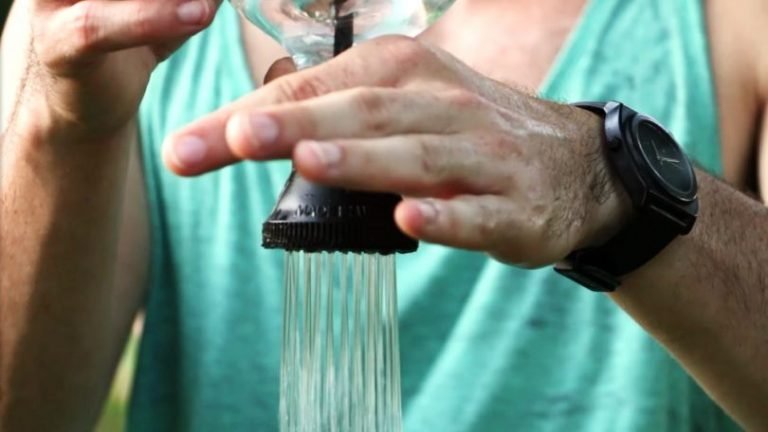
Solar shower bags are significantly larger than hydration bladders and their volume is expressed in gallons, rather than liters or quarts. Common volumes are 5 gal and 10 gal. A gallon is roughly 4 liters or quarts. The shower system consists of a bladder bag and portable shower hose with the head similar to that used in home bathrooms.

Biodegradable Soap/Shampoo

If you really want to Leave No Trace, you should sustain from using your standard soaps and shampoos while in the wilderness. Camping soaps, shampoos, and detergents are made from natural ingredients and break down quickly in the soil after use without contamination.

These products are equally effective as standard products you use at home, though not that cheap. There are solid and liquid forms, though you should first choose liquid forms which have a wider field of application and can be used to wash dishes, textiles and anything else you need to make clean during a backcountry trip.

person-washing-hands-with-eko-soap

For personal hygiene, you apply less soap than you do with standard cleaning products at home. This way a 16 Oz of a biodegradable soap can see more uses than the same amount of standard synthetic soap, thus justifying a part of its high price. This fact also allows you to bring really small amounts to your trip, saving the room in the backpack.

Disinfection solutions

All kinds of body excrements, including sweat, are sources of a large number of pathogens such as germs, bacteria, and viruses. That goes to everyone, no matter the health condition of every individual going to a trip. Additionally, bleeding wounds always require high levels of hygiene to heal effectively. In the wilderness, our capacities to maintain high levels of sanitation are limited, even though we have a complete outdoor bathroom.

Order all your wilderness bathroom elements and necessities some time before going on to the hike, this way you will be able to try it in your backyard before putting into operation. Testing your new camping bathroom in the backyard can be very useful: you will get used to it and learn to get the best from it before you even bring it to a trip.

testing-bathroom

This informal training will help you acquire a daily operating routine with some dainty things, like disposing of waste bags or reusing a bucket toilet. You will also learn what is the optimal time for water in the shower bag to heat up on an average summer day. After several uses, you will be already used to the limited comfort camping bathroom equipment can offer.

Setting Up the Toilet

When you put up a camp in the wilderness, you need to find an appropriate place for setting up the toilet. The optimal place is flat soil, which is at least 200 feet away from the camp and has at least the same distance from any water surface (creek, pond, river, lake, sea…).

Ideally, that place should be next to bushes, trees or a forest with little wind exposure. The absence of wind is very important for the quality of your comfort even if you have a sturdy privacy shelter with the high wing rating. The place, however, would best be sunny, for that reason you don’t go inside the forest.

toilet in the tent

The soil would be rich and support the growth of many plants. These conditions help fast decomposition of your waste.

Waste Disposal

Getting rid of your waste requires finding an ideal place to dig a hole, and, of course – digging it. For that reason, it is best to have large waste bags you can reuse several times until full. Solid bucket toilets go hand in hand with that kind of bags because this kind of toilet can fully enclose a waste bag with waste already present inside.

Whenever a waste bag becomes full, you first dig a hole a bit larger than the full bag. Carefully put the bag handling it for the top and bury it with the excavated dirt.

Getting-rid-of-your-waste

When you are done, disinfect your hands and tools you used, and then wash the hands using biodegradable soap. Also, do not forget to disinfect the toilet seat and install a new bag, so your toilet is ready for new use.

Taking a Shower

For taking a shower, you can use the same privacy shelter you use as a toilet. Just remove the toilet seat and voila!. To get the water, you can use clean fresh water from any surrounding source of water, ideally a spring or creek. Once you fill a solar shower bag full, leave it exposed to direct sunlight for several hours.

Better models of privacy shelters have hangers for an easy taking shower. Environmental water used for taking shower does not have to be rendered drinkable, but it needs to be clear and should not smell.

Bottom Line

The end goal of your backcountry trip is enjoyment through comfort. We go to the wilderness, to feel like a part of it, but we don’t forget that the civilization is our natural habitat and a few of us are able to simply disregard every aspect of it when going away from it.

luxury-camping-bathroom

Some people will just pick a couple of oak leaves and squat for the number two, but for most of us, an actual camping bathroom can’t be spared even if it means the additional burden to your budget and your back while carrying it.

Having a proper sanitary set up will make you ready to spend days or even weeks in the backcountry and feel a little disturbance.  As long as you have enough supplies for serving your nature calls.

Does Boiling Water Purify It?

0

Boiling water with respect to water decontamination or purification is something most people on the planet earth experienced personally sooner or later in their lives. This is actually true, although uncommon for some reasons, likewise for nations in the developed world, for example, the Europe and USA. But does boiling water purify it?

Of course, water boiling with the main aim of cleaning it and making it safe for drinking is greatly a natural issue for nations in the developing world, whereas in some areas this is a standard technique that is performed every day.

So as it is very obvious and taken advantage of by most people in the western world that when the tap is opened, the water is drinkable even if the taste isn’t that great, there are many areas where this isn’t the regular reality.

boiling-water

Water boiling is powerful and very easy, a technique to purify water from certain contaminations and bacteria. Obviously it doesn’t deal with all toxins or outside particles, however, at some point, this technique is everything it takes to have the capacity to drink the water when a sullying emergency emerges in a certain area.

The Meaning of Boiling

The boiling of water or some other substance, is done by heating water in a kind of container to the extent that it becomes vaporized due to its liquid state. Of course that water boiling is termed for decontamination and purification purposes, certainly, implies that there is no compelling reason to heat up the water with the intention of vaporizing them. That is often done when It comes to distillation.

The standard temperature of boiling water is generally 212 degrees Fahrenheit or 100 degrees Celsius, but there are situations when this point lowered or increases toward a marginally unique temperature.

temperature of boiling water

Changes in boiling point of water are usually affected by air pressure. Therefore, the effect happens when you endeavor to boil water at various altitudes – for instance on a mountain peak or to the Dead Sea shores. At the point when the height changes to a huge degree, the progressions get to be substantial. Generally, for each fall or rise of 100 meters, there is usually a marginal change in the boiling point of water.

Boiling water is the most secure technique for purification. Regardless of whether you are out for outdoors, in a nation with under or unsterilized water, or you are afraid that your local water supply has turned out to be contaminated, boiling that water eliminates parasites and germs.

In case you are voyaging, boiling your water for drinking can be a less expensive alternative to purchasing packaged water. However, it is vital to know to what extent you have to boil the water to make it safe for drinking.

woman-drinking-water

Boiling water eliminates protozoans, bacteria and parasites, but it doesn’t remove toxins and chemicals from the water. It might sound surprising to you, but relatively a few survival articles cover that part. In case you are getting your drinking water out of a clean mountain stream, then boiling up the water is most likely all you have to do.

However, if you are getting your drinking water from a different source such as a lake or waterway that gathers spillover from urban areas, then it is important you utilize a chemical water filter. You must remove the chemicals from your water before boiling it or it will be highly concentrated.

chemicals in drinking water-

Indeed, even rain gathered from rooftops or plastic lined dejections on the ground may have some dreadful chemicals. Rain can have a huge number of unsafe chemicals, particularly if you abide in or close to an urban domain. Assuming your water is free of chemicals, filtering gadgets and the synthetic treatment of water nowadays are just quicker substitutes for really boiling it.
Water boiling is sustainable, not at all like chemical treatment and filters. Since you already have a heat source and a flame resistant vessel or some other related things, you can boil your water.

Chemical contamination, for example, arsenic is not evacuated by boiling. Also, water that contains a high iron amount, chlorine or calcium is not good for boiling water. White scales may store in the container base subsequent to boiling if there is a high residue of calcium in the waters.

chemicals in the water

In such situation, the container needs to be washed appropriately after each usage. Boiled water has a flat taste and most people may dislike that. Hence, bubbled water can be refrigerated or chilled down to room temperature in order for it to taste great.

How Long Do You Need to Boil Water?

How long do you boil water to purify it? This has been an exceedingly debated subject for quite a while. Some people do say that water isn’t drinkable until it has attained a rolling bubble, while some others do, say 5, 10 or even 20min of boiling. This section of the article will resolve the issue and give you the accurate time period needed to purify water.

water-that-is-boiling

So why precisely is this a major issue to inquire? Why not simply heat up the water for 60 minutes to get it purified? Well, if you are opened alone to a limited water source, you don’t want to see it evaporating, with regards to survival you have to deal with your resources efficiently. If your only fire source is a fuel burner, any additional time spent boiling it will waste your valuable fuel.

If your water is cloudy, muddy or contains some organic particles, for example, wood or grass drifting around in it, then you need to boil it for a longer time, 10min and above at a consistent boil. This is due to the fact that you have to warm the inward temps of all that particles to no less than 160 degrees F (74 C) as well. Else they could harbor some dreadful microscopic organisms and some other things.

If you have a dirty water, you should purify it by utilizing some kind of filter framework, whether a commercial framework or something made on the fly or even an old shirt. This will save fuel and time over the long haul and guarantee that your water is pretty much safe to drink.

boiling-water-during-hike

So shouldn’t something be said about high altitudes? When it comes to high altitudes, the time it requires for the water to attain a rolling boil and after that cool means that it is drinkable. If you live in 2,000-3,000 feet altitude, ensure that you let your water to sit in the pot, with a cover on it, until it becomes somewhat warm or cool before drinking.

In case you are making a coffee or tea ensure that you let it sit and after that warm it to the fancied temperature you require. You needn’t bother with a thermometer to measure the temperature of water, simply take your water to a complete boil and afterward instantly take it off the warmth and leave the cover on. When the water reaches a rolling boil, you have really wasted fuel, water and time.

In most situations, the time allotment that water is opened up to temperatures of 185 degrees Fahrenheit or higher between the time-period it attains 185 degrees Fahrenheit and the time-period that it attains boiling at 212 degrees Fahrenheit is sufficient enough to execute most pathogens and organisms in the water.

boiling water temperature

That is the reason why specialists have not recommended that you have to heat up the water for more than 1min or so. If you are heating water on an uncommonly hot intense warmth source, boil it somewhat longer to be drinkable. Typically, specialists suggest 3mins of rolling bubbling water at sea altitude to safely purify water for drinking.

Vital Reasons for Boiling Water Before Drinking

Why try to heat up the water before drinking? Well, if you are on an outdoor trip, and you discover a flood of water, you would really be endangering your well-being by drinking from it without purifying first. We all know that water, naturally, is a host to numerous dangerous pathogens which can bring about an intense sickness or even result in sudden death.

Water boiling is an ideal approach to guarantee that it is good for drinking, sifting gadgets and synthetic purification items are not as viable. Heating up your water will surely eliminate all sorts of organisms, for example, microbes, parasites, and viruses.

Pot on the fire

The truth of the matter is that when your water has attained a required boiling point, all pathogens have as of now been executed! As a safety measure, you may want to boil the water for a complete minute just to be a safer side. The time it requires for your water to attain a boil and afterward chill off is all that could possibly be needed to kill every single destructive organism that could cause sickness.

Aside from boiling water to purify it and eliminate all forms of dangerous organisms, here are some other reasons why you should boil your water and make it warm enough before drinking.

Cleanses Digestion

Drinking a warm cup of water early in the morning can help to cleanse your body from toxins by flushing it out. Water and some other liquids help to grind the food that goes into your stomach and also regulate the digestive system.

drinking-water-for-digestion

Boiled water will help to break the foods quickly, thereby enhancing easy digestion. Taking a cup of cold water amid or after a meal can really solidify the oil in food already consumed and thus make a fat deposit in the digestive tract.

Adding ice to already boiled water may strip it of its natural minerals, as these minerals are important to keeping the intestine healthy. Fortunately, you can supplant a cup of chill water with a warm one to enhance digestion, particularly after taking a meal.

Helps Constipation

At a certain point or another, the majority of us are tormented by this regular stomach issue where we have little or no bowel movement. The kind of strain felt amid elimination, joined by bloating, is caused by an absence of water in the body system.

Taking water in the morning

Taking warm water already boiled in the morning on a void stomach can help enhance bowel movements and help constipation while grinding food as they easily go through the digestive tract. Rousing the bowels will return your body system back to its normal operation.

Alleviates Pain

Warm water already boiled, thought to be nature’s most effective home cure, can assist reducing pain arising from menstruation to cerebral pains. The heat produced by warm water is well-known to have a soothing and calming impact on the muscular strength, which can help give immediate alleviation to cramps and muscle spasms.

Woman with pain

Boiled water is typically better for cramps since hot liquids enhance the flow of blood to the skin and help unwind the spasms muscles.

Sheds Excess Pounds

In case you are on a diet, you might have probably heard that drinking a cup of warm early in the morning water before anything else can enhance weight loss. Warm water rises the temperature of the body, which in this way enhance the metabolic rate.

An expansion in metabolic rate permits the body to smolder more calories all through the rate. It can likewise help the kidneys and gastrointestinal tract to work far better.

water-lose-weight

Doctors suggest taking warm water early in the morning, often with a polyphenol-rich lemon submersion, or also with a tea appeared to lessen free radical movement in the body. Taking a cup of warm water together with a lemon will help dissolve the fat tissue in the body, and furthermore, regulate food craving because of lemon’s pectin fiber.

Enhances Blood Circulation

The deposits of fat in the body are dissolved along with compiling residues in the nervous system after taking a cup of boiled warm water. This purges out the dangerous toxins that are circling all through the body and then promotes the circulation of blood. Ensuring that the muscles are in a relaxed state will wipe out poor circulation of blood.

Reduces Premature Aging

Untimely aging is common mostly in women, but fortunately, this can be counteracted by drinking boiled warm water. The availability of any harmful toxins in the body can prompt untimely aging, but drinking warm water can help to purge out those poisons from the body while repairing damaged skin cells to enhance elasticity.

old-lady-drinking-hot-water

To receive the health advantages of warm water, you need to drink it each morning alone or you can also add lemon, for taste.

It is highly recommended that you have warm water because drinking straight heated water can possibly be harming to tissue present in the mouth and throat. After boiling your water, ensure that leave in for some minute so that it can become warm enough before drinking. Likewise, do check with your health specialist before taking boiled warm water in case you are on any drugs that could affect the viability of your medication.

Wrapping it up

Boiling water is a very common task that knowing how to do it can render help to you anywhere. Although water boiling is the best technique for purification, fuel deficiencies or absence of a heat source may imply that this isn’t possible at times.

In these cases, you can eliminate most of the pathogens by utilizing ordinary household unit bleach that doesn’t contain any dyes or perfumes. You need to utilize a spotless container and include five drops of bleach for each two liters of water.

water

This solution needs to remain for almost thirty minutes before the water is drinkable. This technique does not eliminate all pathogens present in the water and, while it is helpful in any emergency, you need to try and boil your drinking water where possible.

Like to share your experience on how boiling has helped you purify your water and some other benefits you have derived from drinking boiled warm water? We do love to hear from you. You can leave us a comment below.

Down vs Synthetic Sleeping Bag: What You Need To Know

0
Down vs Synthetic Sleeping Bag

You’re going on another outdoor adventure sometime soon and it occurs to you that your old sleeping bag is getting a little worn. Or you’re going on your first camping or hiking trip and need a sleeping bag to complete your kit. So, you head out to the store to buy one.

At the store you’re hit with a wide array of colors, lengths, types and most importantly: filling. The decision on whether to purchase down vs synthetic sleeping bag, is very difficult to make correctly, without the neccessary knowledge of each filling’s pros and cons.

That’s why we’ve written this article to help you understand what both down and synthetic fillings have to offer in very practical terms.

variety-of-sleeping-bags

It’s worth understanding which sleeping bag is best for you as a good night’s sleep can make all the difference between an enjoyable trip and a flop. The right sleeping bag will keep you at a comfortable temperature all night long and ensure that you wake up bright eyed and bushy tailed come morning. So, how do you go about choosing the right sleeping bag?

Well the answer is quite simple. You read an informative article like this blog! Once you know what down and synthetic fillings have to offer you’ll be ready to make your choice based on your own personal circumstances.

sleeping-bags-in-tent

Because, as you’ll learn, either one might be perfect for you. It’s entirely a matter of your intended use situations for your new sleeping bag. So without further ado, let’s get into exploring the first of these two fillings: down.

The Characteristics Of Down Filling

What characteristics need to be considered before choosing down sleeping bag.

The Basics

First things first, you ought to know that down is made (usually entirely) from feathers. These feathers tend to be harvested from either geese or ducks. But don’t worry, it’s not their old sharp feathers that are used for flying, it’s the soft, fluffy layer of smaller feathers that these animals carry underneath their regular feathers that makes up down filling.

This layer on a bird creates an insulating midlayer which helps to keep the animal warm naturally. It works by trapping body heat in small air pockets that form within the feather clusters. Alternatively, it’s also extremely breathable! How is that possible?

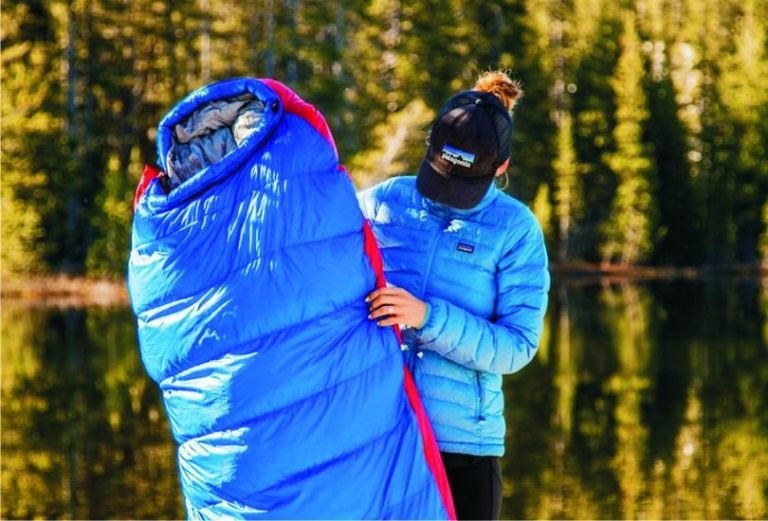
man-in-down-sleeping-bag

Well, we’re not entirely sure, but nature’s done it again here! Down will be warm and comfortable while allowing its surroundings to breath and it will even wick away unwanted moisture.

The Pros

Now that you’re aware of the basic characteristics of down, here are the four main positive characteristics it has in our eyes:

  1. Extremely lightweight
  2. Very compressible
  3. Warm
  4. Durable

The compact nature of down sleeping bags (their light weight, compressible structure), makes them easy to transport over long distances in your backpack. This means them the perfect companion for mountaineering or long distance hiking. You won’t find yourself cold at the end of the day with down either. Made entirely from a naturally insulating substance, down can be very warm and comfortable.

girl-sleeping-in-down-bag

Finally, down’s durability factor is worth mentioning more strongly. A sleeping bag can be quite an investment, so it’s important that you get one that will last. Barring any problems with the exterior case’s workmanship, a good down sleeping bag can last for decades with proper care.

It’s satisfying to know that when you buy a good quality sleeping bag it will be yours for life. Clearly this is dependant on the quality of other sleeping bag parts though (zipper, lining) so you may want to consider opting for a slightly higher priced model to come out on top financially long term.

The Cons

Above, are just a few of the many benefits of down filling in sleeping bags, but as with anything, there are cons to consider as well.

Goose-down

It wouldn’t be fair if we didn’t present those too, so here’s a quick list of the reasons down might not be right for you:

  • Sleeping bags made from it are generally more expensive than synthetic filled ones.
  • It is not hypoallergenic, meaning, those with very sensitive allergies could be negatively affected by it.
  • The cleaning requirements can be a little onerous if it does get dirty.
  • It doesn’t insulate well when it’s wet and takes a long time to dry.

Depending on your individual circumstances, these negative attributes of down filled sleeping bags may or may not be a turning point of decision. We tend to recommend down sleeping bags quite highly but clearly if you have many sensitive, allergy reactions, or are on a very tight budget then down may not be the right choice for you.

down-sleeping-bag-disadvantages

To mitigate the onerous cleaning negative we simply recommend that you shower (or jump in a river) to get clean before you go to bed at night. You’ll feel better being all clean before bed anyway, and it will add years to the life of your sleeping back – down filled or otherwise.

The Price

So you’re aware of both the pros and cons of down filling, and have decided it’s for you? Well, now let’s talk price. The range when it comes to down sleeping bags is quite expensive. From specialized high altitude designs for the climbers of Everest in the thousands right through to < $100 special deals on Amazon. Unless you’re a summit conqueror or on a tight budget, we’d recommend you aim somewhere in between the two extremes.

It’s better to overshoot than undershoot in terms of quality because this is likely to affect your sleeping bag’s durability and comfort – two very important factors. The main difference is likely to be in the down filling itself.

two-sleeping-bags

More expensive down sleeping bag models will be composed of feathers from mature geese.  These feathers are the most fine, soft and lofty ones available and make absolutely fantastic insulators. Pack on top of this, a higher than normal fill power, and you’ve got a great high class model sleeping bag that’ll keep you nice and cozy.

Note: Fill power is the measure of how effective down is as an insulation material. It generally measured how many cubic inches one ounce of down can fill and ranges from around 500 to 900, low quality to high quality respectively. It matters in regard to weight as a 700-fill power sleeping bag with a +20 degrees Fahrenheit rating, will weigh less than the same degree rating level bag with only 600 fill-power.

Conclusion

If you can afford to, and you don’t have any allergy issues or an inability to clean yourself properly before going to bed at night, then a down filled sleeping bag is for you. These easily transportable warm wonders are great camping, hiking and mountaineering companions that have been in use since forever. They get a big thumbs up from us.

couple-in-sleeping-bag

Now that you understand what down has to offer you, it’s important to also investigate synthetic filled sleeping bags. They have their own host of factors, read on to find out what they are.

The Characteristics of Synthetic Filling

What characteristics need to be considered before choosing synthetic sleeping bag.

The Basics

Synthetic filling is man made. It was created to mimic the positive qualities of natural down filling while eliminating some of down’s negatives. Most synthetic fillings, are made with polyester fibers, combined into a variety of filament sizes and intertwined to create clusters with a range of loft levels.

sleeping bag synthetic

They effectively replicate down, but using a man-made substance. The key thing to be aware of when shopping synthetic is the distinction between short-staple and continuous filament.

  • Short staple insulation: This synthetic filling is comprised of short strands of super refined denier filaments that are packed very close together to ensure maximum heat retention. You’ll find sleeping bags filled with these feel very soft and flexible – much like down.
  • Continuous filament insulation: This synthetic filling is created from thicker filament which is very durable and strong. It is likely to have a stiffer feel than short staple insulation and be less compressible as a result. Also, there can be cold spots in its composition. Fortunately, it is more durable than short staple insulation, though, so take your pick.

The Pros

If you’re a fan of either of the above types of synthetic filling mentioned above, then you should know their’s even more to the package. Here’s a quick list of the general positive characteristics of synthetic fillings on a whole:

  • Fast drying
  • Less expensive than down
  • Hypoallergenic
  • Provides insulation even when it is wet

The hypoallergenic characteristic of synthetic sleeping bags is a real drawing card for many allergy sufferers who are trying to enjoy the great outdoors. Suprisingly, it is the unnatural substance (synthetic filling), not the natural substance (down) that best serves to alleviate allergies overnight.

syntetic-material

This is because polyester is fundamentally different from down and has been designed with allergy sufferers in mind. You’ll find that certain sleeping bag brands have tailored their product specifically to the allergen marketplace. So if you’re not a fan of dust mites then synthetic filling may be for you.

The other key factor synthetic filled sleeping bags have over down filled ones, is their ability to dry quickly. Some will even dry in a couple of hours if placed in direct sunlight.

couple-in-synthetic-sleeping-bag

This makes them great long-term camping companions – especially in rainy areas where a little bit a moisture in your tent is inevitable.

The Cons

Though it’s mostly hunky dory, there are a couple of places where synthetic filling can come short when compared with down for the purpose of sleeping bags. These are the negative characteristics of synthetic filling:

  • It has a higher weight-to-warmth ratio than down
  • It may not be as durable as down
  • Insulation power is slowly reduced over time as it gets less, each time your sleeping bag is stuffed back into its sack.

The higher weight-to-warmth ratio of synthetic filling when compared with down filling may not necessarily be a problem for you. All this means is that to achieve the same level of warmth as a down filled sleeping bag a synthetic one will need to be heavier.

cold synthetic sleeping bag

So if you’re planning on staying put in one area (or are a total buff) then this won’t be a problem. Alternatively, if you’re going for long hikes with your sleeping bag in your pack then synthetic fillings may not be perfect for you.

The other negative of a synthetic filling in sleeping bags is entirely a matter of the price point at which you buy them in. Generally speaking, though synthetic, sleeping bags are considerably less expensive than down ones and their exterior and other fittings may thus be made by the manufacturer at a lower quality.

damaged-sleeping-bag

It’s important to check that your sleeping bag zip and outer lining will stand rough handling – especially if you’re going to take it out in the wild with you. There’s nothing worse than a sleeping bag that breaks mid trip. To mitigate this risk you could simply go for a higher end synthetic sleeping bag model.

The Price

So long as you’re not put off by either of the above cons, synthetic sleeping bags are likely to be the perfect option for you. They come in a wide range of prices, but the majority of those on the market tend to be in the cheaper < $250 range. We know that may not sound cheap, but this sleeping bag could last you for many years to come!

As always, we’d recommend going slightly higher instead of lower in terms of budget. Make sure that you check out the manufacturer’s warranty – if they’re willing to ensure their product then that’s a pretty good indication of its makeup.

Conclusion

Synthetic sleeping bags have added a strong alternative to down in the sleeping bag marketplace. They offer a realistic alternative to down in wet outdoor conditions and provide a welcome relief for allergy sufferers.

man-and-woman-in-sleeping-bags

Overall, we’d say they’re a great choice, provided that you aren’t needing to carry them long distance on your back. Best use case scenarios include camping, extra bedding and travel companions. So synthetic fillings have something to offer too! But wait, there’s more. Below we capture the third and possibly best option yet.

The Blended Magnificence

What if you could have all the benefits of both down and synthetic fillings in your sleeping bag, without any of the cons? Well, you can! Enter the special ‘blended’ filling bags. These sleeping bags contain both down and synthetic filling in appropriate proportions and placements.

The synthetic filling generally makes up a thin outer layer of filling, so that the part of the sleeping bag that is more likely to get wet/damp will be able to dry quickly. The center of the bag is then composed of pure down filling, meaning overall the sleeping bag is still very warm and is also incredibly lightweight and compressible.

many-sleeping-bags

We were very impressed by the invention of blended sleeping bags and believe they will be the next big thing on the market. They sit in the higher price range point, but are well worth it, and they’re still usually cheaper than pure down. For avid adventurer’s who want a bag that will do everything from camping to hiking to scaling mountains with them, a blended bag is your best bet.

Note: What you’ve just learnt about sleeping bag fills can be applied to a variety of other outdoor products as well. Everything from full winter jackets to pillows can be found with either down or synthetic stuffing. Now that you know the pros and cons of both, you can choose the best outdoor equipment for you.

And remember, it’s not the filling itself that creates warmth, but rather the fact that it catches your body heat in it’s air pockets. So the more puffy that pillow or winter jacket, the more warm it’s likely to be.

Our Closing Comments

When you’re out there on the market looking at which sleeping bag to buy, the most important part of your decision will be choosing a filling type. Your choice will affect the warmth factor, overall weight, water resistance, size and price tag on your new sleeping bag.

violet-sleeping-bag

Both down and synthetic insulation, are good in their own rights – it all depends on your own personal intentions for the use of your sleeping bag. Whether it’s camping or hiking or something in between, these two types of fills, have you covered. Down is possibly a little more luxurious and comfortable, whereas synthetic fillings can be more practical.

We’d personally recommend the blended bags as being the most multi-purpose and beneficial in all situations. With one of these you can switch from rainy whether camping one weekend to hiking the next and boat trip on the third.

It’s about giving yourself the freedom to develop your outdoor adventure tastes over the years while maintaining a constant sleeping bag companion. It is an investment after all, so getting one that will go the distance and adapt to suit you over the years is worthwhile.

few-sleeping-bags

Can You Eat Poison Ivy: Does Eating it Make You Become Immune to Rashes From It?

0
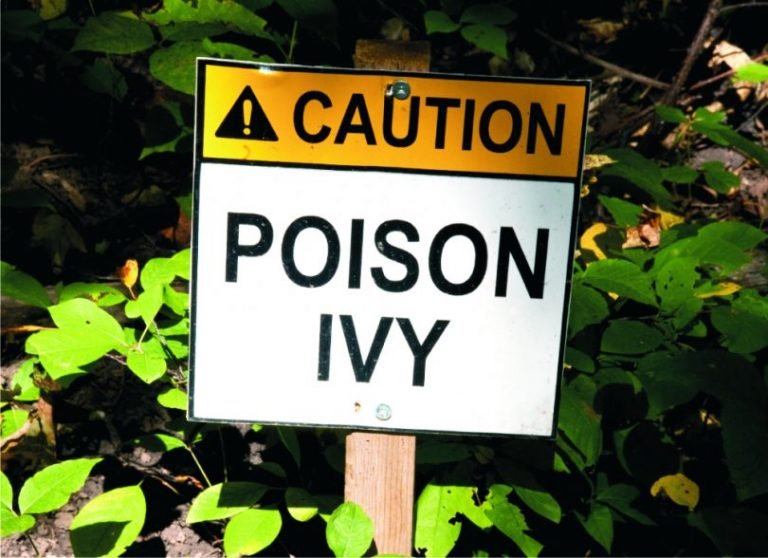
caution-poison-ivy

One of the most common rumors among those who like to wade in the deep wild, is the claim that one can develop immunity to poison ivy rashes, through ingesting controlled amounts of poison ivy parts, particularly berries. This practice is not only ineffective, it is also harmful! Can you eat poison ivy is not a question you should think about seriously, though many would still keep claiming one can become immune to poison ivy rashes if you do it properly.

Let’s first learn some basics. This poisonous plant has one active compound called urushiol, and it is what makes rashes when we come into contact with poison ivy. However, what is most important is that this compound is not a classical, chemical poison, but just an allergen. That means some people and some species of animals are completely immune, and can both get in contact and ingest the plant.

poison-ivy

Since it doesn’t meet the biological definition of organic poison or venom you can’t use it as serum or an ingredient in any effective serums to fight the poisoning or become immune to it. For example, snake venom is a mix of many compounds which need to be stacked up to make a synergic action of poisoning any affected organisms.

Modifying components in a venom can turn it into a venom-repellent and that’s basically how anti-venom serums are made. Owing to the fact that poison ivy (and some other poisonous plants) contain only urushiol as an active component,  it is not possible to get the serum through any kind of modification or controlled intake.

What’s Behind the Claims

Just like most other allergens, urushiol from poison ivy is not harmful for everyone. Some people are genetically resistant to urushiol, and they can touch, eat, chew and drink the plant in its fresh form or as produce (berries, tea…) without developing any symptoms associated with it. Note that those who are immune, and it is around 15% of the US population are immune since birth. This is where the confusion begins.

person-eating-ivy

First, a person who is immune to poison ivy, but is unaware of it, tries eating small amounts of poison ivy leaves or sometimes a berry. In the process of eating they use gloves to pick and put the plant parts into their mouth, believing they’re allergic to it while they aren’t. Sometime upon eating it, they start exposing their skin to the plant’s leaves to find out they get no rashes at all.

Since they weren’t aware of their congenital immunity, they start believing that they have developed urushiol immunity only since they “treated” themselves with poison ivy.

So they start spreading the news throughout the populace, showing evidence of their immunity to others, many of whom are not immune to urushiol, nor can build immunity to it, ever.

hand-touching-poison-ivy

Other than that, it is believed there should be people who become more immune to symptoms caused by poison ivy. There are testimonials and claims of people who allegedly were allergic to poison ivy exposure, but upon eating it these symptoms lessened, and the effect lasted for about a year. Many people keep claiming they have been repeatedly eating controlled amounts of poison ivy to reinstate the alleged immunity to the plant.

Eating It as a Non-Immune Person

Exposing the skin top poison ivy, poison oak and some other plants producing urushiol causes an allergic reaction known as urushiol-induced contact dermatitis. The severity of symptoms is not the same in everyone allergic.

While many will relieve symptoms by just soaking the affected areas in cold water, others will require treatment and pharmaceutical remedies such as topical or oral corticosteroids. In some people even skin exposure to urushiol can be dangerous and life-threatening.

poison-ivy-allergy

Same is with attempts to ingest the plants. Despite most people will just try with very small amounts such as eating one young, underdeveloped leaf of poison ivy, the amount of urushiol released can be very dangerous if the person is more sensitive to the allergen. Note that treating symptoms developed through eating poison ivy is much more complicated and requires more effort than treatment of urushiol-induced contact dermatitis.

Eating fresh poison ivy can affect both digestive and respiratory organs. The most dangerous and critical power of urushiol is making the airways swollen and clogged. The effect lasts long enough to suffocate the affected person if the dose of urushiol taken is large enough.

Death from eating poison ivy is not uncommon and many cases are addressed to voluntarily ingesting it, i.e. the victims knew what they ate and why.

poison-ivy-skeen-reaction

Despite all that, owing to the aforementioned reasons, many people still keep trying to develop immunity through eating the plant and its produce, though fresh leaves remain the most common way of administration. There are some other ways on which people are trying to intake controlled amounts of urushiol trying to become immune to allergy.

Poison Ivy Extracts

Urushiol oil can be extracted from poison ivy, poison oak and other urushiol-containing plants to develop what is believed to be a “remedy or ”serum” for poison ivy contamination. Urushiol containing pills, were once a popular product in attempting immunization, though these are no longer marketed for obvious reasons.

Besides that, there were numerous experiments with injections of diluted urushiol, but the results and findings were not satisfactory to make it a remedy, so that doctors and pharmacists can recommend someone trying them to become immune to poison ivy bruises.

injections-poison-ivy

Today, we can find homeophatic solutions with extremely small amounts of urushiol diluted in water. While the old methods of administering the allergen can also be considered homeopathy, today modern methods use amounts so small that it is hard to believe it can really fight off the allergy.

One is for sure, these solutions are so diluted that they are rendered safe, unlike some old methods of administration, but it can hardly work towards developing immunity to urushiol. What can come as a replacement are pills containing extracts of some other plants, such as jewelweed.

Milk of Goats Who Ate Poison Ivy

Goat is one of many animals known to be naturally immune to urushiol. It is also found that they enjoy feeding on poison ivy vines and are sometimes used in poison ivy control. Some people believe goat milk can help humans develop an immunity to poison ivy contact dermatitis, primarily if it is milk from goats who ate a lot of poison ivy.

Goats Who Ate Poison Ivy

Despite it’s a proven fact of science that goat milk does not contain any urushiol, as it is entirely broken down in the animal’s digestive organs, people keep thinking that regular drinking milk of goats who fed on poison ivy will get them some compounds which they believe bring the goat an immunity to this human allergen.

While it is perfectly safe to drink milk of goats who fed on urushiol-containing milk, its ability to make one more resistant to urushiol contamination, is debatable. Some people claim drinking goat milk is especially effective if it is taken during childhood, and it is possible that some chemicals which make goats resistant to urushiol can be acquired this way.

Note that most other cattle reacts to poison ivy, poison oak, and poison sumac, in a manner similar to humans, so goats are believed by many to have some special ability to help us get rid of painful experiences with it.

cattle eating poison ivy

Overall, we are not assured in the efficacy of this method, but, unlike eating fresh parts of poison ivy plants, drinking goat milk is perfectly safe and recommended for some its other health effects.

Other common ways of administering urushiol

Other ways of taking what is believed to be controlled amounts of urushiol is preparing tea from poison sumac, ivy and oak, eating other parts of urushiol plants such as berries and roots, cooking the fresh plant and inhaling the smoke from burning these.

poison sumac

What is common for all these methods is that it has little or no positive effects to any aspect of human health and it is much more likely to attain a harmful allergic reaction of internal organs to urushiol exposure, which in many cases can be life-threatening.

How Do You Actually Fight Off Poison Ivy

Whilst urushiol is a powerful and highly resistant allergen, there are some active components and herbs which can alleviate the symptoms of poison ivy contamination.

Currently there are no known solutions which can prevent the poison ivy rashes, but after-contact remedies which can be taken topically and orally do exist, and include both pharmaceutical drugs such as oral and topical corticosteroids as well as herbal products from various plants, in particular jewelweed or touch-me-not. Note that taking any of these remedies as a preventive measure is not effective.

poison-ivy-pills

The only prevention that works so far is mechanical protection of your lower legs and feet and learning how to recognize the plant should you know how to stay away from it.

Barrier Creams and Lotions

Some chemical compounds are known to effectively neutralize urushiol quickly, not allowing it to reach to your skin. These compounds are safe for topical use and thus are used as active components in many poison ivy barrier creams and barrier lotions.

Bentoquatam is one of the most commonly used compounds in making poison ivy barrier solutions. The creams or sprays (though creams are a more effective way of administration) need to cover all parts of the skin, which may be exposed to any urushiol-containing plants.

barrier-hand-cream

Bentoquatam (Ivy Block) solutions are known to be highly effective in intercepting and absorbing any urushiol oil touch with the skin. However, it has certain disadvantages. Bentoquatam blocking creams and sprays should not be used in kids aged 6 or less. Also, these should never be used as a means to heal existing urushiol-borne rashes, as these can only worsen the condition.

These creams and sprays can remain effective four hours after application, so you need to reapply these every for hours, if you need to spend a prolonged period of time in an environment where poison ivy is present. Remember that not all urushiol can be absorbed by bentoquatam, so it only delays the occurrence of rashes.

woman-apply-hand-cream

If you believed that you got in touch with the poison ivy or some other urushiol-releasing plant, you need to wash off the solution immediately and reapply a new layer of it. Urushiol barrier creams can be bought or ordered without a prescription.

If You Get a Rash

Contact with any urushiol-containing plants may be unpleasant at best, and in worse cases it can be very dangerous, but luckily, there are many ways which can help alleviate symptoms of urushiol dermatitis. Solutions offered, range from natural products to pharmaceuticals.

Natural Products: Jewelweed

Jewelweed or touch-me-not is a native plant to North America, and native peoples have been using it for centuries to heal various skin conditions. Since some varieties of poison ivy and other urushiol plants are native to North America it is clear the tribes knew of its effect to protect from the rashes.

Jewelweed

Jewelweed products, such as the salve, is known to have a wide field of application with skin rashes, and its effectiveness goes much beyond healing urushiol-induced bruises, and is known to be very effective in healing insect bites.

Jewelweed salve can be bought without a prescription or made at home with natural carrier oil and beeswax. This is a great solution for light to moderate cases of skin irritation without internal symptoms present.

There are many other recipes for natural and kitchen-made poison ivy relief solutions, such as oatmeal paste, banana peel, baking soda bath and others. Most of these can help to an extent in lighter cases of urushiol induced dermatitis, but their rash healing abilities are limited.

Corticosteroids and other pharmaceutic remedies

Most pharmaceutical remedies, including corticosteroids such as hydrocortisone are used for symptomatic treatment of poison ivy and other urushiol-related rashes. That means their effect is to turn off the perception of itching and other unpleasant feelings around the affected areas, rather than making the course of the rashes run faster.

Corticosteroids and pharmaceutic remedies

However, since there is less itching, you will have no reasons to scratch the rash, so your wound healing process will remain mainly undisturbed, and you will not risk infections after excessive scratching.

Topical corticosteroids, those applied on the affected skin, are mainly available over the counter, while oral remedies will require a prescription.

In severe cases of urushiol skin irritation, doctors may prescribe more powerful corticosteroids such as prednisone or triamcinolone. These drugs are immune-suppressants and will slow down the immune system’s response to the severe wound which is in this cases counter-effective in healing it.

Other Preventive Measures

If you’re planning to hike and visit places where poison ivy, poison oak, poison sumac and other urushiol-releasing plants are present, you need to know how to keep away from them. Urushiol is highly persistent and can\t be fought off easily. Wear long sleeve pants and make the entire your foot and ankle area covered by either pants or socks.

hiking long sleeve pants

A good thing about urushiol, is that it takes time to penetrate into the sensitive layers of your skin, and can be removed with soap and rinsed with water. If you feel you’ve caught poison ivy you can relieve with soap and some water, which you can bring with you on the hike. Also, it is strongly recommended to take a shower immediately after a hike to remove any urushiol residues that might be remaining in your body.

It is also important to be able to stay away from the plant whenever possible, it is the ideal way to prevent contamination. You should only keep on the trail without contact with the local flora whenever there is a risk poison ivy might be present.

The ability to recognize poison ivy and other urushiol plant is highly important. Most of these plants appear as vines which sometimes creep up the plants (hence the name “ivy” despite not being related to actual ivy), and poison ivy has leaves which grow as a group of three.

ivy-plant

While we can keep counting descriptive features of these plants, it is best to have photographs of it stored in your phone or tablet you bring with you to any hike.

Remember: Poison Ivy Immunity is Limited!

If you’ve had previous contacts with poison ivy and other urushiol plants, and had no symptoms of an allergy, it means you are immune to the plant. But remember that you can lose the immunity to urushiol after a number of exposures to the compound. The likelihood of losing immunity to urushiol grows with the amount and frequency of contacts with poison ivy, oak and sumac.

While sensitivity from poison ivy can be seen as a great thing, you shouldn’t strive to rely much on it. Also, trying to ingest excess urushiol may significantly reduce your congenital resistance to urushiol allergy. From a doctors’ point of view, no one is actually immune to poison ivy, there are just people who are less susceptible to exposure in the beginning.

The Final Verdict

Urushiol is one of the most aggressive allergens found in nature. While just brushing it with your skin in most cases leaves only short-term effects, ingesting the plant may be life-threatening.

person-hold-ivy-in-hands

In some cases, eating poison ivy is claimed to be beneficial in lessening the symptoms of skin exposure to urushiol, but none of these cases are scientifically documented in a way which should make it worthy of further research.

Let’s say that there might be a limited number of such cases which does not justify the risks associated with poison ivy ingestion at all.

The best, and the only certain preventive measure to poison ivy exposure is covering oneself – with clothes or barrier creams, and learning how to stay away from it. Having soap and water with yourself on the hike and taking shower immediately after it is also known to be highly effective in preventing excessive penetration of urushiol under the skin. Simply, the best amount of urushiol taken is no urushiol at all, even if you appear to be resistant to the allergy to it!

Camping With Infants: It Doesn’t Take a Village to Camp With a Baby

0
Camping With Infants

Not so long ago, you had a baby and you think you won’t be able to go camping any time soon – you’re wrong! Camping with infants is very much possible. Parents are divided when it comes to camping with toddlers and infants.

Some parents think this as a dreadful situation, asking everyone why would they put themselves through that, but some parents are more casual and much less stressed about it, giving them advice.

If you’re a true camping lover and really enjoy being in the nature, don’t be scared to bring your baby with you. Of course, it will be a bit more challenging than it used to be, but that’s life, right?

woman-hiking-with-baby

We have to be honest and agree that simple packing, throwing a backpack into the car, and heading down into the woods, won’t be that simple as it was before you had a baby, but it certainly won’t be as difficult, as some “perfect moms” say it would.

First of all, mobile phones and smartphones make emergency situations much less scarring and the fact that there are lots of kids backpacks and gear, not to mention portable “Pack ‘n play” cribs, makes taking your infant to camping a bit less stressful. How to do it then, you ask? Read on to find out!

Basic things you need to do before you head off

There almost isn’t a parent who has a small baby, that will leave the house without the bag of necessary things. A camping trip is no different, as you’ll carry almost the same amount of necessities as you would if you are heading to the park or a field trip.

man-carrying-baby-while-hiking

You should carefully research the destination where you plan on staying and plan for all the things that “might happen”. Having a detailed plan and lists of everything you need to bring with you is not over-planning.

It is pretty obvious that you need to carry a fair amount of stuff, but you already carry it anyway, so pack carefully. You are probably driving yourself in the woods, so you can stuff your car as much as you like, without having to worry how you are going to bring all those things with you.

Be smart about picking a destination

Keep in mind that your child or an infant, can’t withstand long car drives so choose a destination that is not that far from your home. Do some research on whether there is a supermarket or a grocery store near the campsite. If the answer is no, then we suggest you pick another destination.

hikers-choosing-destination

You don’t want to think about if you carry enough diapers and whether it is okay to change your baby now or a bit later because you don’t have enough diapers.

Search for campgrounds with running water and flush toilets, or perhaps rent a cabin or a room in the motel in the woods (just in case). Some national parks adjusted their resorts and made them kid-friendly, where you can rent a small cabin while some recreation areas and parks are placed by the strategically placed motels.

Rest before you take off

If you start your trip tired and anxious, there is no way this trip will be a vacation. Give yourself some time to rest, although, it is questionable that you’re going to truly rest unless you ask someone to take care of the baby while you take a 2-3 hrs nap, a long shower, and some time to enjoy the coffee/tea.

Leave early

Be prepared to give yourself enough time to arrive at your camping destination, especially long before dark. It is not a good idea to have a screaming kid and no daylight while you have to set up a camp and a tent. You will only stress yourself with why you even decided to go on camping with an infant and be sorry.

hiking-sunrise

Basic things you need to bring with you

Keep in mind not to bring too much baby stuff with you. We know you will think hundreds of times “but what if I need this?” but you need to not get carried away once you start packing your infant’s things in the car. This is why we listed some basic things (and those that can assist in “making things easier”).

Hydration pack

A hydration pack system such as Camelbak water bottle won’t be so heavy to carry even when full. You and your baby, need to be hydrated when going on hikes or short walks.

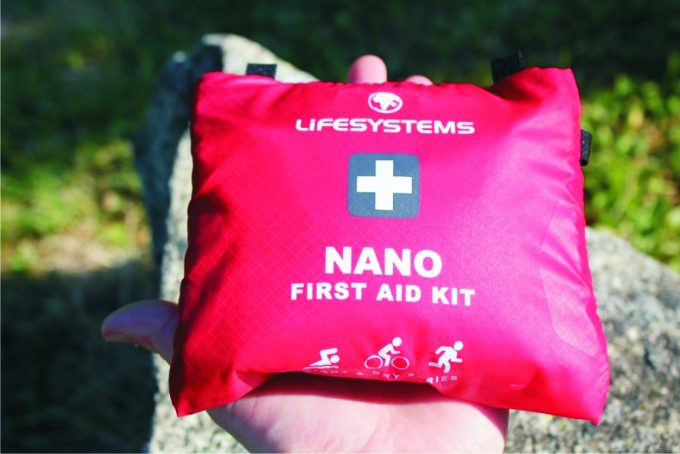
The First- Aid Kit

Bandages, alcohol-free cleansing wipes or Curel, sunscreen for babies, bug spray for infants, etc. Every hiking gear store sells first-aid kits, and if you still don’t have it, make sure you buy one, plus some other necessities like medicine for infants, creme for dermatitis (kids often find Poison Ivy to be an interesting plant) and definitely something for bee stings, as this might be the worst injury that you will have to deal with.

hiking-first-aid-kit

It is better to be prepared than finding yourself panicking around because you didn’t bring everything you need. Infants need more mosquito and sun protection. They can’t tell you if they feel sunburns or if they have been stung. This is why you need to use high, baby-safe SPF sun protection and a mosquito protection for babies. Apply it often during the day.

Food

If you’re still breastfeeding then this will be a fairly easy thing to do as you don’t have to carry around anything. You won’t have to bother yourself with filtering water, sterilizing baby bottles and mixing baby formula. If you’re feeding your baby on the bottle, don’t worry about it too much. It’s not a very hard thing to do. Just make sure you always filter water before you mix it with a baby formula.

If you don’t want to bother yourself with boiling and filtering the water, buy a pack of already treated water in any drug store that sells baby food. You also have to wash your infant’s face and hands as you don’t want your baby to get sick.

hiking-baby-with-food-and-water

Besides water, you don’t have to worry too much about it. Also, a bit of dirt on your baby’s pacifier won’t do any harm and is actually a good thing. Just think of how you ate the dirt when you were a kid and you are still alive to read this article.

Of course, you will rinse the pacifier, you won’t let it eat dirt, but don’t worry about stopping and boiling it in the water every time the pacifier touches the ground. You can also carry a small pack of sanitizing tissues in your pocket or use a clean, bottled water to rinse it.

Clothes

Bringing a headwear is really important if you’re taking your infant to camping, as up to 20 percent of human’s heat is transmitted from our heads and you know that infants have bigger heads than their bodies, so they often lose heat faster than you would in cold weather. Also, keep your baby’s little toes and fingers covered as they also get cold faster than ours.

hiking-baby-headwear

Keep in mind that they are not moving, therefore infants are not generating heat. You need to dress your baby in layers (hoods are okay if you dress it over a beanie, but is not a replacement because they don’t fit as close to the baby’s skin as they should in order to keep the body heat). Layered clothes will provide adjusting the clothing as per weather conditions.

If the weather is nice and warm, you need to make sure you have everything to protect your baby from overheating. You can simply lose some clothing that covers the body, and putting some shaded clothes is mandatory. Keep your infant hydrated and you can even use Pedialyte, as this is an encouragement for drinking, due to its subtle flavor. Your baby will love it.

A lot of baby clothes are made out of cotton material, which is actually not a good material to wear, especially during too hot or too cold weathers. Cotton transfers body heat faster and holds its moisture longer. Pick something that is made out of merino wool for the colder weather and synthetics for the warmer weather.

clothes-for-hiking-baby

The material must be able to dry quickly because a wet cotton onesie can lower the body temperature pretty fast even if it is 80 degrees outside, which is not a good thing and it gets smelly really fast. Both synthetic and merino wool are materials that dry fast and even if you hand-wash your baby’s clothes, it will be dry before you know it.

Blankets

Bring a few blankets with you, as you will use them to cover your baby, lay your baby on the ground, shade a baby or cover yourself if nursing.

The Poop Collector

If you’re going on camping in the woods, be prepared for introducing a lot of hassle and extra weight with packing disposable diapers. Therefore, you will need a diaper bag. No, we’re not talking about the standard diaper bag that you’re carrying everywhere. We are talking about a dry, waterproof bag that is easy to close and seal. This is where you’re going to store all the used diapers and dispose it on your way home.

Toilet paper bags

Why, you wonder? Well… You can’t leave dirty diapers in the woods, can’t you? Babies usually need 3-5 changes per day, if you plan to stay, let’s say 2 days, that’s 6 – 10 dirty diapers, minimum, you can’t leave in the woods. On your way home, find the nearest dumpster and empty the bag or, better yet, find a sanitary dump (the one RV travelers are using) and empty your bag there.

As for the cloth diapers, they are eco-friendly and all, but you still can’t leave them in the woods and, be honest, you don’t want to deal with hand-washing and drying all the dirty diapers outside during your camping vacation.

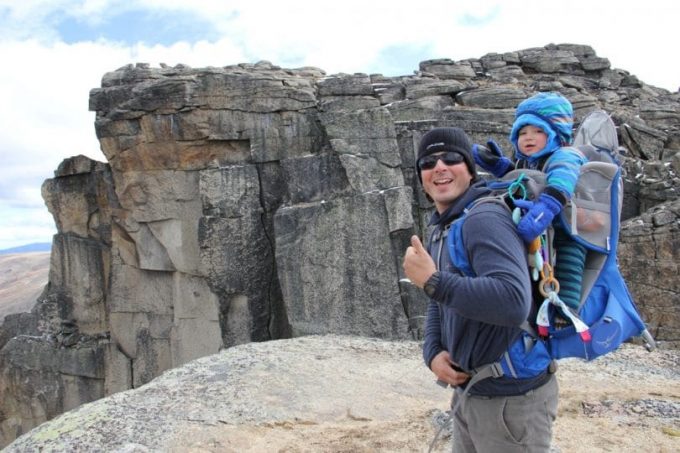
Infant Carrier or Toddler Backpack

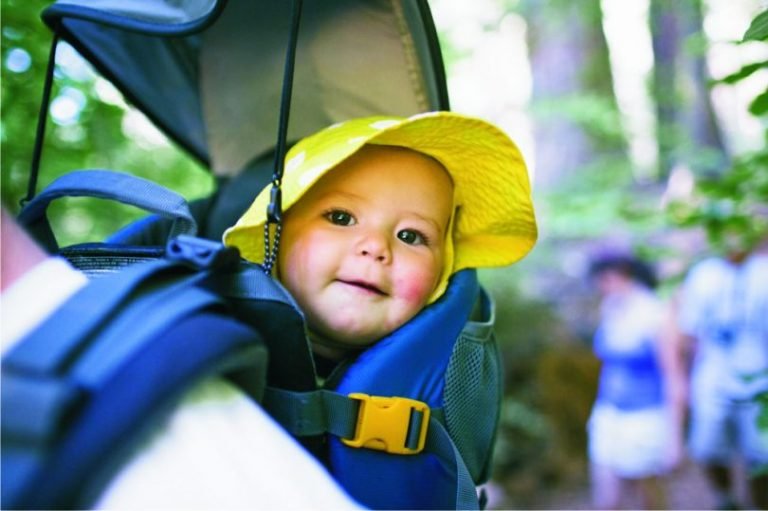
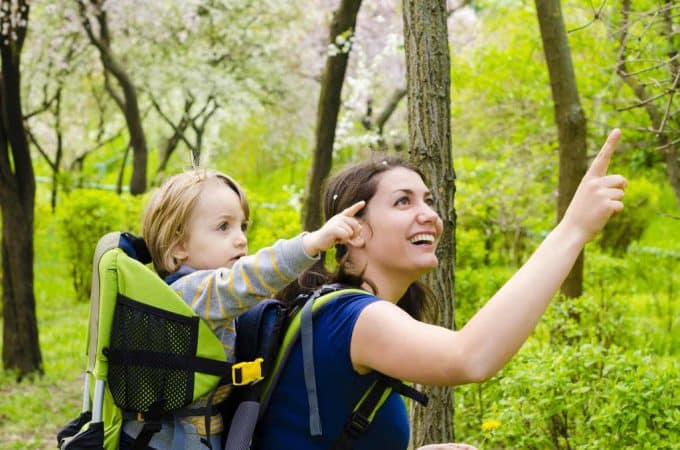
This is something similar to your backpack, but is intended for babies and infants. You can use it to carry your infant on your back or in front of yourself and make sure you don’t carry a baby in your arms all the time. This is an especially smart thing to use if you are going on hiking as you’re gonna need free hands because you never know when you can trip over some rock or piece of wood.

Baby-and-father-hiking

Choose a pack that has a safety harness in order to keep your infant from sliding in (if your baby is smaller) or sliding over (if the baby’s bigger)

“Pack ‘n play”

If your baby is an early walker or a crawler, a necessity like a “Pack ‘n play” will save you lots of nerves, especially if you choose to sleep outdoors. It has a functionality as a crib, but can also be a playpen during the day. This way you will have time to hang out or work something you enjoy around camp.

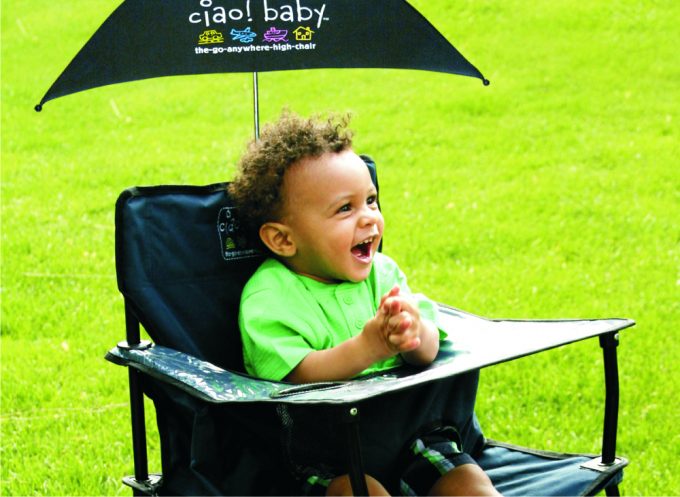
“Clamp-on booster seat”

Although this is not a necessity, this can also save you some nerves, especially if your child is really active and you are afraid to leave kids wander around the camp. This item is useful as a safe spot to put your kid down as well as eating.

Clamp-on booster seat

Foam Floor Tiles

An alternative to the blanket or a mat is the foam floor tiles. When comparing to a regular mat, kids floor tiles are more comfortable to crawl on. You can put them in the tent or even the play pen. It’s colorful and safe. It’s not heavy to carry around and although setting tiles on the ground inside the tent can be a drag, it’ll worth your while as you can freely let your baby crawl inside the tent.

Something to keep them occupied

If you stake out a big tarp you will have a nice, clean place for you to deal with any infant duties. You will see that it is a lot easier to go camping with infants than crawlers or beginners in walking. Bring a few toys for chewing, but keep in mind to keep them clean.

hiking-infant-playing

How to manage sleeping

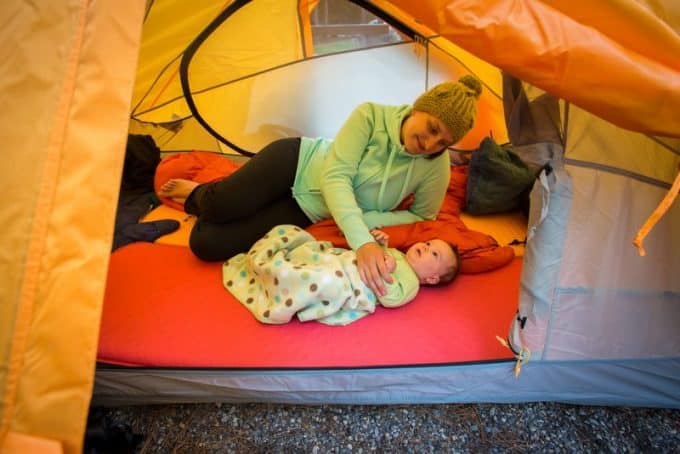
Sleeping with infants is actually quite easy. Just zip together a few sleeping bags and put your baby between you. We understand that some parents are scared about rolling over the baby and have a weird feeling that they are going to crush them, but we never heard of this happening. If you are still not sure and uncomfortable of sleeping with your infant beside you then wait until the baby is a bit older before you go camping with it.

Another option is to use a baby backpack that we mentioned above. They improved a lot in the last twenty years as they hold an infant more comfortable and fit a human body better. So, investing in a good baby backpack might be a good idea here, or you can use a car seat that you can place inside your tent beside you.

hiking sleeping with infants

Simply use your common sense as you will know what works best for your baby. Babies and infants lived outside for millions of years through the history and they survived. Don’t be afraid to put a baby on the ground in a car seat or a backpack – a dingo won’t eat your baby.

Important Tips

  • Many doctors and pediatricians suggest that a child can spend the night outdoors if older than 5 months so don’t get too ambitious and bring your 1-month baby to a camping trip. Use good judgment and common sense.
  • Keep an eye on your infant all the time. No matter what you do, there are lots of dangers outside, especially in the woods and in a campsite. Don’t leave it out of your sight.

What have we learned?

Keep in mind that kids, even though they are out camping with you still need to sleep and eat regularly, so make sure you’re on their schedule and put your infant to sleep at its usual time. Don’t forget the naps, they are equally important too.

baby-camper

Check if your baby can take a nap in your front carrier, if it can – great; if not – plan your activities later or around your baby’s napping and eating schedule. This way you won’t have to unnecessarily stress yourself. Enjoy sharing some time camping with your infant.

Hopefully, you like our article on camping with an infant. We would love to hear your stories about camping with your kids, the good, the bad and the ugly plus some interesting pictures. In case we maybe missed something – a good idea or a recommendation is always more than welcome.

Hiking Shoes vs Hiking Boots: Which One is the Best Footwear?

0
Hiking Shoes vs Boots

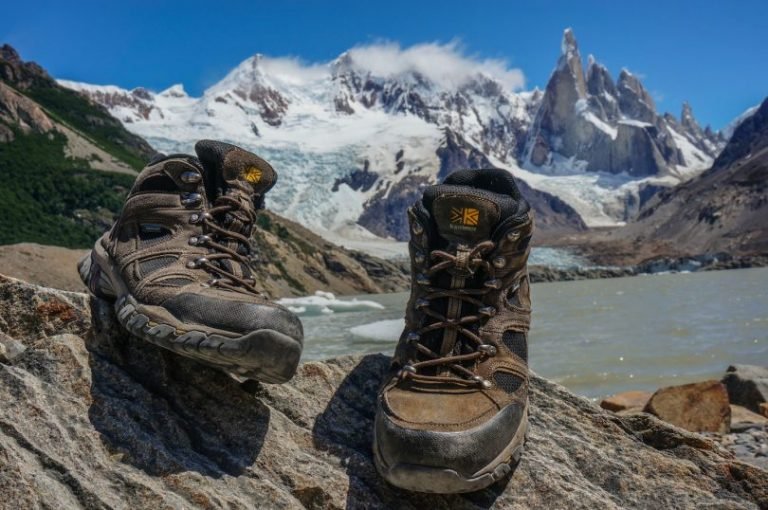
One of the confusions of preparing for hiking pursuits is the choice of the right footwear. Conventionally, people have prioritized hiking boots due to the common belief that they offer an unsurpassed protection and comfort than any other footwear.

Well, in some cases, it’s true, that hiking boots can offer a great protection. But, when it comes to hiking shoes vs hiking boots, the boots do not emerge victorious in all areas compared to hiking shoes, which have nowadays topped the list of hikers because of their comfort and lightweight, among other features.

To ease your confusion, we have discussed some important features for each footwear below. Among other features to look for, we have sought to compare the comfort, protection, waterproof, seasonality, proper fit, weight, and the type of terrains to traverse on.

Hiking-shoes-vs-boots

It is through these comparisons that you might be able to choose the best footwear for your hiking adventure. We personally cannot pick the right footwear model because it depends on personal preference. But we will make your choice easier if you keep on reading.

Comparisons of features between hiking shoes and the hiking boots

As introduced above, we will compare the comfort, protection, traction, waterproof, seasonality of use, weight, proper fit, breathability, and the type of terrain to be traversed using any of these foot-wears.

Comfort

Due to the rigidity of these boots, and the sturdy coverings around the ankles, we doubt the excellence of this footwear in the provision of comfort. The comfort of the hiking boots may be determined by the flexibility and mobility of our feet. Unfortunately, this is something that is lacking in the boots because they are predominantly made of sturdy materials aimed at offering maximum protection.

comfort of the hiking boots

When wearing hiking boots, your feet or your toes may not wiggle enough. This in turn causes the discomfort to your feet, especially when traveling for hundreds of miles or when descending on steep terrains. As a result, you might be prompted to take infinite rests along the way to ease the restricted mobility of your feet. Having noted this, if your priority of buying the hiking footwear is comfort, then the hiking boots may not be the best choice for you.

It is without doubts that hiking shoes have a superior comfort over hiking boots. This is attributable to the soft and light materials used in handcrafting this footwear. For example, your toes and feet will have enough wiggle room when traveling for any length of the terrain. The comfort is measured by the extent of flexibility and mobility of your feet in the footwear. This is something not found in the hiking boots.

Moreover, the fact that hiking shoes are seldom over the ankle length makes them more comfortable. The ankle can move flexibly without any restriction, although it might be vulnerable to tree scratches when crossing over rough terrains. But provided you use this footwear on well-groomed trails, then you are guaranteed a great comfort compared to putting on mobility-restricted hiking boots.

Protection

We have to give credit where is due. The hiking boots get a crown here in foot protection. Their sturdy and rigid designs provide maximum protection compared to the hiking boots. That noted, you can hike in rough terrains, on rocky mountains, or inclement weather conditions without any fear of exposing your feet to danger. The outer sole is also strong enough to not be exposed to sharp objects on your trails.

Red-hiking-boots

Quite often, leather, synthetic materials, and suede are used in designing these boots. They are not only strong, but warm too, to protect you against inclement temperatures, something that light shoes might not achieve to the fullest. So, to those hiking predominantly in the winter seasons and on rough mountains, hiking boots are your best companions for such pursuits.

These shoes might be lightweight and comfortable, but have inferior protection compared to hiking boots. They are made of light and soft materials, which excludes them for use on off-trails, and in winter’s harsh temperatures. But they can still be used in off-trails and harsh temperatures depending on the extent of such inconvenient conditions, because some materials can give a minimum protection even though not comparable to hiking boots.

Lightweight Hiking Shoes

Because many hiking shoes seldom extend over the ankle length, the ankles may be vulnerable to injuries. If trekking over off-trails, you must be vigilant of small trees on the way to avoid scratches on your ankle, otherwise your hiking journey might be fruitless. Furthermore, the mesh patches designed for hiking shoes exposes them to the wrath of the inclement weather conditions. So, that being said, hiking shoes are not the best choices for foot protection.

Traction

What will be the point of hiking on slippery surfaces if your footwear has a poor traction? That will be compromising your safety because you can trip anytime. Imagine if that occurs in higher altitude mountains. It could be extremely treacherous. So, fortunately, hiking boots have lugged soles to offer a better traction compared to hiking shoes. Such traction strength can survive rocky surfaces or any downward slopes.

Traction Hiking boots

However, the fact that these boots have higher soles that take you off-the-ground, can be a drawback to your foot balance on slippery surfaces. But this can be avoided by reducing your speed when going down such surfaces.

These shoes also have a great deal of lugged soles for traction, but not as much as boots do. The boots have thick soles and this emerges as an advantage over the shoes in traction properties. With this minimal traction, you can hike on medium slippery surfaces without tripping to your injuries.

The traction differs from one sole material to the other. Other hiking shoes arguably provide the best traction that can be relative to hiking boots. Well, that depends on the thickness of the sole.

Traction Hiking shoes

The thinner sole, however, has an advantage of traction on slippery because of a great balance. With thinner soles, our feet get more balance from the ground than when the soles are too thick as is the case with some boots. But still, in overall, boots have a great traction if you have planned to travel on such slippery terrains.

Waterproof

Most of the boots for hiking are said to be waterproof should you hike during downpours or step on snow. It is true because some are clothed with Durable Water Resistant (DWR) materials to repel water from soaking through the boots.

However, this waterproof feature has limitations should you get submerged in water for a long time or over the ankle length. Eventually, water drops may soak into your boots and dampen the inside. Moreover, the waterproof materials wear as time goes on. Then you must re-coat the boots.

Probably the worst experience of wearing hiking boots could be their drying time when you have been submerged in water. If you have one pair then that might be a messy day for you. It’s either you let them dry first, or you hike with heavy and dampened boots. All in all, regardless of the setbacks, boots have a great waterproof feature compared to shoes for hiking.

hiking-shoes-in water

Shoes are also said to be waterproof, but inferior to the boots due to their mesh patches. Unless the shoes in question are not meant to be breathable, then they can be competitively waterproof. But that’s rare of course. So, if you are prioritizing waterproof, the hiking shoes may not be the best choice for your desire. Either way, these shoes are predominantly designed to be used in dry seasons where rainfalls are rare.

Even if these shoes can be submerged in water, they can dry fast due to their light weight materials. Firstly, they are breathable, meaning if the water soaks in it can be eliminated through the mesh designs.

It is therefore unlikely that your feet will remain sweaty for a long time. That’s where they beat the boots, because boots takes forever to dry out. So with these shoes you can travel with them while damp knowing that they can dry quickly.

Weight

Weight is an important factor for hikers due to hiking gear that we are compelled to have when hiking for many days. So you wouldn’t want to travel for hundreds of miles with heavy gear and heavy boots. But then in reality, hiking boots are heavy compared to hiking shoes. Of course they are made of heavy materials and have thick soles. All these amounts to heavy weight that is made to provide a good foot protection.

heavy-hiking-boots

So, if you are an ultralight hiking enthusiast, hiking boots may not be the best footwear for your desire. On the other hand, if you plan to hike in the winter season, you have no choice but to tolerate the heavy weight of these boots since they provide a better foot protection in such seasons. In general, the boots are heavier than the shoes.

The hiking shoes are the popular choices for ultralight hiking devotees. They are certainly the winners when compared with the hiking boots. Soft and light materials are used in crafting these shoes. Moreover, the mesh patches add to the advantage of light weight.

So, you won’t expose your feet and your knees to an unbearable heavy weight notwithstanding the types of terrains your traverse on or the weight of your hiking gear you have. For hikers that are fond of running, shoes are the best choices due to their light weight.

girl-holding-hiking-shoes

The other advantage of the shoes is the thin soles. They provide a lightweight sigh of relief to hikers. But then the disadvantage of the thin soles could be the sharp objects when hiking on off-trails depending on the material of the shoe. Nonetheless, hiking shoes are the best choices in terms of the light weight when using them in dry weather conditions.

Durability

With boots you can travel for thousands of miles without them wearing out because of the sturdy materials used in them. They have thick and lugged soles that can survive the rough surfaces, and thus last you for long.

Furthermore, off-trails are not the voids of durability for the shoes due to their rigors. So, if you want to save, hiking boots can be your good choice. You may travel thousands of miles without having to replace them. Their waterproofness also adds a significant value to durability.

It is undeniable that hiking shoes are not as durable as the boots. Their soft and light materials, as well as the lack of quality waterproof feature, are attributable to this void of durability, more especially when traveling on rough surfaces.

light weight-hiking-shoes

But if cared for, and used on even surfaces and well-established trails, they can last you for long. We encourage you to have at least two pairs when hiking for many days.

Proper fit

The hikers’ boots, in general, do not provide a proper fit straight from the box. Our advice is that, wear these boots a few weeks before heading out to your hiking excursions. You can wear them and take short walks to stretch them so that they fit well. Failure to prepare them for a proper fit may result in blisters on your feet and restricted mobility.

Your journey might turn out to be fruitless. This is because these boots are made of strong materials, so they are not easy to conform to your foot shape at first use.

Because of their soft materials, the shoes have an excellent proper fit directly from the box. There is no need to wear them and take numerous short walks before heading out to your trip.

hiking-shoes-size

With this advantage, you can purchase a pair in a foreign country when you hike and fit it instantly without causing blisters on your foot. That’s the advantage of shoes over the sturdy hiking boots.

Season of use

You may have probably concluded in your mind, thus far, that which types of seasons to use these boots for. It is mainly in the winter that hiking boots play a significant role due to their warmth, foot protection, waterproof, and durability.

Winter season requires these kinds of footwear because light materials cannot withstand the coldness and ubiquitous downpours.

For the dry seasons, mainly spring and summer, hiking shoes are the relevant footwear to wear. They are light and breathable. They will therefore let enough air circulation to your feet, thus eliminating the moisture that could cause blisters to your feet.

hiking-shoes-in-summer

Furthermore, these shoes are less insulated, and this makes them preferable in dry seasons. Wearing hiking boots in hot days may prompt you to take them out whenever you rest so as to minimize the heat inside.

Breathability

It is very rare that you may find hiking boots with mesh vents. The main purpose of these footwear is to be well-insulated to provide an unparalleled warmth during inclement weather days. But, then that warmth may lead to sweaty foot and eventually lead to blisters on your softened foot.

Moreover, the ankle are often covered, and this further limits breathability of this footwear. This lack of breathability discredits the use of these boots in hot days or for longer times.

These are certainly the best choices with regard to breathability. Most are made of mesh patches to let enough air in or let moisture evaporate outside. By reducing moisture, they will be preventing the build-up of odor-causing bacteria in the boots.

hiker-in-shoes

This will make sure that the shoes stay fresh no matter how long you have travelled. Furthermore, breathability prevents blisters on your foot because too much sweat soften the foot and eventually the foot, as in the hiking boots, may get blisters due to lack of flexibility of the footwear.

Types of terrains to hike on

This should be obvious when taking into account the types of materials and the thickness of the lugged sole. In a nutshell, rough surfaces, damped or snowy surfaces, steeper mountains, off-trails, and rocky terrains are the best matches for boots.

hiking-in-winter

They will give you an unmatched protection than the shoes would. With the thick sole and a better traction, you are assured a cinch hike in almost all different terrains.

Due to the light and soft materials and a thin sole, you can hike on medium-rough surfaces on well-groomed trails. Too steep surfaces may be a challenge because of the substandard traction compared to the hiking boots.

hiking-in-summer

It is also not preferable to walk on snowy areas for a long time unles you are definitely about the qualities of the shoes to withstand such conditions. And you should not submerge them into water.

Wrapping it up!

With the comparisons given above, we are confident that you are in a good position to choose the best hiking footwear. We are, however, not in any position to pick the best footwear for you because this is predominantly about personal preference.

You need to take into account, inter alia, the climate of your destination, types of terrains to travel on, the weight of your hiking gear in relation to your desired footwear, and many more.

hikers-relaxing-on-the-rock

Just take time to research more about the weather fluctuations and prospects of the inclement climate in your favorite destinations for hiking. This will help refine your search for the relevant footwear needed. We have nonetheless done our best in discussing the features of paramount importance that can be used as criteria for evaluation in hiking footwear.

Backpacking With Dogs: How to Do it Properly

0
Backpacking With Dogs

Backpacking with dogs can be extremely fun and very good for relaxation from the usual daily routines us people go through. Bringing your loyal and a very well trained companion can truly make a huge difference when it comes to hiking overall.

Taking a dog to hike with you does not mean it will be there just to entertain you, it is all about the bond you two create on your adventures, building up a true friendship between the dog and the owner can make the backpacking an amazing experience from which even you can learn.

Many people pick the wrong breeds of dogs to hike with them, which results in many different injuries and bad overall experience in hiking. It is extremely important for a dog owner to know all of the limits and be aware of the situations hiking with a dog can bring.

person-hiking-with-a-dog

Before you decide to take your dog to a hike with you, as you have seen somewhere on the television, it is very important for you to know the needs of your dog just as well as you know your own needs.

Hiking with a dog doesn’t just mean taking him with you and letting him/her run around without any control. Take care of your dog just as you take care of yourself and it should be all good.

Important things to remember before backpacking with your dog

The weather conditions

These are not just a problem for us, it can also be a problem for your dog, check out the equipment available on the market and be prepared for the rain, snow, strong wind and even hot temperatures in summer.

hiking-dogs-in-winter

Each of these weather conditions requires a different type of hiking equipment for you and your dog as well.

Food

Food has always been an extremely important thing to take with you when hiking with a dog, make sure you always take enough food for him/her to prevent him/her from running towards other hikers and begging for food, always have treats and regular food ready for your dog.

Terrain

Rocky terrain and many water crossings might not be an issue for you, but your dog can truly struggle on bad terrains and water crossings. Prepare your dog for such terrain conditions before actually getting him/her with you.

Training

Train your dog to listen and to obey. If you plan on taking your dog to hike with you, you will want to have him/her listen to you at all times.

dog-training

It can be very dangerous and extremely bad for your dog to run into a bear or an animal which can attack you and your dog.

  • Clean – just like you, your dog also has personal needs, in case your dog poops on the trail, pick it up and throw it away in a trash can on the way. Do not just leave it on the ground, no one wants to step in that.
  • Rules – Depending on the hiking trail you are using, many hiking trails have their own rules you need to stick to. If dogs are not allowed somewhere, there must be a good reason why they aren’t, do not break the rules just to make yourself happy.
  • Respect – respect the other hikers and their dogs, do not throw random sweets and treats at someones else’s dog. That way you interrupt their routine and the dog you just gave a treat might start following you instead of its owner, and it might be allergic to the treat you gave him/her. Such things you will never know.
  • Leash – whenever there are many people around and hiking, you should always leash your dog and keep him/her right beside you, do not let it interrupt others just because he/she is curious.
  • Towels – no one likes to be wet and cold, especially not you and your dog. Make sure you have enough towels for both of you, and keep your equipment dry at all times.

Picking the right equipment for yourself is extremely important if you want to have high-quality hiking experience, but equipment for your dog is just as important as yours.

hiking equipment for your dog

Many people buy a random piece of equipment for their dog and think that they have done the right thing, while in real, their dog is struggling on the trail because the backpack he/she is carrying seems to be extremely uncomfortable, not waterproof and keeps his/her belly very cold, which makes him/her nervous and tired a lot more than the other dogs which have regular and good equipment.

What is the right equipment for your dog?

Backpack

It is the most important thing for you to take care of. The backpack for your dog should be waterproof, withstand the elements, keep your dog safe and comfortable as well as allow him/her to carry certain objects.

Never allow yourself to overload your dog’s backpack, make sure you are well informed about the weight limits your dog can take, these are usually easily measured by the vet.

dog-with-hiking-bag

Give your dog enough time to get used to the backpack. Many dogs hate having a backpack at first and will try to take it away, that is why it is extremely important to train and prepare your dog for the backpack and carrying things around as well as hiking.

At first, try keeping the backpack on your dog, but keep it empty, do short trails and walk around with your dog. Every now and then associate the treats in your pocket with the backpack and award him/her for listening. Soon after you have done all of these things patiently, your dog will listen and be ready to hike with you without any issues.

Loading the backpack might not seem like an important thing, but it is actually extremely important if you want your dog to feel comfortable and less nervous about the backpack itself.

girl-with-a-dog-hiking

Adjusting the harness on the dog keeping it snug so it will not chafe. Remove the saddlebags and try to fit two fingers under it. Load the dog backpack with treats, water, and food, but make sure the weight is equal on both sides. The total load of the backpack should never exceed more than one-third of your dog’s weight.

First aid kit

First aid kit for pets is one of the most important things to take with you when backpacking with your dear dog. Just like you can get injuries and feel bad, so can your dog.

firs-aid-kit-for-dog

It is extremely important to have a decent first aid kit for your dog in case of injuries, do not save the money when it comes to first aid, it can be a life savior.

The first aid kit for the pets usually includes:

  • Stop bleeding powder,
  • Tweezers,
  • Dog toenail clippers,
  • Bandage scissors,
  • Baking soda (for bee stings),
  • Pepto-Bismol, Gauze roll,
  • Adhesive tape, Vaseline,
  • Imodium A-D,
  • Dressings and bandages,
  • Nonstick pads and Gauze pads (4 inches square),
  • Topical antibiotic ointments such as Bacitracin,
  • Canine eyewash,
  • Calamine lotion (for itchy bug bites).

All of these things are important to keep your dog safe on the trail, always be ready for the extreme situations and most importantly, do not panic – the dogs can feel if someone is in panic and might negatively react to it, even in the worst possible situations.

Sleeping gear

It is also a rather important thing when it comes to long hiking trails and getting tired. Your dog needs rest, just like you and everyone else, he/she can and will get tired after a long hiking day with you. After being a loyal and a very good dog, your dog deserves a good sleep and time to rest. Depending on the weather conditions, you should always have a tiny sleeping bag for your dog.

sleeping-bag-for-a-dog

Some backpacks are designed to have a sleeping bag, but in case you do not own such backpack, you can always improvise and provide a proper sleeping bag for your 4-legged friend.

Make sure the sleeping gear is always dry and free of the moisture, because sleeping in a wet sleeping bag can be very bad for the health of your dog. Same thing applies to you too of course.

Dog clothing

It is an optional but very useful thing, having a coat for your dog can prevent him/her from getting sick and tired if the temperature is low. A good coat for your dog can also serve in purpose as a sleeping bag if it’s dry.

Some dogs have very sensitive paw pads and should wear the tiny dog boots, these prevent many injuries caused to his/her paw pads and will allow her to pass some trails way easier than usual.

hiking-bog-boots

Dog boots are also awesome if the temperature is rather low, these will keep your dog’s paws warm and very comfortable which plays a big factor when it comes to hiking.

Other optional hiking equipment for your dog

  • Cooling collars for hot days
  • Dog harness for technical trails or climbing
  • Dog tent
  • Creams for the dogs who got no boots
  • Toys for the dogs who like attention when not hiking

Food advice for your dog

Calories are very important and needed for the dogs who go on long distance hiking. Calories can be a complicated thing to plan, but it will all come with the experience – the basics are rather simple and you should try to follow them, in case you are not sure, you can always ask a vet.

hiking-dog-food

Depending on the temperature and weather conditions, as well as the fact whether your dog is on a leash or not. Count on increasing his/her calories from 50-100% when hiking and very close to 100% if your dog is not on the leash

Nutrition is a pretty important thing to take care of as well. Look for food which has main ingredients such as the variety of vegetables, beef, good fat and bison. These are filled with vitamins, glucosamine, and probiotics – very good and helpful for a long hiking trail.

Can your dog go hiking with you now?

That depends on you only, you are the one who knows how your dog functions and whether he/she is ready to actually properly hike with you or not. In case you are not sure whether your dog can handle hiking on certain trails, never hesitate to visit a vet and get yourself informed about all of the important things you did not know about your dog.

girl-hiking-with-dog

Do not risk a life of your dog just because you are not patient or willing to train him/her properly, do not think that buying a proper equipment piece for your dog is a luxury, it really isn’t – if you love your dog.

Remember that your dog is a living being, just like you and just like you the dog can be sad, sick and in pain – you can prevent all of these negative feelings by being informed and reasonable when it comes to hiking with your dog.

If you don’t have the time and enough patience to train your dog properly, you should not force it at all, but if you believe you can make it and you truly want to hike with your dog safely, try it out and let your friends know how fun it is, maybe they will join you next time and bring their own dogs along.

How Many Calories Does Hiking Burn

0
How Many Calories Does Hiking Burn

Hiking is one of those outdoor activities which you can’t underestimate when it comes to losing weight. There are numerous kinds of exercises which can help you burn calories and lose weight, and hiking is a perfect example to get you back in shape.

The question that most people seem to ask is: how many calories does hiking burn? Read along, and we will shed some light on this issue.

You should always remember that the ultimate workout is not on the treadmill, air-conditioned studio, or your gym – it’s in the great outdoors! According to experts, when you go hiking, you hit your muscles from different angles and engage the muscles you often miss when in the gym such as the thighs, your back, and the deep core muscles.

hiking-couple

Additionally, the trail offers some challenges that will help you exercise and burn calories, such as ditches to avoid and logs to climb over. As a result, hiking can provide results that are similar to most grueling boot-camp activities.

Engaging in outdoor activities is also excellent for your brain. A study reveals that just about 5 minutes of activities in the natural environment can boost your mood. This makes a lot of sense: a lush scenery is more inspiring compared to a gym television program.

Research from the University of Kansas and the University of Utah found that hikers scored fifty percent better on their creativity test after they had spent a few days in the natural environment, disconnected from any electronic gadgets.

hikig-girl-in-good-shape

According to scientists, the mind can relax away from the tablets and cell phones, freeing up your imagination. Therefore, any individual at fitness level can take part in Mother Nature’s gym. If you are capable of climbing a flight of stair, then you can hike.

Steps to follow when you go hiking to burn calories and increase your fitness

You should follow several steps if you wish to burn calories and increase your fitness during hiking trip.

Find a great trail

There is a number of useful website available online that can pinpoint some of the best places to go for a local hike. Therefore, you can search for a hiking location near you or outside your town using the online tools. You can search hiking sites using the zip code. Just make sure you know what you expect your trail to have.

hiker-learning-the-map

Read their detailed information such as the length of the trail, the scenery you’ll see and the trail’s difficult levels as there are simple, moderate, and difficult trails. Alternatively, you can stop by a local outdoor or hiking shop and inquire about the best trails in your area.

If you are a beginner, make sure you go for an easy hike but make it challenging. What’s impossible is making a strenuous hike easier.

Get in good form

As is the case with any other sport, you want to protect yourself from injury and obtain the most efficient workouts. When you are on flat stretches, walk like a proud individual – relaxed and shoulders pulled back, spine in line and your chest leading, not the knees.

hiker-walking

When on the downhill, minimize your stride length so that the slope can be more manageable. When you come across a monster climb, squat slightly to get a better balance. Make sure not to walk around hunched over as this could strain your back and expose the knees to injuries, especially if you are hyper-flexing them.

Despite the amount of fun you are having, make sure you take a few breaks whenever you get tired. Also, remember to keep downing water.

Reduce pace!

You don’t have to go very fast to ramp up results or tackle insane inclines. In fact, it is agreed that if you are a novice, it’s better to take on trails that have a few smaller hills and moving at a slow pace. This means that you will be putting in the same amount of energy you use when in a slow jog.

hikign-family

When hiking, you should be in a position to speak comfortably using complete sentences without having to struggle for breath. That way, you will be able to last and remain within your fat-burning zone. When you move at a slower rate for an extended period, your body burns more fats as compared to carbohydrates. With time, you’ll lose faster.

Remember not to blow through the downhill as this requires the body to work harder. When taking the downhill, your body is engaged in a plod-stop-plod-stop rhythm. That way, your body muscles must conspire to stop you, making the whole process more challenging and an excellent calorie burner.

Boost the burn

For you to enhance the benefits of your fitness during a hike, you need to undertake other activities within the hike. Jumping on and off tree stumps, lunging up slight inclines, squatting for sixty seconds and repeating the process several times can help boost the burn.

fitness during a hike

As you are walking, you may press the arms overhead, bring your elbows down your sides, repeating as you walk. Doing acts such as these will help in boosting your workout’s intensity, firing up your fat-melting burner. After you are through with these exercises, continue walking at a moderate pace.

That way, you’ll be able to burn about 25 percent more calories. What’s more, doing some extra exercises when hiking will bump up your burn to 600 calories an hour. This is yet another reason why you need to head for the hills!

Factors that influence the amount of calories you burn

Hiking is an excellent way to get in shape by losing weight. Whether you partake in daily walks in the nearby park or engage on trips to the mountains, outdoor activities will make it possible for you to burn calories and gain muscles. However, some factors will influence the number of calories you will burn.

Body Weight

Generally, the amount of calories you will burn when hiking depends on your body weight. A 160-lb individual will burn about 430 to 440 calories in a span of an hour.

two-girls-runing-during-hike

A 200-lb person will burn about 550 calories in an hour of hiking. Therefore, the heavier you are, the more the calories you will burn in one hour of hiking.

Pack Weight

You should also know that the amount of calories you burn depends on whether or not you are carrying a backpack. If you have one with you, the weight of the pack also affects the number of calories you will burn.

Tourist couple hiking in forest

When you carry a light load such as the day pack, you will burn about 50 to 100 more calories in an hour than without a load. If you have a heavy load, such as backpacks for extended trips, you’ll burn about 200 more calories in an hour.

Intensity

In a study conducted by the American Council for Sports Medicine, researchers discovered that a high-intensity exercise increases the number of calories you will burn even after you are through with your activity. When hiking at a high intensity for about 45 minutes, you will be able to burn an extra 190 calories later during the day.

group-of-people-hiking

A strenuous hike increases your metabolism, and the extra burn takes about 14.2 hours to complete once you are done with hiking. This can even continue through the first three-and-a-half hours of sleep.

Terrain

The extent of the terrain also plays a significant role in determining the number of calories you burn during a hike. Since terrains vary significantly, it’s not possible to tell how hiking in a particular area will alter the number of calories you burn. For instance, you can burn more calories when walking on a rocky, flat ground as opposed to a flat, grassy land.

intensive-hiking

Nonetheless, you will even burn more calories when you walk uphill on grassy terrain as opposed to a flat rocky terrain. Ideally, you burn more calories in a challenging terrain.

Summary table

The table below provides information on the number of calories you burn for specific activities per hour for body weights of 205-lb, 180-lb, 155-lb, and 130-lb. The calculation used are based on the result from a research data conducted by the American College of Sports Medicine.

Walking, Hiking, Climbing (1 Hour) 205 lb 180 lb 155 lb 130 lb
Rock climbing, ascending rock 1024 899 774 649
Rock climbing rappelling 745 654 563 472
Orienteering 838 735 633 531
Backpacking, Hiking with pack 651 572 493 413
Carrying infant, upstairs 465 409 352 295
Carrying infant, level ground 326 286 246 207
Carrying 25 t0 49 pounds, upstairs 745 654 563 472
Carrying 16 to 24 Pounds, upstairs 558 490 422 354
Walk/run, playing with kids, vigorous 465 409 352 295
Run/walk, playing with kids, moderate 372 327 281 236
Standing, playing with kids, light 261 229 197 165
Loading, unloading car 279 245 211 177
Climbing hills with a load of 9 pounds 651 572 493 413
Climbing hills with a load of 10-20 pounds 698 613 528 443
Climbing hills with a load of 21-42 pounds 745 654 563 472
Climbing hills with a load of over 42 pounds 838 735 633 531
Hiking, cross country 558 490 422 354
Walking downstairs 279 245 211 177
Bird watching 233 204 176 148
Walking with kids of pushing a stroller 233 204 176 148
Marching, rapidly, military 605 531 457 384
Race Walking 605 531 457 384
Pushing a wheelchair 372 327 281 236
Walking the dog 279 245 211 177
Mountain climbing, rock climbing 745 654 563 472
Run/walk, playing with animals 372 327 281 236
Walking using crutches 465 409 352 295
Walking, pushing a wheelchair 372 327 281 236

HOW HIKING BLASTS CALORIES

Walking a mile will not burn the same amount of calories as running, but becoming a runner is challenging and not for every person.

running-hiker

This is true because many have tried running and failed the first times. Not everyone is going to feel the pleasure in running as is the case with others, and that’s where hiking comes in. Here are some of the most important benefits you’ll get from hiking:

Increased levels of caloric burn

Although many believe that burning calories is not a priority when it comes to exercising, it’s important to know that this process makes a significant contribution towards weight reduction.

men-hiking-in-the-mountains

Hiking will burn a lot of calories per hour as opposed to walking. Judging by the increase in breathing and heart rate, the uphill section of hiking is the same to a moderately-paced run, from the perspective of calorie expenditure.

It’s a logical progression

Psychologically, it’s simpler to push yourself during a hike than it is when running. If you want to rev up your workout routine, and running is not on the list due to lack of interest of injuries, then hiking can be an excellent alternative. This is a perfect gateway exercise as it helps in building cardiovascular fitness as well as strengthen your leg muscles.

It’s an easier outdoor activity

The best thing about hiking is that you can do it anywhere there’s a hill. You don’t have to drive to the Rocky Mountains for a hike. What’s more, novices can undertake their hiking trips in areas with small hills to give them the same mental effect.

Mountains for a hike

If you are not able to access a hill, using a treadmill at an exaggerated incline will produce a similar effect, although it’s highly recommended you get outside.

Hiking can be adventurous

If you reside in the urban areas, hiking can be a great weekend activity. Make arrangements to go somewhere with hills and a fantastic view, and don’t forget to take your friends with you. Questing to get to the top first will create motivation as you experience each other in an entirely different setting.

fantastic view hike

Instead of remaining inside to watch a movie, it’s more challenging to embark on an outdoor hiking expedition. Additionally, this activity will help burn calories and keep you in shape.

Hiking is an excellent workout

Although a significant part of the motion takes place from your waist down, the arms can also get involved when you use trekking poles. Even when you don’t, there’ll be so much pumping and swinging arm movement than with walking.

The core will be engaged more, and your body will stabilize when going over rough surfaces, while the thigh, calf, and butt muscles will be burning when you are through.

hiking girl beautiful body

The lower body will be stronger, muscular, and more tone with hiking compared to walking. Finally, since it’s a challenging cardiovascular work, the lungs and heart will also benefit from it.

How to get going

Grab a pair of boots with excellent grip and ask a friend to come with you. Find some hilly terrains in your local area. The trails don’t have to be complicated. Make sure you carry your cell phone and some water to keep your dehydration in check.

Begin with something smaller and assess your feelings about the exertion. If you find the activity fulfilling and you would like to push yourself further, you should prepare yourself for something more challenging.

hiking-for-beginners

Once you are comfortable keeping up with the pace, and after you have built up you stamina to attempt something riskier, you’ll have to plan more. Challenging hikes require additional time and money, but it beats a weekend on the couch, or doesn’t it?

Hiking is about getting out and experiencing nature. If you are new at this, make sure you begin with a pre-arranged group. There are numerous hiking groups within your area of residence. All you need to do is ask around or search the internet to see the options available to you.

hiking group

There are some outdoor gear you will need to have with you when you are out hiking. These are:

  • Hiking boots
  • A moderately-sized backpack
  • Cell phone
  • Water and food
  • A first aid kit
  • An emergency rain poncho
  • Camera
  • Sunscreen
  • A hat
  • Bear spray for self-defense
  • Sunglasses
  • Extra socks
  • Replacement shoe laces
  • Water filter
  • Mosquito repellent
  • Emergency fire-starting tools
  • A flashlight
  • A toilet paper (just in case)

Do not forget to dress comfortably. Also, you need to remember that higher elevations are usually colder, and in other cases, the terrain may be covered with snow. Therefore, it is important to know your trail and mark the season for the hike.

In conclusion

In as much as hiking is a leisure activity, it’s also an excellent way to burn calories and reduce weight. When embarking on a hiking mission, make sure you have everything planned out. Pick the right group with similar hiking objectives.

yoga-during-hiking

Going on a hike as a group, or with someone you’re close to will give you the motivation you need to keep moving. In the end, you’ll end up with many great stories to share. Remember, hiking is not a race. Enjoy it as much as you can and while at it, enjoy the scenery as well.

How to Hike: A Beginner’s Guide to Walking in the Nature

0

Hiking can be a great way to not only getting fit and healthy, but a wonderful way to see the beauty of the nature that may even be in your own backyard.

Enjoying a day in the outdoors with friends and family can be a great bonding experience by getting everyone together for a fun day of exercise. Here, we will discuss how to hike and share some important information you need before you go. When you learn how to go hiking, you will soon want to go all of the time!

Preparing for a Hike

Before hiking for the first time, you will want to invest in some good hiking boots, as regular tennis shoes will not work well. Prepare yourself by starting out small and working your way up to longer times. You will eventually be able to go on day hikes and not be tired out quickly.

Hiking-boots

Be sure to pack plenty of water and some snacks while you are gone so that you do not get dehydrated or hungry. Make a list of things you need to take with you as well as a map or GPS so that you do not get lost. Another thing to remember is to tell one or two people where you are going and when you will be back, in case of an emergency.

Hiking Clothing

Here are some of the important items you should wear or have with you while you are hiking. If it is cold, dress warmly as you can always remove layers of clothing.

Boots: Using hiking boots is the best way to go when it comes to hiking. They provide traction and extra grip when going through harder terrain. Boots can also come insulated to keep your feet warm.

Hiking Boots

Socks: Wearing a good pair of socks, or two, will keep your feet dry and take in the moisture from them. Many people prefer wool socks because of this reason. Socks also prevent blisters from occurring and make fore a more enjoyable hike.

Pants: It is not recommended to wear shorts unless it is a hot day and you are not climbing far up. Try to wear pants that are light weight and can dry fast in case you get wet somehow. You can also purchase pants that turn into shorts by unzipping part of the legs. However, wearing pants will prevent you from poison ivy and anything else in the woods that may cause a reaction.

Shirt: As far as shirts go, you want something light in weight and maybe performance based. If it is cold, consider a fleece to wear over your shirt. Never underestimate the difference in temperature as you go up in your hike.

hiking-Shirt

Jacket: Again, you will want a light weight jacket that is still warm, maybe fleece lined or wool. Your jacket should also be fully waterproof and be able to block wind. Consider a jacket that has a hood so you can pull it up if it is a windy or cold day.

Hat: A hat is a perfect item to have, no matter what the weather is. In warm weather, the hat will block sun and give you the ability to see better. In colder weather, a hat will keep in body heat and protect your head from snow or rain.

Sunglasses: You will no doubt need sunglasses when you go hiking, whether it is a sunny day or a cold day. Sunglasses will block the sun and protect your eyes from UV rays.

Sunglasses for hiking

Also, in cold weather, wearing glasses or even snow goggles will help to prevent snow blindness.

Hiking Gear

Having the correct gear can mean a world of difference when you are out hiking. Here is a list of items that will make sure your hiking experiences is stress free and memorable.

Backpack: Be sure to bring along a backpack and fill it with the items listed below along with a flashlight, batteries and maybe some extra clothing if you need it. If you will not be gone all day, then you will not need a huge pack to take with you. Just bring what you need, but be prepared.

Tourist backpack

Map or GPS: Bring along a map or some type of GPS with you so you do not get lost. If you do get lost, do not hesitate to call the authorities.

Cell Phone: Having a cell phone will not only allow you to use a GPS, but you can call for help if you need to, and take breathtaking photos and videos of your hike. If you find yourself without a signal, you should also bring along a radio transmitter, which will allow you to signal for help.

Camera: If your phone does not have a camera, or it does not work, bring a camera with you. You will capture a lot of beauty on your hike. If you love photography, a camera is a must. Later, you can create and album and share your photos with others.

hiking-camera

Sun Block: Do not forget your sun block so that your skin will not be harmed by the elements. Not only can the sun damage your skin, but so can wind, which creates wind burn. It also protects from ultra violet rays.

First Aid Kit: Even if you are going on a short hike, you should bring your first aid kit with you. This should include things like bandages, gauze, scissors, tape, aspirin and alcohol swabs, among other things. This is very important to have because hiking can be dangerous with steep hills and lots of brush.

Pocket Knife: Having a pocket knife allows you to be ready for anything while hiking in the forest. If you get tangled in some brush, you may cut some branches away to free yourself.

Pocket Knife for hiking

Bug Spray: In the summer time, or warmer days, you will want to bring bug spray. Otherwise, you could find yourself covered in mosquito bites. Take the time to spray yourself because not just mosquitoes are in the woods, many other bugs exist.

Food and Water: Water is a necessity and will keep you from becoming dehydrated. You should also bring with you some snacks that will keep you energized and full until you get home. Bringing items like almonds, walnuts, fruit, and beef jerky will keep you full and keep your body ready to hike.

Safety While Hiking

Always be safe while you are out in the wilderness by not only wearing the proper clothing and gear, but by following simple safety rules while hiking. Keep an eye on your feet so you do not get tangled up in anything or step on a snake, which can bite you. You can also twist your ankle or otherwise hurt yourself by not having the proper footing.

painful running injury

If you fear you may have been lost, stop where you are and try to go back until you recognize an area that coordinates with your map. Never panic if you feel you are lost, as this happens a lot and can be easily fixed by backtracking.

However, if you have no clue where you are and need assistance, you should call 911 or authorities that may be located where you are hiking, like a park ranger. Stay where you are so they can find you. Having a GPS on your phone can save hours or days.

Hiking Etiquette

Many people are unaware of hiking etiquette, but it does exist. Below are some rules and general knowledge of what you should do while hiking.

women say hello to other hikers

If you are passing other hikers, especially in areas that are large, you could share information on weather conditions or terrain so the others know what to expect. Even saying hello, can be a form of positive etiquette. However, do what feels comfortable for you.

If you are going down a hill on your hike, and another person or group is coming up the hill, they have the right of way. You should slow down or step aside to provide them with ample room. If you happen to be on even ground, allow groups to pass you by stepping aside.

If you go out with a group of people, keep the noise level down so that you are not disturbing other hikers or the wildlife. Talking on your cell phone while on a hike is considered rude manners. Also, never leave trash behind, as this is not only bad manners but can also mean getting ticketed. Leaving trash around can harm the local wildlife.

hiking with a group of people

If you plan on hiking with your dog, keep him or her on a leash at all times. This is just out of respect for hikers who may not want to be disturbed by your dog running up or jumping on them, or who are afraid of dogs.

Be sure to stay on your trail and keep a map with you. Making your own trail off the beaten path can not only disturb the wildlife but can they can get you lost. Never widen a trail by going around any mud puddles as you should go through them because you should already be wearing hiking boots.

Hikers do not have the right of way in all situations. If you come in contact with a bike or horse while you are out, you should give the horse the right of way, as well as the bike. While the bikes should stop for hikers, many times they are already moving to fast and it would just be easier to have the hiker stop.

hikers-and-hourse

If you find yourself in need to use a restroom, try to find one that is an actual restroom versus going outdoors. However, if you cannot get to a restroom quickly enough, or if one is too far from the trail, try to bring along a bag to clean up your mess. Try not to disturb any of the foliage in the area as you do your business.

A few Useful Tips

Never hike alone in case of emergency, as anything can happen in the woods like getting attacked by an animal, or falling. It would be a good idea to keep your cell phone or a radio transmitter on you, in case you need to be rescued by personnel.

Bring plenty of water for yourself and those with whom you are hiking. Dehydration can happen quickly and you should take several water breaks if you are hiking for long periods of time. Keep snacks on you, for your nourishment as well.

hiker-with-a-bottle-of-water

Bring your backpack with all of your needed items and be sure to use sunscreen. Wearing clothing that is fitting for hiking will help you from feeling weighed down or over heated.

Never forget to let people know where you are going and when you are expected to return home, so they can notify someone to find you if necessary.

Always check the weather before you leave so you know what to expect. When it rains, hiking conditions can become slippery. Use caution if you hike in undesirable weather. If you see dangerous weather like a thunderstorm, you should head back down to the base of your hike.

hiking-during-rain

Never rush to finish a hike. Take several breaks over a period of a few hours so that your body does not burn out. Try to find a shaded area for rest.

While animal attacks happen, they are rare. Animals are usually afraid of human beings and will run away. However, you can purchase sprays that will deter animals like bears and mountain lions.

Backpacking Shower: Personal Hygiene Tips

0

Backpacking becomes enjoyable until your companions remind you how stinky you are, and also tell you how intolerable it is to further hang up with you due to unbearable odors apparently from your armpits, feet and groin.

Those body areas can really emit funky smell that you may struggle to withstand after a few days of not bathing. Imagine if intolerable to you, how will it be for others to tolerate? To prevent that, we need to take note of personal hygiene tips. Among other methods, our focus is on the most user-friendly and quick backpacking shower method.

picture of a solar-camp-shower-28-ivation-5-gallon-outdoor-portable-shower-630

Many people have their theories and guidelines on how to refresh your smell in the wilderness, some of which are not as user-friendly as using the backpacking pocket shower. For example, some may even suggest carrying your deodorants to kill the smell, but we do argue with that and say that deodorants must be left behind. Of all other bathing methods in the wilderness, showering with the portable pocket showers has proved to be the most lightweight and user-friendly method. What is this shower?

What is a backpacker’s shower?

To a newbie this might sound like a foreign language because backpacking or hiking entails trekking far away from villages. One might be asking that how possible that is for one to shower in the wilderness. Well, technology allows us to model almost everything. Even our household showers can be simulated by modern technologies of pocket showers that can unbelievably fit in our pockets.

picture of a solar-camp-shower-57-ivation-5-threaded-cap-630

The Backpacker’s shower is basically a portable shower designed for hikers and backpackers to have a quick shower for hygienic purposes. It usually comes as a round bag, from different companies with varying designs and colors. The most common color is black because of its ability to absorb heat and warm the water without the need to have the stove or campfire. Other showers come with their custom colors. But the shower-head is provided to resemble showering at home.

The common size of such bags is 10 liters. Users get to choose if they need cold or warm shower. Unfortunately, a hot shower may seem impossible because their bags are sensitive to very hot water. You are prohibited to even pour boiling water in the water. That’s understandable when considering the fabric design of a polyurethane-coated nylon material used in these showers because hot water can be damaging to the fabric.

picture of a solar-camp-shower-3-advanced-elements-2-gallon-630

The alternative to warm water is to put in cold water and leave the shower bag suspended on a tree for the whole day in direct sunlight, while you’re busy backpacking or hiking. A black color will be effective in absorbing too much heat and then subsequently heating the water for you to shower later on. That is actually cost-saving because no need to bring along the camping stove or create campfire. However, such tools may be needed in the absence of the sun, and either way will also be needed when you want to cook.

How to fill the backpacker’s shower?

To fill these backpacker’s showers, there is a top filling to pour water at. The instructions are given as to how to operate the shower and how much water should you pour. The shower head is underneath the bag and it can be adjusted to control the water pressure the way you need.

Keep in mind that, ideally, the 10 liters can last for about 7 minutes of showering at a standard pressure. So, if you increase the pressure, more water will be used, and less time spent. But it’s all about the functionality not the minutes taken per se.

close-up solar-camp-shower-46-coleman-cap-630

There’s a fill line inside the bag that indicates the capacity to avoid over-filling it. And it is not mandatory that you should empty all the water for a single shower. So you can spend several showers using the same bag. That way you will be saving the water if it is limited where you are camping. If there’s a water stream in your vicinity then you can empty the pocket shower after every bath.

How to shower using the backpacker’s shower?

After filling your shower with the necessary water, it’s time that you start to shower. But, firstly, keep in mind that the normal soaps should not be used, especially when you’re in close proximity to the lakes or rivers where your companions might possibly fetch water to drink or go fishing at.

picture of a man in a solar camp shower

The rain can erode the soil on which you have disposed of that soap water to the nearby water streams. And it could endanger the fish in those water streams. We advise you to stick with the biodegradable soap which can convert into natural ingredients after being disposed of.

Before showering, get your toiletry bag ready. In a basic toiletry bag, you should typically have the following essentials:

  • Toothbrush and toothpaste
  • Alcohol based sanitizer
  • Biodegradable soap
  • Dental floss
  • Wash cloth or cotton bandanna
  • Toilet paper
  • Baby wipes

Ladies can even have more essentials in that bag. But we reiterate that the deodorant shouldn’t be in your toiletry bag. The deodorant is perhaps good at home only not in the wilderness because that deodorant scent can attract some wildlife to your disliking. And when showering, please pick the spot located at least 200 feet from any water streams or, even better, from your camp. This will help in disposing of your dirty water to prevent contaminating any water stream nearby.

picture of a woman using Pocket Shower by Sea to Summit

To start showering, hang the shower on a tall tree to resemble your household shower with the showerhead within reach so that you can adjust it to let water out. Let that place be secure and clear of any possible obstructions from animals or other intruders. For women, be advised to have a hooting device so that you can alert your camping companions if you suspect that there could be possible threats or privacy invasion next to your showering space.

After showering, you can leave that bag if it still has some water or refill it if you are still going to need another shower later on. If not, then fold and pack it back into its portable case. The interesting thing is that it can be suspended onto any tree, so it makes it easy to travel with it or to change your shower spots.

solar-camp-showers on the ground

Where should you buy the backpacker’s shower?

There are numerous manufacturers of these outdoor essentials such as the Coleman and the Sea to Summit. You can find such products at major online retailers such as the Amazon. Among others on Amazon, we have picked several products that include the G2PLAY camp shower as an ideal product for you. It is made of the environmentally friendly PVC and can hold up to 5 gallons of water for repeated showers. As indicated in its name, it is easily heated by the solar.

So there’s no need to heat water using the stove unless camping in winter where a direct sunlight is so scarce. To hang it, the hanging bar and the rope system are provided. All the features of a backpacker shower are provided.

Preparing for Hard Times with Solar Hot Water Showers

The other recommended pocket shower is the Coleman sun shower. It also has some competitive features and can hold up to 4 gallons of water for numerous showers. It also uses direct sunlight to heat the water. All that you need to do is to hang it in the sun for several hours before taking the shower. The integrated thermometer helps you see the temperature of the water before turning it on. In this way you will know if the water is warm enough or not.

Our last recommendation goes to the Texsport solar shower as one of the best showers for hikers and backpackers. Its black polyethylene attracts enough sunlight to heat the water. It also has some mesh pockets where you can store your valuables such as the biodegradable soap or toothbrush. All other features are included. You can make your pick among these three top-selling products.

picture of a man testing the solar-camp-shower-27-ivation-5-water-flow-630

Watch this video about Sea to Summit backpacker’s shower to get a glimpse of how it works:

Almost any pocket shower works like that. They are lightweight outdoor accessories that every backpacker or every hiker should and are furthermore inexpensive. For example, our recommended products above are all less than $40 on Amazon. So there should be no excuse to be clean in the wilderness.

When should you take a shower?

Most people need a shower after a long day of backpacking or hiking to clean their sweats. Chances are, you already smell unpleasantly after a long day of hiking in hot temperatures. So, you must take that needed shower before you go to sleep, failing which can subject your sleeping bag to dirt and funky smell as well. You will then need to wash the sleeping to avoid further smell.

Early in the morning is also the right time to take the shower. But then during that time you will have to warm water and pour into the shower bag because there will be no sun as yet to heat your water. Cold water can also be refreshing in favorable weather conditions in summer or spring. Winter showers with cold water can subject you to hypothermia so beware of that.

photo of a solar-camp-shower-72-630

Midday showers can also be helpful, especially when you climb mountains because you might perspire a lot. The portable and pocket shower can help you during that time. So it’s advisable to also go with it in case you come across water along the way because holding 5 gallons of water can be unbearably heavy. Targeted body areas such as the groin, feet and the armpits may be washed regularly. But using the alcohol-based solution with the cottons can be helpful to target such areas.

Other hygiene tips in the wilderness

Other than taking the backpacker’s shower, provided you are alone in the hot days and you do not endanger other people’s health by contaminating water streams, you can take a quick bath next to the lakes. If there are backpacking or hiking companions, make sure you take it far from their water source. We still reiterate that use only the biodegradable soap instead of the normal soap used in the household.

But, in our views, the backpacker’s shower comes second to none in the convenience of bathing in the wilderness. The shower can reach the spots that can be challenging with a basic bath tub. You will feel so refreshing after taking the shower. The s can be done in the morning before heading to your hiking journey, and the shower taken later in the evening before taking a nap.

picture of an adult taking a quick bath in the lake

It is also equally important that we pay attention on our hands as well. We may naturally go to bathroom many times a day. So, it is advised that we get our hands sanitized as well to prevent exposing our health to bacteria and viruses from hands to mouth. The guidelines below can be helpful in improving personal hygiene:

  • Have a small hand sanitizer with you everywhere you go. You don’t know when you might need it. Before handling any food or after your bathroom break, use the alcohol-based sanitizer to clean your hands.
  • Have the cotton balls with you to squeeze the isopropyl alcohol on them to rub your armpits, groin and feet. Those areas are susceptible to an unpleasant smell due to sweating. It’s inescapable to have that sweat because that’s your body’s reaction to a hot day of hiking. It could smell worse to your companions. So, rather than taking frequent showers, use the isopropyl alcohol solution on targeted areas.
  • If you come across some lakes or rivers, stop for a few minutes to rinse your feet in the water to reduce the accumulation of dirt and smell. That way you will be saving your socks. During that moment, you can change your socks and put on new ones. Meanwhile, you can hang the changed socks on your bag for the air to dry them. You can even wash them.
  • Brushing your teeth is also helpful to maintain your dental hygiene. We advise you to always carry the pocket size toothpaste and toothbrush. After every meal along your hike, brush your teeth.

These steps help you reduce much of the showering work later when you arrive at your camp. As a result, your shower will just be a quick thing. It is also important to exchange the clothes, but strategically because having a heavy gear full of clothes is just impractical.

Try to rotate your clothes by hanging some in the air to dry for the next day. If you’re in favorable weather conditions, you can wash your light clothes and let them dry in the night. Also pay attention on your underwear. Have extra ones for in case because the groin can be smelly.

The Freemans hang their clothes to dry on Snipe Lake after a rainy week in June

Additional Advice and Recommendations

There are some alternatives to the sold backpacker’s shower. One can consider the homemade ones by procuring the 10 or 5 liter bottles with a showerhead as well. Hanging such bottles onto the tree with the adjustable showerhead to control the water pressure can resemble the household showers, too. That way you will have saved the cost.

However, take into account the inconvenience of those bottles when you have to back them. They will not be as foldable or as portable as the pocket shower. Moreover, they may not be as heat conductive as the bag. And when pouring hot water, they may shrink. Nonetheless, the bottles are still good alternatives in case you didn’t have enough cost to purchase the pocket shower of your desire.

The-Simple-Portable-Camping-Shower-converts-a-1-liter-water-bottles-into-a-portable-shower.-Its-also-compatible-with-Platypus-reservoirs

With regard to the pocket shower; before filling it, you have to observe it to see if there are no leaks. It could be devastating to leave your shower in direct sunlight thinking that the water will be warm later on when you come back, but then find out that it has been squeezed out through the leaks. These bags can be susceptible to scratches of thorns in the wilderness. You have to pay attention to the type of the tree on which you hang the bag.

When pouring water into the backpacker’s shower, make sure that there is not dirt because it can clog the pores of the showerhead. If there’s any other method such as the coffee filter, please use it to filter the water before pouring it. There could be leaks, if the showerhead is being clogged. And after every bath, rinse the shower head to remove any possible particles that could clog it the next time you pour water.

Final Thoughts

With the provision of the backpacker’s shower, gone should be the days when campers, hikers and backpackers spend many days without bathing. You don’t have to subject yourself to huge criticism from your outdoor companions simply because you found it inconvenient to take a bath since you’re accustomed to household showers.

The pocket showers can resemble that with ease for the time being in the wilderness. The only challenge can be the provision of hot water because the bag relies heavily on the solar power to heat the water. Otherwise, you will have to warm water using the camp stove or the campfire.

picture of two solar camping showers

With the information we’ve given you above, we are quite sure that your backpacking hygiene will be on par from now on. We have probably introduced a new product you’ve never heard of before, and have stated the importance of it and how it works. Moreover, the recommended products to narrow down your search have been provided as well. There could be numerous products to choose from. Even further, we have given you general hygiene tips on how to stay clean at the times.