Home Blog Page 14

Big Agnes Pitchpine SL 45 Sleeping Bag: Your Feather Light Sleeping Bag

0
Big Agnes Pitchpine on a sleeping pad

The Big Agnes is a brand well known for their sleeping bags and their Big Agnes Pitchpine SL 45 Degree Sleeping Bag is extremely popular among hikers due to its lightweight mummy style. The bag comes with an 800 fill goose down insulation and a lifetime warranty. This is a lightweight hood-less bag that weighs only 20 ounces.

It’s perfect for warm weather and lightweight backpacking. The sleeping bag is insulated with compressible 800 fill power DownTek treated down, which means it’s more resistant to water and moisture and is faster in drying. The half pad sleeve where you can put your pad will keep you from rolling from the pad when sleeping.

The sleeve is rather big and holds all 20 inches wide mummy shaped or rectangular pads. With this bag, you’ll have the possibility to use pads of different lengths. The side pockets will make it easier for you to pull your pads and adjust the inflation level.

In order to save weight, the designers of the sleeping bag made it not insulated from your waist up and Big Agnes was the first company that removed the insulation from this exact area to get less weight. They removed the insulation only on some sleeping bags so if you’re interested in this brand, but with insulated bottoms included we recommend looking at the different sleeping bag.

With this Pitchpine sleeping bag, as long as you have a good sleeping pad your back and body in general will be protected from the ground that can get cold at nights. The sleeping bag, though, has the lower bottom insulated, which means your feet and legs will still be protected and warm. Besides that, the company offers to choose a sleeping bag with a ¾ or ½ lengths sleeping pad.

Now let us get on with reviewing the Big Agnes Pitchpine SL 45! We hope you find this review helpful and informative! Read on for more!

Review

Packaging

Your brand new Big Agnes sleeping bag will come packed down in a box just bigger than 10 x 10 x 17 inches, and it will weigh just over 1.5 pounds. Once you open the package, you will find your compacted new sleeping bag, as well as a nylon stuff sack and a mesh storage sack. Many recommend airing out your sleeping bag before using it, as it needs air to get more loft.

Filling

Another great feature that comes with this bag is an 800 fill DownTek water repellent down insulation. DownTek is a new insulation on the market, water repellent down, that this brand is using on a variety of their bags by using nanotechnology and a proprietary, and this bag is no exception.

Big Agnes bike-touring

Application process down tag transforms down into a water-repellent antimicrobial and antibacterial down insulation material, so even in the wettest conditions DownTek is going to maintain loft and breathability as well as the insulation value because of its water repelled.

Durability and Design

The Pitchpine bag is available in a mummy shape and in a standard green color. It’s available in 2 sizes – tall and regular which makes it easy to fit most people’s size. Its lightweight design weighs only 1.4lbs for the “tall” size and only 1.2 pounds for the “regular” size.

The regular size of the bag is 10 x 10 x 17 inches or 5’10” in lengths and with a girth of 67.5’ at the shoulders, while the “tall” size is 6’6″ in lengths which makes them both rather spacious. If you’re 5’11, the regular sized sleeping bag will work fine for you, if you’re taller opt for the bigger size.

Big Agnes Pitchpine on the grass

Very durable, this sleeping bag is made without insulation, which means you need a sleeping pad. Made with goose down and feathers, comfort is at a premium. These bags will save weight, but you don’t have to sacrifice this bag for the one with draft zipper, draft collar and the hood on the circle 20 degree, and the Palmer 10 degree bag. Sure, you’ll be the envy of every hiker that has this brand with a UL regular ways, but they’ll carry up to 1 pound (4 ounces) weight more than you.

This bag provides a quilted installation, construction which is ready to be extended to 45 degrees so you’ll easily add a super high-quality pad that will no longer make you jealous of the backpacker who carries the fully insulated sleeping bag. All the divide UL bags are available in regular and long sizes and are highly compressible for stuffing into backpacks.

Insulation

Although this bag has no insulation or padding on the base, it’s exactly what makes it more manageable and light weight. Considering the fact that the bag has no padding means you will need to buy a separate sleeping pad. The padding sleeve of the bag accepts sleeping pads of any type that is 20-inch in width, but the company Big Agnes suggests buying a padded sleeve that is best filled with the AirCore 2.5 sleeping pad that is also inflatable.

Man in a sleeping bag sitting and watching the nature around him

The pad itself is attached to the sleeping bag from the hips to the head and it remains loose so you can roll around with more ease making it comfortable during the night without having your pad escape. In order to prevent it from twisting around, the pad easily anchors to the bag. These ultralight mummy shaped bags are not only super warm and comfortable, but they are also part of the Big Agnes sleep system design.

Additional Features

Other features of the bag include a great pillow pocket where you can insert your camping pillow and interior liner loops where you can add other bedding in case of colder nights plus a zipper system on the left side.

The attached pillow pocket on the Big Agnes Pitchpine

The YKK #5 zipper makes mating with the right sided bags more easy to create a shared sleeping space.

Manufacturer Recommendations

The materials used for the goose down (the fill) and the low thread count (the liners) provide a comfortable insulation. The same materials keep the bag lightweight enough for the hiker to minimize the room in their backpacks, fold it easily and compress it well in their sack.

Value for the Money and Guarranty

The price of the bag is between $250 and $330 which is a reasonable price for the quality of the bag. The only thing that most hikers don’t like it is that the sleeping pad is not included and needs to be purchased separately. The price of the recommended (by the brand) inflatable sleeping pad is an additional $60-80 and depends on of the website.

Big Agnes Pitchpine and some other outdoor gear on the ground

The company offers a lifetime warranty which is great for the hikers looking to buy only one bag that they’ll carry on their hiking trips. Although many hikers used it for no more than 3 seasons.

Although the Pitchpine bag comes in 2 sizes and is great for people who are tall (they have a “tall” size to fit any hikers) this bag, like all Big Agnes bags, has a sleeve attached to slip and has no insulation underneath the bag which means that this model needs a 20’ pad that you can buy separately.

If you’re going light on a hike and need a large bag that fits easily in your sack this is the one to choose. It’s not intended to last for more than three seasons, especially if used in the higher elevations, but comes with a lifetime warranty and does great in warmer weather.

This product is great for using when camping and hiking. If you want something lightweight, easily fold-able than this bag is your perfect choice. It’s easy to use, just slide your pad into the bottom sliders. It has 2 sliders, the bigger one where the head is and the smaller one where you can easily stick your arm in there and pull your pad through.

Adult testing Big Agnes pitchpine sleep system

Hold your sleeping bag and roll it over, take your pad, slide it through the bigger pocket right easily, reach through the smaller pocket and grab the rest of the pad. Turn it over and there you go, you’re ready to use it.

If your pad is longer than the bag don’t worry about it. Most users love it longer because it gives them a little extra room and the opportunity for those who love sleeping on their stomach with their arms locked out in front of them to have a real good night’s sleep. In the inside pocket, you can either put a pillow (or use your pad as a pillow) or add some clothes to make it more comfortable.

PROS:

  • Sleeping Pad Sleeve
  • Comfortable
  • Super Light
  • Packs well

CONS:

  • Inaccurate temp rating
  • Quite pricey

While the brand claims that this sleeping bag and the sleeping system will keep you warm for different temperatures and weather situations, the majority of hikers who tried this system agree that the bag should not be used below 45F degrees. All sleeping bags on the market have temperature ratings (it’s mandatory for companies by law) which indicate the minimum temperature that the sleeping bag is designed to handle.

They recommend it for early fall, late spring and during the summer months. Considering the fact that there is no standard way to test this system of the sleeping bags (there is no universal method to determine temperature ratings) and people’s sleeping habits and physiology is really individualized there are also some hikers who will manage to use this sleeping bag at temperatures below the 45 degrees.

Take this temperature rating with a grain of salt and use your gut as guidance. If you’re a person who feels more comfortable at colder temperatures rather than higher temperatures than you’re welcome to try it and use it below the “prescribed” 45 degrees.


Nemo Celesta Sleeping Bag: The Sleeping Bag With Feminine Curves

0
woman in a sleeping bag watching the sunset

Backpacking and hiking are healthy activities that are practiced by adventurists. Being a hiker doesn’t require much abilities or techniques, it only requires a strong will for spending time in nature and some essential gear that will make you feel more comfortable outside. Among the most important hiking gear is a sleeping bag that will maintain your body temperature and it will protect you from the elements. People tend to avoid backpacking on low temperatures because they are afraid of getting sick.

However, hiking boosts your immune system and it makes your body capable of fighting many bacteria and viruses which might be found in the city. Nevertheless, staying the night on a mountain is never a good idea without the proper equipment. So before diving into this sport it is always a good idea to get to know yourself with the gear recommendations, such as a sleeping bag, which is a necessary piece of equipment.

That said, a regular one day hike doesn’t require much equipment or planning. It simply needs you to take the hike at your own pace and the experiences will come. A several days hiking trip or a backpacking trip, require that you are equipped with more gear, be in good physical shape and health and it would be useful if you have some previous experience.

However, experience is something that can be gained over time. The longer your stay in nature is and the harsher the weather conditions, the more experience and gear you would require. And of course, you will need a sleeping bag with better quality and better features.

For this reason, we have made an extensive research on the current market of sleeping bags and we have reviewed and rated the best ones. However, our best choice was the Nemo Celesta sleeping bag that offers great features and it is a product that has an excellent price range.

Review

The Nemo Celesta sleeping bag is intended for women and you can notice this by its shape. Some people believe that all the sleeping bags are universal. However, this is not true. The bags which are made for women are wider in the hips and tighter in the shoulders.

Packaging

The Nemo Celesta sleeping bag is perfectly following the shape of your body and its design is not bulky at all. The material is also compressible enough and it fits into a small protective bag. Even though the compressing bag itself is not too big, there are smaller compression bags that have far smaller dimensions than the Nemo Celesta.

Picture of a Nemo sleeping bag in a tent

However, in order for the packed sleeping bag to take a smaller dimension a smaller compression bag is needed. In fact, compared to other models, the sleeping bag itself is compressing quite nicely, but it is better that the compression bag is replaced with a new one is size is of great importance.

Design and durability

The Nemo Celesta has the spoon design which increases the warmth inside the bag because there are not empty air spaces around like in the traditional bulkier designs. However, the space inside is not suitable for claustrophobic ones because it is too tight.

Insulation

The Nemo Celesta sleeping bag relies on synthetic stratofiber insulation to keep you warm in cold weather conditions. The material it is made of is always correlating the temperature it can be used for. In this case, the Nemo sleeping bag is made of 40D nylon Rip stop shell. The inside is filled with down.

This is one of the rare ones which are made of a combination of synthetic and natural materials. This allows it to have the most important properties of both materials. As we have mentioned before, down sleeping bags are not good when there is a high air humidity or in rainy areas.

A sleeping bag and a mountain landscape in the background

The Nemo manufacturer has solved this problem by producing a bag with nylon cover. The nylon cover is completely waterproof and you could even use the bag in a heavy rain. The inside is filled with down, which provides the warming properties of this sleeping bag. Because of the down, it is also easily compressible and the packed volume is small enough for you to fit it in the backpack if you choose to do so.

Although the synthetic insulation is excellent for fighting the moisture it weighs a bit more than feather filled insulation. The insulating quality, however, suggests that you are able to use this bag for cold weather temperatures and rainy weather conditions.

Warmth

The insulation is not the only feature that guarantees that a sleeping bag is warm. However, it is the most important feature that will put the temperature limit that you will feel comfortable in. Having this in mind, the Nemo Celesta has a temperature limit of 25F which pretty high for a synthetic insulated bag. Another important feature includes the dead air that usually is around your body.

Woman sleeping in a Nemo sleeping bag

However, this only happens in bulkier sleeping bag designs. The Nemo sleeping bag is minimizing this effect and it is letting your body temperature keep you warm for a longer time. However, most importantly, the space inside the bag is getting warm for a shorter time than a traditional design.

Nevertheless, if you are one of those campers or backpackers that are always feeling cold, you could put an extra layer of clothes over you. Even though most spoon shaped sleeping bags don’t have this spacious luxury, the Nemo Celesta definitely does.

This Nemo Celesta sleeping bag is tested and rated to -25 degrees F. That said, this bag should is not reliable for such a low temperature. Since it is intended for side sleepers and it is very spacious, it also has a lot of dead air around the body. Even though this feature ads in the comfort of the bag, it decreases the temperature comfort limit for several degrees. The dead air around the body is allowing the body to breath, but it is also keeping your body temperature lower.

Woman in a Nemo sleeping bag looking at the mountain landscape

There is also a blanket fold that is responsible for keeping your body, even warmer in cold weather, although its main purpose is being a neck baffle. Even though it has not proved as effective as a neck baffle, it does keep your neck warmer, therefore your whole body is feeling warmer.

That said, although this sleeping bag might be the right choice for most campers, the ones that easily feel the chills might consider using it only for warmer weather temperatures. If this is not possible, a different sleeping bag choice is recommended.

Comfort

When speaking of sleeping bags, the most important feature is the temperature rating. After all, this is the main reason why you buy a bag instead of sleeping in the bushes. Well, that, and the comfort it is supposed to provide.

Regarding the comfort of this sleeping bag there is no one general answer that goes for all campers. Instead, we would say it is comfortable for some and causes a slight discomfort for another. The mummy shaped sleeping bags, including this one are not recommended for side sleepers. However, this model is designed with enough space for your arms, but not enough space if you like to sleep with your knees bent.

Woman-lying-in-sleeping-bag

Even though it is spacier than most mummy shaped sleeping bags, it is still a spoon bag. This means that even though it might feel comfortable sleeping on the side, this sleeping bag is not recommended for the ones that are tossing and turning in their sleep. The height of the user also influences his comfort.

If you are tall, it is better to go with some other option. However, the regular sized campers will love sleeping in this super comfy sleeping bag.

Water resistance

The water resistance is one of the main advantages this sleeping bag has. Even though it is not as warm as some other competitive models and it could not endure minus temperatures, the moisture does not represent an issue. When a synthetic bag, such as Nemo Celesta gets wet, it does not lose its properties such as the feather filled bags.

Instead, it remains the same shape and with the same warmth features. The maintaining of the sleeping bag is also much easier than other models with different insulation. Even though it is not recommended to be machine washed, after washing it, you could feel free to hang it wherever you want.

Woman with a sleeping bag in front of a waterfall

The biggest advantages of this sleeping bag are its moisture resistant properties. This makes the bag suitable for by the river camping, where the possibility of getting it wet is higher. Side sleeper users have also reported that this bag was very comfortable for them and they are able to move in, without any restrictions.

Unique features

Its unique features include a spoon shape that is a bit wider than the traditional spoon shaped sleeping bags and this means that you will have more space in your arms area, therefore switching sides in the middle of the night wouldn’t represent a problem. The pillow which is also a pocket is also a unique feature that not many sleeping bags have. It is placed inside of the hood and it can be used as a pocket for your important stuff when you are not sleeping on it.

A woman in a Nemo sleeping bag in a tent

You could also cover your head with it so that you don’t feel the sunlight in the morning. Either way, it is a unique feature that you are definitely going to enjoy. If you decide that you don’t want to carry the burden of an extra pillow you can put the extra clothes you are wearing with you in the hood pocket and you got yourself a comfortable night pillow.

Value for Money & Guarantee

Even though the Nemo Celesta doesn’t have it all, and it has some downsides such as every other product, it is safe to assume that it provides great features considering the price it is being offered. And what’s best is that there is a new version of the Nemo sleeping bag with similar features that causes the price of this one to drop drastically.

A couple camping in the wilderness with their dog

This way, you are getting a great product that has a lower value because of its updated version.

The Nemo Celesta sleeping bag is a bag designed for ladies. Its every feature is according to the woman’s desires. It keeps you warm, comfortable and it perfectly follows the curves of your body, what more can a girl want?

It is perfect for people who are not keen on the mummy shape, but they don’t like the bulky sleeping bag designs either. This one has a nice footbox that your feet could relax in knowing there is enough place to move around and not feel claustrophobic.

Considering that a woman’s body needs more warmth than a man since they tend to have a lower circulation, this is absolutely a lady’s sleeping bag. Its dawn synthetic mixture will keep you nice and warm on cold weather and you could even use it in the snow. It is the perfect place to cocoon in. A nice and cozy bag that you are not going to want to leave.

A couple camping in the wilderness

And if it happens to rain, the sleeping bag will present a nice shelter from the rain because of its water resistant properties. Simply cover yourself up with the hoodie and not light and no moisture could be able to get to you.

PROS:

  • Warmth
  • Comfort
  • Durability
  • Water resistance
  • Footbox
  • Good insulation

CONS:

  • Compression size
  • Not as warm as other competitive models

That said, we believe this sleeping bag has it all which is why we feel it deserves our top rated status. The only thing left to do is to see if it will be your top rated as well!

Western Mountaineering Puma Gore WS Sleeping Bag: Best Sleeping Bag for High Altitudes

0
A man in a Puma Gore WS Sleeping Bag

Choice of sleeping bag can define the success or failure of any camping trip. Whether it is hiking trip with friends, or a family camping trip, there are many choices out there. They arrange from down, to synthetic, and from two seasons to three seasons. With these many options, it is possible to be overwhelmed when buying, but luckily for you, this guide outlines all the factors you need to consider.

With this guide, you will make an informed decision about sleeping bags with ease. Similarly, you will have a chance to get more familiar with our favorite choice, the Puma Gore WS sleeping bag.

It is important to know that sleeping bags can be differentiated regarding size, shape, comfort rating, season rating and type of insulation. Regarding shape, we have three types of sleeping bags:

  • Rectangular
  • Mummy
  • Semi-rectangular

Rectangular sleeping bags

They are more popular and especially because they are roomier compared to mummy. This feature makes them most suitable for people who like moving in their sleep. They are also very adaptable as you can open it completely to make a comforter or join two from the same manufacturer to make a twin bed.

Rectangular sleeping bag on the grass

They are the best bags if you are looking for space plus they are quite affordable, unlike the mummy sleeping bags. However, they are bulkier and hence not the best for backpackers. They are also not as warm as the mummy.

Mummy Sleeping Bags

These bags have the best insulation and hence the warmest on the market. Mummy bags are extensive at the shoulders and narrow at the feet and hence the best for contoured bodies. They also possess a hound, which you can use to cover your head while sleeping.

 Marmot Plasma 30 sleeping bag in a tent

They are mostly preferred because, in addition to being warm, they are also lightweight. The mummy bags are also easy to compress and hence the most suitable sleeping bag for backpackers. Unfortunately, they are not are not a 100% perfect; they are restrictive, and you might not enjoy sleeping in them if you move a lot in your sleep. They are also expensive compared to rectangular sleeping bags.

Semi-Rectangular Sleeping Bags

Semi-rectangular bags are a simple rectangular bag which tapers at the feet. It is warmer than a regular rectangular sleeping bag, but it has a disadvantage that it is restrictive at the feet.

Globe Semi-Rectangular Sleeping Bags on the ground outside

Both mummy and rectangular sleeping bags have their pros and cons. However, the person using the bag will find that at the end of the day where you are going camping, the kind of climatic condition you are camping in and how much room you need while sleeping among other requirements is what will guide you in making an informed decision.

Avoid buying rectangular sleeping bags while going hiking backcountry. Despite being roomier and inexpensive, they are bulky and cumbersome, and they end up adding weight to your luggage. Mummy bags, on the other hand, are made to retain heat as well as minimize the weight. When you are not considering the price, these are obviously the best.

REVIEW

Packaging

The Puma Gore WS come with a storage sack which you can use to store your bag. The sack can be rolled into the shape of a volleyball making it easier to carry. You should also expect a mummy and large shape which will be big enough to house even the obese individuals. Its vast dimensions will help generate enough air circulation in warm weather situations.

Puma Gore WS sleeping bag laying down in the house

The shell that comes with the Puma Gore WS makes the sleeping bag ideal for virtually all kinds of weather conditions. During the severe winter weather, the shell of the Puma Gore WS keeps you from getting cold and also regulates itself to warm weather. The shell of the Puma Gore WS is windproof; it is practically waterproof and also breathable.

Design and Durability

The Puma Gore WS is excellent in its craftsmanship as a result of the delicate stitching and consistently circulated 850 fill down power. The manufacturers of the bag take pride in making all their products perform well and last for a very long time. The Puma Gore WS compresses into a moderately sized compression sack, and they are very true to their temperature ratings.

Design-wise, the Puma Gore WS Sleeping Bag is a mummy in shape. As we all know, mummy shape offers enough room for numerous kinds of the body so as to feel comfortable when you sleep in it. The Puma Gore WS also come in different sizes to be able to accommodate most body types. Furthermore, if you are a person who is fond of rolling around or sleep in any preferred position, don’t worry, the Puma Gore WS spacious design will surely accommodate you.

Man in Puma Gore WS sleeping bag near another 2

The hood of the Puma Gore WS can be detached during summer when the heat is much to allow more air in the sleeping bag. It can fit comfortably in the winter. For more aeration, you can lift your limb to allow adequate ventilation if you feel there is more heat in the sleeping bag. That is the advantage of a large mummy design.

Insulation

Type of insulation determines how warm a sleeping bag will be. It also helps in choosing the right sleeping bag for a particular kind of weather or location you will be camping. In this category, we have down and synthetic sleeping bags. The down bag has a small fine layer made of bird feathers in the interior. Down insulated bags are preferred because they are lightweight and easy to pack. They are also excellent for heat retention.

Close up of Western Mountaineering Puma Gore WS Sleeping Bag

However, they take a lot of time to dry and once wet they lose all their heat retention features. They are also very expensive compared to synthetic insulated sleeping bags, while the synthetic bags are made of plastic fibers. They are cheaper than down, and they have the capabilities of retaining heat even when wet.

They are also easy to preserve and care for in addition to drying fast. Their only problem is that they are bulkier than down and not as warm as down. The Puma Gore WS are made with a down insulation type.

Warmth

The Puma Gore WS Sleeping Bag is extraordinarily warm if we liken it with other sleeping bags on the market today. This is made possible simply because of its fill down, which has a power of 850. It makes sleeping to be relatively warm to tolerate freezing conditions.

Man sleeping in Close up of Western Mountaineering Puma Gore WS Sleeping Bag

The hood of the bag is in charge of abundant warmth during winter. You also do not need to put on thick socks because the foot box of the Puma Gore WS offers enough heat.

Temperature Rating

Since we are all different, temperature rating should be used merely as a guideline on the most suitable sleeping bag. Most manufacturers take the trouble to put a sticker showing how cold it can get and the amount of warmth that bag will offer you.

Man getting up in a Western Mountaineering Puma Gore WS Sleeping Bag

The month you are hiking, and the elevation should work as a guideline while choosing temperature rating. The Puma Gore WS have a temperature rating of -25 degrees Fahrenheit, which is fantastic for the freezing winter weather.

Weight

The Puma Gore WS is a bit heavy compared to its competitors in the market today. The sleeping bag weighs a massive 6.1 pounds. We believe the manufacturers didn’t do enough regarding the weight of the Puma Gore WS.

A 6' Puma GWS laying down

The sleeping bag would have been perfect if the weight was a little less than 6.1 pounds.

Size

The size of a sleeping bag is a major factor that a buyer needs to consider when purchasing a sleeping bag. Most sleeping bags, including the Puma Gore WS, are designed to be used by a single person. If you buy the Puma Gore WS, it cannot be used for two individuals, but if you are plump or fat in size, the Puma Gore WS Sleeping bag comes in various sizes.

Western Mountaineering Puma Gore WS Sleeping Bags on the Ground and a gorgeous landscap in the background

The sleeping bag comes in different sizes ranging from Extra-long, long and regular. All are meant for just one individual, but varying size. The prices might differ though, for example, the amount of the Extra-long might be different from the long.

Whether you are a wide-carried fellow, a tall woman that likes moving around during night times, or somebody that simply does not like being wrapped too tight in a mummy sleeping bag, this is the one you prefer most. This bag offers heaps of space to make sleeping a lot more comfortable.

Versatility

The Puma Gore WS are versatile in the sense that it can be used for various outdoor activities including hiking and camping. There are situations where you go to mountains and rocky grounds; the Puma Gore WS are the perfect bags for these situations.

Two adults in Western Mountaineering Puma Gore WS Sleeping Bags in the wilderness

The sleeping bag also protects you from different weather conditions.

Value for Money and Guarantee

The Puma Gore WS is one of the best sleeping bags you will find on the market today, consequently, giving you complete value for the money you paid for it. The Western Mountaineering’s main aim is to produce a high-quality sleeping bag which they have achieved by creating the Puma Gore WS. So, if you are worried because of the price, then you should think again because the Puma Gore WS are worth every penny.

2 Puma Gore WS sleeping bags

The Puma Gore WS come with a limited lifetime warranty. The sleeping bag can be used for a much extended period of time. Enjoy!

The Puma Gore WS sleeping bag is your best friend when you are camping in high altitude areas. With the full down collar, the bag has the capabilities of sealing your body heat, hence, keeping you warm all night. Also, it has a temperature rating of -50 to -1 degrees Fahrenheit, hence making it the bets bag while camping in freezing areas.

Its 9” loft makes it the best choice bag for high altitude areas camping. Other features included in the bag to enhance the heat include a breathable hood that keeps your head warm all night. The wind stopper fabric is made of ultrathin and ultralight fabric which helps keep off the wind and prevent the inner warmth from escaping hence keeping you warm all night. It is also perfect for allowing moisture to escape when you perspire, and hence the bag remains dry throughout the evening.

To enhance the durability of this bag, the manufacturer gave more caution to the stitching by adding additional bar tracking to the end seams. The Velcro material is also backed up with fabric that helps reduce the chances of weakness. The bag also features an excellent loft and reinforced foot box.

Furthermore, while buying outdoor gear or any other product for that matter, you will, in one or another, highly depend on other customer reviews. Well, this bag has had several reviews from those who have experience with it.

Close-up of Puma Gore WS Sleeping Bag

Faithful to its specs, the bag has a terrific temperature rating, which makes it a life saver when camping in the most unforgiving weather conditions. Its design and material help keep the moisture out while at the same time trapping in all your body warmth.  It also has excellent breathability features which help keep moisture out preventing the chances of dumpiness.

The bag size is perfect, and a 5’11 person will fit comfortably well. The bag still leaves you with some space to put some other clothing. The comfortable hound will keep your head warm throughout the night, and it also features a loft that pops up just right after unpacking your bag. With this bag, you do not have to skip your winter camping trip.

Another feature that makes the bag even more appealing is the right sided full-length zipper. It is easy to use and strong enough which increases its durability. The GWS shell is perfect for keeping out the moisture and especially if you are experiencing a lot of this inside the camp.

Pros

  • Packable
  • Durable
  • Warm
  • Breathable
  • Roomy
  • Easy to use
  • Lightweight

Cons

  • Expensive
  • Takes time to get stuffed down

The bag is well constructed and compresses easily in a compression pack. It is also easy to unpack and turn inside out.  As long as you wash this bag once in a while or as necessary, it will with no doubt give few years services camping in the Alaska and other cold areas.


How to Prevent Altitude Sickness: Tips, Tricks, and Treatments!

0
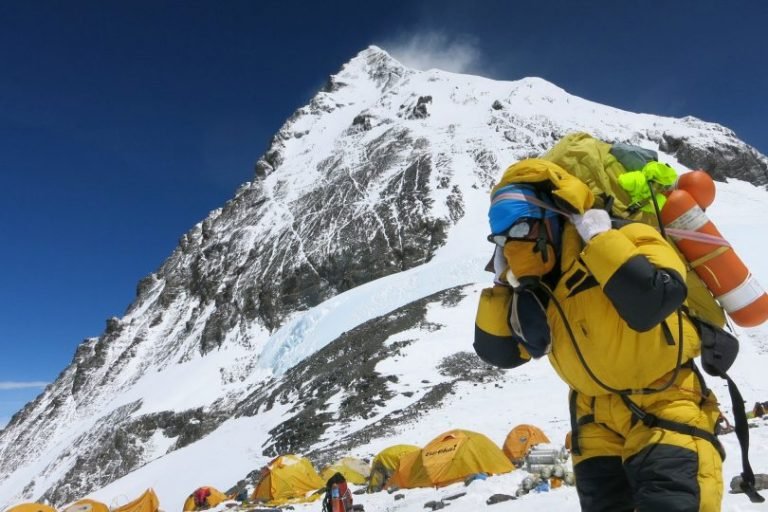
hiker on mount Everest with oxygen

Anyone who hikes regularly is bound to experience altitude sickness from time to time. It can put a damper on conquering any mountain, and is over all just annoying to deal with. At any moment it can go from an inconvenience to life and death, which will really ruin any hike.

We are here to lay out the best tips and tricks to help you prevent altitude sickness, so that you can go back to just enjoying the view! We also have great ways to treat it if none of our prevention tactics are able to work.

Before we get to that, let’s delve deeper into what this sickness actually is, and what causes it. After all, you must know your enemy to fight your enemy.

What is Altitude Sickness?

First things first, what exactly is altitude sickness? It comes from not being able to get much oxygen at high altitudes, because the air is thinner the higher you climb. It tends to happen to people who are not used to going to such high altitudes, but for the most part anyone and everyone can be effected by it. Even someone who climbs every day can be taken down a peg.

altitude sicness take over hiker

Altitude sickness is not typically deadly, and many hikers say it is about the same as a hangover. Unlike a hangover, altitude sickness can turn dangerous fast. In rare and extreme cases it can lead to death if not treated properly.

The big 3

There are three different types of altitude sickness.

  • Acute Mountain Sickness – This is the most minor form of altitude sickness. Its symptoms are more of an annoyance than anything. It will occur within twelve hours of reaching a high altitude, and does not last more than three days. After three days, it is verging on becoming the second type of altitude sickness.
  • High Altitude Cerebral Edema – This can sometimes come after Acute Mountain Sickness. At this point, the altitude sickness can be deadly. The symptoms become severe, and confusion sets in. Immediately get to a lower level, and seek medical help if the symptoms get worse.
  • High Altitude Pulmonary Edema – This is the most deadly type, but usually only happens in altitudes of at least 14,000 feet. The hiker will find it hard to breathe, and start coughing. They should immediately get oxygen therapy, and descend as soon as possible.

Any altitude sickness that is more severe than Acute Mountain Sickness should immediately be treated.

The causes

At high altitudes the air gets thinner, and our body is not getting the oxygen it needs to. Most of the time it comes randomly, and with no apparent cause.

oxygen deprevation

However, there are a few things that could trigger it, including;

  • Ascending too high too fast and keeping your body from getting used to the change in oxygen
  • Overexerting during the first twenty four hours of the climb
  • Not drinking enough water, or substituting water with another liquid
  • Hypothermia
  • Drinking alcohol or using sedatives

The symptoms tend to subside after we get used to the thin air, but sometimes they worsen.

The general symptoms

Altitude sickness has several symptoms, the most common being;

  • A throbbing headache
  • Not wanting to eat
  • Nausea, which might lead to vomiting
  • Being weak and/or tired
  • Being dizzy
  • Having trouble sleeping/ waking up a lot during sleep

Sometimes the symptoms are not too bad, but they can get severe. If it begins to affect your lungs or brain you will become confused, and have trouble walking straight. Your lips or fingernails might turn blue, and when you breathe, it will sound like someone is crumbling paper.

frostbite nails from cold

At this point the altitude sickness is getting close to being deadly. If your breathing sounds like paper being crumbled, or it is hard to breathe at all, then immediately seek medical attention. When the altitude sickness begins to turn into the second or third type, then new symptoms may occur.

Symptoms of high altitude cerebral edema

This is the point where altitude sickness can take a turn for the worst. The symptoms to look out for are;

  • Any general symptoms
  • Confusion (take this as the first sign to seek treatment)
  • Can no longer do regular functions (like walking) because of tiredness or trouble breathing
  • Coordination becomes extremely impaired
  • Eventually a coma will develop

If untreated, this will lead to even worse symptoms and death.

rescue of an alpinist

Symptoms of high altitude pulmonary edema

This is the third and most deadly type of altitude sickness. It usually occurs after the general symptoms, but as it gets worse more symptoms will become present. They will include:

  • Shortness of breath, even when resting
  • Gurgling respirations (this is where your breathing may sound like crumpling paper)
  • A wet cough accompanied by frothy saliva
  • A fever
  • Failure of the respiratory system. This is one of the latest symptoms, and extremely dangerous if not treated immediately.

How to NOT treat it

Before getting into how to treat and prevent altitude sickness, we are going to give you a quick rundown of everything NOT to do. Doing any of these things may worsen the altitude sickness, and could even cause it to take a turn for the deadly.

  • Do NOT over exert yourself! It is important to rest, and limit activity to leisurely walking.
  • Do NOT drink alcohol! Drinking water is fine, but just water.
  • Do NOT go higher! Going higher can turn minor symptoms to severe, or even deadly.
  • Do NOT give aspirin to someone younger than 20! Aleve and ibuprofen will work.
  • Do NOT sleep during bad symptoms! Resting is important, but once the symptoms are bad sleeping can make it worse. Always descend or get treatment before falling asleep.
  • Do NOT ignore your body! If your body is telling you to stop, then stop! It knows what it can and cannot handle.

If the symptoms become worse it is best to go to a lower altitude. If you are with someone who is experiencing moderate or severe symptoms NEVER leave them alone!

having altitude sickness symptoms

In general, it is dangerous to hike alone if you plan on reaching above normal altitudes. Having someone with you could be the difference between living and dying.

Tips to avoid altitude sickness

While there is no way to guarantee altitude sickness won’t strike, there are some ways to avoid it. Here are just a few tricks to keep it at bay on your next hike.

  • Drink plenty of water – It is important to stay hydrated during any hike, but when trekking to higher than average altitudes it is best to drink twice as much water as you normally would.
  • Eat wise and healthy – the best foods to eat are; avocados, broccoli, bananas, celery, chocolate, pasta, and grains. Actually, pretty much any fruit or vegetable would be good to eat. Avoid salt whenever possible!
  • Take it easy – If at any time it becomes hard to breathe, or you become excessively tired then slow down! There is no shame in descending to a lower altitude if you need to.
  • Avoid the sun – The higher you go, the harsher the sun’s rays. Make sure to continuously apply sunblock, and get in the shade when you can.
  • Go slow – The main cause of altitude sickness is going too high too fast. Make sure to ascend at a slow pace, and stop if you need to.
  • Rest a lot – Getting plenty of rest is one of the easiest ways to avoid altitude sickness.
  • See your doctor – Sometimes doctors can prescribe certain medications to keep you from experiencing altitude sickness.

doctor an patient talking

How to prepare

It is always important to prepare and plan before any hike, but it is even more crucial when going to a high altitude. These preparations can either fight or cause altitude sickness.

Planning is key

You should always have a route in place that allows you to only ascend a little bit each day. To keep from falling behind, it is wise to allow an extra day just in case you have to descend to get away from altitude sickness. Having this plan in place will make the trek run smoothly, and prevent frustration in the event of having to descend.

Getting in shape will only help

Altitude sickness plagues even the greatest athletes, but it will still be helpful to be in shape. People who are fit perform better under illness than someone who is unhealthy.

woman in good shape

Being in shape will also make you more capable of helping others, especially if descending during an emergency.

Visit your doctor

Any kind of preexisting condition should be consulted with a doctor before hiking to high altitudes. They will be able to help you prepare, and prescribe any medications.

Medication

Speaking of medication, it can be a great way to fight altitudes sickness. Some of the best medicines that hikers like to use are;

  • Acetazolamide – This medication is known for effectively preventing symptoms, but many hikers say the side effect are not worth the results.
  • Dexamethazone – This is often taken with Acetazolamide, but can be taken alone. Many people agree that it should only be taken alone if the hiker cannot tolerate Acetazolamide.
  • There are other effective medications such as: Methazolamide, Spironolactone, Nifedipine and Sildenafil, but none of these appear to be as effective.

Dexamethazone injections

Natural Prevention

For those who do not want to use medication, there are some natural remedies that can be just as effective.

  • Gingko Bilboa – This supplement is reportedly as effective as Sildenafil when it comes to altitude sickness.
  • Vitamin C – There is not much proof that this works, but it is worth a try if you do not want to use medicine.
  • Coca leaves – Many people who spend a lot of time travelling to high altitudes use these in tea, and some just chew on them. There is no real proof that this works either.

Is medical care needed?

Sometimes nothing is effective in keeping altitude sickness away, and it may not always be obvious that the symptoms are getting severe. Medical care is not always required, but descending definitely could be. So when should you descend?

  • If it is hard to breathe
  • If you are becoming confused
  • If you are too tired to do anything
  • If you are losing coordination

There are times that descending is not possible. If that is the case then immediately seek out medical care if any symptom is becoming worse with time.

Is it really that serious?

Yes. Yes it is. In May of 2016 nearly a dozen hikers were killed by altitude sickness while climbing Mount Everest. In 2010 a university student died of altitude sickness near Lake Titicaca in Peru. Tourist hot spots that sit at extremely high altitudes are starting to outfit rooms with oxygen pumps to protect tourists.

wearing oxygen mask

Some places in Machu Picchu have oxygen that is blown out of the headboard while visitors sleep. With people going to such great lengths to keep altitude sickness from becoming deadly, it is safe to say that this is not something to be taken lightly.

Why are hikers still climbing?

If altitude sickness can be so dangerous, then why would hikers even risk it? The answer is simple: they love hiking and climbing! Yes, it can be deadly, but it can also be treated and prevented. With a little knowledge and preparation, altitude sickness does not have to be anything more than a small bump in the road.

A few things to remember

If you can make sure to just remember a few things, then we are willing to bet that altitude sickness will not be a problem at all.

  • Take it slow! There is no need to overexert yourself, or climb too high too fast.
  • Plan ahead! Proper planning can be a real life saver, especially when it comes to this!
  • Look out for symptoms! Minor symptoms can be treated easily, but the second they become severe descend or get help.

With that in mind, and your new found knowledge of altitude sickness in hand, get out there and enjoy your climb!

girl hiker on top of a mountain

Best Hikes in Phoenix: Enjoy a Great Hiking Trip!

0
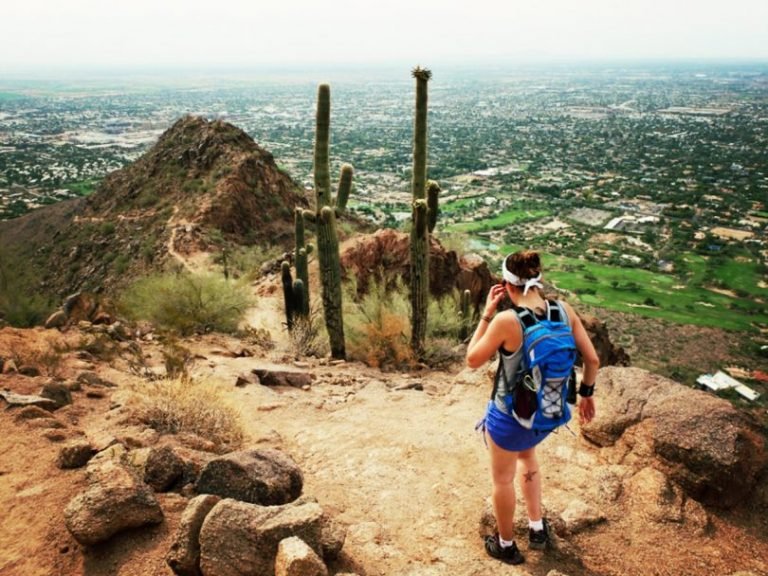
cholla trail in phoenix

Currently ranked by the National Geographic as one of the best cities for hiking in America, Phoenix can be regarded as a mecca of hiking and many explorations. This great city of Phoenix has three remarkable mountain preserves where there exist many trail heads leading to more than 180 miles of notable and developed trails.

These trails are source of attraction for hardened trekkers and even, casual walkers. South Mountain encompasses the whole of the southern border. Camelback Mountain remains solitary and covers the Central Valley horizon. Piestewa Peak stays a series of mountains located on the northern side of Phoenix.

Inside the Phoenix city herself, there are uncountable numbers of preserves, green belts, and parks that are easily accessible for great hikes and casual walks. Are you interested in knowing some of the best hikes in Phoenix? If yes, read on!

Best Hiking Places in Phoenix

Listed below are some of the 10 best hiking places you need to know in Phoenix, these are arranged in no particular order.

girl on summit on Picketpost Mountain

Piestewa Circumference – Freedom Trail

Average Time: 2 hours

Level of Difficulty: Moderate

Distance: 3.8 miles round trip

While Piestewa Peak is generally known for its ever-famous Summit Trail, the Piestewa Circumference Freedom Trail offers a more intensive look at and a closer involvement with the landscape of the desert. Wound around the bottom of the peak, this region holds a variety of desert flora you can ever find in the mountain preserve.

Some portion of this trail synchronizes with the Nature Trail, which offers educational plaques itemizing different flora. The trail starts at the north end of the trail park and will promptly take you over a dry, rocky spring bed, before joining with the Freedom Trail Loop. Since, this is a circumferential hike, you can take either direction.

Piestewa peak

However, you should consider whether to choose a steep climb before you start a hike or go for a right at the intersection. Within Four miles in the preserve, there is some mellow rise picks up all through the hike that are ordinarily close to few memorial saddles.

These are decent chances to stop and take a proper look at the landscape: the peaks, the Phoenix horizon, and many other exciting desert landscapes.

Picketpost Mountain

Average Time: 3 to 4 hours

Level of Difficulty: Difficult

Distance: 4.3 miles round trip

With just 2,000 feet of rising, hiking in the Picketpost Mountain is one that will make you return for more. It provides you a brief trip on the Phoenix Trail before climbing a series of bent curves such that in a matter of one mile, it will make you look down toward the Valley ground floor from 2,800 feet away.

At this point, the trail gets somewhat specialized as we bend, leaning on the cliff walls and intersecting shaky edges before entering a very narrow valley. This area will test your strength and should be done with caution. Just stay focused and engaged.

Picketpost Mountain group of hikers

From the valley, the trail starts an upward series of bent curves and some fun stone bouncing to the upper plateau and lastly the summit. Make sure to stop a while and observe your surroundings as you climb. You will find the views amazing as you ascend.

When you reach 4,375 feet, you will find the panorama incredible, starting from the Superstition Mountains to the Four Peaks to the Weaver’s Needle. During the day, you will have an extraordinary perspective of the Catalina Mountains which is located in the north of Tucson. To your surprise, there is a mailbox on top of the mountain? The Picketpost Mountain is one of a kind trail to enroll in without a doubt.

Tom’s Thumb

Average Time: 3 hours

Level of Difficulty: Moderate

Distance: 4 miles round trip

Situated in the more isolated northern region of the McDowell Sonoran Preserve, you will find Tom’s Thumb sitting at 140 feet and can be seen all through the East Valley and Scottsdale. Numerous hikers often call this local landmark “the dork” due to the amazing patriarch of the climbing scene.

Nevertheless, you do not have to be a climber to appreciate the sheer views of this bulging hiking scene. After climbing for a half-mile, you will reach a precarious series of bend curves. The perspectives are stunning and will help in keeping your mind off the work you are putting in.

hikers on tom thumb trail

You can also anticipate for more stunning perspectives of Cave Creek Mountains, Four Peaks, and Bartlett Lake. At about one mile, you will be sitting at an amazing 3,680 feet. About a half-mile later making two miles, you will gain a saddle for another extraordinary perspective.

At that point, there remain just a half-mile to the ridgeline and an appropriate perspective of Tom’s Thumb and its remarkable proportion.

Camelback Mountain’s Echo Canyon Trail

Average Time: 2 hours

Level of Difficulty: Difficult

Distance: 2.3 miles round trip

Camelback Mountain should be a once in a lifetime hiking. Regardless of whether you are simply going to the Valley or living around here, Camelback Mountain hikes offer probably the most encompassing perspectives of Phoenix.

Situated in the heart of the city, this 1,264-foot climb is an extraordinary taste of the mountain tucked inside the suburban boundary, one that is certain to blow your mind in more courses than one. Throughout this hike, you will enjoy the areas of stair stepping and scrambling.

Camelback Mountain's Echo Canyon

If you are a little bit nervous to climb, be rest assured that handrails have been set up for your help if necessary. At simply under a mile, you will see a false summit. While this may appear like a dreadful trick after the cardio you have been using, the main summit is some steps away from this, and you will soon be on the most remarkable top you can ever find in Phoenix.

Feel relaxed, catch your breath, and appreciate the sights of the amazing metro Phoenix right from South Mountain to Chase Field, Superstition Mountains, and Four Peaks. This is a completely remarkable way to see the beauty of the whole city.

Hieroglyphic Trail

Average Time: 1.5 hours

Level of Difficulty: Easy

Distance: 3 miles

This short climb offers awesome perspectives of the Grand Superstition Wilderness Area and in addition an ancient accumulation of Hohokam petroglyphs. Situated at the bottom of the Superstition Mountains, hiking on the hieroglyphic trail is ideal for families and even a beginner hiker.

The trail head shared something in common with the Lost Goldmine Trail, yet advance you up a little hill and you will discover two wooden sign post stamping where the trail divides. Move left and proceed towards the mountain. At about a half-mile of hiking, you will eventually see the Sombrero Butte, Camelback Mountain, and South Mountain.

hikers on lost goldmine trail

Proceed with another half-mile, and you will be entering the Hieroglyphic Canyon; move along this trail and at about five to nine minutes, you will get into an extensive rocky zone with scores of Hohokam petroglyphs and few small-scale pools of water. You might be wondering why this preserve was not given the name Petroglyphs Trail.

It appears that the early pilgrims and mine workers are to be blamed for the misconception. The Hohokams occupied the Central Arizona, roughly 800 years back, leaving a lot of petroglyphs behind that the early pioneers mixed up as Egyptian hieroglyphics. Hence, give rise to your Hieroglyphic Trail.

Mormon Trail to Hidden Valley Trail

Average Time: 2.5 hours

Level Of Difficulty: Moderate

Distance: 3.9 miles

Situated inside the biggest municipal park in the city of Phoenix, the Hidden Valley Trail of South Mountain gives you a chance to get away from the city with uncommon rock developments and two natural rock channel marking the end of this half-mile trail.

Quietness is always a common thing during this hike, as the city and its sounds look like they have vanished, abandoning you with dazzling rock formation and dry sandy washes. Now entering the Mormon Trailhead hike, the rising is prompt, because it is like half-a-mile to the saddle, where there is a fantastic perspective of downtown Phoenix.

Hidden Valley via Mormon Hiking Trail

You will then hit a steep area of the trail from here, which will straighten out around the one-mile checkpoint. In a matter of minutes, you will come across the crossing point with Mormon Loop and you will need to go straight, remaining on the Mormon Trail throughout until the point that you run into the National Trail.

At this point, take a right and you will be going towards Fat Man’s Pass leading to the Hidden Valley Trail. You are going to enjoy the view and exit through the other rock channel to go back through Mormon Trail.

Cave Creek Trail to Skunk Tank Loop

Average Time: 6 hours

Level of Difficulty: Moderate

Distance: 10 miles

Situated in the upper east of Phoenix within the Tonto National Forest, this particular trail features the riparian desert spring that is Cave Creek. This is more than a city; a real creek flowing through some region of Tonto National Forest, supporting a broad cluster of fauna and flora and not typically found in the desert.

cave creek Hiking Trail

After entering this hike, you will probably overlook that you are right in the desert and some miles away from the city, all regards to the lavish vegetation and the sound coming from the streaming creek adjacent to you. This loop gives you an awesome day hiking adventure.

It starts with a quiet trek through shallow and short water intersections and underneath lavish shades of trees, before finally dropping into a limited canyon and sending you climbing along a lovely, rocky creek bed. At that point, the Skunk Tank Trail loop includes some cardio, with wonderful all-encompassing perspectives on moving hills and mountains that appear round.

It is not an awful result, and simply going over part of the way through the trail, the long bend curves have hoisted you to 3,665 feet. After just a mile, the trail makes a curve and meet up with the Quien Sabe Trail 250. This is the most elevated purpose of the hike at 4,075 feet.

quien sabe trails

Proceed a little more, you will soon reach the Quien Sabe mine, and after, the old mine worker’s camp. This is a decent place to stop by and appreciate a little history before finishing the two miles remaining.

Boyce Thompson Arboretum

Average Time: 2.5 hours

Level Of Difficulty: Easy

Distance: 3 miles

Situated at the floor level of Picketpost Mountain just close to Queen Creek, Boyce Thompson Arboretum is a headquarter for most of the desert plants throughout the world. This Arboretum hike is more than just a hike.

It is more or less an educational walk and an awesome chance to start perceiving what vegetation you have seen on the trails. For a starting hiker, what you will be amazed by what normally occurs in the Valley area you are trekking through.

Upon landing, you should desire to go through the Main Trail as it interfaces with the arboretum’s remarkable elements and appealing routes. For an absolute taste of what you may experience on hikes close to Phoenix, ensure you hit up the Sonoran Desert Trail before going back to the Main Trail.

hikers on Sonoran Desert Trail

From that point, you will discover why you need to visit the Smith Interpretive Center and the Hummingbird Gardens, a memorable structure repurposed to hold two nurseries, displaying succulents and desert flora from around the globe. As you continue going on, you will soon arrive at Ayers Lake, a fabricated reservoir giving water to the whole grounds and serving as a flying creature asylum.

Past this, you will be hiking through a riparian territory, Eucalyptus Forest, an intuitive herb cultivations and a brush of palms. Your trip will be ended with a stroll over the Outback Bridge, finishing on the walkabout trail located along the Australian Desert Exhibit.

Peralta Trail to Freemont Saddle

Average Time: 3-4 hours

Level of Difficulty: Moderate

Distance: 4.9 miles

There is a considerable measure of mystery and history related to the Superstition Wilderness Area, bringing the early historians and hikers to the old mining grounds. Regardless of whether you believe the story or not, this trail is an extraordinary insight into the majesty and beauty of this amazing region.

Superstition Wilderness Area

More so, it leads to one of the best perspectives of its popular landmark: the 1,220-feet-tall Weaver’s Needle. Peralta Trail is named after a family from Sonora, Mexico, who mined the in this same region before an extraordinary slaughter, resulting in different stories of hauntings, lost maps, and gold.

It begins with a heading left to the trail head. At this point, you are going to appreciate the beauty of the gliding mountains that surround you before intersecting the Peralta Creek at the quarter-mile checkpoint, where you start your rising.

After a mile, you will reach a fork in the trail; keep going right and proceed through a series of bend curves upwards. At about a mile and a half, you will come across the Geronimo’s Cave while looking over the canyon. The trail will cross the desert spring bed again before directing you upward and onto some brilliant colored volcanic region.

Freemont Saddle and geronimo cave

Thereafter, you will pass a cave entrance. At that point, it will be left with one-half mile Freemont Saddle for a stunning perspective of Weaver’s Needle.

Reavis Falls

Average Time: 9 hours

Level of Difficulty: Difficult

Distance: 14 miles

Did you realize that there is a 140-foot waterfall just some minutes away from the city of Phoenix? Yes, the Reavis Falls is just 30 feet taller than the famous Niagara Falls. Located deep in the Superstition Wilderness, this fall is not for the swoon of heart, but rather it is unquestionably justified regardless of the effort.

reavis falls in arizona

The condition of the waterfall fluctuates based on any last rainfall occurrence, so arrange in like manner. Start at Reavis Trailhead, with a wonderful perspective of Apache Lake, which is right behind you and an extraordinary visual upon your arrival.

From here, you will make a curve and move through Reavis Trail for a little more than two miles, gaining a saddle at around 4,000 feet. A snappy swing to look behind you yields an extraordinary perspective of Four Peaks. After a mile, you will start to see Castle Dome.

This is a precarious aspect of the trek arrival at a saddle at around 4,675 feet. In a matter of one mile, the trail starts to slip. The descent is around 1,625 feet. And, recall that this will be a jump while going out. At about six miles, you will get to Reavis Creek and trace it upstream, where you will traverse the creek a few times.

reavis falls creak

This includes much rock jumping and customarily extremely icy water. In case the stream is great, you will hear the gliding sound of the waterfall before you see it. The sounds will allure you nearer until you get to this mind-blowing sight, smack spot at the very center of the desert.

Tips for Hiking in Phoenix

Over 200 hikers are being delivered every year from the preserves, mountain stops and desert of the city of Phoenix. The essential tips below can help prevent you from adding to the number:

Tip 1: Watch the Weather

Yes. “It’s a dry warmth”. However, Phoenix’s temperature can be misleading and fatal. Climb when it is cool outside. Attempt early mornings and nights when there exist more shade.

Tip 2: Dress Appropriately

Wear appropriate sunscreen, cap or hat, clothing, and shoes

Tip 3: Bring Water

Ensure you Hydrate before you leave for the hiking trip. Winter climate in Phoenix may fluctuate around a high of 67°, yet make sure to pack water along, regardless of what the temperature might be. Have a lot of water, more than you might predict you require.

hiker-with-a-bottle-of-water

However, if you are outside in the Phoenix sun, you will require significantly, at least 8 cups of water for the day. In case you are heading outside for any reason at all, carry along a bottle of water. If the purpose of going out is hiking, carry along many bottles of water or preferably, a drinking system.

Many individuals have encountered their death after heading into the preserves inside a temperature of 110-degree heat without enough water. That is the main reason hikers are often warned to stay inside or create a shelter beside one of the pools available in the Valley until the month of October.

In case you need to go outside, you may be enticed to hold up until night when it is cooler. It is an intelligent arrangement, but you should know.

Tip 4: Keep in Contact

Convey a cell phone or a satellite phone along anywhere you go and let your friends and family know your plans and the locations you plan on visiting.

Tip 5: Team Up

Don’t ever go hiking alone. In case you feel like going alone, tell somebody about your area of interest, begin times and end times.

Tip 6: Be Honest

Do you have any medical condition? Back issues, knee, diabetes, heart issues, Asthma? Try not to encourage yourself.

Tip 7: Don’t Trail-blaze

You are free to enjoy the beauty of the Sonoran desert landscape. But please, remain on assigned trails.

Tip 8: Take Responsibility

Try not to be somebody that won’t get ready, shouldn’t have been there for wellbeing reasons or overlooked security rules. Be the mindful climber, who gets out for hiking and does it right.

Tip 9: Know the indications of heat stroke

As indicated by the Health Services Department of Arizona, the way to an existence debilitating heat stroke takes after genuinely predictable steps, with a few cautioning signs, for example, warm stroke, warm fatigue, Heat spasms, Thirsty, et cetera.

Sweaty exhausted hiker

Most heat strokes can be prevented by staying inside, wearing lightweight clothing in light hues, taking even and consistent breaks, and, more importantly, drinking a great deal of water.

Tip 10: Avoid the honey bees

Based on the information provided by the Health Services Department of Arizona, you won’t see a ton of animal creatures or bugs all over the place. Most turned out around evening time, so watch the path you step on when you are doing the night walk.

Phoenix honeybee season and summer go as one. Each mid-year, honeybees attack no less than a couple of individuals and dogs present around the Valley.

Tip 11: Always take your sunglasses along

With shorter storms found in Phoenix, the sun frequently set and changes roadways into mirrors, reflecting a very bright light in your eyes and making it difficult for you to see the path lines.

hiker with sunglasses

Keep your sunglasses close to you all the time and drive with caution.

Best Camping in Alabama: Hidden Gems in the Heart of Dixie

0
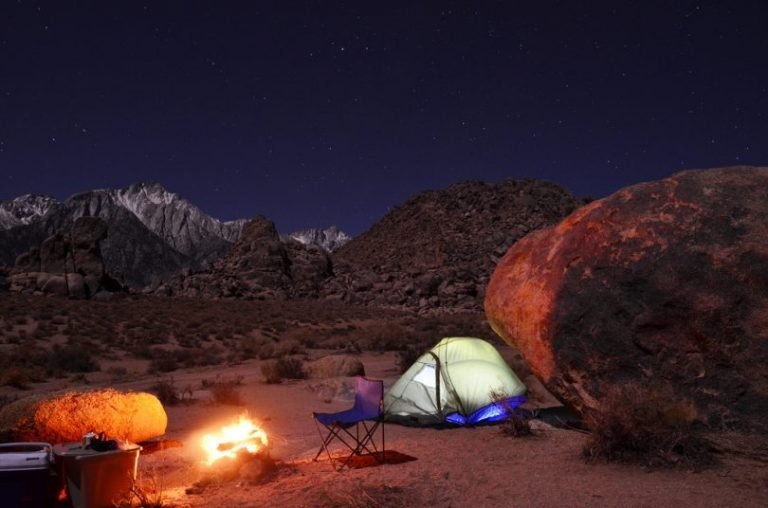
camping alabama

The Heart of Dixie, the start of the Appalachia, the 22nd state — Alabama.  You may not immediately think of Alabama as having some excellent camping locations, but read on to discover some of the best camping in Alabama, and some true hidden gems for those who love the outdoors.

Alabama has four national forests: Tuskegee National Forest near Auburn, Bankhead National Forest in the north, Talladega National Forest in the East, and Conecuh National Forest to the south.  There are 26 state parks and historic state parks sprinkled throughout the state.

There are hundreds of privately owned and government owned, established campgrounds with year-round availability.  Many areas of the national forests and some state parks allow wilderness camping, horseback riding, fishing and hunting.

Many of Alabama’s best camping spots boast of a prominent aquatic feature: a river, a lake, a pond, a bay or even the ocean.  The diversity of Alabama’s ecology is surprisingly varied- it’s not all thick daunting woods.

wildernes in alabama

In this article, we will elucidate a number of different prime camping sites in Alabama.  The different camping sites are categorized by region, and vary in terms of camping type, whether you are looking for something more upscale and comfortable, or something more primitive and wild, there truly is a spot for everyone in Alabama.

North West Alabama

The top west part of the state is home to the Bankhead National Forest, home of the famous Alabama Sipsey Fork River.  This part of Alabama has some of the most remote areas for camping and exploring.  The forest land here is lushly thick with trees, poplar mostly, but is also cut with steep towering rocks, waterfalls, and gorges.

Sipsey Wilderness

This area of land spanning over 24,000 acres is the largest wilderness area in Alabama.  It has been dubbed the Land of 1000 Waterfalls, and for good reason.  Scattered throughout the forest along the Sipsey River, are a number of beautiful limestone and sandstone formations creating the perfect environment for waterfalls.

The number of waterfalls and cascades along the trails in the forest, change with the seasons and the rainfall, but you’re guaranteed to see some year-round. There is one parking lot for day use or to leave your car to go backpacking and camping, but that’s about it.

Sipsey River alabama camping

There are no established campsites, no bathrooms, no modern facilities, just nature.  A popular hike with a safe spot to camp at the end of the hike is the Bee Branch Trail, or official trail number 204.  The trail ends in the heart of Sipsey wilderness.

The hike begins along the river at the day use area parking lot.  It’s rated moderate to difficult due to its length and the at times unmarked trail.  You can start at the Sipsey Trail Head and follow the river, or start at the Thompson Trail Head which passes by some abandoned churches and ancient cemeteries.

You are legally allowed to camp anywhere within the Sipsey National Wilderness, no permit required.

Clear Creek Campsite

This campsite is located within the Bankhead National Forest alongside the serene Lewis Smith Lake.  This area is more suited for families and those wishing to experience the beauty of Alabama’s Appalachian wilderness, but not be so far removed from civilization.

camping at Clear Creek Campsite

This area has over 100 campsites, over 500 miles of lake shore, and two designated hiking and biking trails. As this campsite is located within the Bankhead National Forest, you can easily reach hundreds of miles of trails that web through the national forest, including Sipsey wilderness.

Lewis Smith Lake is a prime spot for year-round fishing, boat activities, and leisure.  The campgrounds operate April through October, but the day use area is open year-round.

Northern Alabama

Less wild than the northwest corner, the other northern parts of Alabama contain some interesting camping options as well.  You, of course, have the more traditional sites along rivers and lakes, but there are other options on farmland or private properties that have opened their home for the outdoor enthusiasts.

Honey Comb Campground

A recently renovated campground situated along Lake Guntersville on the Tennessee River.  The campground is located about an hour outside of Huntsville.  It’s a quick and easy getaway to relax along the river, with beautiful wooded trails and quiet walks on the lake shores.

Honey Comb Campground

You can camp in a tent or an RV, the grounds accommodate for both types of camping. This campground has a little something for everyone.  You can rent a pontoon boat, and you can rent an RV, something that not many campgrounds have to offer.

Fishing, swimming, kayaking, bike riding, and boating are just a few of the more popular activities at Honey Comb. You can use the day use area or camp any day of the year.  The only thing that changes are the hours of operation of the general store, which is open later during the summer.

Tune Farm’s Whistle Stop Camp

This stop is a true hidden gem, it’s one of the more off the beaten path camping spots in Alabama.  The Whistle Stop Camp, so named for its location along an old railroad stop, is an interesting experience in between Huntsville and Birmingham.  It is catered more for the road weary travelers, or those of the more weekend warrior persuasion.

Tune Farm’s Whistle Stop Camp

You may even go so far as to call this one ‘glamping’ or glamorous camping. The 260 acre land was first purchased by Dr. Tune, a successful surgeon, in 1968.  He raised cattle and grew various crops.  His decedents kept the farm alive by eventually switching to sustainable farming practices and became Alabama’s first certified organic farm in the 1990’s.

Today, the Tune family, had opened their doors to camping enthusiasts.  They offer nearly 200 acres of space to pitch a tent and camp, as well as offering a cozy room in their renovated barn or farmhouse, complete with private bathrooms and small kitchens.

Central Alabama

Talladega National Forest is the largest nationally protected land in Alabama.  There are also a number of beautiful wilderness areas surrounding popular cities in central Alabama such as Birmingham and Montgomery.

Talladega National Forest

Talladega has a more varied topography with a more mountainous terrain, and is the southernmost start of Southern Appalachian ecology.  The famed Appalachian Trail runs through this ecology, but the trail officially starts in Alabama’s neighboring state Georgia.

Oak Mountain State Park

Oak Mountain is Alabama’s largest state park and a popular camping destination.  Hiking and mountain biking trails abound.  Many of the trails permit horseback riding as well. Peavine Falls, a 65-foot waterfall located within the park, is accessible by a well-maintained hiking trail.

The fall feeds into a decent sized swimming pool with refreshingly crisp spring water.  Swimming is allowed and encouraged. Horseback riding is also very popular within the 25 miles of trails in the park.  If you can’t bring your own steed, you can sign up for a guided trail ride with the Rusted Roof Barn.

Peavine Falls oak mountain state park

Children ages 10 and up can ride as well.  No horseback riding experience is necessary to ride in the park with the trail guides. Oak Mountain State Park offers its campers a private beach to relax on.  There is another beach open to the public as well for day use, but they have reserved one solely for their camping patrons.

Camping options in the park range from back country wilderness camping to posh, waterfront cabins.  There are also equestrian campsites with amenities for the horses as well as humans, RV hookups, and tent pads.  There is an admission fee to the park and camping fees vary.  The park and campsites are open year-round.

Prairie Creek Campground

Nestled in a fork in the Alabama River lies this tiny piece of public land, a haven for the fishing enthusiast.  It’s a quick getaway from Montgomery, under 30 minutes, and has 55 campsites along the banks of the river.  It’s a quiet spot not too far from the city, with peaceful views of the river and surrounding woodlands.

Prairie Creek Campground

It definitely isn’t for the extreme backpacking enthusiast, but it does make a very nice, quick little get away for those living in nearby Montgomery or Selma.

Eastern Alabama

As you approach Alabama’s borders, Georgia to the east and Florida to the south, the wilderness areas begin to thin.  However, there are still some remaining smaller National Park Service areas that remain available for camping and recreation, such as the Tuskegee National Forest, the smallest of the four national forests in Alabama.

Chewacla State Park

Located not too far from Auburn and one of the largest universities in the southern United States, Auburn University, lies the near 700 acres of Chewacla State Park. It’s a swimming enthusiast’s dream destination with a huge 26-acre spring-fed lake, surrounded by lush green foliage.

There’s a web of hiking and biking trails that you could spend days upon days exploring. In addition to well-groomed campsites for tents and RVs, the now disbanded Civilian Conservation Corps built six rustic stone cottages in the 1930’s that are available for rent in the park as well.

Chewacla State Park biking trail

You definitely wouldn’t be roughing it in these cottages, as they now each have a TV, air conditioning, heater, and modernized flooring, bathroom and kitchen.

Southern Alabama

A small portion of the state lies along a beautiful coastline.  There are a number of smaller barrier islands along the border of the state that host some really beautiful campgrounds.  Alabama’s beaches are a very popular tourist destination, however, so there isn’t much land that’s been left untouched.

If you are more interested in the wilderness aspect of camping, beach camping in Alabama may seem a bit too crowded for you.  However, if you are seeking a more family friendly camping experience, the beaches may be perfect.

family camping alabama

Beach camping isn’t the only place to set up a tent at the south end of the state.  There’s access to the Conecuh National Forest, which lies right along the border of Alabama and Florida.  It’s a change of pace from its more northern national forest counterparts, as this park is of more coastal ecology and less densely forested.

Dauphin Island

If beach camping is more what you’re looking for, head south and drive across the Mobile Bay to Dauphin Island.  It’s a small place, only about 1,000 full time residents, but the island has so much to offer.

Besides a beautiful beach side campground with stunning views of the Gulf of Mexico, there’s an aquarium, bird sanctuaries, rich Native American history, historic Civil War Fort Gaines, and a hefty tourism scene- restaurants, condos, hotels, and many family friendly activities.

The lower right side of the tiny, 166 square mile island hosts a decent sized campground, the Fort Gaines Campground.  There is access to secluded beaches, boat launches, bike paths, and bird sanctuaries.

Fort Gaines Campground

You can also rent water sport equipment, such as kayaks or stand up paddle boards, or simply enjoy the salty breeze rolling off the Gulf of Mexico while relaxing on the beach.

The only thing to keep in mind about travelling and camping on Dauphin Island is tropical storms.  If you are tent camping, check the forecast before you go to ensure you won’t be trapped in bad weather on the tiny island.

Gulf Shores

Gulf State Park is another premier beach camping spot in Alabama.  The state park encompasses miles of striking white sand set against the deep blue waters of the Gulf of Mexico.  There are a number of sites for more primitive tent camping, but there are also cabins and cozy cottages for rent along the shoreline.

Gulf State Park cabin

The Gulf Shores campground is minutes away from the airport, and is a short drive away from the Alabama Gulf Coast Zoo- a must see for the family.  The range of activities varies drastically from beach volleyball to biking, sun bathing to boating.

Open Pond

The Open Pond Recreation Area, located within Conecuh National Forest, is a well-maintained campsite in southern Alabama.  The area is an ideal spot for game hunting and fishing, as well as hiking and exploring the great outdoors.

There are over 70 tent camping sites and 60 RV sites, all available year round.  Hiking enthusiasts can enjoy a full day spent along the 20 mile Conecuh Recreation Trail that circles the lake, meanders through beautiful pines, all the while not changing too much in elevation.

open pond alabama rv camp

It’s a quiet, often overlooked spot, and makes a great camping destination for those seeking more wilderness and seclusion.

Things to Look Out For

As always, before heading out into any wilderness or outdoor adventure, be aware and be safe!  Be prepared by always carrying a first aid kit, a light source, and plenty of water.  Alabama can get very hot and humid in the summer, and the southern parts of the state can receive heavy rains and strong winds from tropical storms coming in along the Gulf of Mexico.

The wilderness is home to some potentially dangerous animals such as feral hogs, bears, and venomous snakes.  Read up on the ecology and fauna before heading out just so you know what to expect.  Often times with any animal encounter, as long as you don’t act as a threat and don’t provoke them, they will leave you alone.

snakes in alabama

A final thing to be aware of is the annual Hangout Fest in Gulf Shores.  If you are planning on camping along one of Alabama’s many premier coastal campsites, you may want to avoid the weekend of the Hangout Fest, usually in May.

It’s a music festival with a variety of genres that attracts tens of thousands of visitors to the small Gulf Coast.  The area can quickly fill up and be very crowded.

Why We Camp

So why do we camp?  Why do we spend our hard earned money to leave the comforts and amenities of our home and hang out in the elements?  We do it for the love of the outdoors, our deep appreciation of nature.  We are so lucky in the United States with literally millions of acres of protected forest land and wilderness.

desert camping in alabama

There are seemingly endless opportunities to camp in the United States, and Alabama should not go unnoticed for its magnificent expanses of wilderness. Stephen Maher, the first director of the National Park Services in the 1920’s, has famously been quoted for the reason behind operating the National Park system and why protecting natural land is so important.

It’s a good reminder for all of us why it’s so important to spend some time out in nature, away from the stress of daily life: “A visit inspires love of country; begets contentment; engenders pride of possession; contains the antidote for national restlessness.”

Best Hikes in Arizona: Best Trails in the Grand Canyon State

0
Hike Grand Canyon Arizona

When people talk about Arizona, they speak about its capital of Phoenix, the stellar universities in the state, that enrich the educations of so many students every year, and then people think about the Grand Canyon – geologically aged at 5 – 6 million years old and said to be the location of some of the best hikes in Arizona for homo-sapiens since our first steps on the soils of the Americas, some 15,000 years ago.

The 277-mile in length gouge in the earth that, at certain intervals, have dips and falls to the river below ranging a mile drop. It is truly a wonder of the world, a revel to the human eye, and a masterpiece of nature. Arizona has much more to offer by way of natural, unbelievable beauty in is plentiful landscape.

The state boasts over ten national parks to hike, camp, skip, jump, and run through. All with adverse similarities and obscure differences. It is a hell of a state for those into their hiking, though, more than anything else. Finding the perfect spot for you and hiking needs of the modern homo-sapien hiker can be tricky with such a plethora of areas to choose from.

girl hiker sitting on stone

A little research into the land can do a world of good when it comes to your next trip, so let us take a look at the best hiking trails in Arizona, their attributes, what makes them unique and worth seeing. So fill your day pack that you require, and let’s get hiking.

Let’s Start Slow, With Some Simple Hike Trails

Starting with some of Arizona’s less formidable trails is merely to ease us all into the where and the what that Arizona has to bring; but know this, that only because these hikes are easier on the foot than traversing down the banks of the Grand Canon by way of path or by abseil, does not make them all 100% safe.

So stay ever vigilant, keep your party safe, and remember to have fun in the promise. Now, after that brief note of caution, onto the trails.

Reavis Ranch found deep in the Superstition Wilderness

Named after Elisha Reavis; a hermit who had come to settle up in the mountainous region in the late 1800’s. An elusive man who spent most of his life either teaching elementary schoolers, divining for gold in the most tumultuous regions of the state, or fighting in the many Indian Campaigns of the time.

Reavis Ranch in arizona

As well as owning the first library of books in the Superstition Mountains, killing a bear using a gun that misfired, and rearing horses and mules, he is best known for his planting of an apple orchard 700ft in elevation. A working orchard that surpassed its planter and continues on some hundred years later.

The ranch and surrounding areas have turned into hiking tourist attractions as of late, where the views are stunning and the apples are plentiful, free to those travelling through the orchards.

This trail is for those interested in the deep history of the gold rush of the late 1800’s outside of California, beautifully kept meadows and orchard, and if you wish to find something as amazing as pine trees just above the blazing heat of the desert sands of Arizona.

Flat Iron, the connection trail to the Superstition Mountains and Four Peaks Wilderness

Another trail of note in the Superstition Mountains is that of Flat Iron. Also known as the Siphon Draw, this is a little less a walk in the park as it is more of a trek through the a rocky terrain that once surpassed will make you feel like a king of all that surrounds you.

hakers in Siphon Draw arizona

A six mile round trip through the rough of the Superstition Wilderness, with some of the most prominent and bewildering rock formations that you are likely to find in the great state, this hike is well worth the effort of its traverse.

This hike is not recommended, though, right after even the slightest of rain falls, as the majority of its paths is made up of slick rock which is not fond footing when slippery.

The gaining of both of the territory’s names are interesting in of themselves, Flat Iron is aptly nicknamed for a large protruding spike of rock that stands at 4,800 feet in the air, and the name of the land Siphon Draw came from the name of the trail.

Browns Peak – Prominent in the Four Peaks Wilderness

A beautiful mountainous pass, found out east of Phoenix in the northern region of the Four Peaks Wilderness. Brown’s Peak is the highest of the four peaks in the territory at over 7,000 feet tall. The path takes you all the way up to the summit, which offers an incredible view.

browns peak four peak

A good sized portion of the entire state of Arizona, and even the highest mountain in the state Mount Humphrey’s, can be seen on a clear day up there.

As well as being revered as an all natural crows nest, the area that surrounds Brown’s Peak has a large black bear population, so be careful when on the trail and stay in packs. Do not let the presence of bears be of alarm, as they stay away from hike trails and rarely cross them unless majorly provoked.

From Molehills to Mountains – Higher Elevated Trails

Mount Wrightson, found just outside of Tucson, in the Santa Rita Mountains

Just over 9,000 feet, Mount Wrightson looms over the nearby city of Tucson in an almost protective fashion. Found in Madera Canyon of the Santa Rita Mountains, this mountain’s peak offers an incredible panoramic view of southern Arizona.

Mount Wrightson santa rita wide view

If you make it to the summit on a clear enough day, you can even be able to see parts of Mexico as you gaze across the landscape. There are two trails available to the public for reaching the summit, and they both cross one another making a classic figure 8 symbol.

The shorter trail of the two at 10.8 miles round trip is the Old Baldy Trail, and three longest coming in at 14 miles round trip, is known as the Super Trail. As mentioned before, both trails lead to to the mountain’s summit, and cross over one another. So the only question you need ask yourself is can I make those extra four miles?

Mt. Baldy Loop looming over the top of the White Mountains

Not to be confused with California’s Old Baldy Mount San Antonio, Mt. Baldy of Arizona shares the same beauty and majesty as its cross state cousin, though towers a lot higher than the SoCal treasure. There are two main hiking trails available for the general public to take with two different peaks to achieve on the hike.

hikers on Mt Baldy loop

Unfortunately, if you are not a member of the White Mountain Apache Tribe, you are not permitted to make it to the true summit of the mountain. But there is beauty in both the public trials of West Baldy #94 and East Baldy #95, and the connection path, #96, that turns the whole trail into a perfect loop. A lot of fun in taking these paths, with some incredible views to compensate the tough journey.

Mount Kimball of the Catalina Mountains

Another mountain that stands close to the city of Tucson, but this time found in the southern peaks of the Santa Catalina Mountains. Mount Kimball is the highest peak in that region, and is what is known as a ‘Sky Island’ – a mountain with its lower slopes deserted, cracking and hot, but the higher you go, the more vegetation and even forestation is found on the higher you get.

The mountain trail is best for seasoned hikers as it is a steep climb on the way up to the summit, and even then can be a tricky trail to hike. Like many of the great mountains in Arizona, this hike is giving you the option of what trail to walk up; Finger Rock Canyon or by Pima Canyon.

Pima Canyon arizona

Both will get you to the summit of Kimball, they just provide different starting routes. Finger Rock Canyon starts you off on a major road that lead to foothill paths, whereas the Pima Canyon trail starts further west and cuts through many other trails along the way. Both are the same level of difficulty to hike up.

Mount Humphrey’s – Highest Mountain in the State

Mount Humphrey’s stands as the tallest mountain in the entire state of Arizona, its peak at 12,633 feet, makes it less of a hike and more of an expedition. Yes, people, before you have come and planted their proverbial flag, but you know what they say, “you gotta do whatcha gotta do”.

Humphrey’s Peak is the hiking trail used to scale the sides of the mountain. The mountain is found a few miles out of Flagstaff, Arizona, and helps form the Kachina Peaks Wilderness Area, that takes up nearly a 18,000 acres of land within the Coconino County.

girl sitting on Humphrey’s Peak

The mountain was named after General A. A. Humphreys, who worked for a time as US Chief of Engineers. The views from the summit of Mount Humphrey are truly remarkable and will brighten up any photographic portfolio; you just have to be proficient enough a hiker to make it all the way to the top.

For Those Opting for the Scenic Route

Kendrick Peak – a lesser Humphrey’s Mountain

Those who wish for a less grueling hike and climb than that offered by Humphrey’s Mount, then you should be heading over to Kendrick Peak; a less intense elevation at 10,000 feet, which still allows bragging rights for you and your party.

Just shy of Flagstaff and an hour from Phoenix, the state’s capital city, stands Kendrick Peak. Found in the San Francisco volcanic field, a 1,800 square mile area filled with over six hundred volcanoes. Some of which have been geographically aged at around six million years old, and the youngest at around a thousand.

hikers on Kendrick Peak top

So, even though the area has not seen a deadly eruption of one of the volcanos for some years, does not mean that it is wholly advisable to stray too far from the beaten hiking path. It is still a fun trail that afterwards grant you the bragging rights of hiking through a volcano field.

Oak Creek Canyon, Sedona

Sedona is an area of Arizona that is plagued, and bettered, by steady and unrelenting tourism attractions, which makes it a hard place to find and maintain a little bit of solitude. Though there is a small area, within a small canyon, where peace and quiet should really be present in its name. At the West Fork of the Oak Creek Canyon, beauty and serenity can be found with ease.

hiker in west oak of Oak Creek Canyon

A hike trail lay deep in the east of the tourism, hiking down to this river bed enclosing feels like something out of an old western film. The waters give the looks of those ripe for divining, and are cool to the touch as you trail through. A real refreshing experience to travel to and through.

Havasu Falls. Visit as long as you obtain permission

The beauties of the Grand Canyon never cease to amaze people. Like the fact that in the middle of all of that dry earth, scorching deserts, its high peaks and mountains, there cascades deep and mystic waters for us to take our time in hiking to, and then spend the rest of your day diving into the scenery.

Majestic waterfalls are awaiting you just within the Havasupai Indian Reservation, one of many located in the state of Arizona, so that means that these waters are only accessible to you after obtaining a special permit to use the land for hiking through and camping on.

Havasupai Indian Reservation

But the turquoise rich, waters, are so worth the hassle of the permit offices. One of the other minor hiccups is the fact that the car park and main entrance are both located a smooth downhill climb from the campsite – which makes for a steady climb to get back to your vehicle so pace yourself.

With photogenic scenes of raging white waters protruding from a mouth, cut out of the red rock holding the valley together, who needs Instagram filters? The Havasu Falls are simply stunning and they are a must see during your time in Arizona. Make sure you check it out.

Enjoy Your Hikes and Stay Safe Out There

Regardless of which of these magnificent trails to hike down, to the top of one of the many mountains the state has to offer or plunge deep into the valleys and ravines in the most famous canyons the country has to offer, you are guaranteed to enjoy yourself and wish that you had more time to explore the next trail head endeavor.

hiker sitting at Horseshoe Bend

Best Hikes In Alaska: Great Ideas for the Frontiers

0
group of people hiking in alaska

Welcome to Alaska, one of the few remaining frontiers of human habitation. Alaska is a place all into itself, it boasts beautiful vistas and vast untouched wilderness. You can witness soaring glaciers, walk through pristine wildflower meadows, hike through stunning forests and make your way along beautiful coastlines.

This is just the tip of the iceberg. The country contains a bounty of astounding flora and fauna. Explore the great outdoors and soak up Alaska’s rugged natural environments. Alaska will captivate the most avid hiker. But, with so much on offer in terms of adventure, many people wonder where to begin?

We offer you our top picks, the best hikes in Alaska that will sate the most intrepid explorers.

Top Hikes in Alaska

Flattop Mountain

Undoubtedly Flattop Mountain is the most popular hiking spots in the country. The mountain itself is 1,070 meters high or 3,510 feet. This quintessential hike up Flattop Mountain can be accomplished in the space of a day. It is a great choice for those individuals who want to experience a magnificent hike, but also like the idea of sleeping in their own beds.

hiker on Flattop Mountain in Alaska

The mountain is easily accessible. There is a regular shuttle service that operates out of Anchorage. You can also drive to the mountain yourself, the views by road are great. Flattop Mountain caters to a range of abilities and offers hikers a selection of well-marked trails to choose from.

You can decide which route is best suited to your level of physical fitness. The terrain is varied, with established trails found in the middle and at the base of the mountain. The trails are made of packed earth and you will find stairs along the route, they are well maintained. Getting to the summit can be tricky as there is no marked path.

The rocks and the gradient can prove to be a challenge so keep this in mind. The final ascent to the summit is steep and can prove too difficult for some individuals. If you do make it to the summit ready yourself for some stunning panoramic views.

From the summit, it is possible to see Anchorage and Mount Spurr, Denali and Mount Foraker, weather permitting. If you can’t reach the summit, don’t worry about it. The mountain has some fantastic low lying trails that are a pleasure to walk around. The lower trails also offer stunning views and are suited to any ability.

hiker on flattop summit

Whatever path you choose, Flattop Mountain is a spectacle to behold and a wonderful experience for all. Nature can be seen in abundance in and around the mountain, so keep your eyes peeled. Moose, bears, eagles and more reside in the area and can be spotted throughout the year. Camping is also an option if you wish to stay overnight.

Camping is permitted half a mile from the trailhead, you might even get lucky and spot the northern lights. Be aware of the weather as it can get cold, a good jacket and some sturdy boots are highly recommended. In winter warm clothing is a must and adverse weather conditions are a possibility.

Ice and snow can be a hazard and these conditions bring with them their own difficulties. Remember, always bring lots of water and some high energy foods.

Exit Glacier and Kenai Fjords National Park

The Exit Glacier and Kenai Fjords National Park, are an unforgettable experience. If you want the chance to encounter the last remnants of an ice age and witness the might and majesty of glaciers first hand, this is a great choice for you.

Girl In Kenai Fjords Wilderness

The park and glacier are open all year round. Normally access by car is restricted from November through until May. Roads close when it snows, so keep this in mind. Winter access is possible via other means of transport. Remember, always check the weather before heading out as conditions can affect the transport and hiking.

The national park provides some great educational learning tours. You can book a ranger-led expedition where you can learn more about the glacial habitat and the park also provides an audio guide. Exit Glacier and the surrounding national park offer a selection of fantastic hiking options.

You can choose between solo exploration or you can head out in groups. When it comes to the trails themselves, they are well marked, managed and maintained. You can choose from three main trails, all of which are fantastic.

Edge of the Glacier Trail

The Edge of the Glacier trail (lower trail) is rated as easy and can be accomplished within the space of two hours. It is wheelchair friendly and offers beautiful views. It will bring you to the edge, an area where you can view the glacier face on and listen to the sound of it moving.

hiker on the edge of Exit Glacier

Keep a lookout for time markers as you hike. These markers have been placed in accordance to the recession of the glacier and offer an insight into the changes that have occurred in the landscape over the years.

Toe of the Glacier Trail

The Toe of the Glacier trail is an offshoot of the lower trail. It will bring you off the trail and over the glaciers rocky outwash zone. The trail is not always accessible. If you want to get a closeup with the glacier, it is a great route. Please watch out for glacial water, do not try and cross fast flowing streams and overhanging ice is best avoided.

Harding Icefield Trail

The Harding Icefield trail (higher trail) is more of an adventure and a greater challenge than the lower trails. It takes up an entire day to hike the trail. The trail eventually leads to a summit viewpoint (height 4.1 miles or 3,500ft). This is definitely a more intrepid experience and is suited to physically healthy individuals.

The Harding Icefield trail is a truly immense hiking experience and takes you through some incredible scenery. The final destination is well worth the hike, with the viewpoint positioning you on top of the glacier. If these trails are not challenging enough and you’re looking for something more extreme, try contacting one of the local mountaineering companies.

harding icefield trail top

They operate various tour services and provide, gear, safety and expertise. It is possible to do more advanced hikes and courses in ice climbing are available. Wildlife can be found in abundance throughout the park and around the glacier. You will have the chance to spot a great range of birdlife, as well as terrestrial mammals.

You might see beavers, bear, moose and more. Always tread carefully and leave no trail. Remember, you are in a delicate ecosystem. Pack for cold weather and bring many layers. Bring lots of food and a decent supply of water with you as you will need it. Prepare for your chosen trails well and enjoy the ice.

Tongass National Forest

An incredible journey awaits those that step into the Tongass National Forest. Tongass verdant green, wet and wild forest wonders await you. Enjoy your hike as you pick your way through some stunning scenery. You will witness huge ancient trees and young growth, ferns and mosses and plants of all sizes.

Immerse yourself in the Tongass, an interconnected web of nature. You will find yourself in the heart of bear country, with wild salmon in the rivers and whales off the shore. Tongass National Forest has an outstanding variety of marine and terrestrial wildlife. The Tongass National Forest is huge and is a very special place.

hiker in tongass national forest

It is a protected habitat for the bald eagle and brown bear. The National Forest encompasses a great range of different types of terrain. You can walk through alpine meadows, or traverse rain forest bridges. Witness ice fields, glaciers, explore caves and islands and so much more.

The hiking trails are very well maintained, clearly marked and extensive. The Tongass National Forest has well over 700 miles of trails for you to explore. Pack waterproofs as you are in a rainforest area, it will be wet.

Always do your research and plan your route before entering the national forest. The forest is vast in size and although the trails are well marked you could easily spend days walking around. With so many trails on offer, you will be spoilt for choice, from following deer to witnessing waterfalls, bear spotting and more.

When it comes to wildlife watching, prepare to be amazed. Be considerate and do be careful, you are a visitor and the Tongass National Forest is home to a huge number of wild animals. The variety of animal life within the park is impressive. Sightings of wolves, bears, moose, deer, bird life and marine life are common.

wildlife in tongass national park

However, do be cautious, bear and moose can cause damage if stressed or startled so please be aware of this fact and respect them and the habitat. It is advised that you brush up on your knowledge of bear safety before entering the Tongass National Forest.

Camping is allowed within the Tongass National Forest and it is possible to spend a great deal of time within the forest limits. Bring your camera and prepare yourself for a walk on the wild side.

Arctic National Park

Do you want to go off trail and find true freedom in the wild? If the answer is yes, then the Arctic National Park (also known as the Gates of the Arctic) is truly the place for you. Traveling by foot through this wonderful landscape gives you the chance to experience a true wilderness adventure. The park has no established trails and no roads.

It is the second largest national park in America. It covers a landmass that is slightly larger than the country of Belgium, totaling at 8,472,506 acres. Visitor numbers are predicted to be as low as 10,000 over the course of a year, the chances of sighting a fellow human are slim. You have no official visitor center or official camp sites.

Arctic National Park

You will be on your own and very much of the trail. Preparation is everything for a hike such as this. You need to do your research and do it thoroughly. Make sure you bring high-quality equipment and ample provisions. Bury yourself in a map before you leave and bring a compass and a GPS locator when you go.

This is not a hike for the faint-hearted. You should be proficient in outdoor survival to take on this challenge. Experience is crucial and you need to be confident in your abilities. Prepare for snow and prepare for the sun, as you will get both. Always remain cautious and be aware of the challenging terrain around you.

You may have to tackle steep ascents and descents, so you must be physically fit. Hiking in the Gates of the Arctic, will be testing and can be incredibly demanding. It is highly probable that you will have to tackle stubborn vegetation and cross watercourses and wetland whilst on your hike, so prepare for this too.

If you prepare for this hike correctly and have the necessary experience in taking on such a challenge, the reward will be great. It is an untouched land and contains some of the most amazing scenery you may ever get the chance to witness. The Gates of the Arctic are host to a wide range of wildlife.

Gates of the Arctic national park

If you are fortunate, you may be able to see bears both grizzly and black bears, caribou, voles, lemmings and more. The rivers are also abundant with fish and you will find millions of insects.

Head out in the summer and enjoy this vast expanse of pristine untouched wilderness. The Gates of the Arctic offer true escapism and a chance to go back to an unblemished natural environment.

Final Thoughts

Alaska has a great deal to offer to the intrepid hiker. Explore Alaska, it is a great land full of natural wonders and adventures. Stay safe and happy trails.

family hiking in Alaska

Bivy Sack vs Tent: Ultralight Camping Choices

0
The Moonwalk and Escape Pod fit together perfectly

The possibility of modern ultralight camping, but might be just as aptly called extreme camping, with necessities pared down to bare minimum.

This sort of camping seeks to keep everything as lightweight as possible using minimum ultralight equipment yet still be in the realms of some safety and comfort. This form of camping requires only essential sleeping arrangements using options like either a bivy sack or an ultralight tent for protection from the elements.

nigor-piopio-solo-tent

With this in mind there will be personal reasons for choosing bivy sack vs tent so let’s explore the choices with their advantages and disadvantages.

Advantages of ultralight backpacking

In general some advantages of ultralight backpacking include:

  • It takes fewer tolls on your body. Lighter weights mean less stress on joints, especially feet, ankles, knees, hips, spine, and shoulders. If you are constantly carrying extra weight the compounding effects may have accumulating effects on your body, so any lesser weights should be appreciated. You may arrive at camp areas in fresher shape and lighter spirit.
  • You can cover the extra miles easier. With lighter weights you can set goals for covering longer distances or climbing more difficult routes with more ease. Or perhaps it will just give you safer parameters for covering distances in the wilderness, so you arrive at camp areas with more time to spare.
  • It keeps life on the trail simple. There is no point trying to “get away from it all” when you feel you have to “take everything including the kitchen sink”. The minimalist ethic simplifies the trip and helps to simplify your tasks and keep your mind free for enjoying every step.

When considering which sleeping arrangement is the best, take into account the various components – shelter, sleeping bag, and protection from the ground. All should combine in such a way to give you adequate shelter and to keep you warm and comfortable. Ultralight camping is a balance of keeping just the right amount of suitable equipment to remain safe, dry, warm, and happy yet being light enough to enjoy the journey you choose.

Ultralight backpacker

The whole of your backpack is connected as a survival system made up of shelter, clothing, eating (hydration, food, cooking), safety and packing method. Weight in sleeping gear can make up a considerable percentage of this allowance so the lighter the whole proportion the better overall. The shelter and sleeping part of the system should integrate for best possible options for shelter, protection, and safety. And whatever system you choose has to ultimately store yet be easily accessible in your back pack.

Bivouac /Bivvy/ Bivy Sacs/Sacks/Bags – the same by every name

A bivy sack is, in its simplest form, an ultralight waterproof cover for a sleeping bag that takes the same form to fit any sleeping bag. The most basic are form fitting, leaving little space at all around the body. Other more recent forms known as bivouac shelters have hoops or structure around the shoulder and head area that gives the occupier more head space to eat and  to move and even roll over with ease without moving the sack layout.

Bivy sack

Some important advantages of versatile models are,

  • The lightweight. Many models are lighter and smaller than any other options available yet still able to provide adequate shelter in most weather conditions. They certainly offer rapid opportunity to get warm quickly.
  • The small packing size. The simplest of bivy sacks will take up little space in any backpack and don’t require extra equipment to set up.
  • The rapid speed of setup and packing up. In critical weather conditions, especially in stormy or snowy temperatures, they are simple and rapid to set up compared to best ultralight tents. This factor could be especially important in emergency situations or if decamping in the dark is necessary.
  • The small space required for placement. These sacks are able to be laid out in very small flat areas, with minimal space for lying down for instance in narrow rock ledges, cramped snow caves, or small flat areas on rocky ground.
  • The lower cost compared to single person tents. If costs are a critical factor, these sacs offer good features for more economical costs.

We can use the above aspects as criteria for evaluating which models are more suitable for various situations.

Bivy Sac Fabrics and Construction

Bivy sacks are usually designed in what is referred to as the mummy shape which closely follows body shape, being wider at the shoulders tapering towards the feet with closure over the head. This form fitting shape is what enables the sack to provide so much warmth.

Bivy sack

With the advent of modern synthetics, manufacturers have been able to produce very strong, light-weight fabrics, that provide wind and water proofing that have, so far, not been possible with more traditional fabrics like canvas or oilskin that were used for old style camping swags. In fact the biggest problem with these synthetic fabrics has been that they are so waterproof, they trap moisture completely which builds up sweat and condensation.

A lot of moisture is lost through our breath and when holed up, in a well sealed bivy sack to keep out the cold weather elements, this moisture condenses inside the sack itself. The sleeping bag can then become quite damp and that can set up a chain reaction so the camper inside starts to get chilled. When sealed sarcophagus like inside one, condensation build up can a problem for comfort and warmth.

To offset this major drawback, the sack manufacturers had to add some method of ventilation. In warmer weather this may be achieved simply by leaving the closure open around the face, but this defeats the purpose of staying warm in colder temperatures so actual construction materials are the key to overcoming this problem.

Winter bivy sack

Some sacks also have insets of mesh that can be left open around the face area to allow ventilation but to keep any bugs at bay. In fact, when insects are an issue, there are some models constructed almost entirely of mesh as insect protection which would prove effective when sleeping in the warm open air or under a tarp.

The relatively new generation of synthetic fabrics has one way “breathability”, which means moisture is allowed to evaporate from inside to outside yet the weave is not permeable from the outside. One of the first fabrics of this type was the trademarked Gore-Tex so similar fabrics are often generically referred to by the same name. The ground sheet side of the sack is usually constructed of totally impermeable material while the upper is of the breathable fabric.

If a bivy sack is to be your camping choice give some thought to what you will actually be sleeping in, which style and weight of the bag. Try to choose a bag that will be warm enough to get you through the planned trip rather than any that might cause overheating during the night. Note also the down sleeping bags, while super for warmth, do not function well if damp inside a bivy sac so lightweight synthetic might be a better choice in some areas.

Sleeping bag in a bivy sack

“Ripstop” threads are also often woven into the fabric for durability. This is where an extra strong thread is woven in at regular intervals, for instance, every ½ or ¾ inch, to resist tearing should the fabric suffer damage. This way the fabric can be kept at a lighter weight but still have better durability.

Packing it All In

Again the lightweight modern fabric options have a lot do with the suitability of bivy sacks as opposed to ultralight tents. They will be lighter than a tent because they don’t contain so much fabric and because they don’t require extra fixing stakes, poles or ropes unless they are the more structures bivouac shelter style.

Outdoor Research Alpine bivy packed

Sacks should also pack down smaller than a tent. When backpack space is at a premium and everything for a multiday hike has to be carried on your back, it is an advantage to be able to take extra crucial gear even if weight is not so much a factor.

But are You Comfortable?

To bivouac, when referring to non military activity, means to use a natural, temporary shelter like a rock overhang, a shallow cave or a snow cave that does not utilize any tents.  All you have to do is find a suitable place to lay everything out. Bivy sacks are quickly arranged with a chosen sleeping bag and mat inside, especially if using a natural environment feature.

At the other extreme, if you are in an area where camping spaces are few and far between, being able to lay out a sack and sleeping gear may be a huge advantage on a remote rocky ledge. This might also be high in snowy alpine regions where bivying in a dug out snow cave may be perfectly cozy.

The North Face Asylum Bivy

However, the usual lack of storage places for equipment, the lack of space in the sackc and little option for staying warm unless lying down in it, might be quite restricting for overall comfort. If however, you prefer to sleep close the nature in pleasant environments and ultralight camping is high on your priority list, bivy sacks may just be for you. Otherwise you might do well to check out what options are available for single person tents.

Solo Tent Options

The term tent can vary from single layer pole constructions, not much more developed than a well pitched tarp, into a double walled roomy construction able to be well anchored to the ground to withstand high mountain winds.

Eureka-Backcountry-Solo Tent

For the purposes of comparison to bivy sacks in this article I am referring only to lightweight single person tents as those are similarly only suitable for one person. Furthermore, I am not considering tarps in this instance, although they can offer protection similar to basic tents.

Some important considerations for ultralight tents are:

  • Level of comfort. When it comes to being comfortable in a number of environments a tent offers room for relaxation, movement, privacy, warmth, ventilation, shelter, and equipment storage.
  • The lightweight. They may not be as lightweight as sacks, but there is not a huge difference and not enough to make a difference unless very critical when it comes to four-season sacks.
  • The small packing size. If the tent construction can be made utilizing trekking poles, pack space can be kept free for other items.
  • The rapid speed of setup and packing up. Most modern tents have very simple, rapid construction system, so while they may take longer to set than sacks, they still only take a few minutes.
  • The small space required for placement. They may not be able to be pitched on rock ledges, but they are suitable for most environments.

Modern Fabrics for Ultralight Options

As with sacks, ultralight tents are only possible because of modern synthetic fabrics which in the case of tents, is usually some form of nylon which is naturally water repellent. The difference between less and more expensive tent fabric is in the coatings for further weatherproofing. The quality of these coatings varies in cost and longevity, on a scale from the most expensive and best being silicone, through polyurethane down to least expensive acrylic.

Ultraviolet (UV) light causes most fabrics to deteriorate so UV block factors are also added to coatings, but because tents are usually left pitched for longer periods, they will have a shorter life span than sacks, that are usually packed away or rolled up when not in use.

Also, light weight and durability can be enhanced by using ripstop threads in the weave, where the tougher (thicker and heavier) threads spaced throughout warp and weft resist tearing. A small hole is easily repaired compared to a long rip. One trait of nylon is that it stretches when wet, so guy ropes need to be tightened if it is raining, loosened when drying

One consideration that can affect whether using an ultralight tent serves a lightweight purpose better than a bivy sack is to utilize equipment for more than one purpose where possible. Many hikers and backpackers these days use trekking poles so if you are able to substitute trekking poles for tent poles this reduces pack weight and simplifies packing systems.

A man setting up Vango Helix 100 solo tent

Trekking poles help keep balance on rough terrain and also spread weight from lower limb joints back onto upper body. If you are choosing to use poles for walking as well as for tent supports it is best to go for adjustable length poles for flexibility of tent set up.  Robust three-piece adjustable poles are the best option regarding that as opposed to lightweight fixed length or adjustable two-piece.

If you choose a tent with dedicated tent poles, which can also accommodate trekking poles, you can make a choice which to use regarding the trip you are making. If for instance you were planning day hikes from a base camp, it may be annoying to have to leave your trekking poles as tent structure, or to have to break the tent down every time you head out.

Tent Styles are not All Equal

Single Layer Pyramid Tents

The most basic of tenting options are pyramid tents, where a pole supports a single layer of waterproof fabric with some sort of waterproof flooring system, which may optionally, and possibly be an insect protection mesh. If a sack is not to your liking, but you want a cheap ultralight option in milder or dry weather, these single layer tents may be the best option. They can be set up relatively quickly and simply and required skills are easily learned.

Single Layer Pyramid Tents

These do offer privacy, space to move and eat in, as well as protection from weather elements, but they will not be as warm as sacks, yet they may suffer from the same condensation problems. Also, if the tent surface is wet, any physical touch may lead to leakage.

Double Layer Tents

When it comes to comfort and protection from any environmental elements ultralight double walled tents are hard to beat. They are relatively warm as one person’s body heat in a single tent is usually enough to keep you warm with a good sleeping bag and sleeping in most temperatures including alpine. The inner layer prevents condensation build up from dripping down in wet or humid conditions.

Double walled tents provide privacy and some have vestibules which allow cooking in rough weather. You also have space to store equipment away from sunlight and rain. Most also incorporate insect mesh which so there can be double layers in the inner wall to allow ventilation yet keep bugs out.

Double Layer solo Tent

Ultralight tents with dedicated poles are by far the easiest to pitch in most environments for most people. They require fewer skills to be comfortable and confident in any situation and because they set up the same every time, the time to pitch the tents quickly becomes a minimum. If you do choose to camp in a tent it may worth considering packing a lightweight bivy sack for emergency situations, especially one with bright colors and reflective surfaces.

So Where does this Leave Tents vs Bivy Sacks?

Imagine you are planning a long hike, the weather is miserable and now you have achieved your goal all you want to do is set up camp, cook a nourishing meal and collapse into bed. With whatever you have to protect yourself, will you be able to set up camp, prepare food and stay comfortable until you have to continue your hike? Which shelter system will you feel confident enough to set up camp with, and safe enough against the elements?

You are the only person who can answer those questions, so when considering, make an honest appraisal of your wilderness skills before deciding.  However, it is advisable to err on the side of caution. An ultralight tent will most likely you better options for being comfortable and secure in an outdoor environment. For multi day hikes with unpredictable or changeable weather conditions, it is quite hard to go past the comforts of an ultralight solo tent in comparison to a bivy sack.

If you are experienced, confident and have high skill levels you may feel your judgment is up to the most difficult of environments and elements you may opt for the ultra of ultra light camping options with a bivy sack. Whatever you decide, happy and safe camping.

Naturehike Ultraight 2 Tent in Windy Conditions at the Norwegian Fiords

Does Bear Spray Work: An Inside Look at Bear Spray Effectiveness

0
Does Bear Spray Work

For those who hike, hunt, camp or do other outdoor activities in wooded areas where bears are known to live, bear spray may be a necessity. Bear spray can be used to spray into a bears eyes if it gets too close to you and you need to get away. This can slow the bear down, or stop it all together, from an attack.

Having bear spray may make you more secure while you are enjoying the great outdoors. But many have wondered, does bear spray work?

The bear spray effectiveness will differ by brand, but will be sprayed into a bear’s eyes from a certain distance away and hopefully prohibit it from attacking you. Bear attacks can occur and can lead to death, which is why bear spray can be an effective tool while you are hiking or camping. It does not hurt to be safe when you are far away from any emergency response help.

man-hold-bear-spray

You will learn that there are areas where bear spray is not legal, and also places where it is legal to carry. Many national parks allow you to bring in bear spray, but some do not. You will find out which ones do in this article. You will also learn some of the dangers of bear spray, the ingredients and more.

This article will also show you about canister sizes and the range in which the spray can reach. Being able to be further away from a bear and spraying the canister can allow you more time in which to escape a dangerous situation involving a big bear.

bear-spray

Remember, safety is the most important factor when you are outdoors where you may be subject to a bear attack. Being prepared is the only thing you can do. Thus, we are going to show you the features of bear spray, show you some great brands that sell bear spray, and give you the low down on the good and bad of this product.

Features to Consider

There are many features that you should take into account before you purchase just any bear spray. You will want to think about how far it will shoot, how many grams are in each burst, etc. Here is where you will find all of that information and more.

Weight

There are many brands of bear spray on the market, and they will all weight differently. Some bear sprays can come in small containers that fit on a key chain along with your car keys. Then there are some bigger cans that can fit onto a hook on your belt.

sprays-for-bears

These bottles do not weigh a whole lot, but you should always consider weight when you are packing all of your gear for hiking or camping. You will also have to decide where you are going to store the bear spray if it is not going inside of your pack. It can be attached to your pack or waist for easy use.

Range

The range in which the bear spray can burst is highly important because you want to be able to deter the bear from attacking you from as far away as possible.

range in which the bear spray can burst

Each brand will have its own range in which it can reach, some can go 35 feet out, others can go further or not as far. You will want to purchase bear spray that can be shot out dozens of feet so you can survive a possible attack.

Glow in the Dark Safety

Some brands of bear spray have a glow in the dark safety, which allows you to not only find the canister in the dark, but be able to point it outwards toward a bear. This is a neat little feature that keeps you from searching around your backpack for your item in the dark.

Holster

Many bear sprays come with a holster, like regular pepper sprays. This allows you to clip the bear spray onto your keys, belt, backpack or other object so you do not lose it or spray it by accident. Many users prefer having a holster because it allows for easy access to the bear spray and for easy storage, when it does not fit into your pack.

Bear Spray Holster

Holsters can be of various sizes and generally come with the pepper spray. If you want a holster, but your pepper spray does not come with one, you can always order one or purchase one at a store that fits the canister.

Grams per Burst

The grams per burst refers to the amount of spray and force that will protrude from the canister. For example, you should look for something at least 44 grams per burst, upwards of 52 grams per burst. This allows for a full stream to come out of the can and straight at the bear with force. The higher the grams per bust, the better it will be.

How Does Bear Spray Work?

In short, bear spray does work. It is effective, by using crushed peppers that are put into a canister and pressurized. The active ingredient in this is oleoresin capiscum, which will cause a burning sensation in the eyes, and other symptoms that will hopefully deter an attack on you.

camping-bear-spray

The lachrymators from the spray will affect the bear’s cornea and make it star tearing up and possibly become temporarily blinded from the spray. The mucus membranes are then effected and the tissues in that area will experience irritation. Once you have fired off the bear spray, the bear can experience a number of reactions including:

  • Tearing of the eyes
  • Burning sensation
  • Runny nose
  • Pain in the eyes
  • Swelling
  • Redness
  • Soreness
  • Trouble breathing

The best thing about bear spray is that it is not lethal, and will deter a bear that is going to attack you. It will disorient them, hopefully, long enough so that you can get away from them and get to safety.

girls-repelling-bear-spray

Many users say that you should use a holster while carrying bear spray because that is the most effective way in avoiding spraying yourself by accident. You do not want to spray yourself by accident when you are trying to outrun a bear!

Did you know the bear spray was invented by Mark Matheny around 1992 after he was almost killed by a bear. He tried to use regular pepper spray on the bear.

After the attack, Matheny developed a pepper spray that was very useful against bears because it allowed the user to shoot from far away, was more potent than regular pepper spray, and it lasted longer.

man-hold-in-hands-bear-spray

Now we will give you some specifications on some different bear sprays. Below, you will see a table showing you some of the different brands on the market and what their specifications are.

Bear Spray Specs Frontiersman Bear Spray Sabre 3 in 1 Spray Counter Assault Bear Deterrent Guard Alaska Bear Repellent Sabre Red USA Pepper Gel Guard Dog Security Pepper Spray
Weight 9.2 oz 0.2 oz 10.2 oz 9 oz 1.8 oz 1.8 oz
Range 35 ft 10 ft 32 ft 20 ft 18 ft 15 ft
Shelf Life 3 years 4 years 3 years 4 years 4 years 4 years
Holster No Yes Yes Yes Yes Yes
Glow in the Dark Safety Yes No No No No No
Amazon Stars 4.5 of 5 4.5 of 5 4.5 of 5 4.5 of 5 4.5 of 5 4 of 5

All of these great products are effective and do their job, as you can see by the fantastic ratings they have. As you can tell, the bigger the canister, the more pressurized the spray is and thus it can spray farther. The smaller canisters, spray several feet less than the larger ones. This is something to keep in mind when you are shopping for bear spray.

Another thing to keep in mind is the shelf life of the bear spray. Hopefully, you will never have to use it after you purchase it. If you fortunately do not use it, know that it does have a shelf life that will be listed on the product’s packaging. For the most part, you can expect you bear spray to last 3 to 4 years on average.

shelf life of the bear spray

Another thing you need to know is if using bear spray is legal where you are. It is completely legal to use in the United States, but some national parks have banned the use of it.

However, several parks recommend that you do bring the spray along with you. They know there are many bears who live in the national parks and that there is a chance of an attack.

They want humans to be able to protect themselves. States like Hawaii allow you to purchase bear spray where regular pepper spray is not legal. If you are located in Canada, it is legal to use bear spray strictly for the use of bears. If you happen to spray a person with bear spray, it is considered illegal.

repelling bear spray on person

Here is a table of the top 10 national parks in the United States that tells you if they allow bear spray.

Top 10 National Parks Allow Bear Spray?
Yosemite National Park No
Yellowstone National Park Yes
Grand Canyon National Park No
Zion National Park Yes
Acadia National Park No
Grand Teton National Park Yes
Glacier National Park Yes
Great Smoky Mountains National Park Yes
Olympic National Park Yes
Rocky Mountain National Park Yes

Never use bear spray for anything other than its intended purpose. For example, if you spray clothing, it can attract bears. It is only effective in a concentrated dosage straight to the animal. Also, you should keep the canister in a cool and dry place.

If they are left in a hot area, such as a car on a hot day, the canister can explode. Not only is this going to be harmful if you are nearby, but the clean up will be long. Plus, bear spray can be a little expensive, so you do not want to waste any of the spray if you can help it.

bear-sprays

All bear sprays are required to be registered by the Environmental Protection Agency, and will be clearly labeled. The EPA recommends you keep the spray in an easy to reach spot that is near your sleeping area, toilet area and cooking area.

What Do Others Have to Say?

Those who have used bear spray is a great product to have along with your gear if you are hiking, camping, hunting, or in wooded areas where there are known bears. Users felt safe with the spray on them, knowing they had protection if they encountered a bear.

Users did say that if you have never used bear spray before, you should practice once or twice so that you know how to use it. Some canisters can seem a little tricky, so take the time to read the instructions and give it a test run. You do not want get caught up in a sticky situation later on. Being safe and prepared is the only way to go. Users say watching some tutorials online were helpful as well.

man use bear spray

Those who have purchased this product state that it works better than your average pepper spray, thus giving a greater burning sensation to the bear.

Many users claimed to be animal lovers and wanted to use bear spray as a deterrent because it is non lethal, which means it will hurt the bear but only temporarily, and it will not kill it. Users see this as a last resort option, only to be used if they are in clear danger.

Some stated that bear spray can be used on other animals if need be. For example, one user stated that he used it when a couple of dogs were chasing him, trying to attack. The dogs were deterred by the bear spray and were incapacitated while the user got away safely.

man-practice-bear-spray-use

There were several users who stated that they had not had to use it yet. They said that when they felt danger occur, they were able to safely escape before coming too close to a bear or dangerous animal. Those who said they never used the product also recommended that you practice before going out into the wilderness.

Of course, there were some less than satisfied users. They stated that sprays that state they can shoot 35 feet, do not actually go that far. They said the spray would go about 20 feet.

However, nobody stated that it was not powerful. In fact, one user stated that they were sprayed on accident by their child and they felt terrible after the effects of the bear spray set in; experiencing tears, burning, pain, and other symptoms associated with the spray.

bear-spray-training

Those who love the outdoors find that this product is a necessity when deep in the wilderness. Whether hiking, camping or enjoying the outdoors, bear spray can be a great addition to your gear that will keep you safe.

Pros and Cons

Next, we will go over some of the pros and cons of using bear spray. Remember, you can only use bear spray where it is legal to do so. If you are within a national park area, check with staff to see if it can be used if necessary.

Pros:

Can be shot dozens of feet away, allowing you space between yourself and the bear.

Some have glow in the dark safety, allowing you to find the spray in the dark.

Easy to tote and store

Comes in various sizes for portability

Fits in a holster on your belt

Not lethal

Works better than regular pepper spray

Expiry date is clearly shown

Product lasts for a few years

Cons:

You can accidentally spray yourself and experience burning sensations and other symptoms.

Can be hard to find in the dark without a glow in the dark safety or light to find.

May not deter an intensely aggressive bear that is on a mission

Bigger canisters can be bulky.

Smaller canisters do not spray as far as bigger ones.

Wrapping it up

As with many things, bear spray should be used with extreme caution. While bear attacks are not common, they do exist and you should be prepared if it is legal for you to do so in the area where you are. Using bear spray can save your life, by giving you ample time to get away from danger, while the bear is incapacitated.

spray-agains-bears

Keep in mind, the bigger the spray canister, the farther it will shoot out, so you do not have to be real close to the bear to use it. Safety is the key when using bear spray.