
Home Blog Page 6

DIY Backpacking Food: Easy Homemade Meals For Your Outdoor Adventure

0

Usually, the kind of food you carry for your backpacking trip matters a lot. Most adventurers find it difficult to decide what type of food to bring with them to their outdoor trip. Normally, as humans, they are prone to choosing the tastiest and most nourishing, but when it’s time to hit the track, things become messy.

To avoid these kinds of problems, it’s important to have an idea of how to create a DIY backpacking food, so it becomes easier to have meals within the shortest possible time. Most people make poor decisions as far as this issue of meals is concerned, and this significantly affects their adventurous events.
When you are planning your backpacking tour, you need to know that what you carry for a one-day trip could greatly differ with the food you would take to your backpacking tour. Various factors would play a part in the choice of food you select such as taste, weight, durability, and nutritional value. It may seem overwhelming to plan and prepare a homemade backpacking food, but once you have an idea of how to go about it, you won’t have to spend a lot of time looking for what is best for you.

METHODS FOR ULTRALIGHT BACKPACKING FOODS

  • If you want to minimize the weight of your food, use a dehydrator to get rid of moisture. Using an inexpensive equipment with stacking plastic will go a long way in removing water from your food.
  • Choose easy and comfort recipes such as stews, sauces, and casseroles which are thick and contain great flavors. Rice, noodles, sauces, mashed potatoes or polenta, and condiments you would serve with a dish may be obtained small packets to compliment your dish. Meals that depend on certain texture, structure or large pieces don’t adapt well to a dehydrator.
  • You do not need to spend so much time cooking yourself. Double your recipe for the favorite meal and place half of it in your dehydrator overnight or before heading to work in the morning and the food will be ready for the trail come the weekend. Alternatively, you can buy a pre-made meal from a deli at the local grocery, prepare it as per the instructions given on the package, and convert the food to a backpacking meal using these principles. Make sure that what you have is a recipe you would love to consume.
  • Pack your recipes along with nutritious and colorful veggies. However, limit the fiber as this is weight without calorie.
  • Make sure the flavors in your homemade backpacking food are varied as this will keep your meal interesting throughout the trip.
  • Once you have prepared your recipe in the kitchen, puree or chop the food to consistent sizes. The smaller the portions cut, the faster the pieces will rehydrate at the camp. At first, the chopped version may look somewhat strange, but the taste of the meal will be familiar and fabulous.
  • You should learn what products rehydrate faster and which ones take the time to rehydrate. It will be very frustrating having to wait thirty minutes for the meal to rehydrate so as the meal can soften when on the trail. Some grains, vegetables, tofu and beans often take some time to rehydrate. Therefore, you can replace these products with the freeze dried versions since these foods rehydrate faster.
  • Be careful with fatty meals as food that contains fatty surface go rancid quickly. Rinse the fat from the meat using hot water before you can rehydrate. Limit the amount of fat when cooking and carry butter or a bottle of olive oil to add at the camp.
  • The closer you are able to get the dehydrated sauces into powder consistency, the faster your homemade backpacking food will be ready when on the outdoors. Pulse the food in a blender or processor once the moisture has been extracted from it. You will notice that the coarser components won’t be easily broken but the sauce ones will.
  • Measure your food into servings before you can put it in a dehydrator. Add some volume of water so as to recreate the initial serving volume.
  • When placing the food in the dehydrator, spread it uniformly and thinly over the trays. For runny sauces and drier recipes, use a fruit leather tray and a mesh tray respectively. Food dries quickly when placed on mesh trays.
  • Do not compromise the drying time. Food can never get over-dried, so make sure you do it overnight or even longer.
  • At the camp, use hot water or create a lightweight insulated ‘cozy’ for nestling the pot. The hotter the food products remain during re-hydration, the quicker it’ll be ready for consumption.

CHOOSING YOUR HOMEMADE BACKPACKING FOOD

The time has come for you to take a chance into the unknown and begin preparing your own camping meals. By using certain ingredients and cups of boiling water, you’ll be in a position to create an actual meal in the wilderness with as many calories as you desire. Here’s how to go about it.

The Base

Let’s begin with the carbohydrates. Select one which is not fussy and pack light. Basically, the carbohydrate will be over a hundred calories per ounce and will be able to rehydrate without having to boil water for over a minute so you can save on fuel. Here are some examples:

  • Rice noodles – This choice is perfect when you are in need of texture
  • Couscous – This is a favorite way to begin a backpacking meal. During a hot period, couscous cooks by adding cold water and leaving it out in the sun covered for about a half an hour.
  • Potato flakes – The Idahoan potatoes are a perfect staple for the backcountry meals. Begin with the plain flakes and add your flavoring.
  • Macaroni – Pasta shapes which are small and thin will cook excellently by adding boiling water and covering for about ten minutes with the heat turned off.
  • Instant rice – While it’s possible to rehydrate instant rice using cold water, heating up the water to a simmer would yield much better results.

The Flavor

After that, you’ll need to consider how to season the base. This can be done with:

  • Spices – Make sure you take a look at your spice cabinet. Some dried mustard perquisites your couscous. You can add dried basil to pasta. Chipotle can be used to add flavor to your instant rice. You should try a few experiments to determine what is suitable for your case.
  • Seasoning mixes – Seasoning packets often come in different flavors including chow mein, fried rice, and chili. The Asian grocery store would be the most ideal place to look for these products. Here, you can find great backpacking meal additions such as instant chicken and powdered coconut milk.
  • Curry paste – You can add this product to your instant rice during your back country ventures, but you’ll need to gauge your comfort level as this may not be suitable for your case.

The Nutrition

Adding nutrition to your back country meal is probably the hardest thing you can do. Vegetables can be heavy, so you’ll need to think carefully and choose products that have a moisture weight reduced. Aim for fifty calories per ounce, which include staples such as dried onion and dried tomatoes, which can be found in any grocery shop. Trader Joe’s is an excellent source of dried veggies, including dried beans, dried coconut, and dried kales.

If you are more than willing to splurge, there are online companies which sell backpacker-friendly vegetables from dehydrated sweet potatoes to freeze-dried spinach.

The Calories

When selecting fat for your backpacking meals, you can never go wrong when it comes to calories. Most fats are upwards a hundred and sixty calories per ounce, so do not hesitate when searching for your hearty meal. You can opt for olive oil, which is easy to carry in a lightweight disposable bottle.

However, there are other options to pick including avocado oil, peanut oil, safflower oil, among others. Remember to keep the oil separate until the food has cooked since water and oil do not mix.

At this point, some splurging can create a huge difference. Powdered butter can boost your back country meal made with potato flakes. Cheddar cheese and powdered Parmesan can make your pasta worthy of a back country.

The Protein

If you have been snacking on beef jerky, almonds, and peanut butter throughout the day, it may not be necessary to include proteins into the end-of-day meal. Nonetheless, if you are thinking of incorporating it into your recipe, there are some options you can consider. At the grocery shop, you can find dehydrated refried beans and bacon bits. If you are brave enough, you can opt for a freeze-dried ground beef.

There are numerous ways of combining the above ingredients to create an easy, fast, and delicious meal. Make sure you do some experiments at home before heading to the back country. That way, you’ll have an idea of how best to prepare your homemade backpacking food without difficulties.

BACKPACKING SNACKS TO CONSIDER

You are on the trail, and you get hit by the snack attack. Now you know you need something fast to quench that desire. Snacks are great to have every time you are in the back country. It is important to prepare some at home before leaving for the back country. Here’s what you’ll need to consider.

  • Fig bars are tasty and affordable. You can also decide to buy something like ProBar Mel and ClifBar Orginal. If you are an experienced backpacker, you may need to consider purchasing a dehydrator to make fruit rolls, dried veggies, and fruits. Salami, dried fruits, cheese, and fruit leather – whatever you prefer, make sure there’s a perfect mix of salty and sweet.
  • Homemade Granola Bars are snacks you can easily make at home. Pack this product in reusable zip lock and snack time baggies. You can include carob chips, chocolate, almonds, pistachios, pumpkin seeds, walnuts, cashews, coconut butter, dried fruit, or any other thing that would be ideal for hiking.
  • You can never go wrong with fresh fruit. Make sure to stock up on fresh fruits such as bananas, grapes, apples, and oranges beforehand. The juice from these fruits will be tantalizing during and after a long hike.
  • The Raspberry Fig Fruit Leather recipe is easy to make, and the outcome is so delicious. This is a perfect snack when hiking or when hanging around the campsite.

WHAT ARE THE BENEFITS OF PREPARING BACKPACKING FOOD?

If you will be spending a tremendous amount of time in the outdoors, it is beneficial and cost-effective to prepare your back country meals as highlighted above. Nonetheless, if you plan is to go on a short-period hike, you may want to bring a pre-cooked meal or prefer eating out. Preparing a homemade backpacking food is preferable as opposed to camp cooking. Here is why:

  • If you happen to forget your fuel canister, hose, or any other critical component, it will be impossible to have a meal, and this ruins your entire experience
  • Cleaning dishes after cooking and eating can be time-consuming and overwhelming
  • If you are purchasing kitchen equipment for camping for a few trips, cooking at the campsite is definitely not a cost-effective measure
  • If you have no experience in camp cooking, the outcome of your meal will vary greatly

So what are the alternatives?

  • Prepare a homemade backpacking meal and take with you on your outdoor trip
  • Carry the just-add-water product (dehydrated meals). These may include items such as dried beans, oatmeal, coffee, tea, and cream cheese. You can also carry pre-made sandwiches for lunch, and other pre-made food for dinner. For instance, if you pre-cook steak or chicken, you can prepare burritos by reheating everything.

BEST BACKPACKING MEALS FOR YOUR OUTDOOR SURVIVAL

Marinated tofu

It usually takes some time to make the tofu before you can hit the trail, but you will fall in love with its taste. Here is how to go about the process: cut the tofu into small blocks for quick and easy marination. One block of tofu should create about eight smaller blocks.

After that, put the block on a towel or a heavy fabric and cover the tofu with it. Put something heavy on the blocks of tofu, so the water and juice content is extracted. It will not be perfect, but it would be ideal that way. Drain the water.

In the meantime, place the following ingredients in a bowl for the marinade:

  • Two teaspoons of olive oil
  • Lime juice
  • A half chopped jalapeno
  • A quarter onion (chopped into smaller cubes)
  • A half teaspoon each of salt and pepper
  • One tablespoon tequila (optional)

Mix the ingredients well to create a homogenous mixture. Now, place the blocks of tofu in the marinade.

When you are in a hurry and making this food right before you can start your trip, give it about fifteen minutes to soak. However, for the best outcome, leave the mixture for fifteen minutes before transferring it to a freezer until the day you are to begin your trip.

The good thing about tofu is that it can unfreeze relatively quicker compared to meat. Once the food is unfrozen, you can prepare it whoever way you find suitable. You can cook it in oil or eat it as it is with some fresh veggies.

Granola bars

If you are a person who loves granola bars and nuts, you can be delighted that there are better ways of making these food products without the weird preservatives and additives. If you’re are a conscious individual, then this recipe will work for you.

Prepare the following:

  • A quarter tablespoon sea salt
  • One and a half cups of rolled oats and same amount of crispy rice cereal
  • A third of a cup of dried blueberries
  • A half cup of shredded coconut
  • A quarter nut butter (almond is suitable)
  • A half syrup (can, brown rice, maple, etc.)
  • A half cup of chopped almond
  • A half a teaspoon of vanilla extract or one teaspoon vanilla sugar

Begin by turning your oven to preheat to three-hundred and fifty degrees Fahrenheit. After that, put on the baking sheet shredded coconut and almond bits to bake until brown areas are formed.

After that, prepare a baking pan and line the pan with two overlapping baking sheets such that all the sides and bottom of the pan are covered. Mix the rolled oats, rice cereals, blueberries, salts, almond, and coconut in a bowl. These need to be uniformly mixed. They will later be put in a baking pan.

In the pan or skillet, place butter and a syrup of your choice. Cook the mixture, so they blend perfectly to create a homogenous mixture. Signs of bubbles indicate your mixture is ready. Add the vanilla extract and stir everything. Remove the pan/skillet from the heat source and give it time to cool slightly.

From here, go back to your oats mixture. Add butter mixture and syrup to the rice cereals and oats and stir well to allow the butter and syrup to dissolve. Pour the mixture into a baking pan and press it with slightly wet hands to make the mixture hard and tight. Ensure the surface is uniform without strange protrusions. When that is done, place the component in a freezer for about fifteen minutes.

After that, take the pan out of the freezer. Using a baking sheet, remove the mixture block and put it on a table. Cut the component into twelve or fewer bars. When you want to store them, it’s advisable to wrap the bars individually in their own wrap. Store the products in a fridge to ensure they do not perish easily. Only remove them from the refrigerator when it’s time to go camping or hiking.

Trout taco recipe

If you are a person who loves to fish when hiking or camping, then this recipe is meant for you. You can prepare trout taco by either bringing an already caught fish or catching one on your own. To make this meal, here’s what you’ll need:

  • Lemon drops
  • Olive oil (to taste)
  • Trout (a single fish yield a portion)
  • A teaspoon of rosemary, pepper, and oregano
  • A corn tortilla
  • A teaspoon salt
  • Sauce

Prepare your fish by ensuring it’s clean. After you have removed its insides, season the fish using a mixture of pepper, lemon, oregano, and rosemary, plus salt. Cover it using olive oil. This can be smeared mostly on the skin area. Add some oil to the skillet to preheat it before you can fry your fish. Fry the fish until it turns brown.

There are other alternatives to the skillet. In case you don’t have it, you can opt for a heavy-duty foil. Wrap your fish in the foil and then place on the charcoal base fire. Alternatively, you insert a stick and put your fish above the flames. However, you need to be carefully so as not to over burn the fish or it may end up turning black and inedible.

Finally, after the fish is cooked and ready, remove the meat from its skeleton and put these pieces on the tortilla wrap. Roll the fish inside the wrap, and you have yourself a homemade backpacking food. You can decide to add other components to your tacos such as ketchup or any other sauce. You can try a Carrot Cayenne Sauce or guacamole.

Delicious Meals For Your Outdoor Adventure

0

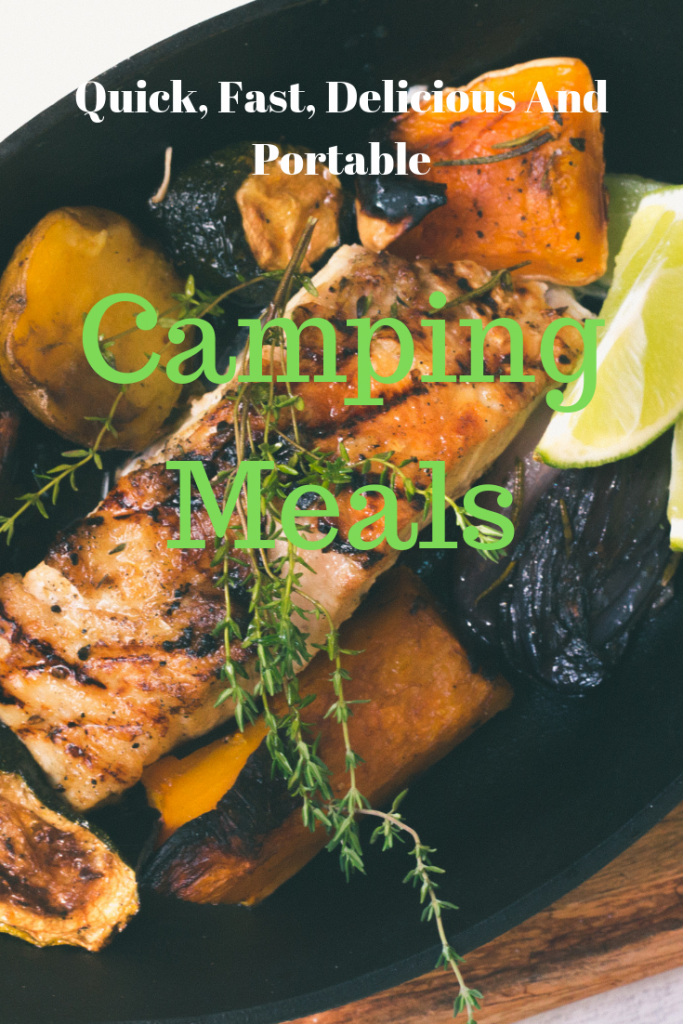
It is that period of the year, usually summer whereby thousands flock to their preferred outdoor camping destinations. Unfortunately, many of them are actually clueless about the best camping meals to treat themselves on their camping site. I am sure you are certainly one of them. Basically, it can be confusing to select the best meals that will last for the entire outdoor trip when taking into account that most foods are highly perishable. Some foods like meat and other vegetables, obviously need refrigerators to last more than two days.

That is a setback to many enthusiastic campers. But freezing it and wrapping it in an aluminum foil can preserve it. Almost all foods that are likely to decay prematurely can be frozen to preserve them. Which foods should you include in your camping gear? The answer to this question is dependent upon one’s preferences and tastes as well as the number of people traveling with. When you are traveling alone, for example, it will be much better to decide which best delicious foods to purchase to your liking.

It will also be equally much better when you are traveling with your family because you probably know their preferred meals. In this article, we have done our best to bring you the most delicious foods for your outdoor pleasure.

The criteria used in selecting these camping meals took into account the meals that are easy to prepare, delicious, healthy and long lasting. Taking perishable foods needs you to travel with a refrigerator of which it is practically impossible if you are camping in the wild mountainous regions where there is no electricity.

Having such perishable foods could shorten your camping days to avoid an intolerable wilderness hunger if you have no alternative. To stay safe, we have collected delicious foods with the best camping recipes that could last as long as you want them to.

These meals are categorized into breakfast, lunch, and dinner. The ultimate decision rests with the camper that which meal is best suited for whichever time. Before we delve into these meals, let’s help you prepare for your outdoor camping journey.

How to Prepare for Outdoor Camping to Make Cooking A Breeze?

It can be daunting at the first time, and an inexperienced camper can be confused with which meals and cooking tools to take along on the trip. Experienced solo campers, too, may have the confusion when traveling with families.

Nonetheless, the best preparation is a solution to all the confusions. Firstly, you have to acknowledge that camping menu varies from the home’s normal menu. In the wilderness, you have to compromise your normal menu and adhere to the most convenient and temporary one.

In order to simplify cooking, some of the camping meals have to be prepared beforehand. If you are into veggies and some spices you probably have to leverage on your household table or other gadgets you wouldn’t travel with due to their size. Prepare your camping ingredients before you leave to eliminate the hassle at the camping site.

For instance, if you want to cut your spinach or prepare a live chicken, do so while you are still at home. By the time you get to the camping site, you will only need a few minutes to prepare meals for cooking. Poor preparation may lead to stress-bound camping days.

If you plan to have scones, for example, you must then bake them before you embark on your journey. Traveling with dough or raw flour to the camping site is time-consuming. That may need you to also bring other ingredients and as thus you will be piling up your camping gear needlessly.

The snacks as well need to be prepared in advance. The pleasure of supplementing your camping meals with snacks cannot be overlooked. Children, in particular, are in fond of snacks. So watch out if you are traveling with kids.

Also noteworthy are the cooking utensils such as knives, pans, pots, grill, cooking racks, and bowels. When selecting the utensils you need to take into account the fact that you will be cooking on a campfire, not an electric stove. With that being said, you must have stainless steel tools that can withstand the intense heat.

The proper materials needed to start the campfire are also important because it may not be a guarantee that you will find them ahead. Avoid the possibility of purchasing from other stores at higher prices because the shops in the vicinity of camping sites are usually expensive.

The Best Breakfast Meals for Campers

The meals for breakfast are often simple without the need to cook them for longer compared to lunch and dinner meals. There is notably a plenty of options to choose from to fulfill your breakfast needs. However, you should strive to prioritize your body health.

Meals such as eggs and bacon, donuts, cereals, oats, sandwiches, omelets, pancakes, buns and bread smeared with butter or cheese are popular among campers to eat early in the morning. They are relatively convenient and easy to prepare.

Below are the breakfast meals that you can choose to treat yourself with in order to make your mornings very pleasing.

  • Pancakes: these are delicious breakfast meals you can treat yourself or your family with. For cost-cutting purposes, you can simply make your own pancakes instead of buying them.
    When making your own at home, you got to have a Ziploc bag for better storage in a cooler after preparing the ingredients. Purchase Sprouted grain, eggs, flour, baking powder, olive oil, honey and milk to make this delicious breakfast meal.
    Alternatively, you can purchase a ready-mix pancake package that you can simply add water on it and then heat it up before serving at the camping site. Do not forget to take a syrup with you that you can serve the pancakes with.
  • Burgers: burgers are also among the favorite delicious and easy to make breakfast meals convenient for camping. But they can also be eaten at lunch or dinner time. Many people have varying preferences of ingredients needed to make a homemade burger.
    Some stores have ready-made mixtures which require only water to warm them.
  • Egg Sandwiches: Aluminum foil will be of benefit in this case because you need to prepare these sandwiches at home and then freeze them. While at the camping site, the campfire will be useful to warm the egg sandwiches for your breakfast.
    You can warm them directly on the campfire or on a grill if you brought one. To make these sandwiches you may have sausages, cheese, veggies, bacon and biscuits.
  • Hot dogs: these can be well served with bacon, cheese, onion or other sauces when flavoring your breakfast. Other than these supplements, the hot dogs can be served plain to make your stomach full until the next lunch meal. It’s your call to make.
  • Gravy and bread or biscuits: this meal can also spice up your breakfast. It needs simple recipes to make your own biscuits or bread to serve with gravy. To prepare a gravy you can peel tomatoes and onions and mix them with favorite delicious spices.
    You will be minimizing the time needed to prepare them at the campsite. Gravy and biscuits or break are quicker to prepare.
  • Omelets: the ziplock bag is needed to prepare this breakfast meal. Scramble eggs and put them in that bag. The number of eggs depends on how many people are you preparing the breakfast for. Meat, onions, mushrooms, bread, jam or peppers could be your choice list.

The Lunch Meals for Campers

Now the real food preparation process kicks in. Lunch meals often take relatively longer to prepare than the breakfast ones. But most of the breakfast meals can be consumed at lunch as well. For example, sandwiches or scrambled eggs can be consumed.

Below are the lunch meals that are popularly regarded as the best for any enthusiastic camper.

  • Chicken enchilada: combined with lettuce, tortilla chips, lime drops, and barbecue sauce, chicken enchilada can be delightful for your lunch. If you are a novice cooker, you need to hone your cooking skills to make the best meals.
  • Pizza: by now you know that pizza comes in different flavors and ingredients. We recommend sausage, fontina, and onions that are flavored with caramel. This meal can best be prepared at home or at the camping site.
    A big stainless steel frying pan is recommended for the preparing of this meal. No one can say no to a delightful and well-cooked pizza. That being said, you need to bring enough ingredients to treat your companions.
  • Sandwiches: these can be suitable for lunch as well. This time you can consider an apricot or peach jam and butter for your sandwich. You need a loaf bread to achieve this.
    At least that will be enough for members of the camp or for you only as long as you are going to stay outdoor. Some potato chips or favorite veggies can make a good combination with your lunch sandwiches. Some campers prepare sandwiches at home and wrap them with an aluminum foil to warm them at their campsite.
    There are plenty of ingredients to consider when making sandwiches.
  • Grilled or toasted cheese: this meal can be combined with any of your preferred  For example, you can slice a bread and put your grilled cheese on the slices. Alternatively, you can serve a grilled cheese with vegetables or meat.
    To prepare this meal, you will need an aluminum foil that can be used in cooking on the campfire. Depending on the strength of the fire, it approximately takes 15 minutes for this cheese meal to be ready.
  • Mediterranean meals: if you opt for a Mediterranean style of food you can see yourself preparing cucumber, feta cheese, tomato, hummus sandwich, potato chips, and olive.
    This will also be a delightful and delicious tasty meal for your lunch at the camping site.
  • Quesadillas meals: a shredded cheese and vegetables with salsa or guacamole will make you this meal. To enhance its taste, add corn, roasted peppers or tomatoes. All these can be prepared at home before you head to your journey. Remember the zip lock bag we reminded you not to forget.

The Dinner Meals for Campers

Now prepare yourself for mouth-watering meals just before you doze off. A serious cooking process is predominantly done to prepare foods for dinner. With dinner meals, families get to enjoy the time together after a long day of traveling or working.

Even those members that have skipped lunch may want their portions come dinner time. The last thing to do is to disappoint them with non-delicious foods or shortage of meals. Let’s help you choose the best meals for dinner while camping.

  • Curly hot dogs: with these curly hot dogs it is the time that you surprise the family with a new item on the camping menu. Take enough hot dogs as well as crescent rolls that you will use to make curly dogs.
    If you brought enough cooking tools to the camping site you can achieve that or otherwise prepare everything at home. Simply slice the crescent roll and wrap it around the hot dog.
    The next step is to wrap them in an aluminum foil to cook them on your campfire until the dough is well-cooked. The time it takes for the meal to be prepared depends on the strength of your fire. Just make sure you do not burn them.
  • Pizza log: this delightful pizza log can be well-cooked using the campfire. The dough can be prepared while you are still at home to avoid consuming more time in the wilderness. All you need is a frying pan, mozzarella cheese, tomato sauce, veggies and some toppings.
    The next step is to roll out the pizza dough so that you can add the ingredients. Half a cup of tomato sauce, toppings of your preference and the mozzarella cheese approximately 8 ounces should be used.
    After adding these ingredients, roll the pizza dough again to make a delightful pizza log. Use aluminum foil to cook it when you prepare for your dinner. After cooking you can then cut it into pieces for everyone at the camp.
  • Potatoes, Green Beans, and a Grilled Sausage: To make this meal you need potatoes, onions, green beans, sausage, salt, pepper, butter for the topping, fish or olive oil, aluminum foil and a grill. Put the grill on the campfire to preheat it.
    Use the foil to put the potatoes, green beans, sausage, and onions. Add salt and pepper to the meal, then pour oil. Enhance its deliciousness with butter toppings.
    Fold all these ingredients with the aluminum foil and then add water through a small opening to cook the meal on the grill. It can take about 30 minutes for the meal to be prepared depending on how hot the grill is.
  • Campfire foil packs: surprise your family with foil packs made with veggies and meat. The ingredients of choice can be pre-made at home and then refrigerated and then wrapped in an aluminum foil.
    At the campsite, you can use the foil to cook the meal. Make sure you add olive oil. Do not cook under strong flames to avoid burning your meal. It is such an easy way to prepare such a meal for your dinner.
  • Easy paella: now try Spanish popular meals at your camping site. To prepare this type of meal you need to preheat the frying pan and add oil to it. Then add onions in the oil for 5 minutes.
    Add rice, paprika, and thyme in the pan and stir them for a minute and sprinkle wine. Put tomatoes and stock thereafter and cook them uncovered for approximately 15 minutes.
    Thereafter put seafood in the frying pan with the prepared food and cover them. Leave them for 5 minutes until all are well-cooked. You can then squeeze the lemon juice into the pan and then serve the dinner meal.
  • Roasted meat or vegetables: prepare your vegetables by cutting them on your cutting board at home before embarking on your journey. These can be carrots, zucchini, peppers, cabbage, potatoes, onions, garlic, squash and cauliflower.
    Bring meat or fish as well as salt and herbs. Wrap everything in an aluminum foil for the convenience of cooking later on at the camping site. While at the camping site, preheat the grill and put the meal on it and constantly turn until well-cooked.

Important Pro Tips

We understand you might be having different taste of the ingredients than what we have just mentioned. Just make sure you do not take perishable ingredients without refrigerating them before leaving your home.

It is important to buy enough plastic or aluminum foil before heading for your outdoor camping adventure. Also take enough foods depending on the number of days and number of family members you are traveling with.

To make sure that you do not forget anything behind, make a checklist of everything you will need from spices to kitchen utensils for minor preparations at the camping site.

Purchase enough and affordable outdoor cookware. These include frying pan and a grill among others. The camping meals we mentioned above are not all-inclusive, but we are confident that we have chosen the best delightful meals. When traveling with your family, we recommend that you make a checklist with them to check what they need. It will be an advantage if you are traveling, because then you do not need anyone’s approval regarding the kinds of camping meals and their recipes.

Arizona: Explore The Hidden Gems

0

Arizona, the capital of Phoenix, is a citadel of learning for many studies seeking to acquire university education, and tone place that completely stands out is the Grand Canyon – geologically aged at 6 – 7 million years old and known to be the best hiking destination in Arizona by renowned hikers.

The 277-mile in length gouge in the earth that, at certain intervals, have dips and falls to the river below ranging a mile drop. It is truly a wonder of the world, a revel to the human eye, and a masterpiece of nature. Arizona has much more to offer by way of natural, unbelievable beauty in is plentiful landscape.

The state boasts over ten national parks to hike, camp, skip, jump, and run through. All with adverse similarities and obscure differences. It is a hell of a state for those into their hiking, though, more than anything else. Finding the perfect spot for you and hiking needs of the modern homo-sapien hiker can be tricky with such a plethora of areas to choose from.

A little research into the land can do a world of good when it comes to your next trip, so let us take a look at the best hiking trails in Arizona, their attributes, what makes them unique and worth seeing. So fill your day pack that you require, and let’s get hiking.

Let’s Start Slow, With Some Simple Hike Trails

Starting with some of Arizona’s less formidable trails is merely to ease us all into the where and the what that Arizona has to bring; but know this, that only because these hikes are easier on the foot than traversing down the banks of the Grand Canon by way of path or by abseil, does not make them all 100% safe.

So stay ever vigilant, keep your party safe, and remember to have fun in the promise. Now, after that brief note of caution, onto the trails.

Reavis Ranch found deep in the Superstition Wilderness

Named after Elisha Reavis; a hermit who had come to settle up in the mountainous region in the late 1800’s. An elusive man who spent most of his life either teaching elementary schoolers, divining for gold in the most tumultuous regions of the state, or fighting in the many Indian Campaigns of the time.

As well as owning the first library of books in the Superstition Mountains, killing a bear using a gun that misfired, and rearing horses and mules, he is best known for his planting of an apple orchard 700ft in elevation. A working orchard that surpassed its planter and continues on some hundred years later.

The ranch and surrounding areas have turned into hiking tourist attractions as of late, where the views are stunning and the apples are plentiful, free to those travelling through the orchards.

This trail is for those interested in the deep history of the gold rush of the late 1800’s outside of California, beautifully kept meadows and orchard, and if you wish to find something as amazing as pine trees just above the blazing heat of the desert sands of Arizona.

Flat Iron, the connection trail to the Superstition Mountains and Four Peaks Wilderness

Another trail of note in the Superstition Mountains is that of Flat Iron. Also known as the Siphon Draw, this is a little less a walk in the park as it is more of a trek through the a rocky terrain that once surpassed will make you feel like a king of all that surrounds you.

A six mile round trip through the rough of the Superstition Wilderness, with some of the most prominent and bewildering rock formations that you are likely to find in the great state, this hike is well worth the effort of its traverse.

This hike is not recommended, though, right after even the slightest of rain falls, as the majority of its paths is made up of slick rock which is not fond footing when slippery.

The gaining of both of the territory’s names are interesting in of themselves, Flat Iron is aptly nicknamed for a large protruding spike of rock that stands at 4,800 feet in the air, and the name of the land Siphon Draw came from the name of the trail.

Browns Peak – Prominent in the Four Peaks Wilderness

A beautiful mountainous pass, found out east of Phoenix in the northern region of the Four Peaks Wilderness. Brown’s Peak is the highest of the four peaks in the territory at over 7,000 feet tall. The path takes you all the way up to the summit, which offers an incredible view.

A good sized portion of the entire state of Arizona, and even the highest mountain in the state Mount Humphrey’s, can be seen on a clear day up there.

As well as being revered as an all natural crows nest, the area that surrounds Brown’s Peak has a large black bear population, so be careful when on the trail and stay in packs. Do not let the presence of bears be of alarm, as they stay away from hike trails and rarely cross them unless majorly provoked.

From Molehills to Mountains – Higher Elevated Trails

Mount Wrightson, found just outside of Tucson, in the Santa Rita Mountains

Just over 9,000 feet, Mount Wrightson looms over the nearby city of Tucson in an almost protective fashion. Found in Madera Canyon of the Santa Rita Mountains, this mountain’s peak offers an incredible panoramic view of southern Arizona.

If you make it to the summit on a clear enough day, you can even be able to see parts of Mexico as you gaze across the landscape. There are two trails available to the public for reaching the summit, and they both cross one another making a classic figure 8 symbol.

The shorter trail of the two at 10.8 miles round trip is the Old Baldy Trail, and three longest coming in at 14 miles round trip, is known as the Super Trail. As mentioned before, both trails lead to to the mountain’s summit, and cross over one another. So the only question you need ask yourself is can I make those extra four miles?

Mt. Baldy Loop looming over the top of the White Mountains

Not to be confused with California’s Old Baldy Mount San Antonio, Mt. Baldy of Arizona shares the same beauty and majesty as its cross state cousin, though towers a lot higher than the SoCal treasure. There are two main hiking trails available for the general public to take with two different peaks to achieve on the hike.

Unfortunately, if you are not a member of the White Mountain Apache Tribe, you are not permitted to make it to the true summit of the mountain. But there is beauty in both the public trials of West Baldy #94 and East Baldy #95, and the connection path, #96, that turns the whole trail into a perfect loop. A lot of fun in taking these paths, with some incredible views to compensate the tough journey.

Mount Kimball of the Catalina Mountains

Another mountain that stands close to the city of Tucson, but this time found in the southern peaks of the Santa Catalina Mountains. Mount Kimball is the highest peak in that region, and is what is known as a ‘Sky Island’ – a mountain with its lower slopes deserted, cracking and hot, but the higher you go, the more vegetation and even forestation is found on the higher you get.

The mountain trail is best for seasoned hikers as it is a steep climb on the way up to the summit, and even then can be a tricky trail to hike. Like many of the great mountains in Arizona, this hike is giving you the option of what trail to walk up; Finger Rock Canyon or by Pima Canyon.

Both will get you to the summit of Kimball, they just provide different starting routes. Finger Rock Canyon starts you off on a major road that lead to foothill paths, whereas the Pima Canyon trail starts further west and cuts through many other trails along the way. Both are the same level of difficulty to hike up.

Mount Humphrey’s – Highest Mountain in the State

Mount Humphrey’s stands as the tallest mountain in the entire state of Arizona, its peak at 12,633 feet, makes it less of a hike and more of an expedition. Yes, people, before you have come and planted their proverbial flag, but you know what they say, “you gotta do whatcha gotta do”.

Humphrey’s Peak is the hiking trail used to scale the sides of the mountain. The mountain is found a few miles out of Flagstaff, Arizona, and helps form the Kachina Peaks Wilderness Area, that takes up nearly a 18,000 acres of land within the Coconino County.

The mountain was named after General A. A. Humphreys, who worked for a time as US Chief of Engineers. The views from the summit of Mount Humphrey are truly remarkable and will brighten up any photographic portfolio; you just have to be proficient enough a hiker to make it all the way to the top.

For Those Opting for the Scenic Route

Kendrick Peak – a lesser Humphrey’s Mountain

Those who wish for a less grueling hike and climb than that offered by Humphrey’s Mount, then you should be heading over to Kendrick Peak; a less intense elevation at 10,000 feet, which still allows bragging rights for you and your party.

Just shy of Flagstaff and an hour from Phoenix, the state’s capital city, stands Kendrick Peak. Found in the San Francisco volcanic field, a 1,800 square mile area filled with over six hundred volcanoes. Some of which have been geographically aged at around six million years old, and the youngest at around a thousand.

So, even though the area has not seen a deadly eruption of one of the volcanos for some years, does not mean that it is wholly advisable to stray too far from the beaten hiking path. It is still a fun trail that afterwards grant you the bragging rights of hiking through a volcano field.

Oak Creek Canyon, Sedona

Sedona is an area of Arizona that is plagued, and bettered, by steady and unrelenting tourism attractions, which makes it a hard place to find and maintain a little bit of solitude. Though there is a small area, within a small canyon, where peace and quiet should really be present in its name. At the West Fork of the Oak Creek Canyon, beauty and serenity can be found with ease.

A hike trail lay deep in the east of the tourism, hiking down to this river bed enclosing feels like something out of an old western film. The waters give the looks of those ripe for divining, and are cool to the touch as you trail through. A real refreshing experience to travel to and through.

Havasu Falls. Visit as long as you obtain permission

The beauties of the Grand Canyon never cease to amaze people. Like the fact that in the middle of all of that dry earth, scorching deserts, its high peaks and mountains, there cascades deep and mystic waters for us to take our time in hiking to, and then spend the rest of your day diving into the scenery.

Majestic waterfalls are awaiting you just within the Havasupai Indian Reservation, one of many located in the state of Arizona, so that means that these waters are only accessible to you after obtaining a special permit to use the land for hiking through and camping on.

But the turquoise rich, waters, are so worth the hassle of the permit offices. One of the other minor hiccups is the fact that the car park and main entrance are both located a smooth downhill climb from the campsite – which makes for a steady climb to get back to your vehicle so pace yourself.

With photogenic scenes of raging white waters protruding from a mouth, cut out of the red rock holding the valley together, who needs Instagram filters? The Havasu Falls are simply stunning and they are a must see during your time in Arizona. Make sure you check it out.

Enjoy Your Hikes and Stay Safe Out There

Regardless of which of these magnificent trails to hike down, to the top of one of the many mountains the state has to offer or plunge deep into the valleys and ravines in the most famous canyons the country has to offer, you are guaranteed to enjoy yourself and wish that you had more time to explore the next trail head endeavor.

Camping Safety: Practical Tips For A Safe Camping Trip

0

Nothing is more beautiful like escaping into the wilderness for a fun, relaxing trip away from the busy schedule of daily life.  However, it is definitely not a smooth ride as enjoying yourself may come at a cost if you are faced with illnesses or injuries in the course of your adventure.

It is for these aforementioned reasons that you have to be verse with these camping safety tips, not just for your time at the campground, but to properly prepare and pack for your trip before you even leave the house.  Doing so can ensure a safe and healthy trip, so you can spend your time enjoying yourself rather than tending to wounds or rushing to the emergency room.

Preparing for Your Trip

Whether packing for a two-week vacation or just a weekend at your favorite camping spot, you have to prepare and pack correctly, to be prepared for any occurrence.

Get Vaccinated: Illnesses such as meningitis or whooping cough may not seem like an issue when camping, but you never know what diseases other people you meet during your trip may be carrying.

That’s why it is important for your first step to be up to date on your vaccinations, so you don’t bring any unexpected, and potentially fatal, souvenirs home with you.  This goes for all members of your party, including spouses and children, and even your pets.

Packing for the Weather: When packing clothing, be sure to check out the weather report for the area you’ll be camping in so you can pack clothing appropriately.  But don’t just pack according to the report, because weather can change at any time.

If the report calls for sunny days and clear nights, pack some pants and sweaters along with your t-shirts and shorts in case it cools off, or unexpected rain showers move into the area.

This goes for bedding as well.  Having a few extra blankets won’t take up that much room, but it’s better to have them and not use them than to freeze during an unexpectedly cool night.

Fans and heaters are also a good option if you have the room and access to electricity; just be careful where you place them, and be sure there is enough ventilation to reduce any risk of carbon monoxide poisoning.

Packing Food and Water: Water is a necessity, especially in high temperatures where you’ll be sweating excessively and need constant hydration.  Many areas do not have clean drinking water, so be sure to pack enough for all members of your party during the entire trip, and check to see if there is a store nearby to purchase more, just in case you begin to run low.

When packing food, be sure any meat is packed carefully so it will not come in contact with any other food items.  Contamination could mean discarding an entire cooler of food, leaving you with nothing.  Using sealable containers is the best choice, so there will not be any chance of meat juices leaking into other items.  Also, if there is cooked meat and raw meat, keep them separate as well, to reduce the risk of food-related illnesses.

Prepare a Safety Kit: Should injuries happen on your trip, you don’t want to be left unprepared.  That’s why a safety kit should be prepared in full before you leave.  The kit itself should be a sturdy, waterproof container, and include:

  • Bandages-rolled, plastic, triangular, butterfly, large and small
  • Sterile compresses
  • Adhesive tape
  • Splints
  • Gauze pads
  • Antiseptic sprays or wipes
  • Cotton swabs
  • Scissors
  • Tweezers and nail clippers
  • Safety pins
  • Thermometer
  • Creams – Antibiotic, burn, poison ivy
  • Sunscreen and after sun lotions
  • Peroxide
  • Hot/cold packs
  • Bug spray
  • Razor blades
  • Pain and sinus medications
  • Antacids
  • Eye drops
  • Snake bite kit (if poisonous snakes are in the area)
  • Ipecac (to induce vomiting if poisonous or harmful items are ingested)
  • Latex Gloves (and a non-latex type, in case of a latex allergy)
  • Road flares
  • Any personal medications normally taken, prescription or otherwise

Not only should you carry these items, but you should know how to use them all.  It is also a good idea to take courses in both CPR and First Aid, so you can be prepared for any type of injury or situation.

Check your safety kit often, as some of the items in this list do have expiry dates, and may need to be replaced before your camping trip begins.  And be sure to replace anything used, so your kit is always fully stocked.

Inform Others of Your Plans: Before you leave, make sure others are aware of your destination, and how long you’ll be gone.  This could be a family member or a friend, whichever you prefer.

This way, if something happens and you are left stranded in the woods with no cell service, someone will be expecting you home and will be concerned if you don’t show up.  Do not post your plans on social media, though.  Telling the world you’ll be away for even a few days could invite break-ins and theft, so keep your plans off of Facebook and Twitter.

After Your Reach Your Destination

Whether camping in the wild or at a busy public park, be sure to follow these tips to ensure your trip will be filled with laughter and fun, rather than pain and injury.

Setting up Your Site: When setting up your tent, be sure to do so away from the fire pit area so there will be little chance of sparks landing on the material and starting a fire.  Campers are less at risk, but if a canopy is opened, it could also catch on fire, so plan your site accordingly.

Food Storage: For those using a cooler, hopefully you’ve followed the advice on packing your food items listed above.  If so, there is only the risk of spoilage to worry about, so be sure to keep your food cold by replacing the ice that has melted each day, especially if in hotter temperatures.

An insulated cooler is the best choice, because it will hold its temperature longer, as long as it is not opened unnecessarily throughout the day.  There are even plug-in coolers available, but if you’re not at an electrical site, these will be of no use.

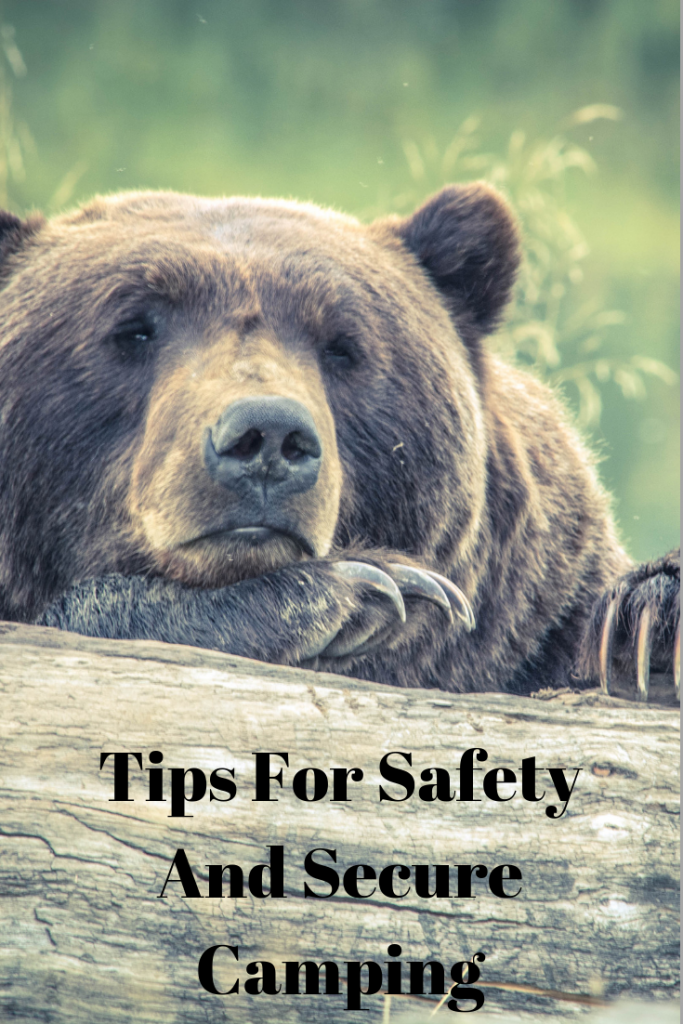
After cooking meals, be sure to pack up all extra food properly and safely, and store it in the cooler.  Do not leave food laying around your site, because this could attract unwanted animals, from small, harmless ones like squirrels to large, dangerous bears.

Also, do not keep food in your tent, for the same reason.  If possible, store your cooler and other non-refrigerated items in the trunk of your car, to reduce the likelihood of unwanted animal attention.

Sun Protection: Be sure to use sunscreen at all times when camping, even if it is overcast.  Harmful UV rays can still reach you through the clouds and cause burns you may not realize you are getting.  If you are swimming, apply it about half an hour before entering the water, and reapply it often.  Sunglasses and hats are also a good idea to protect your eyes on bright days.

Critter Protection: Bugs can carry diseases, and a single bite could bring with it an unwanted illness along with itchy discomfort.  That’s why you should protect yourself from mosquitos, ticks, and other unwelcome pests by using bug spray throughout your trip.

Larger critters can also be harmful, though there is no spray for small animals.  If snakes, squirrels or birds are nearby, do not try to touch them or interact with them.  For smaller mammals and birds, you could carefully shoo them away from a distance.

Snakes or other potentially poisonous animals should be avoided, and if you find you are too close to one, back away slowly, and leave them be.  They probably won’t stick around if there are people nearby.

Having fun: Camping trips include all kinds of outdoor activities, including hiking, bicycling, swimming, and many others.  If these activities are going to be part of your trip, be sure to prepare for them by bringing the appropriate gear.

This includes helmets and padding for knees and elbows when biking, proper footwear for hiking and walking, life jackets when boating, and swim rings and water wings for swimming.

Be sure all of the members of your party can handle the terrain for the hiking and biking trips, and don’t force anyone to go farther than they can handle.  Keep in mind that little children will tire out, and the further you are from your site when they stop walking, the longer you will be required to carry them.

When swimming, don’t go alone, and supervise any inexperienced swimmers closely.  Bring snacks and lots of water for these adventures, but don’t eat right before swimming to reduce the risk of cramps.

For some quiet time, bring a few toys and coloring books to keep the kids occupied in the site, especially if you have littler ones who need naps.  Blowing bubbles is also a great way to entertain kids for hours.

Getting Lost: No matter what activity they are engaged in, be sure to watch your children closely when camping, and explain to them the risks of getting lost if they wander away into the woods, so they are aware of the dangers of wandering off alone.  Of course, not only children can get lost.

Many adults head out for a hike and can’t find their way home.  That’s why it is important to always tell someone in your party where you are heading, in case you don’t return.  Carry a map if possible, as well as a GPS locater and a compass.  Even having a whistle can help you to get rescued, and it is small enough that it is easy to carry in a pocket or on a rope around your neck.

Staying Cool: No matter what you’re doing, it is important to stay cool and hydrated, especially on hot days.  Drink lots of water to replenish what you are losing, and reduce the risk of heat stroke.

If playing games, with grown-ups or children, try to do so in a shady area, and be sure to sit down and rest if you feel yourself overheating.  Don’t go for long hikes or bike rides if the temperature is especially high.

Cooking Safety: Some rules for cooking when camping are the same as those at home.  Be sure to prepare food on a clean surface. Wash your hands thoroughly before and after handling any food items.

Cook meat to a safe temperature before eating, and carry a meat thermometer to be sure this is done correctly.  Don’t mix raw foods with cooked foods, especially meat, so there is no contamination that could lead to food poisoning or other food-related illnesses.  After eating, store any leftovers away promptly.

If cooking over the fire, be sure to use sturdy metal utensils with safety handles, and wear a fire-retardant cooking mitt or glove to keep from getting burned.  Don’t cook over high flames.  Have somebody keep any children and pets away from the fire when you’re cooking, because you may be too focused on what you are doing to watch them at the same time.

If using a stove or grill, be sure to store the fuel canisters properly in an upright position.  Don’t place them too near a fire pit, and don’t try to change any canisters near an open flame or if the stove is already hot.

Make sure you are in a well-ventilated area when using these items, and never try to use one in a camper or tent, because of the threat of carbon monoxide, as well as a risk of fire.  When not in use, turn it off and remove the fuel container, so there will be no chance of injury or explosion.

Fire Safety: At the end of the day, there is nothing more relaxing than sitting around a fire, chatting with your family and friends, or just enjoying the quiet.  But in order to fully relax, you need to be sure your fire will stay where it belongs.

If there is no proper fire pit provided, and you must make your own, be sure to do so in an open area, away from any tents, trees or other flammable items.  Place a ring of large stones to enclose your fire.

Keep a bucket of water, sand, or a fire extinguisher nearby just in case it gets out of control.  Do not leave it unattended for any reason, and be sure to extinguish it completely before leaving your site or heading off to bed.  Also, be aware that in dry seasons, there is a higher risk of forest fires, so check for any bans in the area before even lighting the match.

Hiking And Health Benefits: Amazing Ways To Burn Calories

0

When it comes to losing weight, hiking is one of those outdoor activities which you can’t underestimate . Even though there are actually numerous kinds of exercises which can help you burn calories and lose weight, however hiking still remains the perfect example to get you back in shape and fitness.

The question that most people often asked is how many calories can be burn through hiking, and of course the health benefits associated with hiking?

You should always remember that the ultimate workout is not on the treadmill, air-conditioned studio, or your gym – it’s in the great outdoors! According to experts, when you go hiking, you hit your muscles from different angles and engage the muscles you often miss when in the gym such as the thighs, your back, and the deep core muscles.

Additionally, the trail offers some challenges that will help you exercise and burn calories, such as ditches to avoid and logs to climb over. As a result, hiking can provide results that are similar to most grueling boot-camp activities.

Engaging in outdoor activities is also excellent for your brain. A study reveals that just about 5 minutes of activities in the natural environment can boost your mood. This makes a lot of sense: a lush scenery is more inspiring compared to a gym television program.

Research from the University of Kansas and the University of Utah found that hikers scored fifty percent better on their creativity test after they had spent a few days in the natural environment, disconnected from any electronic gadgets.

According to scientists, the mind can relax away from the tablets and cell phones, freeing up your imagination. Therefore, any individual at fitness level can take part in Mother Nature’s gym. If you are capable of climbing a flight of stair, then you can hike.

Steps to follow when you go hiking to burn calories and increase your fitness

You should follow several steps if you wish to burn calories and increase your fitness during hiking trip.

Find a great trail

There is a number of useful website available online that can pinpoint some of the best places to go for a local hike. Therefore, you can search for a hiking location near you or outside your town using the online tools. You can search hiking sites using the zip code. Just make sure you know what you expect your trail to have.

Read their detailed information such as the length of the trail, the scenery you’ll see and the trail’s difficult levels as there are simple, moderate, and difficult trails. Alternatively, you can stop by a local outdoor or hiking shop and inquire about the best trails in your area.

If you are a beginner, make sure you go for an easy hike but make it challenging. What’s impossible is making a strenuous hike easier.

Get in good form

As is the case with any other sport, you want to protect yourself from injury and obtain the most efficient workouts. When you are on flat stretches, walk like a proud individual – relaxed and shoulders pulled back, spine in line and your chest leading, not the knees.

When on the downhill, minimize your stride length so that the slope can be more manageable. When you come across a monster climb, squat slightly to get a better balance. Make sure not to walk around hunched over as this could strain your back and expose the knees to injuries, especially if you are hyper-flexing them.

Despite the amount of fun you are having, make sure you take a few breaks whenever you get tired. Also, remember to keep downing water.

Reduce pace!

You don’t have to go very fast to ramp up results or tackle insane inclines. In fact, it is agreed that if you are a novice, it’s better to take on trails that have a few smaller hills and moving at a slow pace. This means that you will be putting in the same amount of energy you use when in a slow jog.

When hiking, you should be in a position to speak comfortably using complete sentences without having to struggle for breath. That way, you will be able to last and remain within your fat-burning zone. When you move at a slower rate for an extended period, your body burns more fats as compared to carbohydrates. With time, you’ll lose faster.

Remember not to blow through the downhill as this requires the body to work harder. When taking the downhill, your body is engaged in a plod-stop-plod-stop rhythm. That way, your body muscles must conspire to stop you, making the whole process more challenging and an excellent calorie burner.

Boost the burn

For you to enhance the benefits of your fitness during a hike, you need to undertake other activities within the hike. Jumping on and off tree stumps, lunging up slight inclines, squatting for sixty seconds and repeating the process several times can help boost the burn.

As you are walking, you may press the arms overhead, bring your elbows down your sides, repeating as you walk. Doing acts such as these will help in boosting your workout’s intensity, firing up your fat-melting burner. After you are through with these exercises, continue walking at a moderate pace.

That way, you’ll be able to burn about 25 percent more calories. What’s more, doing some extra exercises when hiking will bump up your burn to 600 calories an hour. This is yet another reason why you need to head for the hills!

Factors that influence the amount of calories you burn

Hiking is an excellent way to get in shape by losing weight. Whether you partake in daily walks in the nearby park or engage on trips to the mountains, outdoor activities will make it possible for you to burn calories and gain muscles. However, some factors will influence the number of calories you will burn.

Body Weight

Generally, the amount of calories you will burn when hiking depends on your body weight. A 160-lb individual will burn about 430 to 440 calories in a span of an hour.

A 200-lb person will burn about 550 calories in an hour of hiking. Therefore, the heavier you are, the more the calories you will burn in one hour of hiking.

Pack Weight

You should also know that the amount of calories you burn depends on whether or not you are carrying a backpack. If you have one with you, the weight of the pack also affects the number of calories you will burn.

When you carry a light load such as the day pack, you will burn about 50 to 100 more calories in an hour than without a load. If you have a heavy load, such as backpacks for extended trips, you’ll burn about 200 more calories in an hour.

Intensity

In a study conducted by the American Council for Sports Medicine, researchers discovered that a high-intensity exercise increases the number of calories you will burn even after you are through with your activity. When hiking at a high intensity for about 45 minutes, you will be able to burn an extra 190 calories later during the day.

A strenuous hike increases your metabolism, and the extra burn takes about 14.2 hours to complete once you are done with hiking. This can even continue through the first three-and-a-half hours of sleep.

Terrain

The extent of the terrain also plays a significant role in determining the number of calories you burn during a hike. Since terrains vary significantly, it’s not possible to tell how hiking in a particular area will alter the number of calories you burn. For instance, you can burn more calories when walking on a rocky, flat ground as opposed to a flat, grassy land.

Nonetheless, you will even burn more calories when you walk uphill on grassy terrain as opposed to a flat rocky terrain. Ideally, you burn more calories in a challenging terrain.

Summary table

The table below provides information on the number of calories you burn for specific activities per hour for body weights of 205-lb, 180-lb, 155-lb, and 130-lb. The calculation used are based on the result from a research data conducted by the American College of Sports Medicine.

Walking, Hiking, Climbing (1 Hour)205 lb180 lb155 lb130 lb
Rock climbing, ascending rock1024899774649
Rock climbing rappelling745654563472
Orienteering838735633531
Backpacking, Hiking with pack651572493413
Carrying infant, upstairs465409352295
Carrying infant, level ground326286246207
Carrying 25 t0 49 pounds, upstairs745654563472
Carrying 16 to 24 Pounds, upstairs558490422354
Walk/run, playing with kids, vigorous465409352295
Run/walk, playing with kids, moderate372327281236
Standing, playing with kids, light261229197165
Loading, unloading car279245211177
Climbing hills with a load of 9 pounds651572493413
Climbing hills with a load of 10-20 pounds698613528443
Climbing hills with a load of 21-42 pounds745654563472
Climbing hills with a load of over 42 pounds838735633531
Hiking, cross country558490422354
Walking downstairs279245211177
Bird watching233204176148
Walking with kids of pushing a stroller233204176148
Marching, rapidly, military605531457384
Race Walking605531457384
Pushing a wheelchair372327281236
Walking the dog279245211177
Mountain climbing, rock climbing745654563472
Run/walk, playing with animals372327281236
Walking using crutches465409352295
Walking, pushing a wheelchair372327281236

HOW HIKING BLASTS CALORIES

Walking a mile will not burn the same amount of calories as running, but becoming a runner is challenging and not for every person.

This is true because many have tried running and failed the first times. Not everyone is going to feel the pleasure in running as is the case with others, and that’s where hiking comes in. Here are some of the most important benefits you’ll get from hiking:

Increased levels of caloric burn

Although many believe that burning calories is not a priority when it comes to exercising, it’s important to know that this process makes a significant contribution towards weight reduction.

Hiking will burn a lot of calories per hour as opposed to walking. Judging by the increase in breathing and heart rate, the uphill section of hiking is the same to a moderately-paced run, from the perspective of calorie expenditure.

It’s a logical progression

Psychologically, it’s simpler to push yourself during a hike than it is when running. If you want to rev up your workout routine, and running is not on the list due to lack of interest of injuries, then hiking can be an excellent alternative. This is a perfect gateway exercise as it helps in building cardiovascular fitness as well as strengthen your leg muscles.

It’s an easier outdoor activity

The best thing about hiking is that you can do it anywhere there’s a hill. You don’t have to drive to the Rocky Mountains for a hike. What’s more, novices can undertake their hiking trips in areas with small hills to give them the same mental effect.

If you are not able to access a hill, using a treadmill at an exaggerated incline will produce a similar effect, although it’s highly recommended you get outside.

Hiking can be adventurous

If you reside in the urban areas, hiking can be a great weekend activity. Make arrangements to go somewhere with hills and a fantastic view, and don’t forget to take your friends with you. Questing to get to the top first will create motivation as you experience each other in an entirely different setting.

Instead of remaining inside to watch a movie, it’s more challenging to embark on an outdoor hiking expedition. Additionally, this activity will help burn calories and keep you in shape.

Hiking is an excellent workout

Although a significant part of the motion takes place from your waist down, the arms can also get involved when you use trekking poles. Even when you don’t, there’ll be so much pumping and swinging arm movement than with walking.

The core will be engaged more, and your body will stabilize when going over rough surfaces, while the thigh, calf, and butt muscles will be burning when you are through.

The lower body will be stronger, muscular, and more tone with hiking compared to walking. Finally, since it’s a challenging cardiovascular work, the lungs and heart will also benefit from it.

How to get going

Grab a pair of boots with excellent grip and ask a friend to come with you. Find some hilly terrains in your local area. The trails don’t have to be complicated. Make sure you carry your cell phone and some water to keep your dehydration in check.

Begin with something smaller and assess your feelings about the exertion. If you find the activity fulfilling and you would like to push yourself further, you should prepare yourself for something more challenging.

Once you are comfortable keeping up with the pace, and after you have built up you stamina to attempt something riskier, you’ll have to plan more. Challenging hikes require additional time and money, but it beats a weekend on the couch, or doesn’t it?

Hiking is about getting out and experiencing nature. If you are new at this, make sure you begin with a pre-arranged group. There are numerous hiking groups within your area of residence. All you need to do is ask around or search the internet to see the options available to you.

There are some outdoor gear you will need to have with you when you are out hiking. These are:

  • Hiking boots
  • A moderately-sized backpack
  • Cell phone
  • Water and food
  • A first aid kit
  • An emergency rain poncho
  • Camera
  • Sunscreen
  • A hat
  • Bear spray for self-defense
  • Sunglasses
  • Extra socks
  • Replacement shoe laces
  • Water filter
  • Mosquito repellent
  • Emergency fire-starting tools
  • A flashlight
  • A toilet paper (just in case)

Do not forget to dress comfortably. Also, you need to remember that higher elevations are usually colder, and in other cases, the terrain may be covered with snow. Therefore, it is important to know your trail and mark the season for the hike.

In conclusion

In as much as hiking is a leisure activity, it’s also an excellent way to burn calories and reduce weight. When embarking on a hiking mission, make sure you have everything planned out. Pick the right group with similar hiking objectives.

Going on a hike as a group, or with someone you’re close to will give you the motivation you need to keep moving. In the end, you’ll end up with many great stories to share. Remember, hiking is not a race. Enjoy it as much as you can and while at it, enjoy the scenery as well.

Camping Tips For Solo Outdoor Adventurers

0

Camping is often considered by many as a group or family activity. When most people think about camping, they usually envisage people sitting together around a campfire, eating and roasting marshmallows for s’mores and sharing their scariest ghost stories. However, camping can also be a solitary activity, that you are going to enjoy very much.

Firstly, solo camping comes with a lot of perks. You won’t have to rely on anyone else, which means you can focus on yourself, enjoy the silence of nature, live in the present moment, and recharge before returning to the hustle and bustle of daily life.

Camping alone might sound scary or dangerous – and it’s often portrayed that way – but it isn’t! Women, especially, are warned not to go camping alone, but so long as you go prepared and make yourself aware of potential risks, there is no reason to believe that camping by yourself is unsafe in any way.

The best way to enjoy your first solo camping trip is to start cautiously and build your confidence from there. While the saying that there is safety in numbers exists for a reason, there is also safety in preparedness. Camping alone isn’t for everyone, but if you love to camp and you’re curious about going it alone, try it at least once.

For novice campers, we will walk you through essential items you should always carry with you, some solo camping tips, risks to be aware of and how to avoid them, and ultimately convince you of the many reasons you should give camping alone a try!

Tips for Solo Campers

Going camping alone might sound intimidating if you’ve never done it before, but anyone can have the confidence to go alone. Solo camping means you won’t have anyone else to rely on, but this can be a liberating feeling and teach you a lot about yourself. You’ll be able to enjoy the silence of nature, stay present, reflect, reconnect with yourself, and recharge your body and mind before returning to normal life. Camping by yourself also offers you the opportunity to focus on improving your skills like starting a fire, pitching a tent, and cooking hot food outside.

If you’re going camping by yourself for the first time, there are a lot of tips that can help you feel well prepared. Novice campers should always camp near the parking lot and other camper sites so you aren’t too isolated if something goes wrong.

Always be mindful of the fact that you have to carry all of your gear by yourself so carry as small a pack as possible by taking only what you need for clothing, food, and cooking supplies. You can also lighten your load by packing a small, uncomplicated tent or even just a hammock depending on the season and location. It’s also helpful and reassuring to choose a location you’re familiar with for your first time solo camping.

Leave an itinerary behind with friends or family so someone knows where you will be and when you’re expected to return. That way you don’t have to worry about being rescued if you find yourself in an emergency situation.

x

Camping alone usually sounds scary or dangerous to people who have never tried it, especially for women. But by following a few simple safety and preparation tips there is no reason to fear solo camping. Just keep in mind that you’ll have a lot of free time to yourself so bring a book or journal, and try relaxing activities like hiking or kayaking by yourself. And it’s ok to make friends if there are other campers nearby and you’re feeling a little lonely!

Essential Items for Camping by Yourself

Whether you’ll be camping by yourself or with someone else, there a few essential items every camper should take to be prepared and stay safe. However, these items are even more crucial for solo campers who need to be ready to handle any emergency situation or unexpected weather conditions on their own. If you’re planning a solo camping trip, make sure these items are on your list:

Navigation

You should always have navigation tools available to help you find your way through the unfamiliar outdoor territory, especially if you happen to get lost which can happen to even the most experienced campers. To help navigate trails and campsites, always carry a map, compass, and GPS, and make sure you know how to use these items before you head outdoors.

Sun Protection

Sun protection is important on every camping trip and in every type of weather. Just because it’s cold or cloudy outside doesn’t mean you aren’t exposed to the sun so protect your skin with sunscreen, sunglasses, a hat, and long sleeves and pants.

Insulation

This is essential for winter camping, but can also be useful year-round. Even summer nights can bring cool weather depending on your location so check the weather before you go and pack clothes and sleeping bags with the proper insulation for your specific needs.

First Aid Kit

A first aid kit might seem like an unnecessary item or added weight, but they can come in handy when you least expect it. Even experienced hikers and campers can twist an ankle on unfamiliar terrain or have an allergic reaction to something they’re unaware of. Always be prepared with a basic first aid kit for camping trips, but especially when you’ll be camping alone.

Fire Supplies

Starting a fire outdoors isn’t easy, especially if you don’t have the right supplies with you. At the very least pack or find some fire starter and carry matches so you can cook yourself a hot dinner and stay warm at night.

Repair Kit/Tools

Most camping and hiking equipment comes with repair items so make sure to always carry them with you. Tent and sleeping bag repair items can come in handy and make a major difference in keeping you safe and warm if you tear something accidentally. Carry some basic lightweight tools as well like a multi-tool to help with setting up your camp or any other unexpected scenarios that might arise.

Food

A hot meal at the end of a day of hiking and camping is always ideal, but never forget to carry emergency non-perishable items in case you can’t start a fire due to rain or other natural elements. Emergency food will also come in handy if you find yourself lost or stranded and waiting for help to arrive.

Extra Water

Nobody can survive without water so always carry extra drinking water or a method for purifying water you collect from a lake or river. You can purchase water purification tablets, rehydration salts, steri pens, or filtered water bottles for cleansing water that might not be safe to drink.

Local Emergency Numbers

Never go camping alone without a list of emergency numbers to call in case something happens to you or someone else. These numbers should include an emergency number like 911 and numbers for the local park ranger.

Solo Camper Concerns

In general, there is no reason to fear solo camping. Fear of camping alone is often spread through the media and scary movies, but there is no reason to fall prey to the negative and false information. By being aware of the realistic potential concerns that might arise while camping alone, you can prepare yourself for any situation and eliminate all fear of going camping by yourself.

Here are a few things to be aware of and prepare for before you try solo camping:

  • Nature is home to all animals, including predators – Be aware of the potential predators in the area you’ll be going camping and do some basic research on how handle any interactions with these animals. For example, know how to hang your food at night if you’re camping in areas where bears are a native predator.
  • If you know you are allergic to certain pollens or plants that grow in the area you’ll be camping, pack any essential items you need to manage your allergies. This might include a daily allergy pill, inhaler, or Benadryl in case of an allergic reaction.
  • Your phone might not get reception – It’s a good idea to carry a cell phone on your camping trip in case you need to call someone in an emergency. However, be aware that your phone might not get reception in remote areas and be prepared to handle emergency situations on your own until you can call for help.
  • Illness and injury are the primary concerns for solo camping – Always carry a basic first aid kit to handle any injuries or illnesses you experience while camping alone. Be able to handle common injuries yourself like wrapping a twisted ankle, bandaging a cut or wound, and carry helpful over-the-counter medicines like a pain reliever and something to help with an upset stomach if you start to feel ill.
bear canister for animal-proofing campsite

Reducing the Risk

Now that you understand the potential risks of camping by yourself, you can reduce the risk of something going wrong by being properly prepared. The primary concerns for camping should always be shelter, first aid, and food and water. Make sure you know how to set up your tent before you go, apply basic first aid, carry plenty of non-perishable food in case of emergency, and extra water or a water sterilization tool.

You can also reduce some risks by knowing how to hang your food out of reach of predators when you go to bed at night, being aware of any allergies you have and how to manage them, and avoiding eating any plants unless you are really an expert on what is safe.

The final major risk reducer you should be prepared with is dressing appropriately. Always check the weather before you go and be prepared for the worst. Also keep in mind that bright gear and clothes will make you easier to spot if something happens. You don’t want to pack anything unnecessary, but certain times of year bring new risks like camping in the winter. Make sure you pack enough warm clothes with the proper insulation to keep you warm and safe.

Reasons to Camp Alone

Beyond preparing you for how to safely plan a solo camping trip, we want to convince you of the many wonderful reasons to go camping alone. Camping is usually considered a group activity, but it doesn’t have to be. Many people enjoy the solitude of escaping to the outdoors alone to seek peace and quiet and focus on themselves for a few days. If you decide to give solo camping a try, you’ll be able to escape from the hustle and bustle of everyday life and enjoy some time to yourself.

Camping alone forces you to learn and understand your personal limitations and strengths. When you realize that you’re capable of carrying your own gear, setting up your own shelter for the night, and cooking yourself a hot meal over a campfire in the middle of nature, it gives you an empowering feeling to realize how many things you can do on your own.

Enjoy the time away to develop independence and self-reliance, skills that are useful way beyond just a few days alone in the wilderness. And best of all, you won’t have to share your s’mores with anyone!

Concluding thoughts on this topic

Hopefully by now we’ve convinced you of the many reasons to give solo camping a try, and helped prepare you for how to do it safely. Spending time alone can be intimidating when you only have yourself to rely on and provide entertainment, but it’s a liberating feeling when you finally realize that not only can you do it, but you also enjoy it.

Just remember to start cautiously by camping in areas you’re familiar with and preparing yourself ahead of time. With knowledge of the essential items you’ll need, risks to be aware of and how to avoid them, and specific tips for camping alone, there’s nothing left to fear.

Are you ready to give solo camping a try? Tell us about your experiences in the comments!

Hiking 101: A Beginner’s Guide to Walking in the Wilderness

0

Hiking is not only the best way to stay fit and healthy, but as a perfect way to see and discover the beauty of the nature that may even be in your own backyard.

Enjoying a day in the outdoors with friends and family can be a great bonding experience by getting everyone together for a fun day of exercise. Here, we will discuss how to hike and share some important information you need before you go. When you learn how to go hiking, you will soon want to go all of the time!

Preparing for a Hike

Before hiking for the first time, you will want to invest in some good hiking boots, as regular tennis shoes will not work well. Prepare yourself by starting out small and working your way up to longer times. You will eventually be able to go on day hikes and not be tired out quickly.

Be sure to pack plenty of water and some snacks while you are gone so that you do not get dehydrated or hungry. Make a list of things you need to take with you as well as a map or GPS so that you do not get lost. Another thing to remember is to tell one or two people where you are going and when you will be back, in case of an emergency.

Hiking Clothing

Here are some of the important items you should wear or have with you while you are hiking. If it is cold, dress warmly as you can always remove layers of clothing.

Boots: Using hiking boots is the best way to go when it comes to hiking. They provide traction and extra grip when going through harder terrain. Boots can also come insulated to keep your feet warm.

Socks: Wearing a good pair of socks, or two, will keep your feet dry and take in the moisture from them. Many people prefer wool socks because of this reason. Socks also prevent blisters from occurring and make fore a more enjoyable hike.

Pants: It is not recommended to wear shorts unless it is a hot day and you are not climbing far up. Try to wear pants that are light weight and can dry fast in case you get wet somehow. You can also purchase pants that turn into shorts by unzipping part of the legs. However, wearing pants will prevent you from poison ivy and anything else in the woods that may cause a reaction.

Shirt: As far as shirts go, you want something light in weight and maybe performance based. If it is cold, consider a fleece to wear over your shirt. Never underestimate the difference in temperature as you go up in your hike.

Jacket: Again, you will want a light weight jacket that is still warm, maybe fleece lined or wool. Your jacket should also be fully waterproof and be able to block wind. Consider a jacket that has a hood so you can pull it up if it is a windy or cold day.

Hat: A hat is a perfect item to have, no matter what the weather is. In warm weather, the hat will block sun and give you the ability to see better. In colder weather, a hat will keep in body heat and protect your head from snow or rain.

Sunglasses: You will no doubt need sunglasses when you go hiking, whether it is a sunny day or a cold day. Sunglasses will block the sun and protect your eyes from UV rays.

Also, in cold weather, wearing glasses or even snow goggles will help to prevent snow blindness.

Hiking Gear

Having the correct gear can mean a world of difference when you are out hiking. Here is a list of items that will make sure your hiking experiences is stress free and memorable.

Backpack: Be sure to bring along a backpack and fill it with the items listed below along with a flashlight, batteries and maybe some extra clothing if you need it. If you will not be gone all day, then you will not need a huge pack to take with you. Just bring what you need, but be prepared.

Map or GPS: Bring along a map or some type of GPS with you so you do not get lost. If you do get lost, do not hesitate to call the authorities.

Cell Phone: Having a cell phone will not only allow you to use a GPS, but you can call for help if you need to, and take breathtaking photos and videos of your hike. If you find yourself without a signal, you should also bring along a radio transmitter, which will allow you to signal for help.

Camera: If your phone does not have a camera, or it does not work, bring a camera with you. You will capture a lot of beauty on your hike. If you love photography, a camera is a must. Later, you can create and album and share your photos with others.

Sun Block: Do not forget your sun block so that your skin will not be harmed by the elements. Not only can the sun damage your skin, but so can wind, which creates wind burn. It also protects from ultra violet rays.

First Aid Kit: Even if you are going on a short hike, you should bring your first aid kit with you. This should include things like bandages, gauze, scissors, tape, aspirin and alcohol swabs, among other things. This is very important to have because hiking can be dangerous with steep hills and lots of brush.

Pocket Knife: Having a pocket knife allows you to be ready for anything while hiking in the forest. If you get tangled in some brush, you may cut some branches away to free yourself.

Bug Spray: In the summer time, or warmer days, you will want to bring bug spray. Otherwise, you could find yourself covered in mosquito bites. Take the time to spray yourself because not just mosquitoes are in the woods, many other bugs exist.

Food and Water: Water is a necessity and will keep you from becoming dehydrated. You should also bring with you some snacks that will keep you energized and full until you get home. Bringing items like almonds, walnuts, fruit, and beef jerky will keep you full and keep your body ready to hike.

Safety While Hiking

Always be safe while you are out in the wilderness by not only wearing the proper clothing and gear, but by following simple safety rules while hiking. Keep an eye on your feet so you do not get tangled up in anything or step on a snake, which can bite you. You can also twist your ankle or otherwise hurt yourself by not having the proper footing.

If you fear you may have been lost, stop where you are and try to go back until you recognize an area that coordinates with your map. Never panic if you feel you are lost, as this happens a lot and can be easily fixed by backtracking.

However, if you have no clue where you are and need assistance, you should call 911 or authorities that may be located where you are hiking, like a park ranger. Stay where you are so they can find you. Having a GPS on your phone can save hours or days.

Hiking Etiquette

Many people are unaware of hiking etiquette, but it does exist. Below are some rules and general knowledge of what you should do while hiking.

If you are passing other hikers, especially in areas that are large, you could share information on weather conditions or terrain so the others know what to expect. Even saying hello, can be a form of positive etiquette. However, do what feels comfortable for you.

If you are going down a hill on your hike, and another person or group is coming up the hill, they have the right of way. You should slow down or step aside to provide them with ample room. If you happen to be on even ground, allow groups to pass you by stepping aside.

If you go out with a group of people, keep the noise level down so that you are not disturbing other hikers or the wildlife. Talking on your cell phone while on a hike is considered rude manners. Also, never leave trash behind, as this is not only bad manners but can also mean getting ticketed. Leaving trash around can harm the local wildlife.

If you plan on hiking with your dog, keep him or her on a leash at all times. This is just out of respect for hikers who may not want to be disturbed by your dog running up or jumping on them, or who are afraid of dogs.

Be sure to stay on your trail and keep a map with you. Making your own trail off the beaten path can not only disturb the wildlife but can they can get you lost. Never widen a trail by going around any mud puddles as you should go through them because you should already be wearing hiking boots.

Hikers do not have the right of way in all situations. If you come in contact with a bike or horse while you are out, you should give the horse the right of way, as well as the bike. While the bikes should stop for hikers, many times they are already moving to fast and it would just be easier to have the hiker stop.

If you find yourself in need to use a restroom, try to find one that is an actual restroom versus going outdoors. However, if you cannot get to a restroom quickly enough, or if one is too far from the trail, try to bring along a bag to clean up your mess. Try not to disturb any of the foliage in the area as you do your business.

A few Useful Tips

Never hike alone in case of emergency, as anything can happen in the woods like getting attacked by an animal, or falling. It would be a good idea to keep your cell phone or a radio transmitter on you, in case you need to be rescued by personnel.

Bring plenty of water for yourself and those with whom you are hiking. Dehydration can happen quickly and you should take several water breaks if you are hiking for long periods of time. Keep snacks on you, for your nourishment as well.

Bring your backpack with all of your needed items and be sure to use sunscreen. Wearing clothing that is fitting for hiking will help you from feeling weighed down or over heated.

Never forget to let people know where you are going and when you are expected to return home, so they can notify someone to find you if necessary.

Always check the weather before you leave so you know what to expect. When it rains, hiking conditions can become slippery. Use caution if you hike in undesirable weather. If you see dangerous weather like a thunderstorm, you should head back down to the base of your hike.

Never rush to finish a hike. Take several breaks over a period of a few hours so that your body does not burn out. Try to find a shaded area for rest.

Even though animal attack often happen, they are actually rare. Animals are just as afraid of human beings as we are of them. Nevertheless, you can purchase sprays that will deter animals like bears and mountain lions.

Discover Arizona Through My Eyes!

0

Arizona is considered today by many hikers as the gateway to the land of many trails and as a destination to many students who see it as an ideal area for studies. These amazing tips are going to guide you discover Arizona through my very eyes!

The state boasts over ten national parks to hike, camp, skip, jump, and run through. All with adverse similarities and obscure differences. It is a hell of a state for those into their hiking, though, more than anything else. Finding the perfect spot for you and hiking needs of the modern homo-sapien hiker can be tricky with such a plethora of areas to choose from.

The 277-mile in length gouge in the earth that, at certain intervals, have dips and falls to the river below ranging a mile drop. It is truly a wonder of the world, a revel to the human eye, and a masterpiece of nature. Arizona has much more to offer by way of natural, unbelievable beauty in is plentiful landscape.

A little research into the land can do a world of good when it comes to your next trip, so let us take a look at the best hiking trails in Arizona, their attributes, what makes them unique and worth seeing. So fill your day pack that you require, and let’s get hiking.

Let’s Start Slow, With Some Simple Hike Trails

Starting with some of Arizona’s less formidable trails is merely to ease us all into the where and the what that Arizona has to bring; but know this, that only because these hikes are easier on the foot than traversing down the banks of the Grand Canon by way of path or by abseil, does not make them all 100% safe.

So stay ever vigilant, keep your party safe, and remember to have fun in the promise. Now, after that brief note of caution, onto the trails.

Reavis Ranch found deep in the Superstition Wilderness

Named after Elisha Reavis; a hermit who had come to settle up in the mountainous region in the late 1800’s. An elusive man who spent most of his life either teaching elementary schoolers, divining for gold in the most tumultuous regions of the state, or fighting in the many Indian Campaigns of the time.

As well as owning the first library of books in the Superstition Mountains, killing a bear using a gun that misfired, and rearing horses and mules, he is best known for his planting of an apple orchard 700ft in elevation. A working orchard that surpassed its planter and continues on some hundred years later.

The ranch and surrounding areas have turned into hiking tourist attractions as of late, where the views are stunning and the apples are plentiful, free to those travelling through the orchards.

This trail is for those interested in the deep history of the gold rush of the late 1800’s outside of California, beautifully kept meadows and orchard, and if you wish to find something as amazing as pine trees just above the blazing heat of the desert sands of Arizona.

Flat Iron, the connection trail to the Superstition Mountains and Four Peaks Wilderness

Another trail of note in the Superstition Mountains is that of Flat Iron. Also known as the Siphon Draw, this is a little less a walk in the park as it is more of a trek through the a rocky terrain that once surpassed will make you feel like a king of all that surrounds you.

A six mile round trip through the rough of the Superstition Wilderness, with some of the most prominent and bewildering rock formations that you are likely to find in the great state, this hike is well worth the effort of its traverse.

This hike is not recommended, though, right after even the slightest of rain falls, as the majority of its paths is made up of slick rock which is not fond footing when slippery.

The gaining of both of the territory’s names are interesting in of themselves, Flat Iron is aptly nicknamed for a large protruding spike of rock that stands at 4,800 feet in the air, and the name of the land Siphon Draw came from the name of the trail.

Browns Peak – Prominent in the Four Peaks Wilderness

A beautiful mountainous pass, found out east of Phoenix in the northern region of the Four Peaks Wilderness. Brown’s Peak is the highest of the four peaks in the territory at over 7,000 feet tall. The path takes you all the way up to the summit, which offers an incredible view.

A good sized portion of the entire state of Arizona, and even the highest mountain in the state Mount Humphrey’s, can be seen on a clear day up there.

As well as being revered as an all natural crows nest, the area that surrounds Brown’s Peak has a large black bear population, so be careful when on the trail and stay in packs. Do not let the presence of bears be of alarm, as they stay away from hike trails and rarely cross them unless majorly provoked.

From Molehills to Mountains – Higher Elevated Trails

Mount Wrightson, found just outside of Tucson, in the Santa Rita Mountains

Just over 9,000 feet, Mount Wrightson looms over the nearby city of Tucson in an almost protective fashion. Found in Madera Canyon of the Santa Rita Mountains, this mountain’s peak offers an incredible panoramic view of southern Arizona.

If you make it to the summit on a clear enough day, you can even be able to see parts of Mexico as you gaze across the landscape. There are two trails available to the public for reaching the summit, and they both cross one another making a classic figure 8 symbol.

The shorter trail of the two at 10.8 miles round trip is the Old Baldy Trail, and three longest coming in at 14 miles round trip, is known as the Super Trail. As mentioned before, both trails lead to to the mountain’s summit, and cross over one another. So the only question you need ask yourself is can I make those extra four miles?

Mt. Baldy Loop looming over the top of the White Mountains

Not to be confused with California’s Old Baldy Mount San Antonio, Mt. Baldy of Arizona shares the same beauty and majesty as its cross state cousin, though towers a lot higher than the SoCal treasure. There are two main hiking trails available for the general public to take with two different peaks to achieve on the hike.

Unfortunately, if you are not a member of the White Mountain Apache Tribe, you are not permitted to make it to the true summit of the mountain. But there is beauty in both the public trials of West Baldy #94 and East Baldy #95, and the connection path, #96, that turns the whole trail into a perfect loop. A lot of fun in taking these paths, with some incredible views to compensate the tough journey.

Mount Kimball of the Catalina Mountains

Another mountain that stands close to the city of Tucson, but this time found in the southern peaks of the Santa Catalina Mountains. Mount Kimball is the highest peak in that region, and is what is known as a ‘Sky Island’ – a mountain with its lower slopes deserted, cracking and hot, but the higher you go, the more vegetation and even forestation is found on the higher you get.

The mountain trail is best for seasoned hikers as it is a steep climb on the way up to the summit, and even then can be a tricky trail to hike. Like many of the great mountains in Arizona, this hike is giving you the option of what trail to walk up; Finger Rock Canyon or by Pima Canyon.

Both will get you to the summit of Kimball, they just provide different starting routes. Finger Rock Canyon starts you off on a major road that lead to foothill paths, whereas the Pima Canyon trail starts further west and cuts through many other trails along the way. Both are the same level of difficulty to hike up.

Mount Humphrey’s – Highest Mountain in the State

Mount Humphrey’s stands as the tallest mountain in the entire state of Arizona, its peak at 12,633 feet, makes it less of a hike and more of an expedition. Yes, people, before you have come and planted their proverbial flag, but you know what they say, “you gotta do whatcha gotta do”.

Humphrey’s Peak is the hiking trail used to scale the sides of the mountain. The mountain is found a few miles out of Flagstaff, Arizona, and helps form the Kachina Peaks Wilderness Area, that takes up nearly a 18,000 acres of land within the Coconino County.

The mountain was named after General A. A. Humphreys, who worked for a time as US Chief of Engineers. The views from the summit of Mount Humphrey are truly remarkable and will brighten up any photographic portfolio; you just have to be proficient enough a hiker to make it all the way to the top.

For Those Opting for the Scenic Route

Kendrick Peak – a lesser Humphrey’s Mountain

Those who wish for a less grueling hike and climb than that offered by Humphrey’s Mount, then you should be heading over to Kendrick Peak; a less intense elevation at 10,000 feet, which still allows bragging rights for you and your party.

Just shy of Flagstaff and an hour from Phoenix, the state’s capital city, stands Kendrick Peak. Found in the San Francisco volcanic field, a 1,800 square mile area filled with over six hundred volcanoes. Some of which have been geographically aged at around six million years old, and the youngest at around a thousand.

So, even though the area has not seen a deadly eruption of one of the volcanos for some years, does not mean that it is wholly advisable to stray too far from the beaten hiking path. It is still a fun trail that afterwards grant you the bragging rights of hiking through a volcano field.

Oak Creek Canyon, Sedona

Sedona is an area of Arizona that is plagued, and bettered, by steady and unrelenting tourism attractions, which makes it a hard place to find and maintain a little bit of solitude. Though there is a small area, within a small canyon, where peace and quiet should really be present in its name. At the West Fork of the Oak Creek Canyon, beauty and serenity can be found with ease.

A hike trail lay deep in the east of the tourism, hiking down to this river bed enclosing feels like something out of an old western film. The waters give the looks of those ripe for divining, and are cool to the touch as you trail through. A real refreshing experience to travel to and through.

Havasu Falls. Visit as long as you obtain permission

The beauties of the Grand Canyon never cease to amaze people. Like the fact that in the middle of all of that dry earth, scorching deserts, its high peaks and mountains, there cascades deep and mystic waters for us to take our time in hiking to, and then spend the rest of your day diving into the scenery.

Majestic waterfalls are awaiting you just within the Havasupai Indian Reservation, one of many located in the state of Arizona, so that means that these waters are only accessible to you after obtaining a special permit to use the land for hiking through and camping on.

But the turquoise rich, waters, are so worth the hassle of the permit offices. One of the other minor hiccups is the fact that the car park and main entrance are both located a smooth downhill climb from the campsite – which makes for a steady climb to get back to your vehicle so pace yourself.

With photogenic scenes of raging white waters protruding from a mouth, cut out of the red rock holding the valley together, who needs Instagram filters? The Havasu Falls are simply stunning and they are a must see during your time in Arizona. Make sure you check it out.

Enjoy Your Hikes and Stay Safe Out There

Regardless of which of these magnificent trails to hike down, to the top of one of the many mountains the state has to offer or plunge deep into the valleys and ravines in the most famous canyons the country has to offer, you are guaranteed to enjoy yourself and wish that you had more time to explore the next trail head endeavor.

The Most Desired Footwear: Hiking Shoes Vs Hiking Boots!

0

Usually, one of the most daunting task is actually choosing the right footwear. Basically, most people have prioritized hiking boots due to the common notion that they offer an unsurpassed protection and comfort than any other footwear can provide.

Normally, it’s true, that hiking boots can offer a great protection. However, when it comes to hiking shoes vs hiking boots, the boots do not emerge victorious in all areas compared to hiking shoes, which have nowadays topped the list of hikers because of their comfort and lightweight, among other features.

To ease your confusion, we have discussed some important features for each footwear below. Among other features to look for, we have sought to compare the comfort, protection, waterproof, seasonality, proper fit, weight, and the type of terrains to traverse on.

It is through these comparisons that you might be able to choose the best footwear for your hiking adventure. We personally cannot pick the right footwear model because it depends on personal preference. But we will make your choice easier if you keep on reading.

Comparisons of features between hiking shoes and the hiking boots

As introduced above, we will compare the comfort, protection, traction, waterproof, seasonality of use, weight, proper fit, breathability, and the type of terrain to be traversed using any of these foot-wears.

Comfort

Due to the rigidity of these boots, and the sturdy coverings around the ankles, we doubt the excellence of this footwear in the provision of comfort. The comfort of the hiking boots may be determined by the flexibility and mobility of our feet. Unfortunately, this is something that is lacking in the boots because they are predominantly made of sturdy materials aimed at offering maximum protection.

comfort of the hiking boots

When wearing hiking boots, your feet or your toes may not wiggle enough. This in turn causes the discomfort to your feet, especially when traveling for hundreds of miles or when descending on steep terrains. As a result, you might be prompted to take infinite rests along the way to ease the restricted mobility of your feet. Having noted this, if your priority of buying the hiking footwear is comfort, then the hiking boots may not be the best choice for you.

It is without doubts that hiking shoes have a superior comfort over hiking boots. This is attributable to the soft and light materials used in handcrafting this footwear. For example, your toes and feet will have enough wiggle room when traveling for any length of the terrain. The comfort is measured by the extent of flexibility and mobility of your feet in the footwear. This is something not found in the hiking boots.

Moreover, the fact that hiking shoes are seldom over the ankle length makes them more comfortable. The ankle can move flexibly without any restriction, although it might be vulnerable to tree scratches when crossing over rough terrains. But provided you use this footwear on well-groomed trails, then you are guaranteed a great comfort compared to putting on mobility-restricted hiking boots.

Protection

We have to give credit where is due. The hiking boots get a crown here in foot protection. Their sturdy and rigid designs provide maximum protection compared to the hiking boots. That noted, you can hike in rough terrains, on rocky mountains, or inclement weather conditions without any fear of exposing your feet to danger. The outer sole is also strong enough to not be exposed to sharp objects on your trails.

Red-hiking-boots

Quite often, leather, synthetic materials, and suede are used in designing these boots. They are not only strong, but warm too, to protect you against inclement temperatures, something that light shoes might not achieve to the fullest. So, to those hiking predominantly in the winter seasons and on rough mountains, hiking boots are your best companions for such pursuits.

These shoes might be lightweight and comfortable, but have inferior protection compared to hiking boots. They are made of light and soft materials, which excludes them for use on off-trails, and in winter’s harsh temperatures. But they can still be used in off-trails and harsh temperatures depending on the extent of such inconvenient conditions, because some materials can give a minimum protection even though not comparable to hiking boots.

Lightweight Hiking Shoes

Because many hiking shoes seldom extend over the ankle length, the ankles may be vulnerable to injuries. If trekking over off-trails, you must be vigilant of small trees on the way to avoid scratches on your ankle, otherwise your hiking journey might be fruitless. Furthermore, the mesh patches designed for hiking shoes exposes them to the wrath of the inclement weather conditions. So, that being said, hiking shoes are not the best choices for foot protection.

Traction

What will be the point of hiking on slippery surfaces if your footwear has a poor traction? That will be compromising your safety because you can trip anytime. Imagine if that occurs in higher altitude mountains. It could be extremely treacherous. So, fortunately, hiking boots have lugged soles to offer a better traction compared to hiking shoes. Such traction strength can survive rocky surfaces or any downward slopes.

Traction Hiking boots

However, the fact that these boots have higher soles that take you off-the-ground, can be a drawback to your foot balance on slippery surfaces. But this can be avoided by reducing your speed when going down such surfaces.

These shoes also have a great deal of lugged soles for traction, but not as much as boots do. The boots have thick soles and this emerges as an advantage over the shoes in traction properties. With this minimal traction, you can hike on medium slippery surfaces without tripping to your injuries.

The traction differs from one sole material to the other. Other hiking shoes arguably provide the best traction that can be relative to hiking boots. Well, that depends on the thickness of the sole.

Traction Hiking shoes

The thinner sole, however, has an advantage of traction on slippery because of a great balance. With thinner soles, our feet get more balance from the ground than when the soles are too thick as is the case with some boots. But still, in overall, boots have a great traction if you have planned to travel on such slippery terrains.

Waterproof

Most of the boots for hiking are said to be waterproof should you hike during downpours or step on snow. It is true because some are clothed with Durable Water Resistant (DWR) materials to repel water from soaking through the boots.

However, this waterproof feature has limitations should you get submerged in water for a long time or over the ankle length. Eventually, water drops may soak into your boots and dampen the inside. Moreover, the waterproof materials wear as time goes on. Then you must re-coat the boots.

Probably the worst experience of wearing hiking boots could be their drying time when you have been submerged in water. If you have one pair then that might be a messy day for you. It’s either you let them dry first, or you hike with heavy and dampened boots. All in all, regardless of the setbacks, boots have a great waterproof feature compared to shoes for hiking.

hiking-shoes-in water

Shoes are also said to be waterproof, but inferior to the boots due to their mesh patches. Unless the shoes in question are not meant to be breathable, then they can be competitively waterproof. But that’s rare of course. So, if you are prioritizing waterproof, the hiking shoes may not be the best choice for your desire. Either way, these shoes are predominantly designed to be used in dry seasons where rainfalls are rare.

Even if these shoes can be submerged in water, they can dry fast due to their light weight materials. Firstly, they are breathable, meaning if the water soaks in it can be eliminated through the mesh designs.

It is therefore unlikely that your feet will remain sweaty for a long time. That’s where they beat the boots, because boots takes forever to dry out. So with these shoes you can travel with them while damp knowing that they can dry quickly.

Weight

Weight is an important factor for hikers due to hiking gear that we are compelled to have when hiking for many days. So you wouldn’t want to travel for hundreds of miles with heavy gear and heavy boots. But then in reality, hiking boots are heavy compared to hiking shoes. Of course they are made of heavy materials and have thick soles. All these amounts to heavy weight that is made to provide a good foot protection.

heavy-hiking-boots

So, if you are an ultralight hiking enthusiast, hiking boots may not be the best footwear for your desire. On the other hand, if you plan to hike in the winter season, you have no choice but to tolerate the heavy weight of these boots since they provide a better foot protection in such seasons. In general, the boots are heavier than the shoes.

The hiking shoes are the popular choices for ultralight hiking devotees. They are certainly the winners when compared with the hiking boots. Soft and light materials are used in crafting these shoes. Moreover, the mesh patches add to the advantage of light weight.

So, you won’t expose your feet and your knees to an unbearable heavy weight notwithstanding the types of terrains your traverse on or the weight of your hiking gear you have. For hikers that are fond of running, shoes are the best choices due to their light weight.

girl-holding-hiking-shoes

The other advantage of the shoes is the thin soles. They provide a lightweight sigh of relief to hikers. But then the disadvantage of the thin soles could be the sharp objects when hiking on off-trails depending on the material of the shoe. Nonetheless, hiking shoes are the best choices in terms of the light weight when using them in dry weather conditions.

Durability

With boots you can travel for thousands of miles without them wearing out because of the sturdy materials used in them. They have thick and lugged soles that can survive the rough surfaces, and thus last you for long.

Furthermore, off-trails are not the voids of durability for the shoes due to their rigors. So, if you want to save, hiking boots can be your good choice. You may travel thousands of miles without having to replace them. Their waterproofness also adds a significant value to durability.

It is undeniable that hiking shoes are not as durable as the boots. Their soft and light materials, as well as the lack of quality waterproof feature, are attributable to this void of durability, more especially when traveling on rough surfaces.

light weight-hiking-shoes

But if cared for, and used on even surfaces and well-established trails, they can last you for long. We encourage you to have at least two pairs when hiking for many days.

Proper fit

The hikers’ boots, in general, do not provide a proper fit straight from the box. Our advice is that, wear these boots a few weeks before heading out to your hiking excursions. You can wear them and take short walks to stretch them so that they fit well. Failure to prepare them for a proper fit may result in blisters on your feet and restricted mobility.

Your journey might turn out to be fruitless. This is because these boots are made of strong materials, so they are not easy to conform to your foot shape at first use.

Because of their soft materials, the shoes have an excellent proper fit directly from the box. There is no need to wear them and take numerous short walks before heading out to your trip.

hiking-shoes-size

With this advantage, you can purchase a pair in a foreign country when you hike and fit it instantly without causing blisters on your foot. That’s the advantage of shoes over the sturdy hiking boots.

Season of use

You may have probably concluded in your mind, thus far, that which types of seasons to use these boots for. It is mainly in the winter that hiking boots play a significant role due to their warmth, foot protection, waterproof, and durability.

Winter season requires these kinds of footwear because light materials cannot withstand the coldness and ubiquitous downpours.

For the dry seasons, mainly spring and summer, hiking shoes are the relevant footwear to wear. They are light and breathable. They will therefore let enough air circulation to your feet, thus eliminating the moisture that could cause blisters to your feet.
hiking-shoes-in-summer

Furthermore, these shoes are less insulated, and this makes them preferable in dry seasons. Wearing hiking boots in hot days may prompt you to take them out whenever you rest so as to minimize the heat inside.

Breathability

It is very rare that you may find hiking boots with mesh vents. The main purpose of these footwear is to be well-insulated to provide an unparalleled warmth during inclement weather days. But, then that warmth may lead to sweaty foot and eventually lead to blisters on your softened foot.

Moreover, the ankle are often covered, and this further limits breathability of this footwear. This lack of breathability discredits the use of these boots in hot days or for longer times.

These are certainly the best choices with regard to breathability. Most are made of mesh patches to let enough air in or let moisture evaporate outside. By reducing moisture, they will be preventing the build-up of odor-causing bacteria in the boots.

This will make sure that the shoes stay fresh no matter how long you have travelled. Furthermore, breathability prevents blisters on your foot because too much sweat soften the foot and eventually the foot, as in the hiking boots, may get blisters due to lack of flexibility of the footwear.

Types of terrains to hike on

This should be obvious when taking into account the types of materials and the thickness of the lugged sole. In a nutshell, rough surfaces, damped or snowy surfaces, steeper mountains, off-trails, and rocky terrains are the best matches for boots.

They will give you an unmatched protection than the shoes would. With the thick sole and a better traction, you are assured a cinch hike in almost all different terrains.

Due to the light and soft materials and a thin sole, you can hike on medium-rough surfaces on well-groomed trails. Too steep surfaces may be a challenge because of the substandard traction compared to the hiking boots.

It is also not preferable to walk on snowy areas for a long time unles you are definitely about the qualities of the shoes to withstand such conditions. And you should not submerge them into water.

Wrapping it up!

With the comparisons given above, we are confident that you are in a good position to choose the best hiking footwear. We are, however, not in any position to pick the best footwear for you because this is predominantly about personal preference.

You need to take into account, inter alia, the climate of your destination, types of terrains to travel on, the weight of your hiking gear in relation to your desired footwear, and many more.

Just take time to research more about the weather fluctuations and prospects of the inclement climate in your favorite destinations for hiking. This will help refine your search for the relevant footwear needed. We have nonetheless done our best in discussing the features of paramount importance that can be used as criteria for evaluation in hiking footwear.

Hiking In The Phoenix: Discover Amazing Trails

0

Ranked by the National Geographic as an ideal hiking destination in America, Phoenix is often seen as the safe haven for hikers. This iconic city of Phoenix has three incredible mountain preserves with many amazing trails leading to more than 180 miles of notable and developed trails.

These trails are source of attraction for outdoor adventurers and some, casual walkers. South Mountain is made up of a whole of the southern border. Camelback Mountain remains solitary and covers the Central Valley horizon. Piestewa Peak stays a series of mountains located on the northern side of Phoenix.

Inside the Phoenix city herself, there are uncountable numbers of preserves, green belts, and parks that are easily accessible for great hikes and casual walks. Are you interested in knowing some of the best hikes in Phoenix? If yes, read on!

Best Hiking Destinations in Phoenix

Listed below are some of the 10 best hiking places you need to know in Phoenix, these are arranged in no particular order.

Piestewa Circumference – Freedom Trail

Average Time: 2 hours

Level of Difficulty: Moderate

Distance: 3.8 miles round trip

While Piestewa Peak is generally known for its ever-famous Summit Trail, the Piestewa Circumference Freedom Trail offers a more intensive look at and a closer involvement with the landscape of the desert. Wound around the bottom of the peak, this region holds a variety of desert flora you can ever find in the mountain preserve.

Some portion of this trail synchronizes with the Nature Trail, which offers educational plaques itemizing different flora. The trail starts at the north end of the trail park and will promptly take you over a dry, rocky spring bed, before joining with the Freedom Trail Loop. Since, this is a circumferential hike, you can take either direction.

However, you should consider whether to choose a steep climb before you start a hike or go for a right at the intersection. Within Four miles in the preserve, there is some mellow rise picks up all through the hike that are ordinarily close to few memorial saddles.

These are decent chances to stop and take a proper look at the landscape: the peaks, the Phoenix horizon, and many other exciting desert landscapes.

Picketpost Mountain

Average Time: 3 to 4 hours

Level of Difficulty: Difficult

Distance: 4.3 miles round trip

With just 2,000 feet of rising, hiking in the Picketpost Mountain is one that will make you return for more. It provides you a brief trip on the Phoenix Trail before climbing a series of bent curves such that in a matter of one mile, it will make you look down toward the Valley ground floor from 2,800 feet away.

At this point, the trail gets somewhat specialized as we bend, leaning on the cliff walls and intersecting shaky edges before entering a very narrow valley. This area will test your strength and should be done with caution. Just stay focused and engaged.

From the valley, the trail starts an upward series of bent curves and some fun stone bouncing to the upper plateau and lastly the summit. Make sure to stop a while and observe your surroundings as you climb. You will find the views amazing as you ascend.

When you reach 4,375 feet, you will find the panorama incredible, starting from the Superstition Mountains to the Four Peaks to the Weaver’s Needle. During the day, you will have an extraordinary perspective of the Catalina Mountains which is located in the north of Tucson. To your surprise, there is a mailbox on top of the mountain? The Picketpost Mountain is one of a kind trail to enroll in without a doubt.
Tom’s Thumb

Average Time: 3 hours

Level of Difficulty: Moderate

Distance: 4 miles round trip

Situated in the more isolated northern region of the McDowell Sonoran Preserve, you will find Tom’s Thumb sitting at 140 feet and can be seen all through the East Valley and Scottsdale. Numerous hikers often call this local landmark “the dork” due to the amazing patriarch of the climbing scene.

Nevertheless, you do not have to be a climber to appreciate the sheer views of this bulging hiking scene. After climbing for a half-mile, you will reach a precarious series of bend curves. The perspectives are stunning and will help in keeping your mind off the work you are putting in.

You can also anticipate for more stunning perspectives of Cave Creek Mountains, Four Peaks, and Bartlett Lake. At about one mile, you will be sitting at an amazing 3,680 feet. About a half-mile later making two miles, you will gain a saddle for another extraordinary perspective.

At that point, there remain just a half-mile to the ridgeline and an appropriate perspective of Tom’s Thumb and its remarkable proportion.

Camelback Mountain’s Echo Canyon Trail

Average Time: 2 hours

Level of Difficulty: Difficult

Distance: 2.3 miles round trip

Camelback Mountain should be a once in a lifetime hiking. Regardless of whether you are simply going to the Valley or living around here, Camelback Mountain hikes offer probably the most encompassing perspectives of Phoenix.

Situated in the heart of the city, this 1,264-foot climb is an extraordinary taste of the mountain tucked inside the suburban boundary, one that is certain to blow your mind in more courses than one. Throughout this hike, you will enjoy the areas of stair stepping and scrambling.

If you are a little bit nervous to climb, be rest assured that handrails have been set up for your help if necessary. At simply under a mile, you will see a false summit. While this may appear like a dreadful trick after the cardio you have been using, the main summit is some steps away from this, and you will soon be on the most remarkable top you can ever find in Phoenix.

Feel relaxed, catch your breath, and appreciate the sights of the amazing metro Phoenix right from South Mountain to Chase Field, Superstition Mountains, and Four Peaks. This is a completely remarkable way to see the beauty of the whole city.

Hieroglyphic Trail

Average Time: 1.5 hours

Level of Difficulty: Easy

Distance: 3 miles

This short climb offers awesome perspectives of the Grand Superstition Wilderness Area and in addition an ancient accumulation of Hohokam petroglyphs. Situated at the bottom of the Superstition Mountains, hiking on the hieroglyphic trail is ideal for families and even a beginner hiker.

The trail head shared something in common with the Lost Goldmine Trail, yet advance you up a little hill and you will discover two wooden sign post stamping where the trail divides. Move left and proceed towards the mountain. At about a half-mile of hiking, you will eventually see the Sombrero Butte, Camelback Mountain, and South Mountain.

Proceed with another half-mile, and you will be entering the Hieroglyphic Canyon; move along this trail and at about five to nine minutes, you will get into an extensive rocky zone with scores of Hohokam petroglyphs and few small-scale pools of water. You might be wondering why this preserve was not given the name Petroglyphs Trail.

It appears that the early pilgrims and mine workers are to be blamed for the misconception. The Hohokams occupied the Central Arizona, roughly 800 years back, leaving a lot of petroglyphs behind that the early pioneers mixed up as Egyptian hieroglyphics. Hence, give rise to your Hieroglyphic Trail.

Mormon Trail to Hidden Valley Trail

Average Time: 2.5 hours

Level Of Difficulty: Moderate

Distance: 3.9 miles

Situated inside the biggest municipal park in the city of Phoenix, the Hidden Valley Trail of South Mountain gives you a chance to get away from the city with uncommon rock developments and two natural rock channel marking the end of this half-mile trail.

Quietness is always a common thing during this hike, as the city and its sounds look like they have vanished, abandoning you with dazzling rock formation and dry sandy washes. Now entering the Mormon Trailhead hike, the rising is prompt, because it is like half-a-mile to the saddle, where there is a fantastic perspective of downtown Phoenix.

You will then hit a steep area of the trail from here, which will straighten out around the one-mile checkpoint. In a matter of minutes, you will come across the crossing point with Mormon Loop and you will need to go straight, remaining on the Mormon Trail throughout until the point that you run into the National Trail.

At this point, take a right and you will be going towards Fat Man’s Pass leading to the Hidden Valley Trail. You are going to enjoy the view and exit through the other rock channel to go back through Mormon Trail.

Cave Creek Trail to Skunk Tank Loop

Average Time: 6 hours

Level of Difficulty: Moderate

Distance: 10 miles

Situated in the upper east of Phoenix within the Tonto National Forest, this particular trail features the riparian desert spring that is Cave Creek. This is more than a city; a real creek flowing through some region of Tonto National Forest, supporting a broad cluster of fauna and flora and not typically found in the desert.

After entering this hike, you will probably overlook that you are right in the desert and some miles away from the city, all regards to the lavish vegetation and the sound coming from the streaming creek adjacent to you. This loop gives you an awesome day hiking adventure.

It starts with a quiet trek through shallow and short water intersections and underneath lavish shades of trees, before finally dropping into a limited canyon and sending you climbing along a lovely, rocky creek bed. At that point, the Skunk Tank Trail loop includes some cardio, with wonderful all-encompassing perspectives on moving hills and mountains that appear round.

It is not an awful result, and simply going over part of the way through the trail, the long bend curves have hoisted you to 3,665 feet. After just a mile, the trail makes a curve and meet up with the Quien Sabe Trail 250. This is the most elevated purpose of the hike at 4,075 feet.

Proceed a little more, you will soon reach the Quien Sabe mine, and after, the old mine worker’s camp. This is a decent place to stop by and appreciate a little history before finishing the two miles remaining.

Boyce Thompson Arboretum

Average Time: 2.5 hours

Level Of Difficulty: Easy

Distance: 3 miles

Situated at the floor level of Picketpost Mountain just close to Queen Creek, Boyce Thompson Arboretum is a headquarter for most of the desert plants throughout the world. This Arboretum hike is more than just a hike.

It is more or less an educational walk and an awesome chance to start perceiving what vegetation you have seen on the trails. For a starting hiker, what you will be amazed by what normally occurs in the Valley area you are trekking through.

Upon landing, you should desire to go through the Main Trail as it interfaces with the arboretum’s remarkable elements and appealing routes. For an absolute taste of what you may experience on hikes close to Phoenix, ensure you hit up the Sonoran Desert Trail before going back to the Main Trail.

From that point, you will discover why you need to visit the Smith Interpretive Center and the Hummingbird Gardens, a memorable structure repurposed to hold two nurseries, displaying succulents and desert flora from around the globe. As you continue going on, you will soon arrive at Ayers Lake, a fabricated reservoir giving water to the whole grounds and serving as a flying creature asylum.

Past this, you will be hiking through a riparian territory, Eucalyptus Forest, an intuitive herb cultivations and a brush of palms. Your trip will be ended with a stroll over the Outback Bridge, finishing on the walkabout trail located along the Australian Desert Exhibit.

Peralta Trail to Freemont Saddle

Average Time: 3-4 hours

Level of Difficulty: Moderate

Distance: 4.9 miles

There is a considerable measure of mystery and history related to the Superstition Wilderness Area, bringing the early historians and hikers to the old mining grounds. Regardless of whether you believe the story or not, this trail is an extraordinary insight into the majesty and beauty of this amazing region.

More so, it leads to one of the best perspectives of its popular landmark: the 1,220-feet-tall Weaver’s Needle. Peralta Trail is named after a family from Sonora, Mexico, who mined the in this same region before an extraordinary slaughter, resulting in different stories of hauntings, lost maps, and gold.

It begins with a heading left to the trail head. At this point, you are going to appreciate the beauty of the gliding mountains that surround you before intersecting the Peralta Creek at the quarter-mile checkpoint, where you start your rising.

After a mile, you will reach a fork in the trail; keep going right and proceed through a series of bend curves upwards. At about a mile and a half, you will come across the Geronimo’s Cave while looking over the canyon. The trail will cross the desert spring bed again before directing you upward and onto some brilliant colored volcanic region.

Thereafter, you will pass a cave entrance. At that point, it will be left with one-half mile Freemont Saddle for a stunning perspective of Weaver’s Needle.

Reavis Falls

Average Time: 9 hours

Level of Difficulty: Difficult

Distance: 14 miles

Did you realize that there is a 140-foot waterfall just some minutes away from the city of Phoenix? Yes, the Reavis Falls is just 30 feet taller than the famous Niagara Falls. Located deep in the Superstition Wilderness, this fall is not for the swoon of heart, but rather it is unquestionably justified regardless of the effort.

The condition of the waterfall fluctuates based on any last rainfall occurrence, so arrange in like manner. Start at Reavis Trailhead, with a wonderful perspective of Apache Lake, which is right behind you and an extraordinary visual upon your arrival.

From here, you will make a curve and move through Reavis Trail for a little more than two miles, gaining a saddle at around 4,000 feet. A snappy swing to look behind you yields an extraordinary perspective of Four Peaks. After a mile, you will start to see Castle Dome.

This is a precarious aspect of the trek arrival at a saddle at around 4,675 feet. In a matter of one mile, the trail starts to slip. The descent is around 1,625 feet. And, recall that this will be a jump while going out. At about six miles, you will get to Reavis Creek and trace it upstream, where you will traverse the creek a few times.

This includes much rock jumping and customarily extremely icy water. In case the stream is great, you will hear the gliding sound of the waterfall before you see it. The sounds will allure you nearer until you get to this mind-blowing sight, smack spot at the very center of the desert.

Tips for Hiking in Phoenix

Over 200 hikers are being delivered every year from the preserves, mountain stops and desert of the city of Phoenix. The essential tips below can help prevent you from adding to the number:

Tip 1: Watch the Weather

Yes. “It’s a dry warmth”. However, Phoenix’s temperature can be misleading and fatal. Climb when it is cool outside. Attempt early mornings and nights when there exist more shade.

Tip 2: Dress Appropriately

Wear appropriate sunscreen, cap or hat, clothing, and shoes

Tip 3: Bring Water

Ensure you Hydrate before you leave for the hiking trip. Winter climate in Phoenix may fluctuate around a high of 67°, yet make sure to pack water along, regardless of what the temperature might be. Have a lot of water, more than you might predict you require.

However, if you are outside in the Phoenix sun, you will require significantly, at least 8 cups of water for the day. In case you are heading outside for any reason at all, carry along a bottle of water. If the purpose of going out is hiking, carry along many bottles of water or preferably, a drinking system.

Many individuals have encountered their death after heading into the preserves inside a temperature of 110-degree heat without enough water. That is the main reason hikers are often warned to stay inside or create a shelter beside one of the pools available in the Valley until the month of October.

In case you need to go outside, you may be enticed to hold up until night when it is cooler. It is an intelligent arrangement, but you should know.

Tip 4: Keep in Contact

Convey a cell phone or a satellite phone along anywhere you go and let your friends and family know your plans and the locations you plan on visiting.

Tip 5: Team Up

Don’t ever go hiking alone. In case you feel like going alone, tell somebody about your area of interest, begin times and end times.

Tip 6: Be Honest

Do you have any medical condition? Back issues, knee, diabetes, heart issues, Asthma? Try not to encourage yourself.

Tip 7: Don’t Trail-blaze

You are free to enjoy the beauty of the Sonoran desert landscape. But please, remain on assigned trails.

Tip 8: Take Responsibility

Try not to be somebody that won’t get ready, shouldn’t have been there for wellbeing reasons or overlooked security rules. Be the mindful climber, who gets out for hiking and does it right.

Tip 9: Know the indications of heat stroke

As indicated by the Health Services Department of Arizona, the way to an existence debilitating heat stroke takes after genuinely predictable steps, with a few cautioning signs, for example, warm stroke, warm fatigue, Heat spasms, Thirsty, et cetera.

Most heat strokes can be prevented by staying inside, wearing lightweight clothing in light hues, taking even and consistent breaks, and, more importantly, drinking a great deal of water.

Tip 10: Avoid the honey bees

Based on the information provided by the Health Services Department of Arizona, you won’t see a ton of animal creatures or bugs all over the place. Most turned out around evening time, so watch the path you step on when you are doing the night walk.

Phoenix honeybee season and summer go as one. Each mid-year, honeybees attack no less than a couple of individuals and dogs present around the Valley.

Tip 11: Always take your sunglasses along

With shorter storms found in Phoenix, the sun frequently set and changes roadways into mirrors, reflecting a very bright light in your eyes and making it difficult for you to see the path lines.

Keep your sunglasses close to you all the time and drive with caution.